This post may contain affiliate sales links. Please see my full disclosure policy for details
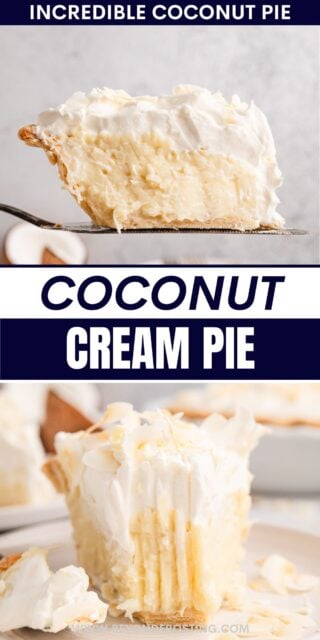
This easy coconut cream pie has thick and silky coconut custard in a flaky crust topped with pillows of whipped cream and toasted coconut. I use my favorite homemade pie crust, but even a ready-made crust does the trick.
If you love this easy cream pie recipe, try my fresh and zesty lemon cream pie or reader’s favorite Chocolate Cream Pie.

TABLE OF CONTENTS
- Dreamy Homemade Coconut Cream Pie
- Why I Love This Recipe, and You Will Too
- Ingredient Notes
- Troubleshooting: Why Is My Cream Pie Filling Lumpy?
- Troubleshooting: Why Won’t My Coconut Cream Pie Set?
- Frequently Asked Questions
- Step by Step: How to Make Coconut Cream Pie
- Storage and Preparation Recommendations
- Get the Recipe
Dreamy Homemade Coconut Cream Pie
I remember the first time I fell in love with coconut cream pie. My then-boyfriend (now husband) and I were on a trip to Seattle, my first time there. In my search for must-try desserts, I saw so many recommendations for a place called Dalhia Bakery by Tom Douglas.
Rumor had it that they had a life-changing Triple Coconut Cream Pie. Well, I can attest it is truly amazing, and now, anytime I am in Seattle, I never miss an opportunity to stop by Dalhias (they also have a life-changing breakfast sandwich). One day I’ll buy a whole pie, but since I am the only one who will eat it, I’ve settled for a single slice at a time. This is my take on Tom Douglas’s famous Coconut Cream Pie. You can find the original recipe online, But I think this homemade version does it justice!
If you’ve been around for a while, you’ve probably made my original Coconut Cream pie, but it’s recently had a makeover and trust me, you’ll love the updated recipe even more. If you came looking for the original, don’t worry, click the link above or head to the recipe card, it’s linked in the notes as well.
Why I Love This Recipe, and You Will Too
- Perfect coconut cream filling. My pie is rich and creamy with just the right amount of coconut sweetness. I swapped out some heavy cream for a can of unsweet coconut milk to amp up the flavor.
- Double the filling. If you’ve made my original version, which has rave reviews, this updated version has more than double the coconut filling, and it comes up right to the top of the crust. I mean just look at that slice!
- Tasty garnishes. Top this coconut pie off with a literal pile of homemade whipped cream, large coconut flakes, and shaved white chocolate, just like the original from Dalhia’s Bakery.
- Stands out among the crowd of pies. Listen, I am team pumpkin pie all day, but there is no doubt in my mind this Coconut Cream Pie should be on the dessert table at Thanksgiving or Christmas.

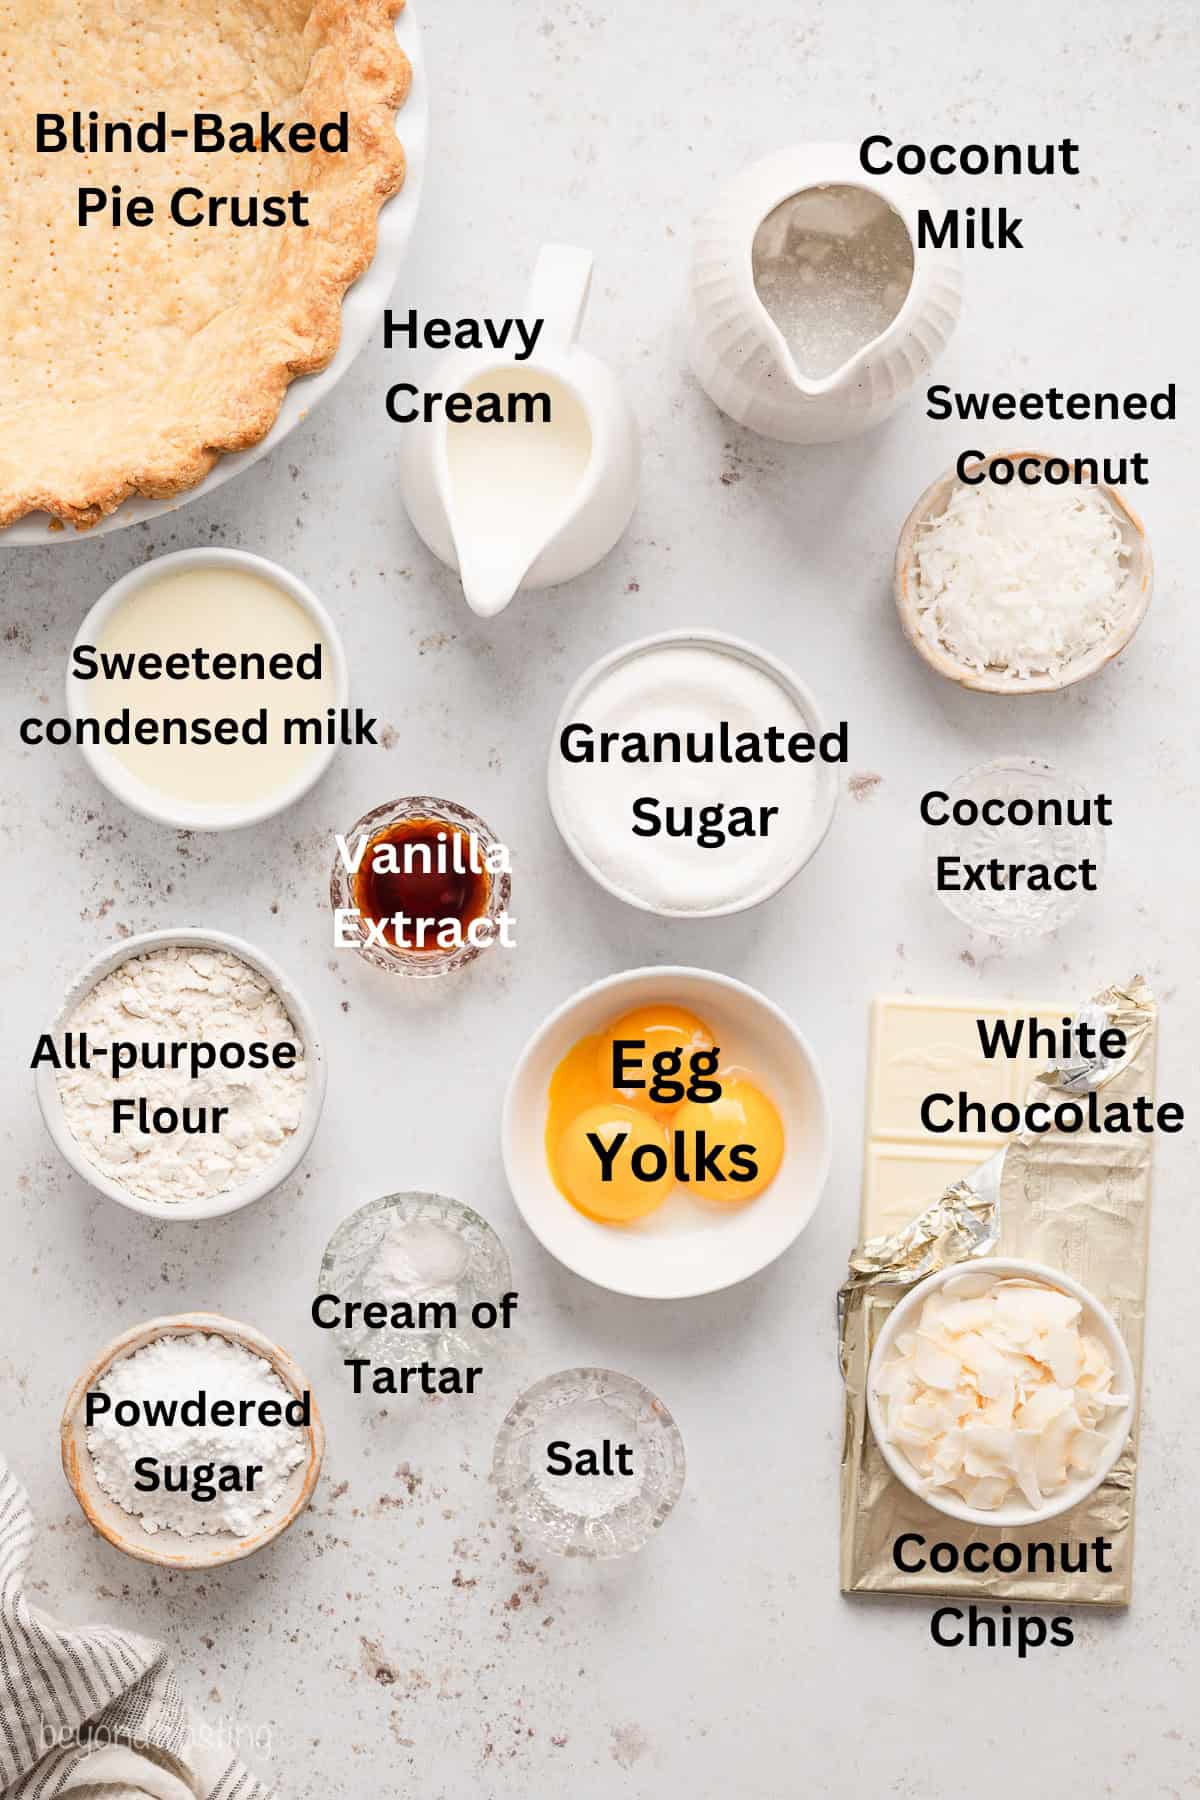
Ingredient Notes
Here are my notes on the important ingredients needed to make this creamy coconut pie. Scroll to the recipe card below the post for a printable ingredients list.
- Pie Crust – I like to prepare and blind bake an easy deep-dish homemade pie crust for this recipe. Of course, you can save time with a store-bought pie crust if you’d like, but you’ll need two of them, because of the amount of filling.
- Egg Yolks – Brought to room temperature. Similar to making a pudding pie, egg yolks are key to a thick and creamy custard filling.
- Full-Fat Coconut Milk – Make sure it’s not coconut cream, which is much thicker. Look for a can of coconut milk in the Asian food aisle. Remember to thoroughly mix it before use, as the fat and liquid tend to separate. This is not the coconut milk you find in the dairy refrigerators.
- Sweetened Condensed Milk – this makes for the ultimate silky filling.
- Coconut Extract – If you can’t find coconut extract, or if you’d prefer a less intense coconut flavor, feel free to swap this with vanilla extract.
- Sweetened Shredded Coconut – This is essential for the filling, though you can opt for unsweetened if you prefer. If you choose shredded coconut over coconut chips for the topping, consider Toasting the coconut for added flavor.
- Heavy Whipping Cream – Use in both the filling and topping. You’ll need 3 cups total.
- Cream of Tartar – Added to stabilize the whipped cream. It’s not 100% necessary, but adding cream of tartar to whipped cream helps it hold its shape, especially since there’s extra whipped cream on top.
- Garnishes – Coconut chips (which are extra large flakes of coconut) or extra toasted coconut, plus chopped white chocolate, for sprinkling over the finished pie just like the original from Dahlia’s bakery.
Troubleshooting: Why Is My Cream Pie Filling Lumpy?
The goal for any pudding pie is a velvety-smooth, silky custard. If your coconut cream pie comes out a bit lumpier than expected, there are a few reasons why this might be:
- The dry ingredients weren’t 100% dissolved. Dissolving the dry ingredients into the liquid ingredients is an important step to prevent a grainy filling.
- The heat was too high. Heating the filling too quickly after adding the egg yolks can cause the egg to scramble and create lumps (even if the egg yolks are tempered). Make sure to keep the pudding over medium-low heat.
- You forgot to stir. Make sure to stir the pudding often so that it isn’t in direct contact with the bottom or sides of the pan for too long.
- You didn’t strain the filling. Don’t skip the step of straining the filling after it comes off the heat. Straining removes any last traces of dry ingredients or bits of overcooked eggs that can make the filling lumpy.
The Finger Test
You can test the filling along the way by rubbing a couple drops of liquid between your finger tips. As long as there is no graininess, it’s safe to say the dry ingredients are dissolved. Just use caution as the filling gets hot.

Troubleshooting: Why Won’t My Coconut Cream Pie Set?
To ensure that you don’t end up with a watery, weepy pie filling, after adding the egg yolks, keep the filling at a low boil for long enough. Slowly heat the filling, and keep it at a low boil for at least a full minute (60-90 seconds). This kills off an enzyme in the eggs called amylase, which can cause the liquid in the filling to weep out after a day or two.
Before pulling the filling off the stove, be sure it’s thickened to a pudding-like consistency. Chill the pie for long enough. Make sure to chill the pie completely once the filling is added. This can take up to 4 hours in the fridge to completely set.
How Do I Fix a Runny Pie Filling
When the custard filling is done cooking, it should be the texture of Jello pudding. If it’s not thick enough, keep cooking until it is.
If you discover that your coconut cream filling hasn’t set after it’s chilled in the fridge for a few hours, don’t panic. To save it, you’ll need to scrape the filling out of the pie crust and reboil it until it reaches that thick consistency.
If the custard is not thickening on its own, you can try adding 1-2 teaspoons of flour or cornstarch to the warm mixture and stir until it thickens.

Frequently Asked Questions
If you’re new to making custard-style pies, these are some more tips for success, plus some tips specific to this coconut pie recipe:
- Can I make this pie gluten free? Yes, to make gluten-free coconut cream pie, use my gluten-free pie crust and substitute cornstarch for the flour in the filling.
- Can I use coconut milk from a carton? No, this recipe will only work with full-fat canned coconut milk. The fat content is too low in coconut milk that comes in cartons (also in lite canned coconut milk), and the pudding will turn out too soft and liquid.
- Make the topping less sweet. You can reduce the powdered sugar in the whipped topping if you want a less sweet pie, but it does make it slightly less stable.
- Can I use a pre-made crust?Absolutely, you can use a pre-made crust. Just keep in mind that since this is a deep-dish pie, you’ll need two crusts as the filling is too generous for a single one
Step by Step: How to Make Coconut Cream Pie
Let’s go on this journey together. You’ll realize that following the steps closely and taking your time is the key to success! Scroll to the recipe card for printable instructions.
Prepare the pie crust.
First, you’ll prepare and blind-bake a 9” flaky pie crust. If needed, my tutorial on how to blind-bake a pie crust has plenty of helpful tips. Your crust will need to cool completely before you add the filling. You can make this up to 24 hours in advance.
Prepare the Filling
Prepare the ingredients: I strongly recommend prepping, measuring, and having all ingredients ready before beginning. This ensures you can stay close to the stove to whisk the filling once you start.
Make the filling. Whisk air into the egg yolks until they’re light and foamy. Meanwhile, whisk flour and sugar with heavy cream, coconut milk, condensed milk, and salt in a saucepan over medium-low heat. Keep whisking until the mixture is warm, but not boiling. Here is where you want to give it the “finger test” I talked about above to ensure the dry ingredients are dissolved.


- Temper the eggs. Slowly stream about ½ cup of the warm filling into the whisked eggs yolks to temper them. Do this before stirring the yolks into the pan with the remaining filling, to keep the egg from scrambling in the heat. Once the milk is mixed with the eggs, pour the whole thing back into the saucepan.
- Cook. Stir constantly until the pudding starts to burp big bubbles then cook for another 60-90 seconds, at this point it should have thickened to a pudding-like consistency.


- Strain. Using a fine mesh sieve, strain the pudding into a bowl. The pudding will be thick but you can use a whisk or spatula to help push it through the sieve. If the filling seems lumpy after the first strain, clean the sieve and strain the filling again.
- Add the extract and coconut, Finally, fold in the coconut extract and shredded coconut by hand.
- Cool: Place a piece of plastic wrap directly on the surface of the pudding and cool on the counter for at least 1 hour.


- Fill and chill the pie. Next, you’ll pour the coconut pie filling into your cooled pie crust. Again, press a layer of plastic wrap directly against the filling, and pop the pie into the fridge to chill for at least 2 hours (or up to 4 hours.
- Make the topping. On the day of serving, prepare the topping. Whip heavy cream in a chilled metal bowl until thickened to soft peaks. Then, beat in the powdered sugar, cream of tartar, and vanilla extract until stiff peaks form.


- Finish and serve. Top your chilled pie with as much of your whipped topping as desired. Finish it off with a sprinkle of toasted coconut and white chocolate, then slice and dig the heck in! You deserve it. You may want to return the pie to the refrigerator for at least 30 minutes to allow the topping to set.


Storage and Preparation Recommendations
Make-Ahead
- Crust: Prepare and freeze the pie crust dough for up to one month. Thaw before rolling. For best results, bake the pie crust no more than one day in advance.
- Filling: This needs time to cool and fully set. You can make this 24 hours ahead of time and store in an airtight container before filling the pie crust. Be sure to place a layer of plastic wrap directly on the surface of the pudding to prevent that skin from forming (even in the airtight container).
- Whipped cream topping: I recommend making this the same day you plan to serve for best results. Decorate the pie a few hours before serving.
Storing:
- Refrigerate. Store your leftover coconut cream pie covered in the fridge for up to 3-4 days. You may notice that the whipped cream starts to weep after a day or two.
- Can I freeze this? I haven’t yet tested this pie recipe in the freezer, so I can’t recommend it be frozen.


Amazing Coconut Cream Pie
- Prep Time: 1 hour
- Chill Time: 5 hours
- Cook Time: 15
- Total Time: 6 hours 15 minutes
- Yield: 10 slices
Description
This coconut cream pie is a dreamy dessert, made with sweet and silky coconut custard in a flaky crust topped with pillows of whipped cream and toasted coconut.
Ingredients
Crust
- 1 prepared deep-dish pie crust, blind baked and cooled
For the filling
- 3 Large egg yolks, at room temperature
- ¾ cup (143g) Granulated sugar
- ⅓ cup (40g) All-purpose flour
- 1 cup (236ml) Heavy whipping cream
- 1 can (13.5 oz) Full-fat coconut milk
- 1 can (14 oz) Sweetened condensed milk
- ½ teaspoon salt
- 2 teaspoons (10ml) Coconut extract (or sub vanilla extract)
- 1 ½ cups Sweetened shredded coconut
For the topping
- 2 cups (472ml) Heavy whipping cream, chilled
- 1 cup (130g) powdered sugar
- ¼ teaspoon cream of tartar
- 1 teaspoon (5ml) vanilla extract
- Unsweetened Coconut Chips or ½ cup Toasted Coconut (optional garnish)
- 4-ounce White chocolate bar (optional garnish)
Instructions
For the Filling:
- In a small bowl gently whisk the egg yolks until foamy and set aside.
- In a medium-sized saucepan, combine the flour, granulated sugar, flour, heavy cream, coconut milk, sweetened condensed milk and salt. Heat over medium-low heat. Start by continuously stirring to dissolve the dry ingredients into the wet ingredients until the filling is warm to the touch and slightly thickened but not boiling.
- Take about ½ cup of the hot filling mixture and whisk into the egg yolks to temper the egg yolks. Pour the egg yolks back into the pan of filling and whisk to combine.
- Continue stirring until the pudding starts to bubble slightly and thicken. Once big bubbles start to pop at the surface, cook for at least 60-90 seconds while continuously stirring. The filling should be thickened like pudding.
- Pour the pudding through a fine sieve into a medium-sized bowl. If needed, you can use a whisk or spatula to help push it through the sieve. Optional: strain a second time through the sieve, washing in between.
- Stir in the coconut extract and shredded sweetened coconut and mix well. Place a layer of plastic wrap directly on the surface of the pudding and chill on the counter for 1 hour.
- Then pour the filling into the bake pie crust. Cover the top of the pudding again, directly on the surface. Refrigerate 2-4 hours until it’s completely cold.
For the Topping:
- Prepare the whipped cream. Place the mixing bowl in the freezer for 5-10 minutes. Pour the heavy whipping cream into the chilled bowl and use a stand or electric mixer with a whip attachment to beat the heavy cream at a high speed until the cream thickens to soft peaks.
- Add the powdered sugar, cream of tartar and vanilla extract and continue beating on high speed until stiff peaks form.
- Remove the saran wrap and spread as much of the whipped cream over the filling as you would like, or use a large piping tip to decorate the pie.
- Garnish with coconut chips or toasted coconut and white chocolate curls. To make the white chocolate curls, use a vegetable peeler and drag it across the edges of the chocolate bar, allowing it to fall on top of the pie. Alternatively, you can make white chocolate shavings but thinly slicing the white chocolate.
Notes
- Original Coconut Cream Pie recipes- here’s the PDF
- To make this gluten-free, use my gluten-free pie crust and swap out the flour in the filling for cornstarch
- Troubleshooting tips: Lots of helpful information in the blog post
Pie Crust
- Prepare the freeze the dough for up to one month. Thaw before rolling.
- A fully-baked crust can be done up to 24 hours in advance of serving. Here’s my full tutorial for how to blind-bake a crust.
- The crust must be fully cooled before filling
Make-Ahead
- Filling: This needs time to cool and fully set. You can make this 24 hours ahead of time and store in an airtight container before filling the pie crust. Be sure to place a layer of plastic wrap directly on the surface of the pudding to prevent that skin from forming (even in the airtight container).
- Whipped cream topping: I recommend making this the same day you plan to serve for best results. Decorate the pie a few hours before serving.
Storing
- Store your leftover coconut cream pie covered in the fridge for up to 3-4 days. You may notice that the whipped cream starts to weep after a day or two.
- Category: Pie
- Method: Baked
- Cuisine: American