This post may contain affiliate sales links. Please see my full disclosure policy for details

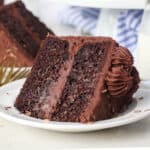
This decadent chocolate zucchini cake features three layers of rich chocolate cake, made ultra-moist with fresh garden zucchini, frosted inside and out with chocolatey brown butter frosting.

TABLE OF CONTENTS
- Chocolate Zucchini Cake With Brown Butter Frosting
- Why You’ll Love This Chocolate Zucchini Cake Recipe
- Ingredients for Zucchini Cake
- Should Zucchini Be Drained Before Baking?
- How to Make Chocolate Zucchini Cake
- Make the Brown Butter Frosting
- How to Assemble the Cake
- Can I Brown the Butter In Advance?
- Tips for Success
- More Ways to Decorate
- How to Store Chocolate Zucchini Cake
- More Fudgy Chocolate Cake Recipes
- Get the Recipe
Chocolate Zucchini Cake With Brown Butter Frosting
Growing up, my family’s garden was always full of zucchini in the summer. There were zucchinis as big as our arms! We’d shred the fresh zucchini and freeze it to have on hand whenever a craving for zucchini bread hit.
I am taking full advantage of zucchini season with the most decadent chocolate zucchini cake.
Rarely would I describe an unfrosted cake as fudgy. But, you guys, this cake is the real deal. I am going to go out on a limb and say it: this may be the BEST chocolate cake I’ve ever made. It’s rich and dense, and the taste and texture of the crumb is perfect.
Why You’ll Love This Chocolate Zucchini Cake Recipe
- Moist and flavorful. Picture the softest, most decadent chocolate zucchini bread, made into a layer cake. This cake features tiers of soft, dense chocolate cake jam-packed with fresh zucchini. To top it off (literally), there’s chocolate buttercream frosting, made extra rich with brown butter.
- Easy to make. I make my chocolate zucchini cake batter with vegetable oil instead of butter, for an extra light, moist crumb. There’s no waiting for butter to soften, and creaming oil together with the other ingredients is a breeze.
- Filled with fresh zucchini. Several rounds of recipe testing led to me packing in as much zucchini as I could without risking a soggy cake, with just the right amount to keep the cake from being too dry, either.

Ingredients for Zucchini Cake
Let’s go over a few notes about the key ingredients you’ll need to make this deliciously fudgy chocolate zucchini cake. Be sure to scroll to the recipe card for the full amounts and recipe details.
- Zucchini – You’ll need 2 medium-sized zucchini, enough to make a little over 2 cups when it’s freshly grated. You can use a cheese grate for best results and also see the section below for tips on how to remove the water from shredded zucchini.
- Oil – Using vegetable oil instead of butter yields a soft, delicate chocolate cake that’s still super moist. If you’d prefer to use butter, that’s fine, too. The texture just won’t be quite as tender.
- Eggs and Vanilla
- Sour Cream – The moisture from the zucchini combined with sour cream makes a truly moist cake with lots of added richness.
- Granulated Sugar
- All-Purpose Flour
- Cocoa Powder – Use a high-quality Dutch-processed cocoa powder, like Rodelle or similar. I found that Dutch-processed cocoa powder produced a fudgier, less bitter flavor than unsweetened natural cocoa powder in this cake. Sift your cocoa powder along with the flour to break up any lumps.
- Salt, Baking Soda, and Baking Powder
- Hot Brewed Coffee – Adding brewed coffee to baked goods helps to bloom the cocoa powder and intensify the chocolate flavors. It makes the cake fudgy without tasting like coffee! For best results, use instant coffee or instant espresso. See my chocolate mocha cake recipe for more details.
- Frosting – I’ve included a chocolate version of my favorite brown butter frosting recipe for this cake, made from browned butter, powdered sugar, cocoa powder, and heavy cream. You can just as easily swap this out for your choice of buttercream or even store-bought frosting. See further in the post for ideas.
Should Zucchini Be Drained Before Baking?
For best results with this cake recipe, before you make your cake batter, it’s important to drain your grated zucchini of excess moisture. Using this method, I was able to remove about 2 tablespoons of water from my zucchini. This prevents the batter and the cake from turning out too watery. To drain the shredded zucchini:
- Squeeze out the liquid using paper towels. Take a handful of zucchini and wrap it up tightly in paper towels (cheesecloth would also work), and then squeeze out as much liquid as possible. I find it’s easiest to do this in a couple of batches.
- Afterward, add the shredded zucchini to a bowl, and press a paper towel down into the zucchini to remove any remaining water.


How to Make Chocolate Zucchini Cake
Who’s ready to make the most insanely fudgy chocolate cake with creamy brown butter frosting? Let’s get started:
Grate and drain the zucchini. Start by grating the zucchini (it’s fine to leave the skins on), and wring out any excess moisture using paper towels. See above for details. Give the drained, shredded zucchini a quick fluff with a fork.

Mix the batter. Next, cream the wet ingredients together with the sugar, and sift the dry ingredients into a separate bowl. Sprinkle approximately ½ cup of the dry ingredients over the shredded zucchini, and toss to coat. Afterward, add the zucchini along with the remaining dry ingredients to the wet batter. Mix, streaming in the coffee as you go.


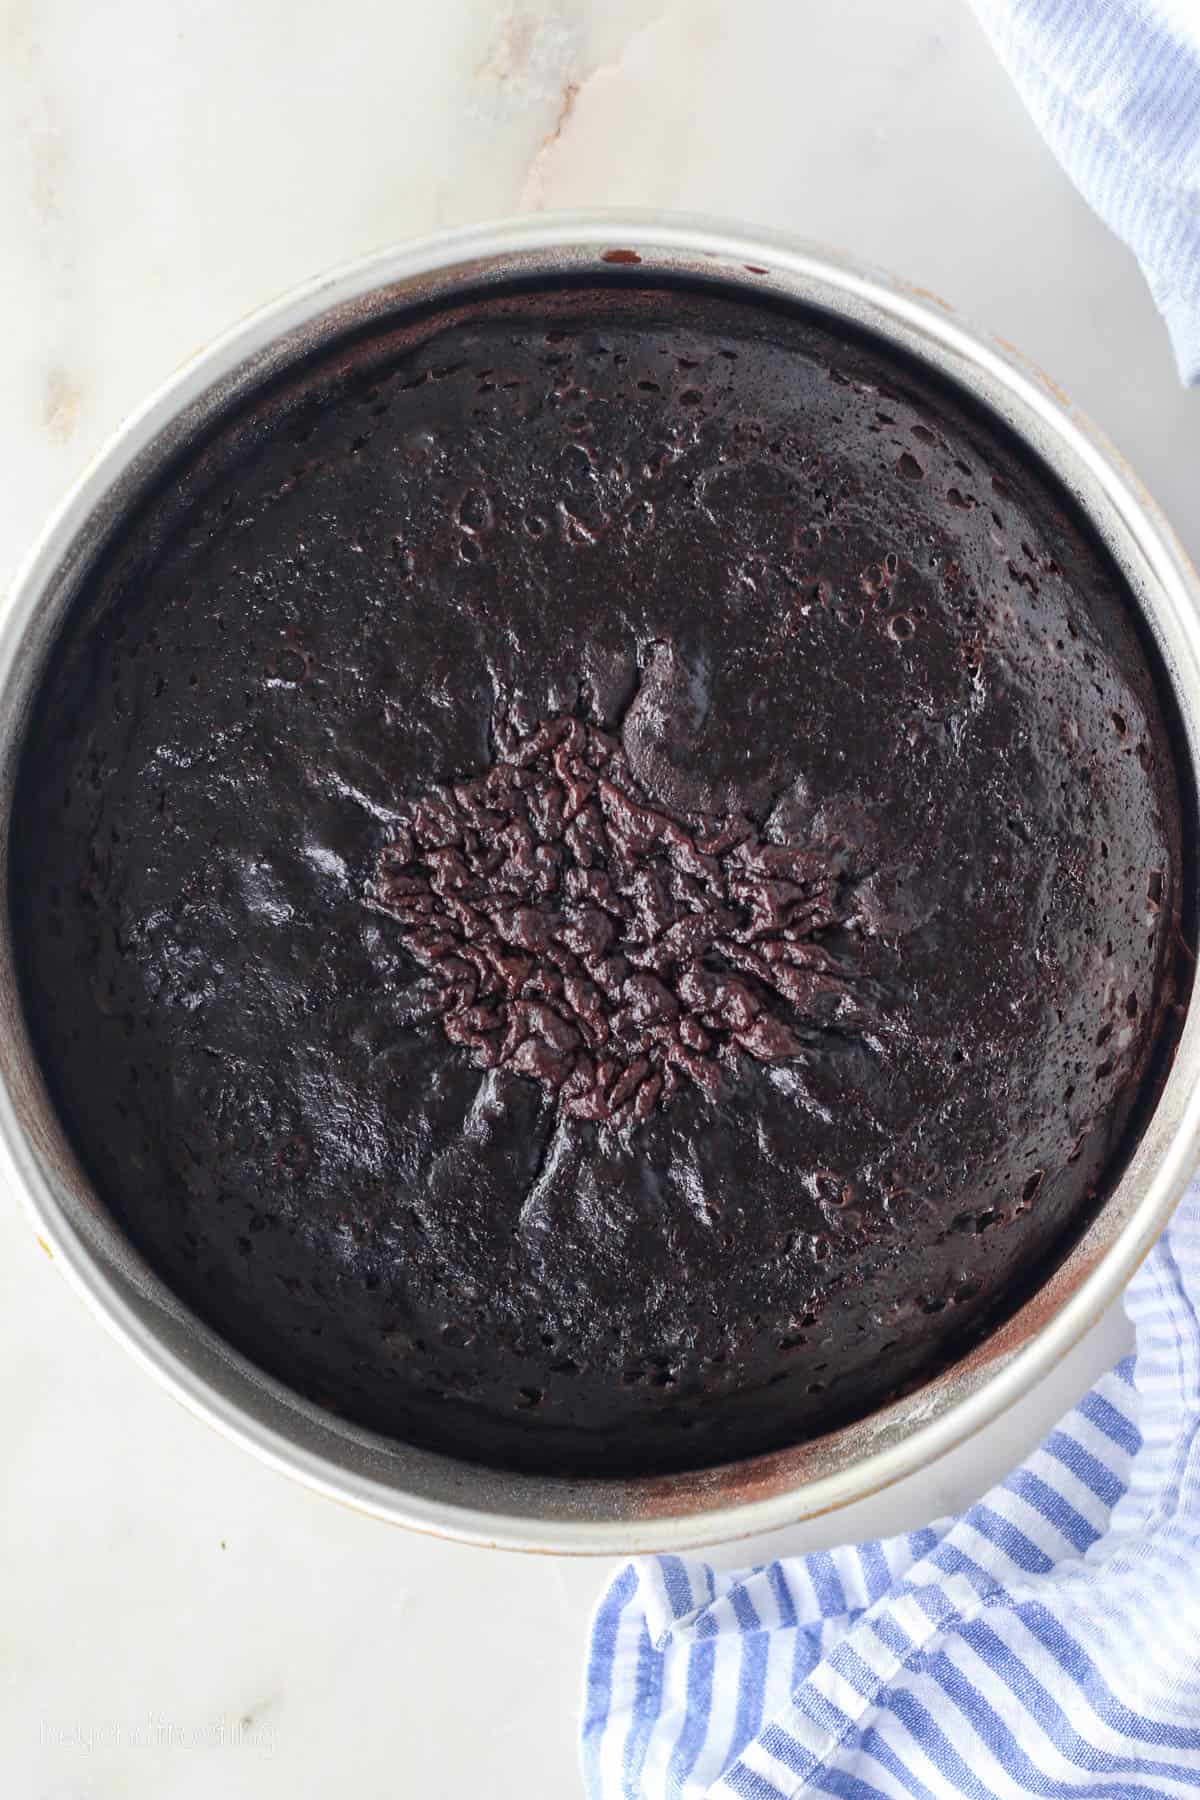
Bake. Divide the cake batter between two greased and lined 8-inch round pans. Bake at 350ºF for 30-35 minutes, then take the cakes out of the oven and let them cool completely before frosting.
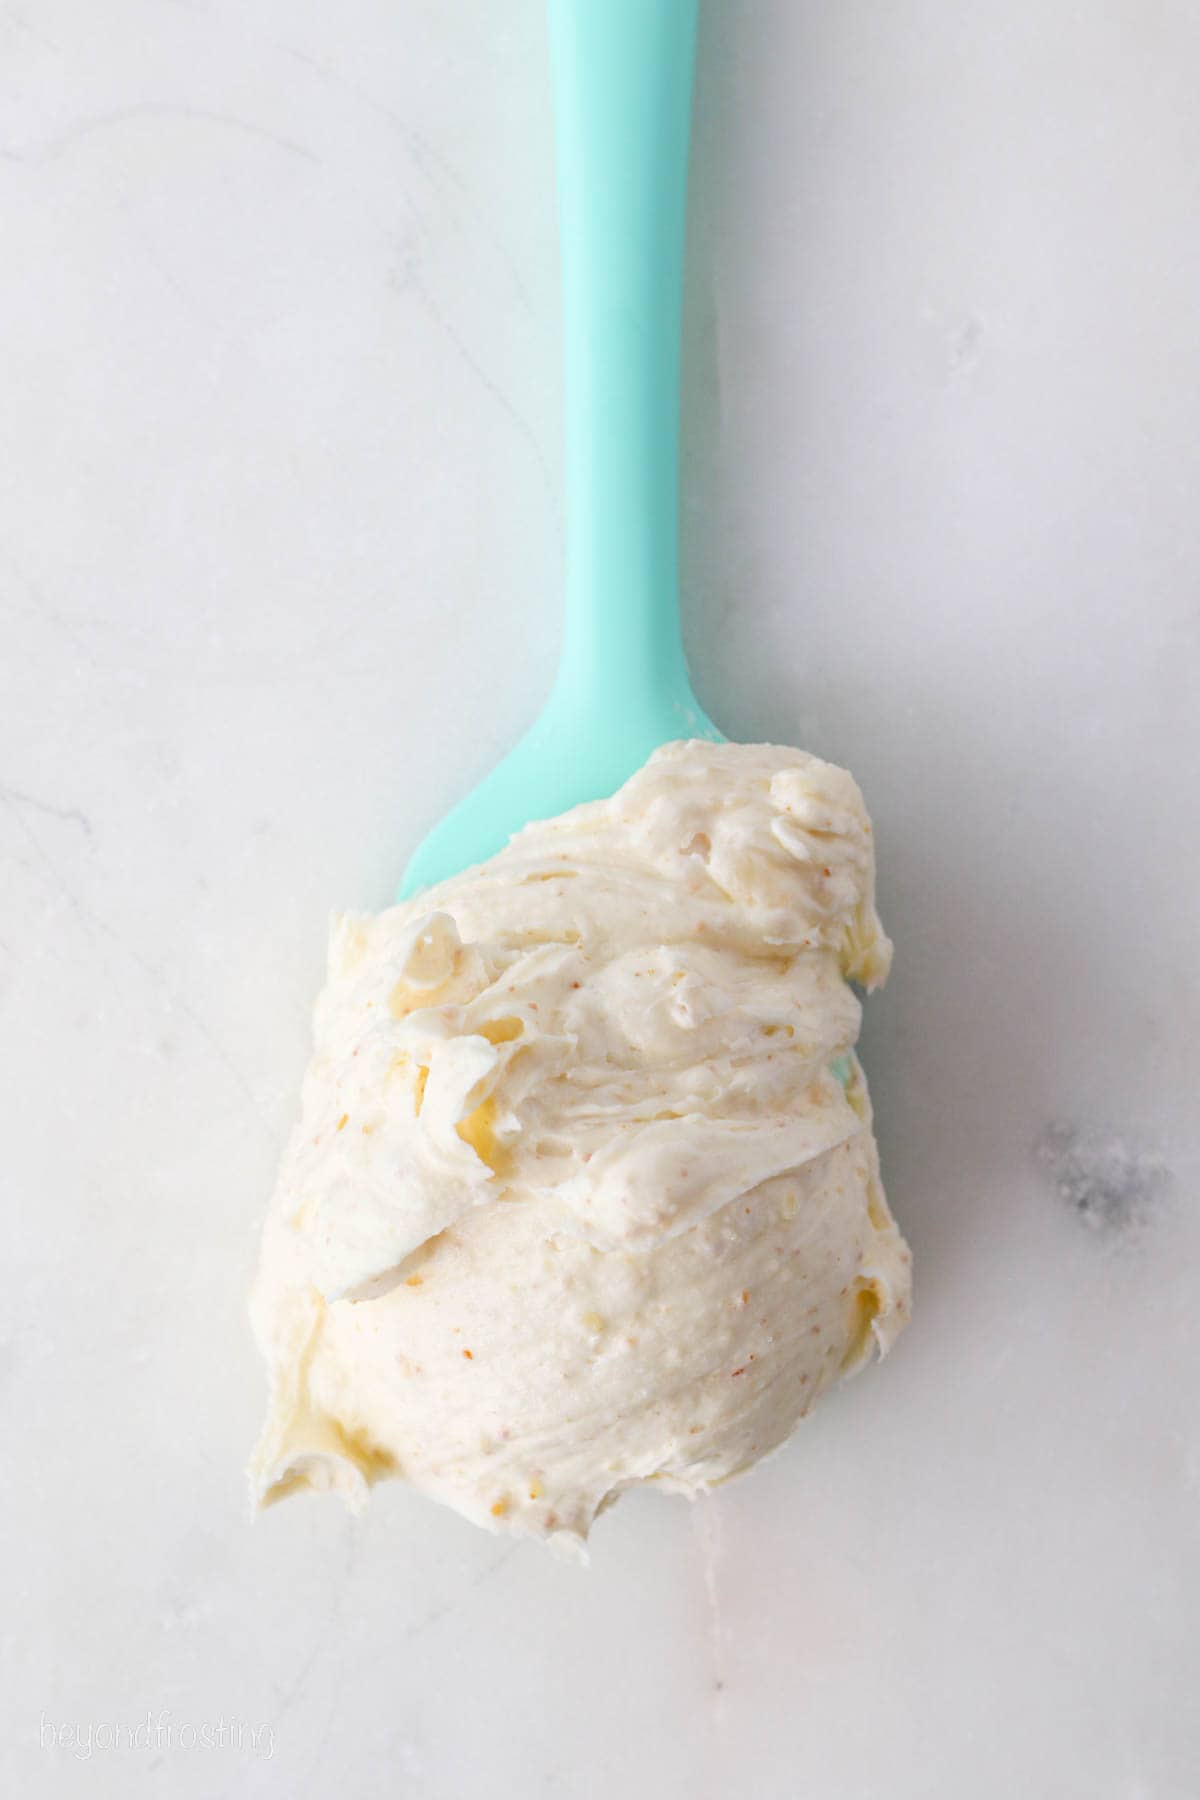
Make the Brown Butter Frosting
I debated back and forth on the frosting for this chocolate zucchini cake. As much as I was tempted by good ol’ chocolate frosting, a chocolate version of my favorite brown butter frosting won out in the end. And boy, does it not disappoint!
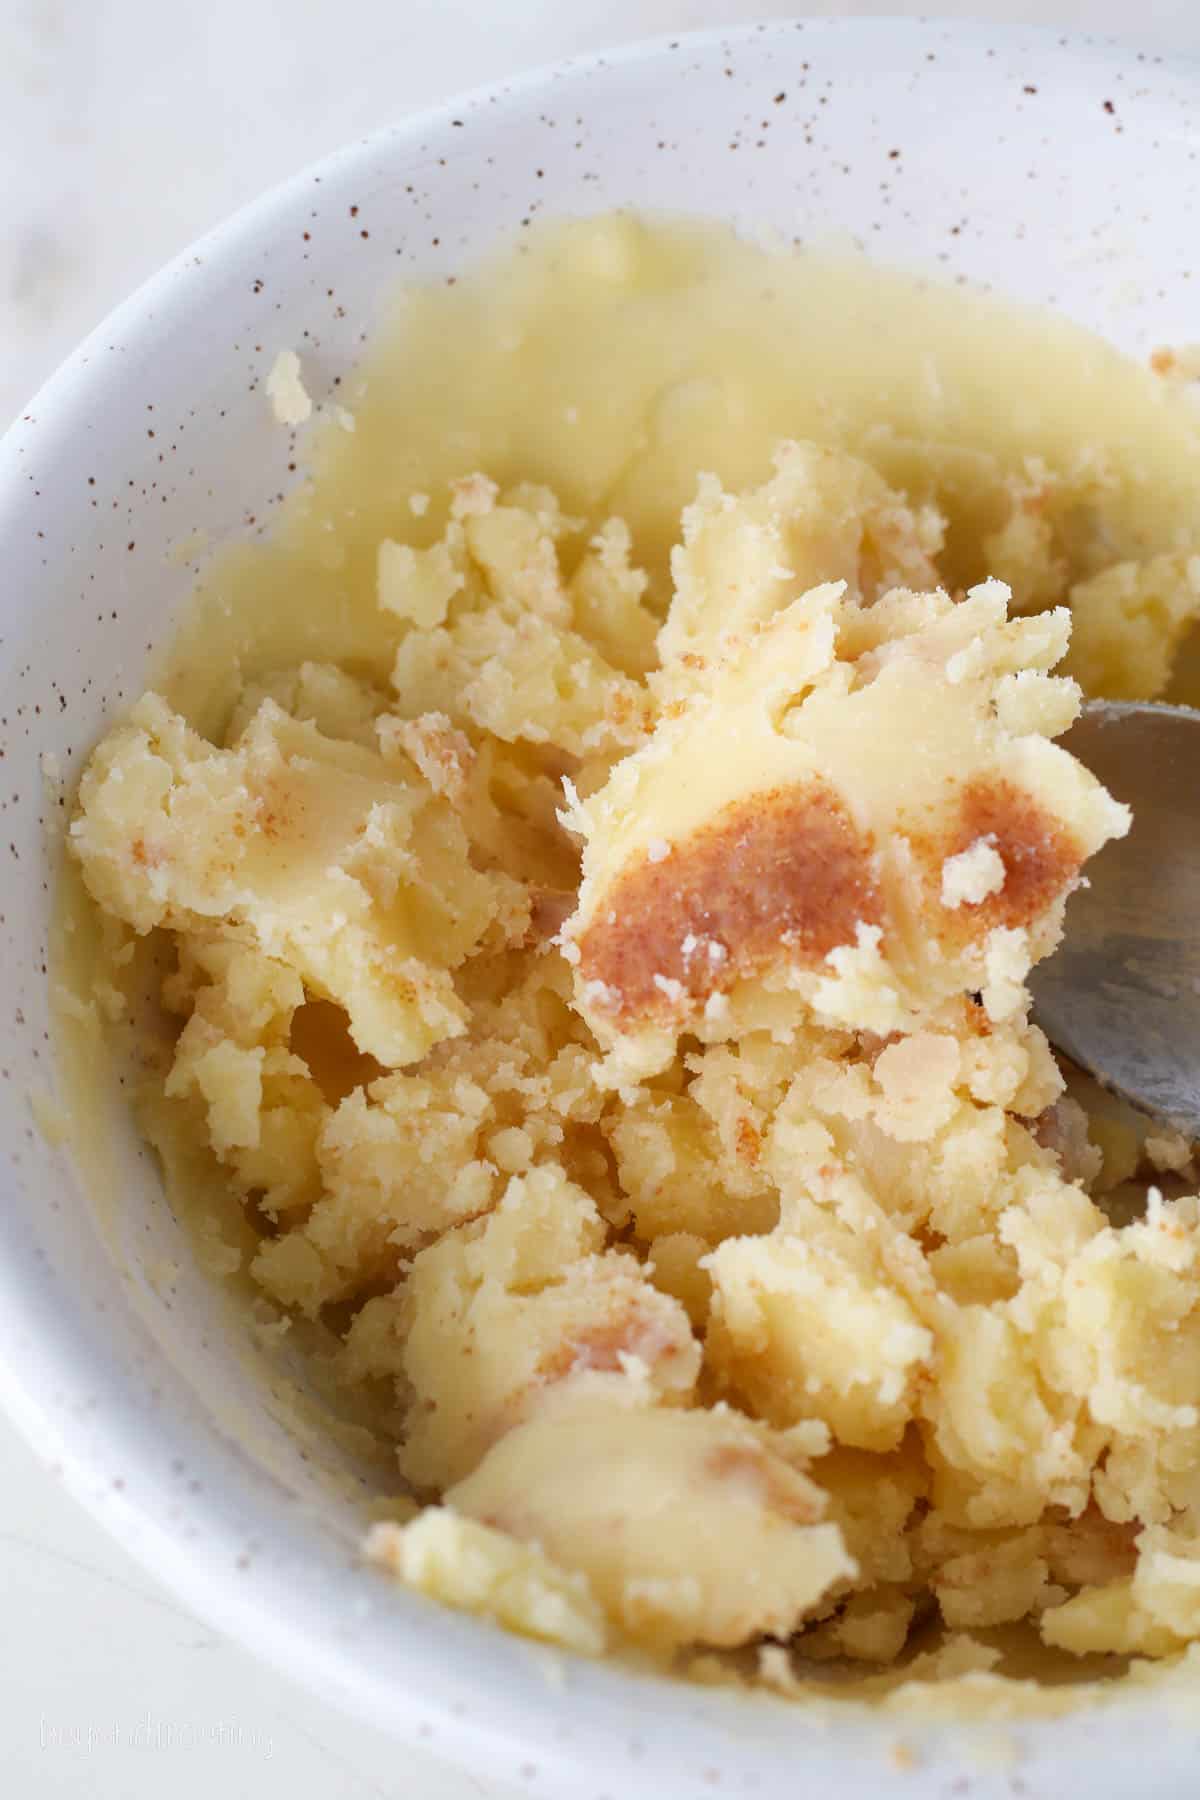
- Brown butter in a saucepan. To make brown butter on the stovetop, heat 1 cup’s worth of cubed butter in a saucepan. Once boiling, stir the butter constantly as the milk solids go from golden to dark brown. Pour the browned butter out into a heat-proof bowl.
- Chill. Place the brown butter into the fridge or freezer to chill for about half an hour, until solid. During this time, the browned milk solids will sink to the bottom of the bowl. Stir the butter with a spoon afterward, to incorporate the milk solids back into the rest of the butter.
- Make the frosting. Meanwhile, add cold butter to a stand mixer, and give it a whip until it’s light and fluffy. The important thing here is that it’s a similar consistency to the brown butter so that it will better incorporate. Beat in the browned butter, followed by the cocoa powder. Gradually add powdered sugar along with vanilla and heavy cream, beating well in between each addition. Finally, give the frosting one more good whip to combine.
How to Assemble the Cake
Once the cakes are cooled to room temperature and your frosting is whipped and ready, it’s time to assemble your two-layer cake:
Level the cake layers. Before you assemble, you may need to level the cakes so that they stack evenly. This involves trimming off the “domes” (the part of the cake that’s puffed up in the center). It’s easy enough to do using a serrated knife or a cake leveler if you have one.
Frost the first layer. Beginning with the first cake, pipe a layer of frosting over the cake, working from the outside edge inward. Smooth over the frosting with an offset spatula or a knife.
Add the second layer. Place the second cake gently over the first, inverted so that the flat bottom becomes the top of the assembled cake.


Frost the cake. Smooth additional frosting over any gaps between the layers to create a crumb coat, and finally, frost the outside of the cake. You can use any extra frosting to decorate! See further on for ideas.

Can I Brown the Butter In Advance?
Yes. You can prepare the brown butter for the frosting up to 2 days in advance. Keep it refrigerated until you’re ready to use it. Note that the butter will turn completely solid once it’s chilled. With this in mind, make sure to let the brown butter come back to room temperature ahead of making the frosting. This way you’ll be able to stir the milk solids back into the butter before combining it with the other frosting ingredients.
If you try to mix brown butter into the frosting when it’s too cold, the butter will not combine properly, leading to chunks of butter in the frosting. I include more details and tips in my post on how to make brown butter frosting.
Tips for Success
Here are my pro tips for the best possible chocolate zucchini cake:
- There’s no need to peel fresh zucchini before baking. The skin is where all the nutrition lies! Simply trim off the stem, and get grating.
- Coat the zucchini with the dry ingredients. This is my handy trick for making the perfect chocolate zucchini cake! It helps to soak up any excess water and avoids overmixing the cake batter.
- Check the cakes for doneness. The easiest way to check that your cake is ready is to stick a toothpick into the middle of the cake. If the toothpick comes out clean or with a few loose crumbs, the cakes are ready to come out.
- Sometimes, if the cake has too much moisture, the top of the cake may appear underbaked in the middle when it comes out of the oven. Even if your cake looks this way, it’s still totally useable, and a toothpick inserted into the center should still come out clean.
- If your frosting is too thick, beat in additional heavy cream, 1 tablespoons at a time. Sometimes it’s helpful to separate the batch into two, and beat smaller amounts of frosting.

More Ways to Decorate
Honestly, I ate so much of this cake on its own, even without the frosting. It’s just that dang good. Chocolate brown butter frosting is melt-in-your-mouth delicious, but you can frost your cake with any kind of frosting you’d like! I’m sure this cake would be amazing covered with tangy chocolate cream cheese frosting, or even Nutella frosting. Or, try one or more of these easy decorating ideas:
- Chocolate Shavings – Grab a chocolate bar (any plain chocolate will work. Use a vegetable peeler and run it over the edge of the chocolate bar to make chocolate shavings.
- Whipped Cream – Top your frosted cake with piped swirls of homemade whipped cream or chocolate whipped cream.
- Crushed Nuts – The first time I made this zucchini cake, I made a “skirt” of crushed walnuts pressed around the bottom edge of the cake. It added lots of satisfying crunch! Pecans or hazelnuts are another good option.
- Chocolate Drizzle – Add a drip of pourable chocolate ganache à la chocolate drip cake, or simply drizzle chocolate sauce over slices for serving. Or, drizzle over some caramel sauce.
If you’re new to frosting and decorating cakes, I include loads of cake-decorating tips and tricks in my posts on how to use piping tips and how to use a piping bag.

How to Store Chocolate Zucchini Cake
- To Store. Store frosted chocolate zucchini cake airtight at room temperature for up to 3 days, or up to 1 week in the refrigerator. I recommend serving leftover cake at room temperature.
- Freezer. I recommend freezing this chocolate cake before it’s frosted, however, it’s still fine to freeze the frosted cake, too. Wrap the cake tightly in plastic wrap or store it airtight in a freezer-safe container. It will keep frozen for up to 1 month. Defrost the cake in the fridge before serving and/or frosting.
More Fudgy Chocolate Cake Recipes
- Chocolate Oreo Cake
- Chocolate Peanut Butter Cake
- Mini Chocolate Cake
- Chocolate Strawberry Cake
- Buttermilk Chocolate Cake

Chocolate Zucchini Cake
- Prep Time: 90 minutes
- Cook Time: 35 minutes
- Total Time: 2 hours 5 minutes
- Yield: 10-12 servings
Description
Decadent chocolate zucchini cake made from layers of rich, fudgy chocolate cake with fresh zucchini, frosted inside and out with chocolatey brown butter frosting.
Ingredients
For the Cake
- 2 ½ cups grated zucchini (About 2 medium zucchinis)
- ½ cup (118ml) vegetable oil
- 4 large eggs, at room temperature
- 1 tablespoon (15ml) pure vanilla extract
- ½ cup (120g) sour cream, at room temperature
- 1 ½ cups (285g) granulated sugar
- 2 cups (240 g) all-purpose flour, sifted
- 1 cup (80g) Dutch-processed cocoa powder, sifted
- 3 teaspoons (12g) baking powder
- 1 ½ teaspoon (6) baking soda
- 1 teaspoon (5g) salt
- 1 cup (236ml) hot brewed coffee
For the Frosting
- 1 ½ cups (339g) unsalted butter, cold
- 1 cup (80g) Dutch-processed cocoa powder, sifted
- 5 cups (650g) powdered sugar, sifted
- 1 tablespoon (15ml) pure vanilla extract
- ¼ teaspoon salt
- ¼ cup (59ml) heavy whipping cream
Instructions
For the Cake
- Preheat the oven to 350°F. Prepare two 8-inch round baking pans, line the bottom with parchment paper, and grease and flour the sides of the pan.
- Using the large cheese grater, grate the zucchini with the skin on. Then use paper towels to squeeze out extra water from the zucchini, as much as possible. Refluff the zucchini with a fork. Set aside.
- In a large mixing bowl, combine the eggs, oil, sour cream, and vanilla extract. Beat all the ingredients together until well combined. Add the sugar and beat until incorporated.
- Sift together the remaining dry ingredients in a large bowl and whisk to combine. Scoop ½ – 1 cup of the dry ingredients into the shredded zucchini and stir to combine, coating the zucchini with the dry ingredients. Then add all the dry ingredients and the zucchini to the wet ingredients. Being mixing and slowly stream in the coffee. Beat at a low speed until well combined.
- Divide the batter evenly between the two pans, about 2 ¾ cups of batter each. Bake at 350°F for 30-35 minutes. Test the cake for doneness by inserting a toothpick into the center of the cake. If the toothpick comes out clean, the cake is done. Remove from the oven and allow to cool completely.
For the Frosting
- Divide out 1 cup of butter. Cut the butter into 1 tablespoon size pieces and place in a saucepan. Turn stovetop on to medium-low heat slowly bringing the butter to a boil, stirring occasionally. Once boiling, the bubbles will go from big to small, and once the milk solids start to turn golden brown, stir constantly until the golden color starts to darken. Immediately remove from the heat and pour into a heatproof bowl.
- Refrigerate the browned butter for 20-30 minutes until it solidifies but it’s not too hard. This can also be placed in the freezer to speed up the process. Once chilled, stir the browned butter back together with a spoon until the milk solids are mixed back into the butter.
- Cut the remaining cold butter into tablespoon-size pieces. Using the paddle attachment, whip the butter for 5-7 minutes, scraping down the bowl occasionally until the butter is whipped and easily spreadable. Then mix in in the browned butter until well combined. Next, add the cocoa powder, and beat until well combined.
- Add 3 cups of powdered sugar, the salt, and the vanilla extract and beat at a medium-high speed until well combined, then beat for another 1-2 minutes. Next, add the remaining powdered sugar with the heavy cream, 1 tablespoon at a time, and beat on low speed until sugar and cream are incorporated. Increase speed to medium-high and beat for 3-5 minutes, adding additional heavy cream to thin the frosting as needed.
Assembly
- Level the cake layers if needed. Place a dollop of frosting on your cake board and place the bottom layer of cake on top of that. Place half of the frosting in a large piping bag, then cut off the end of the piping bag. Pipe the first layer of frosting, pipe in circles working outside edge to the middle. Spread evenly with an offset spatula. Place the second layer inverted of the cake.
- Use the piping bag to fill in any gaps between the layers and to create a crumb coat. Using an offset spatula or icing smoother, wipe away the excess frosting, leaving you just enough to coat the outside of the cake. With the remaining frosting, pipe the frosting along the outside edge of the cake using a large open round tip then use an offset spatula to smooth the edges. Run a knife up and down the edges of the cake to create the vertical lines and use any remaining frosting to decorate with.
Notes
- Storage instructions: This can be stored at room temperature in an airtight container for 3 days or in the refrigerator for up 7 days. It’s best served at room temperature.
- Optional decoration: Grab a chocolate bar (any plain chocolate will work. Use a vegetable peeler and run it over the edge of the chocolate bar to make chocolate shavings.
- Category: Cake
- Method: Oven
- Cuisine: American