This post may contain affiliate sales links. Please see my full disclosure policy for details
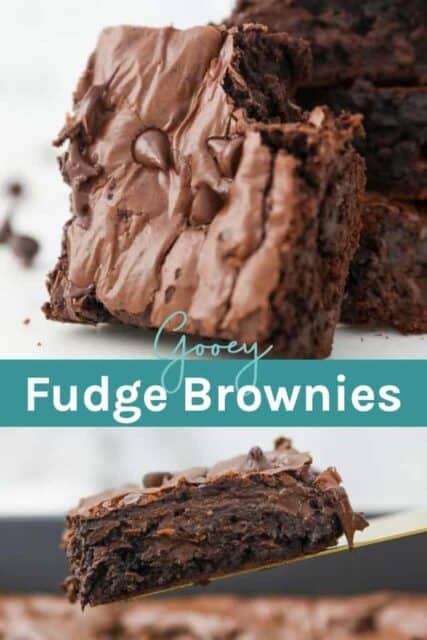
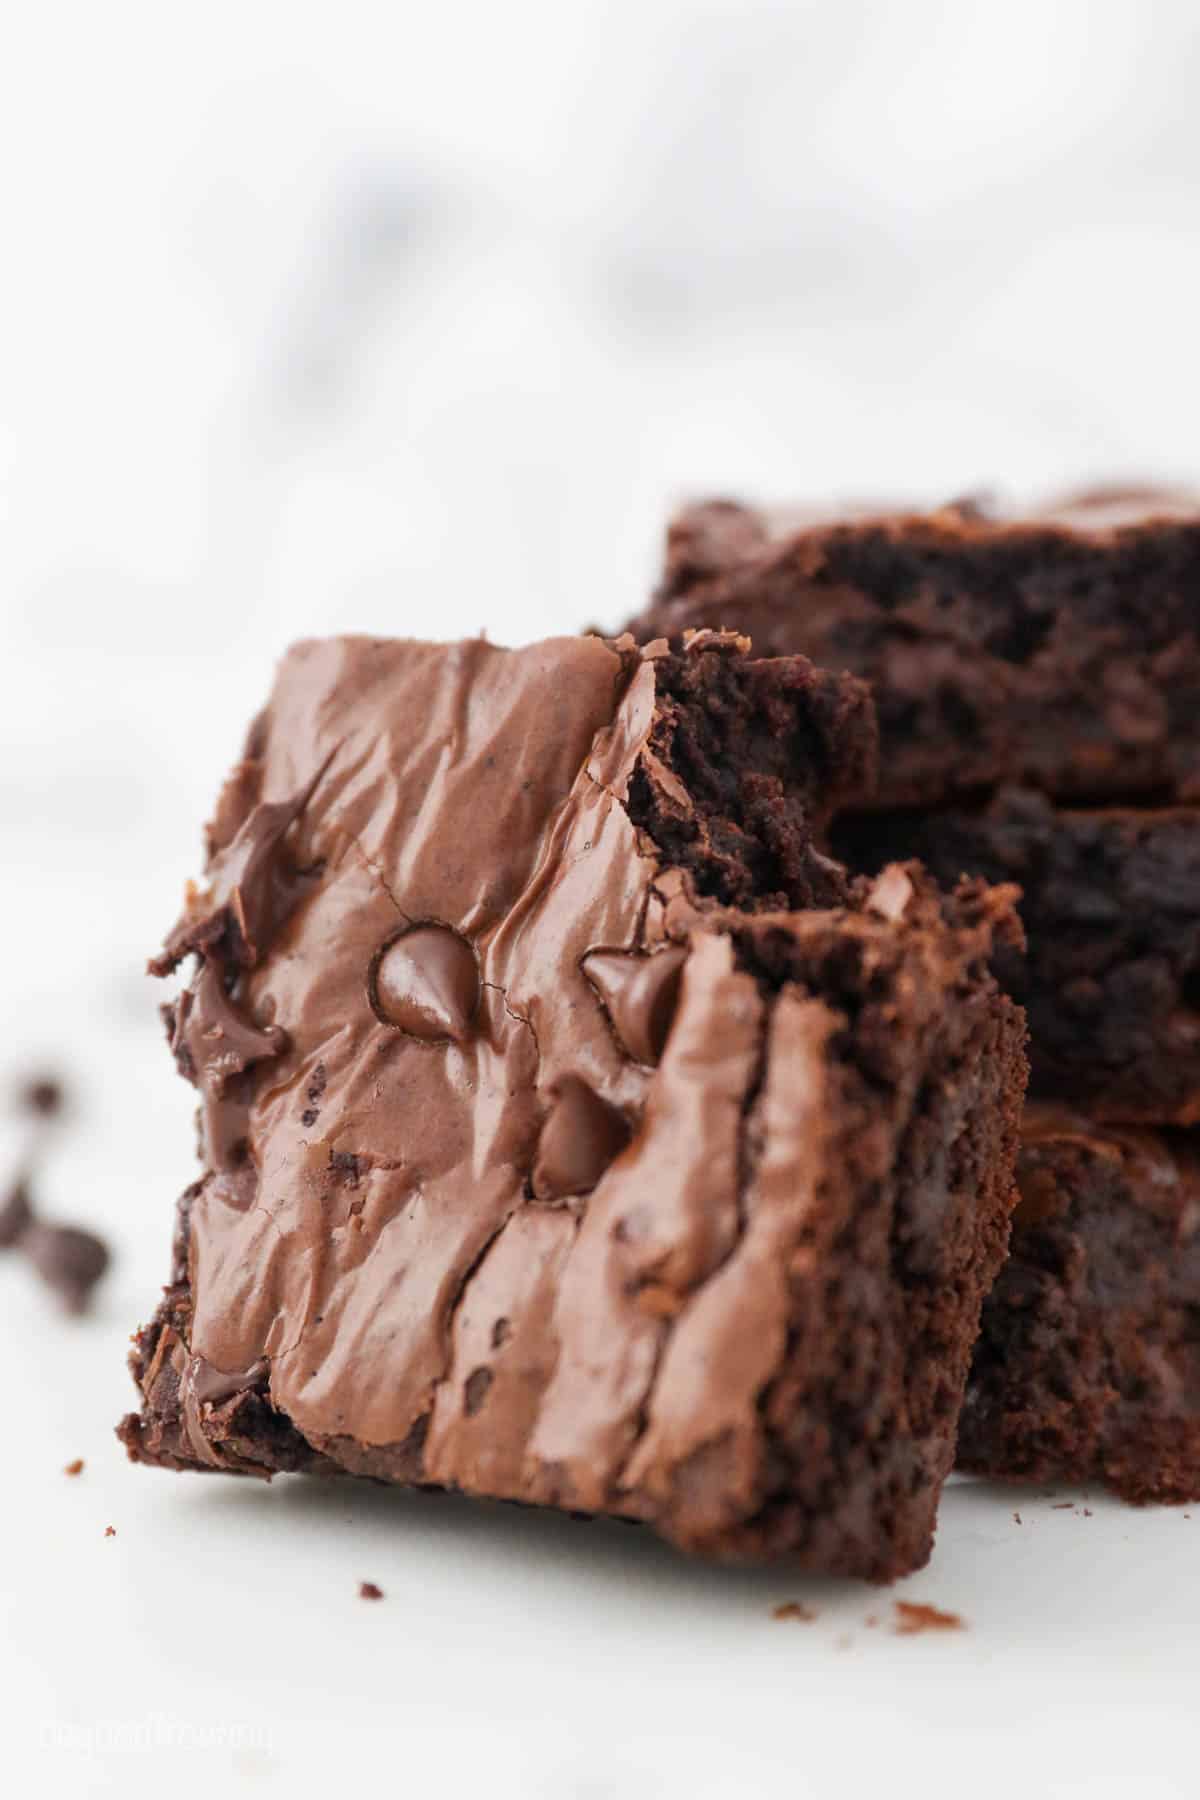
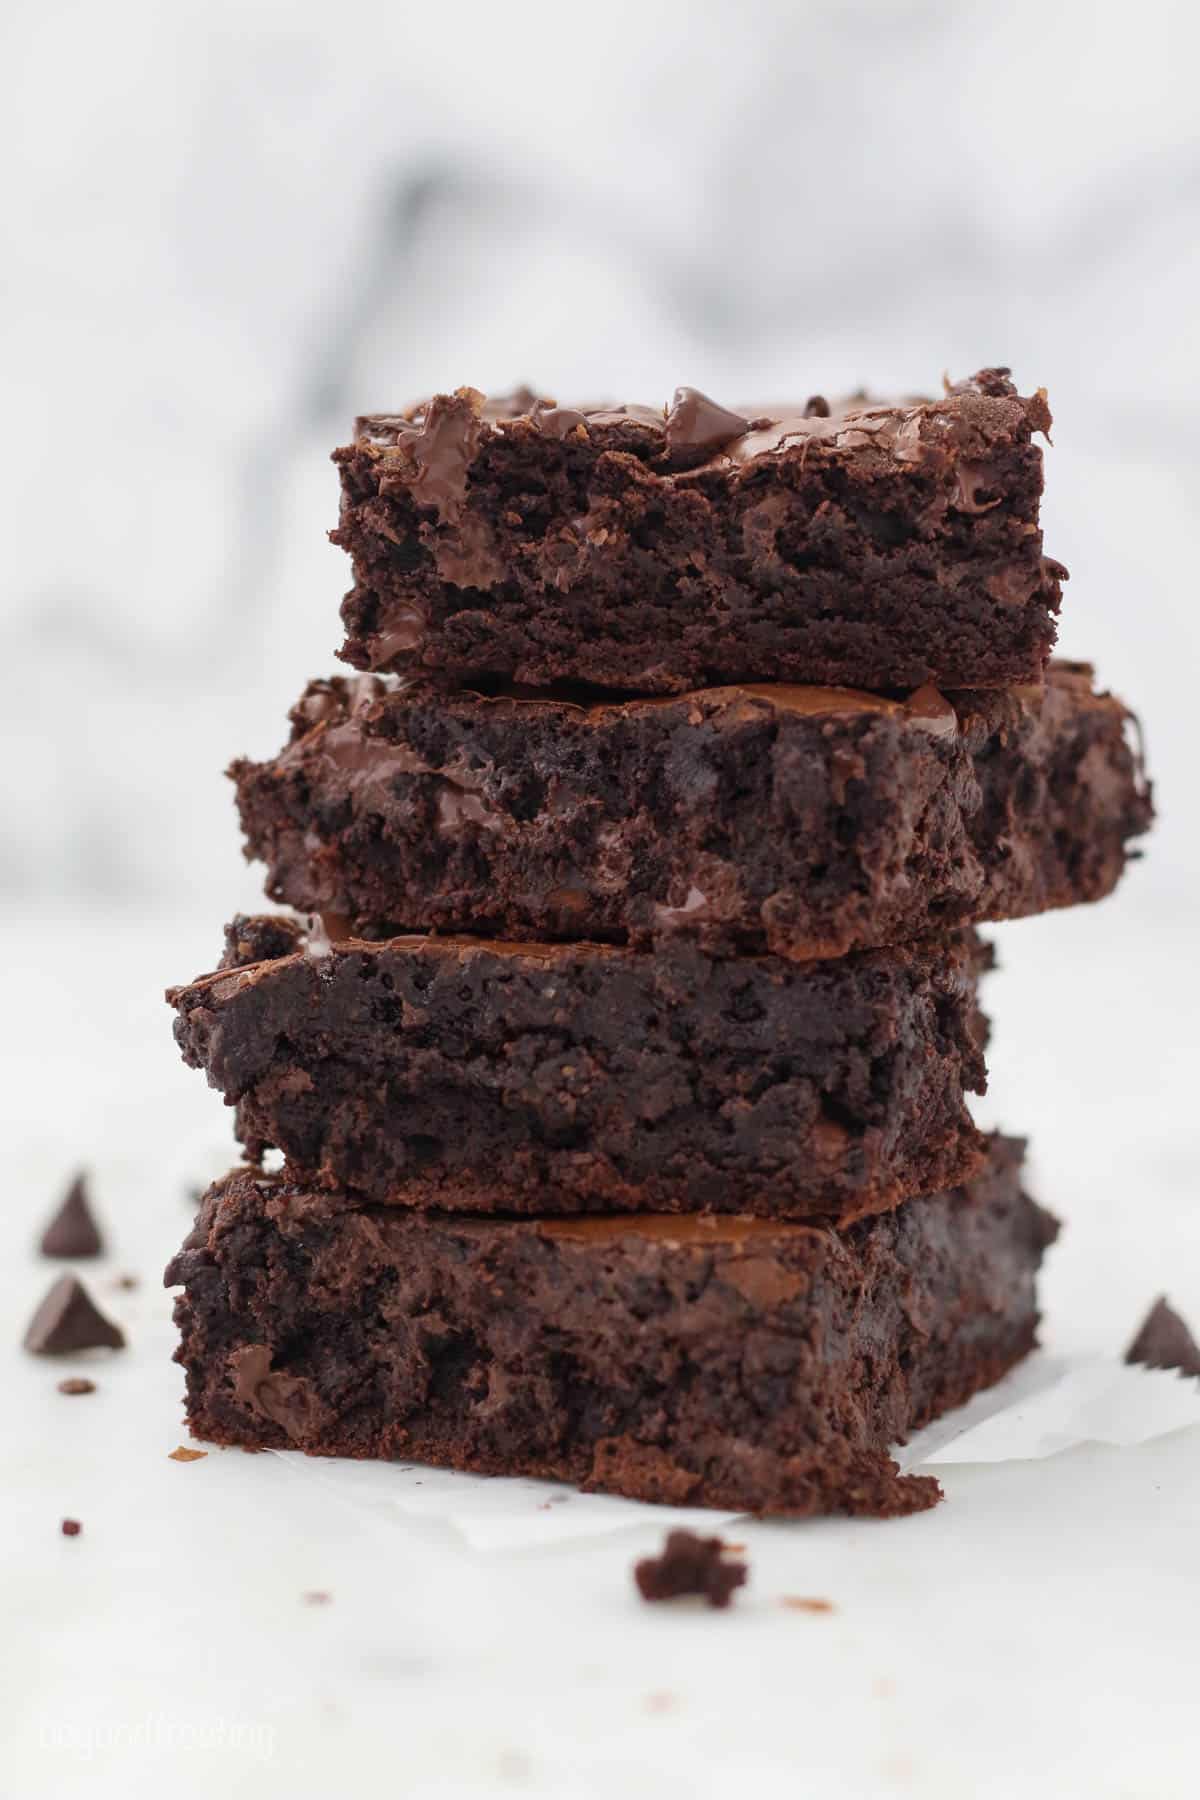
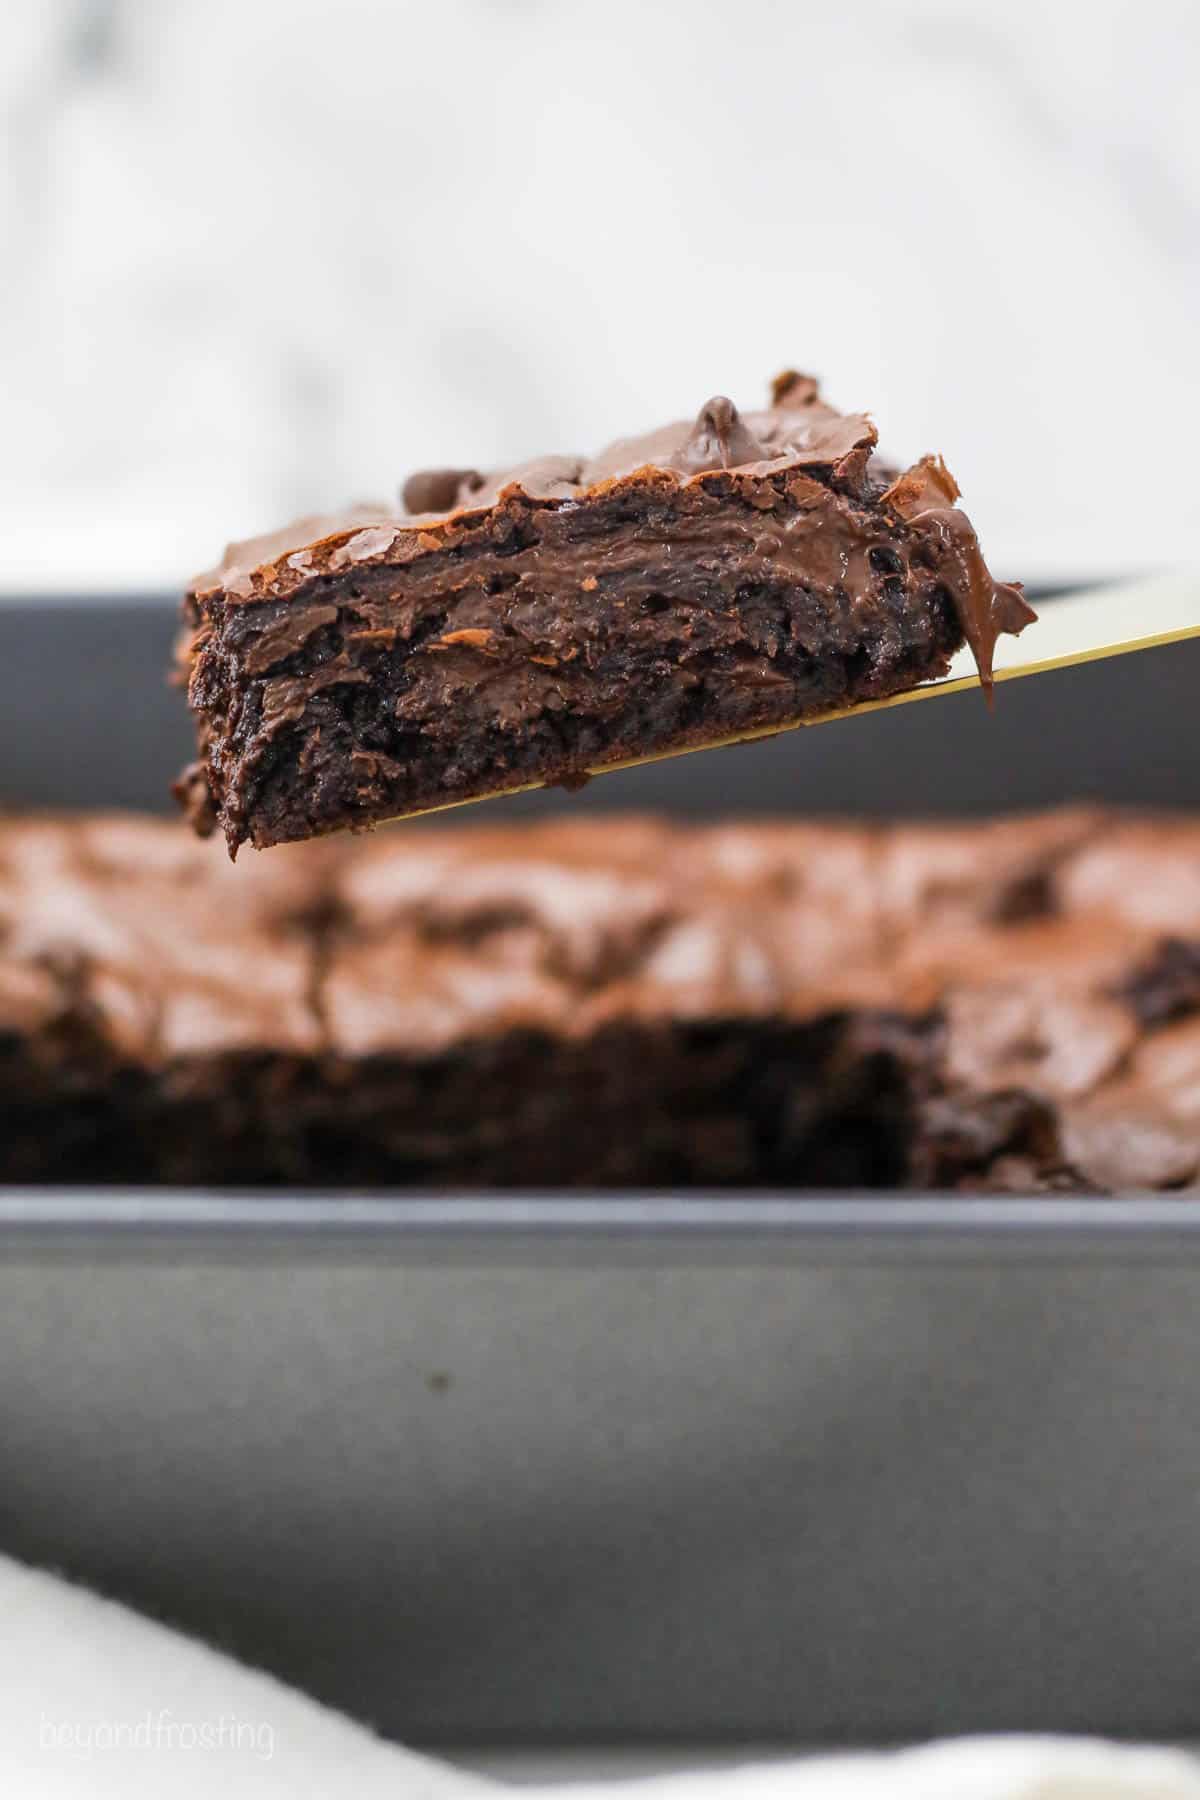
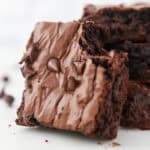
These Fudgy Homemade Brownies are better than any boxed brownies mix. They’re dense, rich and fudgy with a flaky layer on top. If you’ve never made brownies from scratch, this easy recipe is the perfect place to start!
Fudgy Homemade Brownies
You guys, oh my gosh, I’ve been on a mission to make the perfect, fudgy, from-scratch brownie recipe. I’ve poured my heart and soul into perfecting this recipe. Somewhere around recipe test #15 I started to lose count of how many batches we made to get here.
I loooove this recipe, and I will probably never make a boxed brownie mix again. This recipe has triple the chocolate. There’s melted chocolate in the batter, cocoa powder, and chocolate chips on top. Plus I’ve discovered the secret to achieving the shiny flakey layer on top that you often get with a brownie mix.
I’m a dark chocolate girl myself, but one of the best things about this recipe is you can make adjustments to suit your taste.
What Makes these Brownies So Good?
Out of the oven, they’re melty, gooey, lick-your-fingers good. But once they’ve had time to set and cool, the texture is spot on.
- Gooey, fudgy and intensely rich
- The crackly and flakey top layer
- Triple the chocolate
- Simple to prepare
- Freezes well
- Small or large batch options
The Secret to Perfectly Fudgy Brownies
Much like a chocolate chip cookie, opinions about brownies are fierce and widely debatable. Are you team fudgy or cakey? Edges or middle? Chocolate chips or no chocolate chips?
In all the testing I did, I determine that melted chocolate is the key to a fudgy brownie. Recipes that only use cocoa powder tended to be drier and a cakey texture. This recipe has both melted chocolate in the batter and additional chocolate chips mixed in.
Use Dark Chocolate for the Batter
For the batter, I love using dark chocolate for its deep and rich flavor, but it’s really important that you buy high-quality ingredients. I recommend buying a chocolate bar that is at least 60% cocoa or higher. Brands like Ghirardelli, Lindt and Guittard are the most readily available in the baking aisle.
Don’t Use Chocolate Chips for the Batter
I don’t like to use chocolate chips for the brownie batter because they generally have a wax-like coating. As a result, they don’t melt as smoothly and they’re oilier. However, you can make this recipe with chocolate chips if you don’t have a baking bar. To replace the 4-ounce chocolate bar in the recipe, use a heaping ½ cup of chocolate chips.
How to Get that Flaky Brownie Top
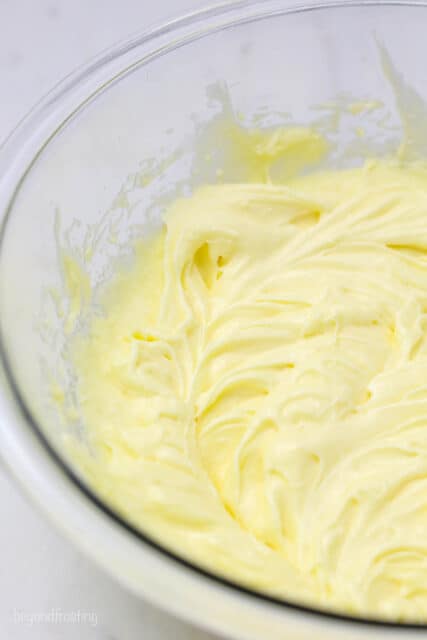
After lots of research and recipe testing, a flakey and crackly topped brownie is the result of beating the eggs for an extended period of time. Be sure not to skip this step. It incorporates air into the batter and it actually forms a meringue layer on top of the brownies which creates the flakey and crackly layer on top.
There is a specific but easy way to prepare this recipe to achieve this effect. First, the butter and sugar are well-creamed together. Then the eggs and egg yolks are added and beaten for at least two minutes. At this stage, the batter looks like a light and fluffy vanilla cake batter.

Ingredients You’ll Need
- 4-ounce dark chocolate bar: Use a high-quality chocolate bar, at least 60% cocoa or higher. Ghirardelli, Lindt and Guittard are all great options.
- Unsalted butter
- Granulated sugar
- Eggs & egg yolks- extra egg yolk add richness
- Pure vanilla extract
- All-purpose flour
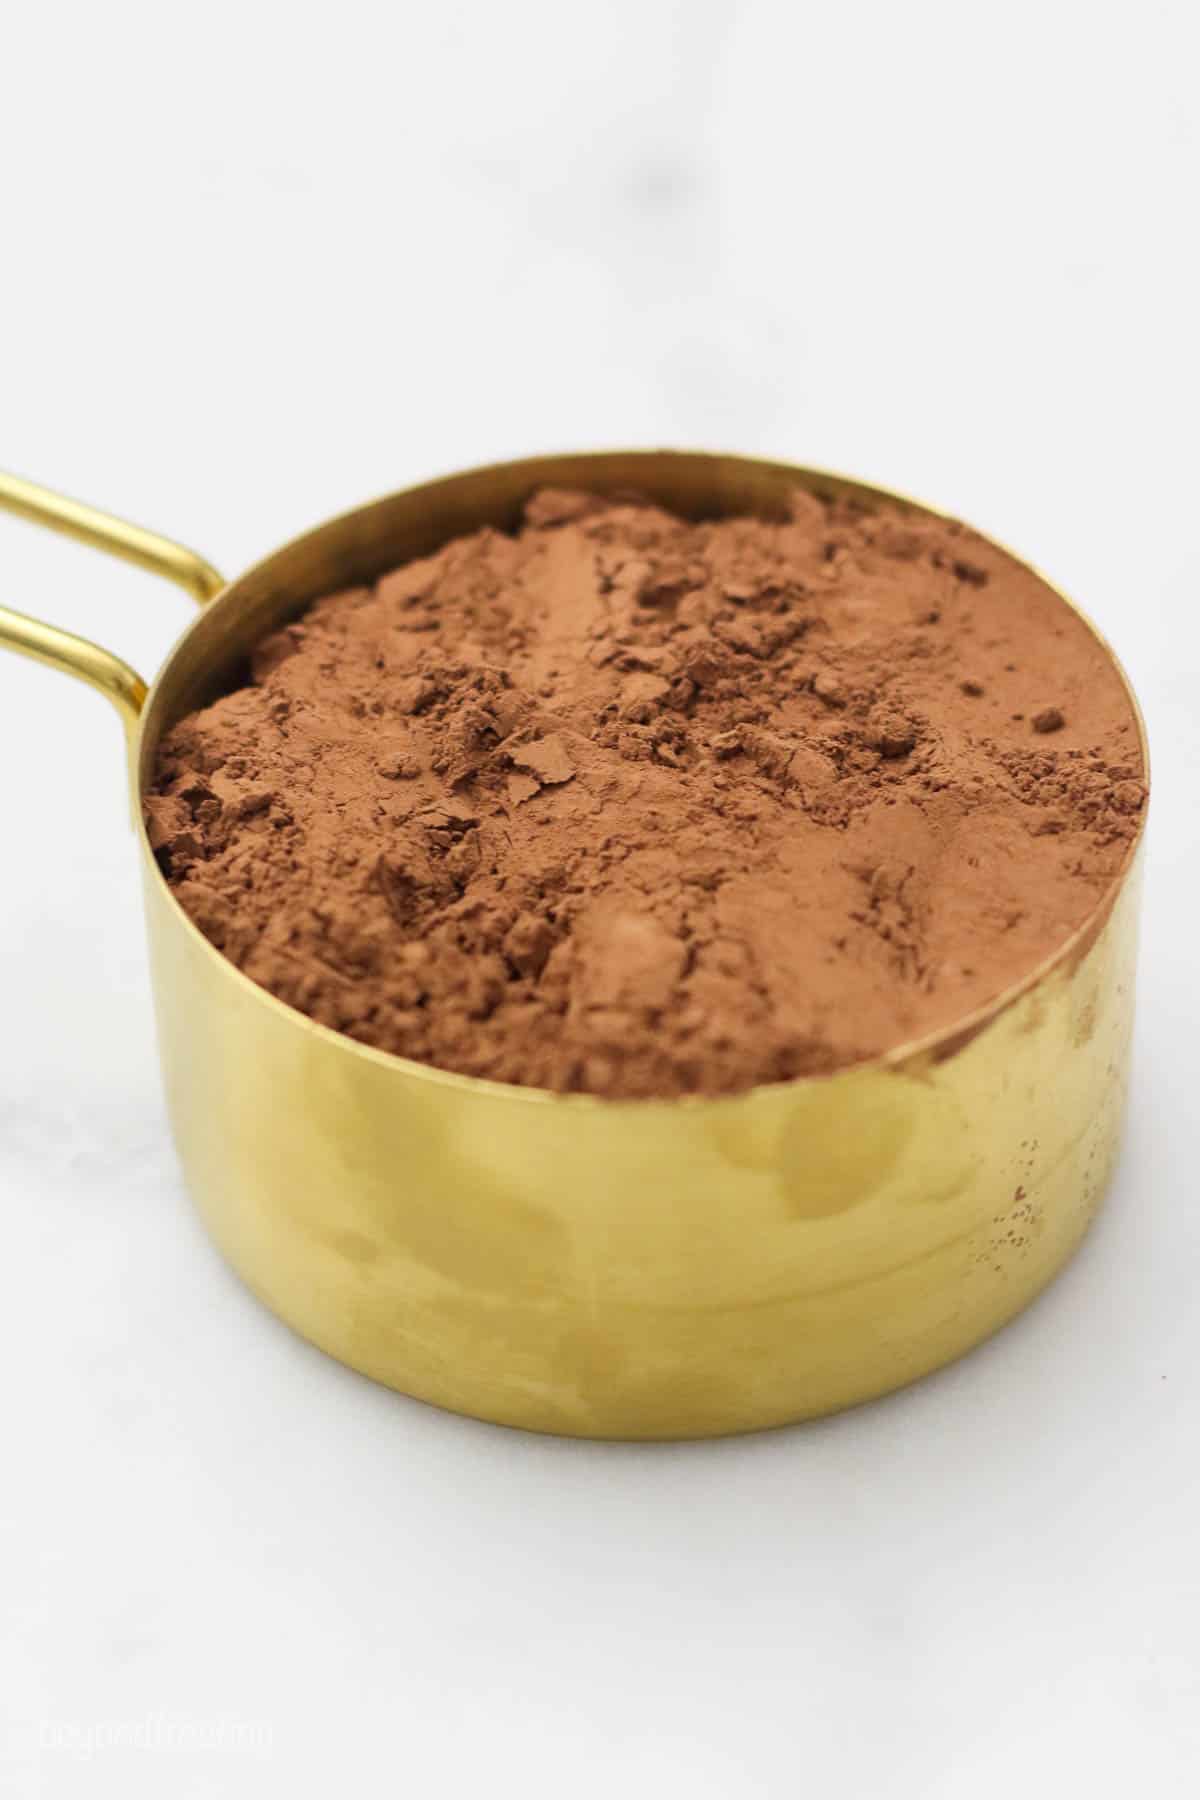
- Rodelle cocoa powder- after all my recipe testing, this was a clear favorite
- Salt
- Baking powder- most recipes don’t have an leavening agent, but I found this was a real game-changer in achieving the type of texture you’ll find in a boxed brownie mix while maintaining the fudgy centers.
- Semi-sweet chocolate chips are mixed into the brownie batter
What Cocoa Powder is Best?
I tested this recipe with three different cocoa powders:
- Rodelle- a Dutch process cocoa powder
- Hershey’s Special dark– a blend of Dutch process and natural cocoa powder
- Hershey’s naturally unsweetened cocoa
Hands down, the winner was Rodelle cocoa powder. I don’t always bake with a Dutch-process cocoa powder, but it has the smoothest, richest flavor and has highest level of cocoa butter on the market.
However, this recipe will work with any of these cocoa powders. If you prefer a more milk chocolate taste, I recommend using Hershey’s naturally sweetened cocoa and opting for a milk chocolate bar for the brownie batter.
How to Make Fudgy Brownies
- Prep: Preheat the oven and grease your pan with cooking spray I don’t line my pan with parchment paper, because I like to edges of my brownies to be extra crispy.
- Combine butter and sugar: Melt the butter and beat together with the sugar until they’re nice and creamy.
- Add eggs: Make sure to beat the eggs for 2 minutes It’s REALLY IMPORTANT that you don’t skip this step as it is what makes the flakey top layer. Beat until the mixture if light and fluffy, it should resemble a cake batter texture.
- Add the melted chocolate and vanilla
- Add dry ingredients: Sift the dry ingredients for the smoothest texture and combine with the wet ingredients
- Fold in the Chocolate chips then pour the batter in the prepared pan
- Bake & enjoy
How to tell when these brownies are done
Don’t overbake the brownies! Your toothpick will still be gooey but not too “wet” and glossy. You do not want your toothpick to be clean, this would be considered overdone, and may result in a drier texture.
Variation Ideas
There are lots of ways you can make these brownies to personalize and suit your own unique taste:
- Espresso powder: You can add a tablespoon of instant espresso powder for an even deeper, richer chocolate flavor
- Add nuts: Add chopped walnuts or pecans for a crunchy texture
- Change the chocolate chips: try adding white chocolate, butterscotch, or peanut butter chops
- Add candy: Add M&M or Reese’s Pieces
- Fudgy ganache topping: Want to make them even more decadent? Add a layer of ganache on top.

Can I Use Other Pan Sizes?
This recipe is for an 8-inch pan, but I’ve tested it with several types of pans and sizes for your convenience.
- 9-inch square or round pan: The baking time is approximately 20-22 minutes depending on the type pan used. I use dark non-stick pans sprayed with cooking spray.
- Larger batch: Double the recipe for a 9×13 inch pan. Baking times are similar to the 8-inch pans.
- Glass pans will always require a longer baking time. After 22 minutes, I check my brownies every 1-2 minutes.
How to Store Brownies- Fridge or Freezer
- Counter: You can store brownies on the counter in an airtight container for 3-4 days.
- Fridge: If you want your brownies to keep longer, store them in an airtight container in the fridge. They will keep for 5 days when stored this way.
- Freezer: If you want to freeze your brownies I recommend cutting up the individual slices, then wrapping each one in saran wrap. Place the wrapped brownies in the a freezer-safe airtight container. They will keep in the freezer for up to 3 months.
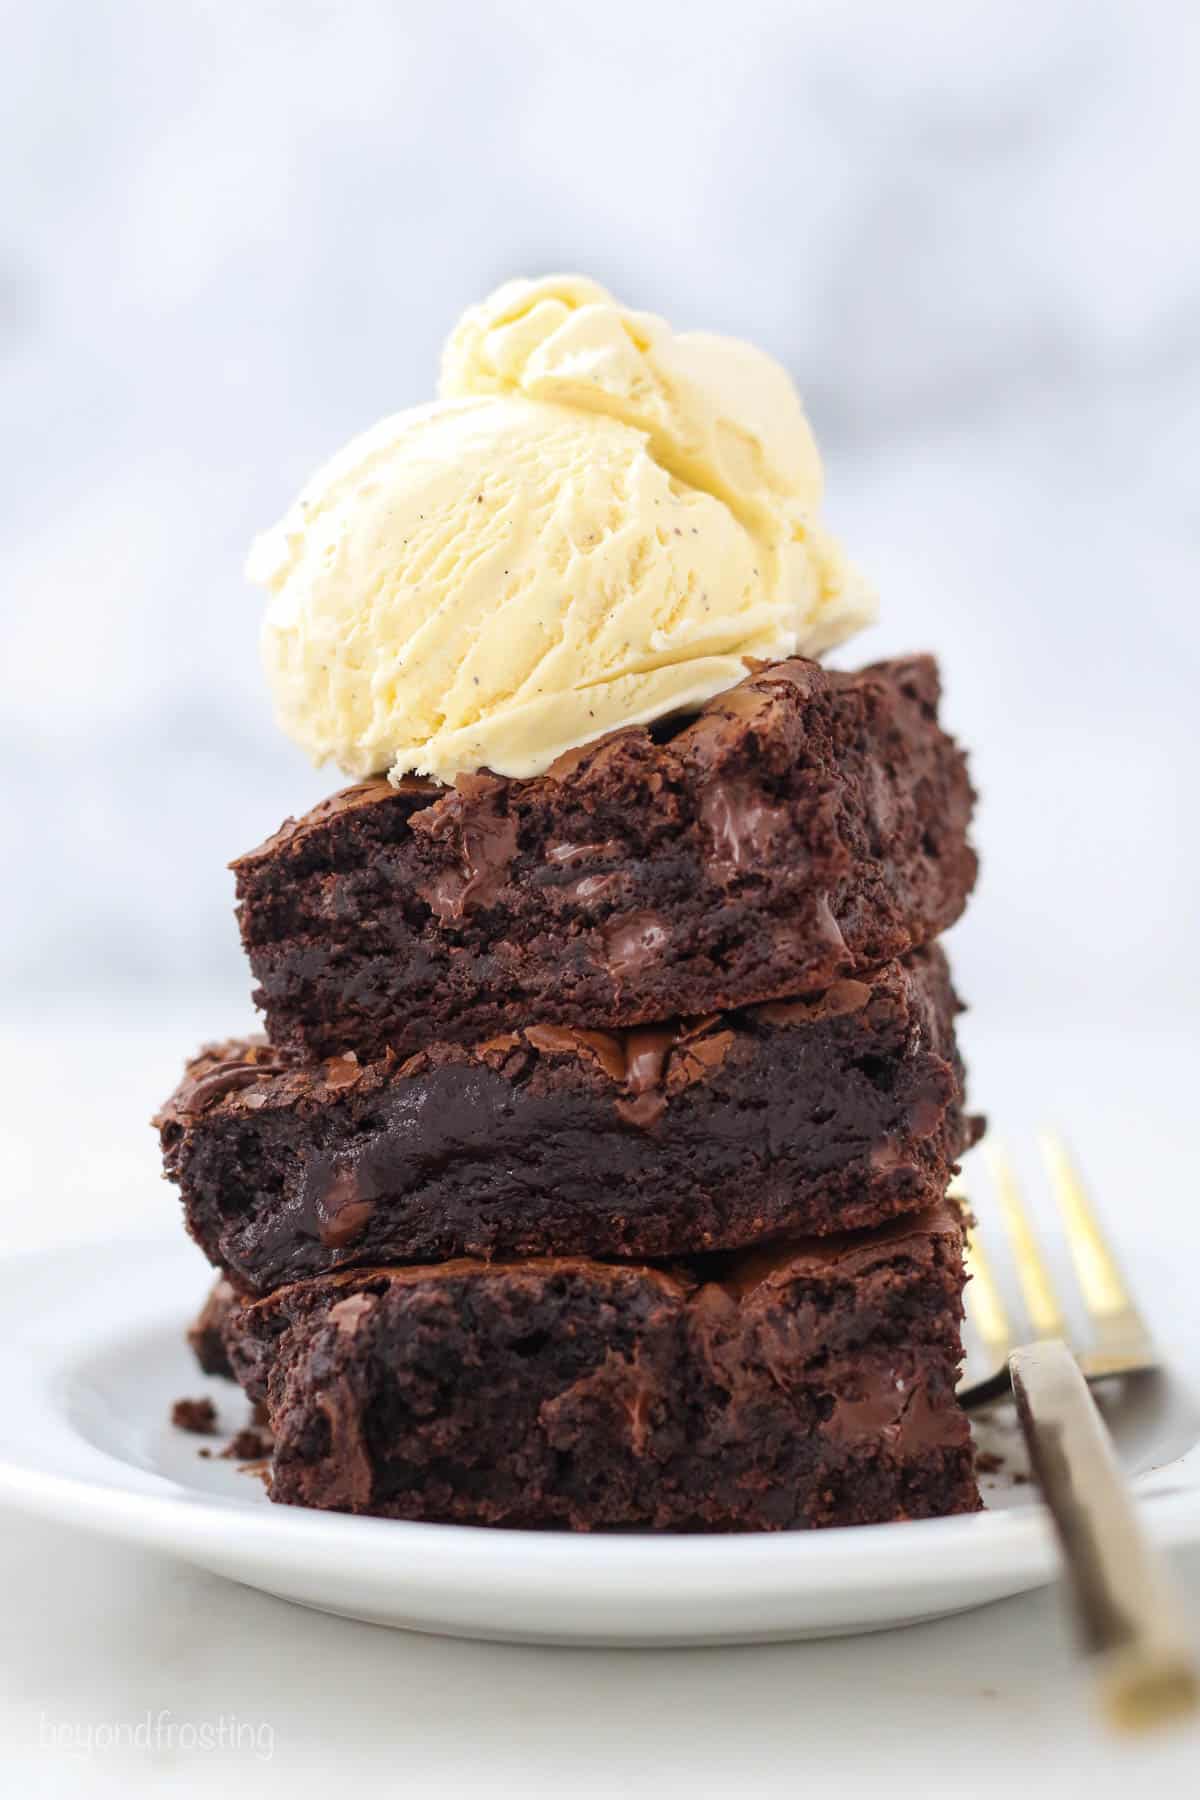
- Defrosting and Reheating: Defrost frozen brownies overnight in the fridge or on the counter for a few hours when you’re ready to eat one. You can also zap them in the microwave for 10-20 seconds (or until they are as warm as you want them to be). I like to do this when I plan on serving the brownies with ice cream.
Homemade Fudgy Brownies Recipe
- Prep Time: 15 minutes
- Cook Time: 22 minutes
- Total Time: 37 minutes
- Yield: 9 slices
Description
These gooey Homemade Brownies are better than any boxed brownies you’ll ever make. The middle is dense, rich and fudgy with a flakey layer on top.
Ingredients
- 4 ounces dark chocolate, melted (see notes)
- ½ cup (113g) unsalted butter, melted
- 1 cup (190g) granulated sugar
- 2 large eggs
- 1 large egg yolk
- 1 tablespoon (15ml) pure vanilla extract
- ½ cup (70g) all-purpose flour
- ½ cup (55g) Rodelle cocoa powder, sifted (see notes)
- ¾ teaspoon salt
- ½ teaspoon baking powder
- ¾ cup (135g) semi-sweet chocolate chips
Instructions
- Preheat the oven to 350°F.
- Chop the chocolate into smaller pieces and melt the chocolate in a microwave-safe bowl for approximately 2 minutes at 50% power. Stir every 30 seconds until completely melted and smooth. Set aside to cool.
- Melt the butter in a microwave-safe bowl and combine with the granulated sugar; beat together until well combined.
- Next add the egg and egg yolk and beat for 60-90 seconds at a higher speed until the batter is fluffy (texture resembling a cake batter). Then add the vanilla extract and melted chocolate and beat until combined.
- Combine the dry ingredients in a separate bowl and stir to combine. Add the dry ingredients to the batter and mix just until combined. Fold in the chocolate chips with a spatula.
- Generously grease an 8-inch baking pan. Spread the batter evenly and bake at 350°F for 20-24 minutes. Toothpick should still be somewhat gooey but not wet in the center. Remove from the oven and allow to cool prior to cutting. Store in an airtight container.
Notes
- Melted Chocolate for the batter: I recommend using a high-quality baking bar such as Ghirardelli or Lindt. These are best with dark chocolate, but any type of melted chocolate will work. If you don’t have a chocolate bar, then you can use chocolate chips. 4 ounces of chocolate is equivalent to a generous ½ cup of chocolate chips.
- Beating the sugar: It’s important to beat the sugar into the melted butter to allow the sugar to dissolve.
- Whipping the eggs: Be sure to beat your eggs and yolk until the batter is really light and fluffy, resembling a cake batter. This ensures the flakey crust on top.
- Cocoa Powder: I recommend Rodelle Cocoa powder. It all my tests, it had the best taste and texture. It’s a Dutch-processed cocoa powder. However, any cocoa powder will work, this recipe has been tested using several varieties.
- Substitutes for butter: ½ cup of vegetable or coconut oil can be substituted for melted butter if needed, but melted butter produces the best results.
- Salted vs Unsalted butter: If using salted butter, reduce the salt by at least half
- Baking Pans: This can be made in an 9-inch square or round pan. The baking time is approximately 20-22 minutes depending on the type pan used. I use dark non-stick pans sprayed with cooking spray. Glass pans will always require a longer baking time. After 22 minutes, I check my brownies every 1-2 minutes. If you stick a toothpick in the center of the brownies, it will still be gooey but not as “wet”. The brownies will continue to bake for several minutes as they cool.
- For a large batch, double this recipe and bake in a 9 by 13-inch pan. Baking time is similar.
- How to store or freeze these: Store in an airtight container or freeze for up to 1 month. To freeze the brownies, first allow them to cool completely, slice and wrap the brownies tightly in plastic wrap and then again in aluminum foil before placing them in the freezer. Thaw prior to eating.
- Reheat the brownies if desired for 10-20 seconds in the microwave for that fresh-from-the-oven taste. Serve with vanilla ice cream.
- Category: Brownies
- Method: Baked
- Cuisine: American


Hi. I have a go to brownie recipe I use for my son but I really want to try this one. My son likes rum in his brownies, kinda like rum balls… Would you recommend trying this and what would need to be omitted if I did?
Sounds delicious! I would probably add 1 tablespoon of rum to start unless he likes something super strong. Use only 2 teaspoons of vanilla and then add the 1 tbsp of rum
Just made these last night and they turned out sooooo perfect! Absolutely love this recipe. Melted chocolate definitely makes all the difference in the world. I doubled the recipe and baked the brownies in 2 8×8. The first pan i didn’t line with parchment and the brownies were messed up in the removing process. The 2nd pan I did line with parchment and was able to easily remove and cleanly cut with a sharp knife into perfect bars
That’s wonderful Emily!! Thank you so much, I love love love this recipe and I am so happy you enjoyed it!
I have question. If you don’t line the baking tin with a parchment paper, how to you remove the brownie for the tin post baking. If you turn it over onto some plate won’t it spoil the flaky layer?
I think you should have a very hard time removing the brownie from the pan without a layer under them. You can try using foil but sometimes when you cut the brownies, you get foil attached to the bottom.
I use Bakers Joy instead of regular cooking spray and my brownies don’t stick to the foil or a disposable foil pan. I use same irregardless of what kind of pan I use. Brownies are much easier to remove. I cut mine in the pans after cooled.
Made these Julianne though I like my brownies a bit chewy and sticky this came out soft and fudgy but tasted awesome
Thanks so much for the feedback!
Can you omit the chocolate chips at the end of this recipe? What additional changes would you make if you omit them?
Yes you can, no further changes needed.These are added to a finished batter, so if you take them out you don’t need to do anything.
I made these brownies today and really liked them. I didn’t add extra yolk as I don’t like eggy flavour and reduced baking powder to half. My brownies came out a little cakey. U think said changes could have made them cakey. No complains as they are yum and enjoying as I write this comment. Just curious though😊
Thanks Neha, yes the changes you made would have effected the outcome
I couldn’t get these brownies to cook on the center. Only edges were fully cooked. I baked them about 20 minutes longer than what the recipe called for and still not fully cooked. The edible edges were good but you really have to like dark chocolate to like these.
Hi Allison- what type of pan did you use? The middle of the brownies should not be fully cooked through, they are meant to remain fudgy and will further set as they are cooled.
Hi! I made this recipe which turned out scrumptious! I loved its fudgy texture and the decadency! I did cut down on sugar a bit so they aren’t super sweet. I made it using semi sweet chocolate chips! Will make them!
LOVE to hear this Uzma! Thank you!
Did you mean Softened Room Temperature Butter? Because no way does melted butter look like that
Hi Aiden- nope it definitely melted butter. If you’re referring to the step by step photos, the one on the left is after mixing the butter and sugar and the one on the right is after whipping the eggs/yolk- it resembles a cake batter texture
So I made these first going by your directions but doubled for 9X13 and after they were done & cooled I threw them out!!!! Although I knew better for whatever reasons I still did everything according to your recipe which 3/4 tsp. Of salt then doubled 1 1/2 tsp. Salt inedible!!! All that salt & salted butter that’s insane to say the least, So last night I re did them with 1/2 tsp. Salt in total a whole lot better & atleast edible although still can taste the salt slightly nothing like the first time I made them, If I venture into trying this recipe a 3rd. X I am either going to use unsalted butter & then the salt or drop salt down to 1/4 tsp. For doubled recipe 9X13.
Hi Carla- thanks for sharing. I should have specified this recipe was made with UNSALTED butter. So it makes sense if you use both salted butter and the full amount of salt why it would taste that way. I’ve added recipe notes regarding this.
I fell in love with Saco cocoa powder decades ago when I was in the hunt for a better tasting cocoa powder. Didn’t care for Ghiradelli and was not happy with the bitterness of the Hershey’s brand. I stumbled up Saco at Winco one time and never looked back. I buy 3-4 at a time. I use it for my homemade hot chocolate, cookies, cakes, syrups, brownies and more! Can’t go wrong and tastes semi sweet and smooth! Sounds like the Rodelle cocoa powder is similar. I’m headed to the kitchen now to make these brownies!
Oh I’ve never heard of Saco before, I will have to check out it out! If you do make these, please come back and let me know what you think! Happy baking!
It’s a must to try Saco Dutch Cocoa. It’s wonderful ‼️Lately it’s been hard to find. I’m going to use it when I make these brownies ♥️ I’ll let you know. I haven’t heard of Rodelle as well. I will check for it as well.
Mmmm, these look great, Julianne! I’m also a big fan of Rodelle Dutch-process cocoa powder; I use it almost exclusively in my baking. My all-time favorite brownie recipe is the one on the back of the Rodelle cocoa bag, but these brownies of yours look equally delicious! I appreciate all the testing you did to yield as perfect a recipe for us as you could. Thank you for all your hard work and dedication!
Awesome Erin! Thank you for the kind words. This was a long but fun project!