Description
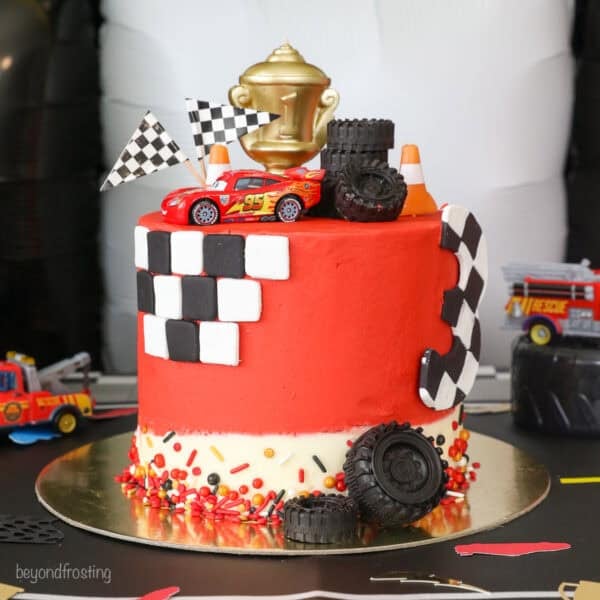
With racing-red frosting and just a little fondant, this Lightning McQueen cake is perfect for a kids’ Cars birthday party! From the cake to the buttercream and decorations, here’s how to make it, step by step.
Ingredients
For the Cake
- 1 ½ cups (285g) granulated sugar
- ½ cup (118 ml) vegetable oil
- 3 large eggs, at room temperature
- 1 tablespoon (15 ml) pure vanilla extract
- ½ cup (120g) full-fat sour cream, at room temperature
- 2 cups (280g) all-purpose flour, sifted
- ½ cup (40 g) cocoa powder, sifted
- 1 tablespoon (5g) espresso powder (optional)
- 2 ½ teaspoons (9 g) baking powder
- ½ teaspoon (2 g) baking soda
- 1 teaspoon (5 g) salt
- 1 ¼ cup (296 ml) hot brewed coffee
For the Buttercream
- 2 cups (453g) unsalted butter, cold
- 7–8 cups (910-1041g) powdered sugar
- 1 tablespoon (15ml) pure vanilla extract
- 1–3 tablespoons (15-44ml) heavy whipping cream (or milk)
- 1/8 teaspoon salt
- Red gel colors
For the Decorations
- 4 ounces White and black fondant
Instructions
For the Cake
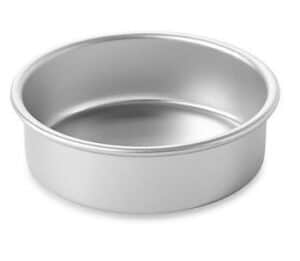
- Preheat the oven to 350°F. Prepare three 6-inch round baking pans, line the bottom with parchment paper, and grease the sides.
- In a large mixing bowl, combine the sugar, vegetable oil, eggs, and vanilla extract. Beat on medium speed until well incorporated. Next, mix in the sour cream and beat until well combined.
- In a separate bowl, sift together the dry ingredients. To the batter, alternate adding half the dry ingredients followed by half of the coffee, and mix just until the flour starts to incorporate. Repeat with the remaining ingredients. Use a spatula to scrape down the sides of the bowl and stir the batter from the bottom to the top to ensure it’s well mixed.
- Divide the batter evenly between the three pans, about 1 2/3 cups of batter per pan. Bake at 350°F for 25-32 minutes. Test the cake for doneness by inserting a toothpick into the center of the cake. If the toothpick comes out clean, the cake is done. Remove from the oven and allow to cool completely.
For the Buttercream
- Cut the butter into pieces. Using the paddle attachment, whip the butter for 5-7 minutes, scraping down the bowl occasionally. Beat until the butter is whipped to a soft and spreadable consistency.
- Alternate adding 3 cups of powdered sugar at a time with the liquid ingredients: vanilla extract & heavy cream. Add the salt. Ensure the powdered sugar is well combined, then whip for 1-2 minutes before adding the next cups of powdered sugar.
- Once all the powdered sugar has been added, increase the speed to medium-high and beat for another 2-3 minutes to whip additional air into the frosting. Then turn the mixer down to the lowest speed and beat for about 2-3 minutes, which helps eliminate some of the air bubbles.
To Assemble
- Use a cake leveler to cut the domes off the top of the cake so all 3 layers are even and flat. Place a dollop of frosting on a cake board and place the bottom layer of cake on top of that.
- The middle layers of the cake are frosted with the white buttercream (not colored). Using 1 cup of frosting between each layer, spread it evenly with an offset spatula. Add the second cake layer and add the remaining buttercream. Place the third layer of cake on top.
- Next, add a crumb coat to the entire cake. First, use an offset spatula to press any excess buttercream onto the edges of the cake. Next, fill a large piping bag and cut off about 1 inch from the bottom. Pipe a thin layer of frosting along the outside edge of the cake, filling in additional gaps between the layers, and a thin layer of buttercream on top of the cake. Then, use an offset spatula or icing scraper to wipe away the excess frosting, leaving just enough to coat the outside of the cake. Do not mix the crumb-coating frosting back into the bowl if it has cake debris in it. Refrigerate the cake for 15-30 minutes until the outside layer is chilled.
To Decorate
- Prepare the black and white fondant squares by rolling out each color to a thin but even thickness, but not less than 1/8” thick. Use a square cookie cutter (mine was 5/8” wide) and cut the squares out, about 2 dozen of each color. Set aside or place in a single layer in a flat, airtight container to be used later.
- Fill a large piping bag with 2 cups of white buttercream, and cut the tip of the piping bag off about 1/2 “ up from the bottom tip. Starting at the bottom edge of the cake, evenly pipe 3 rows of white buttercream. Next, use an icing scraper to smooth out the frosting. First, run it under very hot water and dry it thoroughly.
- Lightly press the scraper up against the side of the cake at a 90-degree angle, rotate the cake in a circle, applying even pressure on the scraper. Repeat these steps until the buttercream is smooth.
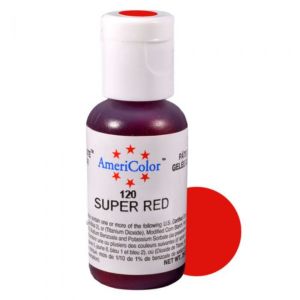
- Dye the remaining buttercream red using a Super Red gel until it reaches the desired color. See the note section for additional tips for dying buttercream red. Fill a large piping bag half full. First, add a thin layer of red buttercream to the top of the cake and smooth. Use the remaining buttercream to pipe around the outside edge of the cake, working your way from the edge of the white icing up to the top of the cake. Lightly press the scraper up against the red buttercream on the side of the cake at a 90-degree angle, rotate the cake in a circle, applying even pressure on the scraper.
- Once it’s mostly smoothed, you can scrape the entire cake as needed. Heat the scraper under very hot water and dry it thoroughly. Lightly press the scraper up against the side of the cake at a 90-degree angle and smooth.
- Press sprinkles into the white buttercream.
- Next, place the fondant squares along the top edge, alternating black and white. If you find they are not sticking, use a toothpick to gently rough up the buttercream so the fondant can stick to it, or add a touch of buttercream to the back of the fondant square.
Notes
Tips for Red Buttercream:
- To make the red a bit darker, you can add a touch of black gel icing. Stick a toothpick into the black icing color, and then dot that into the red buttercream, mix to incorporate and repeat as needed (do not stick the toothpick back into the gel icing container; get a new one).
- Adding a drop of purple or violet gel color can also help to deepen the red color and shift it to be more crimson. Work slowly, as adding too much at a time may shift the buttercream to a color you don’t like.
Storage:
- Store the unfrosted cake layers tightly wrapped for up to 2 days. Keep the finished cake covered airtight in a cake carrier. Remove any plastic decorations before storage.
- Leftover buttercream can be stored in the refridgerator for 7 days or in the freezer for up to 2 months in an airtight container.
Party Decor
- You can shop cake items and party decor on my Amazon Store Front or shop the decor here.
- For the sprinkles, I combined 2 packages of “Sarah’s Bakeshop” Sprinkles found at Walmart. One package is red, the other is black, white, and gold, which may be discontinued as it’s not on their website.
Nutrition
- Serving Size: 1 Slice
- Calories: 850
- Sugar: 94.2 g
- Sodium: 300.8 mg
- Fat: 43.7 g
- Carbohydrates: 114.6 g
- Fiber: 1.7 g
- Protein: 5 g
- Cholesterol: 134.2 mg