Description
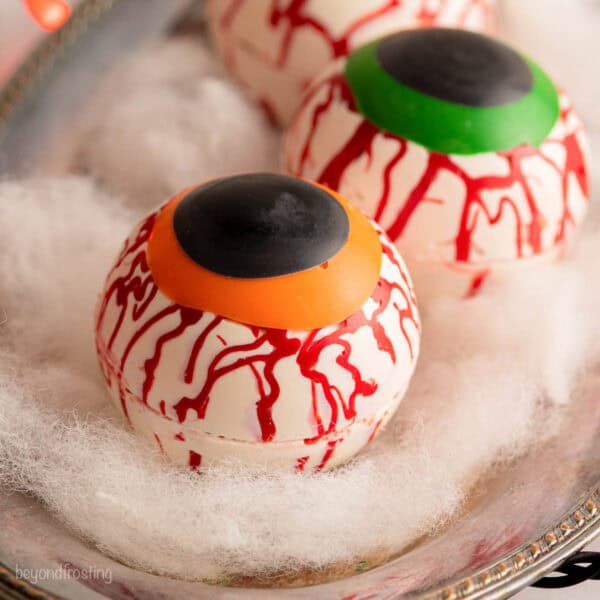
These popular hot chocolate bombs are decorated for Halloween to look like Spooky Eyeballs for a fun and festive treat. See just how easy they are to make! Inside they’re filled with hot cocoa mix and mini marshmallows.
Ingredients
- ¼ cup black candy melts
- ¼ cup green candy melts
- ¼ cup orange candy melts
- ¼ cup red candy melts
- 1 cup white candy melts or Ghirardelli melting wafers
- 6 tablespoons powdered hot cocoa mix
- ½ cup mini marshmallows
Instructions
Melting the Chocolate
- Whenever the instructions call for melting candy melts or chocolate, be sure to melt them in a microwave-safe bowl at 50% power to prevent them from burning. If they are burned or start to seize, you’ll have to start over. I recommend melting in 20-30 second intervals and stirring each time.
Top side of eyes:
- Melt the black candy melts until melted and smooth. Spoon into a piping bag or small Ziploc bag. Cut the corner to make a dime-sized hole. Pipe a quarter-sized circle into the center of each silicone mold. Place into the freezer for 5 minutes to set.
- Separately melt the green and orange candy melts pour into two piping separate piping bags, cut off the corner of the bag. Pipe a 1” round circle on top of the black candy melts. Once all of the 6 eyes are done, place them back into the freezer for 5 minutes until set.
- Next melt half of the red candy melts and place them into a piping bag. Snip only the tip off the piping bag. Pipe a bunch of squiggly lines going up the sides of each mold to create a bloodshot look. Place back into the freezer for 5 minutes until set.
- Finally, melt half of the white candy melts (or chocolate wafers) until melted and smooth. Coat the cavities of the mold one at time. Put a spoonful of melted chocolate in each cavity and swirl it around to coat the outside. If it’s thin, add additional chocolate (Note this could take longer depending on thickness). Melt additional chocolate if needed.
- Refrigerate for 10 minutes or until set. Once they’re completely set, remove the shells from the mold and wipe it clean.
Bottom side of eye:
- Melt the red candy melts pour into a piping bag with the tip cut off. Pipe a bunch of squiggly lines going up the sides of each mold. Place back into the freezer for 5 minutes until set.
- Melt the remaining white candy melts. Coat the cavities one at a time as described above. Once all are coated, place back into the refridgerator for 10 minutes or until set.
To assemble:
- Boil about ¾ cups of water either on the stovetop or in the microwave. Place a plate over top of the measuring cup to warm the plate.
- Press the top of the eye on your heated plate briefly to heat the edges. Quickly flip over the shell and fill with 1 tablespoon of hot chocolate mix and a couple of mini marshmallows. Do not over stuff.
- Repeat the above with the bottom side of the eye and gently press the two shells together, being careful not to press too hard so you don’t crack your bottom shell. Refrigerate for 10-15 minutes to set.
To serve
- Place a chocolate bomb in the bottom of a mug. Heat milk in the microwave until desired consistency, pour warm milk over the chocolate bomb. Stir until combined. Serve with whipped cream.
Notes
These should be stored in a cool dry place until ready to use. They can be kept in an airtight container for one week.
