This No-Bake Lemon Shortcake Icebox Cake is layers of soft ladyfingers, lemon cheesecake mousse and whipped cream. This is one recipe you’ll make time and time again.
Love this recipe? Subscribe to get recipes delivered to your inbox!
This recipe is sponsored by Lucky Leaf, all opinions are my own.

I hope you all had a wonderful Easter. Ours was mellow. I shot a couple of recipes in the morning and we spent the afternoon with family and friends. I, of course showed up with loads of desserts and cakes that were missing a slice. It’s become somewhat of an expectation that I never bring a full cake to a party. Luckily I have understanding friends.
When I’m home baking up a storm every weekend, I’m usually crushing over my desserts to my boyfriend. His “limited” dessert palette leaves me to do most of the taste testing. Thankfully for him, I make a lot of chocolate and Oreo desserts. He’s not such a fan of lemon, but that just means more for me!
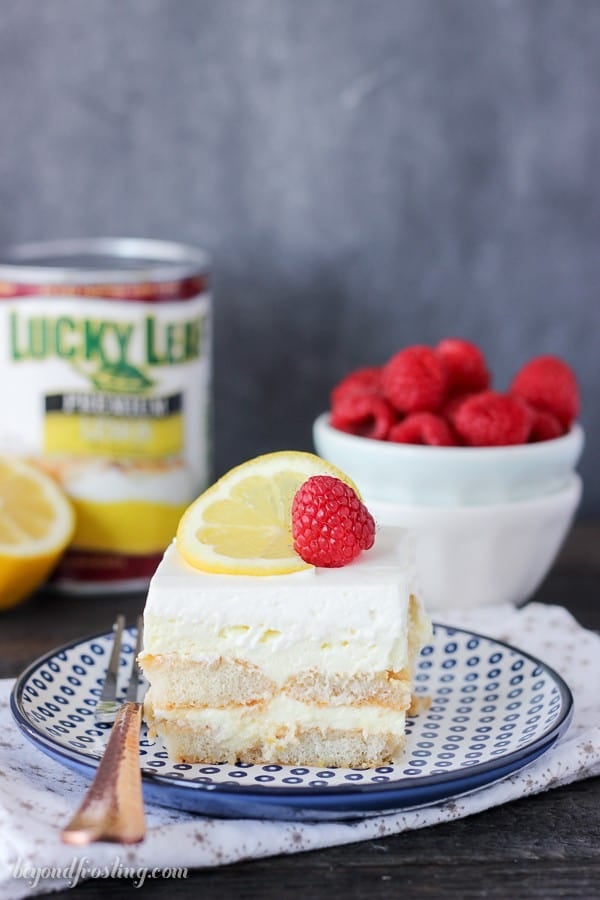
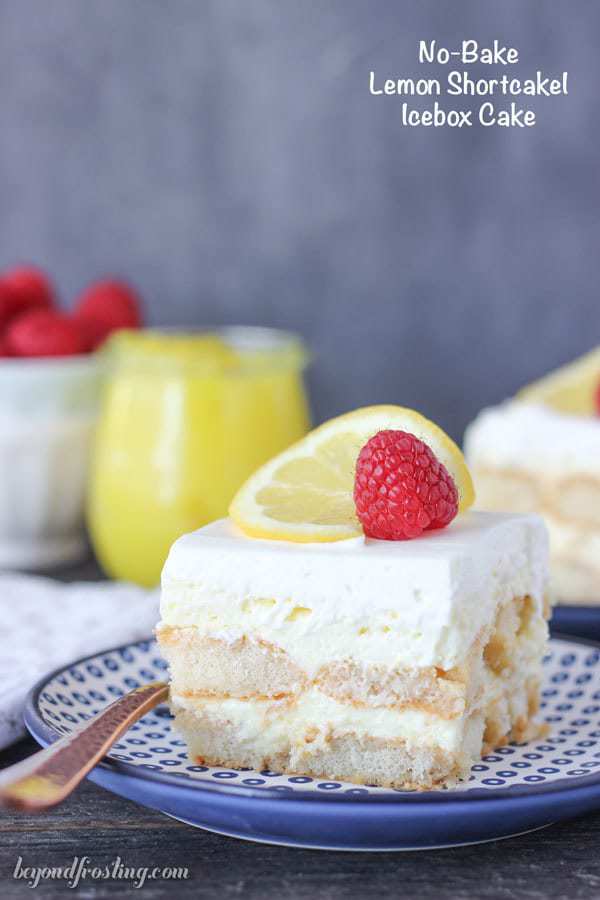
When it came time to slice into this Lemon Cheesecake Shortcake, I knew I had something special. My knife slide through the layers with ease and I pulled out that first slice without a problem.
Usually with desserts that have ladyfingers, the ladyfingers can sometimes be difficult to cut through if they are not moistened enough. Such was not the case here.The ladyfingers are coated with milk on both sides, which absorbed into the cookie, leaving you with a cake-like texture.
In between the layers of ladyfingers is a whipped lemon cheesecake filling. The filling is airy in texture but packs a punch of lemon flavor. It’s all topped off with homemade whipped cream.
The filling starts with a hint of cream cheese mixed with Lucky Leaf Lemon Pie filling. I’ve added some fresh lemon zest to up the anty. This is also mixed with plenty of whipped cream.
After a few hours in the refrigerator, this baby is ready to go. Doesn’t this just scream spring to you? It’s garnished with a slice of lemon and some raspberries for a pop of color. You could always make this dessert even more unique by adding some of your favorite berries to the filling.
You guys will be pleasantly surprised at how quickly this dessert is to assemble. Obviously it’s no-bake, and I think you guys know how I feel about that! Go grab yourself a can of Lucky Leaf Lemon Pie filling so you can make this ASAP! Lucky Leaf has a free recipe E-book just for my readers where you can grab this recipe and more. Click here for your free download!
Keep up with all the happenings. Follow Beyond Frosting:
Do you love No-Bake Treats? Be sure to check out my cookbook!
Facebook | Twitter | Pinterest | Instagram
Follow along with Lucky Leaf:
Facebook | Twitter | Pinterest
This recipe is sponsored by Lucky Leaf, all opinions are my own. Thank you for supporting the brands that help support Beyond Frosting.
Print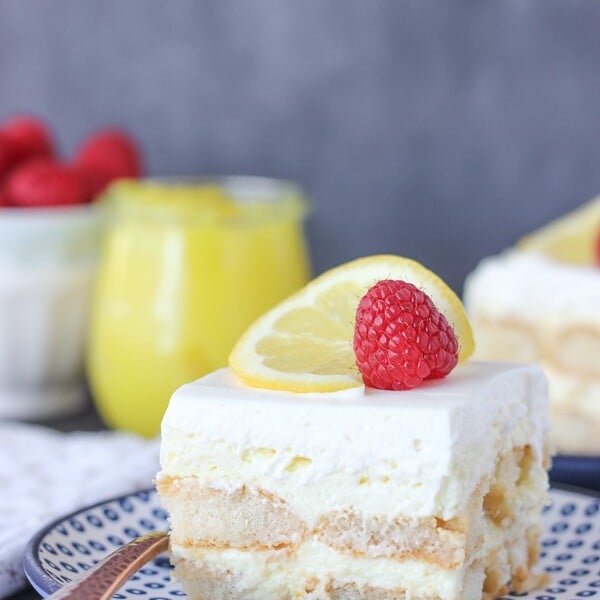
No-Bake Lemon Shortcake Icebox Cake
- Prep Time: 20 mins
- Total Time: 20 minutes
- Yield: 12-15 slices
Description
This No-Bake Lemon Shortcake Icebox Cake is layers of soft ladyfingers, lemon cheesecake mousse and whipped cream. This is one recipe you’ll make time and time again.
Ingredients
For the mousse:
- 2 cups heavy whipping cream
- 1 ¼ cup powdered sugar
- 8 ounces cream cheese, softened
- 1 can Lucky Leaf Lemon Pie Filling
- ½ cup Powdered confectionary sugar
- Zest of one large lemon
- For the shortcake:
- 2 cup milk
- 2 teaspoon pure vanilla extract
- 2 packages ladyfingers (7oz size)
Instructions
- For the mousse: Place your mixing bowl in the freezer for 5 to 10 minutes to chill. Pour the heavy whipping cream into the chilled bowl and use an electric mixer to beat the heavy cream on medium-high speed until it’s bubbly. Slowly add the powdered sugar and continue beating on high speed until stiff peaks form. Set aside in the refrigerator until needed.
- To soften the cream cheese, remove the wrapper and place on a microwave-safe plate. Microwave for 15-20 seconds.
- In a large mixing bowl, beat the softened cream cheese on medium-high using the paddle attachment until the cream cheese is light and fluffy, and free of lumps. Scrape down the sides of the bowl.
- Next add the Lucky Leaf Lemon Pie Filling and zest from one large lemon. Continue beating on medium-high speed until all ingredients are well combined, scraping down the bowl as needed. Slowly add powdered sugar and beat until incorporated.
- Take 2 cups of the prepared whipped cream and gently fold into the lemon cream cheese mixture and fold over and over until all ingredients are well mixed.
- For the layers: To assemble the dessert, line the bottom of a 9-inch square dish with parchment paper.
- In a small bowl, combine the milk and vanilla extract. Dip the top and bottom of each ladyfinger in the milk mixture and line the bottom of the dish with one layer of dipped ladyfingers. You may need to cut the ladyfingers in order to fit two rows into the dish.
- Once the bottom layer is built, spread half the lemon mousse over top. Then, add the next layer of dipped ladyfingers followed by the remaining mousse, spreading evenly.
- Lastly, spread the remaining prepared whipped cream over the top of the mousse. Cover this and refrigerate for 4 to 6 hours to allow the layers to set. Serve with fresh berries.
Filed Under:








Good evening, Julianne. I’d like to make this recipe, but I was wondering. Do you think it would work to substitute lemon curd for the lemon pie filling? Have you perhaps ever tried that? My husband and I are continuing to try your desserts and I’ve yet to find one we don’t love!
Thank you!
Yes, I think this would work!
I’ve made this a number of times and it’s been a huge hit each time!! It’s my go to summer dessert.
Awesome Kelly! Thank you so much for sharing!
Could you use marscapone cheese instead of cream cheese?
I have not tested this recipe specifically but I’ve used mascarpone in similar recipes. So I think you should be fine!
What size can is the pie filling?
HI Vicky, it should be 22oz
I see powdered sugar and confectioners both in the mousse, is this the same or is one granulated sugar?
Hi Rita, yes these are the same. There is a portion for the whipped cream and a portion for the filling. Enjoy!
Do you use the soft or hard lady fingers in this recipe?
Hi Janice, I use the hard lady fingers.
LOVE a good icebox cake and this one looks amazing!
Thank you Julie! Me TOO!!
What a beautiful no-bake cake Julianne. Clever to dip the ladyfingers. Don’t think I could stop at one slice!
Than you Allie! I know I certainly couldn’t stop after the first few bites!
SO summery-fresh. Love this for entertaining!
You got that right Sandy! Thanks for your kind words.
I love lemony desserts during spring and summer. This looks so yummy!
Me too Katie! It is perfect for summer time.
Lemon anything is my favorite! What a pretty and simple cake.
Well thank you Sabrina! I love the freshness of this dessert!
So smart to use the ready to use lady fingers and the Lucky Leaf pie filling. It looks delicious!
Thanks Barbara, if helps make this dessert so easy!
Brings back memories of testing the lemon raspberry icebox cake so I know this is delicious beyond belief.!
Oh yes! That one was a good one! This isn’t frozen, but it is just as easy as the other one!
Bookmarking this for when the weather heats up and I don’t want to turn on the oven!
Awesome Peabody, thank you!
I love Lucky Leaf Lemon Pie Filling, and this cake is going to be a hit at summer potlucks! Fantastic 🙂
Thanks Aimee! I am a huge fan of the lemon filling because I would likely not ever make something like that myself. It’s so easy to just toss a can of filling in.
I have never bought lemon filling in a can, I don’t think we have it in NZ.
I have a heavy crop of Mayer lemons each year and make my own lemon curd.
Awesome Sharon! You could definitely make your own homemade lemon curd if you had to
What a great idea for using ladyfingers. It seem like I always have a few extra after making tiramisu so I could totally make mini versions of this with them.
Thank you Heidi! I’ve been using them left and right lately, it seems like I can’t stop! I love the idea of the mini versions!