
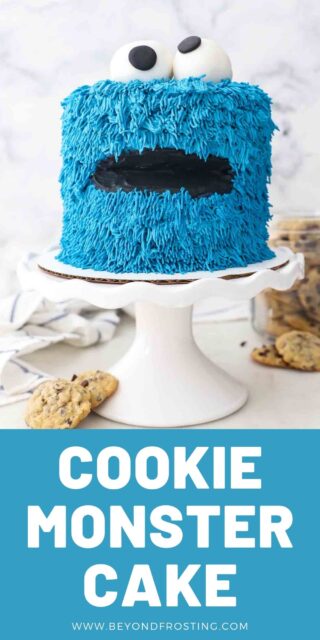
This is the perfect cake for a Cookie Monster birthday party or smash cake. Here you’ll find the step-by-step tutorial including how to assemble the cake and most importantly, how to decorate it as well. With a few simple steps, anyone can make this cake at home!
Homemade Cookie Monster Cake
I have been dying to share with you the details of my baby’s first birthday! We did a cookie monster theme, with a smash cake AND I made him a separate chocolate cake on his actual birthday.
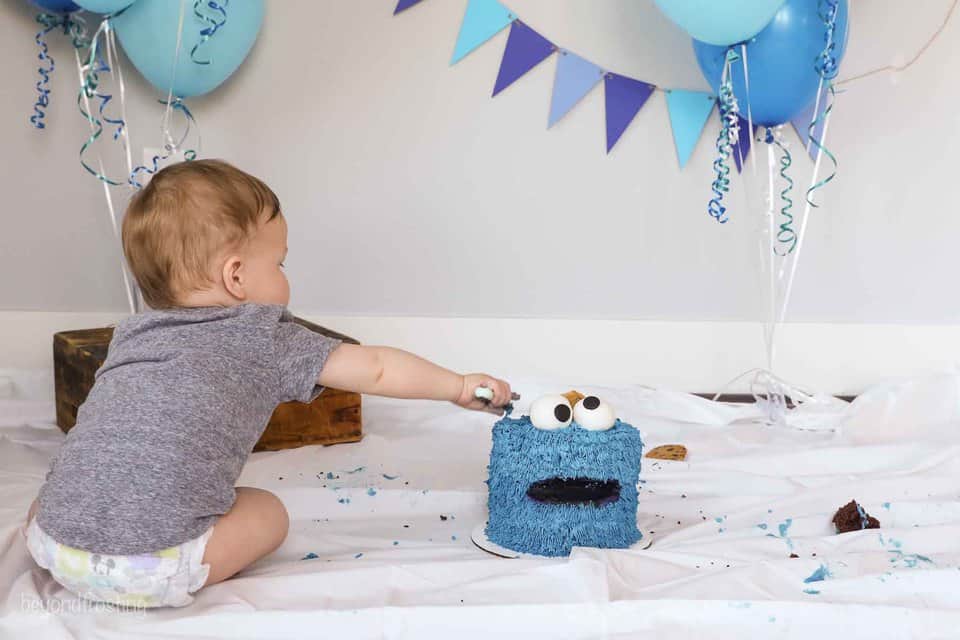
One of things that excites me about being a mom is to celebrate the birthdays and create memories. So for his first, of course, I was dreaming of a smash cake photoshoot with a messy faced baby, covered head to toe in frosting. But that is the opposite of how it was. He really didn’t want to be near the cake and hardly put his hands in it at all. There were even some tears, but eventually he warmed up to it.
My baby loves silverware and dipping his spoon into things, so I gave him that and he was all about it. I also had made a jar of chocolate chip cookies for the photoshoot and after everything was cleaned up, I gave him the jar of cookies to play with and that was also a huge hit. All in all I got some great photos, but a cake that was hardly touched. It was still so worth it!
If you want to recreate this cake at home, I have written a very detailed post with step-by-step instructions. It’s quite long, but you can scroll through the headings to find what you need and also check out the table of contents at the top of the post, you can jump to each section. I’ve also included a full list of helpful tools.
That’s it, it’s time to make a cake!
What type of cake can I use?
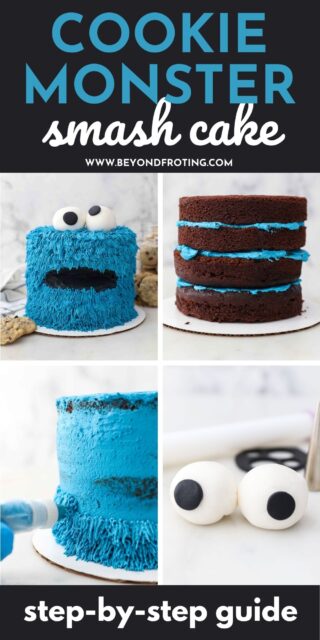
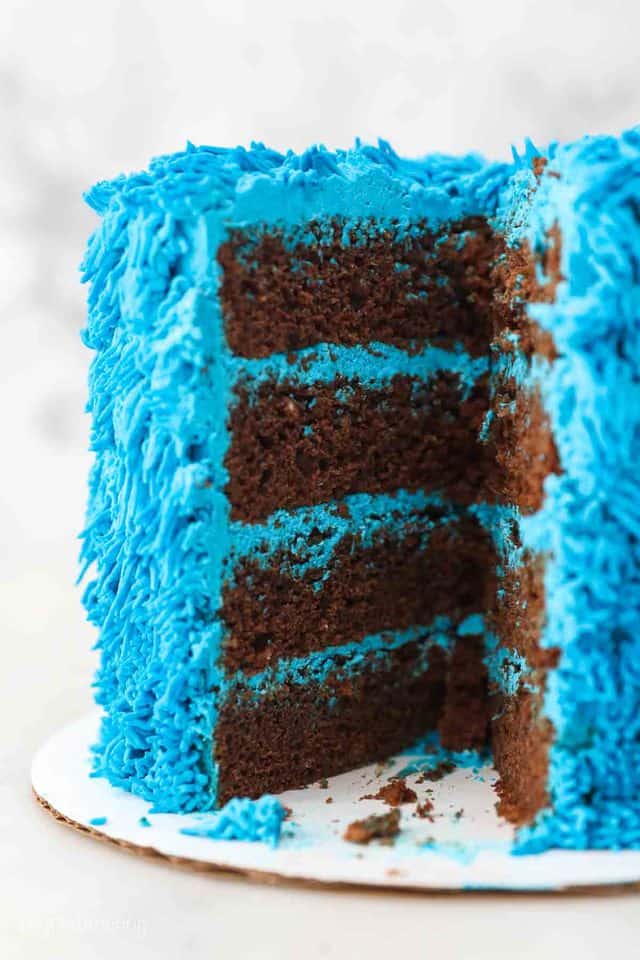
You can make any flavor you want! I chose to make a four layer 6-inch cake, which is a double batch of my mini chocolate cake. The mini cake is two 6-inch layers and also works great as a smash cake, I just wanted a tall cake.
If chocolate isn’t your thing, you might like my vanilla or yellow cake. A full batch will make four 6-inch layers with similar baking times to this recipe.
You can even use a cake mix instead, but I do find that they are almost too delicate to use for a 4-layer cake. You may need two boxes or consider making a 3-layer cake instead.
The best frosting for a smash cake
Traditionally I would recommend my vanilla frosting (which is still a great option), however I chose to use mascarpone whipped cream for this cake instead. If you’ve never made this type of frosting before, I have a full tutorial, including a video that might be helpful for you.
Why I love it
- It’s got far less sugar in it
- It’s much easier to handle when piping and makes it so quick to frost this cake
- It doesn’t crust over like a buttercream so it’s easier for the baby to smash
- It tastes amazing. It’s thicker than whipped cream with a mousse-like texture
However, this cake has to be refrigerated, so take that into consideration. If you were planning an outdoor party, this frosting wouldn’t be ideal.
The first time I made the cake, I had just enough frosting. The second time I made it, I had almost a full piping bag leftover. This will vary based on how much frosting you put between layers and use for the crumb coat. Trust me when I say that it’s better to have leftover frosting them to come up short.
How to make the blue frosting
Whenever working with food dyes (but especially in this case) I recommend wearing food safe gloves and having lots of wet paper towels on hand to clean up.
Just a fair warning- Yes, this will turn your baby baby blue. Their mouth, teeth, hands, clothes etc. will turn blue. However, it will wash out with soap and water, it might take a few times.
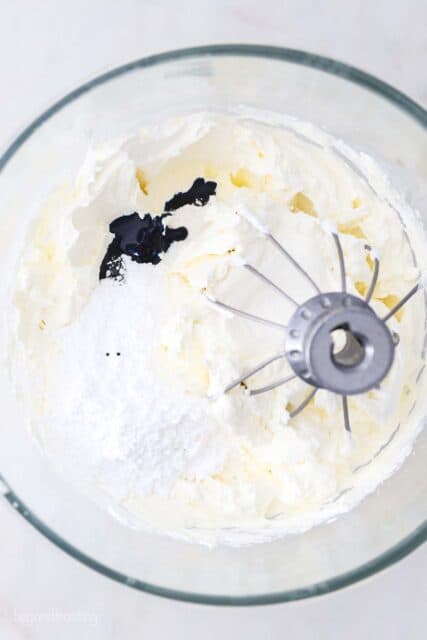
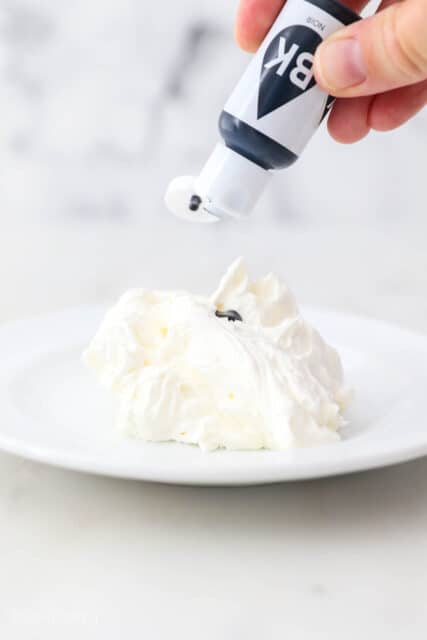
The color I used is electric blue, which was quite bright, so I added just a touch of black to darken it. Add just a small drop at a time to get it darker. A royal blue color would also work great.
Before you add the blue color, set aside a quarter cup of the frosting for Cookie’s mouth. This going to be dyed black, and you can find the tutorial below.
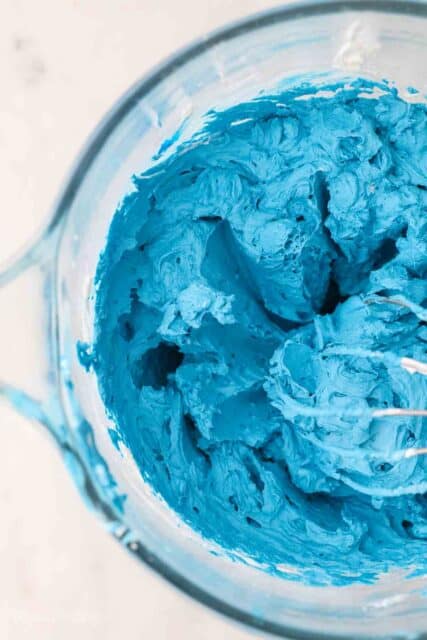
Once the mascarpone whipped cream reaches soft peaks, add the powdered sugar and blue gel color together, about ½ teaspoon to start. Beat until the blue is incorporated. Add additional drops of the blue until you reach the desired color. Make sure to stir the frosting with a spatula, incorporating all the frosting on the bottom of the bowl.
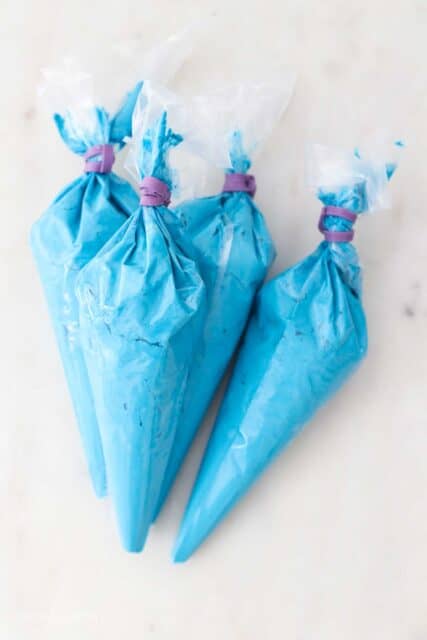
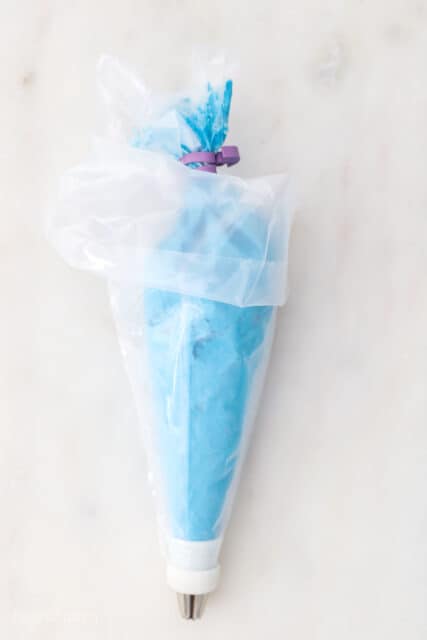
Fill 4-5 small piping bags only 2/3 full and tie off the end with a rubber band. Refrigerate until ready to use. If you’ve never filled a piping bag before, I have a great tutorial about working with piping bags and piping tip.
Assembling the cake
Just a couple basic steps to assemble this cake, and you’ll be on your way to decorate.
- Level the cake: Make sure they’re flat on top. Use a cake level or serrated knife.
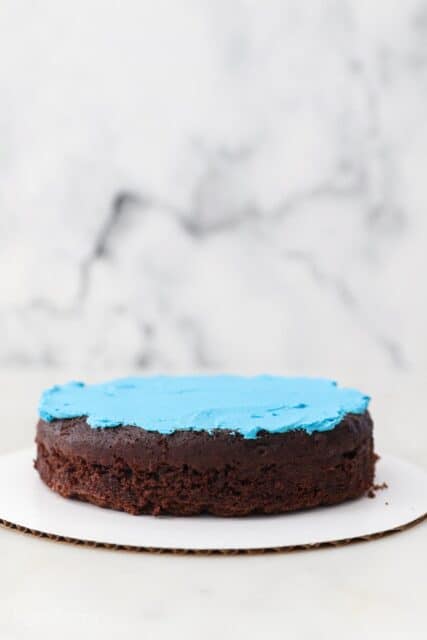
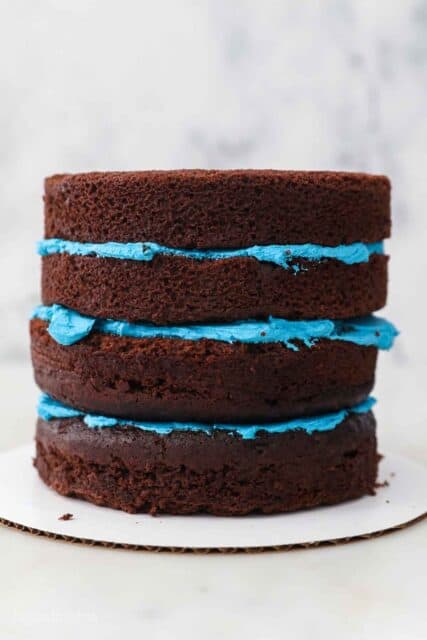
- Stack the layers: Use ¼- ½ cup of frosting between each layer and spread evenly. If you are serving this as a birthday cake, definitely use ½ cup. But since I made this as a smash cake, I didn’t need very much frosting between the layers. Just enough to hold them together. You can see I inverted the 2nd and top layer, which gives a nice flat surface for stacking and decorating.
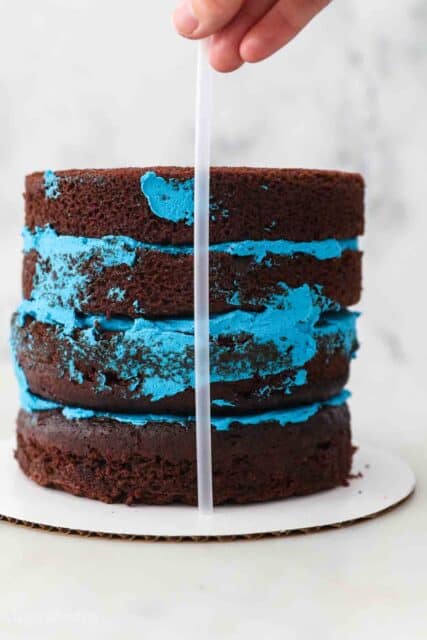
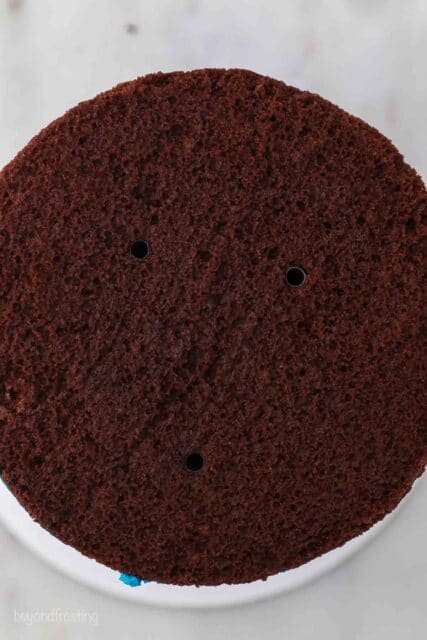
- Add the structure: Once all the layers are stacked, take 3 plastic straws, and cut them just short of the height of the cake. Place them in a triangular pattern. You can use wooden dowels, but straws are much easier. This helps hold the cake steady, so it doesn’t slide.
- Time to decorate: Once this is done you’re ready to decorate!
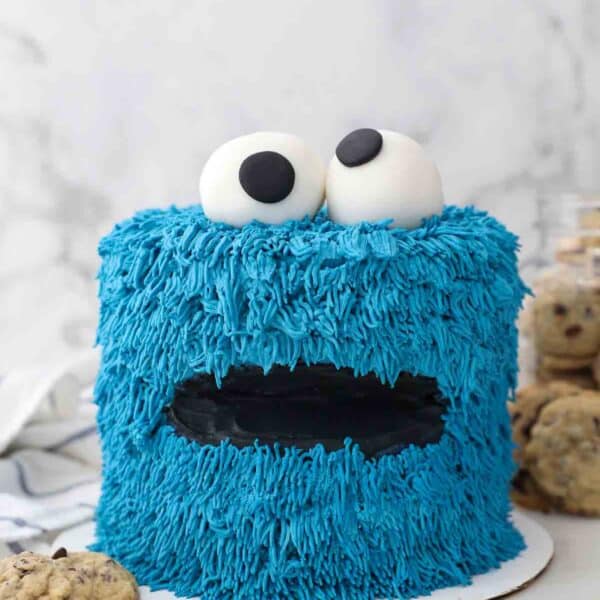
The easiest way to decorate a Cookie Monster cake
If this looks intimidating to you, let me tell you that this is actually the easiest way to decorate any cake. This technique uses the grass tip. It’s easy to cover up mistakes and it’s very forgiving.
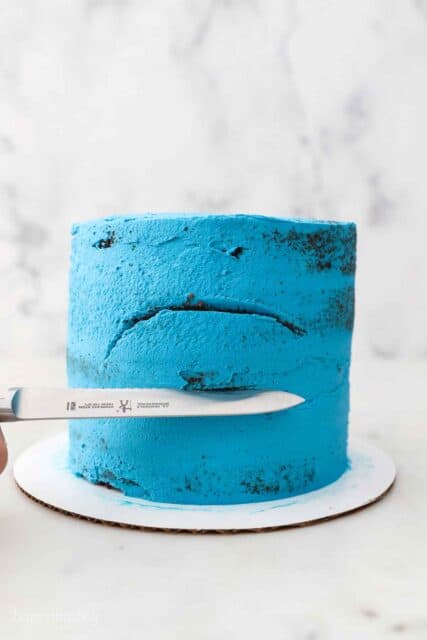
Crumb coat the cake: First apply a very thin crumb coat on the outside of the cake. It’s helpful to use an offset spatula or bench scraper to spread and smooth the icing out. Also be sure to fill any gaps in between the layers of frosting.
Prepare the piping bag: Use one piping bag at a time, and if it feels like it’s getting soft or runny, it’s best to ditch it and grab another bag. Assemble a small piping bag with a couple and a grass tip. If you are unsure how to do this, check out this detailed post for more helpful information on using piping bags. Drop one of your frosting filled bags inside the second piping bag.

Cut out the mouth: See more detailed instruction below.
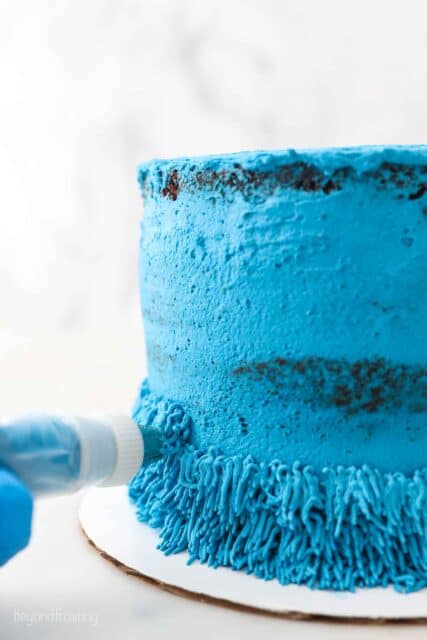
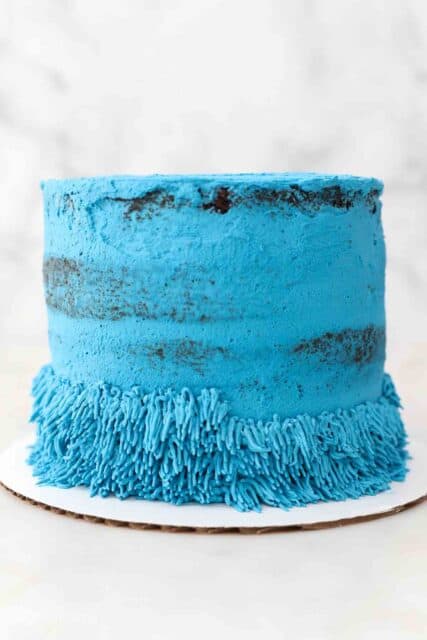
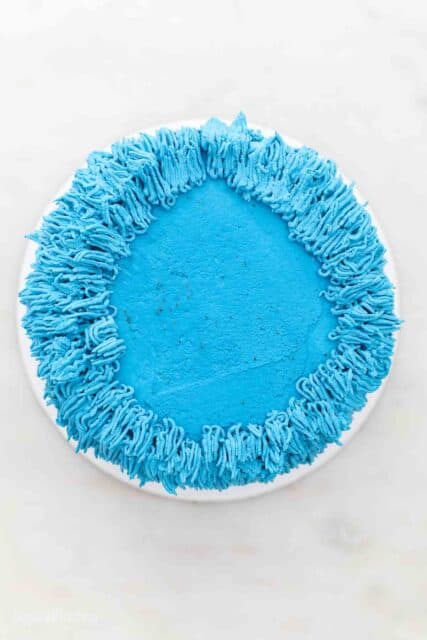
Start piping: Starting along the bottom edge and working in a circle around the cake, press the piping tip up against the edge of the cake and gently pull it away as you apply pressure to the bag. The longer you pull away, the longer the hair will be. Start the next layer just slightly above and pull the frosting downward so it sits overtop of the bottom layer. Repeat until the side of the cake are frosted.
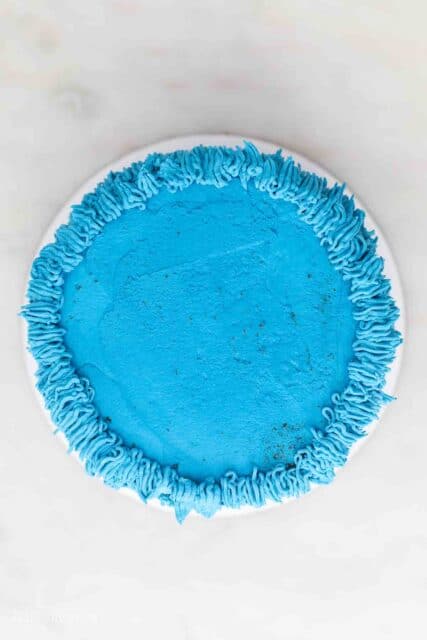
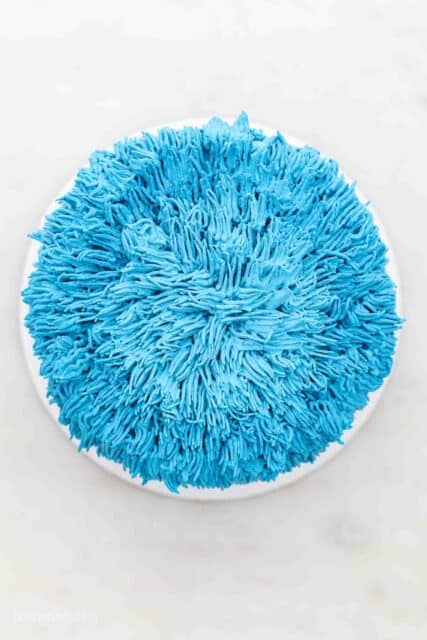
Frost the top:To frost the top, start from the outside edge and working in a circle until you reach the middle.
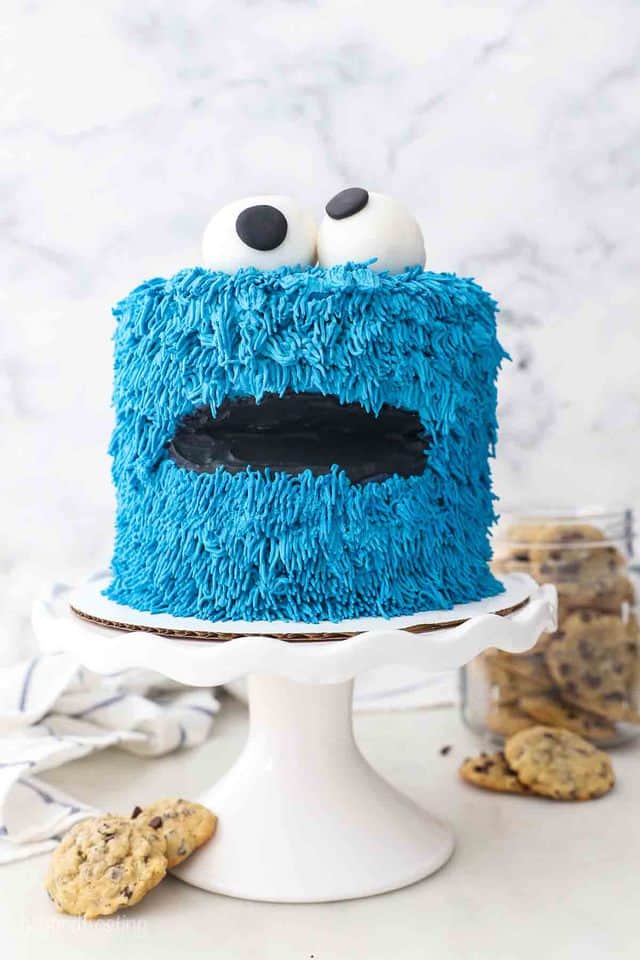
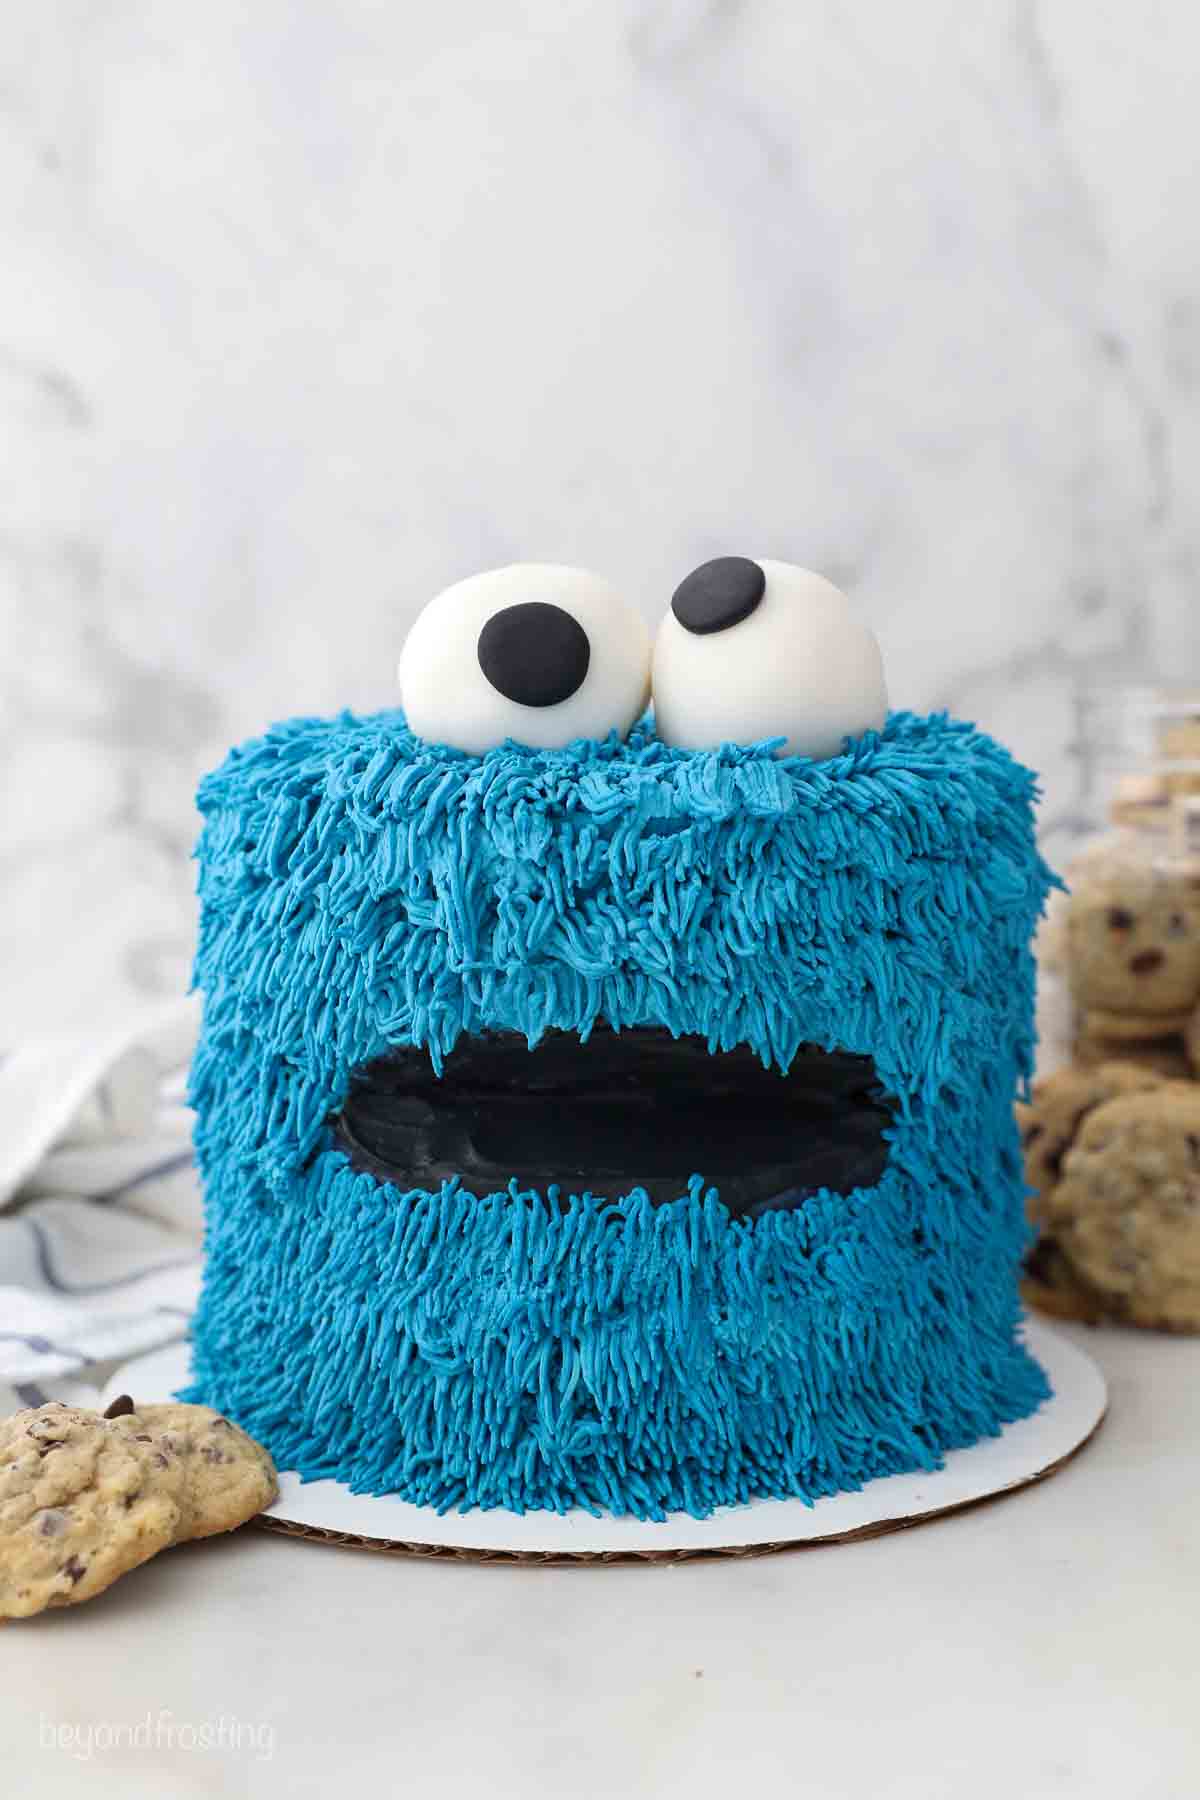
How to make Cookie Monster’s mouth
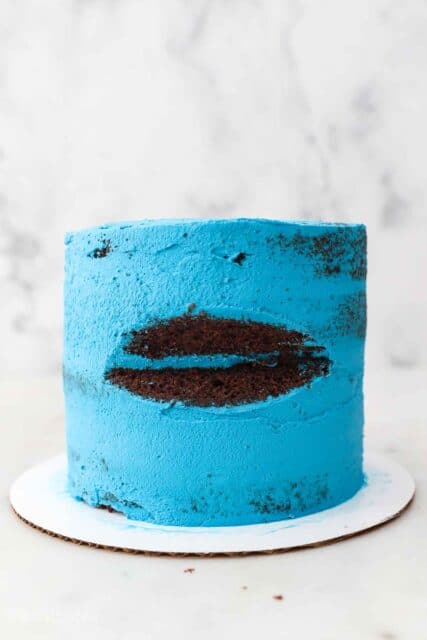
Once you have the cake crumb coated, use a serrated knife to cut the mouth. First make the top cut. Angled it like a half moon and cut at about a 45-degree angle. Then on the bottom, cut upwards at a 45-degree angle, meeting the edges of the upper part of the mouth. Remove the piece of cake.
If you wanted to frosting that blue, or just leave it as is, you can. But I dyed some of the frosting black. After sitting in the refrigerator overnight, parts of it discolored to a slightly purply color, especially where it meets the blue frosting. However, this was not that noticeable in my final photos.
As an alternative, you could cut fondant pieces instead, especially if you already had black fondant for the eyes. Place a thin layer of frosting underneath the fondant. Place the fondant on prior to frosting the cake so you can cover the edges with the frosting.
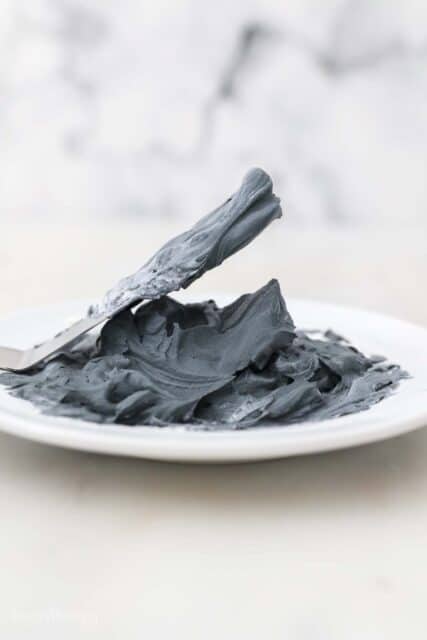
Dying black frosting
You’ll need about ¼ cup of the frosting for the mouth. Use a couple drops of black gel and mix it into the frosting. Just be careful not to overdo it. The color will appear as a dark grey at first, but it will darken as it sits. Getting a true black color is very difficult to do with a small amount of frosting.
How to make Cookie Monster’s eyes
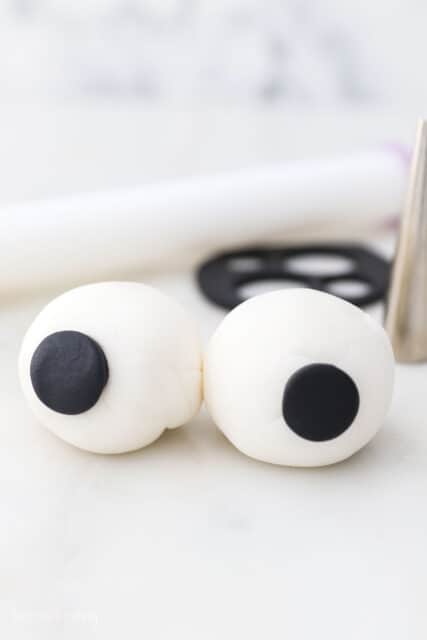
These are quite simple to make. The most important part is setting the pupil of the eye off center, since Cookie’s eye are a little wacky.
I bought black fondant to make it easy on myself. But you need such a tiny amount (about the size of a quarter), so you could also color some of the white fondant with black food gel instead. Another option is to get a food safe black marker and draw them on the white fondant.
Materials and tools
- White Fondant
- Black fondant
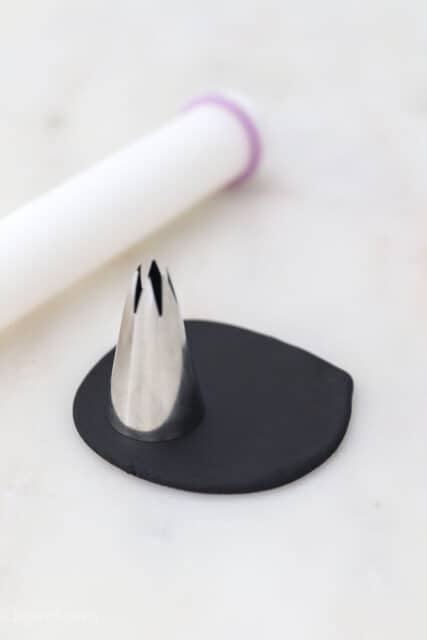
- Small rolling pin
- Small circle cutter (such as a 1M piping tip)
- Split a 4-ounce package of white fondant in half, and roll into two balls. Set aside. Note that the fondant is soft, so the bottom side may flatten out, but that’s okay because you’ll put them on top of the cake.
- Roll out a quarter size piece of black fondant about 1/8” thick. Cut out two black circle. You may need a toothpick to remove them.
- Dampen the back of the circles with a touch of water and place off center on the white eyeball. Allow them to dry, and set the eyes on top of the cake right before serving.
How to store a frosted cake
Once frosted, this cake needs to be refrigerated and it’s best kept in an airtight container. If left in the refrigerator uncovered, the frosting will crust on the exterior and that doesn’t taste great. You can use either a cake carrier or get a tall cake box, and then wrap it in saran wrap around the outside.
How far in advance can I prepare this?
For the cake layers, you can make ahead and freeze for up to two months. Thaw to room temperature prior to using. I do not recommend preparing the frosting in advance, as it works best once it’s been applied to the cake. This cake will keep fresh in the refrigerator for a couple days if properly stored. However, due to the nature of the colored frosting, it’s best to serve within two days.
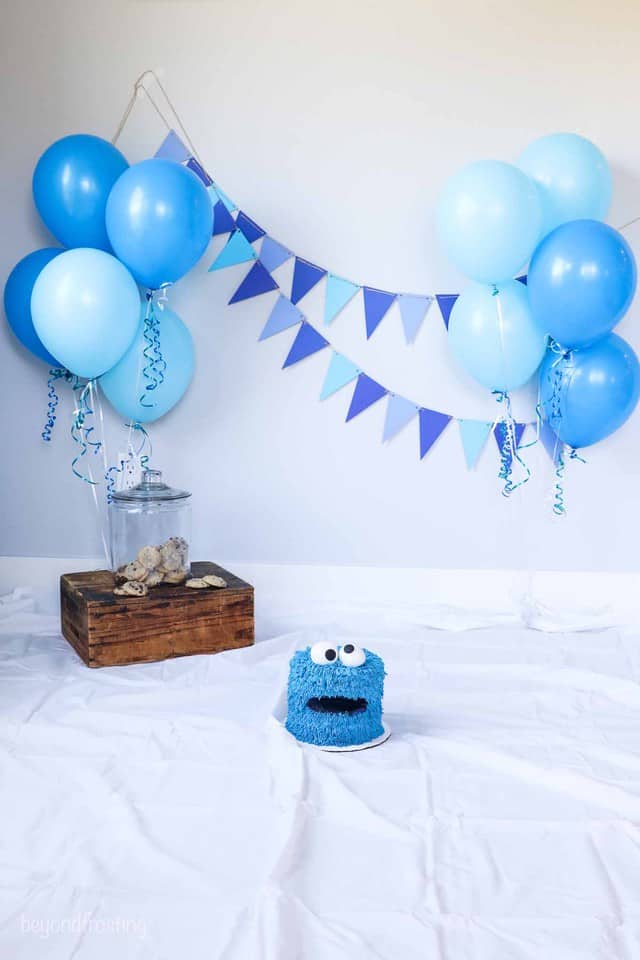
How to set up a smash cake photoshoot
I’m not an expert, but this is what my setup looked like. It was cute and did the trick. Just a heads up, you and whomever might be helping you with a photoshoot should also be prepared to be covered in blue frosting, especially if you have a wiggly baby.
- To protect my floors, I taped down a plastic drop cloth. Then I brought a white sheet to go over top. Both of these I threw away after. The sheet was covered in cake and frosting. This is optional but it’s the aesthetic I wanted.
- I got 10 blue balloons from the grocery store and blue bunting off Etsy for my backdrop.
- In the background I also put a wooden box (you can get something similar from Michales) and then a glass jar with chocolate chip cookies in the background.
For his actual birthday I also ordered this highchair banner and a cake topper.
Helpful materials and tools
Here is a list of the tools used to make this cake. Some of must-haves like the piping bags and tips and others are nice to have like the turntable and angled spatula.
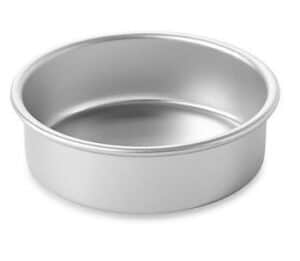
- 6-inch pans
- Bake even stripes
- 8-inch cake board
- Cake turntable
- Cake level
- Angled spatula
- Small piping bags
- Coupler
- Grass frosting tip
- Electric blue gel color
- Black gel color
- White Fondant
- Black fondant
- Cake carrier
Cookie Monster Smash Cake
- Prep Time: 2 hours
- Cook Time: 22 minutes
- Total Time: 2 hours 22 minutes
- Yield: 12 servings
- Category: Cake
- Method: Oven
- Cuisine: American
Description
This is the perfect cake for a Cookie Monster birthday party or smash cake. This is a chocolate layer cake with mascarpone whipped cream that has been died blue.
Ingredients
For the cake
- 1 ½ cups (285g) granulated sugar
- ½ cup (118 ml) vegetable oil
- 3 large eggs
- 1 tablespoon (15 ml) pure vanilla extract
- ½ cup (118 ml) sour cream
- 2 cups (280g) all-purpose flour
- ½ cup (55 g) natural unsweetened cocoa powder
- 2 ½ teaspoons (9 g) baking powder
- ½ teaspoon (2 g) baking soda
- 1 teaspoon (5 g) salt
- 1 ¼ cup (355 ml) milk
For the frosting
- 16 ounces mascarpone cheese, cold
- 2 cups (472ml) heavy whipping cream
- 1 cup (130g) powdered sugar
- 1 teaspoon (5ml) vanilla extract
Instructions
For the cake
- Preheat the oven to 350°F. Line the 6-inch pans with parchment paper or grease and flour the edges.
- Combine the sugar with the wet ingredients: In a large mixing bowl, combine the sugar, vegetable oil, eggs and vanilla extract. Beat on medium speed until the eggs and oil are well incorporated and the batter is lighter in color. Next, mix in the sour cream and beat until well combined.
- Combine the dry ingredients: In a separate bowl, sift together the dry ingredients. Alternate adding half of the dry ingredients and half of the milk at a time. Mix until well combined, then use a spatula to scrape down the sides of the bowl and stir the batter to ensure it’s well mixed.
- Fill the pans: Divide the batter evenly between the pans, about 1 1/4 cups batter per pan.
- Bake at 350°F for 20-24 minutes. Test the cake for doneness by inserting a toothpick into the center of the cake. If the toothpick comes out clean, the cake is done. Cool completely prior to frosting.
For the frosting
- Chill the mixing bowl: Place the mixing bowl and whisk attachment in the freezer for 5 to 10 minutes to chill.
- Combine mascarpone and cream: Spoon the mascarpone cream into your bowl and beat on a medium-low speed (speed 3 on a stand mixer). Slowly pour in the heavy cream, about 1 cup, allowing the mascarpone cheese to turn to a liquid consistency. Add the remaining heavy cream then increase the mixing speed to high (speed 8-10) and beat it until soft peaks form.
- Set aside: Remove 1/4 cup of frosting for the mouth. Add just a drop of black food gel and stir until combined. Set aside in the refrigerator.
- Finish the frosting: Next, add the powdered sugar, vanilla extract and blue gel color. Beat on low until sugar is incorporated then continuing beating at a high speed until stiff peaks form.
To assemble
- Level the cake: Make sure they’re flat on top. Use a cake level or serrated knife
- Stack the layers: Use ¼- ½ cup of frosting between each layer and spread evenly.
- Add the structure: Once all the layers are stacked, take 3 plastic straws, and cut them just short of the height of the cake. Place them in a triangular pattern.
- Crumb coat the cake: First apply a very thin crumb coat on the outside of the cake. Smooth with an offset spatula or bench scraper.
- Fill 4-5 small piping bags: With the remaining frosting, fill bags only 2/3 full and tie off the end with a rubber band. Keep refrigerated. When ready to use, cut off the tip of the bag.
- Cut out the mouth: First make the top cut. Angled it like a half moon and cut at about a 45-degree angle. Then on the bottom, cut upwards at a 45-degree angle, meeting the edges of the upper part of the mouth. Remove the piece of cake. Fill with black frosting.
- Prepare the second piping bag: Assemble a small piping bag with a coupler and a grass tip, and then drop one of the frosting filled piping bags inside.
- Decorate: Start piping along the bottom edge and working in a circle around the cake. Start the next layer just slightly above and pull the frosting downward so it sits overtop of the bottom layer. Repeat until the side of the cake are frosted
- Frost the top:To frost the top, start from the outside edge and working in a circle until you reach the middle.
- Place the eyes: Do this right before serving.

Notes
- If you only have two 6-inch pans, that fine. Just let the cake cool for 15 minutes after baking. Remove the cake and then wash and reuse the pan. Be sure to remix the cake batter prior to filling the pans.
Nutrition
- Serving Size: 1 slice
- Calories: 645
- Sugar: 39g
- Sodium: 316mg
- Fat: 43g
- Carbohydrates: 58g
- Fiber: 1.9g
- Protein: 8.4g
- Cholesterol: 142mg


