This easy recipe for Sugar Cookie Icing makes decorating a breeze! Made with only 4 ingredients in 5 minutes, this smooth and creamy icing recipe is basically failproof when it comes to frosting and coloring. Make bright, beautifully decorated cookies with perfect icing and a few simple techniques.

I absolutely love making sugar cookies. Ever since I was a kid, baking and decorating sugar cookies has been all about making memories (and eating a little sugar along the way).
We’ve always had two types of frosting for our family’s favorite cookie recipe: buttercream and this icing. While Vanilla Buttercream will always have a place in my heart, this sugar cookie icing is also a classic. It comes out perfectly pourable, pipable, and spreadable without much fuss. It’s very similar to Royal icing, without meringue powder, and hardens up just as nicely. Below, I’m sharing how to make it, plus all my best icing tips and tricks for you to use this season!
I use this easy sugar cookie icing on my favorite holiday-worthy recipes, from Classic Cut Out Sugar Cookies to Gingerbread Men Cookies. You could even use them for my easy no-roll sugar cookies. You’re going to love it.
What Makes This the Best Sugar Cookie Icing?
- Only 4 ingredients. I’m all about an easy icing recipe, and nothing beats this one. You need just 4 ingredients and 5 minutes, with no fancy bells, whistles, or equipment.
- Sets up perfectly. You don’t have to worry about smudging and denting with this icing. Once it sets fully, it doesn’t budge, making Christmas cookies easy to store and share.
- Adaptable. You can color this icing, thicken the consistency, thin it out, and more. It’s so easy to handle, you can even get the kids involved!

Icing Ingredients
Now, let’s get into the four basic ingredients that make up this ultra-simple icing recipe.
Be sure to SCROLL TO THE END OF THIS POST for the full amounts and details.
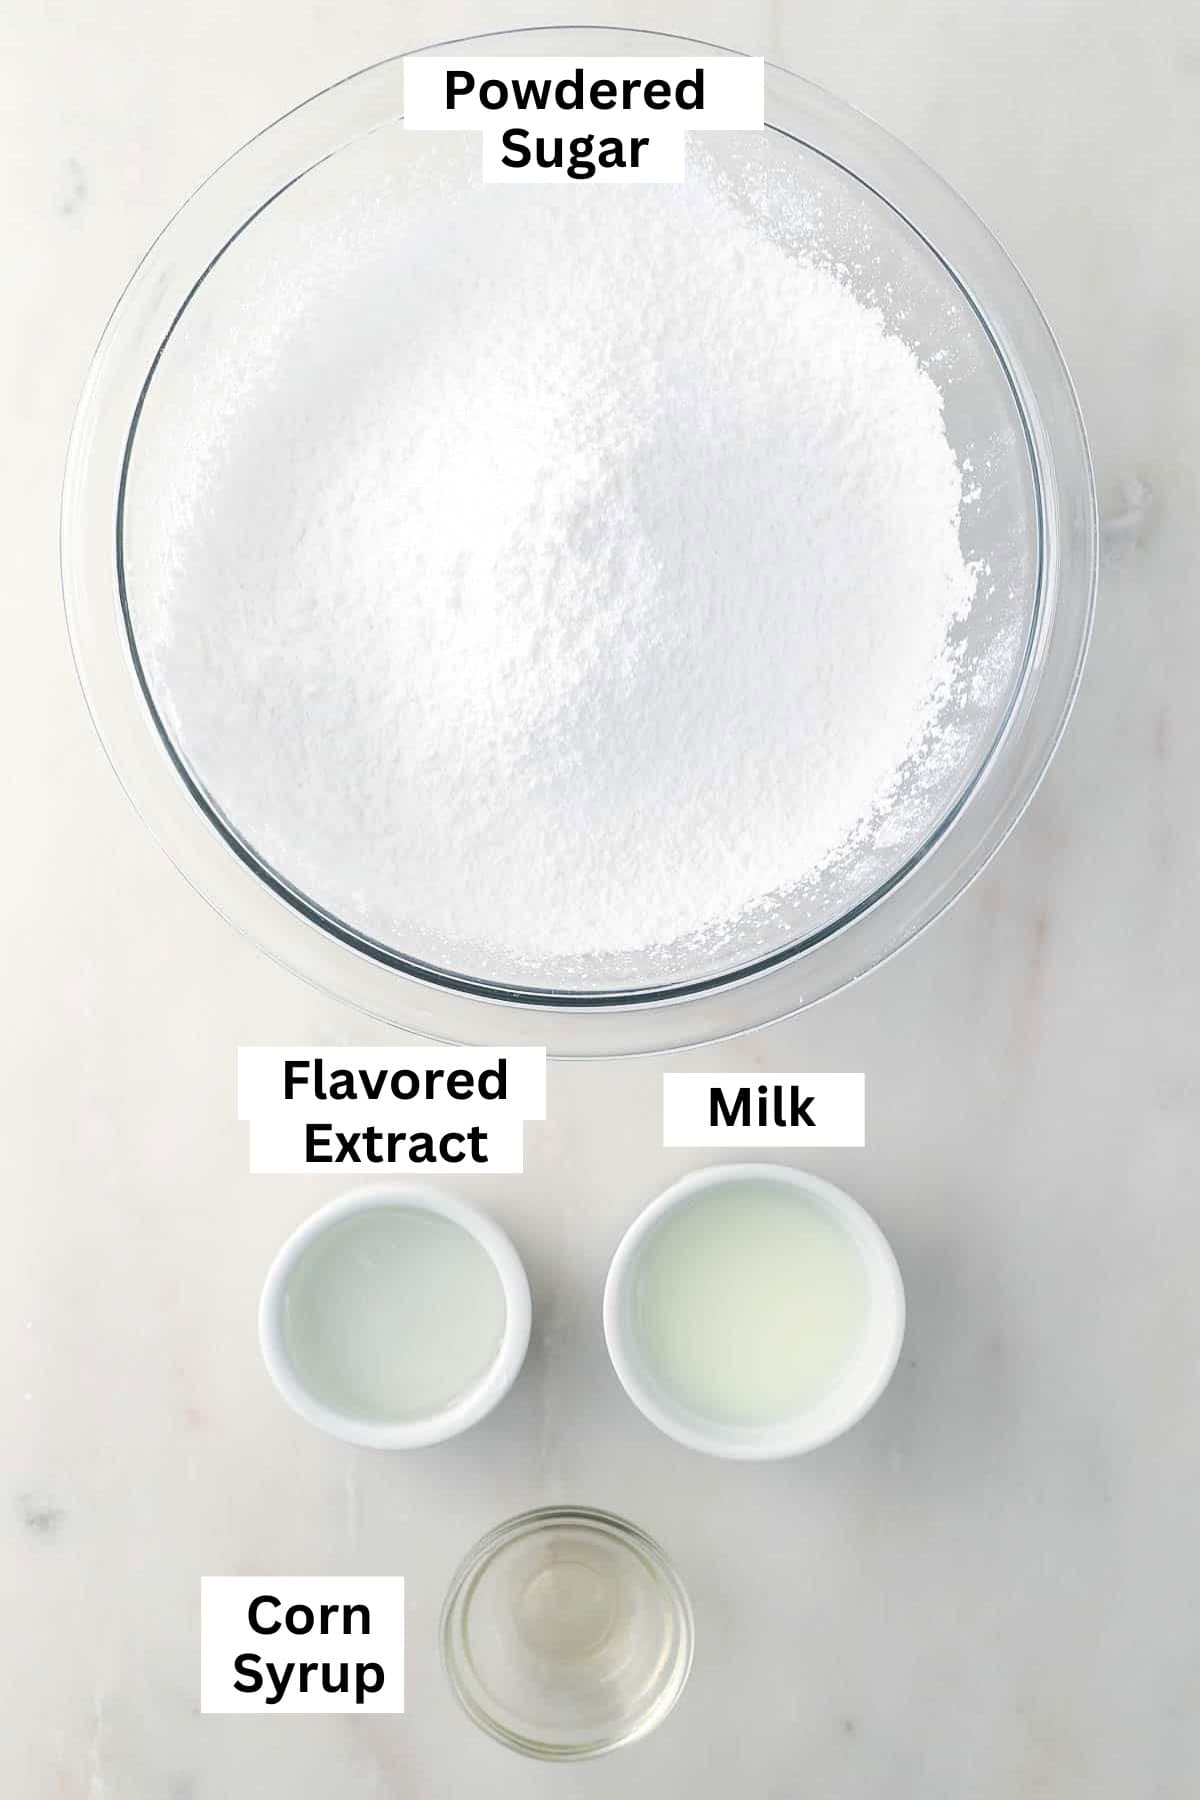
- Powdered Sugar – Also called confectioner’s sugar. You’ll want to sift your powdered sugar before you start, to break up any lumps. This is key to silky smooth sugar cookie icing.
- Corn Syrup – Adding corn syrup gives icing an attractive sheen, and also helps provide a thicker, more controllable consistency. I’ve included substitutions below.
- Milk – To thin out the consistency as needed. Any kind of milk will work – whole milk, 2% milk, or even cream. For a dairy-free option, use a non-dairy milk or water.
- Flavoring – Flavor your icing with basic vanilla extract, or mix it up with peppermint, almond, or even lemon extract. I highly recommend using pure flavor extracts versus artificial ones wherever possible.
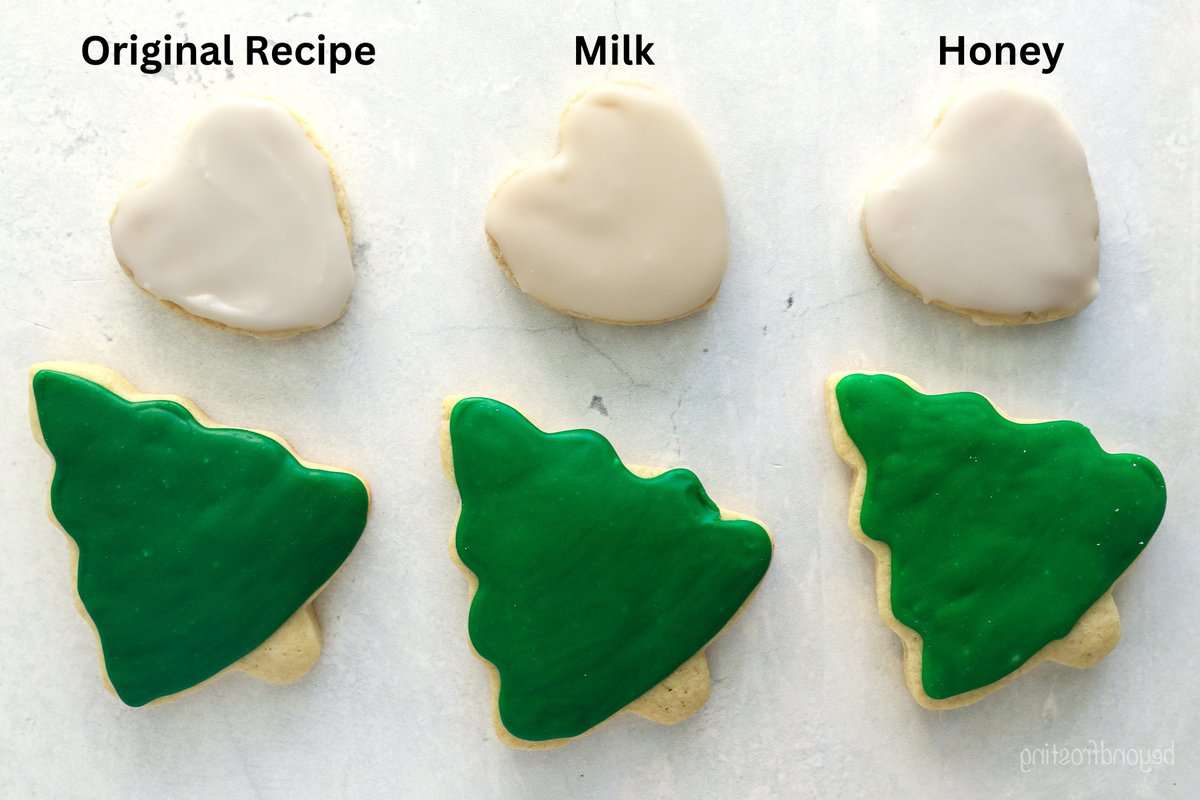
Corn Syrup Alternatives
Over the years, I’ve received many questions about corn syrup alternatives. In places outside the US, this might be known as golden syrup. In the below example, I used traditional vanilla extract for all 3 recipes, which is shifting the color a little yellow. You can get some white icing color to make it a brighter white.
- Corn syrup gives these a light sheen when dried and also helps to thicken the frosting, allowing you to have control over the consistency without having to add more powdered sugar. When dried, the corn syrup dried the hardest, while still maintaining a soft bite.
- No corn syrup. Without corn syrup, this icing still performs very well and can be piped. It dries solid, but not quite as firm as the corn syrup. You can still stack them. You’ll have to add additional milk (1/2 teaspoon at a time) until you reach the desired consistency. The only way to make this thicker is to add more powdered sugar.
- Honey: Many of you have suggested you can use honey, I tried it with a 1:1 replacement of the corn syrup. This will tint the icing slightly yellow, similar to the milk. Consistency-wise, it’s very close to the corn syrup and still dries firm.
How to Make Perfect Sugar Cookie Icing
Ready to make some frosting? Making smooth and pipable sugar cookie icing couldn’t be easier. Be sure to read on for more icing tips as well as ways to use your fresh batches of sugar cookie icing.
- Sift the powdered sugar. First, pass the powdered sugar through a fine mesh sieve, breaking up any lumps.
- Combine the ingredients. Whisk together the sifted sugar with corn syrup and milk until smooth. You can adapt the consistency of your cookie icing depending on preference and/or what you’ll be using it for. See below.
- Add flavoring and coloring. This part is optional, but if you’d like to flavor your frosting, mix between ¼ to ½ teaspoon of your choice of extract into the icing. You can also divide your icing and color it using gel food dye. See the section further on for details.
What Consistency Should My Icing Be?
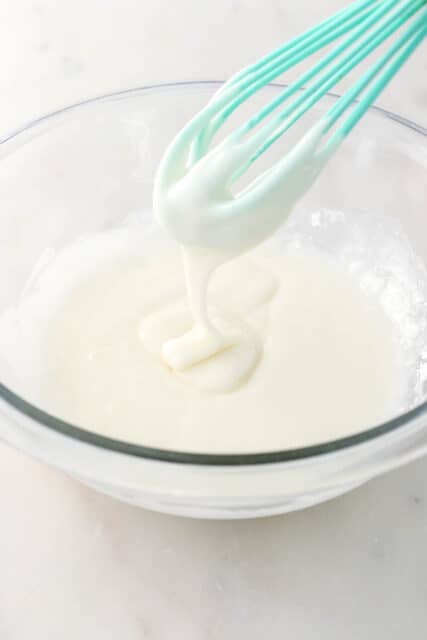
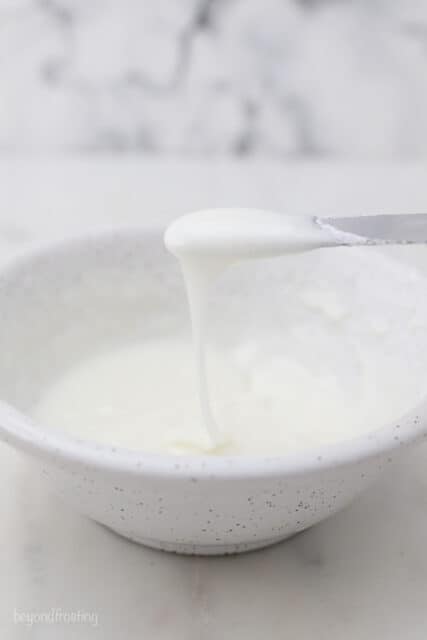
The general consistency of icing should be thinner than corn syrup, but thicker than maple syrup. A good way to check is to let it run off the spoon: the icing should hold together and drip slowly, and not run off completely or stay stiff in place.
Adapting your icing consistency is as easy as adding more milk or powdered sugar, a little at a time. For a thinner consistency, add a teaspoon of milk at a time. For thicker icing, add an additional ¼ cup of powdered sugar until you reach your desired consistency.
What Is the Best Food Coloring for Icing?
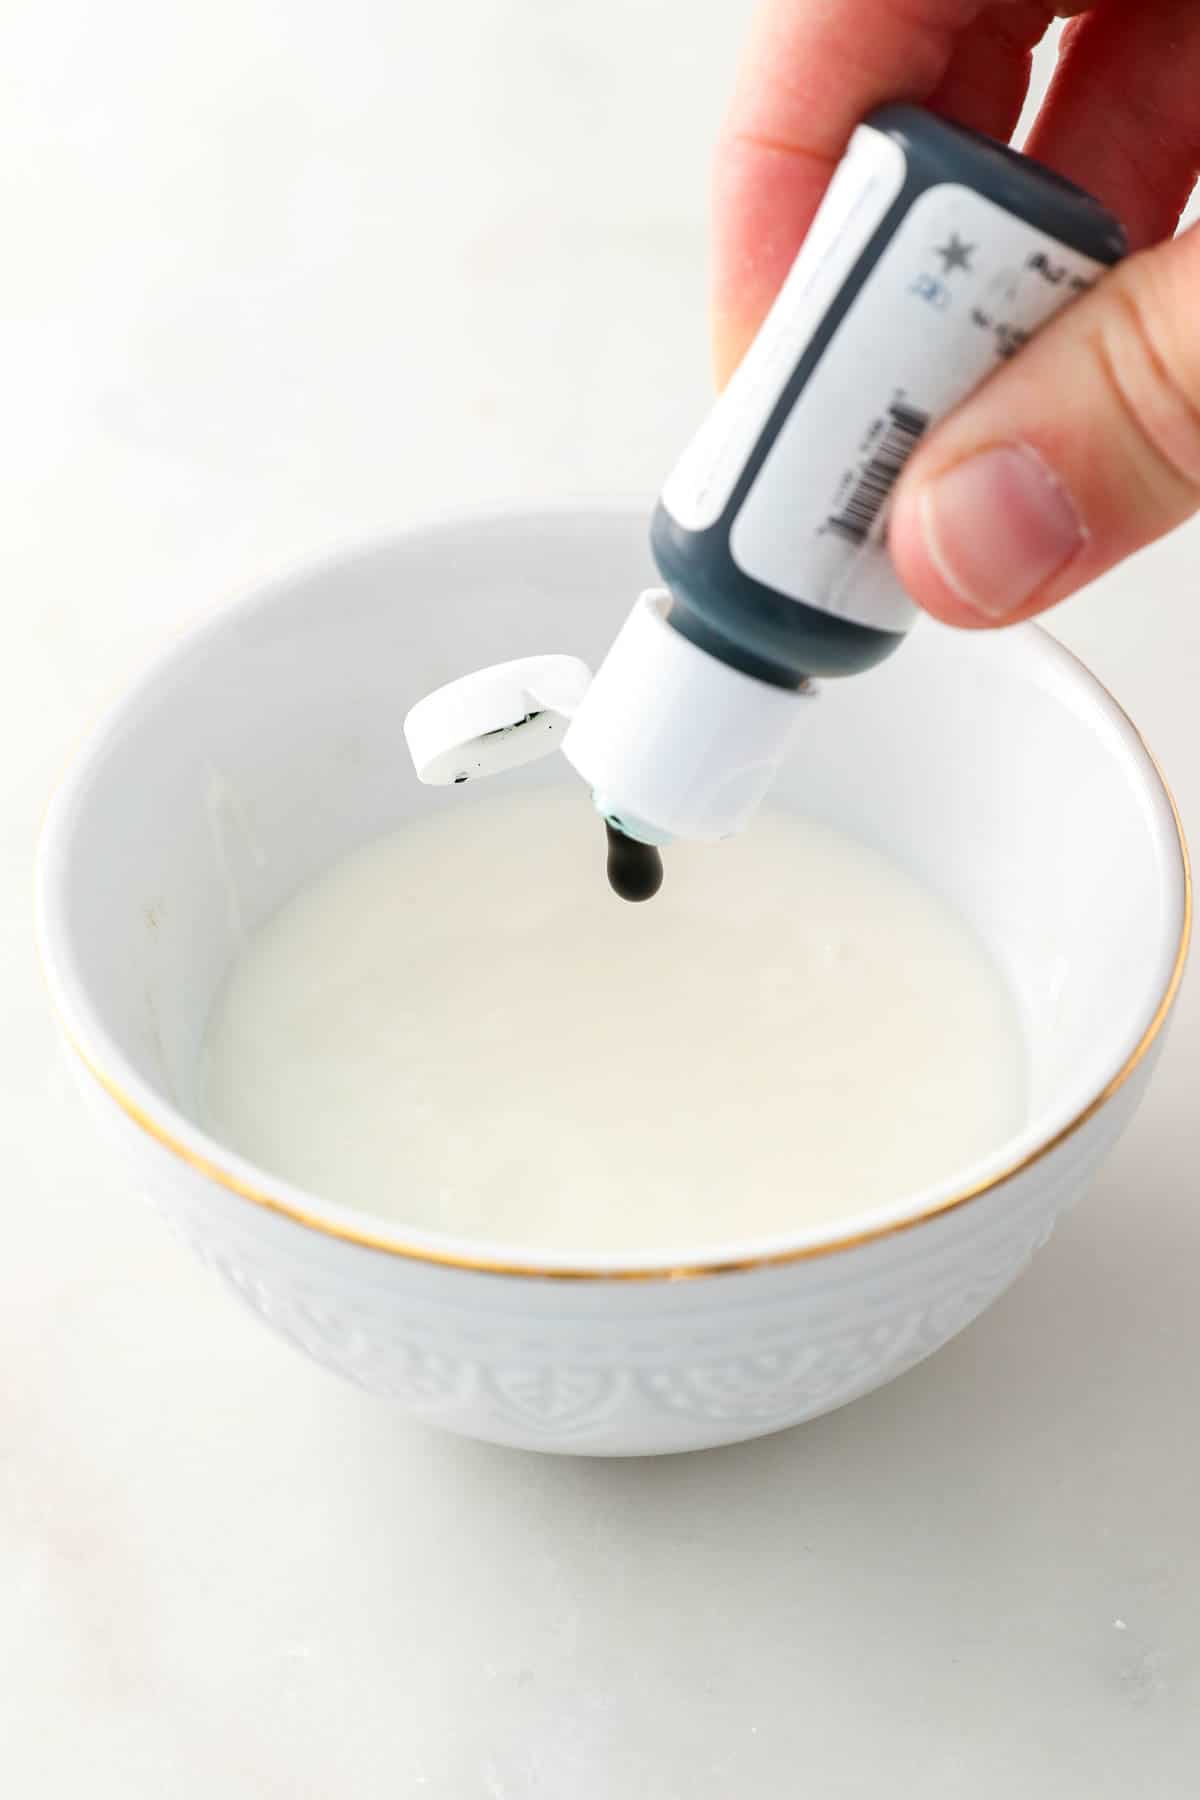
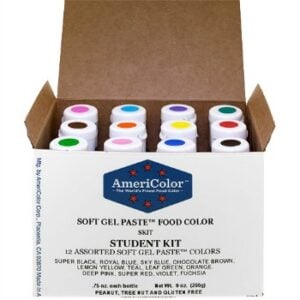
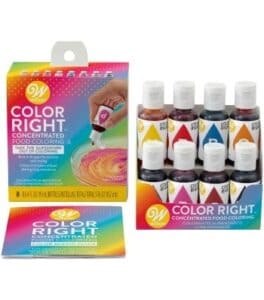
Adding color to icing is easy, the key is to use quality gel colors, like the ones from Amerigel or Wilton’s Color Right Color System. Gel dyes are my favorites for coloring icing, and a little goes a long way.
So, which one is best? It depends on what you prefer. Amerigel offers lots of individual colors, so you’re more likely to find the one you need already available. Meanwhile, Wilton’s offers 8 basic colors that can be mixed by hand to create over 50 different shades. Both are available at craft stores, cake supply stores, or online.

How to Decorate Sugar Cookies With Icing (Squeeze Bottle or Piping Bag)
This sugar cookie icing is super easy to handle, making it great for everyday decorating. Let’s go over my favorite methods for decorating cookies with homemade icing:
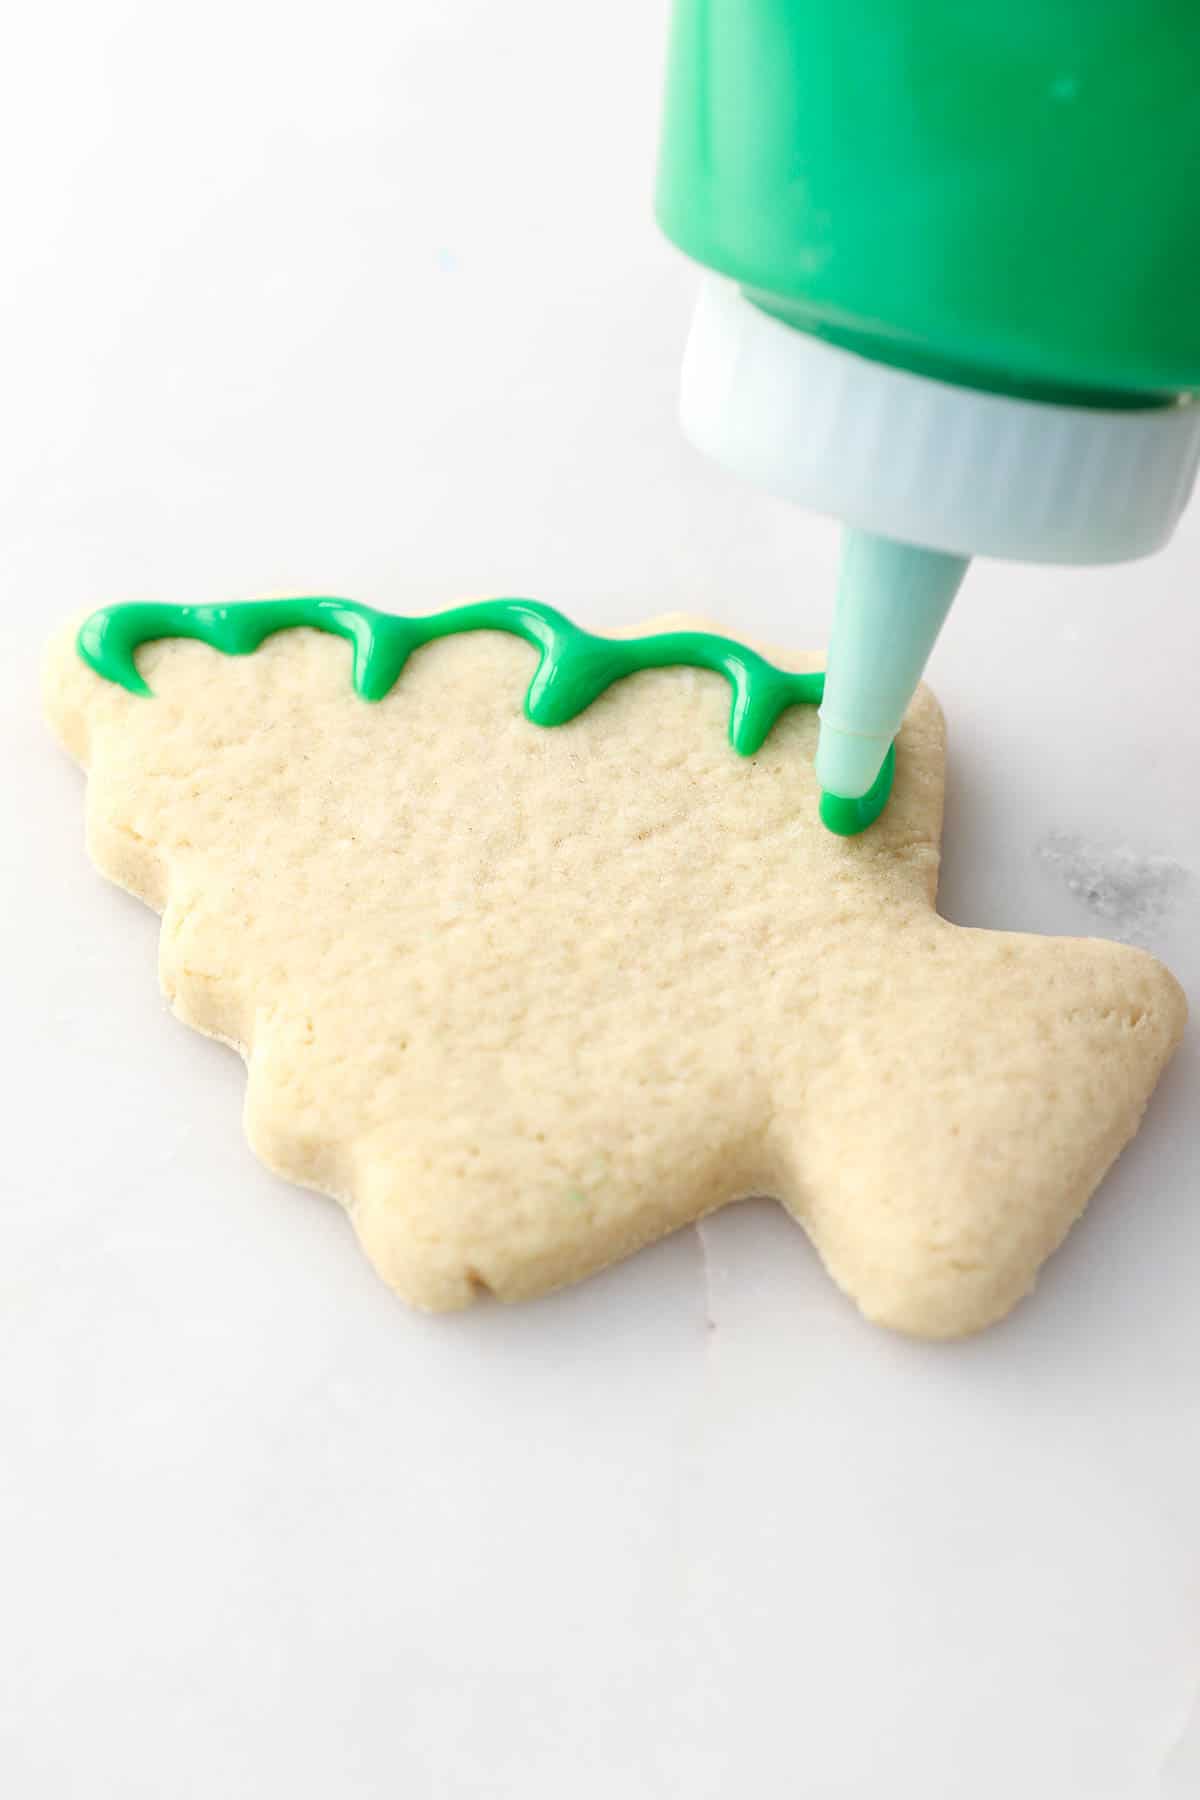
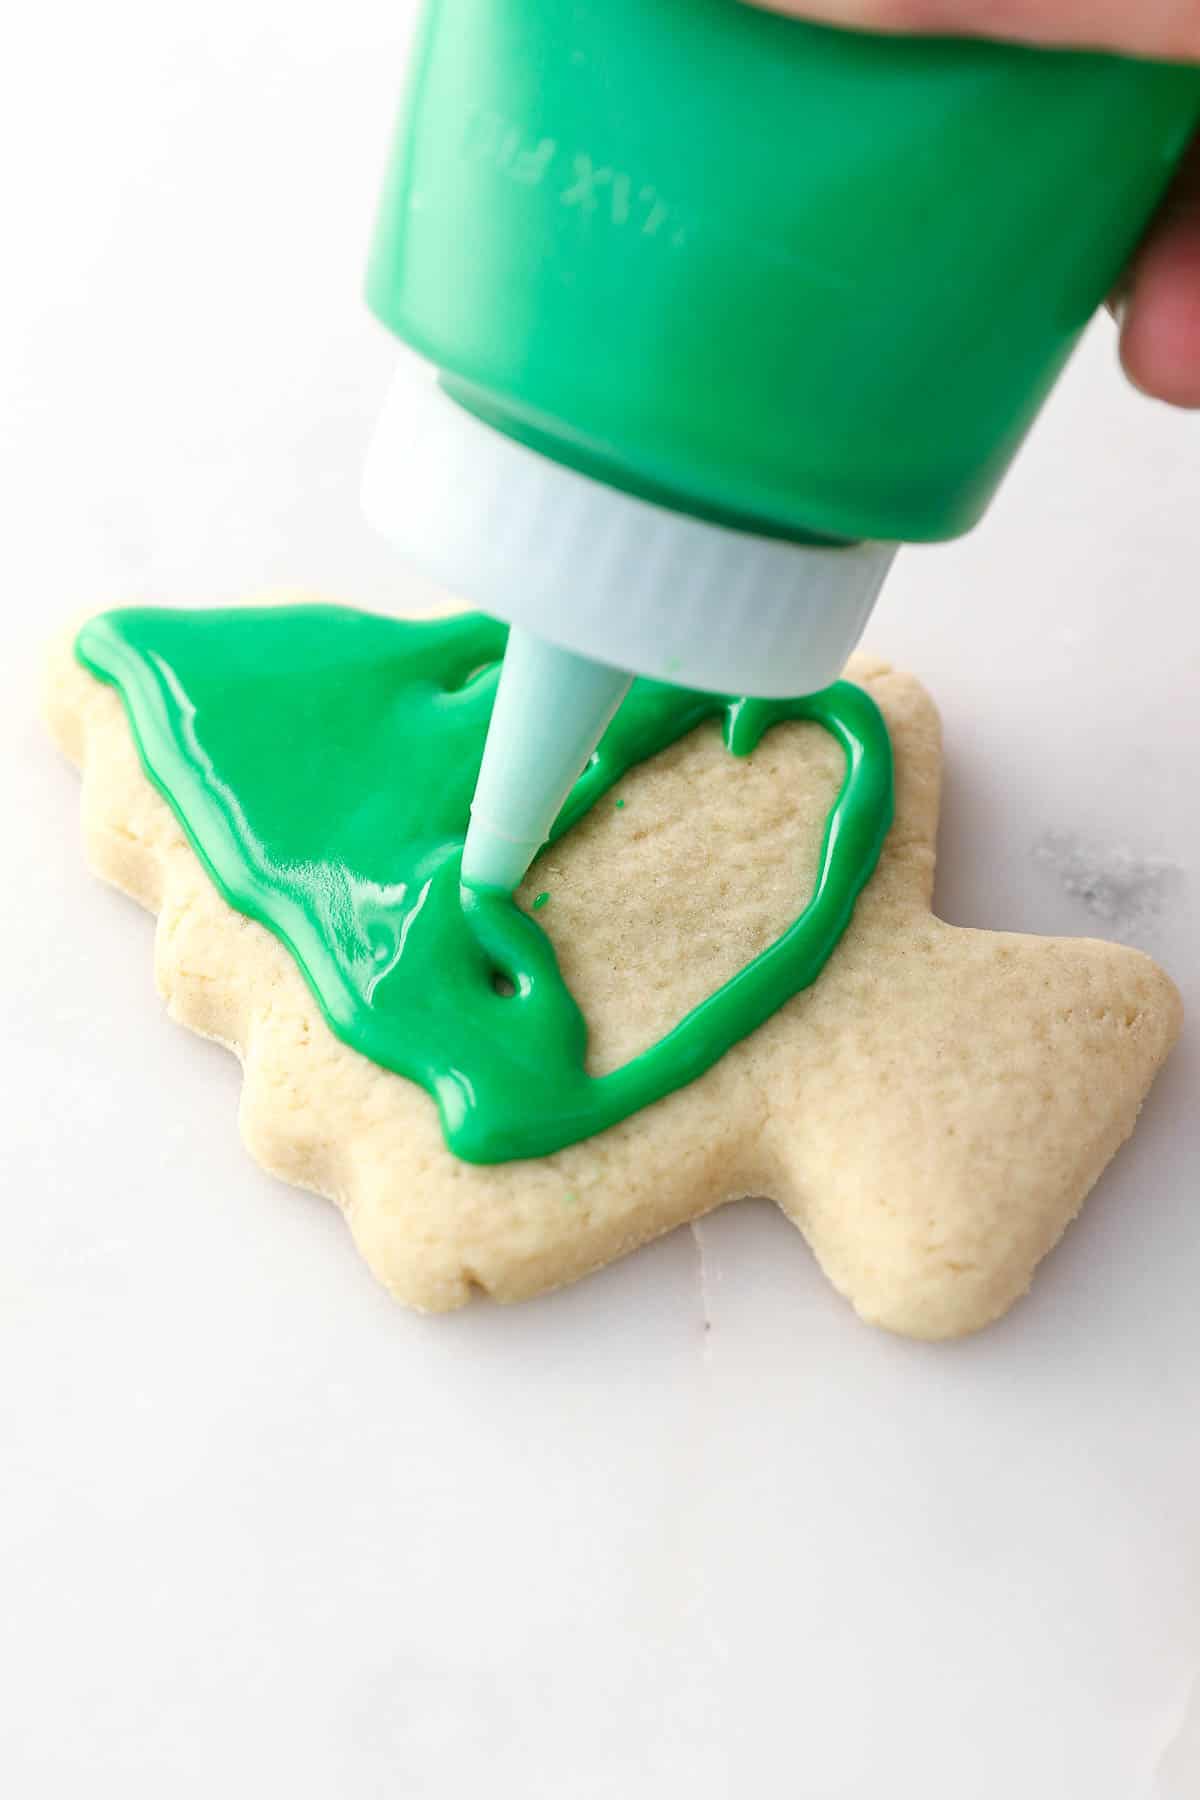
- Squeeze Bottle – Squeeze bottles are great for little hands to use, but they are more difficult to clean. Icing consistency is key when using a squeeze bottle. It’s important that the icing can be easily squeezed out without blocking the tip, otherwise, you run the risk of a very messy POP!
- Piping Bag – I actually prefer the piping method, as it allows for more control in terms of icing placement and the amount of pressure applied. Pro-tip for quickly filling a piping bag: Fold the top of the bag down over a cup, and pour/spoon the icing in. Find more helpful tips in my post on How to Use a Piping Bag.
When it comes to icing your sugar cookies, I recommend using a piping bag with a coupler for the best results. A size 2 or size 3 piping tip is best for outlining, meanwhile you can fill cookies with a size 5. Just be sure the filling doesn’t pour over the top of the outline you made.

Using Your Sugar Cooking Icing to Make a Marbled Design
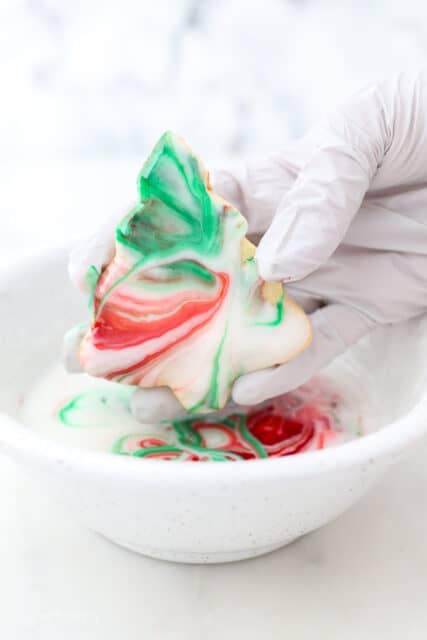
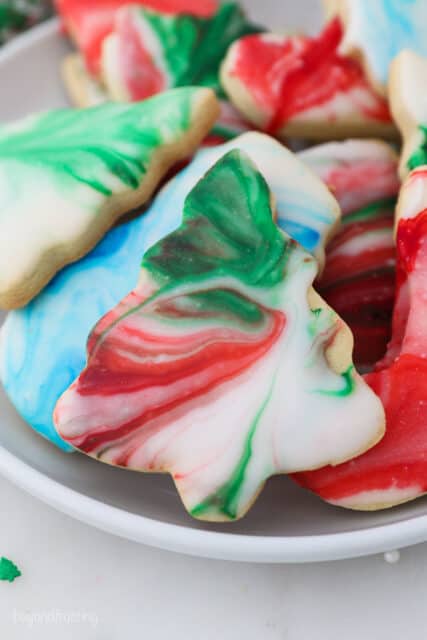
This marbled icing technique looks fancy, but it’s actually super easy, even if you’ve never decorated cookies before. It’s the perfect way to make your cookies look bakery-worthy with almost no effort! Once you’ve made the icing:
- Add color – Pour most of your icing into a shallow bowl, then set aside about ¼ cup. Add a drop or two of gel food coloring to the bowl and gently swirl it with a toothpick. Don’t overmix—you want ribbons of color, not one solid shade.
- Dip the cookies – Hold each cookie by the edges and dip the top straight into the swirled icing. Lift it out, let the extra icing drip off, and place it on a parchment-lined baking sheet. The marble effect appears like magic!
- Let them dry – Leave the cookies out to dry completely. Depending on the icing thickness, this could take a couple of hours or overnight. The colors will soften slightly as they set, but the swirls still look gorgeous.
How Long Does the Icing Take to Set?
This depends on the thickness of the icing layer, and a bit to do with the climate in your house. The top layer of icing will start to crust within the first several minutes, but it can take several hours for the icing to set all the way through. Plan on having plenty of space or cookie sheets available for them to dry in a single layer.
Tips for Success
Here’s a quick round-up of some last-minute tips and tricks for icing sugar cookies to perfection:
- Don’t skip sifting. Sifting the powdered sugar creates a smoother consistency in the icing. Very important!
- I use the same consistency for the outline as I do for the fill. The icing consistency is pretty forgiving in this recipe, so you can use the piping tip, a toothpick, or a gentle shake to fill in any little holes.
- You can adjust the consistency of your icing how you see fit. See the section above for details on how to adapt the thickness of the icing. A thin consistency is easier for kids to use, for example, especially if they are spreading or painting it on. Note that the thinner the icing, the more transparent it will be once it’s dried.
- Do not pipe or decorate too close to the edge of the cookie. If the icing is on the thinner side, it will run off the edges of the cookies.
- Add sprinkles and decorations shortly after applying the icing. This icing tends to set on the top layer quickly and will start to crust over after a few minutes, making things like sprinkles harder to stick. However, also consider how you plan to serve your cookies, as some larger sprinkles are prone to falling off when handled too often. For this reason, you may want to add those later and pipe some fresh icing underneath.

Storage Instructions
Iced sugar cookies are at their best within 2-3 days from when they’re frosted. The icing itself is also at its best when used right away, however, sugar cookies and icing are both easy enough to store for a later day:
- Make-ahead: You can make this up to 2 days in advance, keep stored in an airtight container on the refrigerator. Bring to room temperature before using. You may need to adjust the final consistency before using it.
- Storing Leftover Icing: Store leftover icing airtight in the fridge for up to 1 week. I recommend stirring it before you use it again, to revive the consistency.
- How to Store Decorated Sugar Cookies: Allow the iced cookies to dry and set in a single layer on a cookie sheet. When they’re completely dry, store the cookies at room temperature in an airtight container. They’ll look their best within the first few days.
- Freezing: I do not recommend freezing the iced sugar cookies as it changes the appearance of the glaze (this can lead to spotting, color shifting, etc.). Instead, freeze the baked sugar cookies and then decorate them after they’re thawed. You can read more about how to freeze-baked cookies in my Sugar Cookies post.


Sugar Cookie Icing Recipe
- Prep Time: 5 minutes
- Cook Time: 0 minutes
- Total Time: 5 minutes
- Yield: 24 cookies
- Category: Frosting
- Method: Whisked
- Cuisine: American
Description
This easy Sugar Cookie Icing makes decorating a breeze! Made with only 4 ingredients in 5 minutes, this simple icing recipe is perfect for piping and coloring. Enjoy bright, beautifully decorated cookies!
Ingredients
- 2 cups (260g) powdered sugar, sifted
- 2 tablespoons (30ml) milk
- 1 tablespoon (15ml) corn syrup
- 1/4–1/2 teaspoon extract (optional: vanilla, almond, peppermint or lemon)
Instructions
- Combine the sifted powdered sugar and 2 tablespoons of milk in a bowl and whisk until well combined, then Whisk in the corn syrup. If needed, add additional milk 1/2-1 teaspoon at a time to thin out the frosting. If too thin, add an additional 1/4 cup of powdered sugar.
- To color the icing, divide the icing into separate bowls. Add a small drop of your gel colors to the icing. Mix thoroughly.
- Apply to cookies using a squeeze bottle or piping bag. Allow the cookies to dry flat for up to 24 hours.
Notes
- This icing goes wonderfully with my quick and easy cutout cookies and gingerbread cookie
- Use gel colors when dying icing, for bright, vibrant colors. I recommend Amerigel or Wilton’s Color Right food gel dyes.
- How to adjust the icing consistency: To make the icing thinner, add additional milk 1 teaspoon at a time. You want it to be drippy but not runny. If you think your frosting is too thin, add more powdered sugar ¼ cup at a time.
- Storing decorated sugar cookies: It can take anywhere from a couple of hours to overnight for the icing to harden, depending on how thick the icing is. Once the icing is set, you’ll be able to stack your sugar cookies. Store the iced cookies in an airtight container at room temperature. I recommend placing a layer of parchment paper in between layers, to keep them from sticking.
- Make-ahead: You can make this up to 2 days in advance, keep stored in an airtight container on the refrigerator. Bring to room temperature before using. You may need to adjust the final consistency before using it.
- Leftover icing: Store in an airtight container in the fridge for up 7 days from preparation.
Nutrition
- Serving Size: 1 cookie
- Calories: 105
- Sugar: 14.8 g
- Sodium: 31.6 mg
- Fat: 4.1 g
- Carbohydrates: 17 g
- Fiber: 0.1 g
- Protein: 0.7 g
- Cholesterol: 18 mg





Hi! Looking forward to trying this with our Grands ages 1-8. How do you get the icing on to look so well-covered and smooth? In the past we used buttercream icing and table knives. Would paint brushes work for the younger kids, and squirt bottles for the older kids to do edging, etc? If yes, what particular bottles?
Thank you!
Hi Christine! The methood I used is showing in the blog post. I use a technique to outline and flood the cookie, similar to royal icing, but the consistency is all the same. For young kids, toddler age, I use food-grade paint brushes, you can get them from Wilton online (they are also linked in my post). This is really the best for little hands. For squirt bottles, I prefer those over piping bags for older kids, they are just a little less messy, and I also grab them from Wilton or something similar. But the squirt bottles are a bit harder to clean. They will work for the fill and flood method. You can also outline with the squirt bottle and spoon a little bit into the middle to help with teh flooding. Gently shake the cookie to spread the icing.
Does your cookies after frosting them need to be kept in refrigerator since you using milk?
Typically the ratios of milk to powdered sugar crystalize and stablize the milk. You can find some in depth answers online. You can also try it with water instead of milk for an extended shelf life
This is truly an amazing recipe! Sets up quickly but not finicky at all to work with. So glad I found it! Thanks!
Awesome Jamie, thank you so much!
Since you use milk in the frosting recipe, do you refrigerate your cookies?
I do not, the rations of sugar to milk can stabilize the milk, but you could use water if you wanted to.
Can I sub maple syrup or honey for the corn syrup or can I even just omit it ?
This is covered extensively in the blog post along with explanations and images. Please refer to the post under “Corn Syrup Alternatives”
Each year my husband’s family has a Christmas cookie making weekend and we struggle to find a fun, easy way to decorate the sugar cookies. This year we used this recipe to make THE BEST icing. We found this on Instagram, where her post showed using a thinner version of this recipe and gel food coloring to make a really awesome marbling effect. No fumbling to ‘paint’ the frosting on the cookies with butter knifes and using gross sprinkles…. Just dip and lift, and they are gorgeous! Totally recommend and pinned for next year. This was a HIT! We’re already talking about using this icing and effect for Easter, and that folks might have a ton of fun doing this at a shower or another party.
Yes Julie! Thank you so much for stopping by to share this with everyone! Your cookies were so beautiful!
Love this recipe it gives the best cookie decorating tips and my 4 kids loved it. They turned out wonderful and are a great holiday treat. My family even used them for a bake sale and it was a hit! Over all I love this recipe and totally recommend for anyone looking for a fun Christmas activity to do with the kids
This icing recipe is perfect! I hate decorating cookies & rarely do it (probably why I’m lousy at it lol). I made the tie-dye/marbled icing for my sugar cookies & within minutes I had unique, shiny cookies! Bonus that they didn’t take long to dry for stacking. I will definitely be using this recipe & technique in the future. Try it, you won’t be disappointed!!
I absolutely love that! Thank you for sharing!
I have just read your entire article from the sugar cookies you make to the easy to understand icing you described thoroughly. This is honestly the most thorough directions of making icing that I have ever read. I cannot wait to try this next week with my two granddaughters who are 11 and 13. Thank you again for being so precise and easy to understand. I will let you know after we make our beautiful iced cookies
That’s wonderful Regina! Thank you so much!
Thank you for both the cookie and the icing recipe. I made them over the weekend and I did exactly as you said and it came out perfect. I will be sharing these with my coworkers. Thank you so much.
That’s amazing! I am so happy to hear that and hope everyone enjoyed them!
Hi Carolyn,
Where do you get your adorable sprinkles and do they taste good? I got some sprinkles last year and they tasted awful, I’d like to get some cute ones that stay on the cookies and taste good, any ideas would be helpful. Thanks for your great recipes, happy holidays!
Hi Becky, I buy a lot from https://sweetapolita.com/, I also buy some from Walmart too, Sweet Indeed is another good one, and these as well. https://www.shopsweetsandtreats.com/sprinkles