Learn how to decorate Christmas cookies 3 ways: as a stocking, Christmas tree, or present. We’ll be using my simple cut-out sugar cookie recipe and a basic buttercream frosting to make these holiday treats. Santa will be thrilled to get these!

Cookie baking and decorating is a cherished Christmas tradition in my family. It’s so fun to gather in the kitchen, make cookies with the kids and then decorate them with different designs! Today I’m going to show you how to decorate Christmas cookies in our favorite shapes: a Christmas tree, a stocking or a present.
Making perfect frosted sugar cookies is easier than you think. Once you get the basics down, you’ll be decorating sugar cookies for Christmas like a pro. It’s so much fun and a great way to get into the holiday spirit.
Why You’ll Love These Decorating Ideas
- Easy techniques. This tutorial keeps things simple and will teach you techniques you can use anytime. We decorate sugar cookies or Easter, Valentine’s Day, and Halloween!
- Perfect buttercream frosting. My buttercream recipe is creamy and stable, and perfect for piping or spreading, whichever you need for your desired design.
- Adaptable. It’s easy to adjust the flavors and colors of your frosting, for endless decorating possibilities! I get you started with three of my favorite Christmas cookie designs.
What Type of Frosting Is Best for Decorating?
The most popular frosting for cookies is buttercream frosting, or you can use sugar cookie icing for a different look. For this tutorial, I include my favorite vanilla buttercream frosting (found in the recipe card), as it’s thick and stable and great for piping.
If you aren’t coloring your frosting, you can use any type of buttercream frosting you’d like. Try this fudgy chocolate frosting or creamy peanut butter frosting.
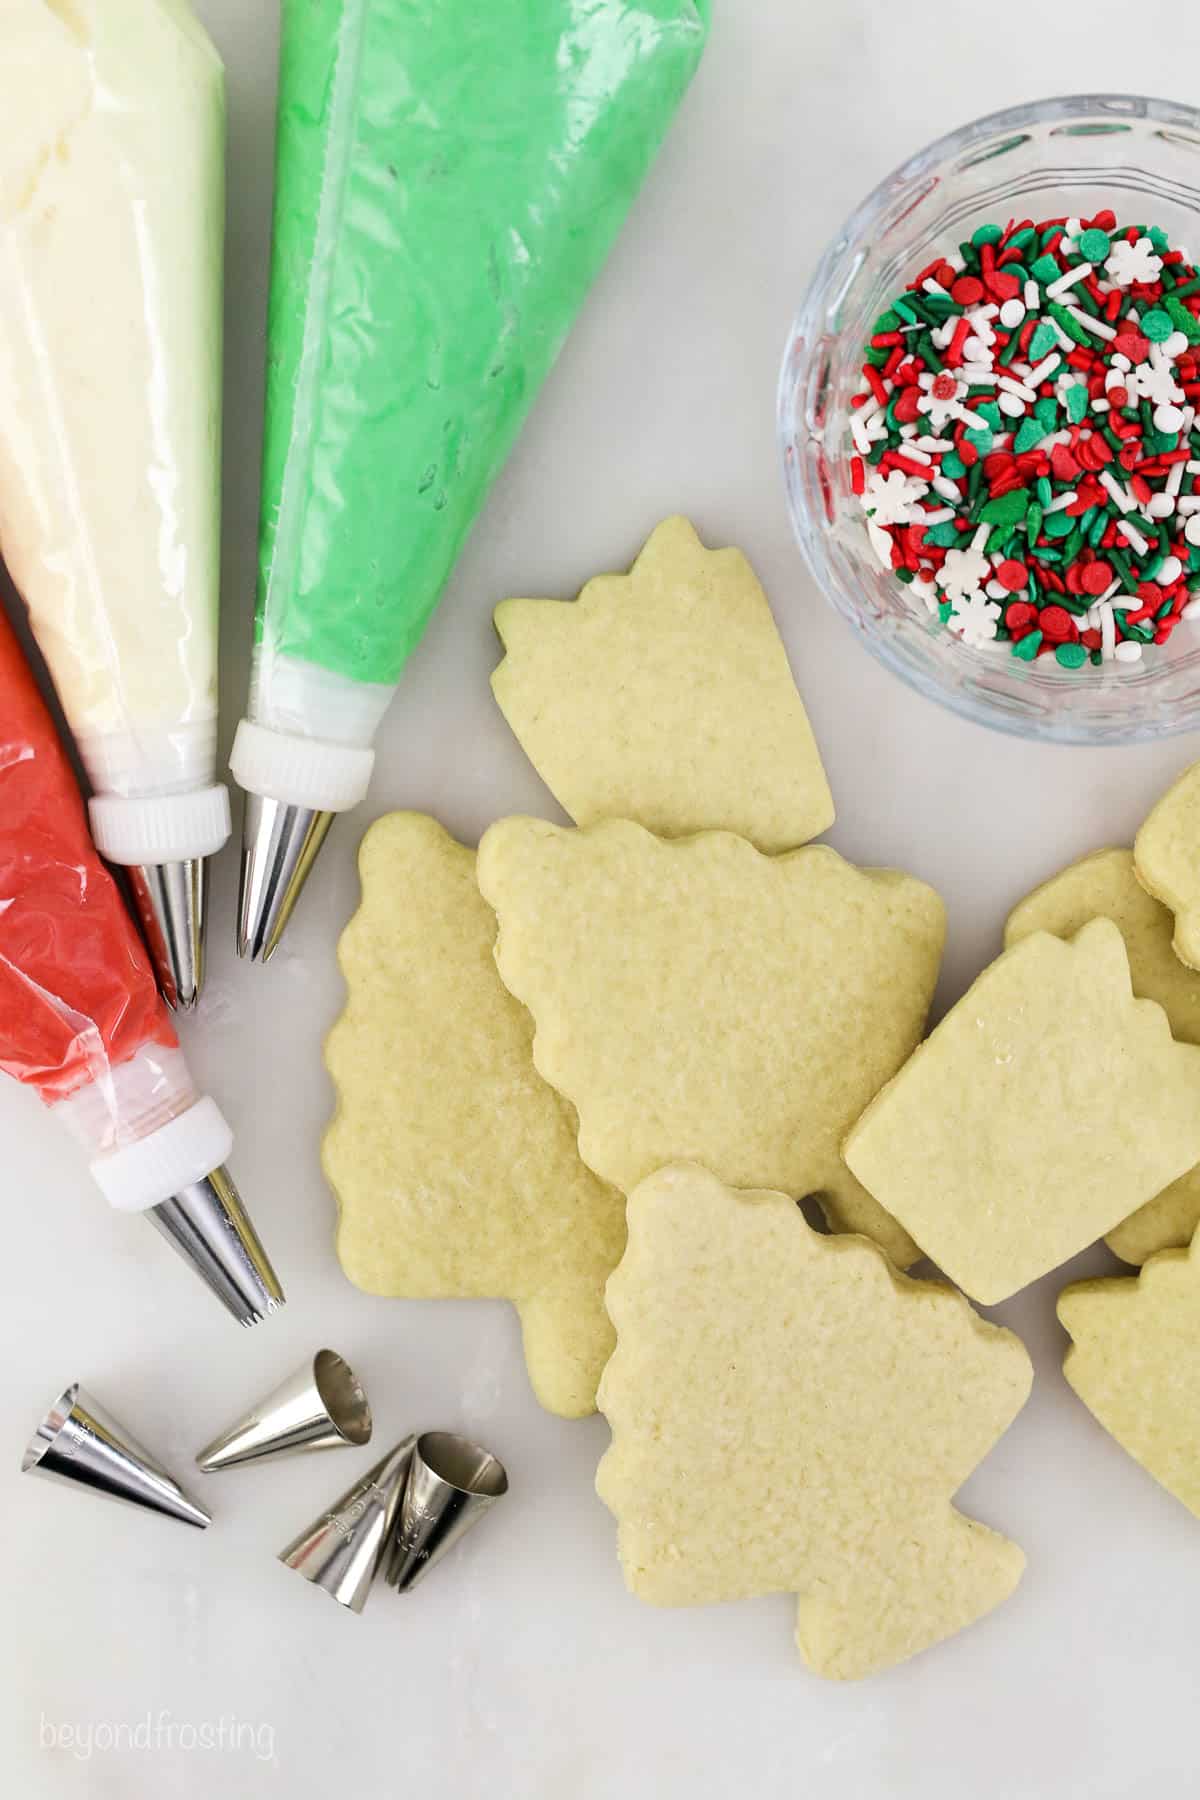
Ingredient Notes
Below you’ll find some quick notes on the ingredients you’ll need to make and decorate these festive Christmas cookies. The vanilla buttercream requires just 4 ingredients! Don’t forget to scroll to the recipe card at the bottom of the post with the full recipe details and instructions.
- Sugar Cookies – You’ll need a batch of soft and chewy cut-out sugar cookies. My recipe needs only 30 minutes of chilling time! You can also follow this tutorial using my chocolate cut-out sugar cookies.
- Butter – The key to making the best frosting for cookies is to start with butter that’s cold from the fridge, and not at room temperature. I recommend unsalted butter.
- Powdered Sugar – Also called confectioner’s sugar. It has a finer texture compared to granulated sugar.
- Vanilla – For the best flavor, stick with pure vanilla extract. If you prefer a crisp, white frosting (that isn’t tinted yellow), consider using clear vanilla extract.
- Heavy Whipping Cream – You can also use whole milk or 2% milk.
- Food Coloring – I recommend the gel food dyes from Wilton or AmeriColor.
Can I Flavor Buttercream?
Certainly. While traditionally made with vanilla extract, this sugar cookie frosting can be flavored with any type of extract you prefer. Almond, peppermint, or lemon are great options, or you can use a combination of flavors.
Tools You’ll Need
There are a few tools that are helpful to have when it comes to decorating cookies. A few of these are optional but to achieve the best designs, I do recommend having most of these on hand.
- Piping Tips – I go into detail on the tips I use for this tutorial later in the post. Be sure to check out my complete guide on how to use piping tips as well.
- Piping Bags – I usually use 12-inch decorating bags. Be careful to not fill them more than ¾ full so you can easily hold them in your hand.
- Couplers (affiliate link) – A coupler set isn’t mandatory, but it makes it SO much easier to change out piping tips while using the same piping bag with the same color frosting.
- Angled Spatula – This angled spatula is my best friend. It’s perfect for mixing color into frosting, filling piping bags, and spreading.
- Sprinkles – Because every frosted sugar cookie is even better with sprinkles!
Using Piping Bags
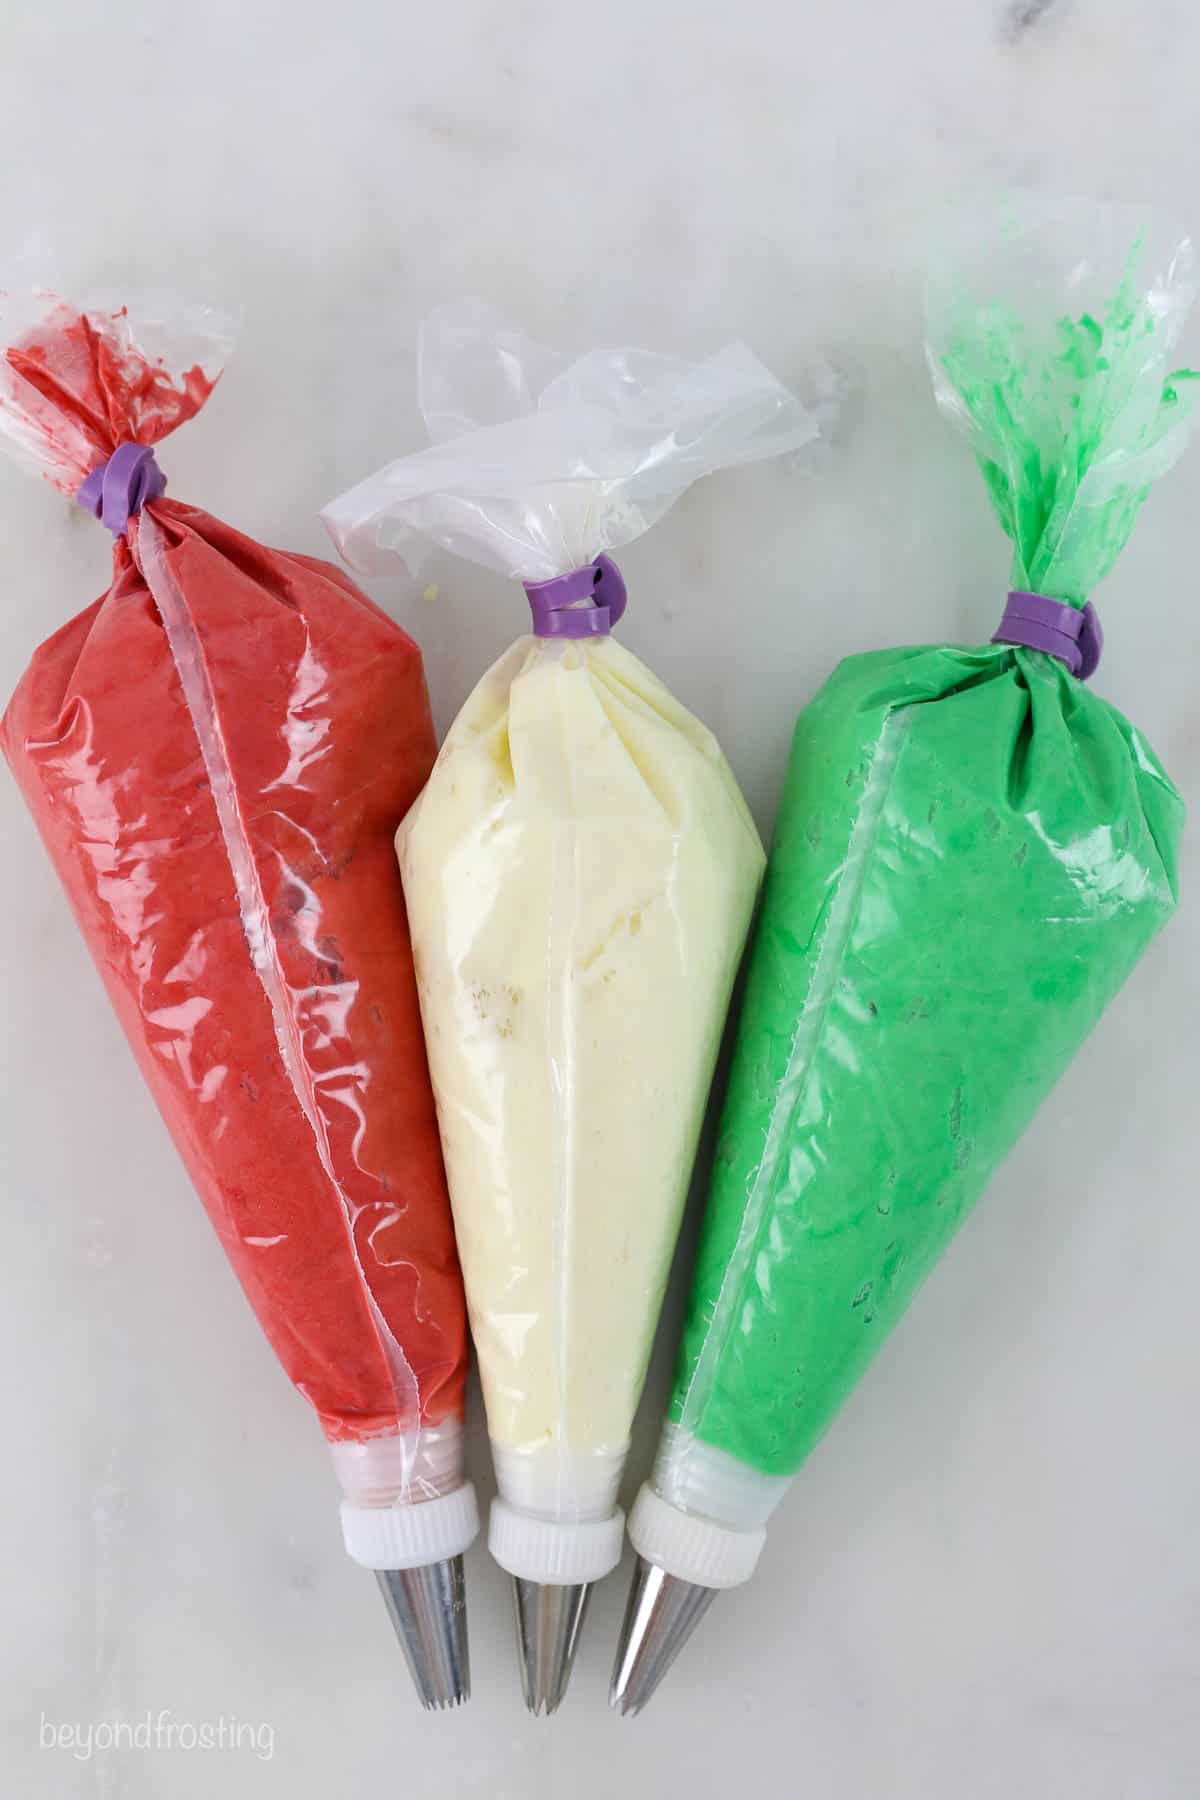
For the cookie decorating tutorials below, you’ll need to trim, fill, and add tips to your piping bags. If you’re new to piping frosting, I have an entire post dedicated to how to use a piping bag to get you started. Here is a basic run-down of how to prepare the piping bags for this recipe:
- Trim the bag. Start by snipping the tip off the piping bag, just below the bottom edge of the coupler (if you’re using one).
- Fill the bag with frosting. To quickly fill a piping bag, I recommend folding the bag over a cup or glass and spooning the frosting in, as it makes it easier to fill while keeping your hands clean.
- Seal the bag. Push all of the air out and twist the end of the bag tightly closed. A rubber band works great, or you can use these icing bag ties from Wilton.
- Fit the tip to the bag. Choose your piping tip (see my recommendations above), attach it to the piping bag, and get frosting. I include which piping tips I use for each of the designs below.
Which Piping Tips Are Best For Decorating?
There are countless piping tips on the market, but you can accomplish a lot with just a few basics! In the tutorials below, I’ve included the piping tips that I used for each design. Here’s a quick overview:
- Wilton #5 open round tip (the #3 also works)
- Wilton #21 open star tip or Wilton #18 (you can do SO much with these tips alone!)
- Wilton #199 French star tip
While I don’t use them in this tutorial, I also like to have a multi-opening or grass tip, and this basketweave tip on hand for more detailed designs.

How to Make The Frosting
Before the fun part of decorating the cookies comes the (also fun) part of making the buttercream frosting. You’ll find the full ingredients and directions in the recipe card, but for now, here’s a quick overview:
- Whip the butter. Add the cold, cubed butter to the bowl of your stand mixer. Beat the butter until it’s whipped and fluffy. This can take a few minutes, but don’t skip this step!
- Add the remaining ingredients. Next, gradually add powdered sugar, alternating with the liquid ingredients until the frosting is well combined.
- Whip again. Increase the mixer’s speed and beat the frosting for an additional 3-5 minutes, until it’s smooth and airy. Voila! Perfect homemade frosting.
Tips for Coloring Your Frosting
After the frosting is prepared, it’s time to add some fun colors! Here are a few tips and tricks for coloring sugar cookie frosting. Check out my full tutorial on how to color buttercream for a detailed step-by-step.
- Use gel colors and avoid food coloring. Gel food dyes are highly concentrated, and won’t change the consistency of the frosting.
- Use the color sparingly. A little goes a long way. I usually use 1-2 drops per 1 cup of frosting. You can always add more as needed. Use a toothpick to add the dye in small amounts.
- Create a color palette. I recommend 3-4 colors, max. This ensures that there’s enough frosting to go around and helps reduce the mess.
- Just need a little bit of one color? Spoon 2-3 tablespoonfuls of frosting into a cup and use a toothpick to dye and mix the color.
3 Easy Ways to Decorate Christmas Cookies
With your frosting whipped and ready, you’re nearly ready to decorate! Make sure to bake your sugar cookies far enough in advance so they’re completely cooled to room temperature when it’s time to frost them. Warm cookies will melt the frosting right off. The best way to decorate these Christmas cookies is using a piping bag with piping tips.
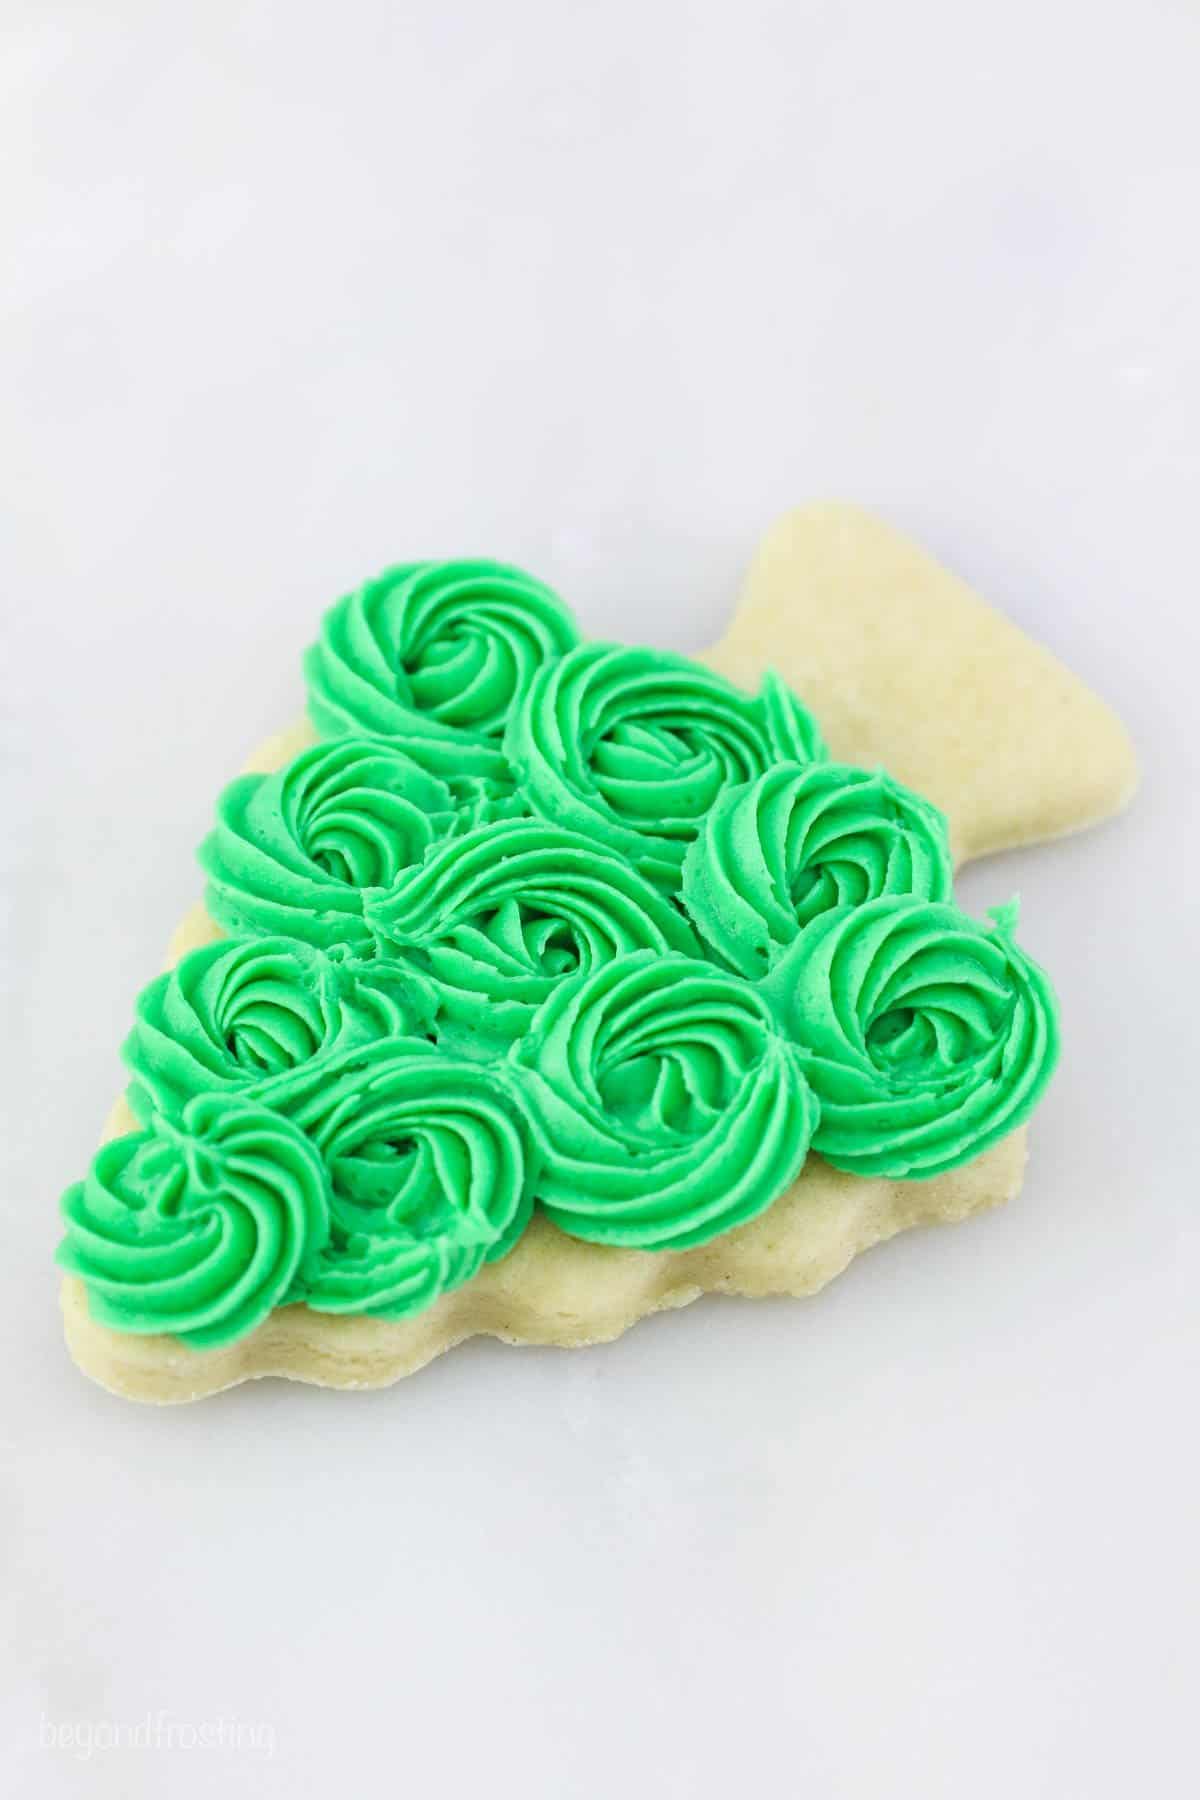
Christmas Tree Cookies
There are endless ways to decorate sugar cookies. Getting creative is half of the fun! I’ll start you off with 3 easy step-by-step tutorials for frosted sugar cookies. Beginning with these adorable Christmas tree cookies!
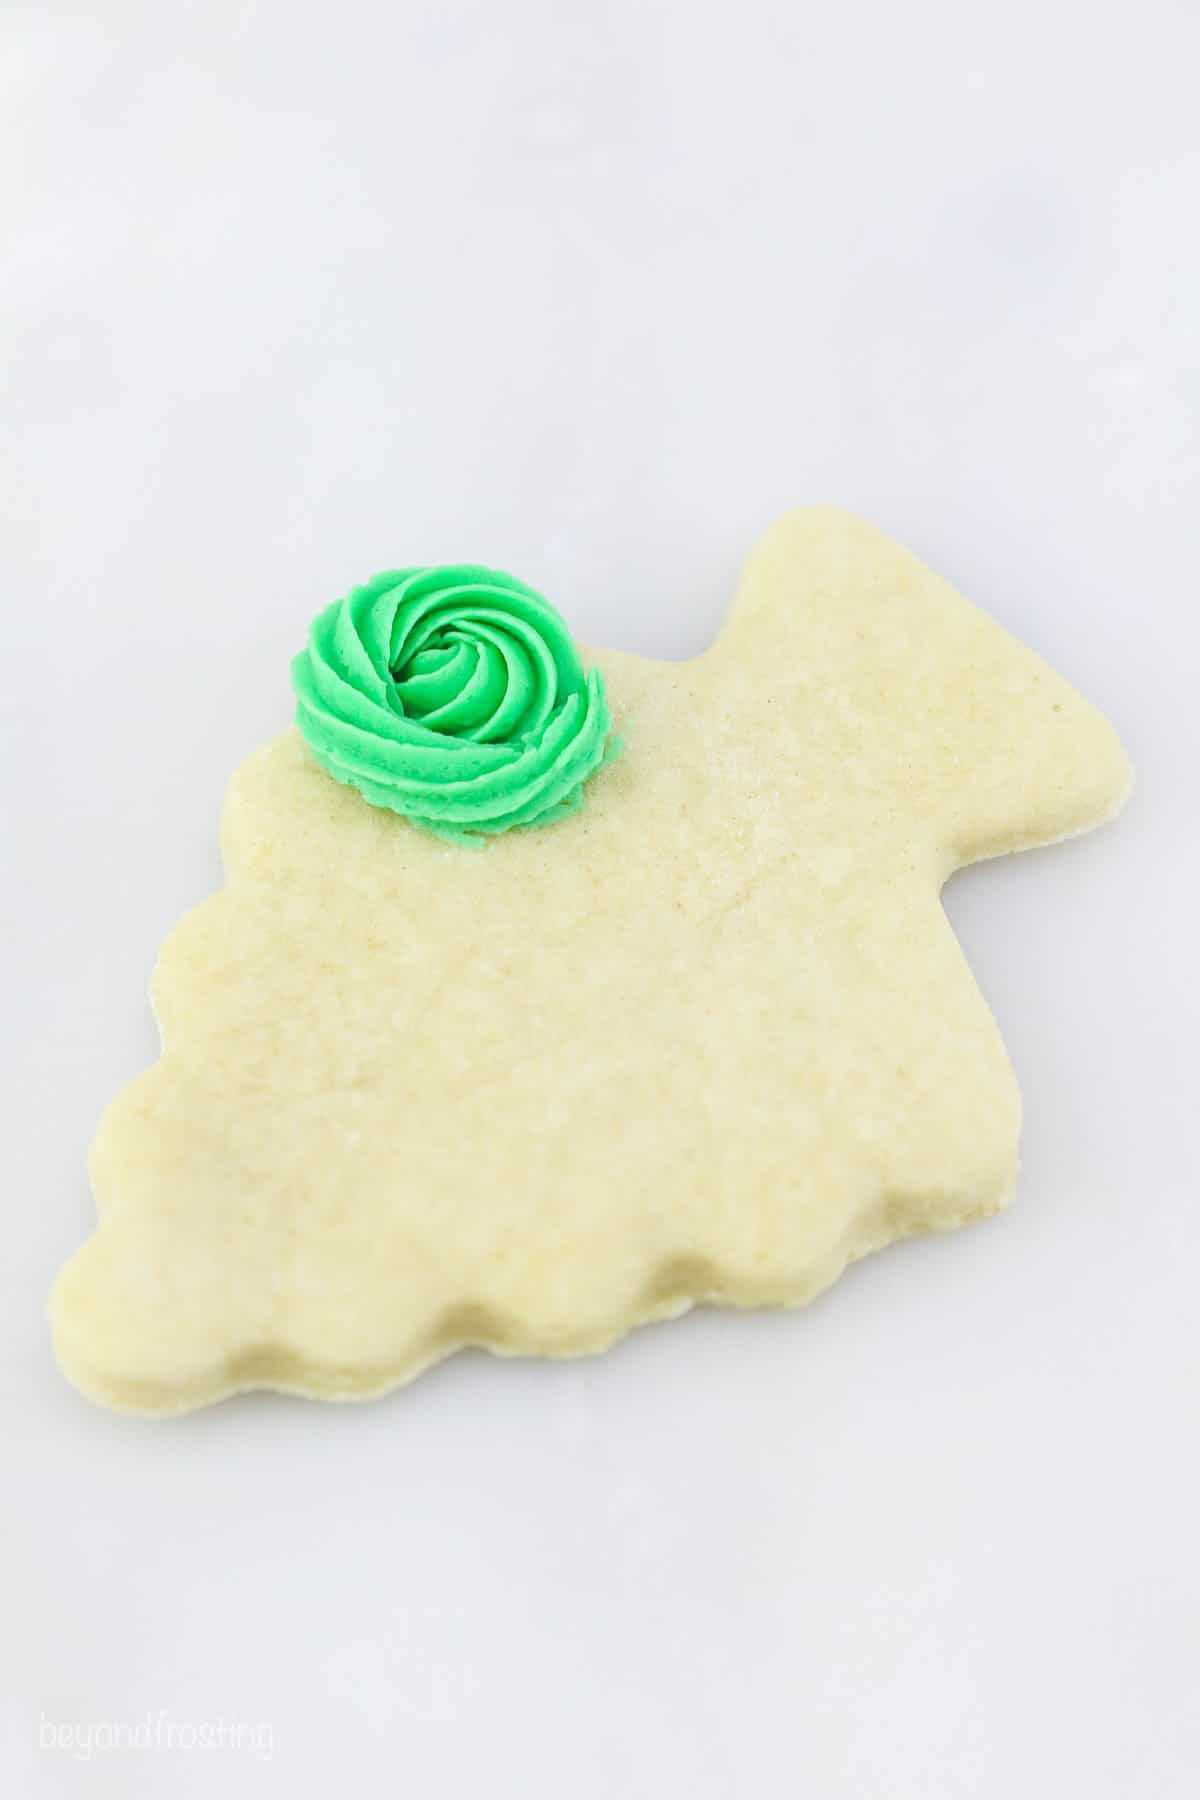
Tips Used: Wilton #21 open star tip or Wilton #18.
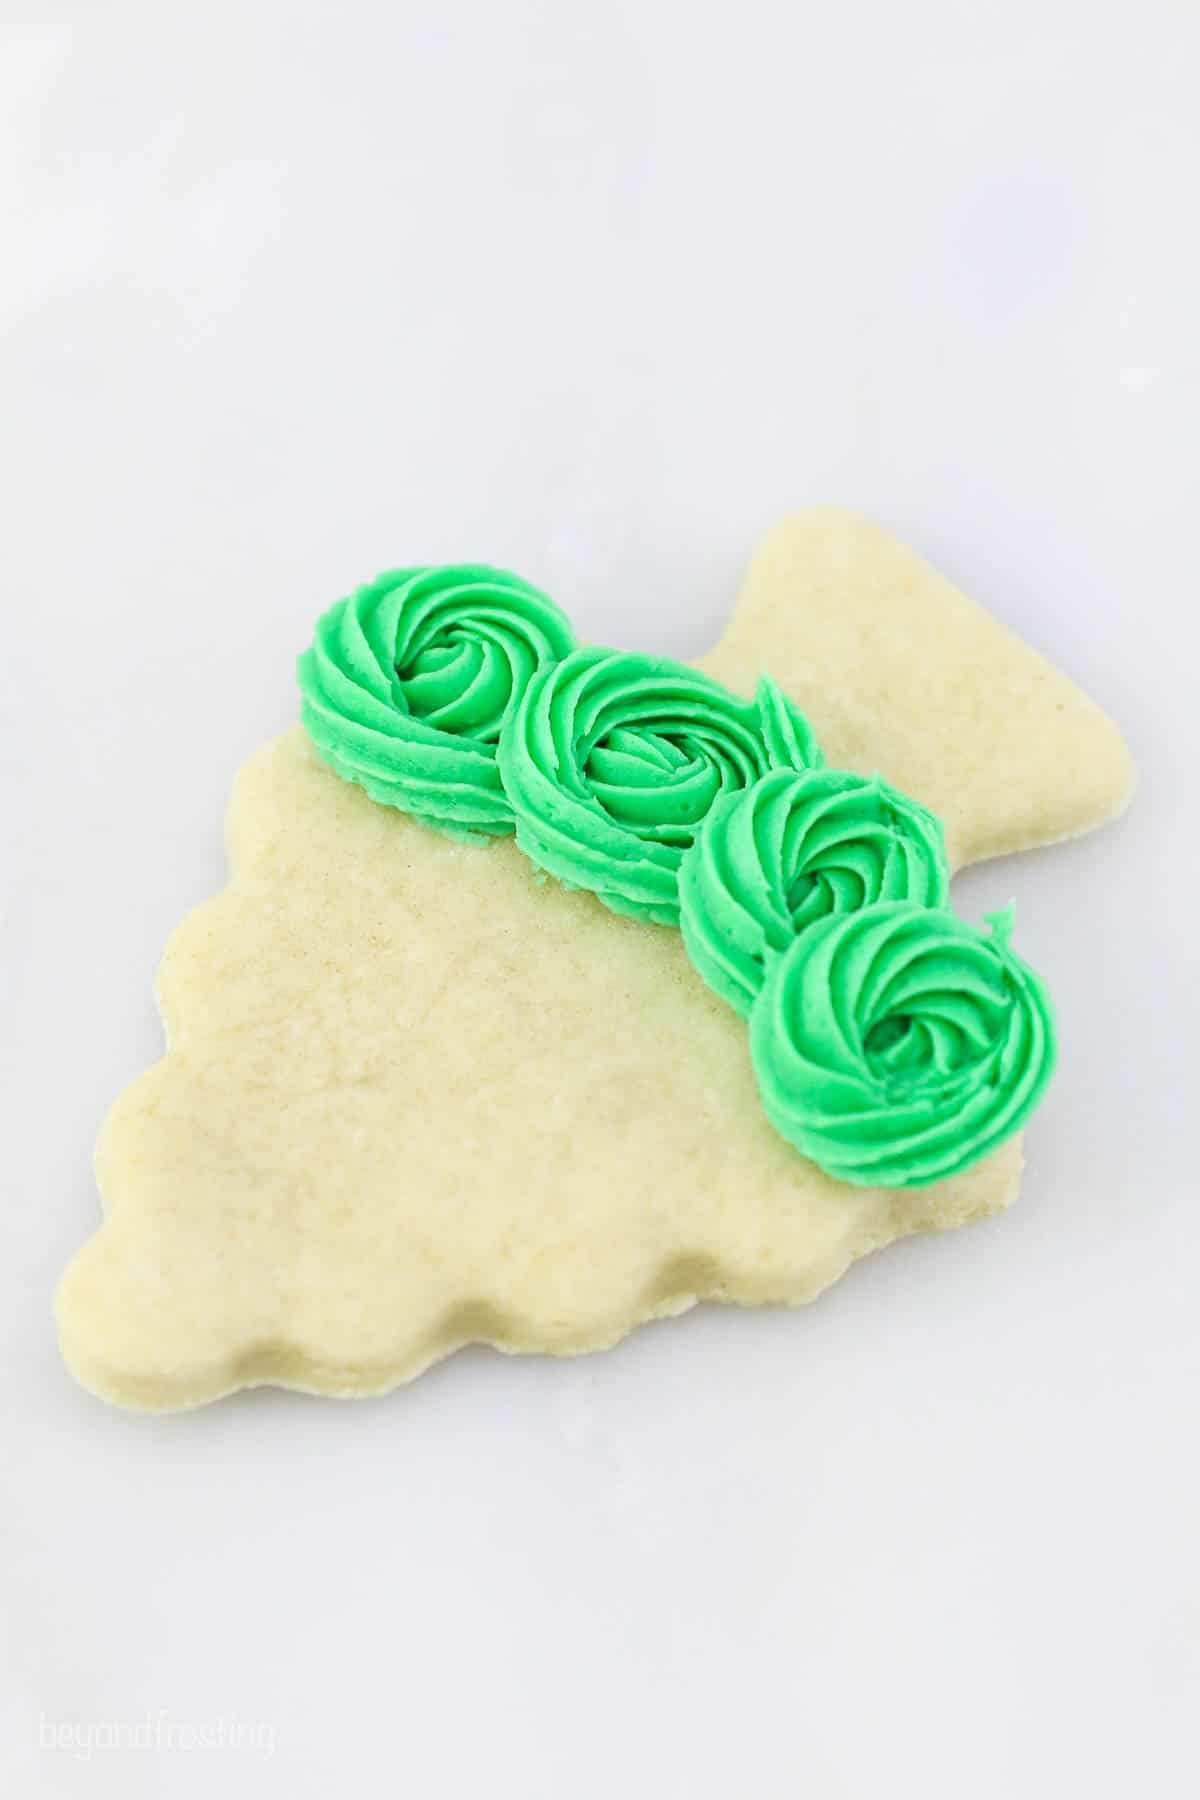
- Pipe rosettes. Working your way from the bottom to the top, pipe a single rosette. Add the second one on top, covering the end of the first rosette.
- Repeat the pattern. Continue this pattern across the cookie and then start working your way up to the top in rows.
- Add sprinkles. Decorate your tree with sprinkles if desired.
Stocking Christmas Cookies
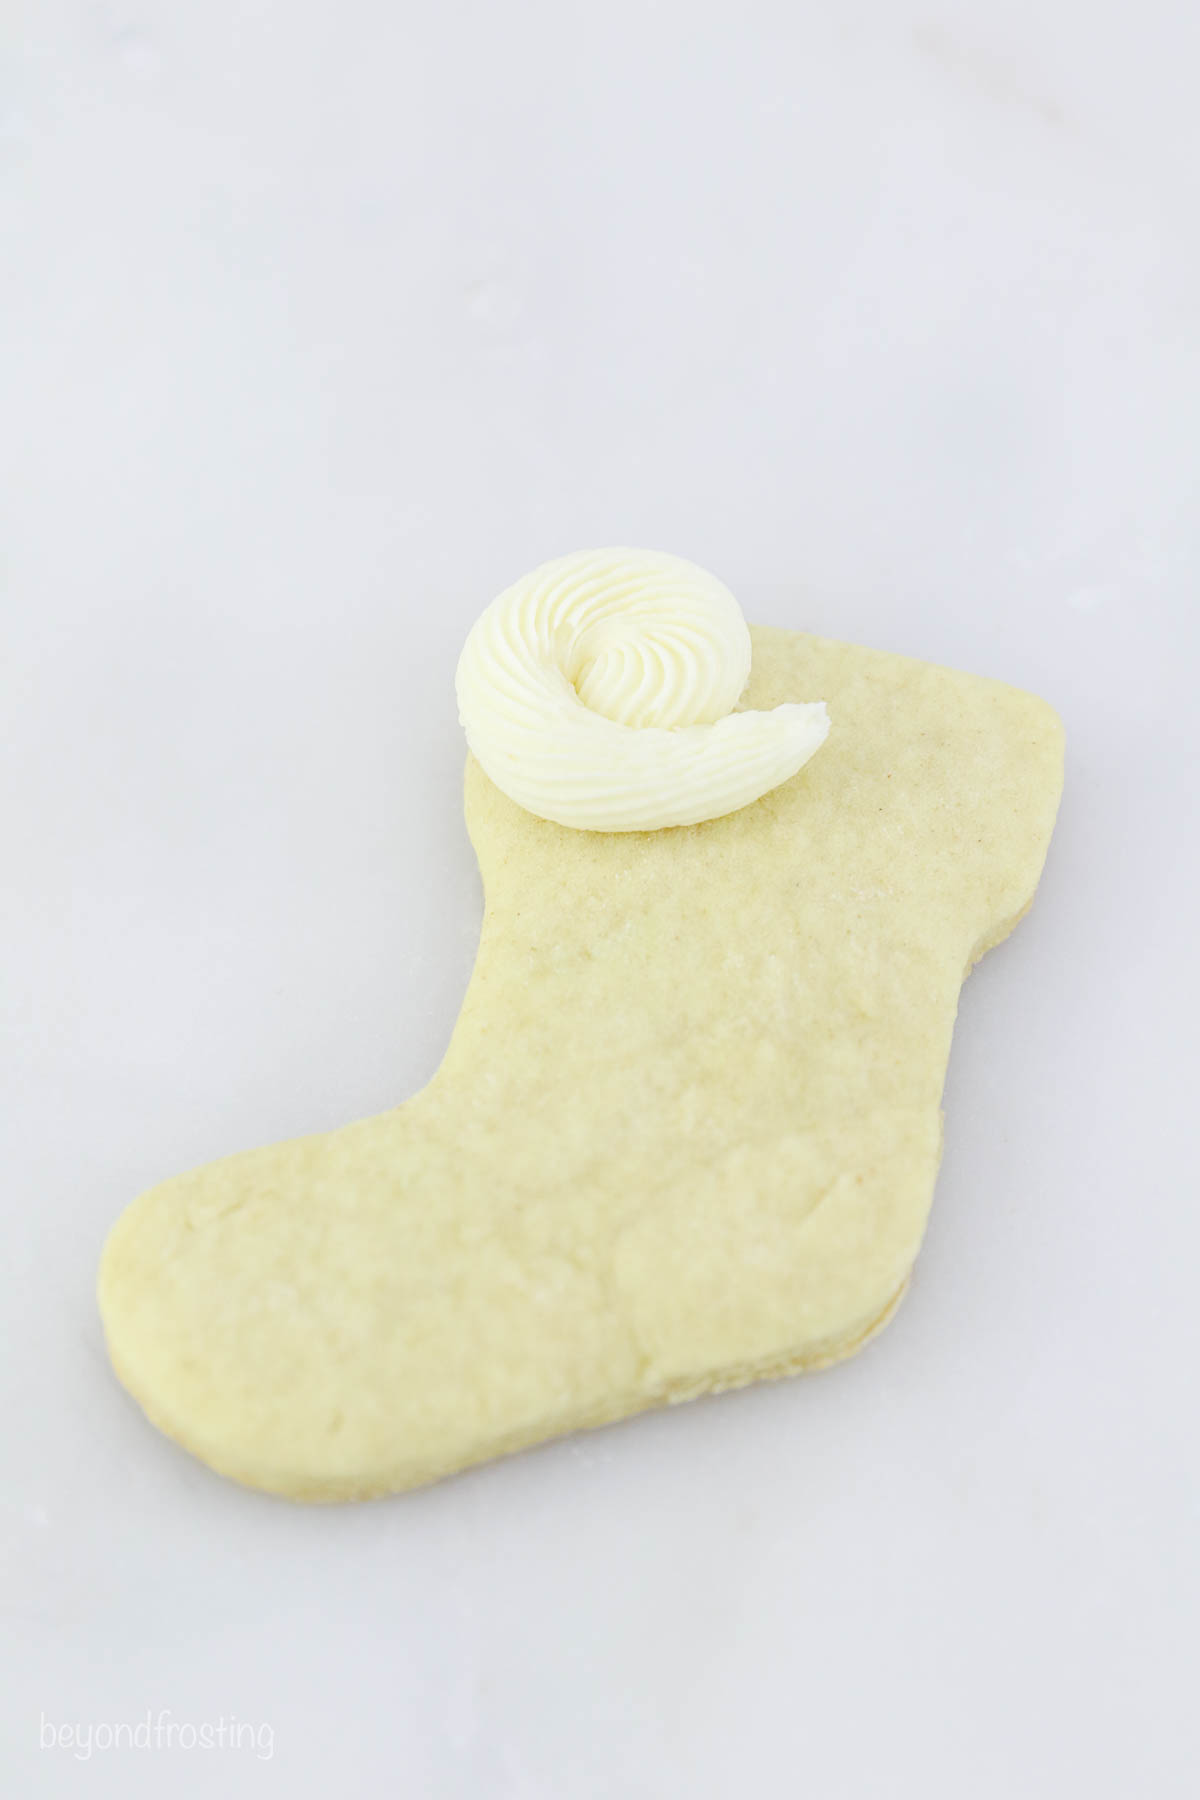
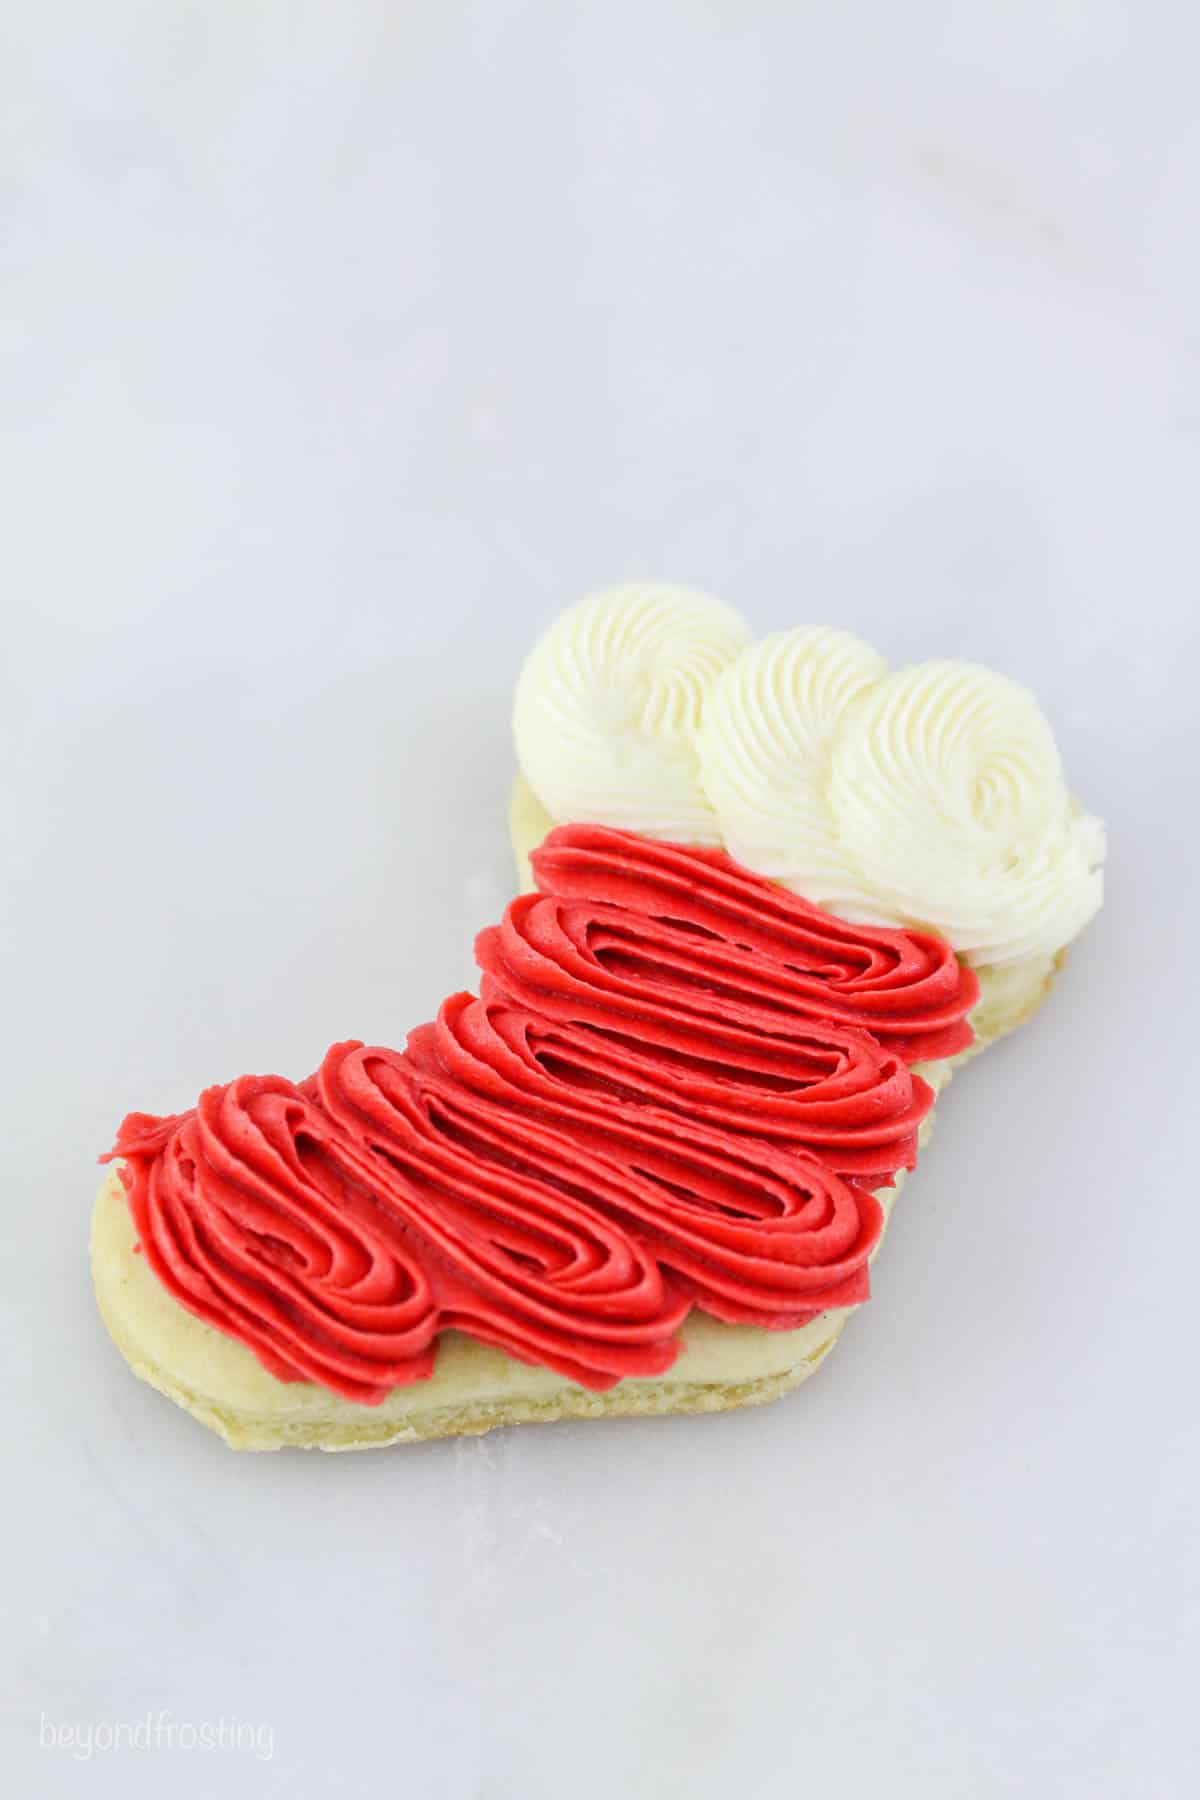
How cute are these little sweet sugar cookie stockings? All you need to make them is a stocking-shaped cookie cutter and the following quick steps:
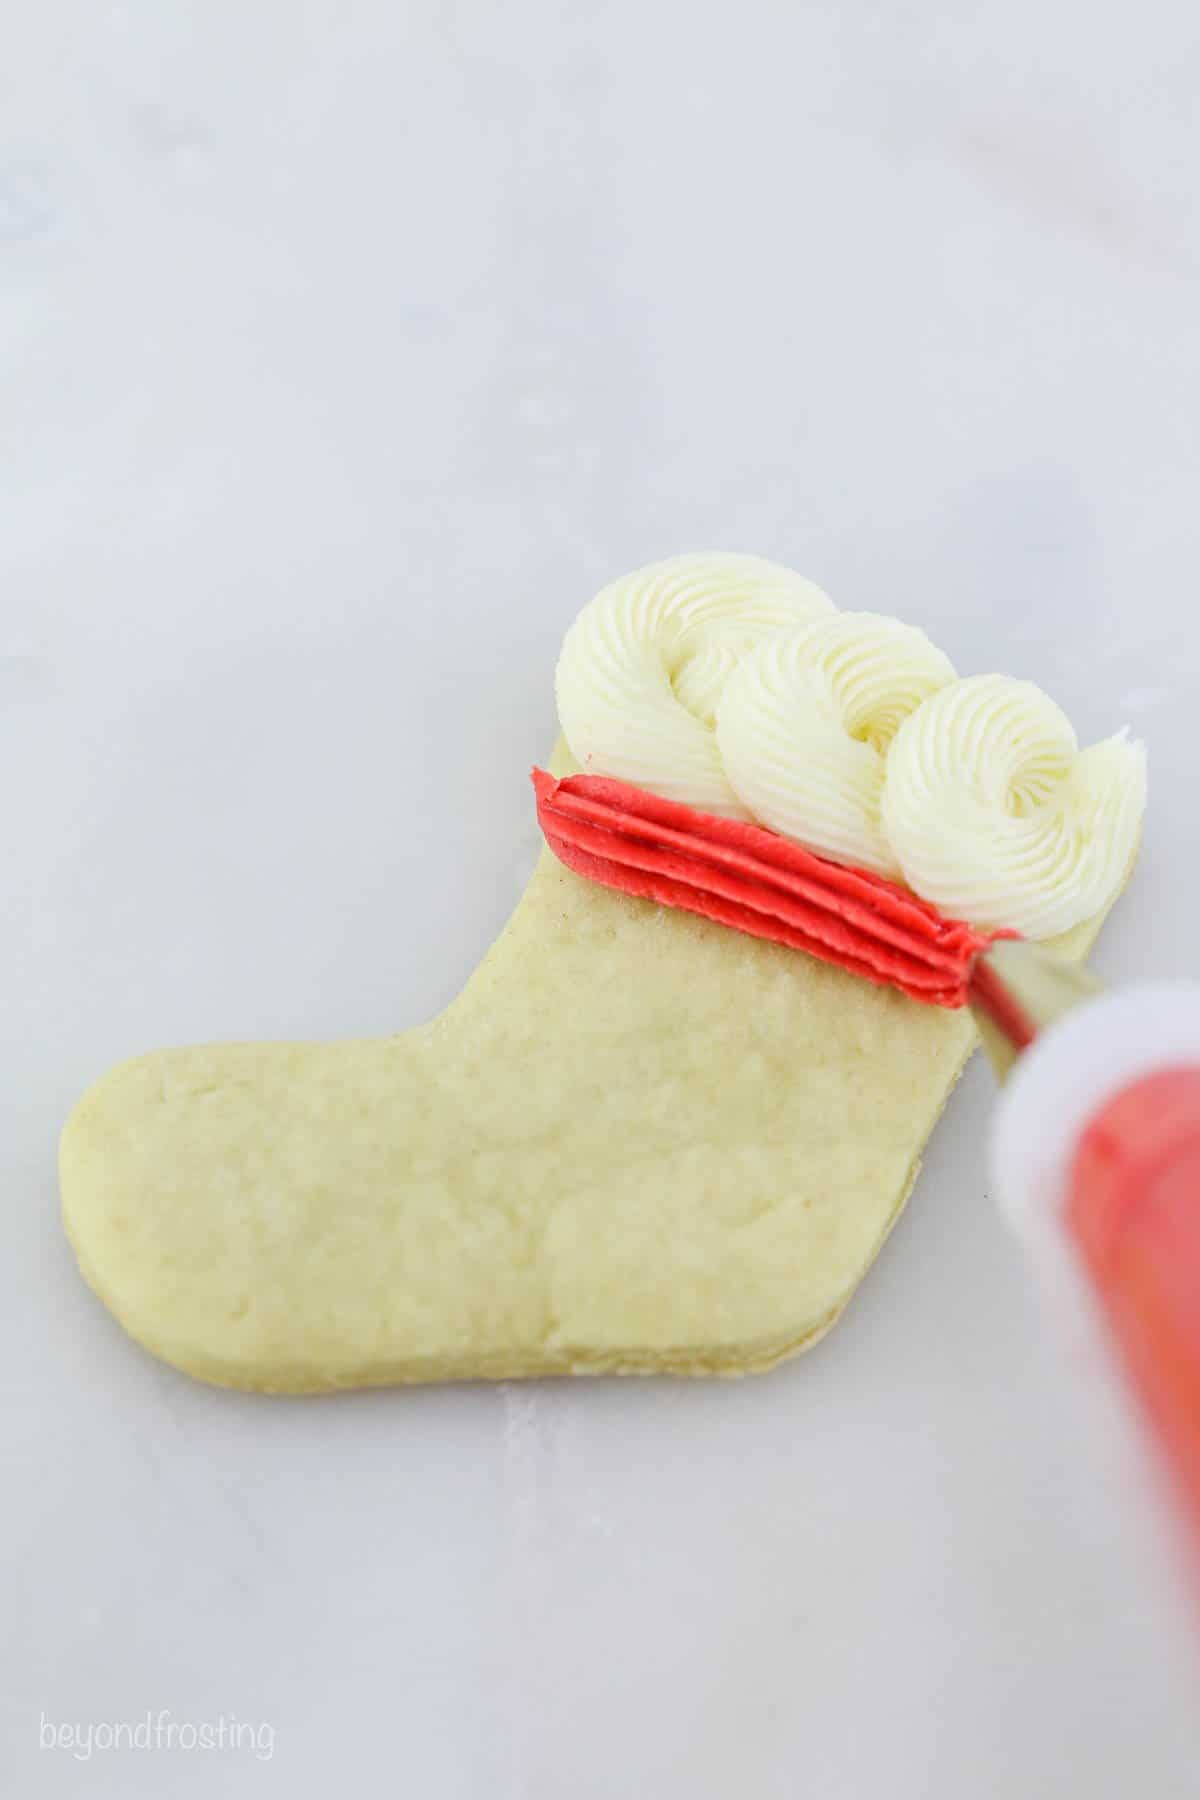
Tips Used: Wilton #199 French star tip (white frosting), #21 (red frosting)
- Pipe rosettes. First, make three rosettes at the top of the stocking using the Wilton #199 French star tip (you can also use a #21).
- Add the red frosting. Next, pipe the red buttercream with a Wilton #21. Working from one side to the other, wrap the frosting around at the end before moving to the next edge.
Present Christmas Cookies
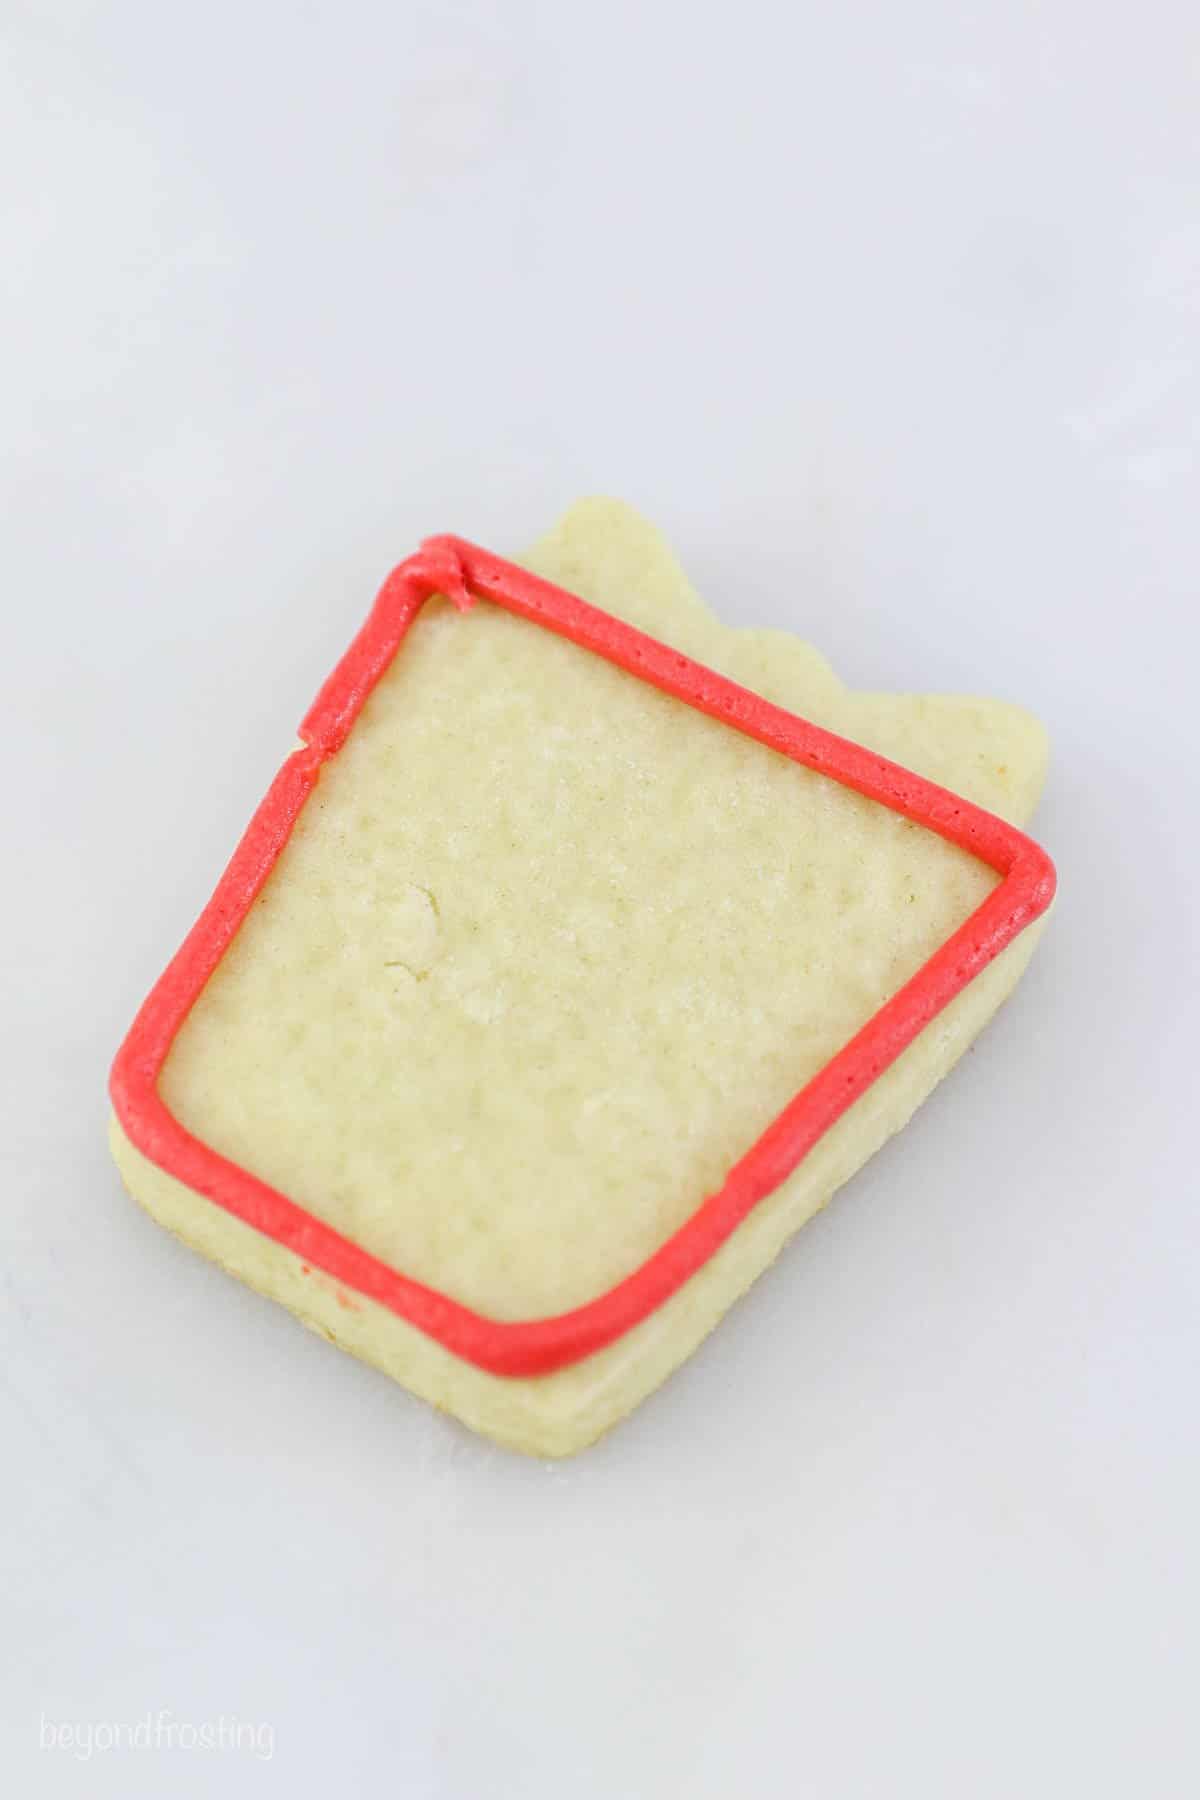
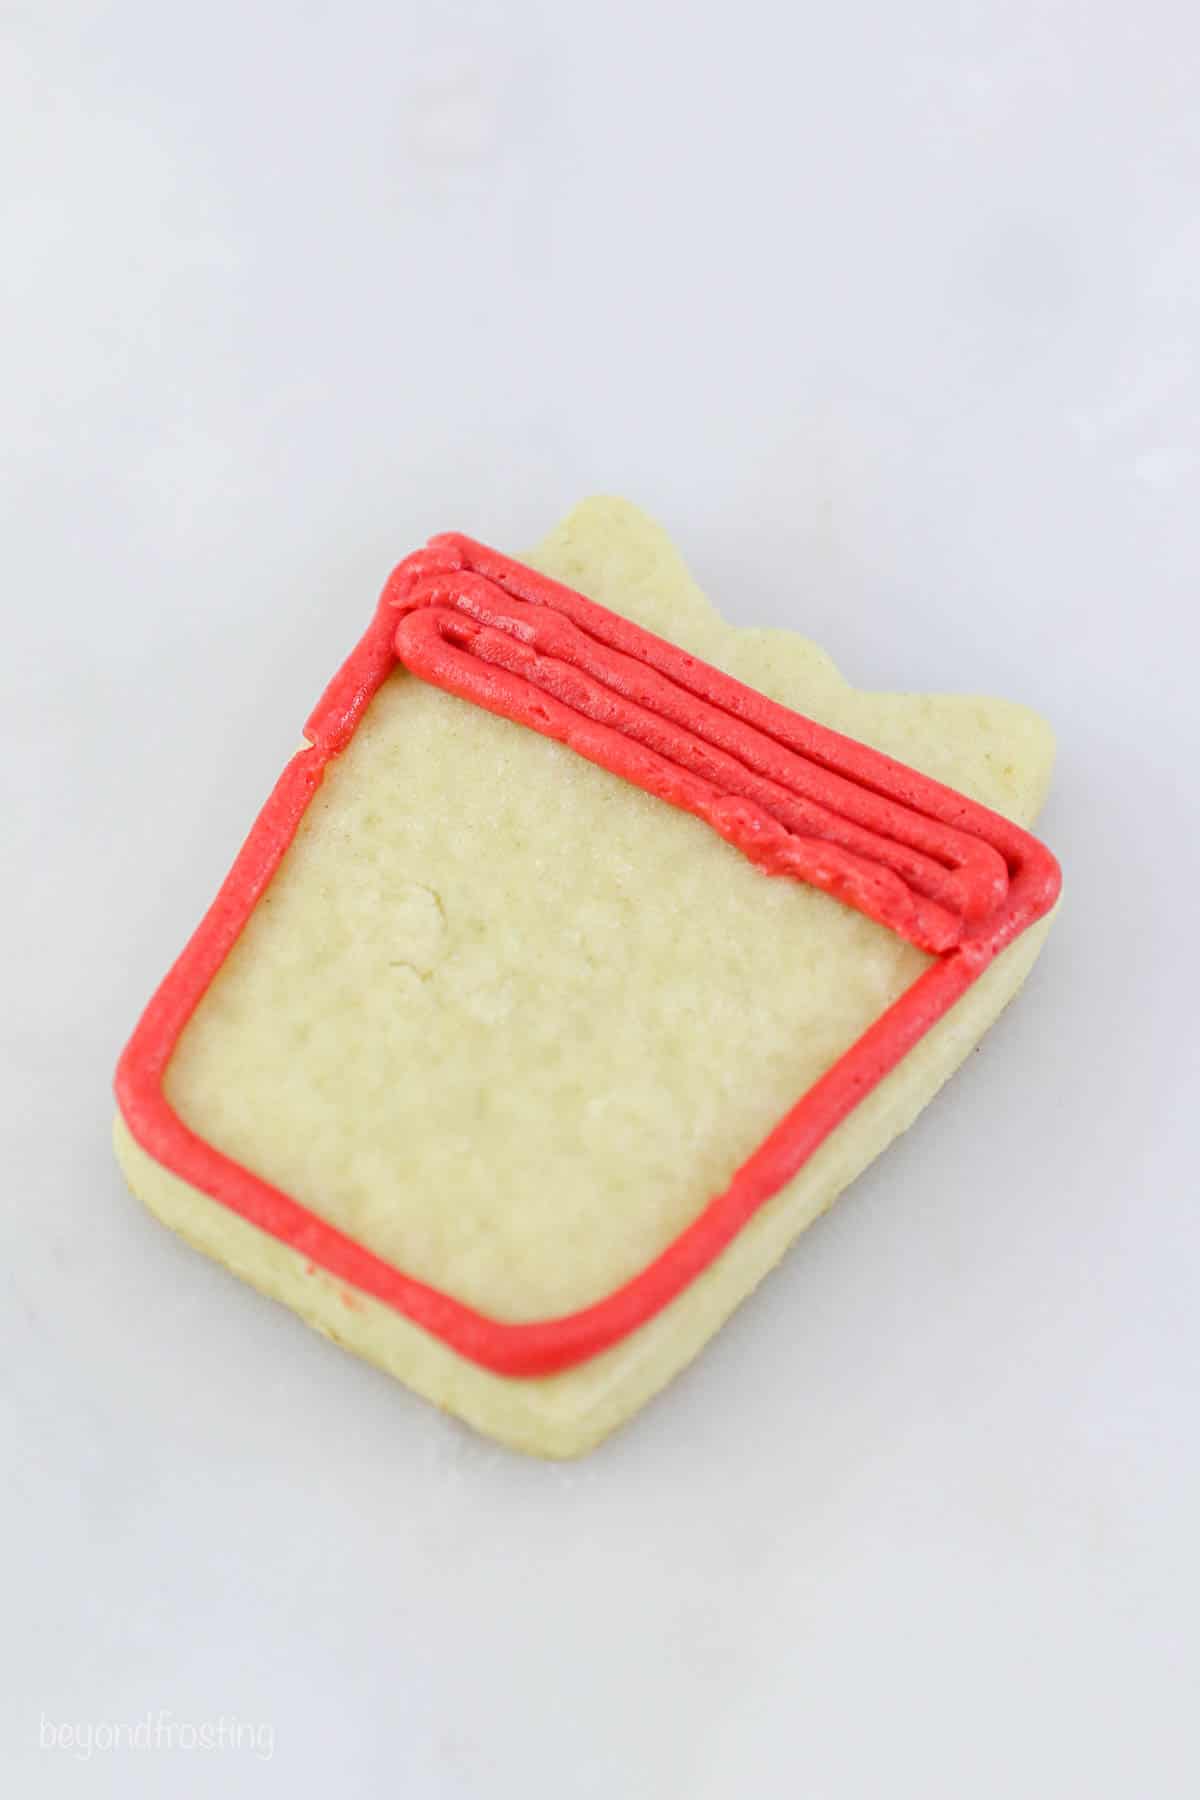
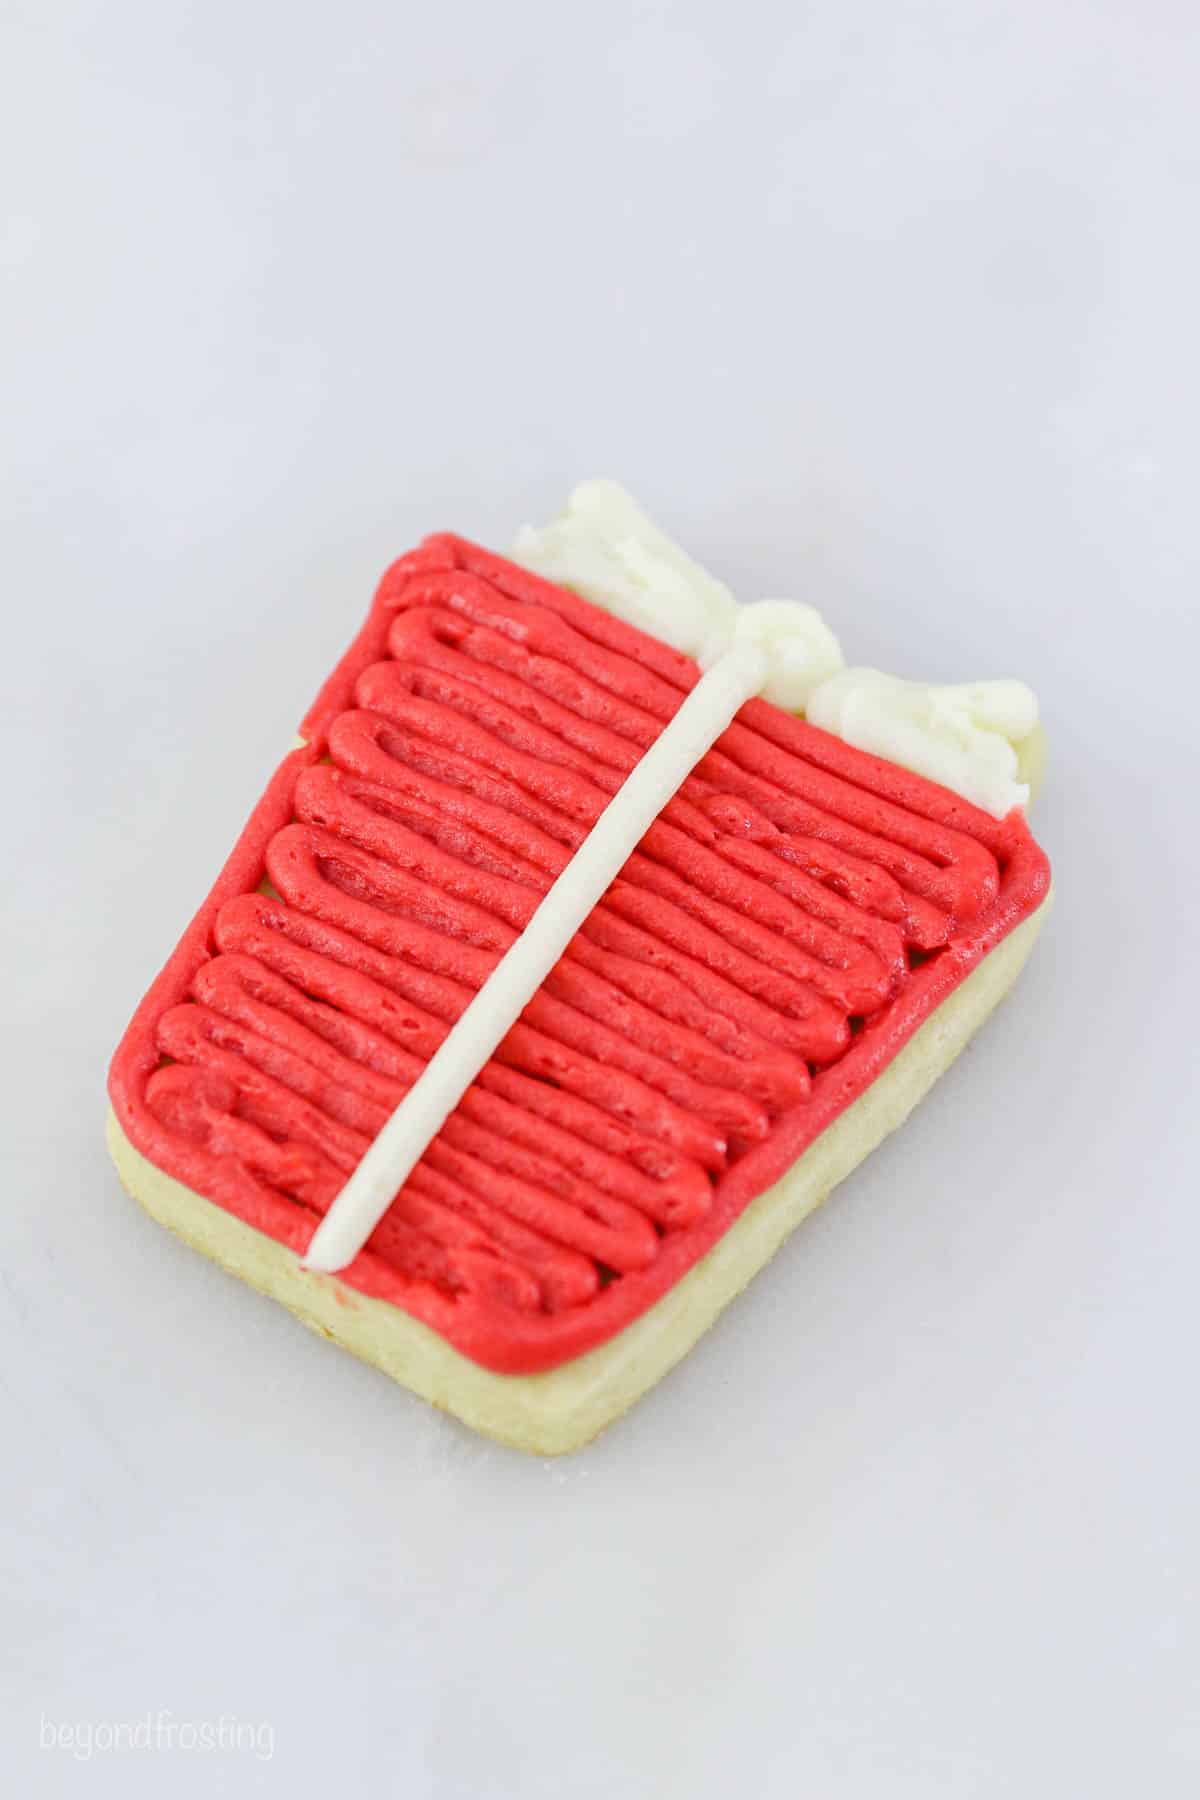
For these Christmas gift cookies, you’ll use an outline and fill technique similar to the outline and flood method you would use with royal icing.
Tips Used: Wilton #5 open round tip.
- Outline the cookie. Start by outlining the edge of the sugar cookie with red frosting.
- Fill in the cookie. Working right to left (or vice versa), fill the cookie by moving the piping tip back and forth from one edge to the other. Do your best to keep the line continuous.
- Add a ribbon. To add a white bow, use the Wilton #5 tip with white icing. Decorate with sprinkles as desired.
Frequently Asked Questions
Is frosting the same as icing?
Many recipes use the terms “frosting” and “icing” interchangeably. However, frosting is usually thicker and more fluffy than icing. Icing tends to be thinner, sets quicker, and hardens once it’s dry. For this reason, icing is usually drizzled or poured over cookies and baked goods, while frosting is pipeable and spreadable.
What happens if my frosting “breaks” while piping?
Sometimes, a frosting line “breaks” halfway through (this can often happen with smaller piping tips, or if your frosting is too wet). To fix it, try gently scraping off the frosting with the flat edge of a knife before starting over. Or, do your best to bridge the gap using a toothpick. If the frosting breaks when you are filling, simply cover it with a sprinkle!
Does this buttercream frosting harden?
No, buttercream frosting won’t harden completely. The frosting will develop a light crust the longer it sits at room temperature, however, the underlayer stays quite soft. For this reason, I don’t recommend stacking the frosted sugar cookies. See the section below for detailed storage instructions.

How to Store Frosted Cookies
- To Store. For best results, store the frosted cookies airtight in a single layer. Stacking the cookies may damage the frosting. They’ll stay fresh for up to 3 days at room temperature, or up to 5 days in the fridge.
- Freeze. Once decorated, pre-freeze the frosted cookies on a cookie sheet for 15-30 minutes, until hardened. Afterward, transfer the frozen cookies to an airtight container. As long as the frosting is firm, these can be stacked with a layer of parchment paper in between. Thaw the cookies at room temperature on a cookie sheet in a single layer.
Storing Extra Frosting
- Refrigerate. Buttercream frosting can be stored in an airtight container in the fridge for up to 1 week.
- Freeze. Store any leftover frosting in an airtight container or Ziploc bag (squeeze out any excess air) and freeze it for up to 2 months. Allow frozen frosting to thaw to room temperature before you use it. I recommend re-whipping the frosting with your mixer to get the fluffy texture back.

Christmas Cookie Frosting
- Prep Time: 15 minutes
- Total Time: 15 minutes
- Yield: 4 1/2 cups
- Category: Frosting
- Method: Stand Mixer
- Cuisine: American
Description
Learn how to make beautifully frosted sugar cookies with this easy buttercream frosting recipe and Christmas cookie tutorial! Use the recipe below to make and color your frosting, then check out my post for step-by-step instructions showing you how to make different designs.
Ingredients
- A batch of homemade sugar cookies
For the frosting
- 1 1/2 cup (339 g) (3 sticks) unsalted butter, cold.
- 5 cups (650 g) powdered sugar
- 2 1/2 teaspoons (12 ml) pure vanilla extract
- 2 tablespoons (30ml) heavy whipping cream (or milk)
- Pinch of salt (optional)
Instructions
- Cut the butter into pieces. Using the paddle attachment, whip the butter for 5-7 minutes, scraping down the bowl occasionally, and beating until the butter looks light in color.
- Add 2 cups of powdered sugar and mix on low speed until incorporated into the butter then add the vanilla extract and mix to combine. Beat for about 60 seconds.
- Next, add 2 cups of powdered sugar and beat on low speed until sugar is incorporated. Increase speed to medium-high and beat for 3 minutes.
- Add the last 1 cup of powdered sugar along with the heavy whipping cream and salt. Beat on low until the ingredients start to mix. Increase speed to medium-high and beat for another 3-5 minutes to whip additional air into the frosting.
- Divide the frosting into bowls, add gel colors, and decorate.
Notes
- This will make enough to generously frost 24+ sugar cookies
- Storing: Frosted cookies should be stored in an airtight container. I do recommend a single layer for best results, but if you need to stack two layers high, place a piece of parchment paper between layers. Stacking cookies can result in some damage to the frosting.
- Freezing frosted cookies. Frosted cookies can be frozen. Once decorated, place them on a cookie sheet in the freezer for 15-30 minutes until the frosting had hardened. Then transfer to an airtight container. As long as the frosting is firm, these can be stacked in the container, with a layer of parchment paper in between. Thaw cookies on a cookie sheet in a single layer. These can be thawed on the counter for a couple of hours.





One of the best butter cream frosting I’ve ever made! I tried to 1/2 the recipe but didn’t come out the same.
Thanks for sharing Janet! I am so happy you found it!
Excellent job … thanks for all of your hard work that you put into this so that we could enjoy
your skills.
You’re welcome Sally! Thank you!
Does this recipe need to be refrigerated?
Like after they’re frosted? There is a whole section of this blog post about storing cookies- frosted or unfrosted.
This is so helpful! I was wondering if you have any tips on how to get the colors look vibrant? I can never get my red really red. And same with green. Thanks
Hi Carissa, If you can, let the colors sit overnight, they will get darker, For red and green, I usually add a touch of black to deepen the color. You can also try mixing a couple colors together like red and crimson to get a deeper red. There’s a trick I’ve seen floating around online about using an immersion blender that I want to try to. You may want to look that up to.
What can I do when the frosting seems to get too warm?
First, I’d recommend changing colors, or using less frosting in your piping bags. If not throw your piping bag in the fridge for 10-15 minutes.
As long as the frosting is the right consistency to begin with, and you don’t overfill your bags, you should be ok.
I tend to make several bags of the same color of frosting to avoid this problem. Then I use the double bag method where I have one piping bag with my coupler and piping tip and I drop in a second bag of frosting. It’s really easy to change out the bag of frosting for another one when it gets too warm.
I hope this helps
Hello. Thank you for getting back to me. I will give it a try. Thanks again.
Have a great Christmas.
Can this also be used for gingerbread cookies?
absolutely yes!
Hi . Can you use this frosting to decorate a cake?
Absolutely, many of my cakes on my site use this frosting. Here you can you find the full tutorial for my vanilla buttercream
Hello if I have leftover frosting how can I best store it and use it again later to decorate the rest of my cookies ?
You can freeze it! I like to fill a Ziploc bag with the frosting or a freezer-safe container, then squeeze all the air out of the bag, seal it and freeze it for up to two month. You will need to allow it to soften for a couple of hours to room temperature. I recommend re-whipping it in the mixer to get the fluffy texture back.
How much criso do you use for the buttercream frosting if using both butter and crisco?
Hi Sue, you can use 50/50 butter to Crisco or if you want them to set even more use 1:3 butter to Crisco ratio.
Does this icing dry enough that you can stack cookies? I noticed there were some stacked on the plate. How long do they have to dry? I make the Wilton class buttercream with powder sugar and Crisco. Would I need to add some meringue powder to help it crust over? It’s my family and friends favorite icing so I don’t want to mess with it. I’ve never tried royal icing and not sure I want to learn to decorate that way or not. Great website!! Thanks for all the tips.
Hi Shannon, the frosting does crust a little bit, but not enough where I would recommend stacking them if you’d like them to hold the design. It will get mishaped with the weight of the cookies. You can add some meringue powder, that would help. However I haven’t done it in my buttercream but I am familiar with the Wilton method. I don’t decorate with royal icing, only buttercream!
It’s good that you mentioned how you should consider how many different colors you are planning to use when you are decorating your cookies. My wife’s birthday is coming up, and I want to decorate some sugar cookies in a unique way. I wonder if there is a way to make the cookies look shiny.
for the perfect vanilla frostingwhen you say you use crisco and butter do you do half and half? 3/4 cup of each?
Hi Shelley, yes just half and half of each. So depending on how much frosting you need, it could be 1/2 cup butter and 1/2 cup shortening or 3/4 cup shortening and 3/4 cups butter
Delicious cookies these are.Like these beautiful cookies.
Cookie Gifts
I actually really dislike royal icing, so this is perfect! Buttercream is WAY better 🙂
These look fabulous, Julianne! I love frosted cookies so much around this time of year!
Such great tips! Sugar cookies are always so hard for me. They never look good, this came at the perfect time!
You are so talented! And patient! I love how your tree cookie turned out. Such lovely detail
Girl these are amazing tips! In love with your beautiful cookies!
You are a master at this cookie decorating! These look so GOOD! One of the best things to do during the holidays and you are totally killing it! YOU GO GIRL!