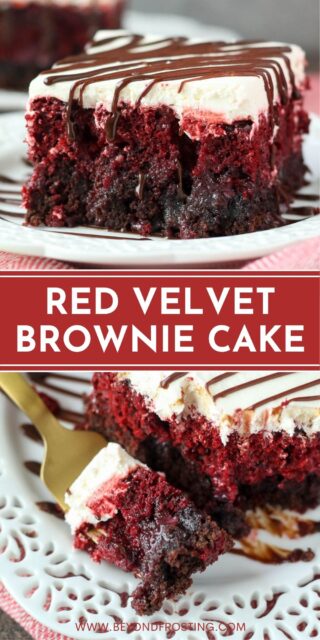
A fudgy brownie meets a moist and tender red velvet poke cake in this mouthwatering dessert. Topped with a simple cream cheese frosting and a drizzle of hot fudge, you’re going to obsess over this Red Velvet Poke Cake!

The Best Red Velvet Poke Cake
Imagine that the fudgiest brownie of all time had a baby with the most crave-worthy red velvet cake. This indulgent dessert is more delectable than anything you could dream up! It all bakes in the same pan at the same time with two separate box mixes.
Why You’ll Love This Poke Cake Recipe
- Easy. It’s an incredibly easy recipe that results in a truly heavenly treat.
- Decadent. The magic happens once the sweetened condensed milk soaks into the still-warm brownie cake. And the simple whipped cream cheese frosting on top is almost like a layer of no-bake cheesecake. You’re welcome! Oh, and don’t forget about the drizzle of hot fudge that finishes it off. Don’t you just want to sink your teeth right in?
- Crowd pleaser. This is the perfect recipe to take to potlucks or to whip up for gatherings. Everyone will devour this dessert and be so impressed by your baking prowess! (No need to tell them how easy it was to make this poke cake.)
If you’re a poke cake lover like me, you may also want to check out my top 15 most popular poke cakes!

What You’ll Need
Here’s a quick look at what you’ll need to make a red velvet poke cake. Be sure to scroll down to the recipe card below for a full ingredient list.
For the Red Velvet Brownie Cake
- Red Velvet Cake Mix: Use your favorite brand.
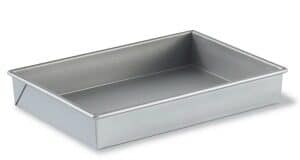
- Fudge Brownie Mix: Make sure it’s the “family size” for a 9×13 inch pan
- Egg, Oil & Water: Each mix will give you the specifics on what exactly to use and how much.
- Sweetened Condensed Milk: This keeps the cake super soft and moist.
For the Whipped Cream Cheese Frosting
- Cream Cheese: Brought to room temperature.
- Cool Whip: Or Homemade Whipped Cream.
- Hot Fudge: To garnish the cake.

How to Make a Red Velvet Poke Cake
This recipe could not be simpler or more straightforward. You just have to make the cake and brownie batters, pour them into a pan, bake, poke, pour in the sweetened condensed milk, add the frosting and slice it up!
- Preheat Oven: Preheat the oven to 350°F.
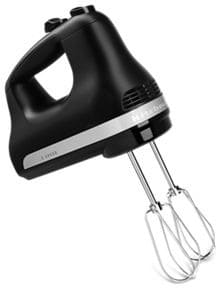
- Make Cake Batter: Add the cake mix and the ingredients listed on the box to a mixing bowl. Mix well until all of the ingredients are combined. Pour the batter into a 9×13-inch pan.
- Make Brownie Batter: Add the brownie mix and the ingredients listed on the box to a different mixing bowl. Mix until everything is well combined. Pour the brownie batter overtop the cake batter.
- Bake: Bake your brownie cake in the preheated oven for 30-35 minutes. Remove the cake from the oven and allow it to cool for at least 30 minutes.
- Poke Holes: While the cake is still warm, use the end of a wooden spoon or another round object to poke holes all over the top of the cake.
- Add Condensed Milk: Pour the sweetened condensed milk evenly overtop the cake until the can is empty. Allow the cake to absorb the condensed milk until it has cooled completely.
- Make Topping: Add the cream cheese and the Cool Whip to a mixing bowl. Beat on medium speed for a few minutes until well combined. Spread the frosting over the completely cooled cake. Add a drizzle of hot fudge if desired.
- Enjoy! Cut and serve the cake or refrigerate it in an airtight container if you’re not enjoying it immediately.

Tips for Success
That’s all there is to it! Though I do have a few helpful tips and tricks to make sure your poke cake comes out perfectly every time:
- Watch the clock. Be careful not to overbake the cake. Take it out just before all of the brownie areas are fully baked – they’ll continue to set as the cake cools. The cook time will vary by oven and the type of pan used, so keep a close eye on your cake, especially in those last few minutes of baking.
- Don’t skip the sweetened condensed milk. Since this cake has to be stored in the fridge due to the cream cheese topping, the condensed milk helps it stay wonderfully moist and tender. It really wouldn’t be the same without it!
- Add the condensed milk while the cake is warm. Your cake should not be hot when you pour in the sweetened condensed milk, but it should definitely still be warm. I suggest letting it cool for about 30-40 minutes.
- Want to make a homemade topping? If you’d prefer not to use Cool Whip, then I would suggest making this cream cheese whipped cream, which is essentially the same topping, just made with whipped cream instead of Cool Whip.

Variation Ideas
You can easily get creative with this cake by making an adjustment or two to the recipe. Here are a few clever ideas!
- Different cake mix: I adore the red velvet and brownie combo, but this treat would also taste amazing with any other flavor of cake. There are tons of possibilities! This recipe was inspired by Cookies & Cups who made a funfetti version.
- Nutella instead of hot fudge: Everyone loves chocolate hazelnut spread, and you can certainly drizzle it over this cake instead of the hot fudge if you’d like. Simply scoop some Nutella into a plastic bag, cut off the corner and squeeze it out over the cake.
- Chocolate cream cheese frosting instead of Cool Whip: If you’re a die-hard chocoholic, you may want to forego the frosting included with this recipe in favor of some Chocolate Whipped Cream Frosting. It’s super easy to prepare!
- Caramel drizzle: If you’re a fan of topping your brownies with caramel sauce, you’re going to love drizzling it over this cake as well. The caramel drizzle makes this poke cake reminiscent of a Better Than Sex cake.
How to Store a Poke Cake
Cover the top of your baking dish tightly with saran wrap or cut your cake and store the slices in an airtight container. Either way, the cake will keep in the fridge for 3-4 days.
Can I Freeze It?
If you leave off the whipped cream cheese topping and add it after the thawing process is complete, you can freeze this cake for up to 1 month. Wrap it tightly in plastic wrap and store it in a freezer-safe container. Thaw it out in the fridge before frosting and serving it.
Print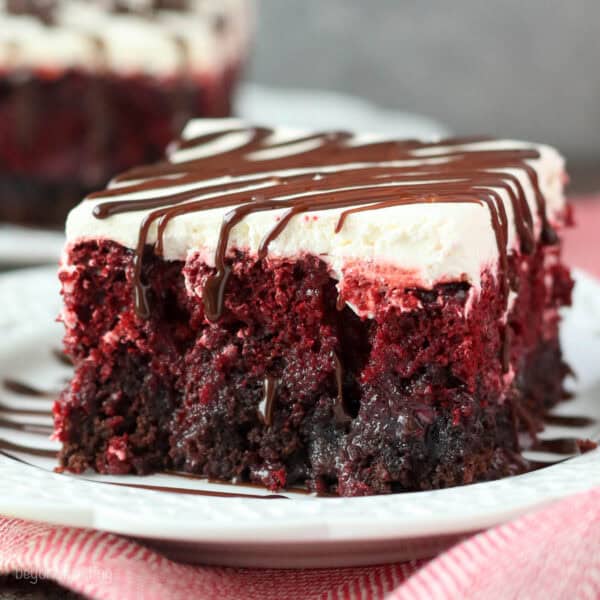
Red Velvet Poke Cake
- Prep Time: 20 minutes
- Cook Time: 28 minutes
- Total Time: 48 minutes
- Yield: 15
- Category: Dessert
- Method: Oven
- Cuisine: American
Description
A fudgy brownie meets a moist and tender red velvet poke cake in this mouthwatering dessert. Topped with a light 2-ingredient cream cheese frosting and a drizzle of hot fudge, you’re going to obsess over this Red Velvet Poke Cake!
Ingredients
For the Red Velvet Brownie Cake
- 1 Box (15oz) Red velvet cake mix
- (plus ingredients on the box- egg, oil, water)
- 1 Box (18oz) Fudge brownie mix
- (plus ingredients on the box- egg, oil, water)
- 1 jar (14 oz) Sweetened condensed milk
For the Whipped Cream Cheese Frosting
- 1 pk (8oz) Cream cheese, at room temperature
- 1 container (8oz) Cool Whip, thawed – or Homemade Whipped Cream
- Hot Fudge for garnish
Instructions
- Preheat oven to 350°F.
- In a mixing bowl, combine red velvet cake mix with ingredients list on the box. Mix well until all ingredients are combined. Pour batter into a 9×13” pan.
- In a mixing bowl, combine brownie mix with ingredients listed on the box. Mix well until all ingredients are combined. Pour brownie batter over top of red velvet batter.
- Bake in preheated oven for 30-35 minutes. Remove from oven and allow cake to cool for at least 30 minutes.
- While the cake is still warm, take the end of a wooden spoon or another round object and poke holes all over the top of your cake.
- Pour can of sweetened condensed milk over the top of cake and allow it to absorb in the cake until cake is cooled. Let set until completely cooled.
- While cake is cooling, prepare the chocolate cream cheese topping – in a mixing bowl, combine the cream cheese with the Cool Whip (or whipped cream). Beat on medium speed for a few minutes until well combined. Spread over the completely cooled cake. Garnish with hot fudge.
- After adding the cream cheese frosting, the cake must be refrigerated.
Notes
- Homemade topping: If you’d prefer not to use Cool Whip, then I would suggest making this cream cheese whipped cream, which is essentially the same topping, just made with whipped cream instead of Cool Whip.
- To Store: Keep cake in an airtight container in the fridge for 3-4 days.
- To Freeze: Leave off cream cheese topping, wrap cake tightly in plastic wrap and store in a freezer-safe container for up to 1 month. Thaw in the fridge before frosting and serving.
- Baking times: The cook time will vary by oven and the type of pan used, so keep a close eye on your cake, especially in those last few minutes of baking. Take it out just before all of the brownie areas are fully baked – they’ll continue to set as the cake cools. Over baking will cause this cake to be dry.
Nutrition
- Serving Size: 1 slice
- Calories: 629
- Sugar: 52.9 g
- Sodium: 433.9 mg
- Fat: 33.2 g
- Carbohydrates: 76.2 g
- Fiber: 0 g
- Protein: 8.5 g
- Cholesterol: 89.4 mg
Filed Under:
Discover More Dreamy Red Velvet Recipes
There’s something so luxurious about a red velvet dessert. You’re sure to enjoy the following recipes!
- Homemade Red Velet Cupcakes


I am trying this tomorrow. Shouldn’t the brownie mix go first and the red velvet top the brownie?
No, the cake batter goes in first. As the brownie batter is thicker, some of it naturally sinks during the baking process.
It’s delicious but definitely takes longer than 30 minutes to bake.
Every pan and oven will perform differently
Very good. It’s a dessert that looks and tastes decadent, but totally easy to make! Great to make during the Christmas season.
Thank you so much Rainey!
I made this for my Mom’s 82nd birthday. What a hit!!! Absolutely delicious! Senior citizens, the little kids and everyone in between loved it! So easy but looks and tastes like something you have to slave over! Can’t wait for an opportunity to make it again!
Love to hear that! Thank you so much!
Delicious!! Make a day ahead so sweetened condensed milk makes the cake & brownie fudge-like🤤
Can I use a brownie recipe instead of a box? If so what size would work
I have not tested this, so I cannot say either way
So how do you know if it’s done? If the center is still liquid?
Oh no, it should still pass the toothpick test, baked all the way through until a toothpick comes out clean. But you’ll need to adjust the baking time based on your oven and type of pan.
Real gooood and real eeeezy
Very happy to hear that Savannah! Thank you so much!
Delicious! And a hit with everyone. A rarity with my picky kids.
Yeah!! That’s amazing! I am so happy to hear that!
I don’t understand how the picture looks like the brownie mix is on the bottom and the red velvet cake is on top but the directions are just the opposite!
Hi Lesley, As the cake bakes, a lot of the brownie batter will settle to the bottom.
Do I need to grease and flour the baking pan?
Unless you are removing the whole cake from the pan, you wouldn’t need to flour it, but depending on the type of pan you may want to spray the bottom of it
Curious why directions say to pour cake batter in pan , then brownie batter on top, when the picture shows the opposite.
the brownie batter settles more on the bottom as it cooks
Made this delicious Red Velvet Brownie cake for my son’s 23rd birthday 🥳 and it was a Hit! Everyone loved it. I made mine with homemade whipped topping and red sprinkles in addition to the chocolate topping- it was so pretty! I love how simple and fun it is to make! I’ll certainly bake this again!
Thank you so much Amy! I am so happy to be a part of such a special birthday!
Can you make this using the brownie and cake mixes from scratch instead of box?
I’ve never tested it, so I am not sure how it would work.
In order to get cakes out of the cake pans, you have to turn them over onto a baking rack to cool… so I would say “yes” the cake was flipped, that’s why the red velvet is now on top and the brownie mixture is on bottom
Hi Cynthia- I don’t turn this out onto a pan to cool, it stays in the pan and it gets soaked in the Sweetened condensed milk
Ooooooooooh very very good. I made (2) 8×8 and they were perfect. I can’t wait to try with added cherries 🍒.
Yes! Thank you Geneen! I hope you enjoy! Just curious, how long was the bake time for two 8-inch pans?
I’m going to say about 35 minutes. I kept checking with toothpick 🙂
Great, thank you!
This looks delicious! Making it this weekend for my daughter’s sweet sixteen as a surprise! Question…do you think I could double this for a larger cake? If so, would you make any other adjustments?
Hi Nida, I would recommend baking only one 9×13 pan at a time, because it’s already a very large amount of batter for one pan and people have reported a lot of varying baking times
I followed directions to the letter.. and after 35 minutes the center was still soup. So bummed out.
Hi Jamie, please remember that baking time are suggested. Each oven is different, each pan is different. Maybe we used different brands of mixes that would have effected it. Some oven temperatures are not accurate or fully preheated first. I suggest you keep baking it until it’s done. A couple others have also commented here that they had to bake for much longer than 35 minutes. It doesn’t mean you did anything wrong, it just means that some of the factors I listed above would cause a longer baking time.
The recipe calls for pudding the red velvet batter in the pan first and then the brownie batter. But the picture shows the brownie batter on the bottom as the final product. Did you flip the cake over out of the pan after cooked before frosting, and that’s how the brownie batter ended up at the bottom? I like the brownie batter on the bottom, but not sure if it matters which goes in the pan first batter wise.
I put the red velvet batter in first and then the brownie batter. Since the brownie batter is heavier it seemed to mostly sink as it baked. I’ve see a variety of results from people who’ve made it on Pinterest.
What size brownie mix? There are some for 8 or 9″ pans and some for 9×13″. Thanks.
For a 9x13inch size, so an 18oz box.