
Tender and crispy buttermilk waffles are one of my favorite weekend breakfasts. This easy recipe makes perfect, fluffy waffles that are golden on the outside and soft in the middle. Make a double batch to store and reheat throughout the week!
If you love cozy, classic breakfast recipes like these homemade buttermilk waffles, be sure to try my family’s 1-hour cinnamon rolls.

Fluffy Homemade Buttermilk Waffles
There’s nothing better than tucking into a stack of fluffy, golden waffles on a lazy Saturday morning. My family LOVES this buttermilk waffle recipe. It’s a classic breakfast, made with simple pantry ingredients, plus tangy buttermilk and vanilla. These waffles are tender, crispy, and flavorful without being too sweet. I love doubling the batch whenever I make them since they’re easy to store and quick to reheat during the week!
My Family Loves These Waffles
- Crispy and golden. I’ll show you how to cook perfect buttermilk waffles that are crispy outside and soft inside. You’ll need a waffle maker (there’s no getting around that, unfortunately), but it’s super easy to do.
- Light and fluffy. My trick for the best waffles is to add cornstarch to the flour and whip the egg whites before mixing the batter. They’re small extra steps, but they make a BIG difference for light, fluffy waffles.
- Versatile. This buttermilk waffle batter makes the most delicious waffles as-is, but you can always stir in a handful of chocolate chips, blueberries, or lemon zest to make it your own.

Ingredient Notes
The best waffles start with just a few important pantry ingredients, which I’ll walk you through here. Scroll down to the recipe card after the post for a printable list of the ingredients.
- Cornstarch – Mixing a little cornstarch into all-purpose flour makes these waffles extra light and crisp. You could use only all-purpose or cake flour instead. In this case, you’ll end up with a slightly denser waffle.
- Sugar – I use light brown sugar, but regular granulated sugar works, too.
- Baking Powder and Baking Soda – For the fluffiest waffles, use both baking soda and baking powder. Baking soda reacts with the buttermilk and makes the waffles tender while baking powder lifts the batter.
- Buttermilk – You can’t make buttermilk waffles without buttermilk. It’s the secret to fluffy waffles with tasty, tangy flavor.
- Eggs – You can make this recipe with whole eggs, but I like to separate the yolks from the whites, and then whip the egg whites before folding them into the batter. The waffles are delicious either way, but separating the eggs makes the waffle texture lighter and crispier.
- Butter – I use salted butter (but unsalted will work too) and melt it beforehand. You can also use vegetable oil.
Make a Buttermilk Substitute
If you don’t have buttermilk in the fridge, don’t worry. Make a homemade buttermilk substitute for your waffles by combining 2 tablespoons of lemon juice (or white vinegar) with 2 cups of regular milk. Let the mixture rest for a few minutes, stir, and your “buttermilk” is ready to use.

How to Make Buttermilk Waffles
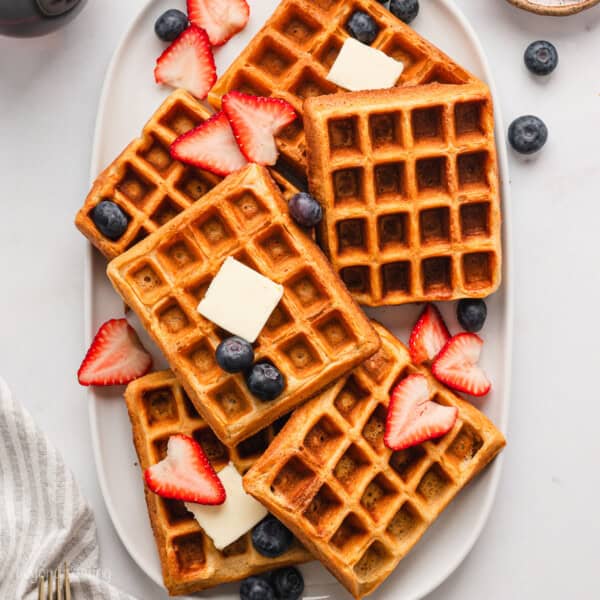
I make smaller, square waffles in my square iron, but you can just as easily make this batter into big Belgium-style waffles. Either way, it takes a few easy steps. Follow along below, and check out the recipe card for printable instructions.
Make the Batter
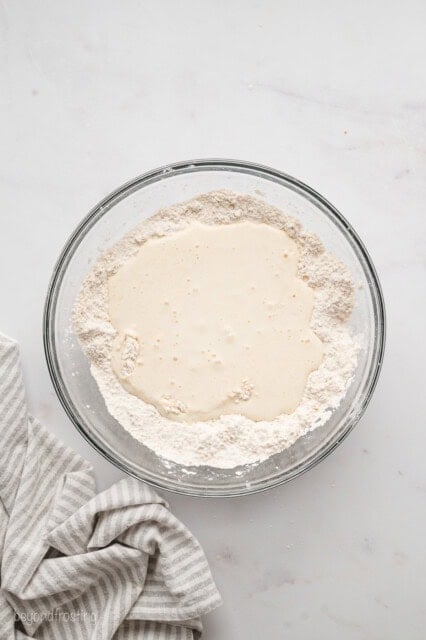
- Mix the dry ingredients. Whisk together flour and cornstarch with sugar, baking powder, baking soda, and a pinch of salt.
- Add the wet ingredients. Separately, mix the buttermilk, egg yolks, vanilla, and melted butter. Add the wet ingredients to the dry ingredients.
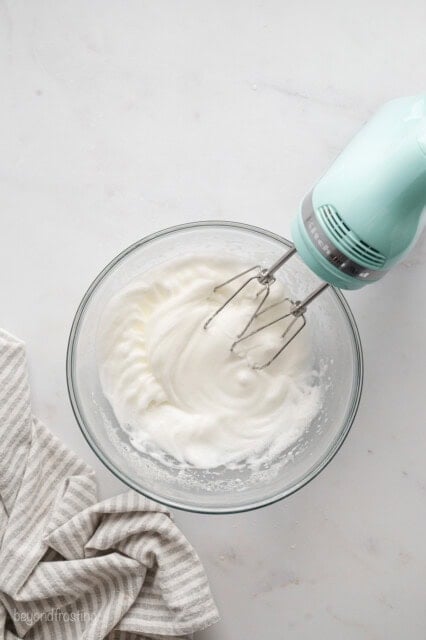
- Whip the egg whites. Take out a third bowl, and whip the egg whites. This step is optional, but, if you have the time, it’s worth it!
- Combine. Fold the egg whites into the batter. Be careful not to overmix, this deflates the egg whites.


Cook the Waffles
With your batter ready, heat your waffle iron as high as it will go and grease the grid with cooking spray. Fill each waffle well about ¾ full with batter. Close the lid, and cook according to your waffle iron manufacturer’s instructions. My waffle iron usually takes between 5-6 minutes.


Tips for Using a Waffle Iron
- Get the right consistency. Your buttermilk waffle batter should be thick, like the consistency of a cake batter. If there’s too much moisture, the waffles won’t get crispy, so add a little extra flour. If it’s too thick, I’ll usually add more buttermilk (up to ¼ cup) to help thin it out.
- Preheat the waffle iron. If your waffles didn’t get crispy, it could be because your waffle iron isn’t hot enough. The key to golden, crispy waffles is striking while the iron is hot (literally). If your waffle maker isn’t fully preheated, your waffles will come out soft and pale.
- Watch the steam. Some waffle makers come with a ready-to-eat indicator. If your model doesn’t have one, wait until the steam escaping out of the iron stops, then lift the lid.
- Check for doneness. Your buttermilk waffles are done when they’re golden and crisp outside, and still tender inside.

Serving Suggestions
Buttermilk pancakes are the perfect canvas for our favorite seasonal waffle toppings: apple pie filling in the fall, fresh berries in the summer, and whipped cream and salted caramel sauce around the holidays. I’ve always enjoyed my waffles topped with butter and plenty of maple syrup (being from Vermont, real maple syrup is a must!). You can be as old-school or as creative as you’d like.

How to Store
- Refrigerate. Store the cooled leftover waffles in the fridge for up to 3 days. I like to keep mine individually wrapped inside an airtight container or freezer bag. They’re great to grab and reheat for breakfast on the go or freeze (see below).
- Reheat. The best way to reheat homemade waffles is in the toaster, the same way you’d reheat frozen waffles!
- Freeze. Buttermilk waffles can be frozen airtight for up to 3 months.
More Breakfast Recipes

Buttermilk Waffles
- Total Time: 30 minutes
- Yield: 8 waffles
- Category: Breakfast
- Method: Waffle Iron
- Cuisine: American
Description
These homemade buttermilk waffles are tender on the inside, crispy on the outside, and irresistibly fluffy. Smother them with maple syrup and toppings for a fun family breakfast, or freeze your waffles to reheat throughout the week.
Ingredients
- 1 ½ cups (210g) All-purpose flour
- ½ cup (64g) Cornstarch
- 3 tablespoons (42g) Light brown sugar, lightly packed
- 1 teaspoon (4g) Baking powder
- 1 ½ teaspoons (6g) Baking soda
- 1 teaspoon (5g) Salt
- 1 ¾ cup (414g) Buttermilk
- 2 Large eggs, separated
- 1 ½ teaspoons (8ml) vanilla extract
- 6 tablespoons (84g) Salted butter, melted
Instructions
- Preheat your waffle iron set to the highest setting.
- In a large bowl whisk together the flour, cornstarch, brown sugar, baking powder, baking soda, and salt until combined. Set aside.
- In a medium bowl combine the buttermilk, egg yolks, vanilla extract, and melted butter.
- In another medium bowl, whip the egg whites with a handheld mixer or stand mixer with a whip attachment, until stiff peaks form. Set aside.
- Pour the wet ingredients into the dry ingredients and mix until just combined. This should be the consistency of a thick cake batter. If it is too thick, add up to ¼ cup more buttermilk until it reaches the correct consistency. Carefully fold in the whipped egg whites. Fold until there are only just a few streaks of egg white left, do not over-mix.
- When the iron is hot, spray the wells with nonstick cooking spray and fill the bottom well with ⅓ to ½ cup of batter, or whatever it takes to fill your wells about ¾ full of batter. Close the lid and cook until your waffle iron tells you the waffle is ready. Waffles should be lightly crispy on the outside and tender and fluffy in the center.
- Serve warm with butter, berries, and warm maple syrup.
Notes
- This recipe yields about 8 small rectangular waffles or 4 large round waffles.
- Buttermilk substitute: Add 2 tablespoons of lemon juice or white vinegar to 2 cups of whole milk. Let this mixture sit for 5-6 minutes until it starts to curdle, then stir.
- Why use cornstarch in waffles? I make my waffles with cornstarch mixed in, for an even lighter and crispier result. Alternatively, you can use exclusively all-purpose or cake flour, minus the cornstarch. The waffles will be a little more dense.
- Do I need to separate the eggs? Separating the eggs and whipping and folding in the whites helps to achieve a light and crispy waffle. I’ve also made this recipe by adding whole eggs to the liquid ingredients, and the waffles are still delicious. You’ll just wind up with slightly less batter, and a slightly denser waffle.
- Storage: Store leftover waffles in the fridge for up to 3 days or in the freezer for up to 3 months. Waffles are best reheated in the toaster like a frozen Eggo waffle.