These Red Velvet Hi Hat Cookies are a soft-baked red velvet cake mix cookies topped with marshmallow frosting and a coating of chocolate. If you love red velvet, you have to try these cake mix cookies!
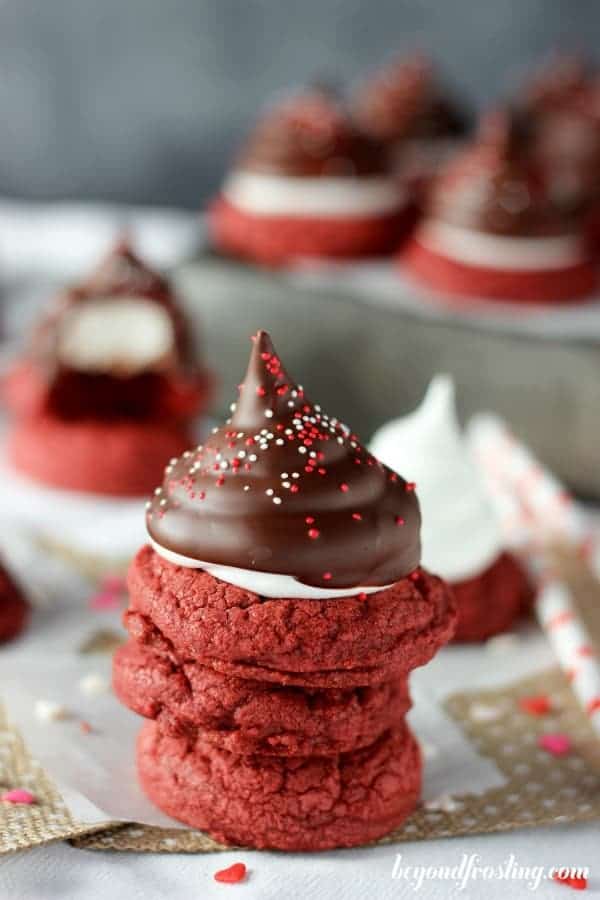
A while ago, I saw these hi-hat cookies over at Cookie and Cups and I just thought they were the cutest. Valentine’s day seems like the perfect time for some Red Velvet Hi Hat Cookies.
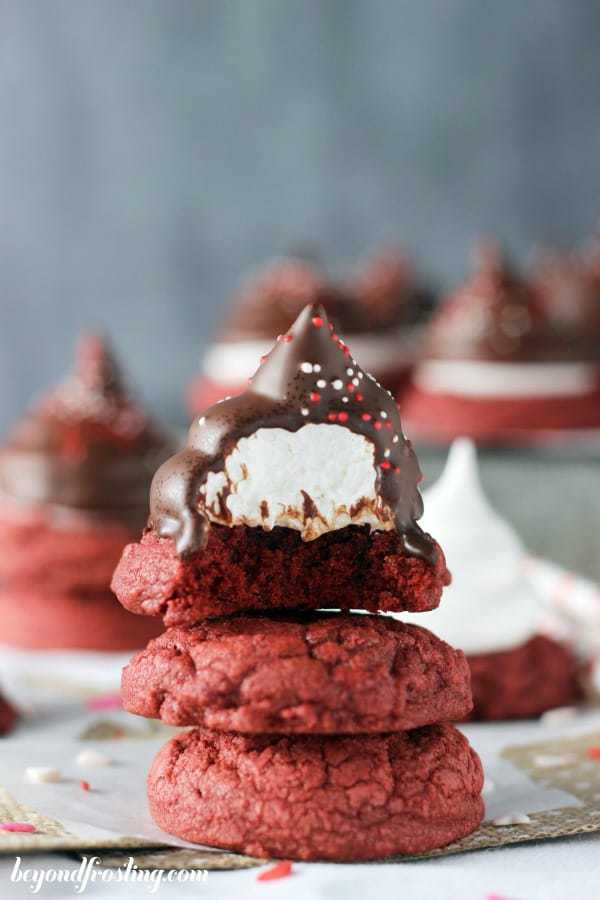
These cookies start with a cake mix. The cookies are soft and pillowy, which is why I think I love them. Plus they’re covered with a fluffy marshmallow buttercream and dipped in a chocolate shell. Aren’t they jus the cutest? If you love red velvet cake, these cookies are a must-try.
A lot of cake mix cookies use a whole box of cake mix in the place of flour. My recipe combines traditional cookie ingredients while incorporating part of a cake mix. I think this is what helps make these cookie nice and thick, and helps prevent them from spreading like some pudding cookies.
You’ll need these cookies to be a little flat on top so you can pipe the frosting. I recommend taking a spoon and gently pressed the top of the dough down before baking.
Marshmallow Frosting
The frosting on these cookies is a fluffy marshmallow frosting. You have two options for the frosting.
If you like a traditional marshmallow frosting, you can make a meringue based frosting using egg whites and sugar. I love the marshmallow frosting from Climbing Grier Mountain. This is the recipe I used for these cookies because it’s light and soft, making it ideal for dipping in chocolate.
The key to working with this meringue based frosting is making sure it’s cooled prior to using, but also using it right away. I find that if it’s stored in a container, it doesn’t keep as well. It’s at the best stiffness when it’s piped right away.
Otherwise you can try making a more traditional buttercream version using butter and marshmallow crème, similar to this Marshmallow Buttercream recipe from I Am Baker.
Chocolate Coating
The magic shell chocolate coating is made with chocolate chips and vegetable oil. When melted, they combine to the perfect consistency for dunking these cookies into. The cool thing about the magic shell is that is can also be used for things like chocolate dipped strawberries or on top of ice cream too!
You could also use candy melts, but I find that taste is not nearly as good as actual chocolate. Also I’d still recommend thinning out the candy melts with the vegetable oil.
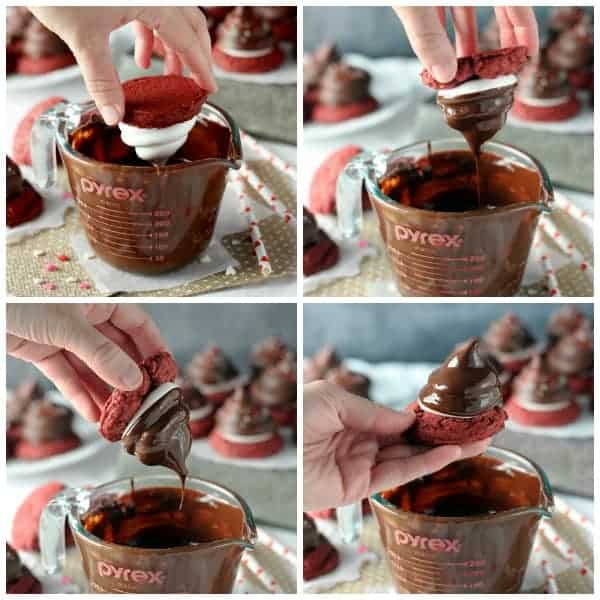
- You want the chocolate to be really thin so it’s not too heavy and it hardens quickly.
- Also I recommend giving the cookies a gentle tap on the counter prior to dipping to help the frosting adhere to the cookie.
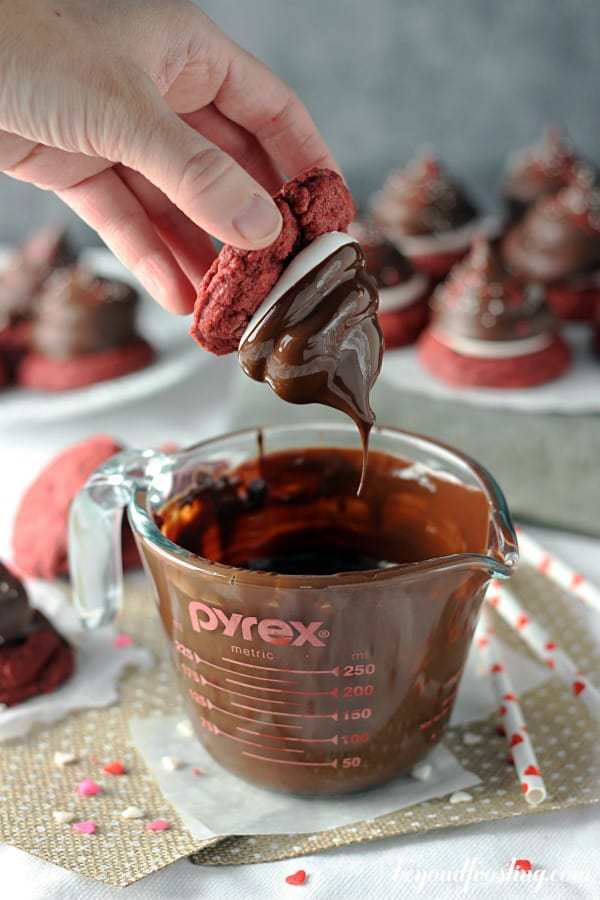
- You’ll also want to be sure to work quickly as you dip and flip. Don’t hang out down there in the bowl of chocolate or you could lose your frosting.
You will notice I used a deep dish for the melted chocolate. This is so I didn’t hit the bottom of the bowl, but you do want to the opening to be wide enough that you can get the cookie dipped while holding it.
Tap off all the extra chocolate and then flip the cookie over and allow to set until hardened. Tapping off the excess chocolate will prevent it from running down the sides too much.
Then let the chocolate cool for a minute before you add the sprinkles.
You can make these cake mix cookies in any flavor! If you don’t care for red velvet, try them with a chocolate cake mix. Sounds delicious, right?
Keep up with all the happenings. Follow Beyond Frosting:
Facebook | Twitter | Pinterest | Instagram
Print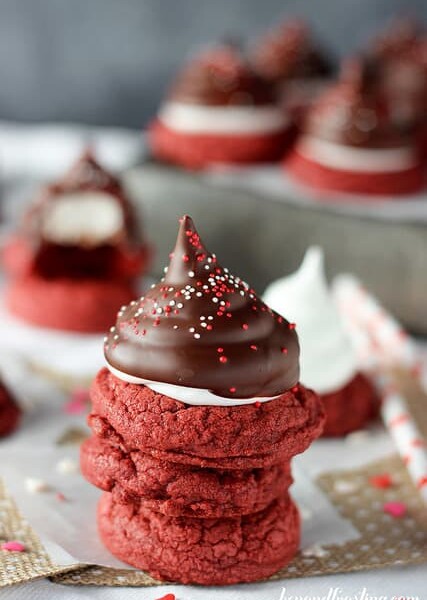
Red Velvet Hi Hat Cookies
- Prep Time: 45 minutes
- Cook Time: 10 minutes
- Total Time: 55 minutes
- Yield: 24-26 cookies
- Category: Cookies
- Method: Baked
- Cuisine: American
Description
These Red Velvet Hi Hat Cookies are a soft-baked red velvet cake mix cookies topped with marshmallow frosting and a coating of chocolate.
Ingredients
For the cookies
- 1 2/3 cups all-purpose flour
- 1 cup red velvet cake mix
- 1 teaspoon baking powder
- ½ teaspoons salt
- 2 tablespoons dark chocolate cocoa powder, such as Hersheys
- ¾ cup unsalted butter, softened
- 1 cup granulated sugar
- 1 large Egg
- 2 teaspoons pure vanilla extract
- Red food color (optional)
For the frosting
- 2 egg white (from large eggs)
- ¼ teaspoon salt
- ¼ cup granulated sugar
- ¾ cup corn syrup
- 1 teaspoon pure vanilla extract
For the magic shell
- 11 ounces dark chocolate chips
- 3 tablespoons vegetable oil
Instructions
- Pre-heat oven to 350° F.
- In a separate bowl, combine flour, cake mix, baking powder, salt and cocoa powder. Stir and set aside.
- Soften butter in the microwave for 15 seconds. Combined softened butter and sugar in a mixing bowl. Beat on medium speed until light and fluffy, 2-3 minutes.
- Add the egg and vanilla extract and beat until well combined.
- Reduce mixer to low speed and slowly add dry ingredients. Once combine, increase speed to medium high and beat for 1-2 minutes until soft dough forms. Add red food coloring for a deeper red color if desired.
- Spoon 2 tablespoons of cookie dough onto baking sheet lined with parchment paper or silicone baking mat. Gently press the top of the cookies down with the back of spoon or spatula. Bake at 350° F for 10-12 minutes. Allow cookies to cool on the pan for several minutes before transferring to a wire rack. Cool completely.
- For the marshmallow frosting: In a stand mixer using a whisk attachment, beat the 2 egg whites with salt until foamy and frothy.
- Gradually add sugar and continue beating until soft peaks form.
- Heat the corn syrup in a glass microwave-safe dish until it bubbling (almost boiling). Then slowly pour the corn syrup over egg white mixture, a little at a time while beating on high speed until harder peaks form. Finally add the vanilla extract and beat until glossy.
- For the magic shell, Combine chocolate chips and vegetable oil in a tall, microwave safe dish or cup. Melt for 45 seconds and stir until smooth. If not completely melted, microwave for another 15 seconds. Magic shell should be completely smooth and easily run off a spoon.
- Fill a large piping bag, fitting with an open round tip (or slice off the end) and pipe marshmallow frosting on cooled cookies.
- Quickly dip the frosting in magic shell and tap off excess chocolate on the side of the dish. Immediately flip cookies over and allow chocolate to harden. Garnish with sprinkles if desired prior to the chocolate settling.
Notes
- Cookies can be stored in an airtight container for three days.
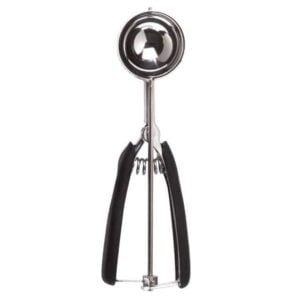
- In order to achieve round cookies, I used a medium cookie scoop. After scooping, be sure to press down the top of the dough slightly to create a flat top.
- The marshmallow frosting is from Climbing Grier Mountain
Filed Under:
Recipes you might like from my friends:
Chocolate Kiss Cupcakes from The Cake Blog
Red Velvet Cake Batter Fudge from Chocolate Chocolate and More
Red Velvet Cheesecake Cookie Cups from Mom on Timeout





These are gorgeous!!
Thanks Des!
I don’t think I could deal with the stress of making treats for a wedding, but I could definitely deal with the stress of assembling these cookies. (I get easily stressed.) They look delicious!
HHAHA! I know what you are saying Megan!
Ohhh. This red velvet hi hat cookies look delicious. I’m pretty amazed that the frosting didn’t budge when you had it upside down dipping it. Gorgeous cookies!
It’s the craziest thing Miranda! The marshmallow frosting is perfect for this!
These are so creative! I always mean to try hi-hat desserts and I haven’t done it yet. A red velvet cookie is the perfect starting point for those! They’re pretty and festive, and they look AMAZING.
Oh Thank you Sarah! They really are so fun! I hope you try it some time!
Ok, those are seriously too cute! Love love love the frosting to cookie ratio here 🙂
You got that right Jocelyn!
I always love all of your hi hat recipes and these cookies are so cute! I would probably eat the entire batch if I made them. Way to go on your first wedding of the year! I’m always impressed that you make so many cupcakes!
Oh my gosh, Thank you Ashley! One down, one to go!
Oh wow! They’re so cute!
Thank you Marye!
I would totally worry that my frosting would fall off! I am going to have to give these a try sometime!
Hi Beth! I did have one that fell into the magic shell, but just because the chocolate was not thin enough to dip. I just scooped it out, it didn’t ruin the whole batch, thank gosh!
These are so cute. My daughter would love them. Biting through the hat would be her favorite part.
HAHA! It is pretty fun! It is the perfect excuse to dive in face first!
I’m obsessed with these! They’re so cute and I love the presentation 🙂
Oh thank you Medha!
Hi-hat cookies! These are so cute and I love that they’re red velvet. These are so cute and fun for Valentine’s Day!
Thank you so much Beth!
Ok, you’ve convinced me I need to try cake mix cookies at least one time in my life .. cuz lets be honest these look fantastic AND so stinking cute! Need to make these for my sons class for valentines day! 🙂
That would be so fun! They are super easy to make. I just replaced some of the flour in the recipe with cake mix. Other recipes use a whole box of cake mix!
These are seriously the cutest cookies ever. Love that hi hat! And doing a wedding. *shudder* Go you!
Thank you Dorothy!
You are pretty darn fantastic for pulling off that wedding, and these are the cutest things ever. Pinned!
Oh you are too kind! Thank you Jocelyn!
Julianne, I love these!!! I’ve always wanted to make hi-hat cookies!!! these are so pretty and WOW you baked all the desserts for your boyfriend’s friend’s wedding?! You rock, seriously. congrats!!
Yes I did Alice! This was the 3rd wedding I have done. Only 1 more to do this year (so far!). I love it but it can be stressful too.
Oh so purty Julianne! They turned out so nice.
Hope you had a fab weekend!
Thank you Melanie! I was really happy with them!
Pretty much the prettiest cookies ever! And I can just imagine that anyone would flip over these if they got them on Valentine’s. I know I want them!
Thank you Mir! I love the different colors too!