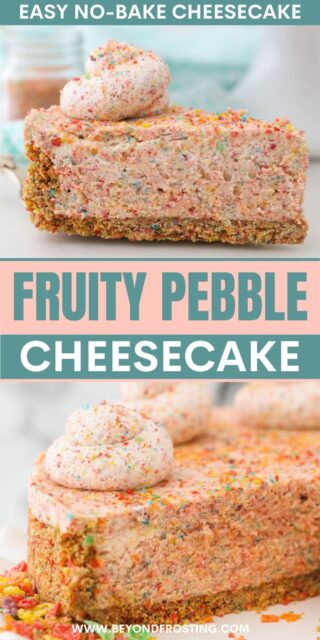
This No Bake Fruity Pebbles Cheesecake is LOADED with Fruity Pebbles! Find them in the crust, the filling, and the whipped cream topping. Fun and easy to make!

The Best Fruity Pebbles Cheesecake
Ever since I shared my Fruity Pebbles Cookies, I’ve been hooked on the idea of incorporating Fruity Pebbles into desserts. When I saw a Fruity Pebbles Cheesecake on Instagram from a pie place in LA called The Pie Hole, I knew I had to try making it.
I decided to turn it into a no bake cheesecake to make it even easier (and because this is the perfect dessert for summer and who wants to heat up the kitchen in July?!).

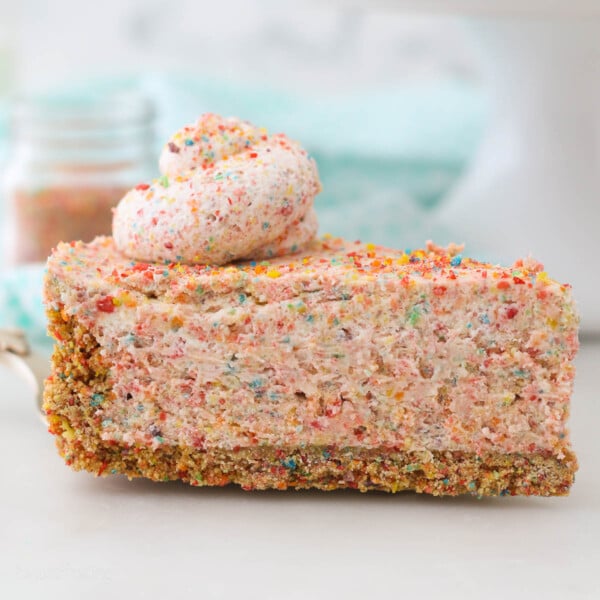
Instead of the traditional graham cracker crust, I opted for Nilla Wafers because they’re just a little bit sweeter, and I made sure Fruity Pebbles were in all aspects of the cheesecake.
There are Fruity Pebbles in the Nilla wafer crust, in the sweet, creamy filling, AND in the whipped cream topping.
The end result? This cheesecake is unbelievable! If you enjoyed Fruity Pebbles as a kid, you’re going to adore this dessert. I have no problem eating the rainbow when it comes to this Fruity Pebble Cheesecake!

Key Ingredients
This no bake cheesecake really requires just a handful of ingredients.
- Nilla Wafer crumbs – Along with Fruity Pebble crumbs, these are used to create a sweet but sturdy base.
- Fruity Pebbles – The star of the recipe! Used in the crust, filling, and whipped topping!
- Heavy cream – Heavy cream helps the filling hold its shape and is also used for the whipped cream topping.
- Powdered sugar – Sweetens the filling while making it nice and smooth.
- Cream cheese – It’s important to use full-fat cream cheese as low-fat will not hold the form as well.

Recipe Variations
Here are two alternatives to making this easy cheesecake recipe.
- Make the crust with graham crackers. You can easily swap the Nilla Wafer crumbs for graham cracker crumbs in the crust. I just prefer the texture and flavor of Nilla Wafers, as they’re a bit sweeter.
- Make it with Cocoa Pebbles. Prefer the chocolate version to the original cereal? You can easily make this into a Cocoa Pebbles cheesecake by swapping out the cereal.
How to Make No Bake Fruity Pebbles Cheesecake
Making this Fruity Pebbles cheesecake is easier than you may think!
Step 1: Make the crust
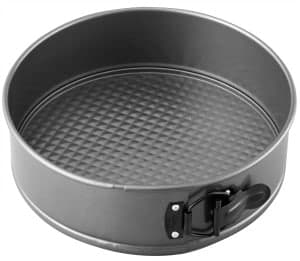
Separately grind the Nilla Wafers and Fruity Pebble cereal into fine crumbs then combine them together. Pour melted butter over the crumbs, stirring to coat well. Press into the bottom and up the sides of a greased springform pan, lined with parchment paper. Refrigerate while preparing the filling.


Step 2: Make the Filling
- Make the whipped cream. Beat the cold heavy cream until soft peaks form. Add in the powdered sugar and beat until stiff peaks form.
- Make the cream cheese mixture. In a separate bowl, mix the cream cheese until it’s free of lumps. Add in the sugar until well incorporated. Finish with 2 tablespoons of heavy cream.
- Combine the filling. Fold the whipped cream into the cream cheese mixture, until well-mixed. Stir in crushed Fruity Pebbles.
- Chill. Transfer into the prepared crust. Refrigerate for at least 4 hours.


Step 3: Make the Topping
Make the whipped cream topping by beating heavy cream until soft peaks form, then adding powdered sugar and crushed Fruity Pebbles. Beat until stiff peaks form. Use a large star round tip to decorate the cheesecake. Chill until the cheesecake is set.


Tips for Success
Here are a few tips for making the best no bake cheesecake.
- Chill the equipment. When making homemade whipped cream, I always recommend chilling the bowl and whisk for at least 15 minutes. This helps keep the heavy cream cold and form the stiff peaks easier.
- Use softened cream cheese. It’s important to allow the cream cheese to soften so that you have a smooth, creamy texture without any lumps.
- Crush the Fruity Pebbles. For the filling, I recommend using Fruity Pebble crumbs instead of the full cereal. I’ve made it both ways and when using the cereal without crushing it, the texture can sometimes be a bit chewy. Crushing the cereal into crumbs solves this problem.
- Chill overnight. While 4 to 6 hours is the minimum chill time, I highly recommend preparing your no-bake cheesecake a day in advance so that it has extra time to set fully.

How to Store
Your Fruity Pebbles Cheesecake can be refrigerated for up to 3 days. Keep it tightly wrapped in plastic wrap.
You can also freeze this cheesecake. Allow it to chill completely in the fridge, then freeze in the springform pan for a few hours. Remove from the springform pan, double wrap tightly in plastic wrap, and wrap again in aluminum foil. Freeze for up to a month and thaw overnight in the fridge.
More Fruity Pebbles Desserts:
- Fruity Pebbles Ice Cream Cake
- Fruity Pebbles Pound Cake
- Easy Fruit Pebble Marshmallow Cookies
- Fruity Pebble Poke Cake
No-Bake Fruity Pebbles Cheesecake
- Prep Time: 30 minutes
- Chill Time: 4 hours
- Total Time: 4 hours 30 minutes
- Yield: 8-10 slices
- Category: Cheesecake
- Method: Refrigerator
- Cuisine: American
Description
This No Bake Fruity Pebbles Cheesecake is LOADED with Fruity Pebbles! Find them in the crust, the filling, and the whipped cream topping. Fun and easy to make!
Ingredients
For the Crust:
- 1 cup (104g) Nilla Wafer crumbs
- 2 cups (72g) Fruity Pebble Cereal
- ½ cup (113g) unsalted butter, melted
For the Filling:
- 1 ½ cups plus 2 tablespoons (384g) heavy whipping cream, divided
- ¾ cup (98g) powdered sugar
- 2 cups (72g) Fruity Pebbles cereal
- 16 ounces (452g) full-fat cream cheese, at room temperature
- ½ cup (95g) granulated sugar
For the Topping:
- ¾ cup (117ml) heavy whipping cream
- ½ cup (18g) Fruity Pebbles cereal
- 2 tablespoons (16g) powdered sugar
Instructions
For the Crust:
- Grind the Nilla Wafers cookies into a fine crumb using a food processor or blender. Do the same for the Fruity Pebble cereal. Combine together in a large bowl. Pour the melted butter over the crumbs and stir until well coated.
- Line the bottom of a 9-inch springform pan with parchment paper. Gently grease the sides of pan with a thin coating of cooking spray. Press the crumbs into bottom and up the sides of the pan. Refrigerate the crust until the filling is prepared.
For the Filling:
- Grind the Fruity Pebble cereal into a fine crumb using a food processor or blender.
- Make the whipped cream. Put your mixing bowl and whisk in the freezer for 10 to 15 minutes until it is completely cold. Beat 1 1/2 cups heavy cream on medium-high speed for a couple of minutes until it reaches soft peaks. Add the powdered sugar and continue beating until stiff peaks form. Set aside.
- In the mixing bowl, beat the cream cheese on medium-high speed until it’s free of lumps, and scrape down the bowl occasionally. Add the granulated sugar and continue beating until well incorporated. Add 2 tablespoons of heavy whipping cream and beat until incorporated, scraping down the bowl as needed.
- Fold the prepared whipped cream into the cream cheese mixture. Gently turn it over from the bottom to the top until it’s well mixed, then add the crushed cereal. Pour the cheesecake filling into the prepared crust. Cover this and refrigerate for a minimum of 4 hours.
For the Topping:
- Grind the Fruity Pebble cereal into a fine crumb using a food processor or blender.
- Make a second batch of whipped cream following the method described above. Chill the mixing bowl. Beat the heavy cream on medium-high speed for a couple of minutes until it reaches soft peaks. Add the powdered sugar and cereal and continue beating until stiff peaks form. Use a large open star round tip, to decorate the cheesecake.
Notes
- You can use graham crackers in place of Nilla Wafers
-
Storing: This cheesecake can be refrigerated for up to 3 days. Keep it tightly wrapped in plastic wrap.
- For the original recipe, you can download it here.
-
Freezing: You can also freeze this cheesecake. Allow it to chill completely in the fridge, then freeze in the springform pan for a few hours. Remove from the springform pan, double wrap tightly in plastic wrap, and wrap again in aluminum foil. Freeze for up to a month and thaw overnight in the fridge.
Nutrition
- Serving Size: 1 slice
- Calories: 622
- Sugar: 32.9 g
- Sodium: 292.7 mg
- Fat: 46.9 g
- Carbohydrates: 47.2 g
- Fiber: 0.3 g
- Protein: 5.6 g
- Cholesterol: 130.8 mg

This was super easy and super fun to make. It smelled absolutely delicious. It’s the kind of dessert where it’s really fun to make once and to try. But I probably wouldn’t make it again. It’s not that it wasn’t good. It was really good. But there’s probably more delicious desserts to try…
Hi Amber, thank you so much for your honest review!
Such an easy recipe to follow! Made this three times, once for Christmas dessert, and had two friends order one from me as well. Was a HUGE hit with everyone!
Yeees Megan! That’s awesome! Thank you!
Step 3 for the filling says to beat 3/4 cup of cream but the ingredient list says 1 1/2 cup?im assuming to just use the full 1 1/2 Butkus t wanted to be sure!!
Thanks for pointing that out Amanda, it should be 1 1/2 cups for the batch of whipped cream.
I made this last night. I put it in the fridge and let it chill overnight. It was good besides the cereal being too soggy. Would you suggest eating immediately at 4 hours after being chilled?
Hi Tiffany- Actually this will happen regardless of when you serve it. Cereal is meant to absorb moisture- think about how quickly your cereal absorbs milk once you add it. So it will result in a “chewier” texture
I made this tonight. It’s so yummy. I also tried it with Cocoa Pebbles. It’s even better…lol The cereal flavored part is essential to this one though. And you have to make two batches of it too. One to fold in and the other to put on top. Positively delicious!!
Both cheesecakes were wonderful.
Courtney you are my people!!! Thank you!!
Would this recipe work in a regular pie tin? I know it would be too much but maybe it could make two? Or do you think if I halved the recipe it would be enough to make one regular pie tin? Looks delicious but I don’t have my spring form pan!
Hi Chelsea, you could probably get 2 pies in a regular or pre-made pie plate. You can also make it in a 9-inch square pan!
Have a safe trip! This recipe is so fun!
Have a great and safe trip! Have you ever tried gel nails? They are amazing. Last beautifully for a couple of weeks and they are waterproof/un-chippable within seconds of being applied at the salon. So worth it. You just put cuticle oil on in the evenings. So nice not to worry about it and know that your nails will look great every time you look at them. It’s the little things sometimes.
And this Pebbles Cheesecake? YUM!
I bake and play guitar, so I can only get my nails done if I’m on a break from both at the same time. And I give you mad props for going back after the smudging, because I would’ve just cried in the car. Yay for you!
And this cheesecake…whoa. Happy times!
Your photos are STUNNING, girl. Seriously AMAZING. And I love this idea SO much!