
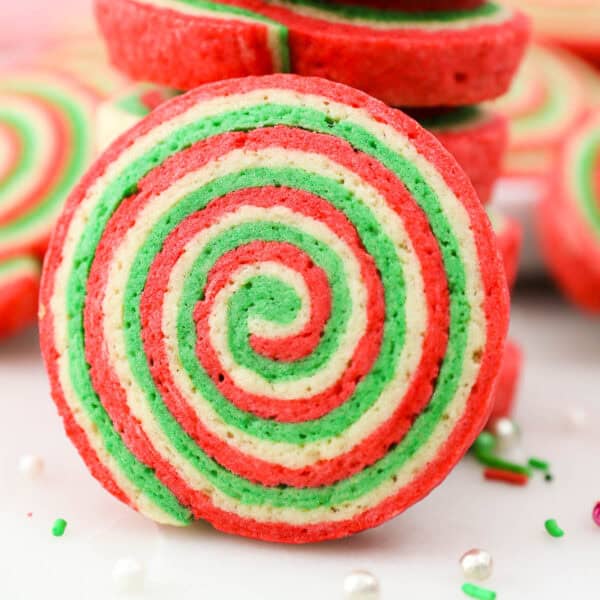
These lightly sweetened and delicious Christmas Pinwheel Cookies put a merry, festive spin on a classic! This easy recipe for pinwheel sugar cookies instantly brightens up any holiday cookie platter.
Want to see a chocolate vanilla version of these cookies? Try my Nana’s classic pinwheel cookie recipe!

Easy Christmas Pinwheel Cookies
Today, I’m taking my cut-out sugar cookie recipe and infusing it with the holiday spirit! These Christmas pinwheel cookies put a bright, festive spin on the original. They’re soft, chewy homemade sugar cookies dyed merry red and green for Christmas and rolled up into perfect pinwheels. This is an easy and fun cookie recipe that never fails to zhoosh up a cookie plate with a pop of color.
One bite and you’re hit with all the beloved flavor of a classic sugar cookie. These have crunchy, buttery edges with soft, subtle sweet flavor, and that lovely melting feeling that comes as the crumb dissolves in your mouth.
Why You’ll Love This Pinwheel Christmas Cookie Recipe
What makes this one of my best Christmas cookie recipes? These pinwheel cookies are:
- Festive. You can’t find a more perfect cookie for the holidays than these easy pinwheel sugar cookies! The red and green swirls give off serious North Pole/Whoville vibes.
- Easy to make. This is a fuss-free recipe for Christmas sugar cookies with a (literal) twist. Just prep the dough, roll it out, slice, and bake.
- Perfect for gifting. These fun Christmas cookies are made with love and are the best for spreading Christmas cheer to friends and family. Who doesn’t love a bright and colorful batch of cookies?

Ingredient Notes
Below is an overview of the main ingredients you’ll need when making your Christmas pinwheel cookies. Please refer to the recipe card for the full list and details!
- Unsalted Butter – For the best results, this should be at room temperature
- Milk – You can use whole milk or 2% milk when making the cookie dough. The milk is added last to help bring the dough together.
- Flavoring – You can flavor your sugar cookie dough with your choice of almond extract or vanilla extract. For the best flavor, I recommend using real extracts and not the imitation kind.
- Food Coloring – For dying your cookie dough Christmassy colors.
What Kind of Food Coloring Do You Use for Cookies?
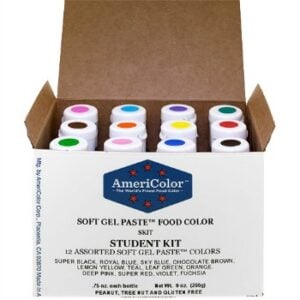
Gel food coloring yields the brightest and most vibrant colored cookie dough. Americolor, Chef Mate, and Wilton are all great brands and my go-to’s for cookie recipes like this one.

How to Make Christmas Pinwheel Cookies
Let’s go over how to make Christmas pinwheel cookies step-by-step.
Step 1: Color the Cookie Dough
First, you’ll prepare a batch of sugar cookie dough and divide it so that you can color it using your gel colors. Here’s how to do it:
- Make the cookie dough. Beat together butter and sugar, then mix in the eggs and your flavoring extract of choice. Whisk together baking soda and milk, then add this mixture to the other wet ingredients. Lastly, mix in the salt, flour, and two additional spoonfuls of milk. The dough should be stiff yet pliable.
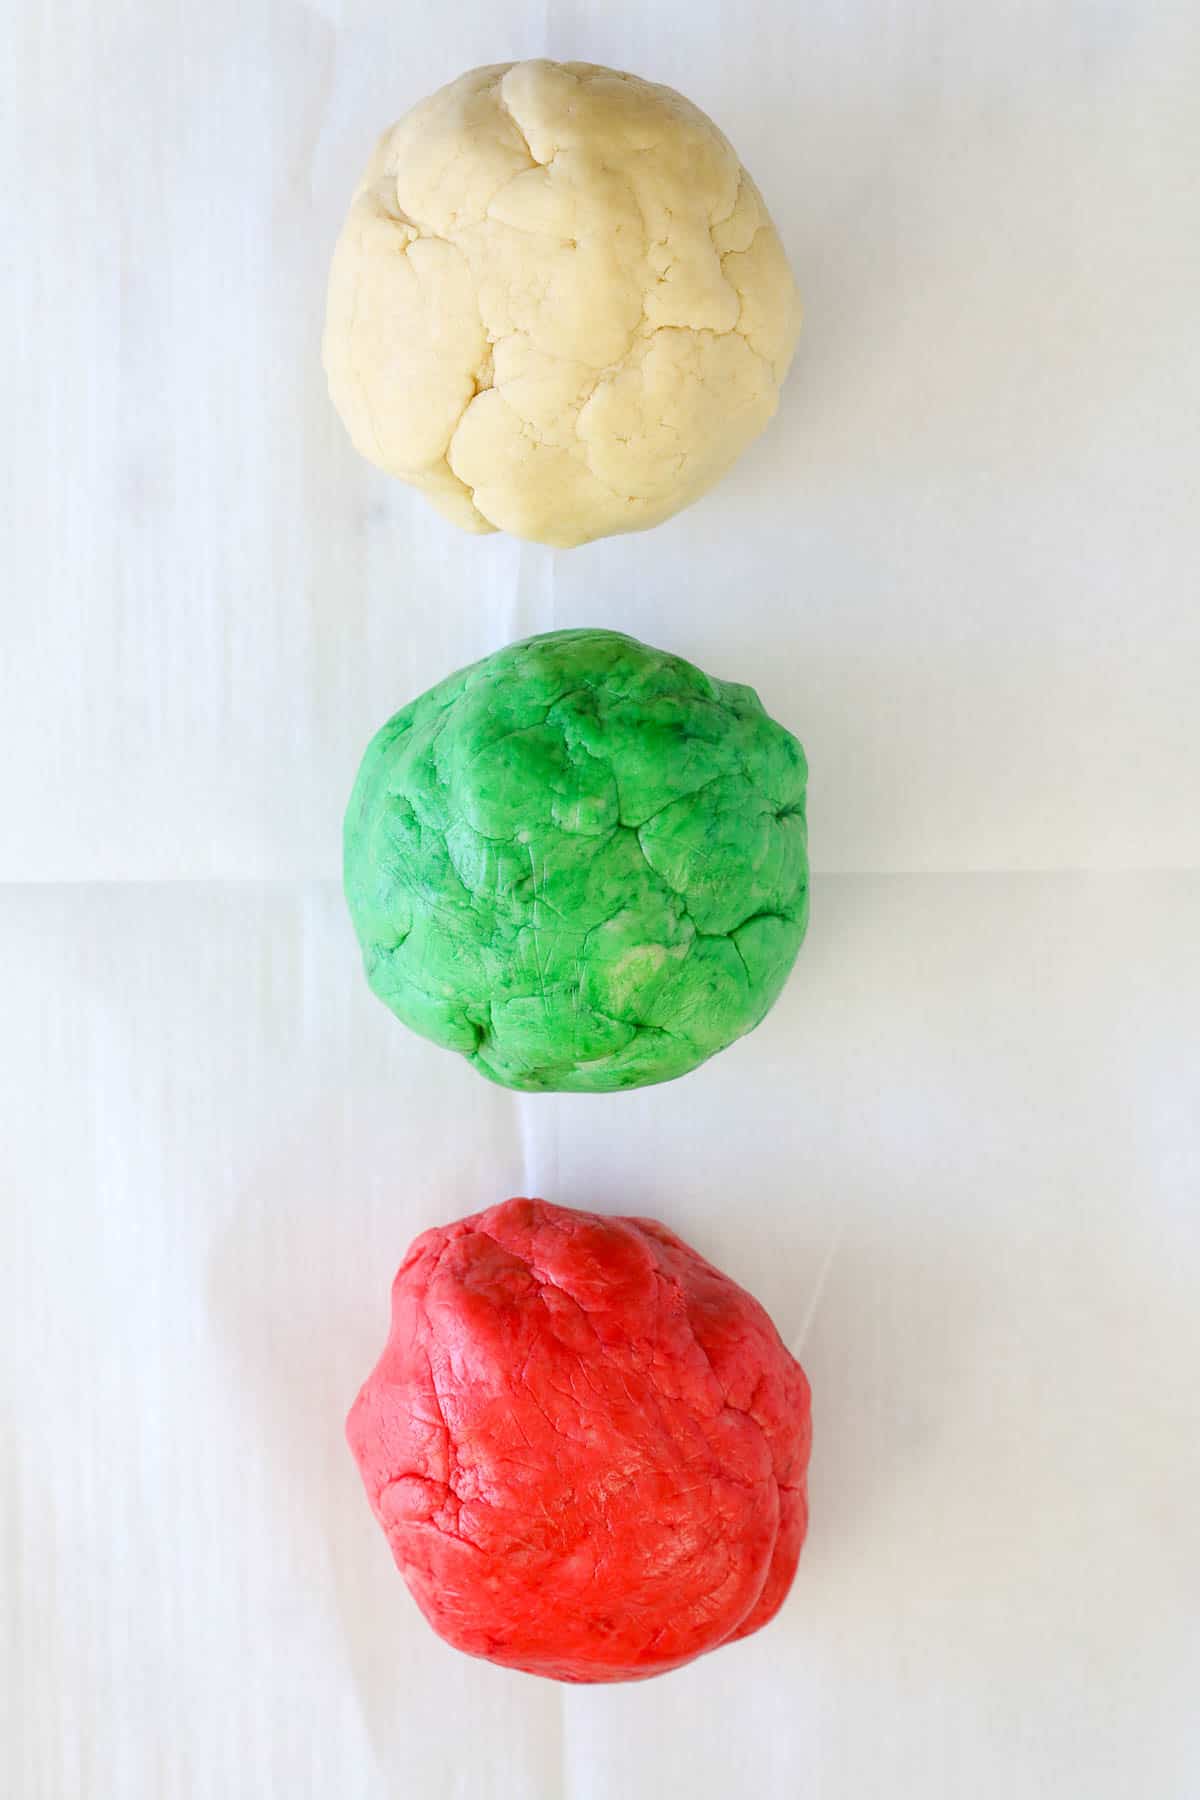
- Color the dough. Divide the dough evenly into three balls. Color the first dough ball red and the second ball green. The third dough ball can be left uncolored. See the tips section later for added guidance on dying your cookie dough.
Step 2: How to Roll a Pinwheel Cookie
Once your dough is colored and ready, it’s time to roll it out and stack it. I find this is easiest to do if I divide the three dough colors in half first. The smaller amounts are easier to work with and it helps prevent cracking.


- Flatten out the dough. Begin with a red piece and roll the dough into a longish rectangle, about a quarter-inch thick. Repeat with the white dough and the green dough, laying each color over top of the red rectangle.
- Assemble. Once all the layers are stacked, place a layer of parchment paper overtop and roll the stacked cookie dough to about ⅜” thick. Use a knife or a pizza cutter to trim away the uneven edges.


- Roll. Now, you’ll roll up the pressed cookie dough into a tight log. Continue to roll and elongate the dough log with your hands. Finally, wrap the dough log in plastic wrap and place it into the fridge to chill. Place the log with the seam side down.
Step 3: Slice and Bake the Pinwheels
Finally, your refrigerated cookie dough is ready to bake! Get your cookies sliced and ready to go while you preheat the oven:

- Slice the cookies. After about an hour, get your cookie dough out of the fridge and cut the log into even-sized slices. Lay the pinwheels out on a baking sheet lined with a silicone baking mat.
- Bake. Bake the pinwheel cookies in a 350ºF oven for 9-11 minutes, until slightly browned on the bottom. Be careful you don’t overbake them! Once they’re out of the oven, leave the cookies to rest on the baking sheet for a few minutes before transferring them to a wire rack.
Tips for Perfect Pinwheel Cookies
Some additional tips to follow when rolling out and baking the best Christmas pinwheel cookies:
- Don’t overmix the cookie dough. Make sure that you don’t overwork the cookie dough, as this can cause it to crack. You want your pinwheel sugar cookie dough soft and pliable.
- To help with sticking, roll the cookie dough out between two pieces of parchment paper. You can also give the dough a light dusting with flour if needed.
- When dying the cookie dough, use a mixer until combined, and then finish working the gel color in with your hands. It’s fine if there are some minor streaks. You won’t notice them once the dough is rolled out.
- Gel colors tend to stain skin. So, be sure to use food-safe gloves when coloring your dough, to avoid red and green fingers!
- Use a food scale to divide the dough. This way, you’ll wind up with an even amount of dough for each color.
- Work in smaller amounts. Dividing the three dough colors in half before rolling and layering will make it easier to work with, for less cracking and breakage.
- White in the middle. These look best when the undyed color is in the middle.
- For even more festive flair, roll the pinwheel logs in Christmas-colored sprinkles or nonpareils before wrapping and chilling.

Common Questions
These cookies are made with good old, classic sugar cookie dough and food coloring. I use my favorite sugar cookie recipe, but if you can make pinwheel cookies using your own family’s recipe, too.
Pinwheel cookie dough must be chilled before baking, so this is a great Christmas cookie to make up to 48 hours ahead. See the section below for details.

Can I Make the Cookie Dough In Advance?
Yes! You can prepare the sugar cookie dough up to 2 days ahead. I recommend following the recipe right up until you’ve rolled the dough logs. Then, store the plastic-wrapped dough in the fridge until you’re ready to slice and bake it. You can also freeze the rolled and wrapped dough for up to 1 month.
How to Store Pinwheel Christmas Cookies
- To Store. Store your Christmas pinwheel cookies airtight on the counter for up to 5 days. These are great to portion into mason jars for easy decorating and gifting!
- Freeze. Store the baked pinwheel cookies in a freezer-safe container or resealable freezer bag and freeze them for up to one month. I recommend storing them with parchment paper between layers to prevent sticking. Thaw the cookies at room temperature before serving.
More Christmas Cookie Recipes
- Classic Spritz Cookies
- Peanut Butter Kiss Cookies
- Easy Pinwheel Cookies
- Peppermint Crunch Sugar Cookies
- Cranberry Almond Shortbread Cookies
Christmas Pinwheel Cookies
- Prep Time: 60 minutes
- Cook Time: 11 minutes
- Total Time: 1 hour 11 minutes
- Yield: 36-40 cookies
- Category: Cookies
- Method: Oven
- Cuisine: American
Description
These festive Christmas pinwheel cookies are dyed vibrant red and green for the ultimate holly jolly treat! Instantly brighten up a holiday cookie platter with this easy sugar cookie recipe.
Ingredients
- 1 cup (226g) unsalted butter, at room temperature
- 1 cup (190g) granulated sugar
- 1 teaspoon baking soda
- 6 tablespoons (60m) milk, divided
- 2–3 teaspoons (5-10ml) almond or vanilla extract
- 2 large eggs
- ½ teaspoon salt
- 5 cups (600 g) all-purpose flour
- Gel colors for dying (see notes)
Instructions
- Beat the butter and sugar on medium-high speed until the sugar is dissolved and creamy.
- Add the eggs and flavored extract to the butter and beat until all ingredients are well incorporated. Then, in a small glass dish, dissolve the baking soda in 4 tablespoons of milk and add to the mixture, beating until combined.
- Finally, add the salt followed by the flour 1 cup at a time, then 2 tablespoons of milk, and mix until a stiff dough forms.
- Divide the dough into 3 equal-sized balls. Dye one red, and one green and leave one undyed using either your mixer or your hands (see notes for additional tips). Then divide each ball in half (it’s easier to work with smaller portions)
- Starting with the red, roll each individual color into a rectangular shape, about 10 inches long and 6 inches wide, and ¼ inch thick. Roll between two pieces of parchment paper and lightly dust with flour if needed to prevent sticking.
- Proceed to roll out the undyed color, and then place it directly on top of the red. It’s helpful to use a rolling pin to transfer the dough. Next, do the green.
- Once all the colors are stacked, cover with a second piece of parchment paper and proceed to roll out the cookie dough again until it’s about 3/8 inch thick. Trim off the excess sides with a knife or pizza cutter.
- Starting with the narrow edge, roll tightly into a log. Once rolled, use your hands to roll again, to expand the log. Wrap tightly with plastic wrap and place seam side down and chill for at least 30-60 minutes.
- Preheat oven to 350°F. Line a baking sheet with a silicone baking mat.
- Remove the dough from the fridge. Using a sharp knife, cut them into 3/8-inch wide slices. If they are misshaped, gently roll them between your hands to shape them into a circle. Place about 1-inch apart on the baking sheet.
- Bake at 350° for 9-11 minutes just until the bottoms turn slightly brown. Allow to cool for 5 minutes before transferring to a wire rack to cool completely.


Notes
- Flavor: These are not a very sweet cookie. Don’t skimp on the extract. To make them sweeter you can add a vanilla glaze or dip them in chocolate.
- Gel colors: I recommend using gel colors to dye the dough so it’s bright and vibrant. Americolor, Chef Mate, and Wilton are my go-to’s.
- If using a stand mixer to color the dough, mix just until the color comes together, and then work in your hands until it’s well mixed. I recommend using food-safe gloves as the gel colors will color the skin. If you have some streaky dough, that’s fine you won’t even notice when it rolled out.
- If you have a food scale, weighing the dough into equal sizes is best. My dough weighed 1260g, so 420 grams of each color. Then divide in half again after dyed.
- It’s easier to work with this in smaller amounts, to get the dough to the proper thickness. If the dough is too thick, it will tear once you roll it, which causes uneven baking and cracks in the cookies.
- Make-ahead: Sugar cookie dough can be made up to 2 days in advance, but I recommend rolling to logs and then storing, as the dough is easiest to work with right after it’s mixed. The prepared dough logs can be wrapped in plastic wrap and frozen for one month.
- Storing: Baked cookies can be stored at room temperature in an airtight container for up to 5 days or frozen for 1 month.
Nutrition
- Serving Size: 1 Cookie
- Calories: 135
- Sugar: 5.8 g
- Sodium: 73.4 mg
- Fat: 5.6 g
- Carbohydrates: 19 g
- Fiber: 0.5 g
- Protein: 2.3 g
- Cholesterol: 23.9 mg


Everything went as planned, you are right they are not sweet. Im put more sugar in the next batch.
Thank you Darleen!
How many cookies does this recipe yield?
30-40 cookies (see recipe card)
Genuinely these taste so bad, they look beautiful but 5 cups of flour was far to much they tasted like flour and almond not at all sweet, all you could taste was the flour with a hint of the almond. I’m not sure if a mistake was made when writing out the recipe because all of the other pinwheel recipes I’ve come across since making these only call for 3 cups of flour to the one cup of sugar. I’ve yet to find one that calls for more cups of flour when the sugar ratio is so low, it’s a shame, because as I say, they came out so bright and vibrant. It’s just a shame that they tasted so bad.
Hi Laura, the recipe is correct, it’s actually my cutout cookie recipe which I’ve made since I was a kid. It’s not an overly sweet sugar cookie, but rather soft and buttery, flavored with the extract of your choice. I’m sorry you didn’t enjoy these.
I made these tonight. They turned out so great!!! They are beautiful!! Thank you for all your tips and notes!!! I will definitely make these again!
YEAH Holly!! Thank you, this just made my day!