
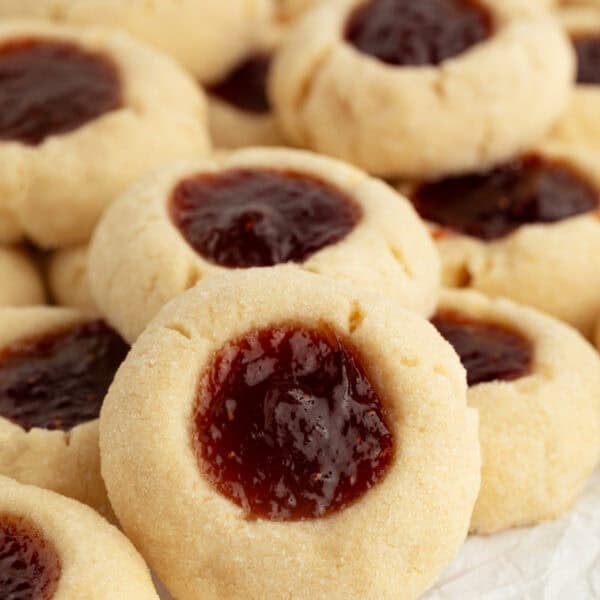
Thumbprint cookies are buttery, melt-in-your-mouth shortbread cookies with a smooth filling that you can customize with your favorite fruit jam, caramel, or chocolate. Roll the cookie dough in sugar for extra sweetness and crunch!

Buttery, fruit-filled thumbprint cookies are classic holiday cookies, but I honestly love making them year-round. They’re similar to shortbread or butter cookies, with a texture that melts in your mouth. Meanwhile, the tart-fruity jam in the center is just sweet enough, and you can swap jam for any of your favorite fillings to make chocolate thumbprint cookies, caramel, and more.
This recipe is tried-and-true, yielding soft-baked cookies without cracks and without spreading. I used to roll these cookies in powdered sugar, but I’ve come to crave the crunch of a granulated sugar coating!
Why These Thumbprint Cookies Will Leave Their Mark
- Less cracking. Cracked dough is one of the biggest challenges with thumbprint cookies, but I’ve tested and retested this recipe to get it right. I’ll share my trick for perfectly indented cookies, plus more tips.
- So many filling options! You can fill these thumbprint cookies with fruit jam, chocolate, caramel, and more. I even have a version with peppermint cream.
- Easy dough. The dough is easy to mix, and you can make it in advance, since it needs to chill in the fridge. Freezing the dough is another option that makes it easy to pop these cookies into the oven, whether it’s the busy holiday season or beyond.

Ingredient Notes
Here are the key ingredients you’ll need to make classic thumbprint cookies. Scroll to the printable recipe card for the full recipe with exact measurements.
- Butter – Unsalted and softened to room temperature. If you’re using salted butter, consider omitting the salt that comes later in the recipe, or adding less. Another option is to swap regular butter with browned butter.
- Sugar – Rolling the cookie dough in extra sugar makes the outside crispy and adds extra sweetness to the shortbread cookie. While you can skip it without affecting how the cookies bake, I love the extra texture it gives.
- Egg Yolks – Just the yolks, but extra richness and moisture in the cookies. My egg yolks were chilled, just out of the fridge (eggs are easiest to separate this way). Since the cookie dough needs to be chilled, I didn’t find that the cold yolks made a difference in this recipe.
- Cornstarch – I use cornstarch in my thick chocolate chip cookies recipe to keep the baked cookies extra soft. It works the same in the shortbread for these thumbprint cookies.
- Jam or Preserves – I used Smucker’s Strawberry Preserves, but you could also use homemade strawberry filling. You can customize the thumbprint cookies with any fruit jam or preserves you’d like, including raspberry, blueberry, marmalade, etc. You can also make thumbprint cookies with chocolate filling, which you’ll need to add after baking. More on this below.

Optional Fillings
You can fill your indented cookie dough with so many different fillings; it just depends on what you have and what you like.
- Jams: Strawberry, raspberry, apricot, blueberry, cherry, blackberry, grape jelly – any flavor goes, whether you prefer sweet or tart.
- Preserves: Any of the above flavors, or orange marmalade or lemon preserves.
- Fruit butters: Apple butter is a popular one, but you’ll find peach, pear, and plum butters also. Pumpkin butter would be wonderful in the fall! I’d suggest making the indent in the cookies slightly deeper if you’re using fruit butter, to avoid overflow.
- Chocolate and caramel: To fill these thumbprints with chocolate ganache or salted caramel, you’ll need to bake them first. Follow the directions to prepare the cookie dough, and skip adding the filling until the cookies are completely cool. You can even prepare the caramel or chocolate the night before, so it has time to cool fully, too.
- Lemon curd: Lemon curd can be added to the thumbprint cookies before or after baking. Baking will set the curd, while adding it to the baked cookies preserves the curd’s fresh lemon flavor.

How to Make Thumbprint Cookies
These are the steps to prepare the buttery shortbread dough, then fill and bake it to make perfect homemade thumbprint cookies.
- Mix the cookie dough. Start by creaming the butter until it’s completely smooth and lump-free, then beat in the sugar, followed by the egg yolks and vanilla. Next, mix in half the flour along with the cornstarch and salt. Once combined, add the remaining flour. Since this is shortbread dough, it should be smooth and crumbly, but not dry.
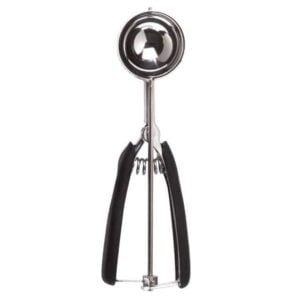
- Portion the cookies. Now, use a medium cookie scoop (1 ½ tablespoons) to scoop the dough into balls. Roll the dough smooth in your hands. If you’d like, fill a small bowl with a few tablespoons of sugar and roll the cookie dough balls in that before adding them to a lined baking sheet.


- Indent the cookies. Dip the back of a ½-teaspoon measuring spoon in flour first, then use it to press a small indent into the top of each cookie dough ball. Work carefully so you don’t end up with too many cracks in the dough.
- Fill the thumbprints. Give your jam a good stir, and then add about 1 teaspoon of filling to the indent in each cookie. Place the baking sheet with the filled cookies into the fridge for 45 minutes so the cookies firm up. This keeps them from spreading in the oven.


- Bake. When it’s time to bake, arrange the cookies two inches apart on two lined baking sheets. I was able to fit 12-13 cookies per sheet. Leave one sheet in the fridge while the first sheet bakes. Bake the cookies at 375ºF for 13-15 minutes. The cookies should just start to turn golden at the edges.
- Cool. Rest the thumbprint cookies on the baking sheet for 15 minutes (moving them too soon can cause them to crumble). Afterward, move the cookies to a wire rack to finish cooling before storing them.
Baking Notes for Perfect Cookies
- Temperature matters. I tested baking these thumbprints at both 350°F and 375°F. The higher temperature yielded a cookie that didn’t spread as much and had a smoother jam texture. An oven thermometer comes in handy to check that your oven is at the right temperature.
- Slow and steady. I found that if I pressed on the cookies too hard or too fast when making the indentation, the cookies were more likely to form large cracks.
- Bake one sheet at a time. Bake one sheet of thumbprint cookies at a time so that they bake evenly. If you only have one baking sheet, allow it to cool completely before you bake your next batch. Otherwise, the cookies will spread on the hot pan.
- Don’t overbake. For softer cookies, bake for 13 minutes. The longer the cookies bake, the taller they get and the more likely the jam may split on top from the indentations rising too much. The cookies continue to firm up while they cool on the baking sheet.
- Use a piping bag. To easily fill the cookies with jam, transfer the jam to a piping bag. See my tutorial that covers how to use a piping bag for tips. You can also use a ziplock baggie with the corner snipped off.
- Don’t overfill the cookies. Aim for about 1 teaspoon per indentation. Otherwise, if you overfill the cookies with jam, it will leak over the sides.

Frequently Asked Questions
Yes. You can prepare and shape the cookie dough and refrigerate it up to 48 hours before baking. Just add the filling when it’s time to bake! You can also wrap and freeze the cookie dough for up to 2 months. Thaw the dough overnight in the fridge, then portion, fill, and bake the thumbprint cookies as usual.
Chilling is super important when making thumbprint cookies. Chilling hydrates the flour in the dough, which in turn prevents the cookies from spreading while they bake. It’s key to soft, chewy cookies with golden, set edges that hold their shape.
These thumbprint cookies shouldn’t spread if they’ve chilled for long enough and stay chilled until they go into the oven. That being said, if you find your cookies have spread a little, use the edge of a glass or a large cookie cutter to gently reshape the cookies right when they come out of the oven.

Storage
- At room temperature. Once the thumbprint cookies are cooled, store them in an airtight container on the countertop for up to 3 days.
- Refrigerate. Alternatively, you can store the cookies in the fridge for up to 5 days.
More Favorite Cookie Recipes
Thumbprint Cookies
- Prep Time: 30 minutes
- Cook Time: 14 minutes
- Total Time: 44 minutes
- Yield: 25
- Category: Dessert
- Method: Oven
- Cuisine: American
Description
Thumbprint cookies are buttery, melt-in-your-mouth shortbread cookies rolled in sugar and filled with your favorite fruit jam. Customize the filling with chocolate, caramel, and more!
Ingredients
- 1 cup (226 grams) unsalted butter, softened
- ¾ cup (143 grams) granulated sugar, plus 3 tablespoons to roll the cookies in (optional)
- 2 large egg yolks
- 1 teaspoon vanilla extract
- 2 ⅔ cups (320 grams) all-purpose flour, spooned and leveled
- 2 tablespoons (15 grams) cornstarch
- ¼ teaspoon salt
- ½ cup jam or preserves of your choice
Instructions
- Cream the butter in a large mixing bowl with an electric mixer until smooth. Make sure there are no lumps in the butter. Mix in the sugar until light and fluffy.
- Add the egg yolks and vanilla extract, and mix until combined. Then, mix in half of the flour, the cornstarch, and the salt. Mix until the flour is incorporated before adding the remaining half of the flour. Continue mixing until the dough looks crumbly but feels smooth to the touch. It shouldn’t be sticky, nor should it be dry.
- Use a medium (1 ½ tablespoons) cookie scoop to scoop out level scoops of dough, and roll the dough in your hands until round, smooth balls are formed. Roll the balls of dough in the extra granulated sugar, if desired.
- Place the dough balls about 1 inch apart on a small, parchment-lined baking sheet or cutting board. Use the back of a ½ teaspoon measuring spoon dipped in flour to press round indentations on top of each ball of dough, pressing carefully so you don’t get too many large cracks in the dough.
- If you are opening a new jar of jam or preserves or if it has just come out of the fridge, stir it up to help loosen the jam. Then, spoon about 1 teaspoon of jam into each indentation. Place the cookies in the fridge for at least 45 minutes.
- Preheat oven to 375°F. Line two large cookie sheets with parchment paper. Place the chilled cookies on one of the cookie sheets about 2 inches apart. I was able to fit 12-13 cookies on each sheet. Bake the cookies, one sheet at a time, for 13-15 minutes, or until the cookies start to turn golden around the bottom edges.
- Let the cookies rest on the cookie sheet for 15 minutes before transferring them to a cooling rack to cool completely before serving or storing in an airtight container.

Notes
Recipe Tips
- Press slowly. I found that if I pressed on the cookies too hard or too fast when making the indentation, the cookies were more likely to form large cracks.
- Bake one sheet at a time. Bake one sheet of thumbprint cookies at a time so that they bake evenly. If you only have one baking sheet, allow it to cool completely before you bake your next batch. Otherwise, the cookies will spread on the hot pan.
- Don’t overbake. For softer cookies, bake for 13 minutes. The longer the cookies bake, the taller they get and the more likely the jam may split on top from the indentations rising too much. The cookies continue to firm up while they cool on the baking sheet.
- Use a piping bag. To easily fill the cookies with jam.
- Don’t overfill the cookies. Aim for about 1 teaspoon per indentation. Otherwise, if you overfill the cookies with jam, it will leak over the sides.
Storage Instructions
- At room temperature. Once the thumbprint cookies are cooled, store them in an airtight container on the countertop for up to 3 days or refrigerate cookies in the fridge for up to 5 days.
Nutrition
- Serving Size: 1 Cookie
- Calories: 169
- Sugar: 9.5 g
- Sodium: 28.5 mg
- Fat: 8.2 g
- Carbohydrates: 22.1 g
- Fiber: 0.5 g
- Protein: 1.8 g
- Cholesterol: 35.7 mg


Simply the best cookies ever! You just can’t stop eating them they are that good!
Thank you so much for your kind words, Brooklyn! I’m so glad you enjoyed these cookies.