This Candy Cane Poke Cake is an easy-to-make, holiday dessert you don’t want to miss. Made-from-scratch cake is soaked with sweetened condensed milk, then topped with whipped cream, hot fudge drizzle, and Andes Peppermint Crunch candy.
Looking for more easy holiday desserts ideas? Try these Easy Christmas Cupcakes or get creative and make a Christmas Tree Cupcake Cake.

Easy Holiday Poke Cake Recipe
When it comes to holiday recipes, the easier the better. With family get-togethers to attend, gifts to buy, AND food to make, the holiday season can start to feel too busy really quickly.
Well, thanks to this Candy Cane Poke Cake recipe, you can have dessert taken care of in no time at all!
This 30-minute cake is ultra moist, has the perfect amount of peppermint flavor, and is topped with whipped cream, hot fudge sauce, and Andes Peppermint Crunch. Holiday dessert doesn’t get better than that!
Why is it Called Poke Cake?
Because you literally poke holes in the cake!
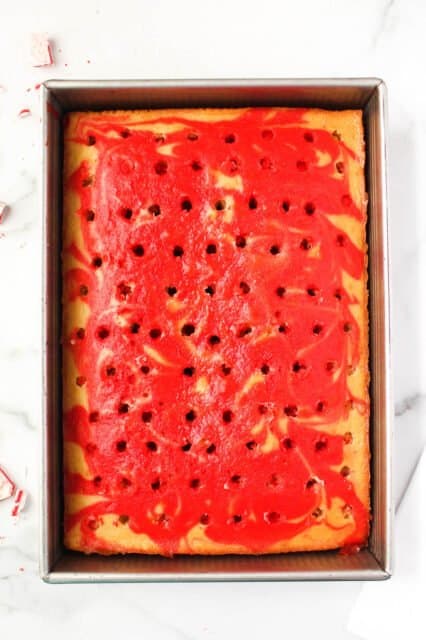
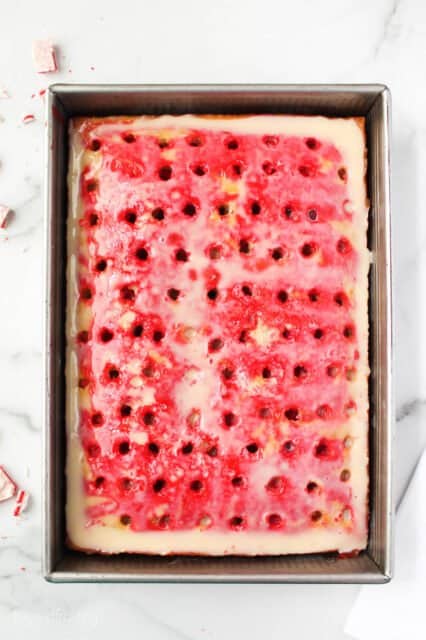
After the cake is baked, you’ll use the end of a wooden spoon to poke holes all over the top of the cake, which are then filled with sweetened condensed milk. This adds tons of moisture and sweetness.
Love poke cake? Check out my other quick, easy, and delicious poke cake recipes!

What You’ll Need
Here’s everything you will need for this poke cake recipe:
For the Cake:
- Granulated Sugar
- Vegetable Oil
- Unsalted Butter – melted before incorporating into the batter.
- Eggs and Egg Yolks – you will need two whole eggs and then two additional egg yolks which help make the cake super moist.
- Vanilla Extract
- Peppermint Extract
- Sour Cream – sour cream is the secret to making this cake super moist without overdoing it on the sweetness.
- All-Purpose Flour
- Baking Powder and Baking Soda
- Salt
- Buttermilk or regular milk. Buttermilk creates a creamier, more moist texture, but if all you have is regular milk that will work too.
- Red Food Gel – I prefer to use Amerigel coloring. The gel is thicker than traditional food coloring so it prevents the batter from thinning out. I use the color “super red.”
For the Filling & Topping:
- Sweetened Condensed Milk – make sure you’re using sweetened condensed milk, not evaporated milk. They are not the same!
- Heavy Whipping Cream
- Powdered Sugar
- Vanilla Extract
- Hot Fudge Sauce and Andes Peppermint Crunch – both optional for garnish (but highly recommended.)
How to Make Peppermint Poke Cake
For the Cake: Combine the wet ingredients. In a large mixing bowl, combine sugar, oil, butter, eggs, egg yolks, peppermint extract, and vanilla extract. Mix together, then beat in sour cream until well combined.
Combine the dry ingredients. In a separate bowl, combine all the dry ingredients.
Mix dry and wet ingredients and add buttermilk. Alternating between the dry ingredients and the buttermilk (about 1/2 at a time), add both into the bowl with the wet ingredients. Stir dry ingredients each time until just combined.
Reserve 1/2-cup for red dye. Remove 1/2-cup of the batter and place in a separate bowl. Add in red food coloring and beat until red.
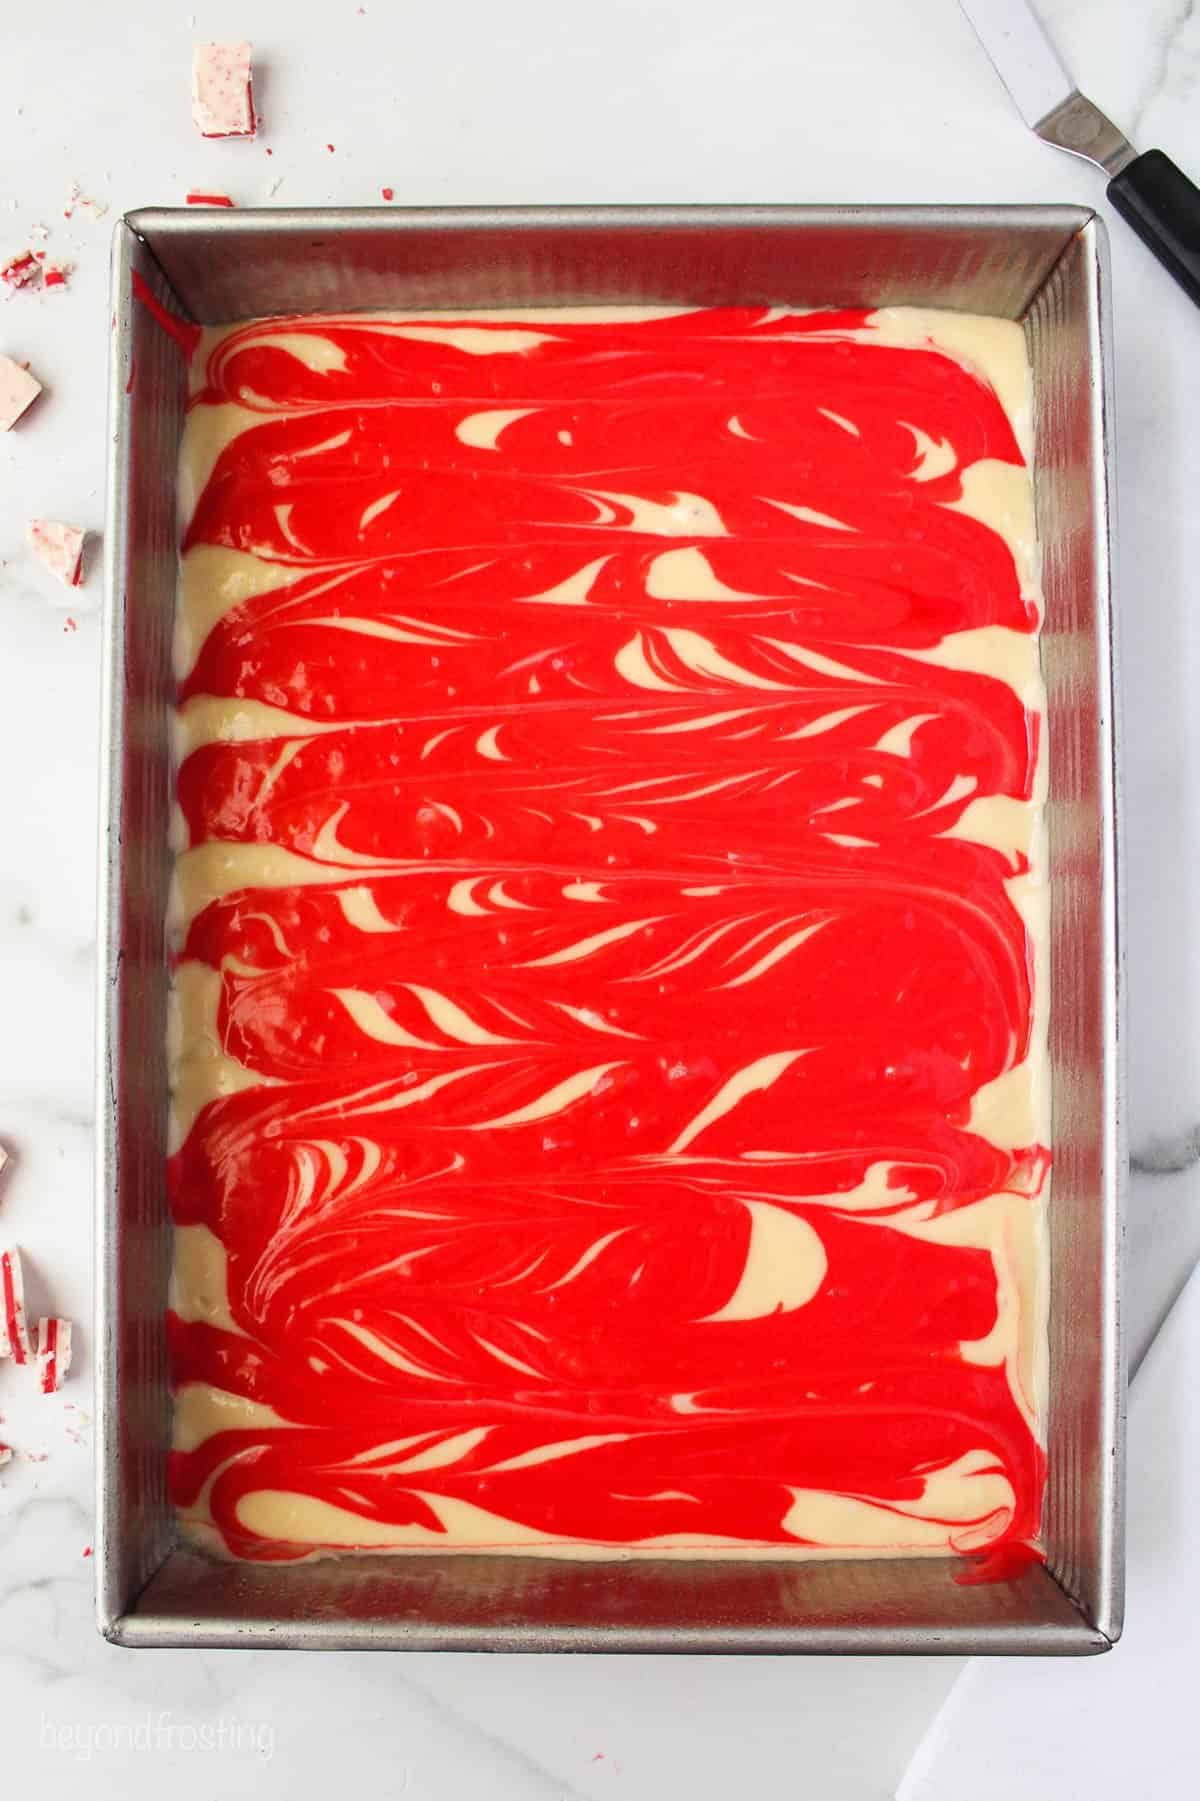
Swirl batters together. Pour the un-dyed cake batter into a 9×13-inch cake pan, pour the red cake batter on top, then use a knife to swirl the two together.
Bake. Bake at 350ºF for 25-30 minutes, remove, then cool completely.
For the Topping
- Make whipped cream. Place a mixing bowl in the freezer for 5-10 minutes to chill. Pour the heavy whipping cream into the chilled bowl, then use an electric mixer to beat until the cream thickens to soft peaks.
- Add powdered sugar. Mix in powdered sugar slowly and beat on high speed until stiff peaks form.
To Assemble
- Add holes. Use the end of a wooden spoon or another round object to poke holes all over the cake.
- Add sweetened condensed milk. Pour the sweetened condensed milk over the top and allow it to soak in.
- Add toppings. Top the cake with whipped cream, hot fudge sauce, and crushed Andes Peppermint Crunch candy.
My Best Tips for Poke Cakes
Here are a few tips for making the best possible poke cake!
- Don’t swirl too much. Swirl the un-dyed batter and dyed batter together just enough to create contrast but not too much. If you over-mix the two, you’ll just end up with a red cake.
- Use a wooden spoon to poke holes. I recommend using the handle end of a wooden spoon to poke holes so they’re large enough for the sweetened condensed milk to really soak in.
- Use sweetened condensed milk. Make sure you use sweetened condensed milk, not evaporated milk, for the topping. Evaporated milk is thick and creamy but has no added sugar. Sweetened condensed milk is much sweeter and more syrup-y which is exactly what you need to create the best texture and flavor.
- Don’t skip the toppings. The whipped cream, hot fudge sauce, and Andes Peppermint Crunch are optional but highly recommended. Seriously. Don’t leave em out!

How Far in Advance Can I Make This?
Poke cakes are wonderful recipes to make ahead of time and alleviate some of the holiday baking preparations. The cake itself can be baked up to two days in advance and kept in an airtight container at room temperature or in the refrigerator. Once the filling and toppins are added it must stay refrigerated.
How to Store Finished Cake
This candy cane poke cake will last in an airtight container in the fridge for up to 3 days. It has to be stored in the refrigerator due to the topping.
Can I Freeze This?
You can, you will just want to freeze it before adding the filling and topping.
To freeze, bake as directed, cool completely, then wrap in plastic wrap and aluminum foil. Freeze up to 3 months. When you’re ready to bake, thaw in the fridge, poke holes in the cake, then top with sweetened condensed milk and whipped topping.
Print
Candy Cane Poke Cake
- Prep Time: 10 minutes
- Cook Time: 20 minutes
- Total Time: 30 minutes
- Yield: 12-15 slices
- Category: Desserts
- Method: Baked
- Cuisine: American
Description
This Candy Cane Poke Cake is an easy-to-make, festive dessert you don’t want to miss. Made-from-scratch cake is soaked with sweetened condensed milk, then topped with whipped cream, hot fudge drizzle, and Andes Peppermint Crunch candy.
Ingredients
For the Cake
- 1 1/2 cups (285g) granulated sugar
- ½ cup (118 ml) vegetable oil
- 2 tablespoons (28g) unsalted butter, melted
- 2 large eggs
- 2 egg yolks
- 2 teaspoons (10ml) pure vanilla extract
- ½ teaspoon peppermint extract
- 1/2 cup (118ml) sour cream
- 2 ½ cups (350g) all-purpose flour
- 2 teaspoons (7.5g) baking powder
- 1 teaspoon (4g) baking soda
- 1 teaspoon (5g) salt
- 1 1/3 cup (315ml) buttermilk or milk
- Red food gel
For the Filling & Topping
- 1 can (14oz) sweetened condensed milk
- 1 ½ cups (354ml) heavy whipping cream
- ¾ cups (98g) powdered sugar
- 1 teaspoon (5ml) pure vanilla extract
- Hot fudge sauce for garnish (optional)
- Andes Peppermint Crunch for garnish (optional)
Instructions
For the Cake
- Preheat oven to 350° F.
- In a large mixing bowl, combine the sugar, vegetable oil, butter, eggs, egg yolks, peppermint extract, and vanilla extract. Beat on medium speed until the eggs and oil are well incorporated and the batter is lighter in color (about 2 minutes.)
- Scrape down the bowl as needed, then mix in the sour cream. Mix until well-combined.
- In a separate bowl, combine the dry ingredients.
- Alternate adding half the dry ingredients and half the buttermilk at a time. Mix until the flour is just incorporated. Use a spatula to scrape down the sides of the bowl and stir the batter from the bottom to the top to ensure it’s well mixed.
- Remove 1/2-cup of the batter and place in a separate bowl. Add in food coloring and mix until it is bright red.
- Pour the un-dyed cake batter into a 9×13-inch cake pan, then pour the red cake batter on top. Use a knife to gently swirl the batters together.
- Bake at 350ºF for 25-30 minutes or until a toothpick comes out clean. Remove from the oven and allow to cool completely.
For the Topping
- Place a mixing bowl into the freezer to chill for 5-10 minutes. Pour in the heavy whipping cream, then use an electric mixer to beat the heavy cream at medium-high speed until it thickens to soft peaks.
- Slowly add in the powdered sugar and vanilla extract and continue to beat until stiff peaks form.
To Assemble
- Use the handle end of a wooden spoon to poke holes all over the top of the cake.
- Drizzle on sweetened condensed milk and allow it to soak in.
- Top with prepared whipped cream, hot fudge sauce, and Andes Peppermint Crunch candy.
Notes
- Don’t swirl too much. Swirl the un-dyed batter and dyed batter together just enough to create contrast but not too much. If you over-mix the two, you’ll just end up with a red cake.
- Use a wooden spoon to poke holes. I recommend using the handle end of a wooden spoon to poke holes so they’re large enough for the sweetened condensed milk to really soak in.
- Use sweetened condensed milk. Make sure you use sweetened condensed milk, not evaporated milk, for the topping. Evaporated milk is thick and creamy but has no added sugar. Sweetened condensed milk is much sweeter and more syrup-y which is exactly what you need to create the best texture and flavor.
- Don’t skip the toppings. The whipped cream, hot fudge sauce, and Andes Peppermint Crunch are optional but highly recommended. Seriously. Don’t leave em out!
Nutrition
- Serving Size: 1 slice
- Calories: 437
- Sugar: 36.1g
- Sodium: 358mg
- Fat: 20.8g
- Carbohydrates: 57.6g
- Fiber: 0.7g
- Protein: 6.4g
- Cholesterol: 91.2mg








This cake was not good at all I followed the directions to a tee and the cake was not good and the frosting and topping called for 1 tsp of vanilla which was incorrect and totally ruined the topping
Hi Joyce- sorry you didn’t like the cake, this is my favorite yellow cake recipe, just with a little bit of peppermint extract. Not sure why the vanilla extract would ruin the topping- it’s a pretty standard whipped cream recipe.
thx… have a blessed Christmas and a Happy New Year! 🙂
Hi Sandy- I added these to the recipe!
Thanks for correcting — much appreciated — now others will know. 🙂
Might be a good idea when questions are submitted – address them in the recipe — I just hate reading through the comment area to find out info.
Thanks again! 🙂
Thank you Beth! I am so excited for vacation!
They are so good right?! Thanks for stopping by Jocelyn!
Thank you Dorothy! Happy early Thanksgiving to you guys!
Me to!
Thanks so much Gloria! I am ready for winter 🙂
Oh my gosh you have to at least try them!
Thanks Donna!
Thanks Trish! I hope you guys had a good vacation as well!
I think they will like it Patty! I hope you have a nice Thanksgiving!
This looks fun to make, bake and partake (in). Another beautiful display of your talent.
Thank you Debbie!
it looks yummy!
Thanks Dina!