This isn’t your typical Christmas Tree Cake – it’s made up of individual cupcakes! You can turn any batch of cupcakes into an adorably festive holiday treat with this creamy whipped frosting and Christmas tree decorating guide.
The Cutest Cupcake Christmas Tree Cake
Decorating the Christmas tree is one of my favorite holiday activities – tied with baking, of course. This easy Christmas tree cake involves both! It’s so fun to transform a basic batch of cupcakes into a festive and delicious work of art.
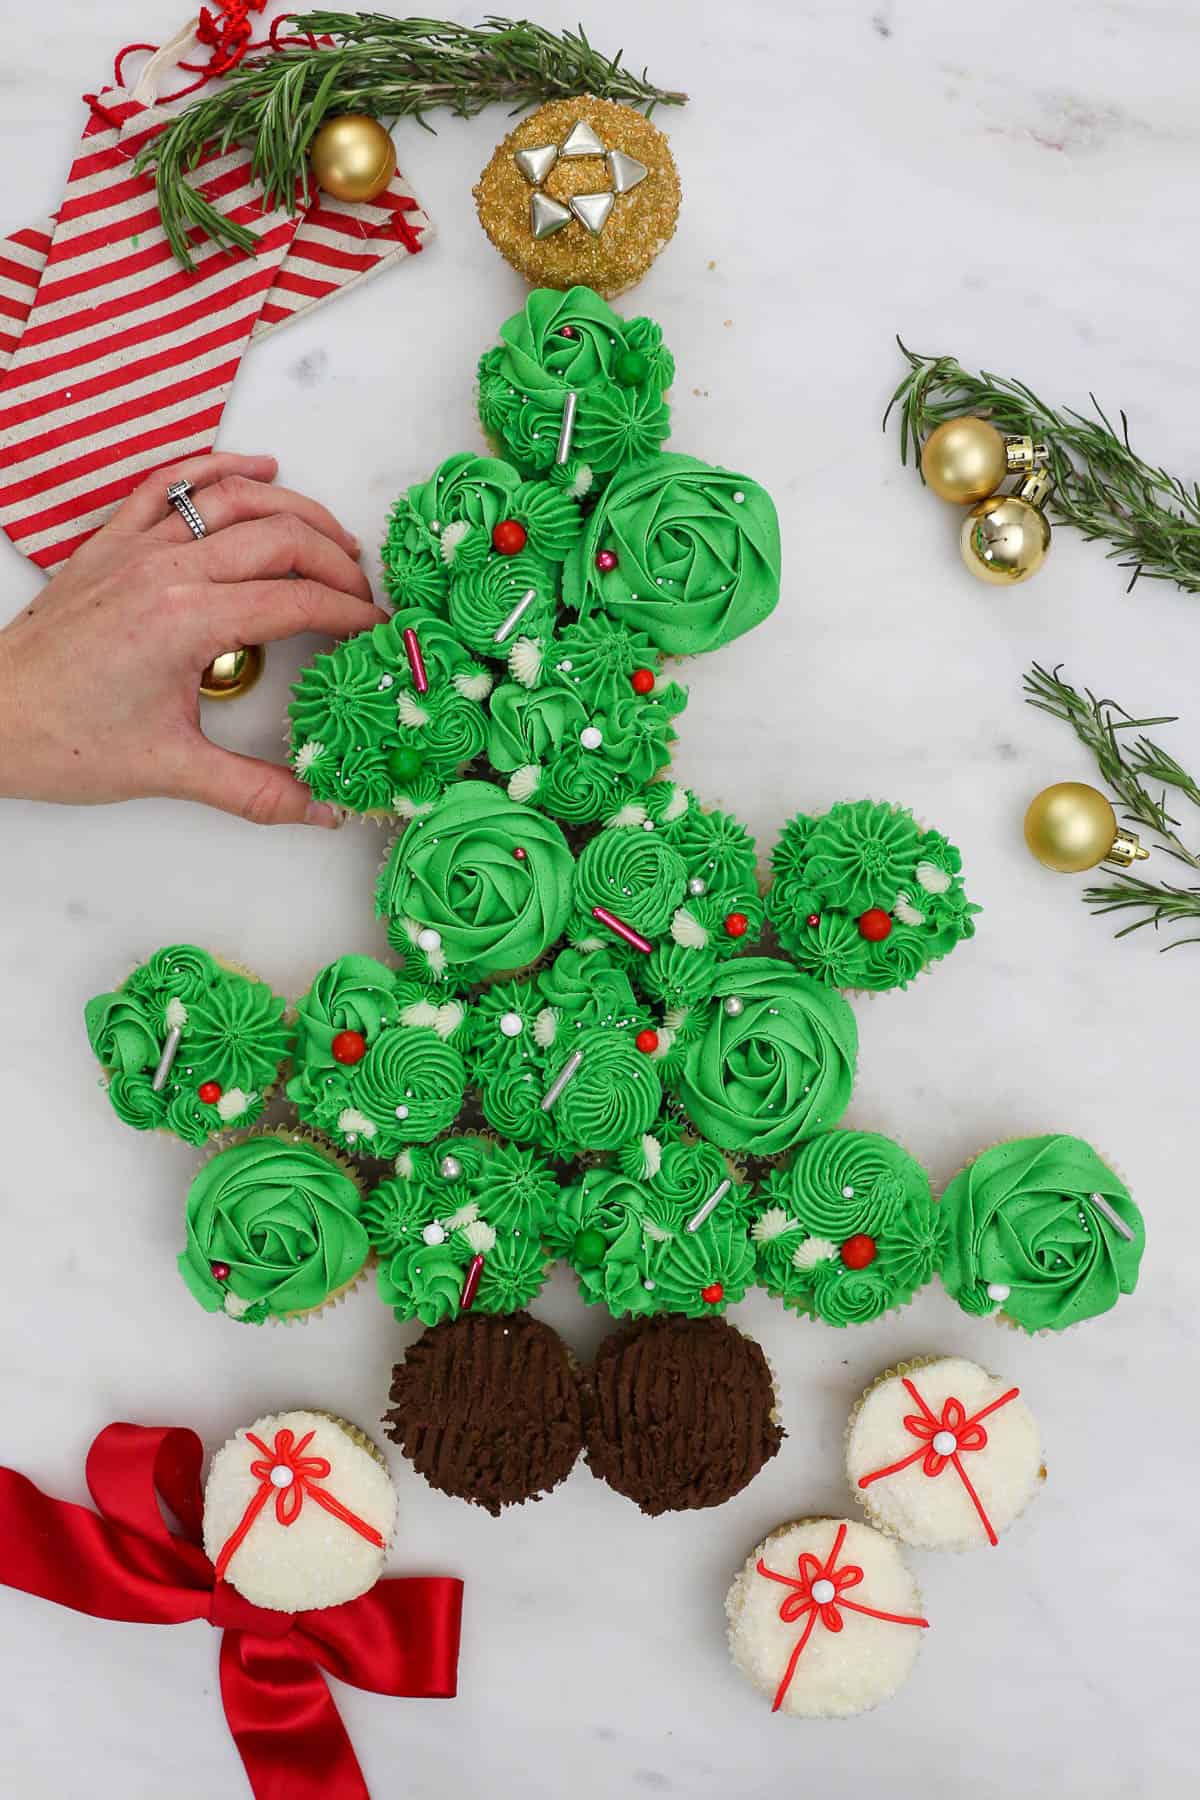
One of the best things about a cake made out of cupcakes is that everyone can grab their own helping with ease. You don’t have to break out a big knife or worry about cutting even slices to give everybody their fair share.
Once you’ve got your favorite cupcakes baked and cooled, it’s just a matter of making the buttercream and decorating. The frosting comes together quickly in just one bowl, and the decorating process is super easy to follow along with. Before you know it, you’ll be showing off the most adorable Christmas tree cake of all time!
What You’ll Need
This cupcake collage comes together with minimal ingredients. You just need a few things to make the frosting and a couple of items for decorating.
- Cupcakes: Make sure they are completely cooled before adding any frosting.
- Unsalted Butter: Cold.
- Powdered Sugar
- Heavy Whipping Cream: For a super smooth and creamy frosting.
- Vanilla Extract: Use a high-quality extract for the best results.
- Salt:
- Chocolate: This should be melted right before it’s used in the frosting
- Green Food Coloring: It’s important to use gel food coloring – not liquid food coloring, which will thin out the buttercream. I use Americolor’s Leaf Green shade.
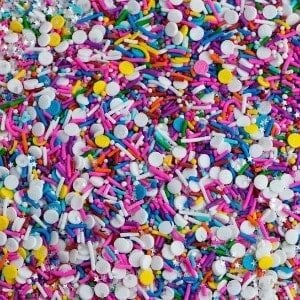
- Sprinkles: Use your favorite holiday-themed variety! If you’d like to decorate the cupcake on top of the tree like a star, you’ll need some gold sprinkles too.
What Kind of Cupcakes Should I Use?
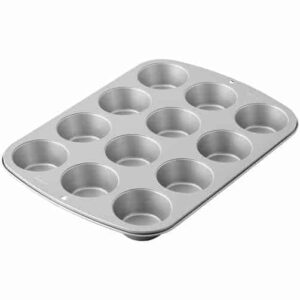
You can use any kind of cupcakes under the sun for this recipe, as long as you have at least 24 of them. I highly recommend going with my Fluffy Vanilla Cupcakes or my Chocolate Cupcakes! The vanilla cupcake recipe makes 24-28, and I like to use the extras to make presents for underneath the tree. If desired, you can prepare a batch of box mix cupcakes to save time.
Helpful Tools for This Recipe
If you’ve decorated baked goods like sugar cookies, cakes and cupcakes before, you probably already have all the tools you need for this recipe. I recommend rounding up the following products:
- Angled Spatula
- Size 1M Piping Tip
- Ateco 866 Large French Tip
- Size 21 Piping Tip
- Wilton 199 Piping Tip
- Decorating Couplers
- Large and Small Piping Bags
If you don’t know what all these piping tips are, here is a helpful guide.
How to Make Christmas Tree Cake
For some reason, I always thought that these cupcake cakes were more difficult than they actually are. It didn’t take long for me to perfect the process, and every step is super easy to follow!
Make the Cupcakes & Frosting
Prepare Cupcakes: Prepare a batch of at least 24 cupcakes and let them cool completely.
Make the Frosting: This is my vanilla buttercream recipe, which starts with cold butter. It has to be whipped in a mixer with the paddle attachment for several minutes until it’s super light and fluffy. After that you can alternate adding the powdered sugar with the liquids (vanilla extract and heavy cream or milk) until the frosting is a stiff but spreadable consistency.
Since you’ll be dying the frosting green, you’ll do some extra mixing once the color is added, so it’s okay to go a little thicker up front.
Color the Frosting
Make the chocolate buttercream: If you instead to add the trunk, you’ll need some chocolate buttercream. Separate out 1/4 cup of the finished frosting. Mix in 2-3 teaspoons cocoa powder. You may want to add 1/2-1 teaspoon liquid (milk or water) to help the cocoa powder incorporate.
Set Aside More Buttercream: Separate out another 1/4-1/2 cup of frosting if you’d like to have another color of frosting for your cake, such as white for the star on top and the extra present cupcakes – or if you’d like a two-toned frosting. Depending on the intent of your design, you may want to set aside more than half a cup for this.
Dye Remaining Frosting: Dye the remaining buttercream with the green gel colors and fill two large piping bags 2/3 of the way full.
Prepare Piping Bags: Prepare at least 1 or 2 small piping bags with couplers (affiliate link) and small piping tips, plus one small bag without a coupler for the larger piping tips so that you can easily switch them out.
How to Assemble & Decorate
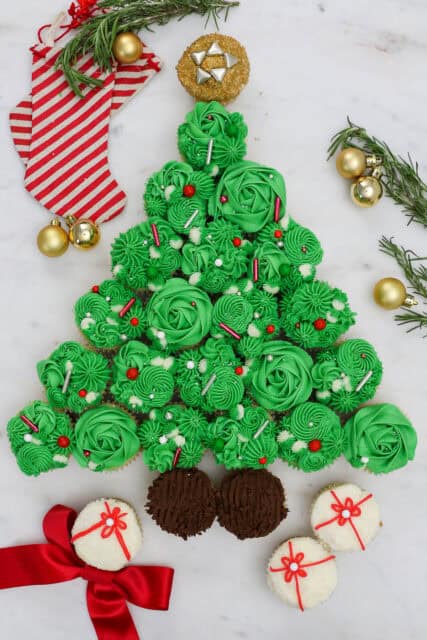
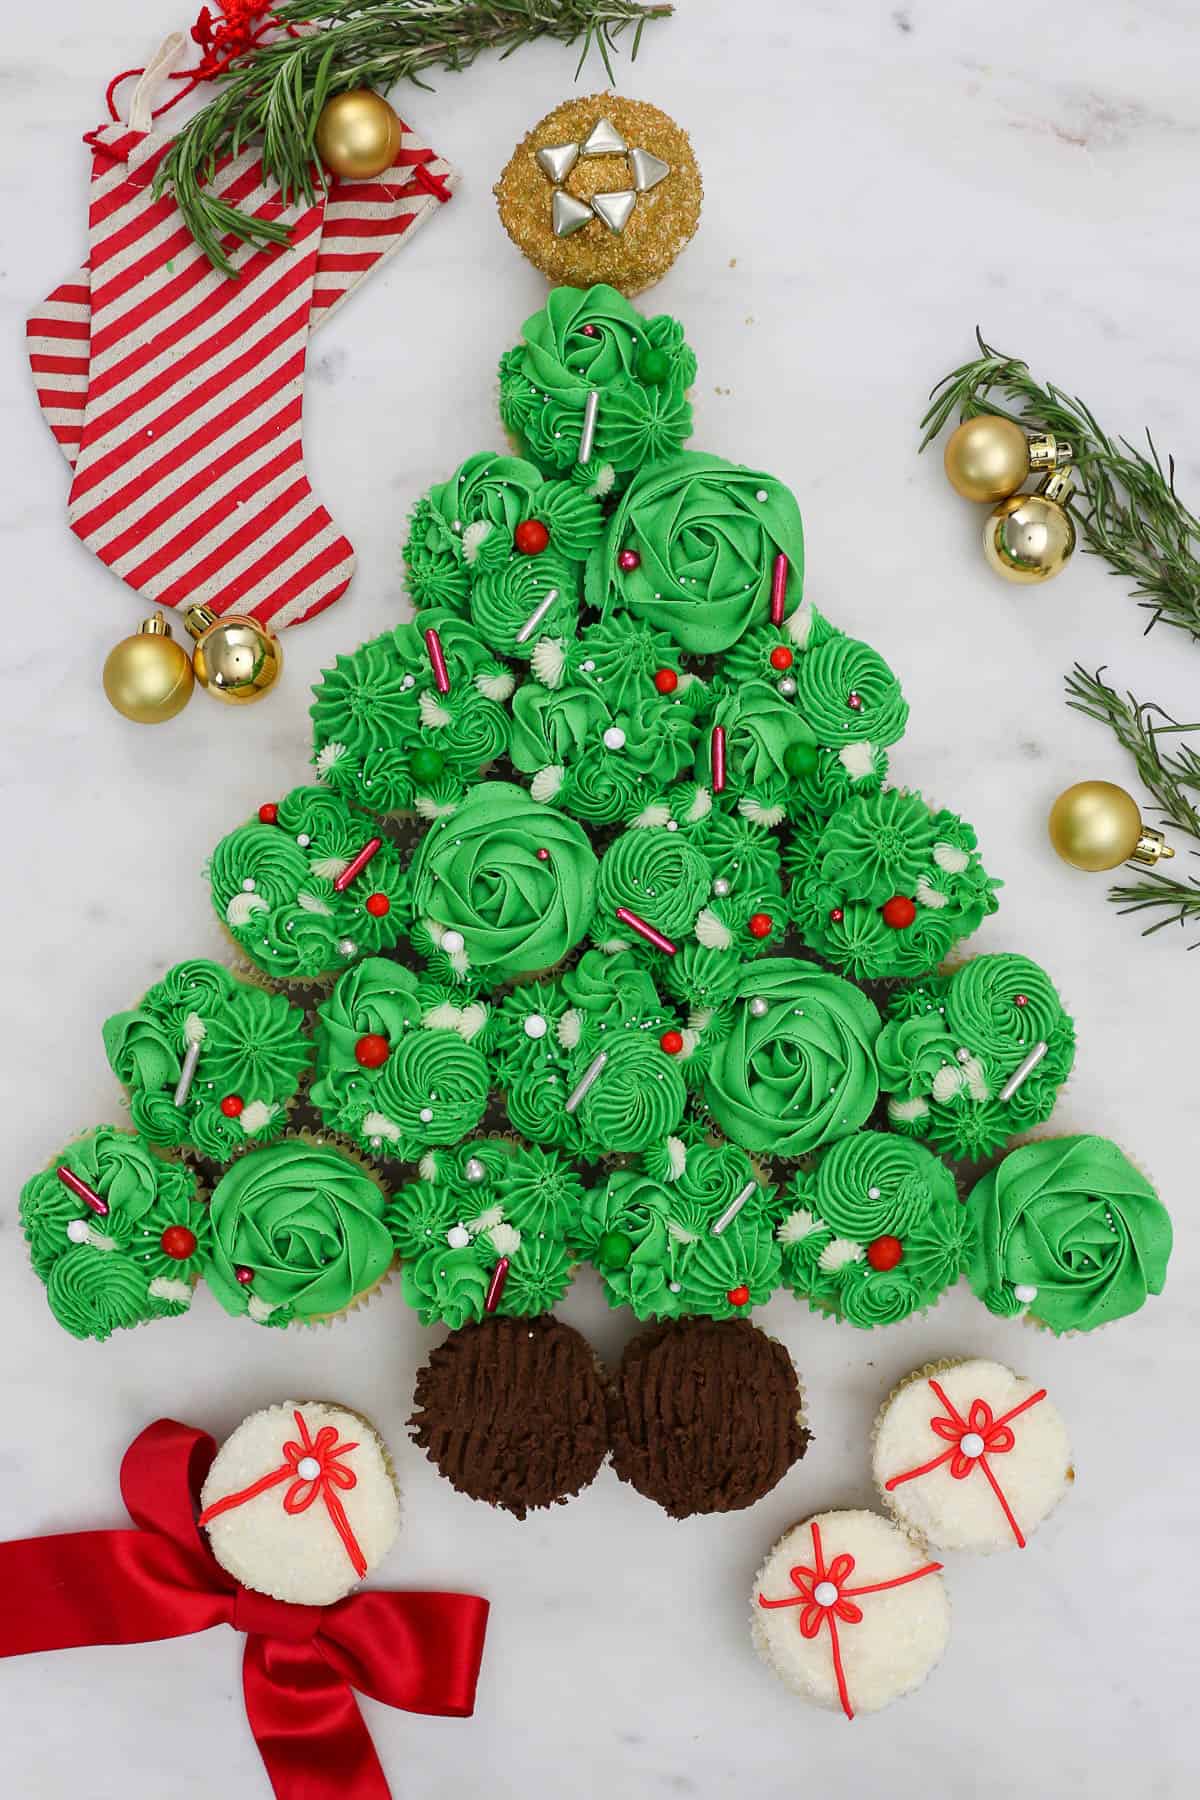
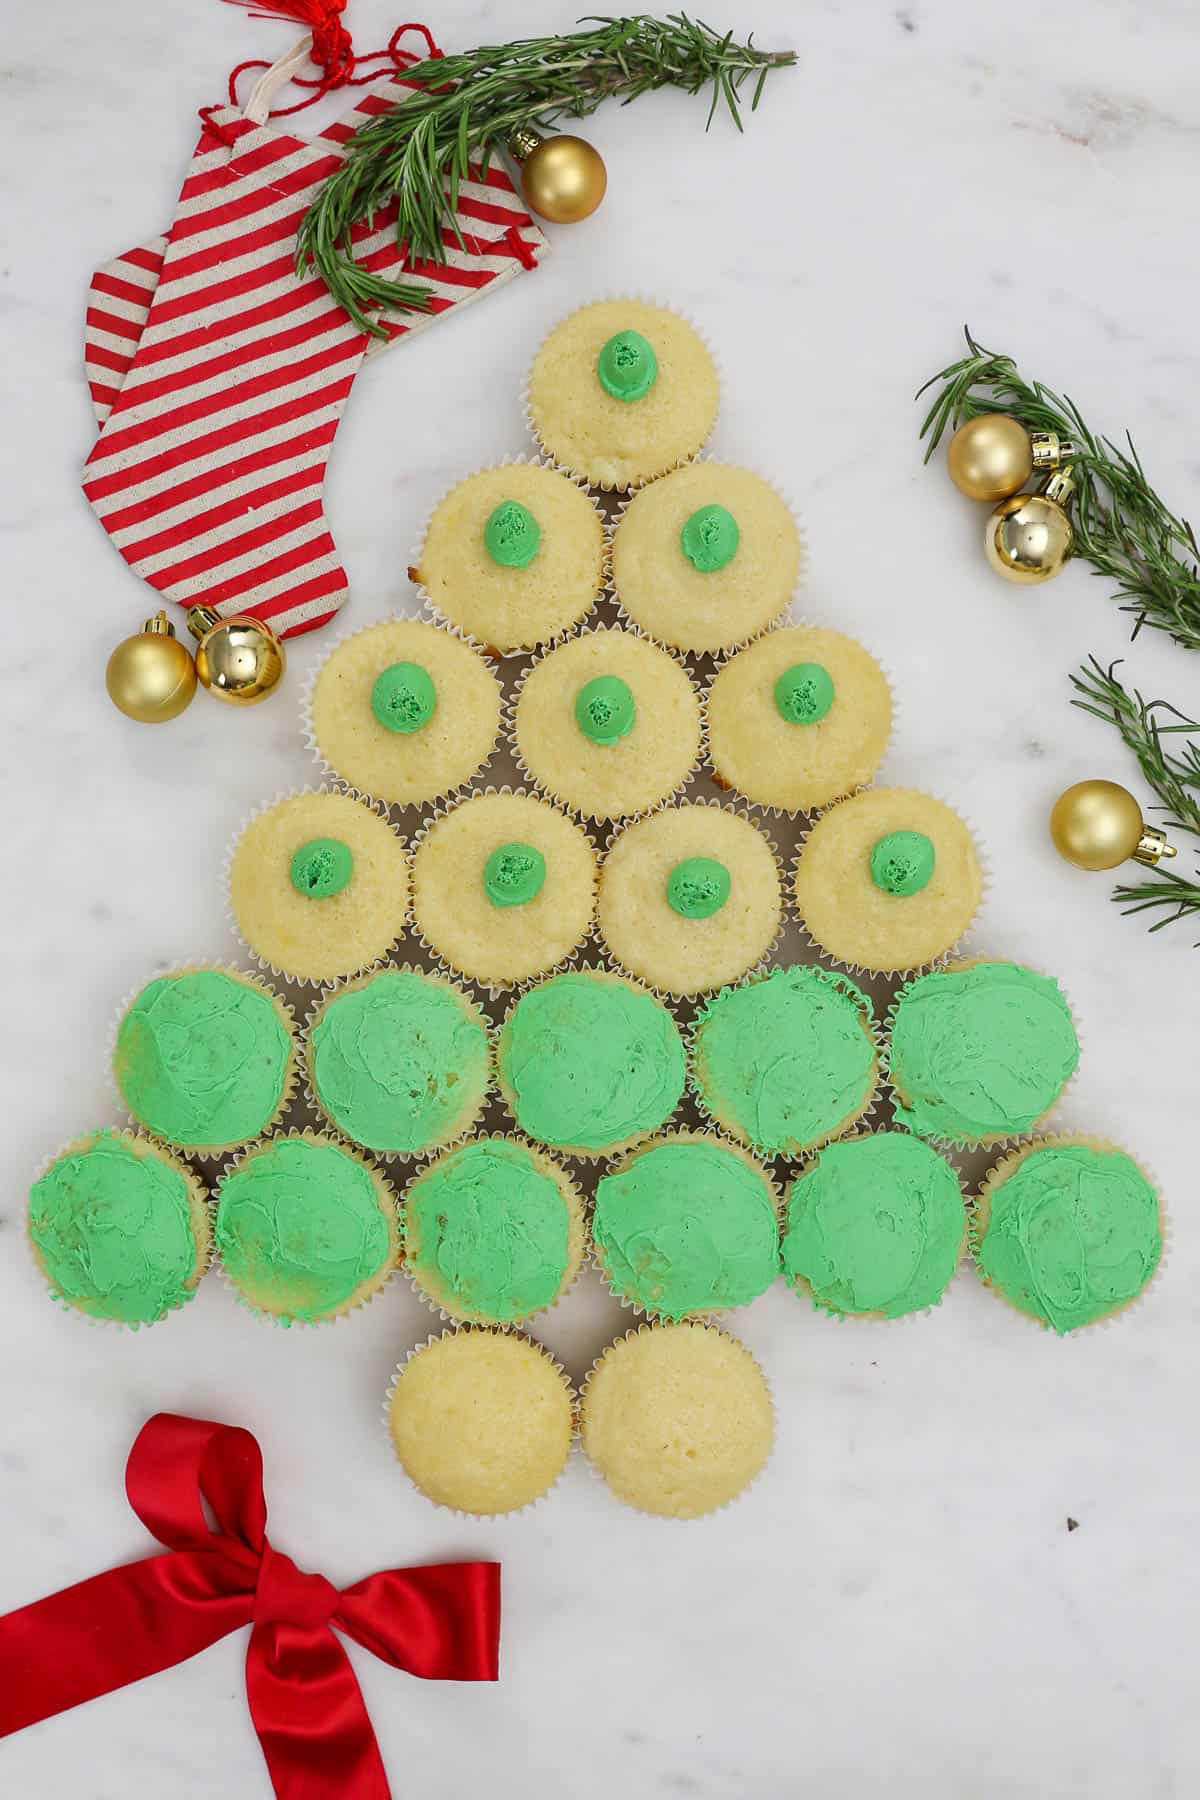
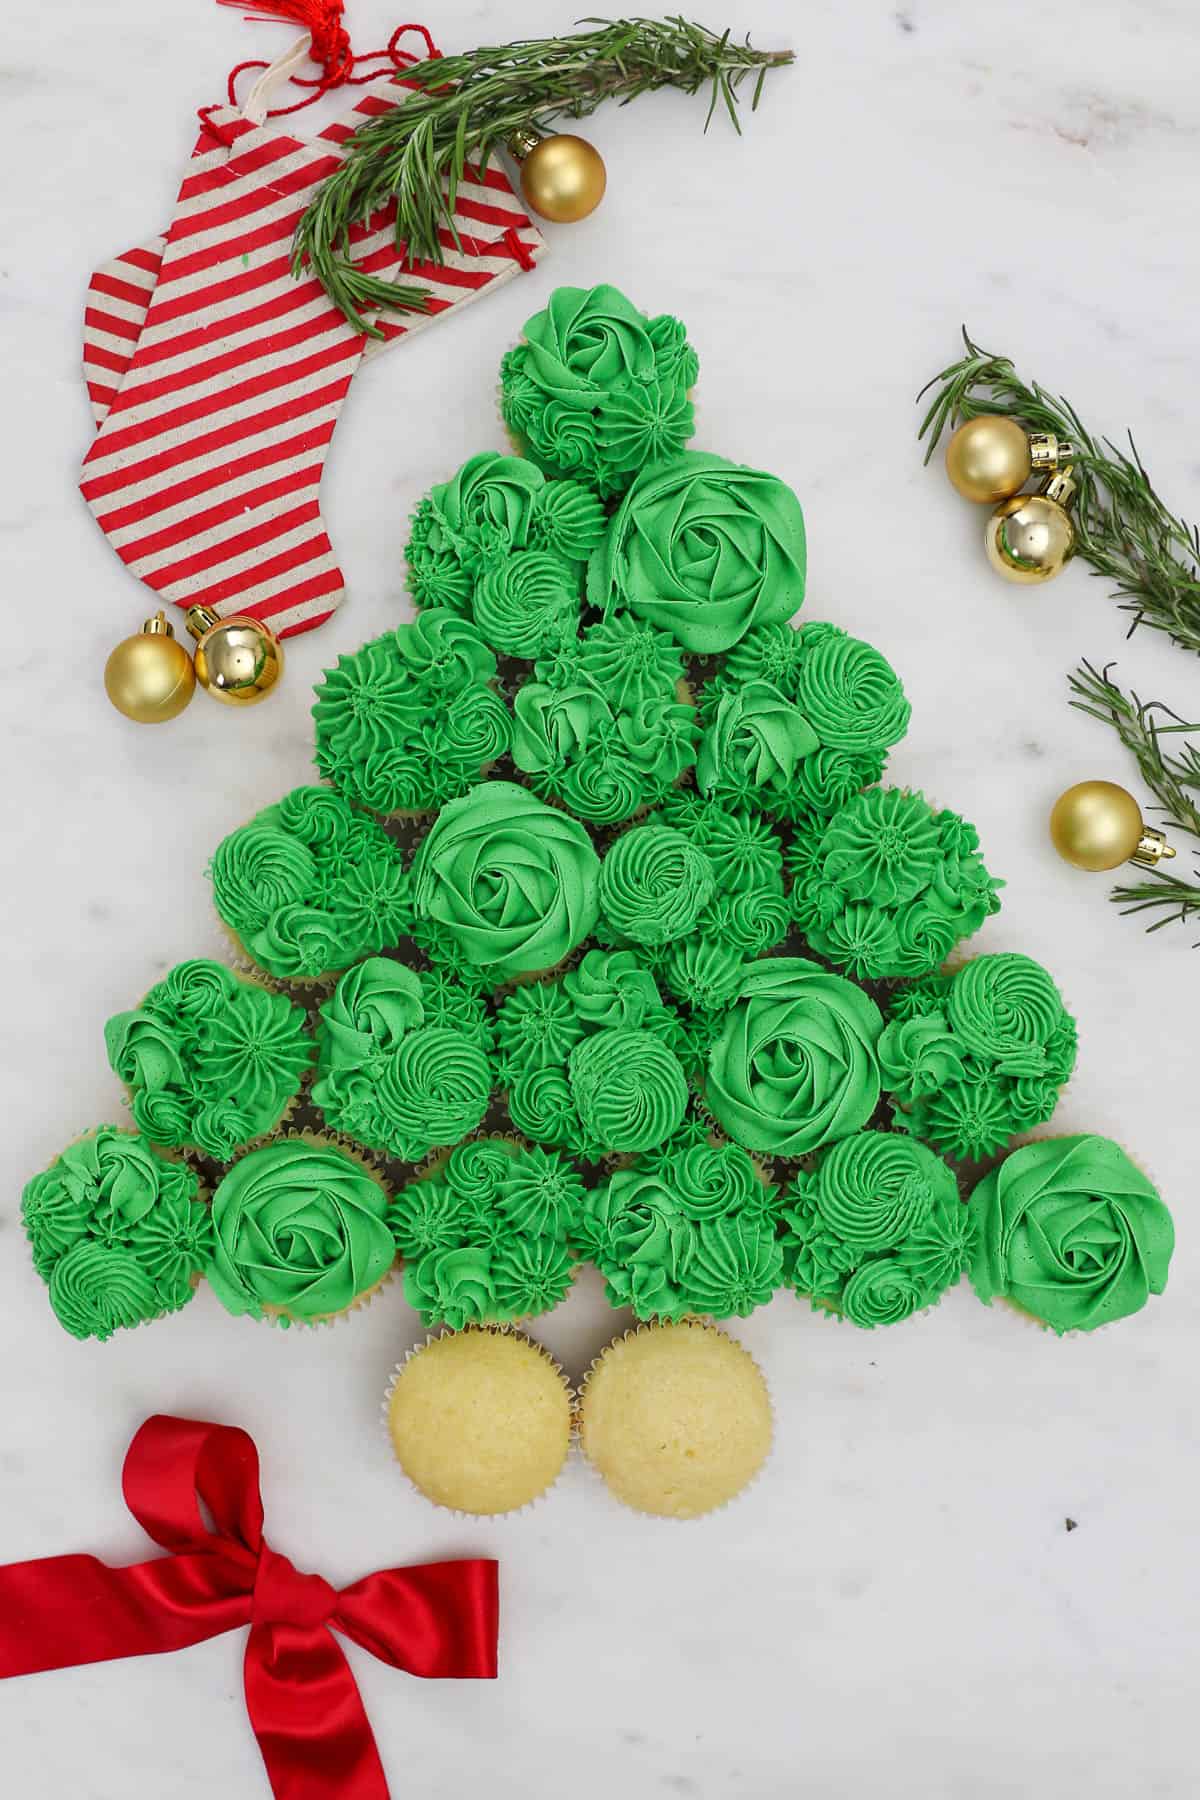
Step 1: Add Base Frosting Layer. Set up your cupcakes in the shape of a tree. There should be 6 in the bottom row above the trunk, 5 in the next row, and so on. F
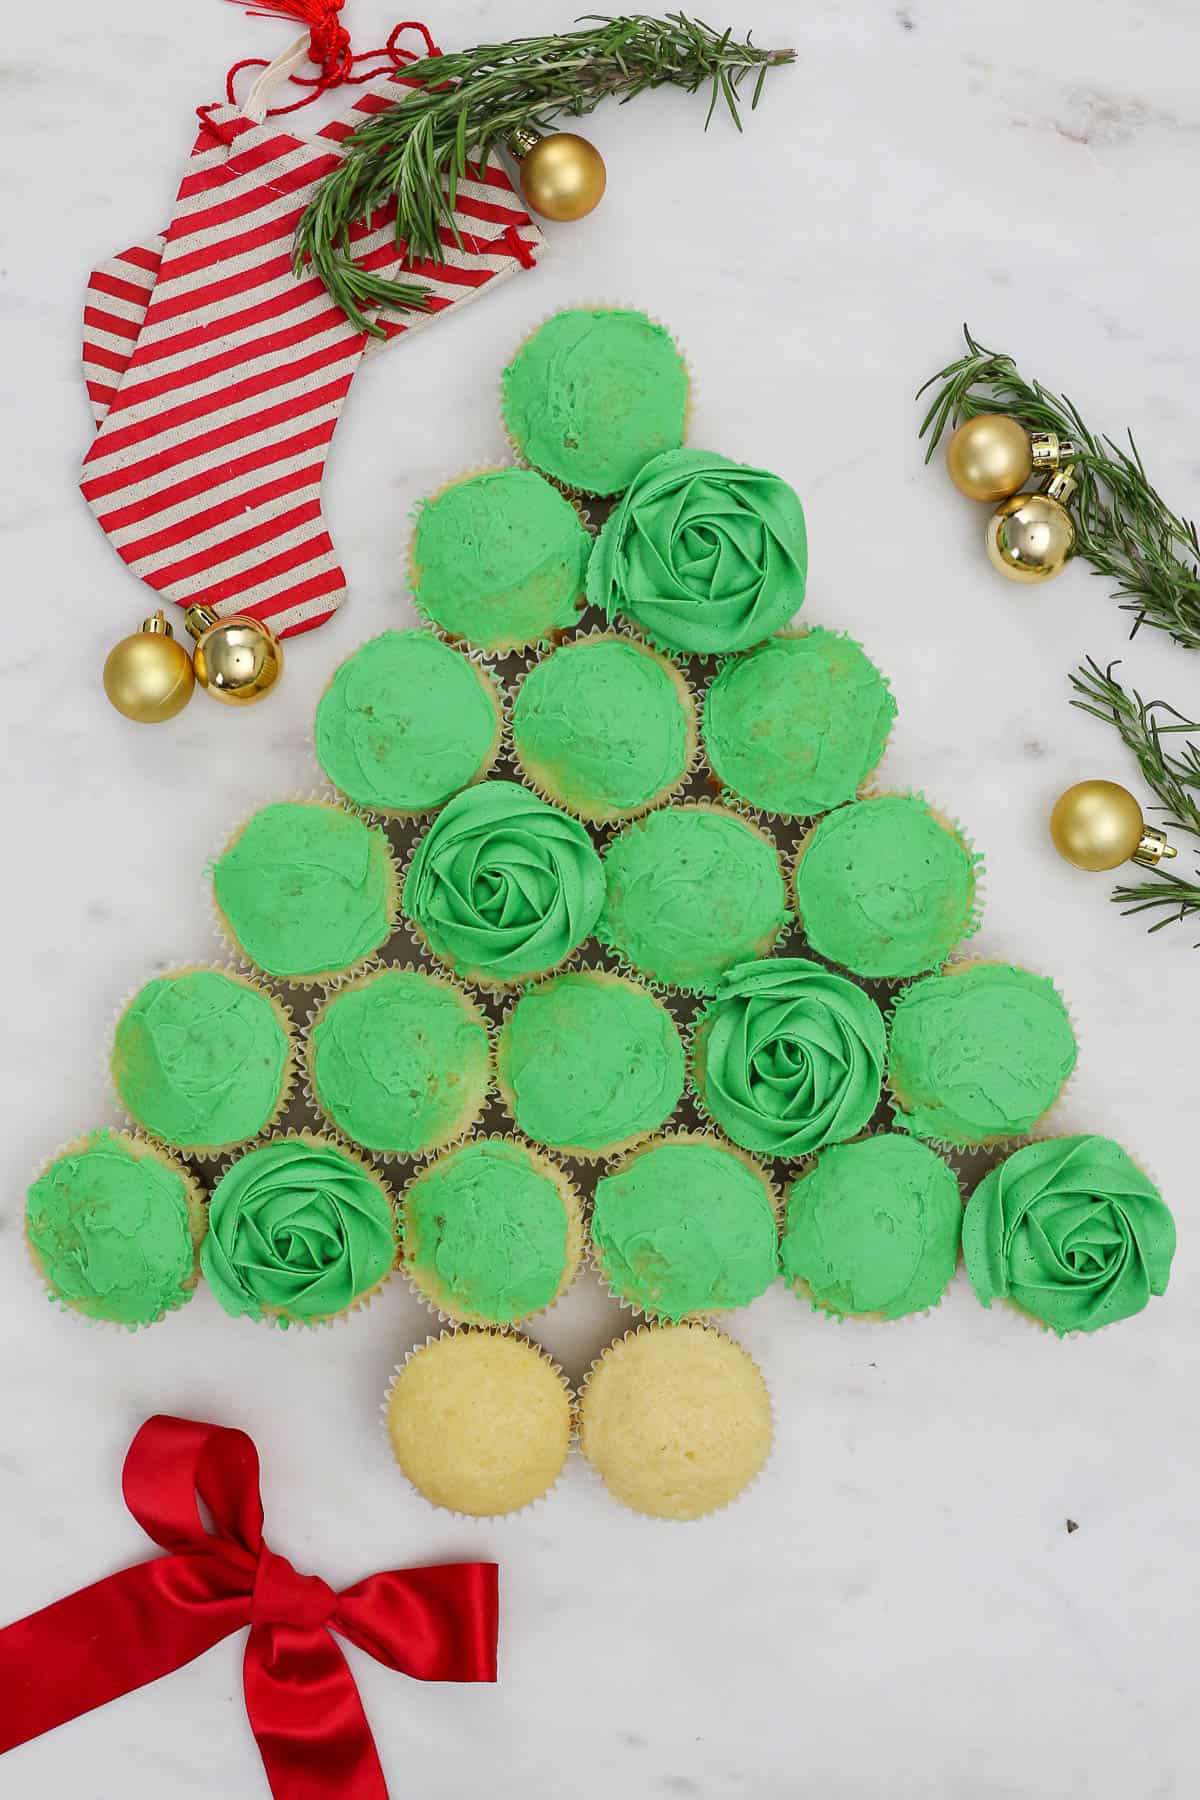
or all of the cupcakes, you’ll be frosting with green buttercream, place about 1 teaspoon of frosting onto each cupcake and spread it out evenly. This step is optional but helps fill in the gaps in the decorations.

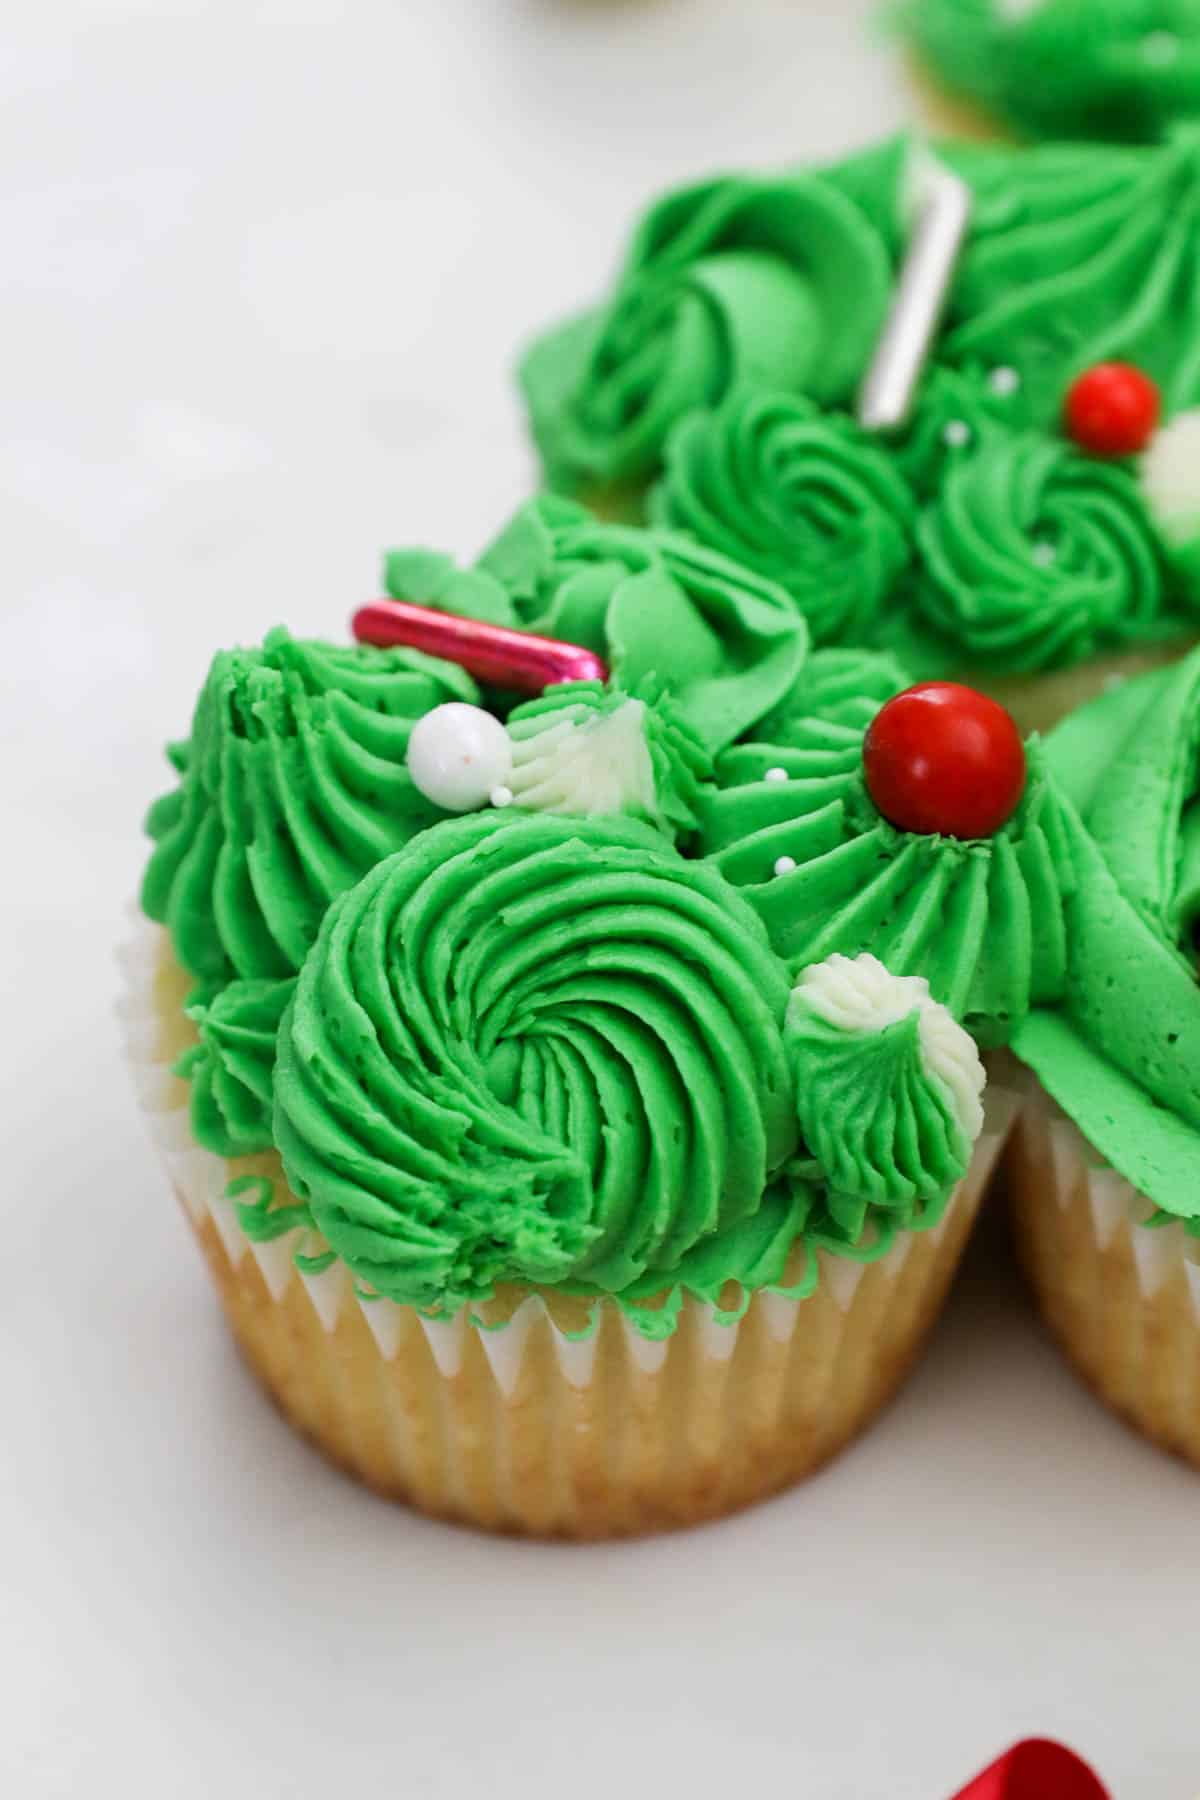
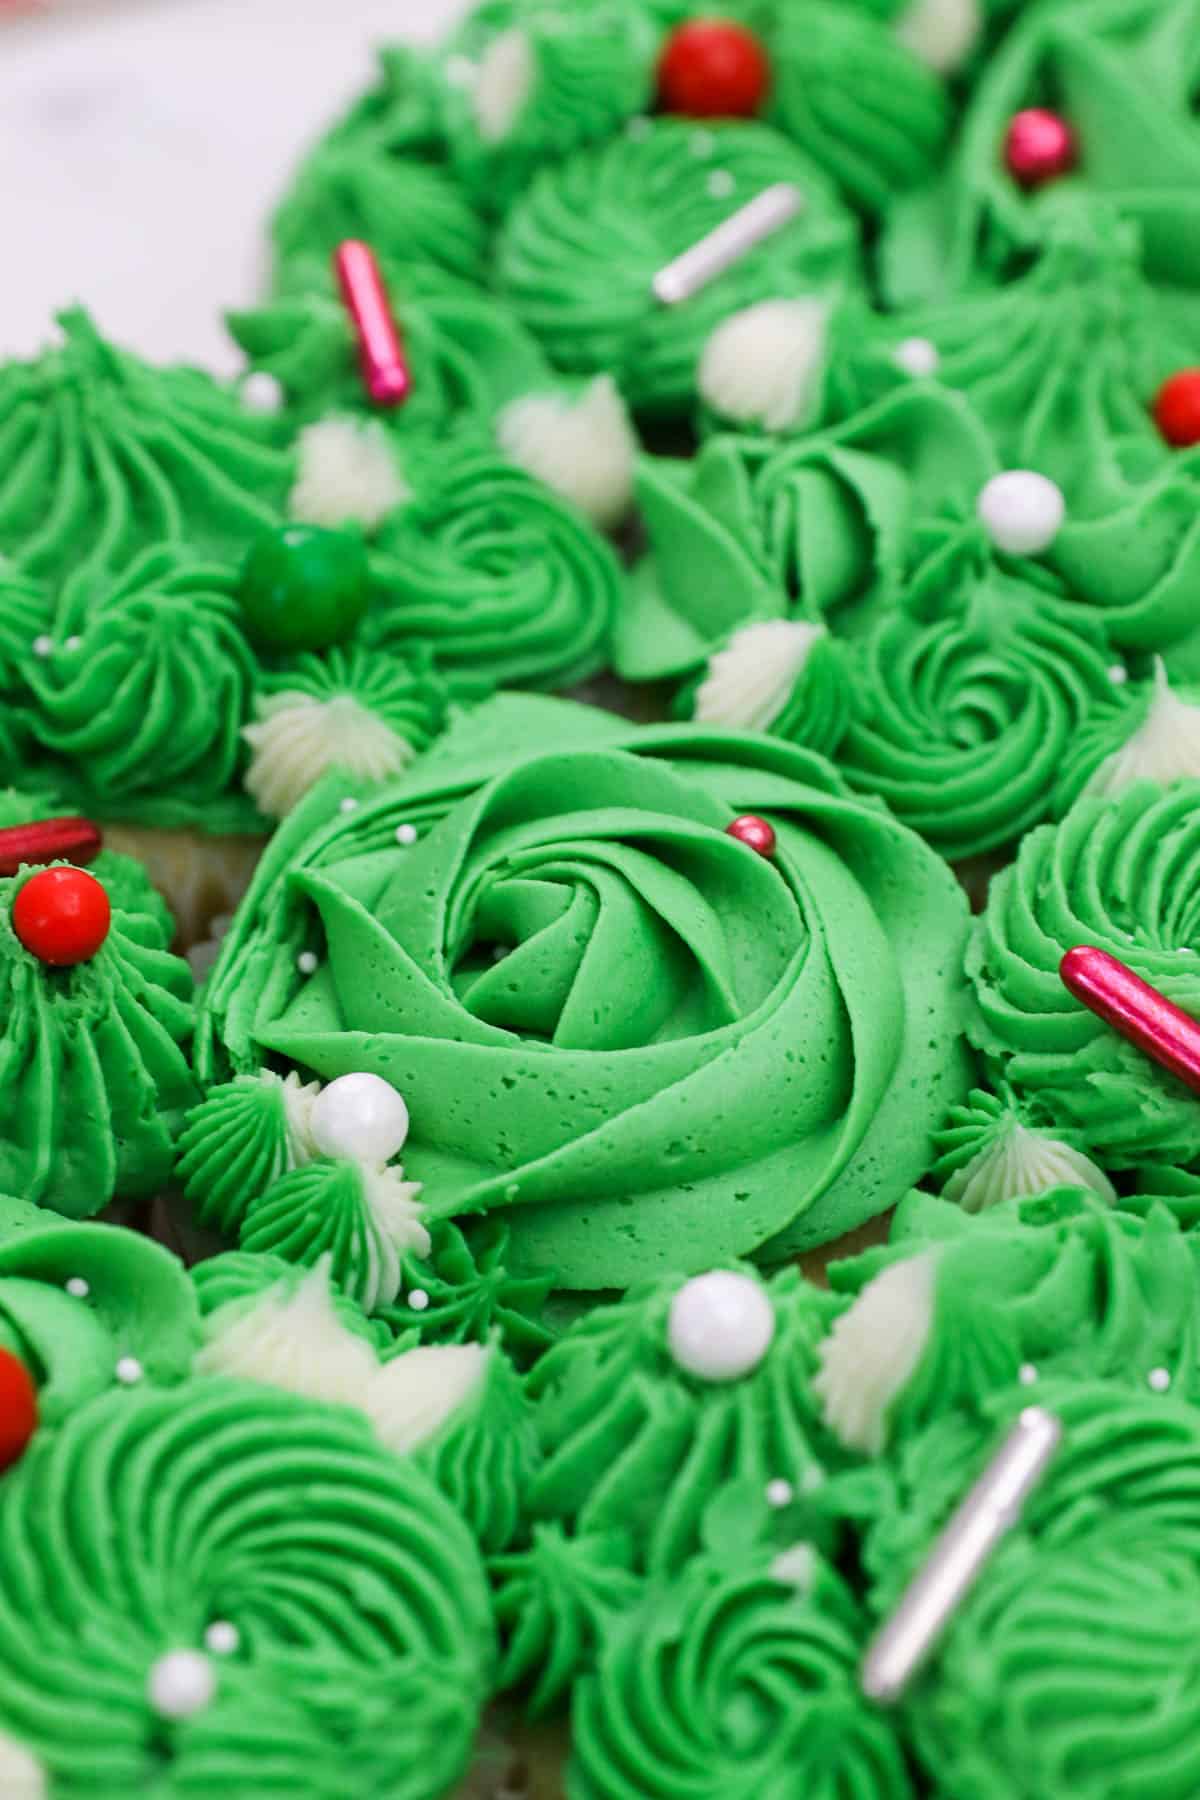
Step 2: Pipe Rose Patterns. Use your 1M piping tip to frost a few cupcakes with a large rose design. I recommend doing 5-7. You may want to come back in halfway through and add some smaller roses on additional cupcakes.
Step 3: Pipe Additional Designs: Use your large French star tip (Ateco 864) to make big dollops and swirls of frosting to cover portions of the remaining cupcakes.
Then you may want to come back again with a 1M and do some smaller roses, or smaller rosettes with the French star tip. The goal is to have most of the cupcakes covered.
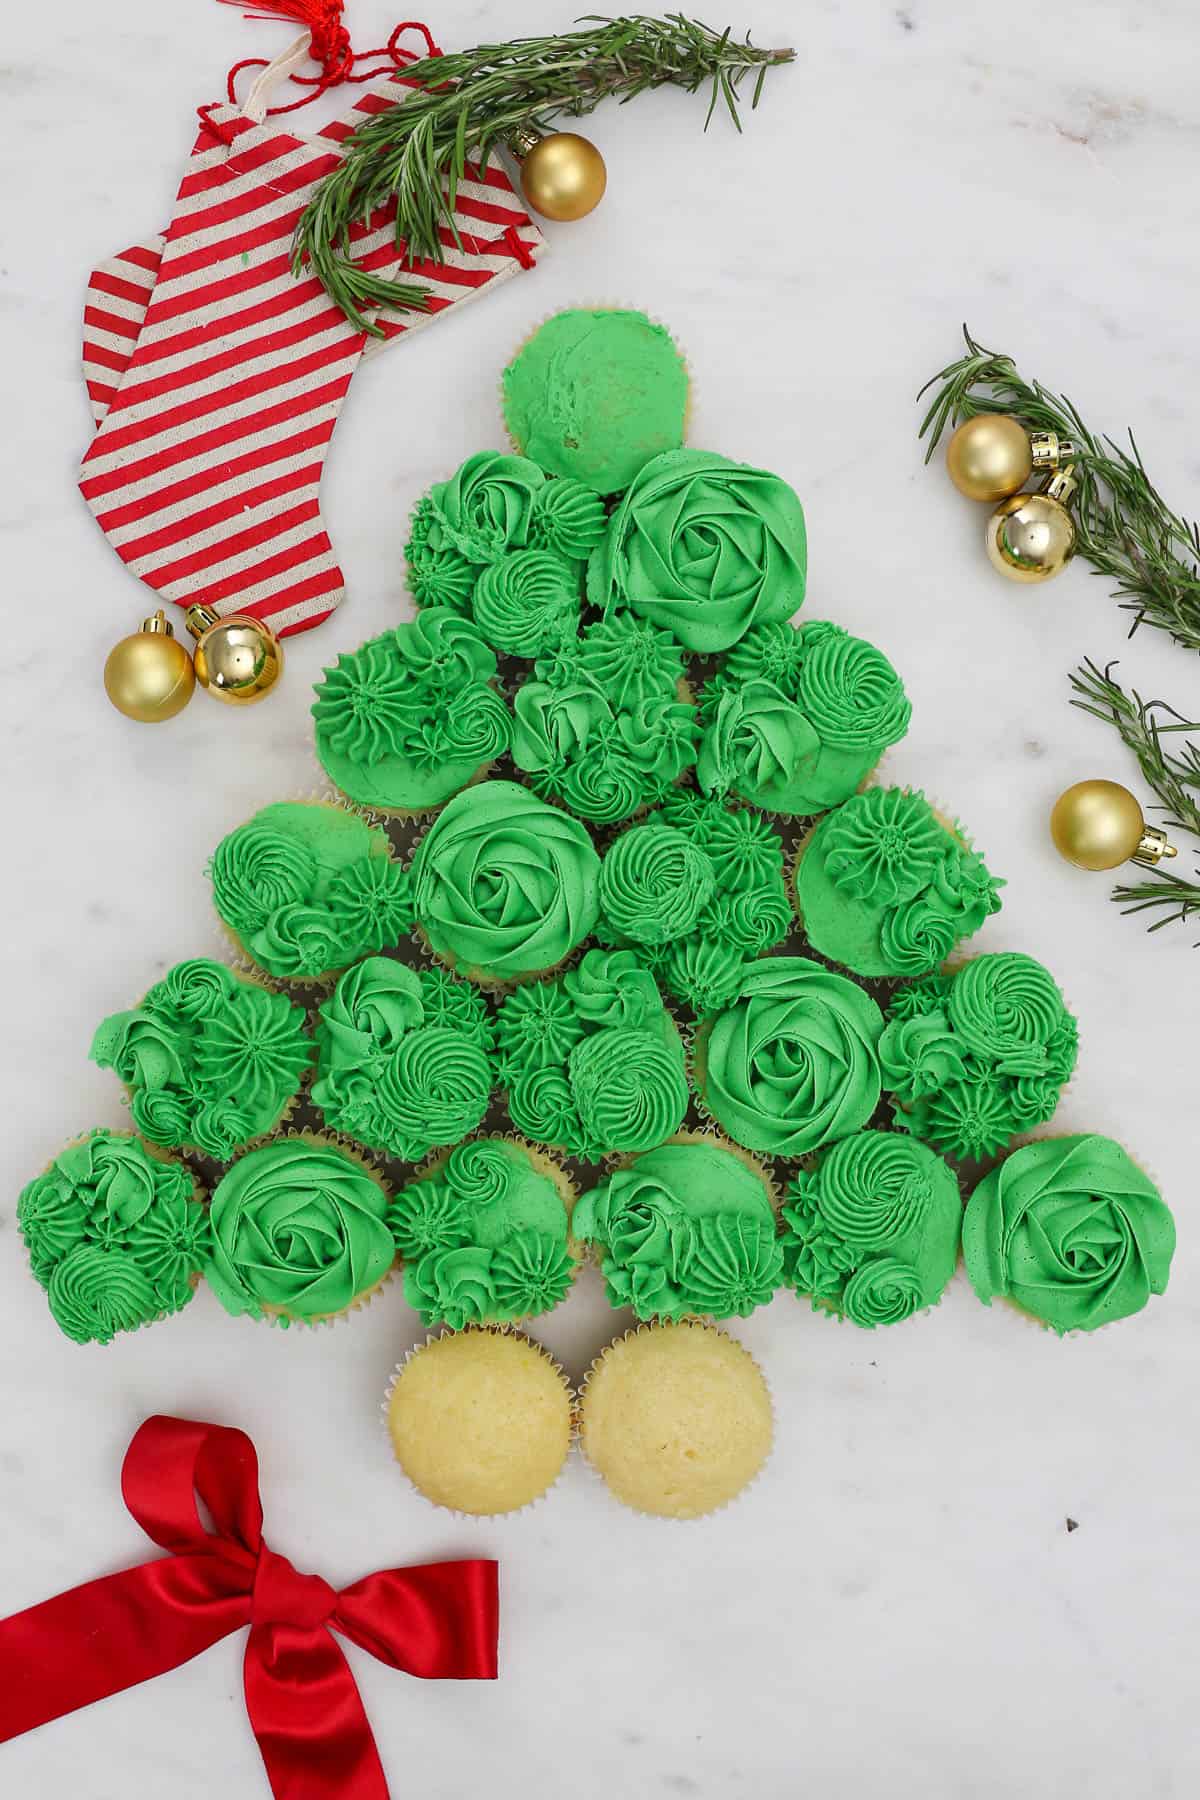
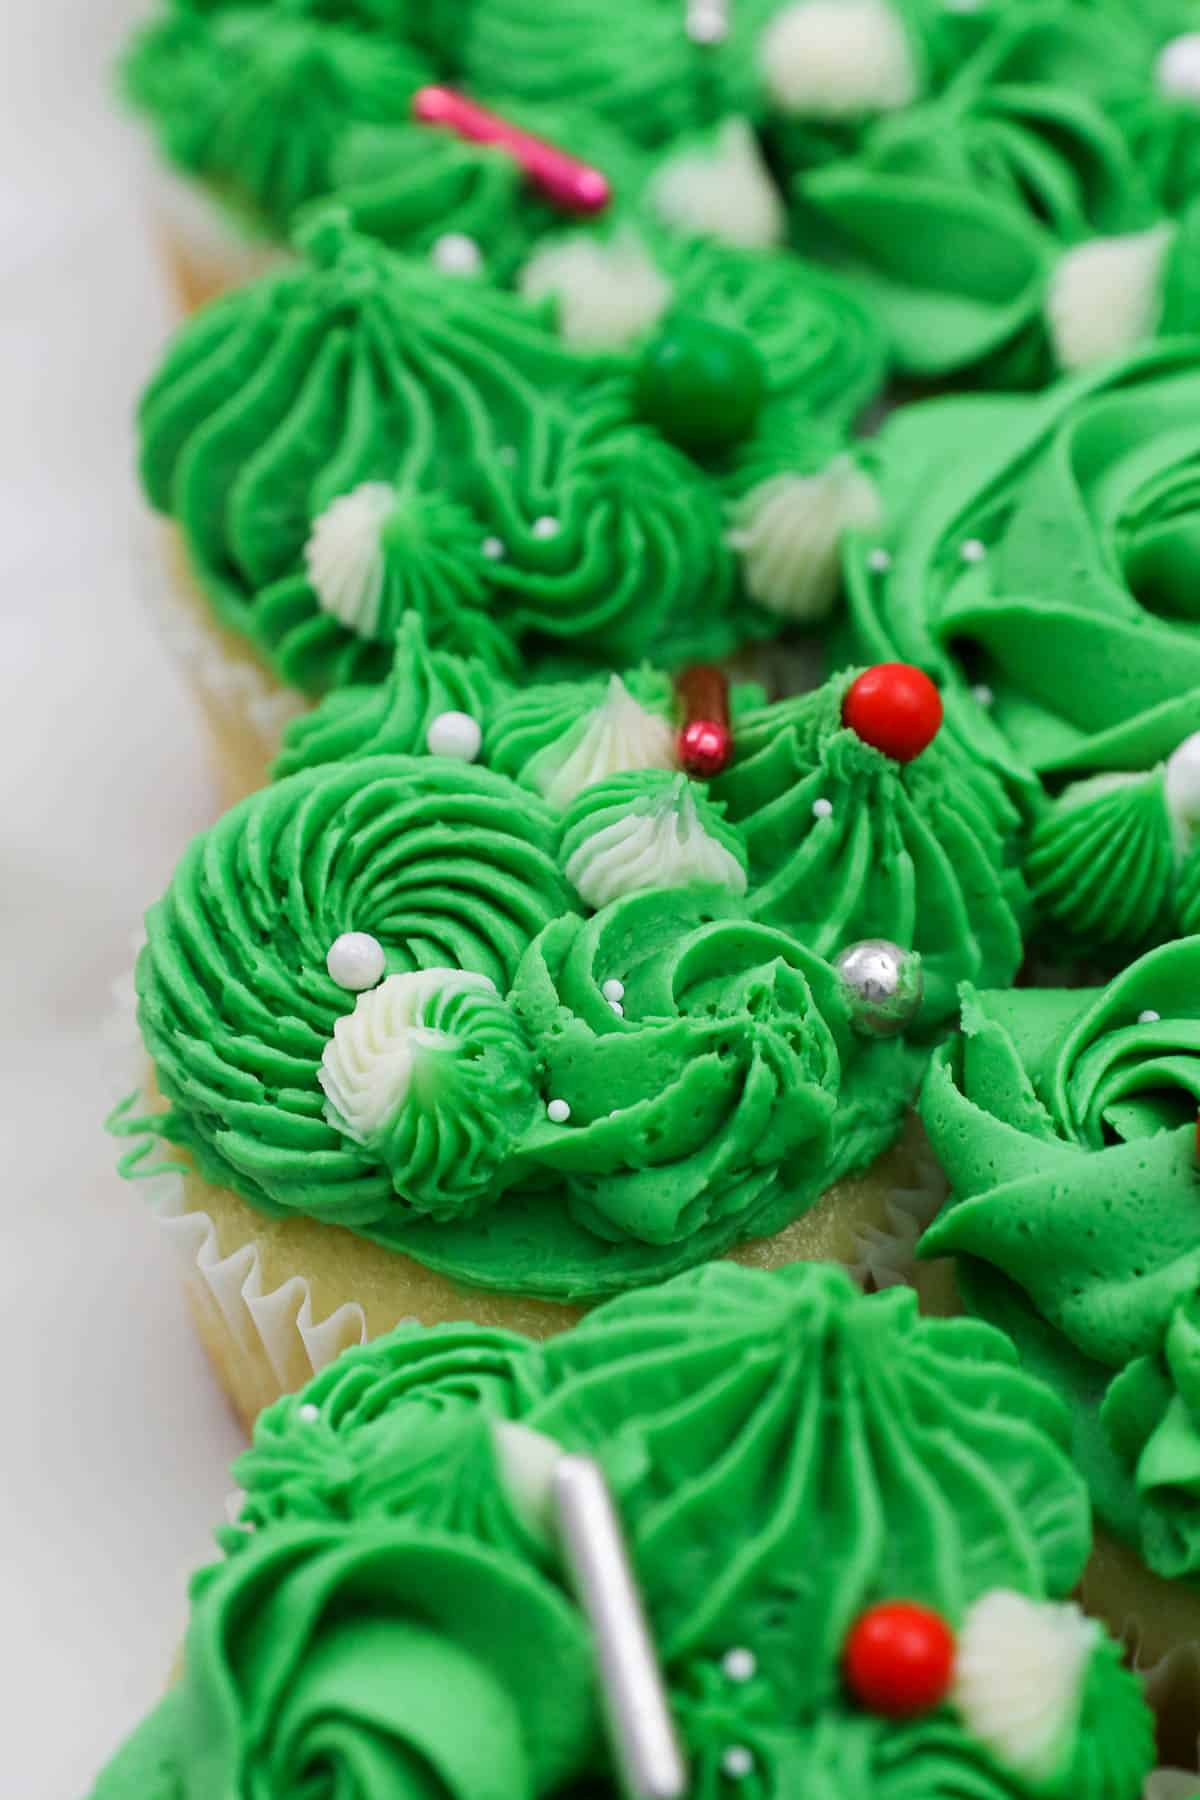
Step 4: Fill Gaps. Use your smaller piping tips to fill in the gaps with rosettes. This is where I use small piping bags with tip 21 and tip 199. Here you will inspect each cupcake and fill in the top and sides with rosettes.
Step 5: Decorate Star For the star on top, frost your final cupcake with the white buttercream, then dip it into your gold sprinkles. I also like to add some gold dragée triangles in the shape of a star.
Step 6: Add Sprinkles: Add your holiday sprinkles for the finishing touch.
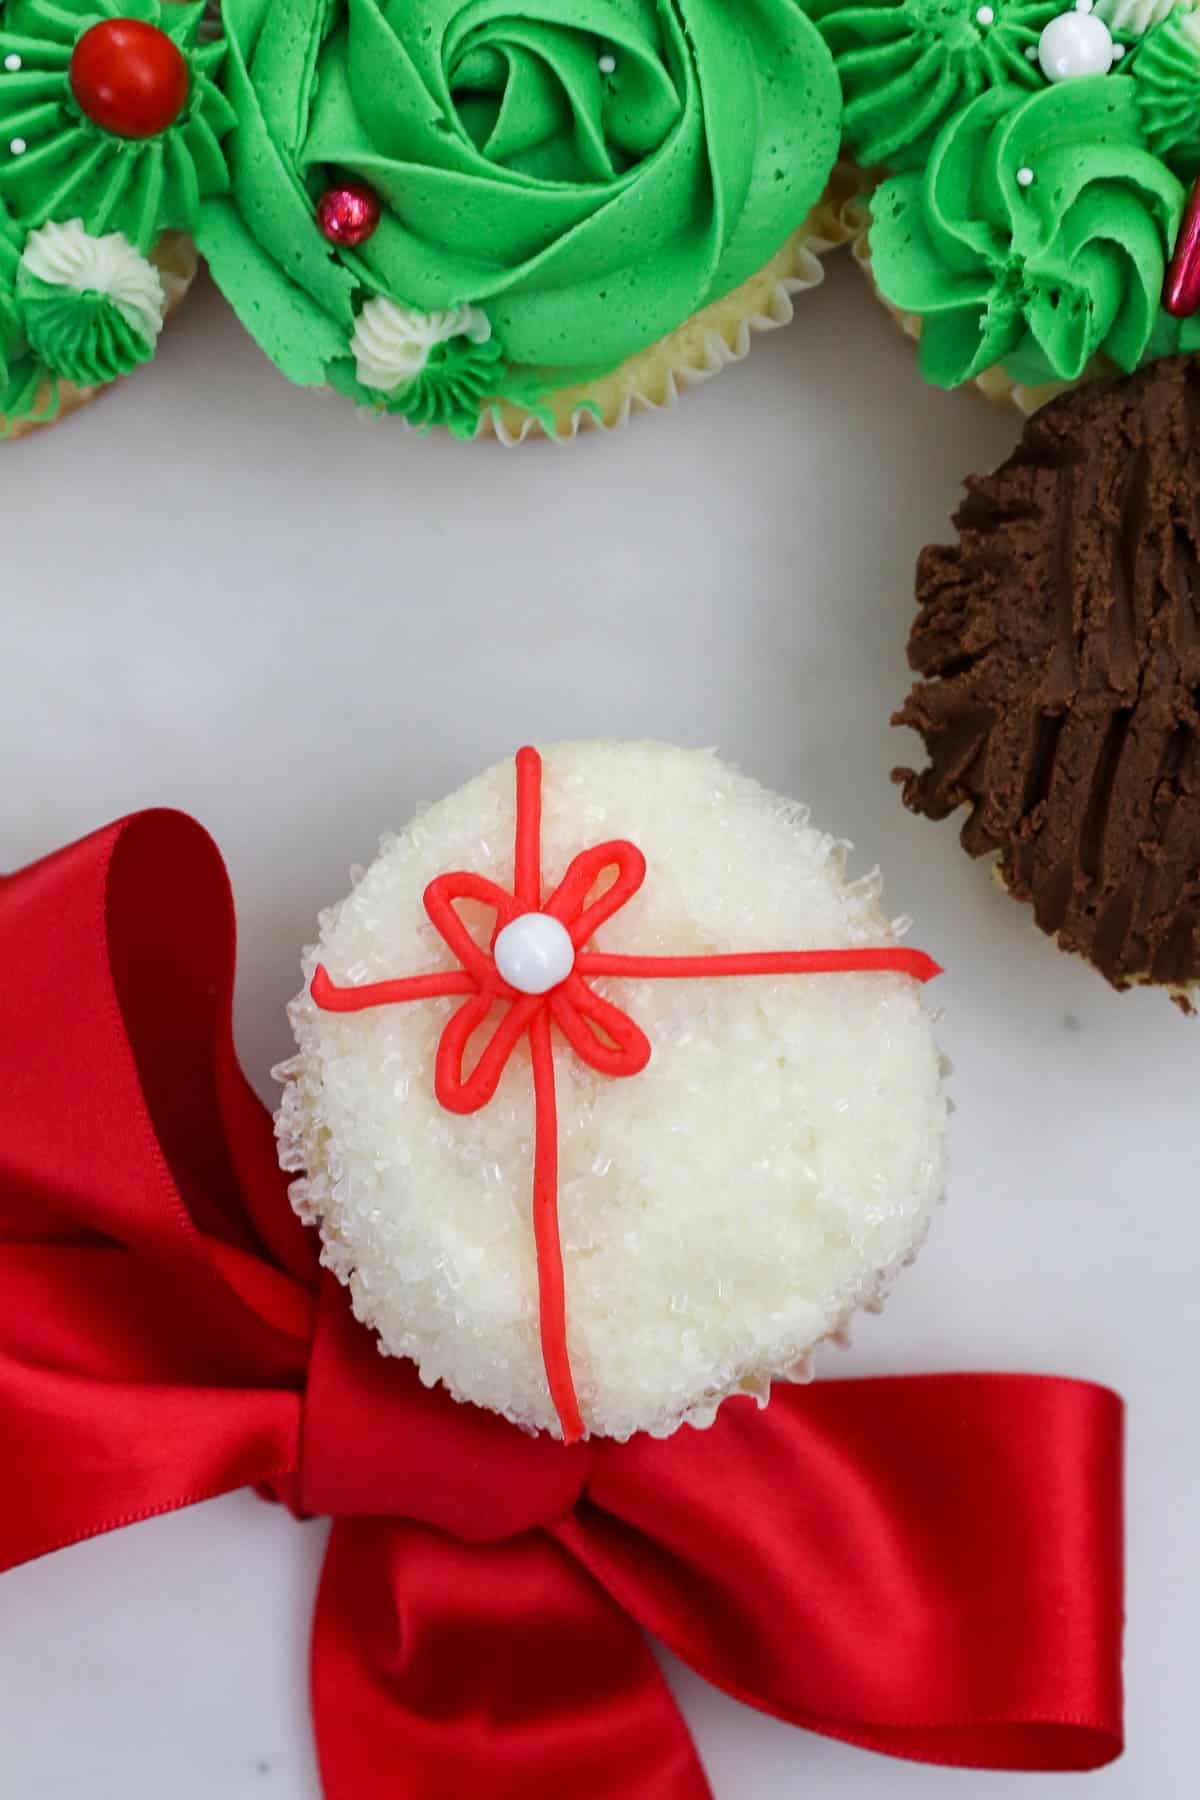
Step 7: Presents. If your recipe made more than 24 cupcakes, you can make cute little presents underneath your tree! Frost the cupcakes with white frosting and dip them in sanding sugar. Then, dye a couple tablespoons of frosting with red food coloring. Use a small open round tip (size 5 or smaller) to pipe the ribbon and bow onto each cupcake. Place a large sugar pearl on the center of each bow.

Tips & Tricks for Christmas Tree Cupcakes
From whipping up the buttercream to assembling and decorating the cake, these tips and tricks will help you prepare the ultimate edible Christmas tree.
- Beating the Buttercream: You’ll want to whip the frosting for several minutes at the stages indicated in the recipe, but most importantly, prior to adding any powdered sugar. It’s helpful if you review the tips in my standalone recipe for this frosting prior to making it.
- Fine-Tune the Shade of Green: Straight out of the bottle, I find Americolor’s Leaf Green shade to look a bit more like Easter grass than a Christmas tree. So I add a tiny touch of black and yellow to darken it. Use a toothpick to add the black instead of dropping it into the bowl since it’s so strong. Stick with gel rather than liquid food coloring so you don’t thin out the frosting. For more advice on this, check out my post detailing how to color buttercream.
- Only fill the piping bag halfway: This frosting can soften from the warmth of your hands as you use it, so I recommend preparing two large piping bags with green frosting to prevent this and make it easier to handle.
- Assemble the Tree Shape Before Decorating: I find it easiest to lay out the cupcakes prior to decorating them, but you may prefer laying them out after adding the initial layer of frosting. After you’ve frosted the base, you’ll definitely want to assemble the tree shape before adding the decorative frosting so you can see it all come together as one design.
- Add Dimension With a Two-Toned Frosting: If you want to add some dimension to your designs with a two-toned frosting, fill a piping bag with both green and white frosting and use your large French star tip to form dollops and swirls on the cake.
Can I Make This Frosting in Advance?
If you’d like, you can prepare your buttercream up to 24 hours before dying it and decorating the cake. Store it in an airtight container at room temperature. You may have to re-whip the frosting in your mixer bowl for a few minutes to fluff it back up before working with it.
I recommend separating out the small portions of frosting for the trunk and star, and then actually adding the green gel color, then storing overnight. The colors will get darker as it’s sits. You can still rewhip the next day if needed.
To store for longer than 24 hours, this buttercream will last up to 7 days in the refrigerator or 2 months in the freezer. Thaw to room temperature and rewhip before using.
How to Transport It
If you want to transport this to your holiday celebration, you’ll need a board at least 16-inches by 18-inches wide. Most cake boards are not made this large, so I suggest cutting a big piece of cardboard and covering it with aluminum foil. Unless your cardboard is extra sturdy, I recommend reinforcing it with a second layer.
The good news is that these cupcakes are can stand alone as each one is uniquely decorated. That means you could transport the cupcakes it in airtight containers and assemble it into the tree design once you arrive to your party.
Storage Instructions
I store leftover cupcakes in an airtight container at room temperature for 3 days. If you live in a warm or humid climate, then I suggest refrigerating. If you have to refrigerate your cupcakes, leave them out at room temperature for a bit before enjoying them to let the frosting soften up.
Print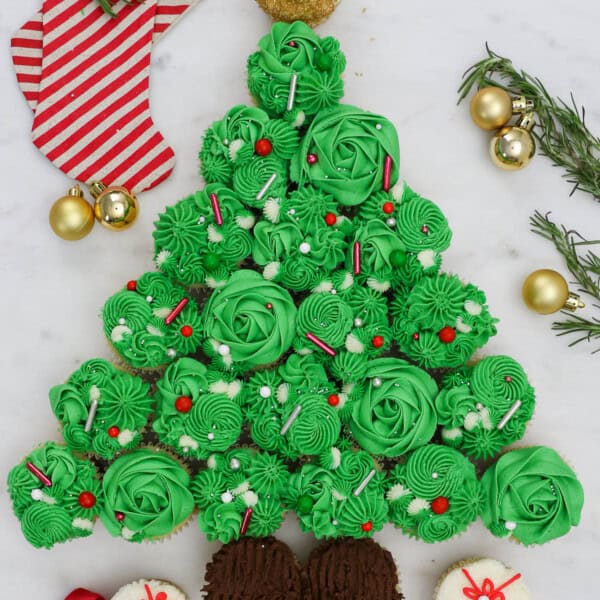
Christmas Tree Cake
- Prep Time: 1 hour
- Cook Time: 15 minutes
- Total Time: 1 hour 15 minutes
- Yield: 24
- Category: Dessert
- Method: Oven
- Cuisine: American
Description
This isn’t your typical Christmas Tree Cake – it’s made up of individual cupcakes! You can turn any batch of cupcakes into an adorably festive holiday treat with this creamy whipped frosting and Christmas tree decorating guide.
Ingredients
- 1 batch (24) Vanilla Cupcakes or Chocolate Cupcakes
- 1 1/2 cup (339 g) unsalted butter, cold
- 6 cups (780g) powdered sugar
- 2 ½ (12 ml) tablespoons heavy whipping cream
- 2 teaspoons (10ml) vanilla extract
- Pinch of salt
- 2–3 teaspoons cocoa powder
- green gel food coloring
- sprinkles
Instructions
Make the Cupcakes & Frosting
- Prepare a batch of at least 24 cupcakes and cool completely.
- Cut the butter into pieces. Using the paddle attachment, whip the butter for 5-7 minutes, scraping down the bowl occasionally, beating until the butter is very fluffy.
- Add 3 cups of powdered sugar and mix on low speed until incorporated into the butter then add the vanilla extract and mix to combine. Beat for about 60 seconds.
- Next, add an additional 2 cups of powdered sugar and beat on low speed until sugar is incorporated. Increase speed to medium-high and beat for 3 minutes.
- Add the last 1 cup powdered sugar along with the heavy whipping cream. Beat on low until the ingredients start to mix together. Increase speed to medium-high and beat for another 3-5 minutes to whip additional air into the frosting.
Color the Frosting
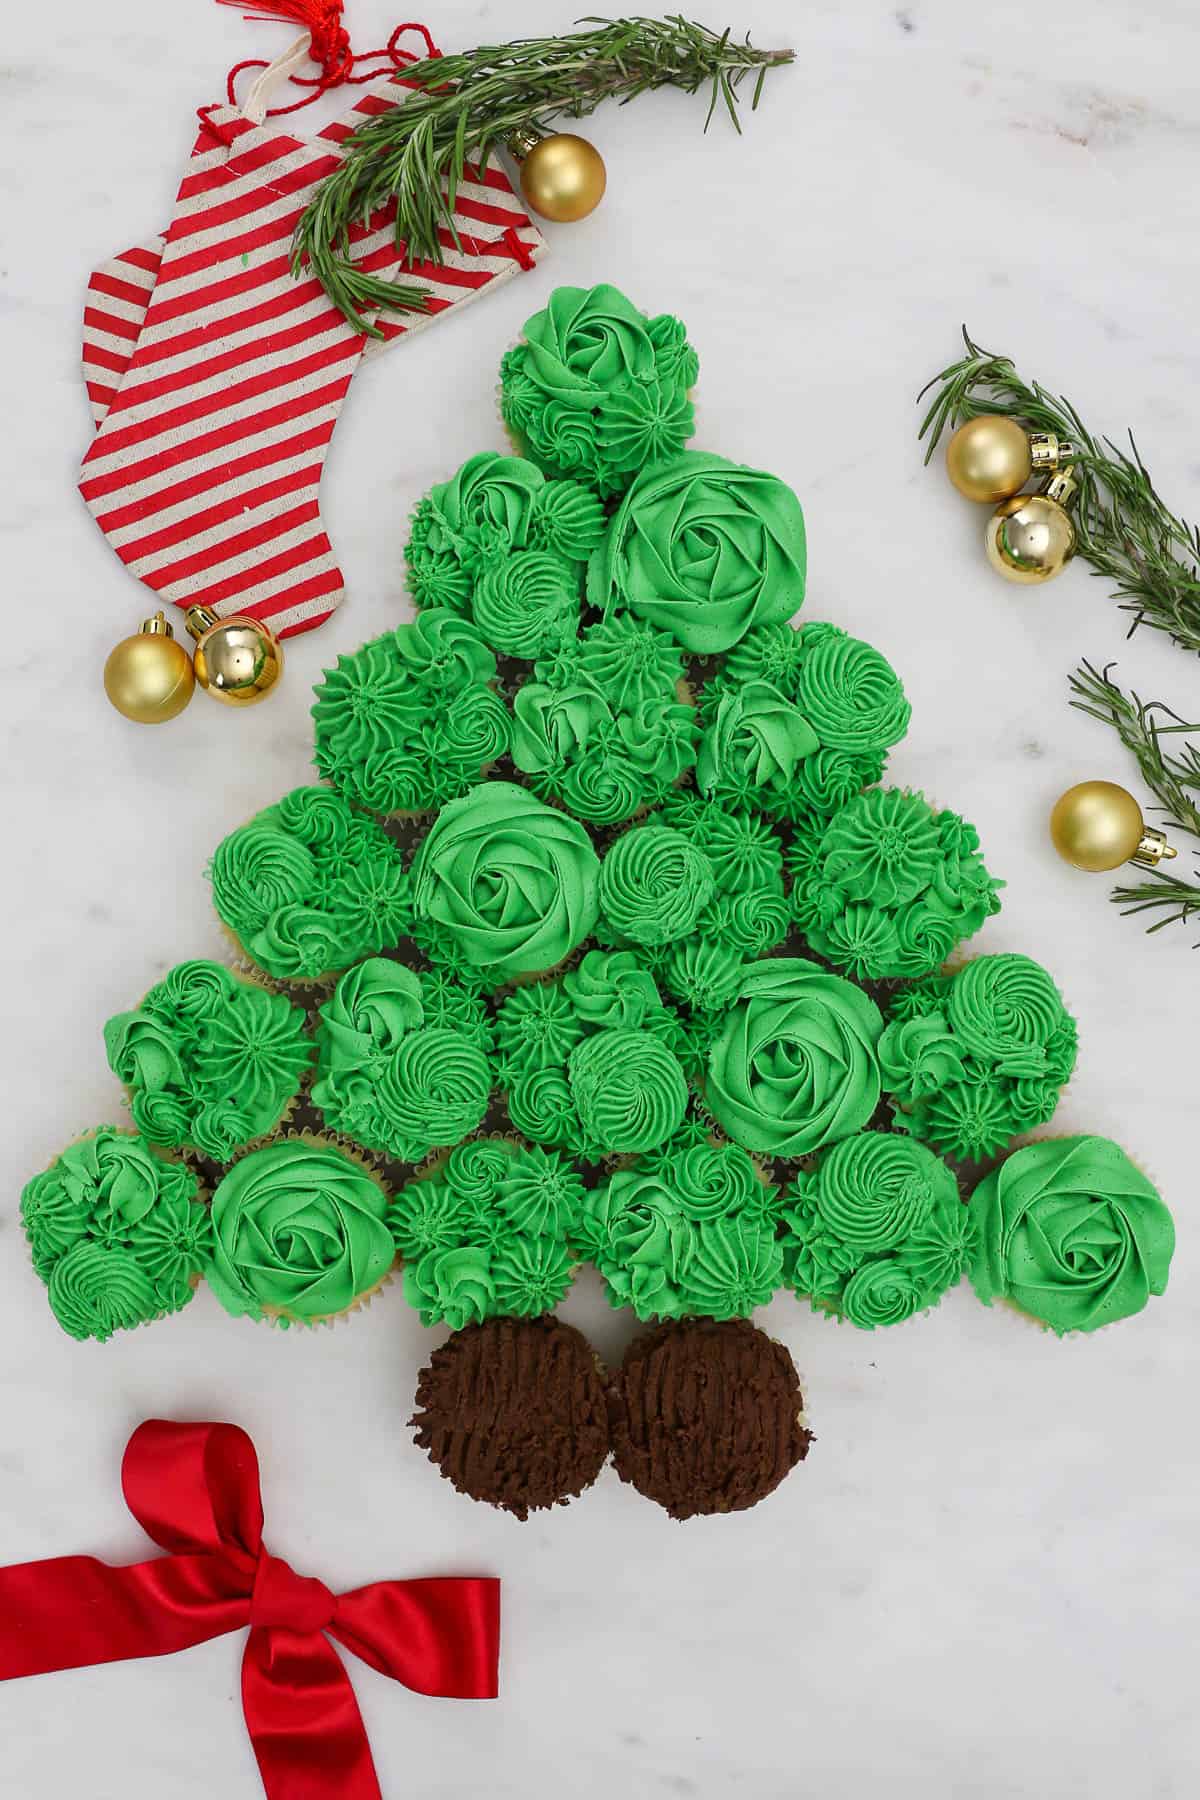
- Separate out ¼ cup of the finished frosting. Mix in 2-3 teaspoons cocoa powder until well combined, You may need to add up to 1 teaspoons milk or water to help incorporate the cocoa powder. Use immediately for the tree trunks, and then use a fork or toothpick to give them a rough look
- Separate out another ¼-½ cup of frosting if you’d like to have another color of frosting for your cake, such as the white for the star on top, the extra present cupcakes or if you’d like a two toned frosting (note you may want to set aside more than 1/2 a cup for this depending on your design intent)
- Dye the rest of your remaining frosting green, fill two large piping bags 2/3 full.
- Prepare a couple of piping bags: at least 1 or 2 small piping bags fitted with couplers and one small bag without a coupler for the larger piping tips so that you can easily switch them out.
Assemble the Cake
- Set up your cupcakes in the shape of a tree. For all the cupcakes you’ll be frosting with green frosting, place a small dollop of frosting (appx 1 teaspoon) on each cupcake and spread evenly with an angled spatula.
- First, use a 1M piping tip to make the large roses. You may want to come back in halfway through and add some smaller ones
- Then use a large French star tip (size 866) to make large dollops of frosting and large swirls.
- Finally, use the smaller piping tips, size 21 and and size 199 to fill in the gaps making rosettes.
- For the star on top, use your white frosting to frost the cupcake and dip in gold sprinkles.
- Decorate the tree with sprinkles.
- Any leftover cupcakes can be decorated to look like presents.

Notes
For more tips and helpful instructions be sure to review the blog post.
Substitute a cake mix: If you prefer not to bake from scratch, you can use a cake mix for the cupcakes, but make sure you have 24 cupcakes at least.
Storing leftovers: I store leftover cupcakes in an airtight container at room temperature for 3 days. If you live in a warm or humid climate, then I suggest refrigerating. If you have to refrigerate your cupcakes, leave them out at room temperature for a bit before enjoying them to let the frosting soften up.
Nutrition
- Serving Size: 1 Cupcake
- Calories: 400
- Sugar: 46.9g
- Sodium: 118.6mg
- Fat: 17.9g
- Saturated Fat: 11.8g
- Carbohydrates: 58.3g
- Fiber: 0.4g
- Protein: 3.1g
More Fun Christmas Dessert Ideas
Continue spreading the love this holiday season with more festive desserts for your friends and family. You’ll love the ideas below!


Hello!
I made your Christmas tree cake yesterday/today for my daughter’s first birthday party. It turned out really great, and I had so much fun decorating with the different tips. Loved your suggestion for the tree trunk; a little cocoa and a toothpick and it looked so bark-y! I used your recipe for chocolate cupcakes, and it brought good responses from “the crowd,” Thank you for all the advice on how to make this. I really appreciate you talking about which tips to use and in which order you do all the steps. I wish I could send you a picture! I’m pretty new at this; this is only the 3rd cake I’ve decorated. But your tips and specific info really made it doable!
-Naomi (Mama of 2 littles)
Naomi that is so awsome and makes me so happy to hear it! These types of project can be very intimidating to do and I am glad that the tutorial was helpful. Happy holidays!
Thank you for the step by step and detailed info to make this. It looks so festive and I will be bringing this to work! Also, thank you for the links to buy some of the special items. Merry Christmas!
You’re so welcome Carol! I hope you enjoy making this!
This is super cute! I’d love to make this for our connect group Christmas dinner 😀 It would be perfectly festive for the occasion, and it’s just so adorable…really love your piping, Julianne 🙂 Super pretty!
Thank you Erin!