
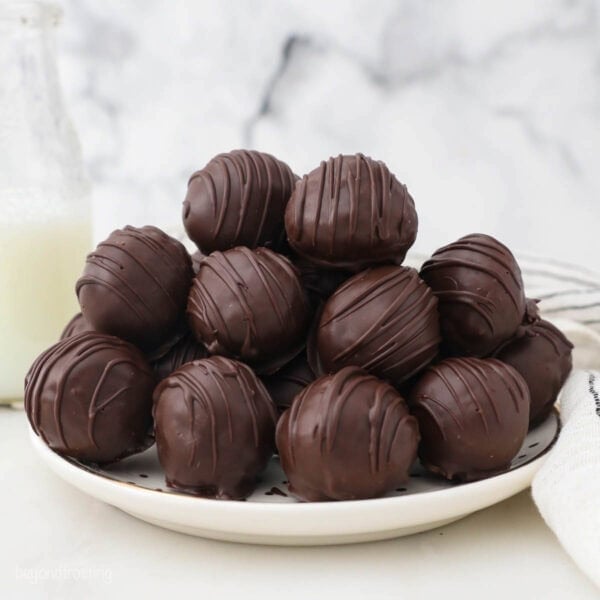
These quick and easy no-bake peanut butter balls are full of crunchy Rice Krispies and covered in rich dark chocolate! If you’re looking for a sweet and satisfying snack or dessert that only uses a handful of ingredients, this is the recipe for you.

Peanut butter and chocolate in a bite-sized treat? Yes, please! These dreamy peanut butter chocolate balls with Rice Krispies are one of the best variations of my homemade chocolate truffles I’ve made! Once the smooth layer of chocolate melts in your mouth, you’re left with a soft, creamy, and subtly crunchy cluster of peanut butter bliss.
Why This Crispy Peanut Butter Balls Recipe Works
- No baking. These tasty truffles come together in the blink of an eye with no baking required. You simply mix, microwave and chill.
- Great for gifting. If you’re feeling generous, these yummy little confections are a thoughtful and inexpensive gift idea. It’s easy to decorate them for the holidays and drop them off to friends and relatives!
- A classic, made crispy! Your average peanut butter balls (also called buckeyes or buckeye balls) are made up of 3 main ingredients: peanut butter, powdered sugar and vanilla extract. But we don’t do average here! This version adds a velvety chocolate coating and crispy cereal bits inside for even more sweetness and texture.

Ingredient Notes
The filling inside these chocolate-covered peanut butter balls isn’t far off from peanut butter fudge. I’ve covered the important ingredients you’ll need to make these treats below. Scroll to the recipe card for the printable list and amounts.
- Unsalted Butter – Should be at room temperature.
- Creamy Peanut Butter – I recommend shelf-stable creamy peanut butter, like Jif. Do not use a natural peanut butter as it tends to make the peanut butter balls oily.
- Powdered Sugar – Sift your powdered sugar (confectioner’s sugar) so that there are no clumps.
- Rice Krispies Cereal – To add a subtle crunchiness that takes these chocolate peanut butter balls over the edge! You can also use generic crispy rice cereal or swap it out with variations, like Chocolate Rice Krispies, etc.
- Dark Chocolate Melts – I have never had anything but perfect results using Ghirardelli’s dark melting wafers. Other good-quality chocolate brands are Lindt and Guittard.

How to Make Peanut Butter Balls with Rice Krispies
I always looked forward to the peanut butter balls when my mom attended cookie exchanges during my childhood. Had I known how easy they are to make, I would have been whipping them up myself!
- Combine the ingredients. Combine the butter and peanut butter in a medium-sized mixing bowl and beat until the mixture is completely smooth and free of lumps. Add the powdered sugar and vanilla extract and beat until well combined.
- Fold in the Rice Krispies. Next, gently fold in the Rice Krispies. Take care not to crush them up too much.


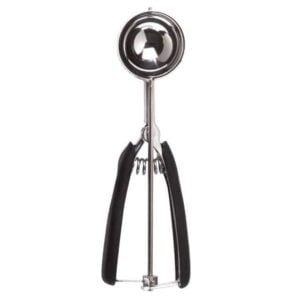
- Scoop the dough. Now, use a small cookie scoop to portion balls of dough onto a baking sheet. This keeps them uniform in size. If you don’t have a cookie scoop, you can use spoons.
- Chill. Refrigerate the peanut butter balls for 30 minutes, or freeze them for 15 minutes. This makes them easier to handle.
- Shape the balls. Afterward, remove the chilled peanut butter scoops from the fridge. Roll them between your hands to form a smooth ball. When you’re ready to start dipping the balls in the chocolate, pop the tray in the freezer for 10 minutes so they firm up again.


Dip the Peanut Butter Balls in Chocolate
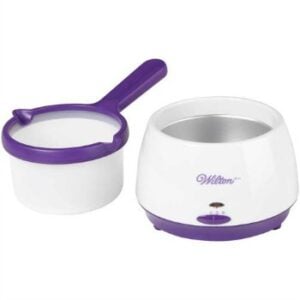
- Melt the chocolate. In a microwave-safe bowl, melt the chocolate wafers at 50% power in 30-second intervals, stirring after each interval and continuing until all of the chocolate is melted. See my tips on how to melt chocolate. Or, if you have a candy melting pot like you see here, it’s ideal for dipping these.
- Dip the peanut butter balls. Work in small batches (6 at a time) and keep the remaining peanut butter balls in the refrigerator or freezer until you’re ready for them. They’re easier to work with when they’re firm. Use a spoon to dip each ball in the chocolate, covering it completely. Then lift the ball out of the chocolate with a fork and tap the fork on the side of the bowl to remove excess chocolate.
- Let the chocolate set. Place the balls back on the baking sheet and allow the chocolate to set completely. To add a chocolate drizzle, do so after the chocolate coating has set.


Can I Make These In Advance?
You sure can. If you’d like to make the peanut butter balls ahead of time and dip them in the chocolate coating once you’re ready to serve them, be my guest! Simply leave them chilled on the lined baking sheet until you’re ready to shape and coat them. You can also make them to completion and store them in the fridge or freezer according to the instructions below.

Truffle Making Tips
- Use high-quality chocolate. The quality of the chocolate makes a big difference in how well it melts. Standard chocolate chips, for example, don’t melt as smoothly because they come with a waxy coating. If you’re using chocolate that’s not meant for melting, I suggest adding in a tablespoon of butter to help it out. Be extra careful not to burn the chocolate.
- Use a candy melting pot. I recommend melting your chocolate with a Wilton melting pot or similar, for best results. Once melted, it keeps the chocolate at the perfect temperature for dipping. You could also melt the chocolate using a double boiler.
- Get out the gloves. Whenever I’m working with peanut butter, I know it’s going to be sticky! I like to use food-safe gloves for easy cleanup.
- Chill the dough before dipping. These peanut butter balls should be chilled both before and after they’re rolled to shape. Keep them in the fridge until you’re ready to dip them so they stay firm.
How to Decorate Peanut Butter Balls
Want to add more than a drizzle of chocolate to your peanut butter truffles? Maybe it’s the holidays, and a coating of crushed peppermint or sprinkles is in order? There are tons of tasty possibilities! Just remember that, unlike a chocolate drizzle, most toppings should be added to the truffles before the chocolate has fully set so that they stick. Try these ideas:
- Seasonal Sprinkles
- Sea Salt
- Chopped Peanuts
- Oreo Cookie Crumbs
- Toasted Coconut Flakes
- White Chocolate Drizzle
- Chopped Walnuts

Storage and Freezing
- Refrigerate. Leftover chocolate peanut butter balls should be stored in an airtight container in the fridge. Enjoy them within 1 week.
- Freeze. These peanut butter truffles are freezer-friendly. Store them in a freezer-safe container and thaw them out in the fridge for a few hours before enjoying. Don’t let them thaw for too long after freezing them, or they may develop condensation. Frozen peanut butter balls will stay good for up to 3 months!
More No Bake Desserts
Peanut Butter Balls with Rice Krispies
- Prep Time: 1 hour
- Cook Time: 0 minutes
- Total Time: 1 hour
- Yield: 54
- Category: Dessert
- Method: No Bake
- Cuisine: American
Description
These chocolate-covered peanut butter balls are filled with creamy peanut butter and crunchy Rice Krispies cereal. Make them with 6 ingredients and no baking!
Ingredients
- ½ cup unsalted butter, at room temperature
- 1 jar (16oz/454g) creamy peanut butter
- 3 ½ cups powdered sugar, sifted
- 1 teaspoon pure vanilla extract
- 2 cups Rice Krispie cereal
- 15 ounces Ghirardelli dark chocolate melting wafers
Instructions
Make the Peanut Butter Balls
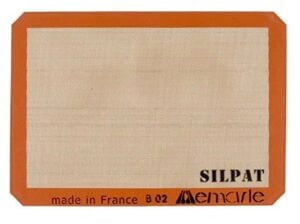
- Line a baking sheet with parchment paper.
- In a medium-sized mixing bowl, combine the butter and peanut butter and beat until completely smooth and free of lumps.
- Add the powdered sugar and vanilla extract and beat until well combined. Fold in the Rice Krispies cereal.
- Use a small-sized cookie scoop and place it on the baking sheet. Refrigerate for 30 minutes or freeze for 15 minutes.
- Remove from the refrigerator and roll the between your hands to form a ball. When you are ready to start dipping, pop the tray in the freezer for 10 minutes to harden.
Make the Chocolate Coating
- Work in small batches (6 at a time) and keep the remaining peanut butter balls in the refrigerator or freezer until ready.
- In a microwave-safe bowl, melt the chocolate wafers at 50% power in 30-second intervals; stir after each interval and continue until the chocolate is melted. Reduce microwave time as needed so the chocolate does not burn.
- Use a spoon to dip the balls in the chocolate, covering them completely. Then lift out of the chocolate with a fork and tap the fork on the side of the bowl to remove excess chocolate. Place the ball on the baking sheet and allow the chocolate to set completely.
- To add a chocolate drizzle, do so after the chocolate coating has set.
Notes
- Leftover peanut butter balls should be stored in an airtight container in the fridge. Enjoy them within 1 week.
- Store them in a freezer-safe container and thaw them out in the fridge for a few hours before enjoying. Don’t let them thaw for too long after freezing them or they may develop condensation. Frozen peanut butter balls will stay good for up to 3 months!
- Be sure to use a peanut butter like Jif or Skippy. Do not use all-natural peanut butter as it’s too oily and can separate.
Nutrition
- Serving Size: 1
- Calories: 147
- Sugar: 11.8 g
- Sodium: 45.4 mg
- Fat: 9.1 g
- Carbohydrates: 15.1 g
- Fiber: 1.1 g
- Protein: 2.4 g
- Cholesterol: 5 mg


Do the rice krispies actually stay crunchy?
Not as crunchy as when they are out of the package but I don’t find they soggy. They just add a nice texture.
Hi Julie you say to Use a small size cookie scoop and place on the baking sheet. Refrigerate for 30 minutes or freeze for 15 minutes. Do you mean the finished product?
I’m confused
Hi Ann, no you need to scoop the peanut butter balls and then chill before dipping. If you do not chill them, then they are too soft to dip.
Everyone LOVED this recipe! Adding to my ‘tried and true’ file.
This is the best Christene! Thank you for sharing!
I haven’t made them as yet! Reviews are so good! I am making them for a Christmas party how far in advance would you recommend?
Thanks all of your recipes are delicious!!
Hi Linda! Up to 1 week in the fridge, otherwise freeze them!
Ha e you ever made these using milk chocolate. I really do not like dark chocolate .
You can use milk or dark, or even white chocolate
These are so good!! People were asking for the recipe❤️
Wonderful, thank you so much Kelley! I really appreciate that!