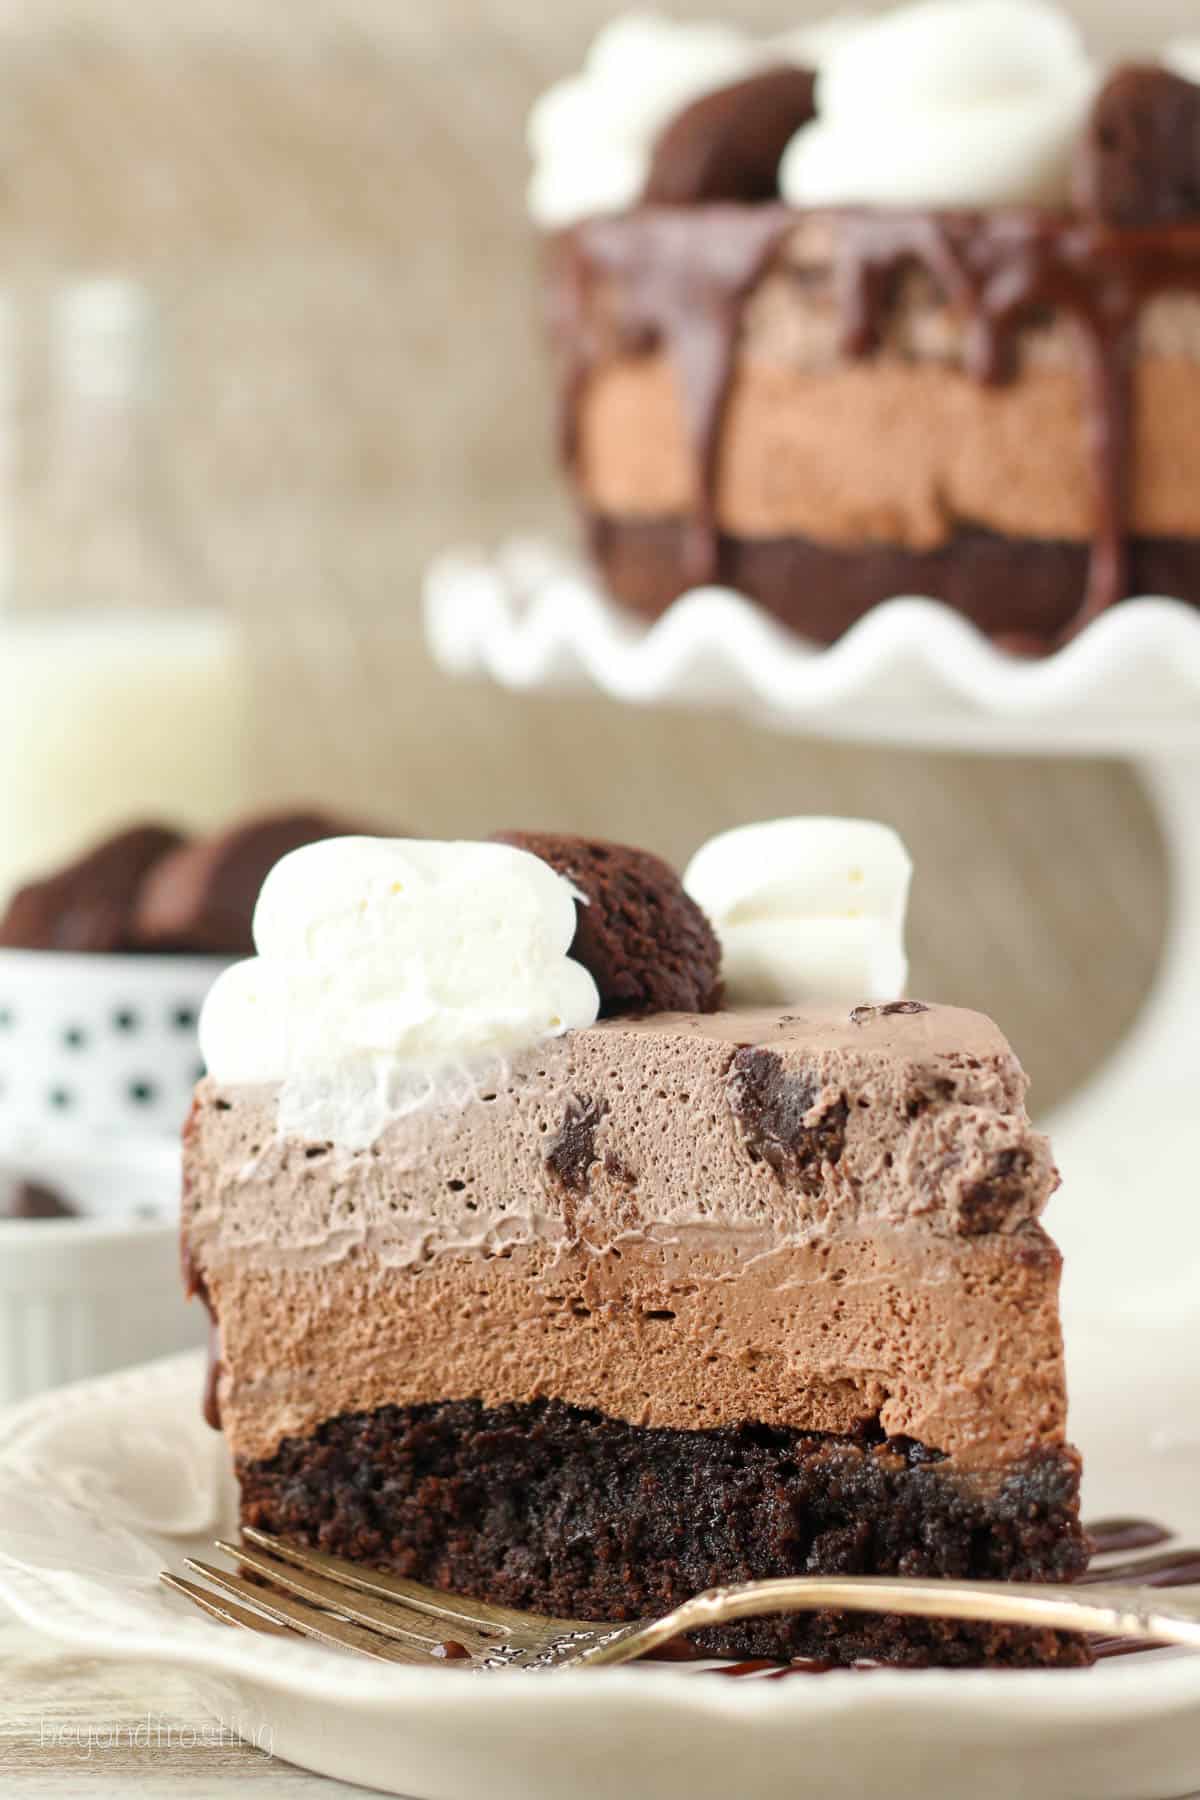
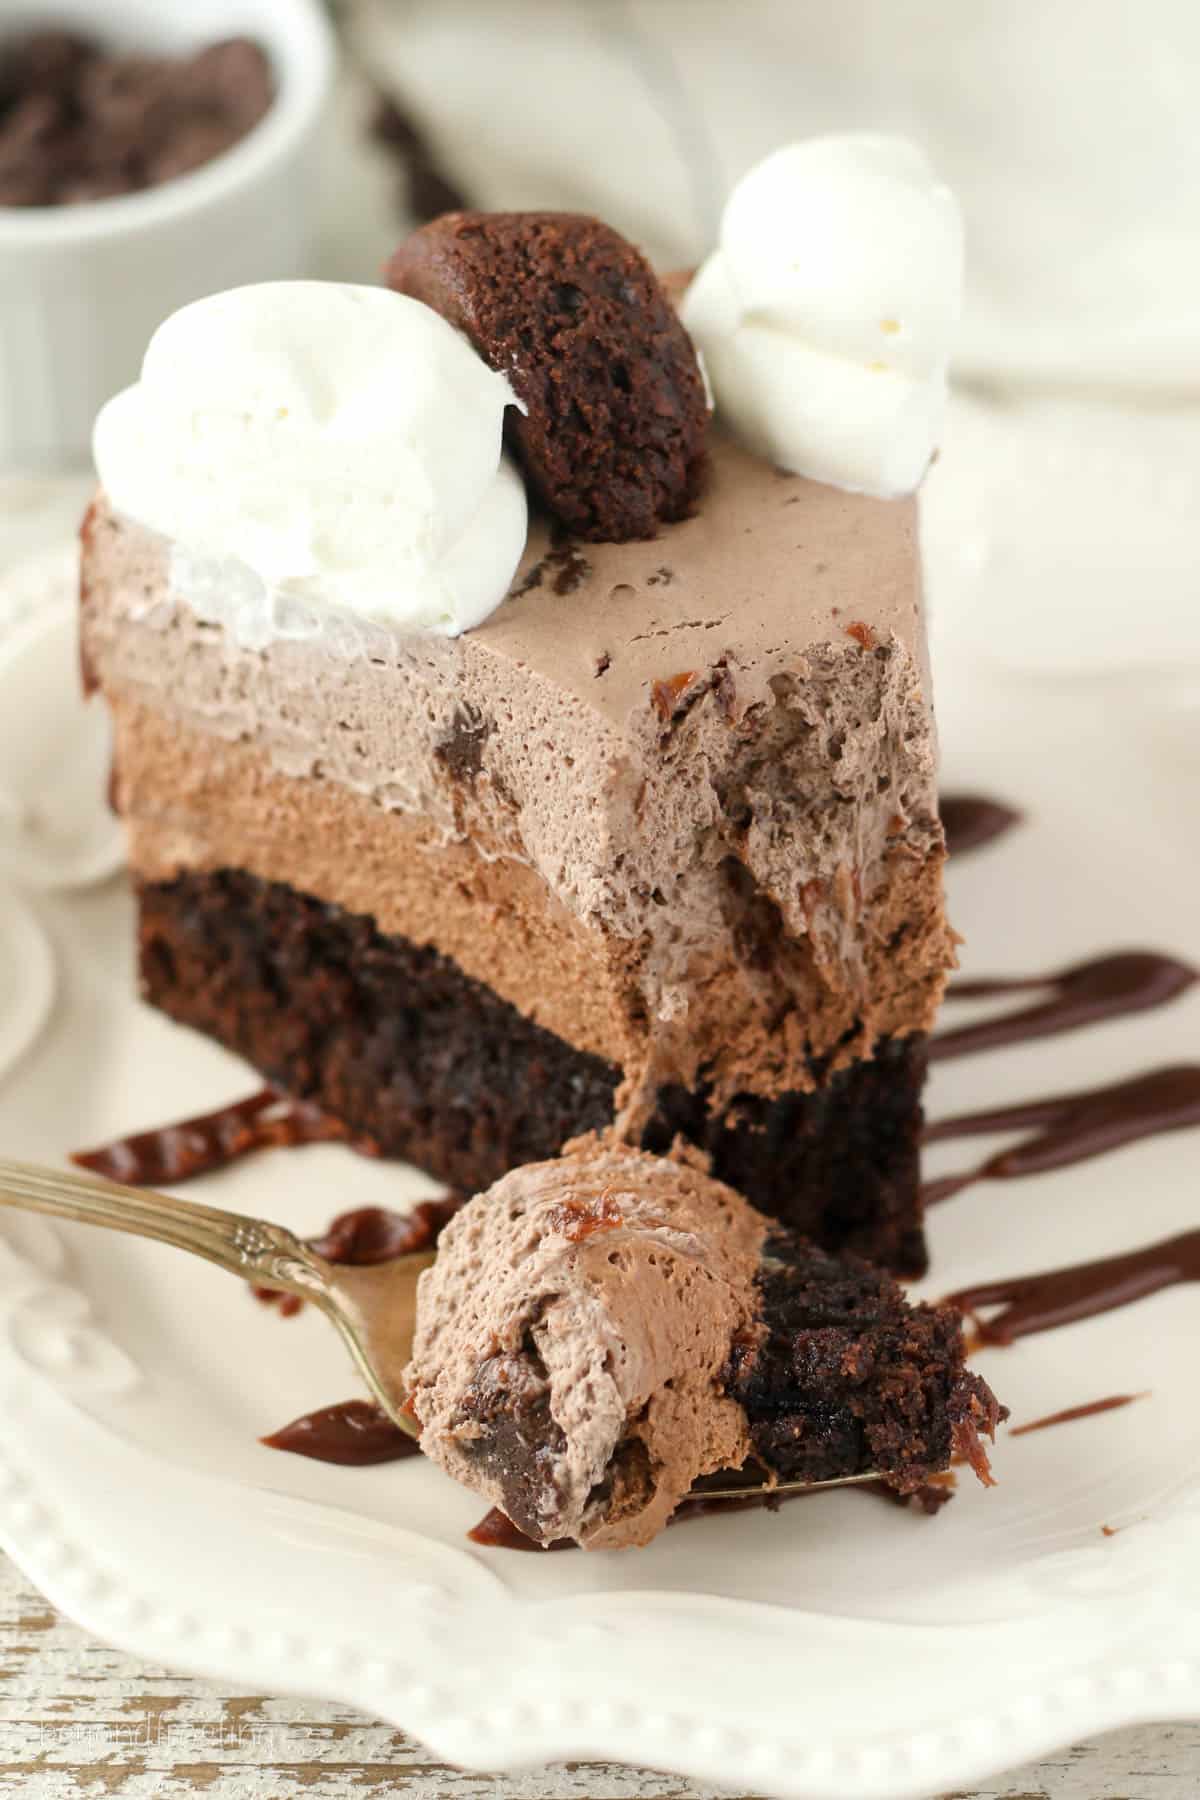
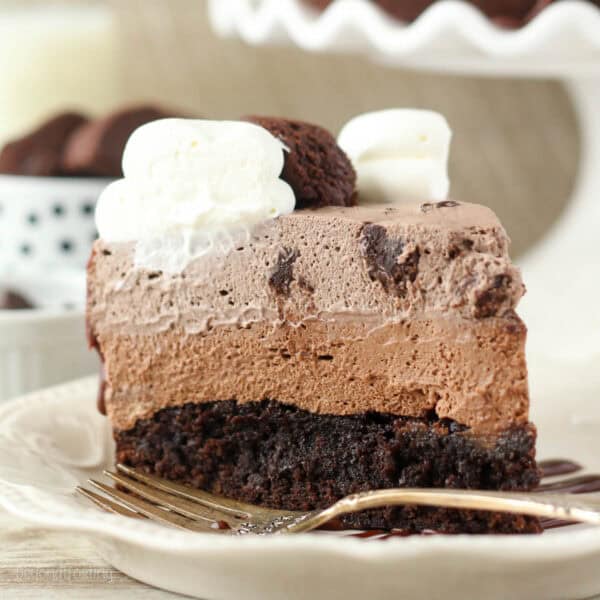
This Triple Chocolate Brownie Mousse Cake is a rich, decadent, mouthwatering dessert for all you chocolate lovers! It’s a fudgy brownie base topped with layers of chocolate mousse, brownie batter mousse, chocolate ganache, and whipped cream.
Easy Triple Chocolate Mousse Cake with Brownies
If you’ve ever tried my easy chocolate mousse cake, then you know you’re we’re going over the top for this one.
I’ve swapped out the chocolate cake layer for a fudgy brownie, kept the light and airy layer of chocolate mousse, then added a third layer of brownie mousse on top. All that is finished off with chocolate ganache, homemade whipped cream, and chopped brownies.
This is what I would call a chocolate lover’s dream-come-true!
Key Ingredients
- Brownie Baselayer – For the brownie layer, you can either mix up a batch of boxed brownie mix or make a homemade brownie. I’d recommend my quick and easy cocoa powder brownies.
- Brownie Mix – Even if you choose to make a homemade brownie for the base, I do recommend using a boxed brownie mix for the brownie batter mousse. The dry ingredients are mixed into whipped cream. You can heat-treat the brownie mix the same way you heat treat flour, making it safe to eat
- Chopped Brownies – Chopped brownies are added into the brownie mousse and used for decoration. I use store-bought brownies to keep it simple, but feel free use homemade (maybe a double batch of the cocoa powder brownies), let them cool, then chop them up into pieces for the mousse.
- Gelatin – You will need unflavored powdered gelatin for both the chocolate mousse and the brownie batter mousse to help stabilize the mixture so the cake has more structure.
- Chocolate Chips – I recommend mini chocolate chips so incorporate them nicely into the chocolate mousse.
- Cream Cheese – Use a block of full-fat cream cheese for the best texture. Be sure to soften to room temperature first.
How to Make Triple Chocolate Mousse Cake
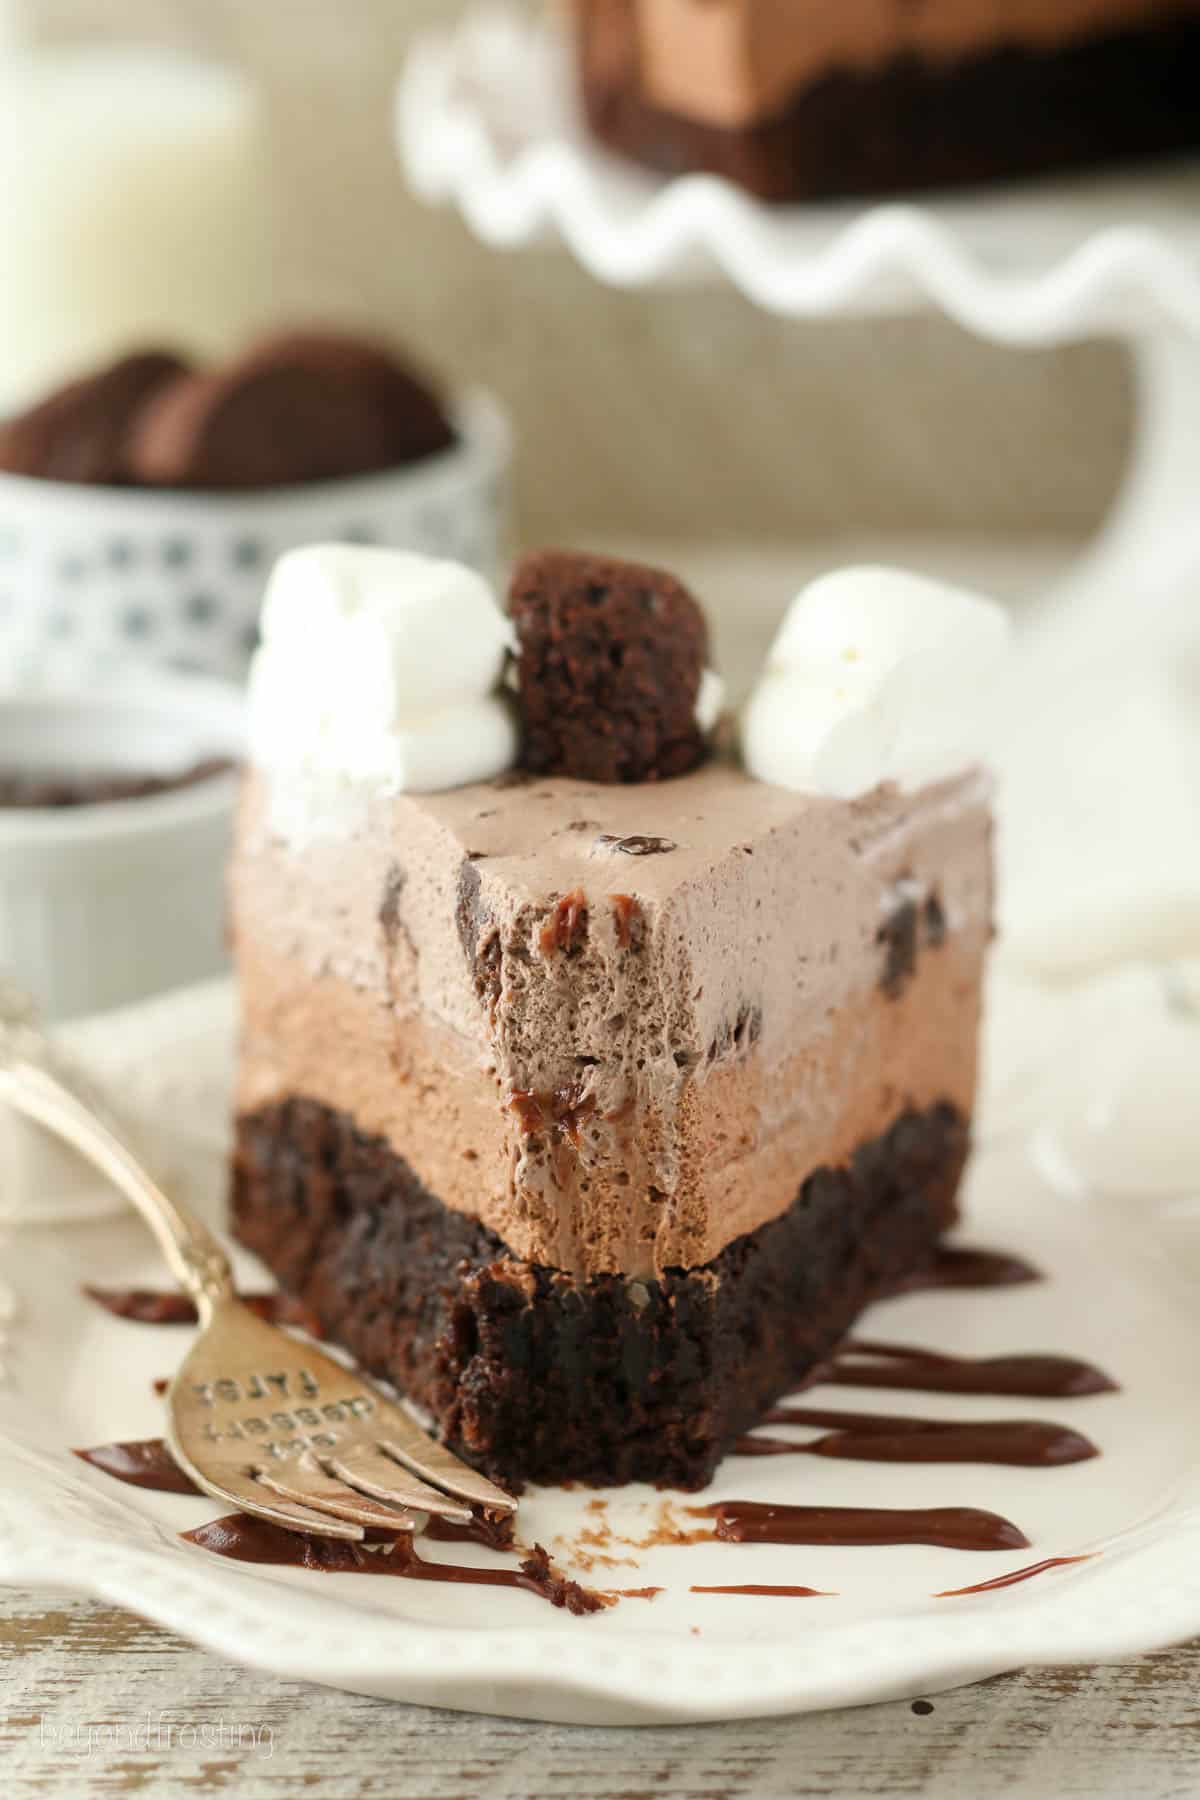
This recipe looks like a lot of steps with a lot of ingredients. But in actuality, it’s just a few simple steps that repeat a couple of times for each layer, and a few dishes involved. Let’s break it down:
Brownie Layer
These instructions are assuming you’re using a boxed brownie mix. If you choose to make a homemade brownie, you’ll follow the preparation instructions and bake it in the 9-inch springform pan.
- Make the brownie batter: Make the brownie batter of your choice, homemade or boxed, then pour into a 9-inch springform pan lined with parchment paper.
- Bake: Bake at 350ºF until the brownies are set, but still slightly fudgy. Cool completely.
Chocolate Mousse
- Prep the gelatin and chocolate: Bloom the gelatin. Combine the gelatin powder with one tablespoon of cold water. Let it sit for a couple of minutes as it thickens into a gummy, solid state. Then, heat the gelatin in the microwave for 5-7 seconds just until it’s melted. Make sure and remove any pieces that didn’t melt down.
- Melt the Chocolate In a separate bowl, combine chocolate chips and heavy whipping cream. Microwave until melted. Add in the warmed, liquid gelatin and mix until it’s combined.
- Make the whipped cream: Chill a mixing bowl and whisk in the freezer for a few minutes, then pour heavy cream into the chilled bowl. Beat until it’s thickened to soft peaks, then add the powdered sugar and beat until stiff peaks form. Set that aside.
- Combine all ingredients: Combine the cream cheese and the sugar and beat until well combined and smooth, then mix in the cocoa powder. Slowly add in a couple of tablespoons of heavy whipping cream followed by vanilla extract, beating until combine. Next mix in the melted chocolate, until it’s well incorporated. Finally, you’ll fold in the prepared whipped cream, stirring until combined.
- Layer: Pour the chocolate mousse over the cooled brownie, then place it into the refrigerator.
Brownie Batter Mousse
- Heat treat the brownie mix: Spread the boxed brownie mix onto a baking sheet lined with parchment paper and bake at 350ºF for 10 minutes until it’s heated to 160 degrees Fahrenheit. Once heated, allow it to cool, and sift through a fine mesh sieve to break up any clumps.
- Bloom the gelatin: prepare a second batch of gelatin the same way you did for the chocolate mousse, then melt it and allow it to cool.
- Make the whipped cream: Prepare another batch of whipped cream, chilling the bowl first. Beat the heavy whipping cream at a high speed until it’s thickened to soft peaks, then add the dry brownie mix, and liquid gelatin and beat until stiff peaks form.
- Combine: Fold the chopped brownie pieces into the prepared mousse.
- Layer and Chill: Pour the brownie batter mousse over the chocolate mousse, then place into the refrigerator for 4-6 hours or until set.
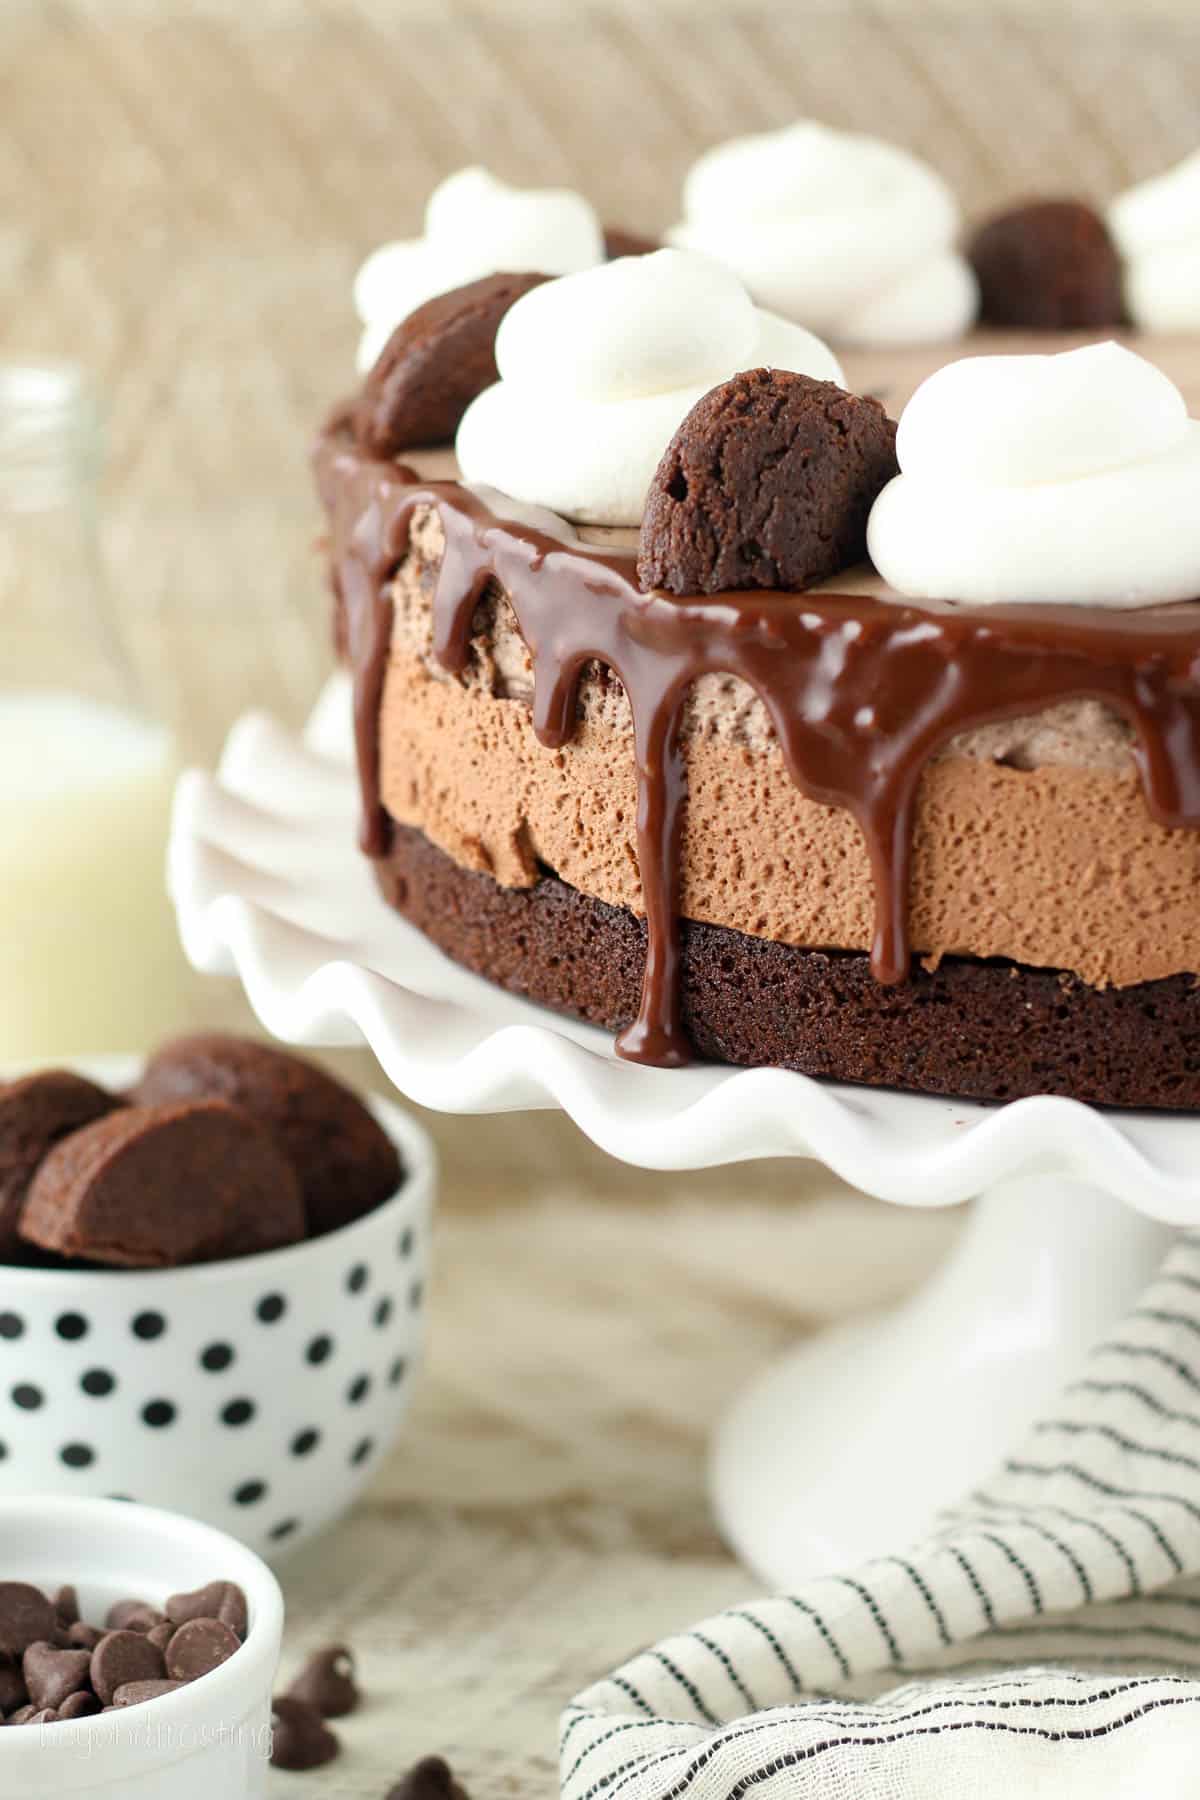
Chocolate Ganache
- Melt the chocolate: In a bowl, combine chocolate chips and heavy whipping cream. Microwave in 30-second increments, stirring each time until melted and smooth.
- Decorate: Transfer the ganache to a piping bag or use a spoon to decorate the edges of the cake. The ganache will run down the sides.
Whipped Cream Topping
- Make the whipped cream: Prepare a third batch of whipped cream to decorate with.
- Top and serve: Use a piping bag to pipe a border around the top of the cake and garnish with leftover brownies.
How to Heat Treat Brownie Mix
If you’re at all concerned about the raw flour from the brownie mix, don’t worry! You can easily heat treat it the same way you might heat treat flour for a no-bake recipe. Check out my post on how to heat treat flour for instructions!
Tips for Success
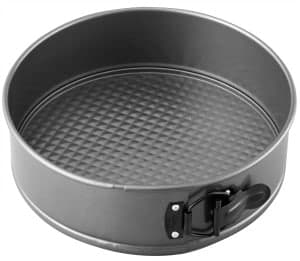
- Use a springform pan. This makes it a whole lot easier to remove the cake from the pan without damaging it at all.
- Line the bottom of the pan. A layer of parchment paper helps prevent the brownie crust from sticking to the bottom.
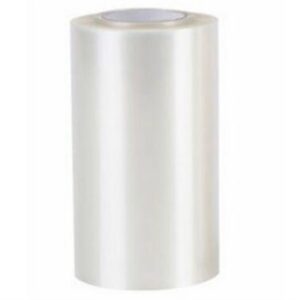
- Line the sides of the pan. When you’re ready to assemble, Line the sides of the pan with parchment paper or a cake collar for the smoothest edges.
- Cool the brownies completely. If the brownies are warm when you layer on the mousse, the filling will just melt all over. They need to be completely cooled off so the cake can hold its shape.
- Give it plenty of time to chill. I recommend letting the mousse layers chill in the fridge for at least 4-6 hours so they have time to fully set.
- Wait on the toppings. Add the toppings just before serving for the best presentation.
How to Store Finished Mousse Cake
Finished chocolate mousse cake will last covered in the fridge for up to 4 days! Wrap tightly in plastic wrap or put the entire pan in an airtight container.
This can be prepared up to 2 days in advance, but I do recommend adding the topping the day of serving if possible. Once the ganache is added, it’s difficult to place back in the pan.
Can I Freeze It?
You could freeze this once it’s been fully prepared and set, but the texture may change once it’s thawed. I recommend freezing it while it’s still in the pan, wrapped tightly with two layers of plastic wrap, plus foil to prevent freezer burn.
Note that because the mousse recipe contains gelatin, it will not freeze completely solid. Thaw the chocolate mousse cake in the fridge before removing it from the pan and serving.
Triple Chocolate Brownie Mousse Cake
- Prep Time: 1 hour
- Chill Time: 6 hours
- Total Time: 7 hours
- Yield: 10-12 slices
- Category: Dessert
- Method: Oven
- Cuisine: American
Description
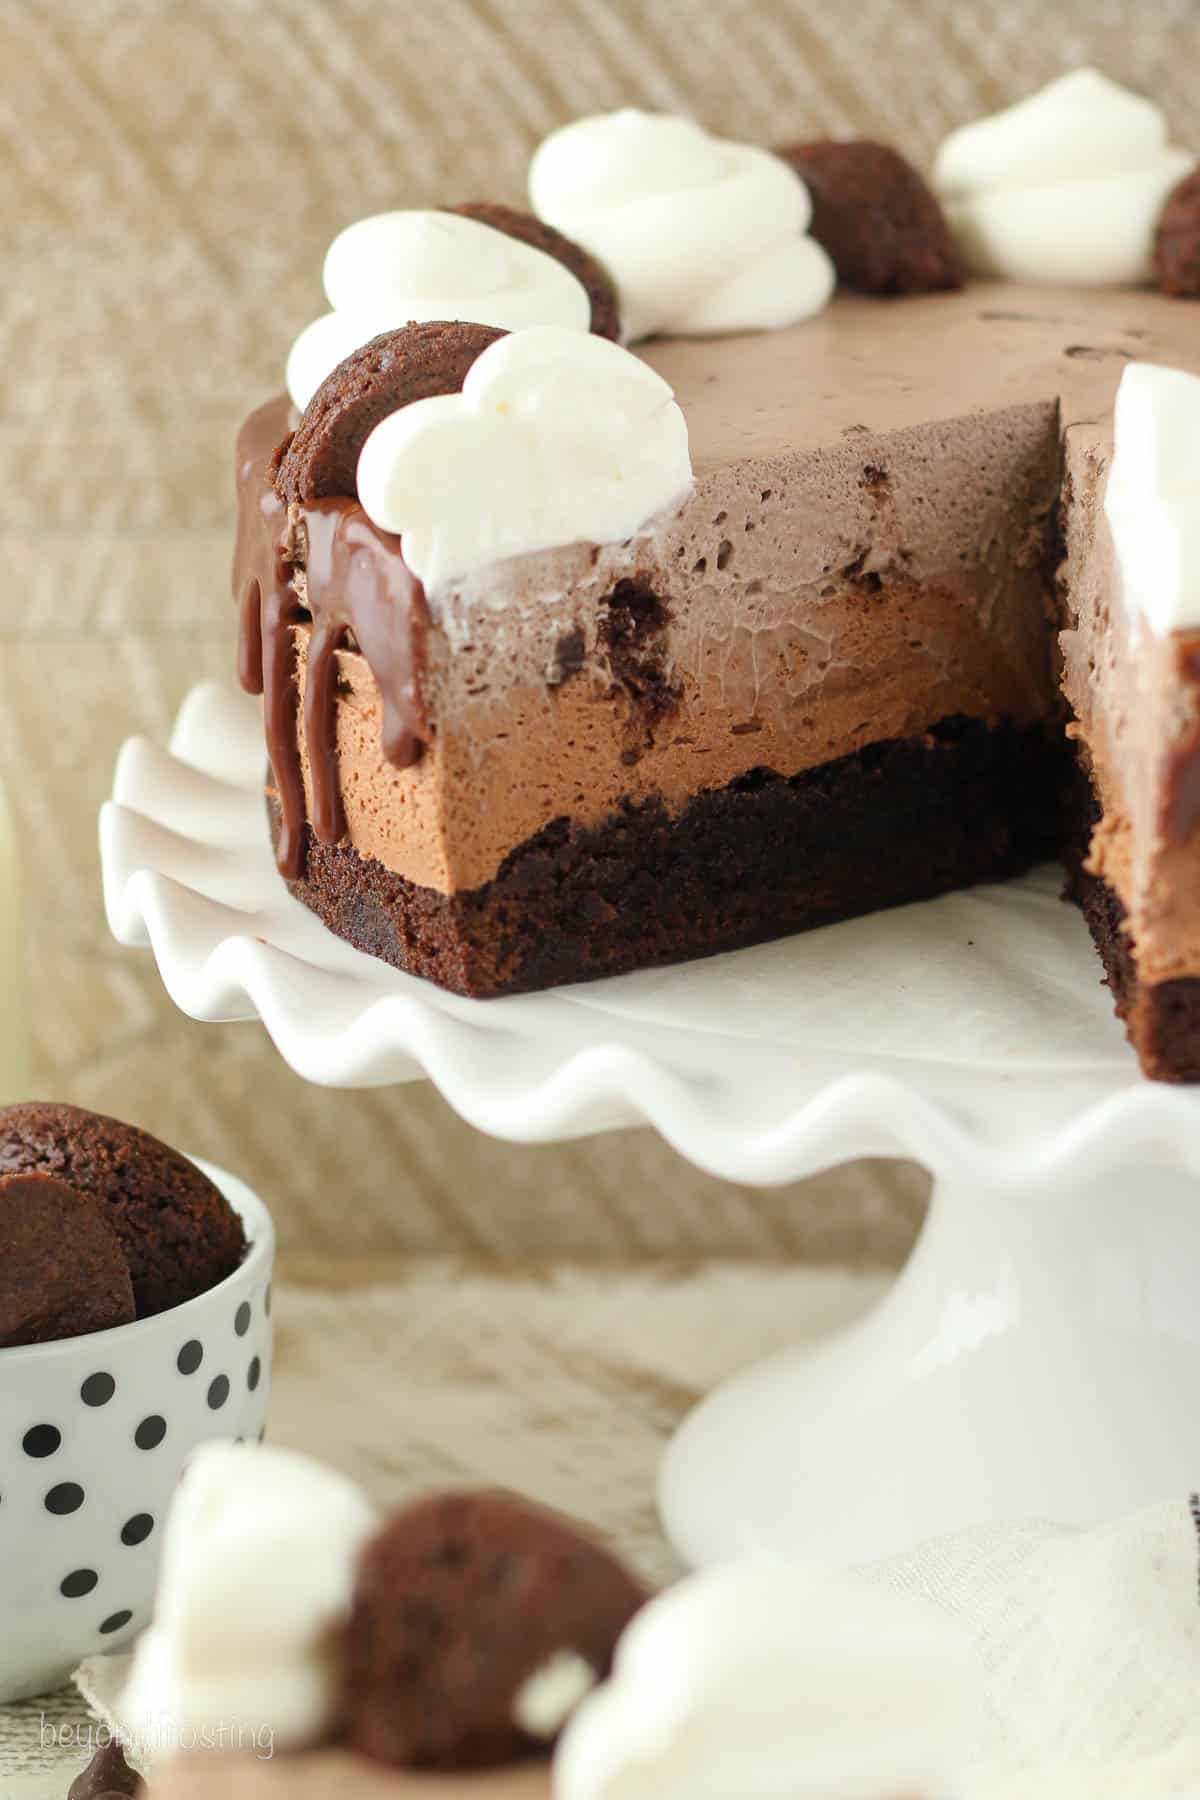
The mouthwatering Triple Chocolate Brownie Mousse Cake is so sinful. There’s a fudgy brownie on the bottom, a layer of easy chocolate mousse and finally a layer of mouthwatering brownie batter mousse.
Ingredients
For the Brownie Layer
- 1 box (19oz) fudgy chocolate brownie mix
- Ingredients listed on the box: oil, eggs, water
For the Chocolate Mousse
- 1 tablespoon (15ml) water
- 1 teaspoon gelatin
- ½ cup (90g) semi-sweet chocolate chips
- 1 cup plus 4 tablespoons (295ml) heavy whipping cream, divided
- ½ cup (65g) powdered sugar
- 8oz (226g) cream cheese, at room temperature
- ¼ cup (48g) granulated sugar
- 2 tablespoons (10g) cocoa powder
- 1 teaspoon (5ml) vanilla extract
For the Brownie Mousse
- 1 tablespoon (15ml) cold water
- 1 teaspoon gelatin
- 1 cup (236ml) heavy whipping cream
- ¾ cup dry brownie mix
- 1 cup chopped brownies (store-bought)
For the Toppings
- ½ cup (90g) dark or semi-sweet chocolate chips
- ¾ cup + 2 tablespoons (207ml) heavy whipping cream, divided
- 3 tablespoons (24g) powdered sugar
- Additional chopped brownie for garnish (optional)
Instructions
For the Brownie Layer
- Preheat the oven to 350°F. Line the bottom of a 9-inch springform pan with parchment paper.
- In a medium-sized bowl, combine the brownie mix, with the ingredients listed on the box. Stir until the batter is well combined and there are no dry ingredients left.
- Pour the batter into the springform pan and spread evenly. Bake at 350°F for 35-40 minutes until the center is baked but still slightly fudgy. Allow the brownie to cool completely.
For the Chocolate Mousse
- In a small dish, combine 1 tablespoon of cold water with 1 teaspoon gelatin. Sprinkle the gelatin over the cold water and allow it to set to a solid (2-3 minutes).
- In a microwave-safe bowl, combine the chocolate chips and 2 tablespoons of heavy whipping cream. Microwave in 30-second increments, stirring each time until the chocolate is melted and smooth.
- Next, melt the gelatin in the microwave for 5-8 seconds until it turns back into a liquid. Watch it closely! Remove any lumps that did not melt. Stir the liquid gelatin into the melted chocolate and set it aside to cool.
- Prepare the whipping cream. Chill a mixing bowl in the freezer for 5 minutes. Using the chilled bowl, beat 1 cup of heavy cream on high speed until it’s thickened to soft peaks. Next, add the powdered sugar and continue beating at high speed until stiff peaks form. Set the whipped cream aside.
- Combine together the cream cheese and sugar, beating at a medium-high speed for 2-3 minutes, until the cream cheese is completely smooth, scraping the bowl occasionally. Next, add the cocoa powder and beat until well combined, scraping down the bowl as needed.
- Next, slowly add 2 tablespoons of heavy whipping cream and the vanilla extract and continue beating until combined. Then add the melted chocolate and mix thoroughly into the cream cheese mixture. Finally, fold the prepared whipped cream into the cream cheese and stir gently until the mixture is well combined.
- Place the cooled brownie in the bottom of the springform pan lined with parchment paper. It’s helpful to line the sides with parchment paper or a cake collar (affiliate link). Pour the chocolate mouse over top of the cooled brownie and refrigerate while you prepare the next layer.
For the Brownie Mousse
- Prepare the heat-treated brownie mix. Bake the brownie mix on a baking sheet lined with parchment paper at 350°F for 8-10 minutes until it reaches 160 degrees F, stirring halfway in between. Allow the mixture to cool and then sift with a mesh sieve.
- In a small dish, combine 1 tablespoon of cold water with 1 teaspoon of gelatin. Sprinkle the gelatin over the cold water and allow it to set to a solid (2-3 minutes). Next, melt the solid gelatin in the microwave for 8-10 seconds until it turns back to a liquid. Watch it closely!
- Prepare the whipping cream. Using a chilled bowl, beat 1 cup of heavy cream on high speed until it’s thickened to soft peaks. Next, add the brownie mix and liquid gelatin and continue beating at high speed until stiff peaks form. Set the whipped cream aside.
- Chop 1 cup of the prepared brownies into small pieces, about the size of a dime or smaller and gently fold them into the brownie batter mousse. Pour the brownie batter mousse over the chocolate mousse.
- Refrigerate the cake for 4-6 hours until the mousse layers are set.
For the Toppings
- Chocolate ganache: In a microwave-safe dish, combine the chocolate chips with 2 tablespoons heavy whipping cream. Microwave for 30-60 seconds until the chocolate starts to melt. Stir until the chocolate is completely smooth. The chocolate should run smoothly off your spoon. If it is still too thick, add additional heavy whipping cream.
- Remove the chilled cake from the pan and use a piping bag or spoon and gently pour the ganache along the edges of the cake. The chocolate will run down the sides. Allow the ganache to set before adding any additional toppings.
- Whipped Cream: Prepare another batch of whipped cream as instruction above using 3/4 cup heavy cream, combined with the powdered sugar. Pipe a border around the outside edge of the cake and garnish with leftover brownies.
Notes
Preparation and Storage:
- Finished chocolate mousse cake will last covered in the fridge for up to 4 days! Wrap tightly in plastic wrap or put the entire pan in an airtight container. This can be prepared up to 2 days in advance, but I do recommend adding the topping the day of serving if possible. Once the ganache is added, it’s difficult to place back in the pan.
- Freezing: You could freeze this once it’s been fully prepared and set, but the texture may change once it’s thawed. I recommend freezing it while it’s still in the pan, wrapped tightly with two layers of plastic wrap, plus foil to prevent freezer burn.
For the brownie layers
- For the bottom layer, consider using this cocoa powder brownie, baked in the springform pan.
- A boxed brownie mix works best for the brownie batter mouse
- Chopped brownies are used in the mousse and for garnish. For this I recommend buying already prepared brownies, or do a double batch of homemade brownies, using the leftovers for the mousse and garnish.
Filed Under:
More Mousse Cake Recipes
- Brookie Mousse Cake – Same brownie base but with layers of Oreo Mousse and Chocolate Chip Cookie Mousse.
- Brownie Bottom Mint Chocolate Chip Mousse Cake
- Banana Dulce De Leche Mousse Cake


The recipe is great but all the ads make it impossible to follow. The website resets the location to a new spot in the recipe or glitches out repeatedly. So frustrating! Also – the brownie mousse ingredients call for 1 1/2 cups but the directions only use 1 cup.
I am sorry you experience technical difficulties with the site. I have not seen that happen yet, so I will keep an eye on it. Thank you for pointing out the error in the brownie mousse, I will look into it.
I made this for my son’s 19th birthday. Everyone raved about the cake! Mine wasn’t as pretty as yours but the taste shined through. I added parchment paper to the sides as it was suggested and it worked perfectly. Thank you for a super tasty and well written recipe!
That is wonderful Nikki! Thank you so much for sharing!! I love this one so much and I am glad you did to!
This looks amazing!! Can it be prepared as minis? Also, can it be frozen to set instead of refrigerated?
Not sure what size you’re asking about for minis. But you can freeze these, but they should be served thawed from the fridge
Will the brownies stay soft while refrigerated? Or will they harden?
The bottom brownie was more firm but not hard, I could still cut through it without an issue. The pieces of brownies were still soft, but I used a store brought brownie to save time.
Hi this looks great. Do i have to wait the full 4 hours before a apply the Ganache and whip cream?
Nope! You just want to make sure that the filling is completely set. I’d like to take the sides off of the pan when I add the ganache and the whip cream and if your filling is not set it will kind of fall apart.
It is not so easy to prepare this recipe, many steps for three preparations, although it looks delicious.