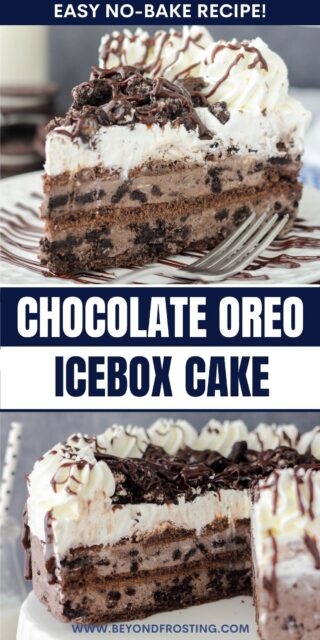
This Oreo icebox cake has decadent, frozen layers of creamy chocolate Oreo mousse, chocolate graham crackers, and fluffy whipped cream, topped with heaps of chopped Oreos and drizzled fudge. It’s the ultimate no-bake dessert for the chocolate and Oreo lovers in your life!

I took this Oreo icebox cake to a potluck recently, and I swear, people fought over the last slice! This is a no-bake dessert that celebrates two of my favorite ingredients: Chocolate and Oreo cookies. It has layers of creamy Oreo mousse and chocolate graham crackers, topped with homemade whipped cream.
But I didn’t stop there. I loaded the finished icebox cake with even more Oreos and a generous drizzle of chocolate fudge before serving. If you love oven-free desserts like my no-bake Oreo cheesecake and Oreo ice cream cake recipes, this Oreo icebox cake has your name all over it.
About This No-Bake Oreo Cake Recipe
- Give the oven a break. As much as I love baked recipes like my Oreo cake and Oreo brownies, no-bake desserts are especially handy in the summer months. This icebox cake is also perfect for making ahead, since it needs time to set in the freezer.
- Layer on layer. With two thick layers of frozen chocolate mousse studded with crushed Oreos, separated by more cookies, and topped with whipped cream, this icebox cake recipe is rich and chocolatey. Still, it’s also cool and refreshing!
- Easy to make. Sure, there are layers. But this icebox Oreo cake comes together with easy ingredients and only 20 minutes of hands-on prep. This cake would be a great Fourth of July dessert or birthday cake, when you can chill it overnight.

Ingredient Notes
Here are quick notes on the key ingredients in this Oreo icebox cake recipe. Scroll to the recipe card for the printable recipe with the exact amounts and detailed instructions.
- Cream Cheese – Bring the cream cheese to room temperature beforehand. I don’t recommend low-fat cream cheese for this recipe, as the higher water content leads to ice crystals in the cake filling.
- Heavy Whipping Cream – Make sure it’s cream for whipping and not for pouring. Full-fat heavy cream is a must!
- Cocoa Powder – Any kind. Dutch-processed cocoa powder will have a darker color and a more intense cocoa flavor. You can learn more about the types of cocoa powder.
- Oreos – Crush the Oreos for the filling using a rolling pin or a heavy object. You could also use the food processor. I like to leave bigger chunks n between the crumbs.
- Chocolate Graham Crackers – I like to use chocolate graham crackers to layer into the Oreo icebox dessert. Feel free to use other varieties of graham crackers or chocolate cookies if preferred.

How to Make an Oreo Icebox Cake
With only 20 minutes of prep before it’s ready for the “icebox” (modern speak for freezer!), this Oreo icebox cake is an ideal make-ahead dessert. These are the steps.
- Make the chocolate mousse. Start by beating the cream cheese, then add the heavy whipping cream, ¼ cup at a time. The mixture will be liquid. Afterward, add the vanilla extract. Beat the mixture into soft peaks, add the powdered sugar and cocoa powder, and beat again until stiff peaks form.
- Add the Oreos. Next, crush up the Oreos and fold them into the chocolate mousse.
- Make the crust. Now, arrange a layer of chocolate graham crackers in the bottom of a springform pan lined with parchment paper. You may need to cut the cookies to fit.
- Assemble the cake. Spread half of your prepared chocolate Oreo mousse over the cookie crust. Add a second layer of graham crackers, followed by the rest of the mousse filling. Top the cake with a final layer of graham crackers.
- Add the topping. To make the whipped topping, beat whipping cream in a cold bowl until soft peaks form. Then, slowly add powdered sugar and beat the cream into stiff peaks. Pipe a whipped cream border around the outside edges of the cake.
- Chill. Place the cake covered in the freezer for 2-4 hours. When it’s time to serve, top the icebox cake with crushed Oreos and warm hot fudge or chocolate ganache.
Recipe Tips
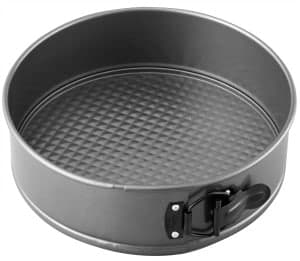
- Use a springform pan. A springform pan makes it so easy to remove the cake from the pan without damaging it. If you have one, I highly recommend using it.
- Line the pan. I like to line the pan with parchment paper to prevent the graham crackers from sticking. You can either hang it out of the edges and close the pan around it, or cut a 9-inch circle to fit the bottom.
- Cut the graham crackers. Don’t be afraid to cut the graham crackers up to fit the pan. We want the bottom to be completely covered to form a nice crust. The mousse will help hold it all together.
- Wait on the toppings. I like to add the toppings right before serving. I prefer the Oreos to be a little bit crunchy and the hot fudge will melt the cake if added to soon.
- For clean slices, run a sharp knife under warm water. Slice, then clean and repeat between slices.

Refrigerate or Freeze?
This Oreo icebox cake can be stored both ways. A refrigerated icebox cake is softer and more pillowy, and the graham crackers take on a cake-like texture. A frozen icebox cake is a little firmer, and the graham crackers are crunchier. Both ways are delicious. This icebox cake can be stored for up to 4 days in the fridge or for up to 1 month in the freezer.
More Oreo Dessert Recipes

Oreo Icebox Cake
- Prep Time: 20 minutes
- Freezing Time: 4 hours
- Total Time: 4 hours and 20 minutes
- Yield: 10 slices
- Category: Dessert
- Method: Freezer
- Cuisine: American
Description
This Oreo icebox cake has decadent, creamy layers of chocolate Oreo mousse, chocolate graham crackers, and fluffy whipped cream, topped with heaps of chopped Oreos and fudge sauce.
Ingredients
For the Cake
- 8 ounces (226g) cream cheese, at room temperature
- 1 ½ cups (354g) heavy whipping cream
- 1 teaspoon (5ml) vanilla extract
- 1 cup (130g) powdered sugar
- 2 tablespoons (10g) cocoa powder
- 24 Oreos, crushed
- 1 box (14.4 oz) chocolate graham crackers
For the Topping
- 1 ¾ cups (413ml) heavy whipping cream
- 1 ¼ cup (162g) powdered sugar
- Hot fudge sauce for drizzle
- 6 Oreos
Instructions
For the Filling
- Using an electric mixer, beat the cream cheese for 2 to 3 minutes until it is completely smooth. Add ¼ cup of the heavy whipping cream and beat until the cream cheese resembles a liquid mixture. Then add all the remaining heavy whipping cream and vanilla extract and beat on medium-high speed. Once the mixture reaches soft peaks. Then add the powdered sugar and cocoa powder and beat until stiff peaks form.
- Place the Oreos in a large Ziploc bag and use a rolling pin or another heavy object to crush the Oreos. Fold the crushed Oreos into the chocolate mousse until well incorporated.
- Line the bottom of a 9-inch springform pan with parchment paper. I prefer to hang it out of the edges and close the pan around it, but you can cut a 9-inch circle to fit as well. Align the chocolate graham crackers in the bottom of the pan, cutting crackers as needed to fit, but the more large/whole pieces you have, the better structure they will provide.
- Divide the chocolate Oreo mousse in half. Spread half of the mousse over the bottom layer of graham crackers. It helps if you hold the graham crackers in place with your fingers if they are sliding around. Next, add a second layer of graham crackers and spread the remaining mousse. Finally, add the third and final layer of the graham crackers.
For the Topping
- Place the mixing bowl and whisk attachment in the freezer for 5 to 10 minutes to chill. Pour the heavy whipping cream into the chilled bowl and use an electric mixer to beat the heavy cream at medium-high speed until soft peaks start to form. Slowly add the powdered sugar and continue beating at high speed until stiff peaks form. Pipe a border around the outside edge.
- Cover this with aluminum foil and freeze for 2 to 4 hours or you can choose to keep this in the refrigerator, but allow at least 4 hours for the graham crackers to soften.
- Prior to serving, remove the icebox cake from the freezer and allow it to thaw for 20 minutes. Crush 6 Oreos and sprinkle over the top of the cake. Drizzle warm Hot Fudge sauce over the Oreos.
Notes
- Storing: The graham cracker icebox cake can be stored for up to 4 days in the fridge or for up to 1 month in the freezer. A refrigerated icebox cake is softer, and the graham crackers take on a cake-like texture. A frozen icebox cake is a little firmer, and the graham crackers are crunchier. Both ways are delicious. It just depends on your preference!
Nutrition
- Serving Size: 1 slice
- Calories: 645
- Sugar: 45.7 g
- Sodium: 261.6 mg
- Fat: 43.4 g
- Carbohydrates: 61 g
- Fiber: 0.5 g
- Protein: 5.3 g
- Cholesterol: 110.3 mg


Hi! Found your recipe searching for ice box cake when it was my son’s birthday and 90+ degrees! I could not find chocolate graham crackers anywhere so had to use plain. Still delicious! And easy. And didn’t have to turn on the oven, hallelujah! Thanks.
Love that! I am so happy to be a part of your son’s birthday! We always had ice cream cakes for our birthdays when I was growing up
This was great! I made it for my Oreo-loving son’s birthday and he LOVED it! I was a little daunted with trying to get the graham cracker right with not wanting it to be too hard/ crunchy and complete mush, but some how it came out perfect. I love how the recipe was easy to make, even for this less-experienced cook. Even better, it made the perfect amount of whipped cream topping and made some extra which helped account for my frosting goofs and redo! Thanks!
for the topping, isn’t it too much sugar for the whipping cream.
for a whipped cream, I had in mind 1 cup of whipping cream for 1 tablespoon of icing sugar.
here it’s 1 cup and 3/4 whipping cream for 1 cup and 1/4 of powdered sugar.
is it right ?
Thanks in advance.
Hi there, I actually always make my whipped cream 50% powdered sugar to the liquid. So for 1 cup of heavy cream I use 1.2 cup powdered sugar. This isn’t every time, but most of the time. This ensures a nice stuff whipped cream, however it is much sweeter than if you make it without the powdered sugar.
Somehow I missed this post. Holy Moses!!! It is stunning to look at and contains everything I LOVE!!! I will have to find a reason to make this!!! It for sure is a crowd pleaser!!
You make such gorgeous desserts, I’m kind of glad we’re not neighbors (in the nicest way possible, because I’d likley be at your doorstep every day)!
Ice box cakes are amazing and I’ve made a bunch of them, but none quite this pretty!!
You are seriously too kind. I would take you as my neighbor ANY day
Woah I think I actually saw my name written into that cake! This looks sensational!!! Pinned.
LOL!! So did I friend, so did I.
I hope you try it Joanne!!
This looks like chocolate heaven! My guys are going to love it!
Thanks Joanne! It sure is and you could use any type of Oreos!
You can’t have too much chocolate! Looks great!
I totally agree Laura!!