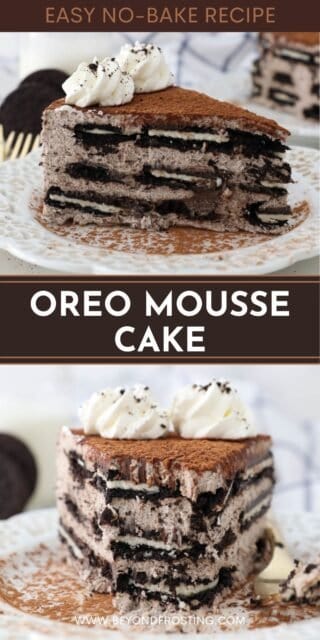
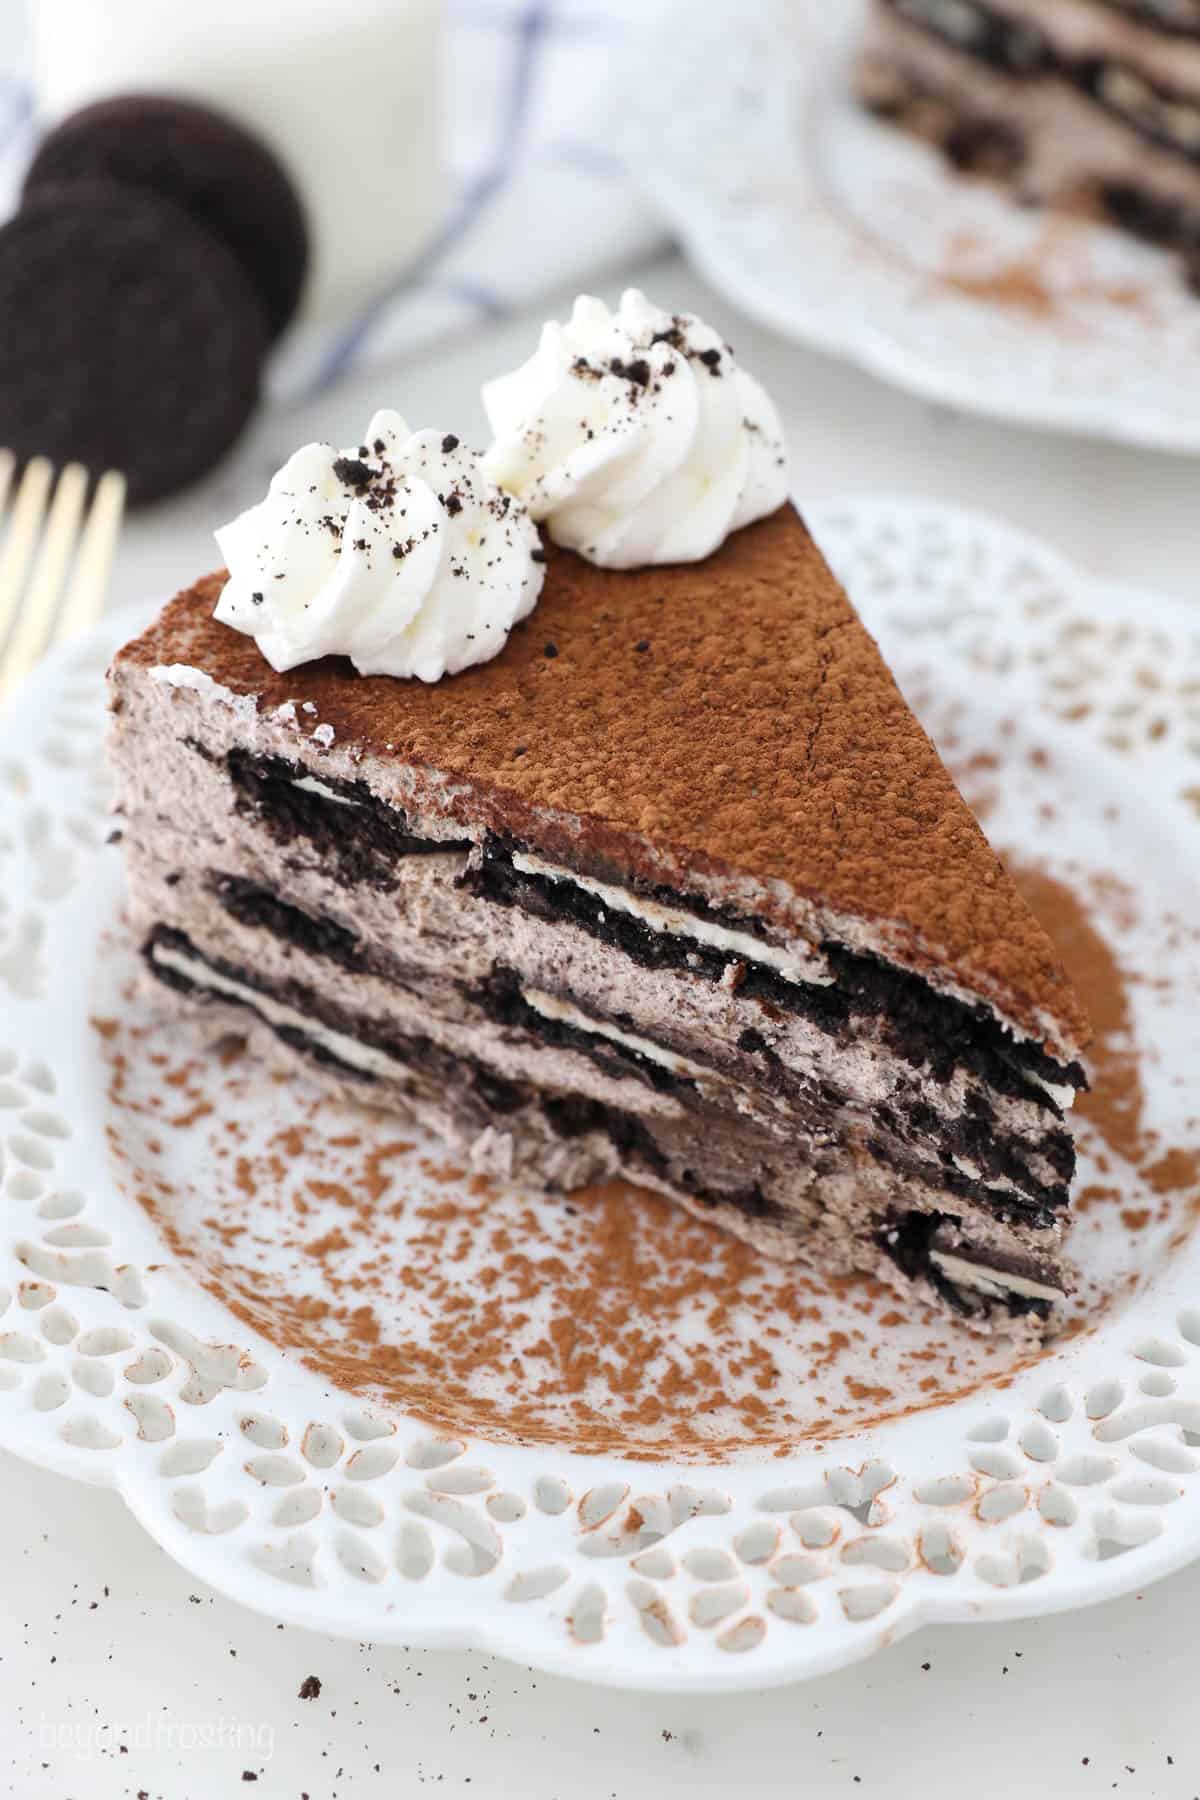
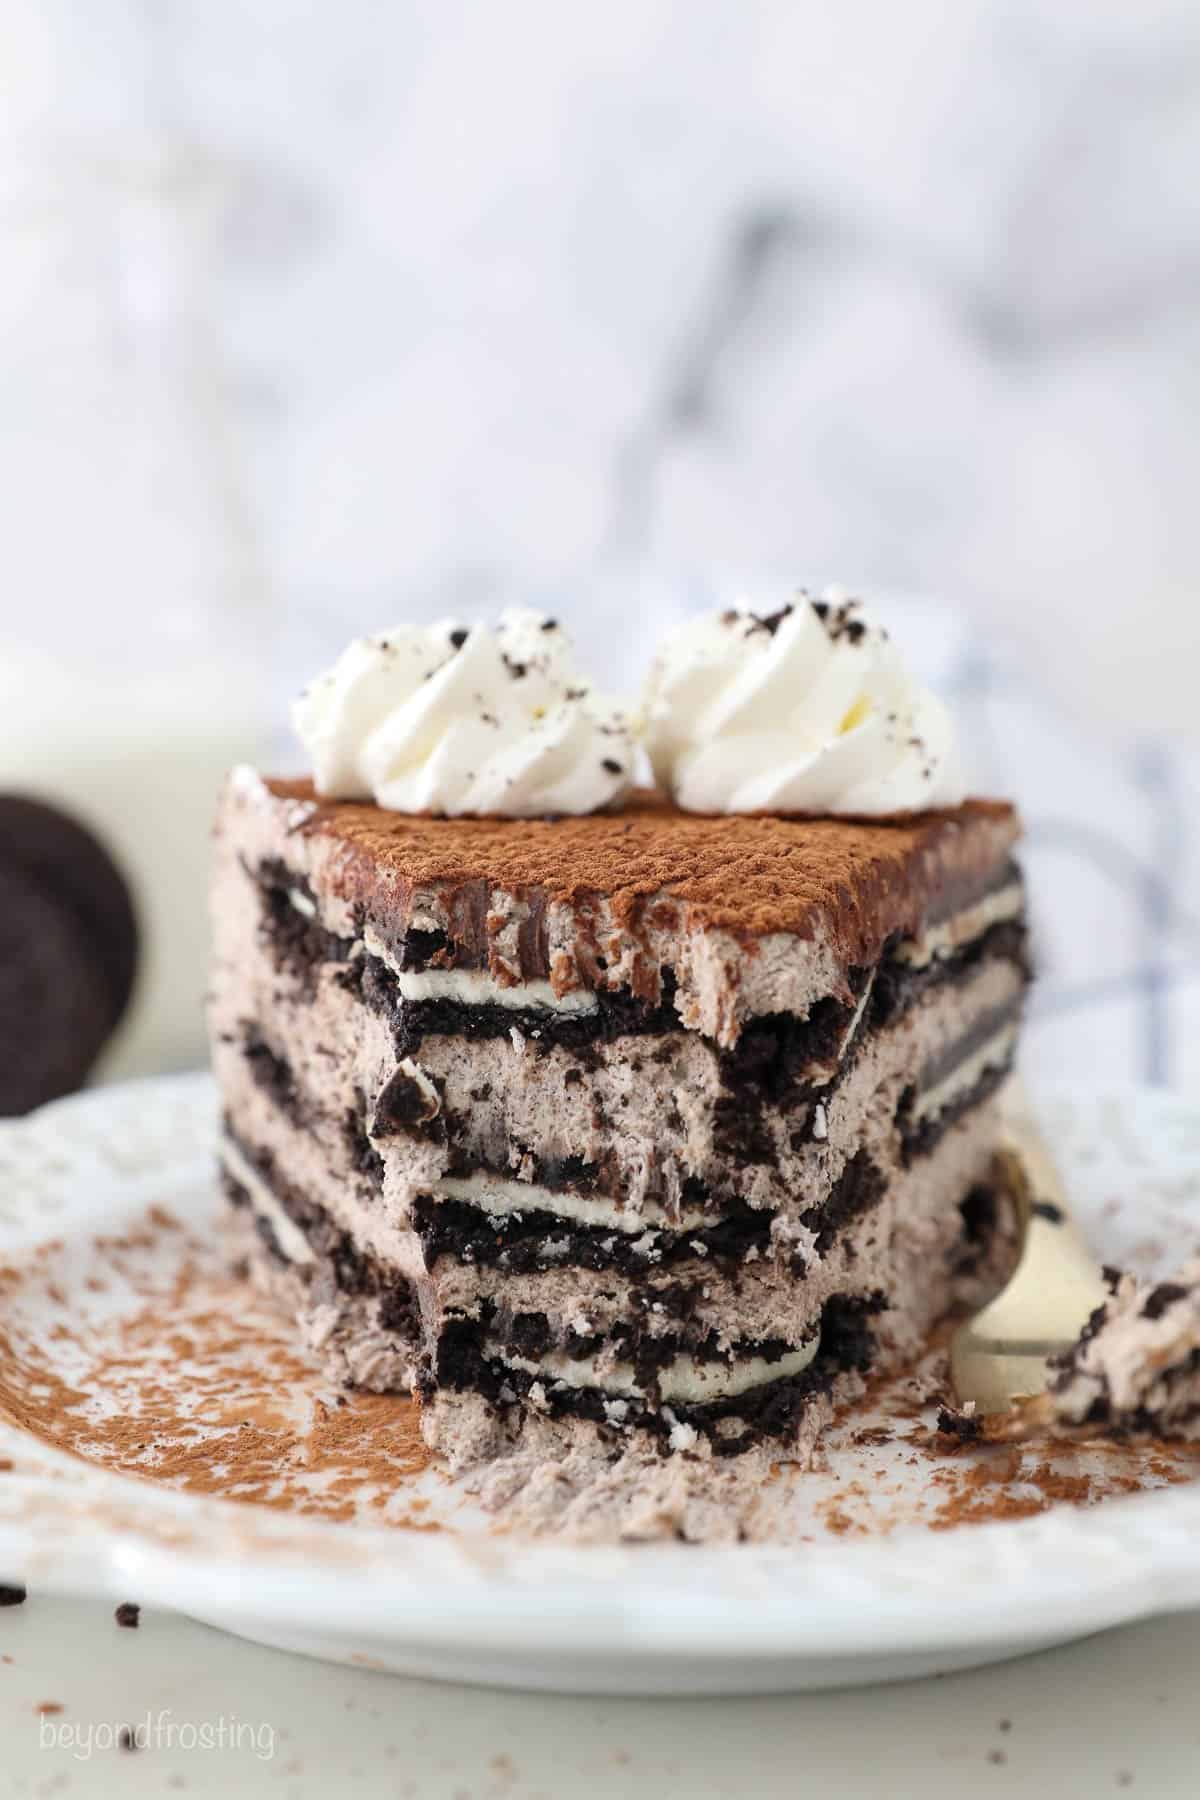
This is the ultimate Oreo lovers’ dessert. The Oreo cookies are soaked in coffee and layered with a decadent Oreo mascarpone mousse. There’s no baking required for this Oreo Mousse cake.
This post is sponsored by the American Dairy Association Mideast. All opinions are my own.

Easy Oreo Mousse Cake
Whether it’s the dead of summer and you don’t want to turn on the oven, or you’re planning an epic holiday dessert, this No-Bake Oreo Mousse Cake should definitely be on the menu. This is basically a big cake made of Oreos and whipped cream, but it’s all dressed up for the occasion.
First, you’ll make a ridiculously good Oreo mousse with mascarpone cream, heavy cream and Oreo crumbs. It’s the Oreo version of my mascarpone whipped cream and I will for sure be making this again.
Each Oreo cookie is dipped in a mixture of coffee and milk, sort of a nod to Tiramisu but with Oreos. Once this has had time to chill, the Oreos soften to a cake-like texture and your fork will just sink right in. I’d describe this as rich but not overly sweet. It was quite easy to finish off a slice.
You might want to serve this up with a big glass of milk, hot chocolate or even a cup of coffee. To make holiday beverages like hot chocolate and lattes extra creamy, swap out water with milk. Adding milk adds a boost of calcium and protein, too!
This holiday season, I’m partnering with my dear friends at the American Dairy Association Mideast. Did you know that milk is the No. 1 nutritious product requested by food banks? Each year, dairy companies work with local food banks to provide nutritious dairy foods to those in need. Do you have questions about milk and dairy foods? Check out this list of top questions that come up.
Now let’s get started on dessert!
Ingredients List
- Oreo Cookies– you’ll need two 14oz packages, any variety will work!
- Coffee– you’ll need about ¾ cups. It can be warm or cold, doesn’t matter, but you will be dipping the Oreos in it, so make sure it’s not too hot.
- Milk- just a touch to mix into the coffee
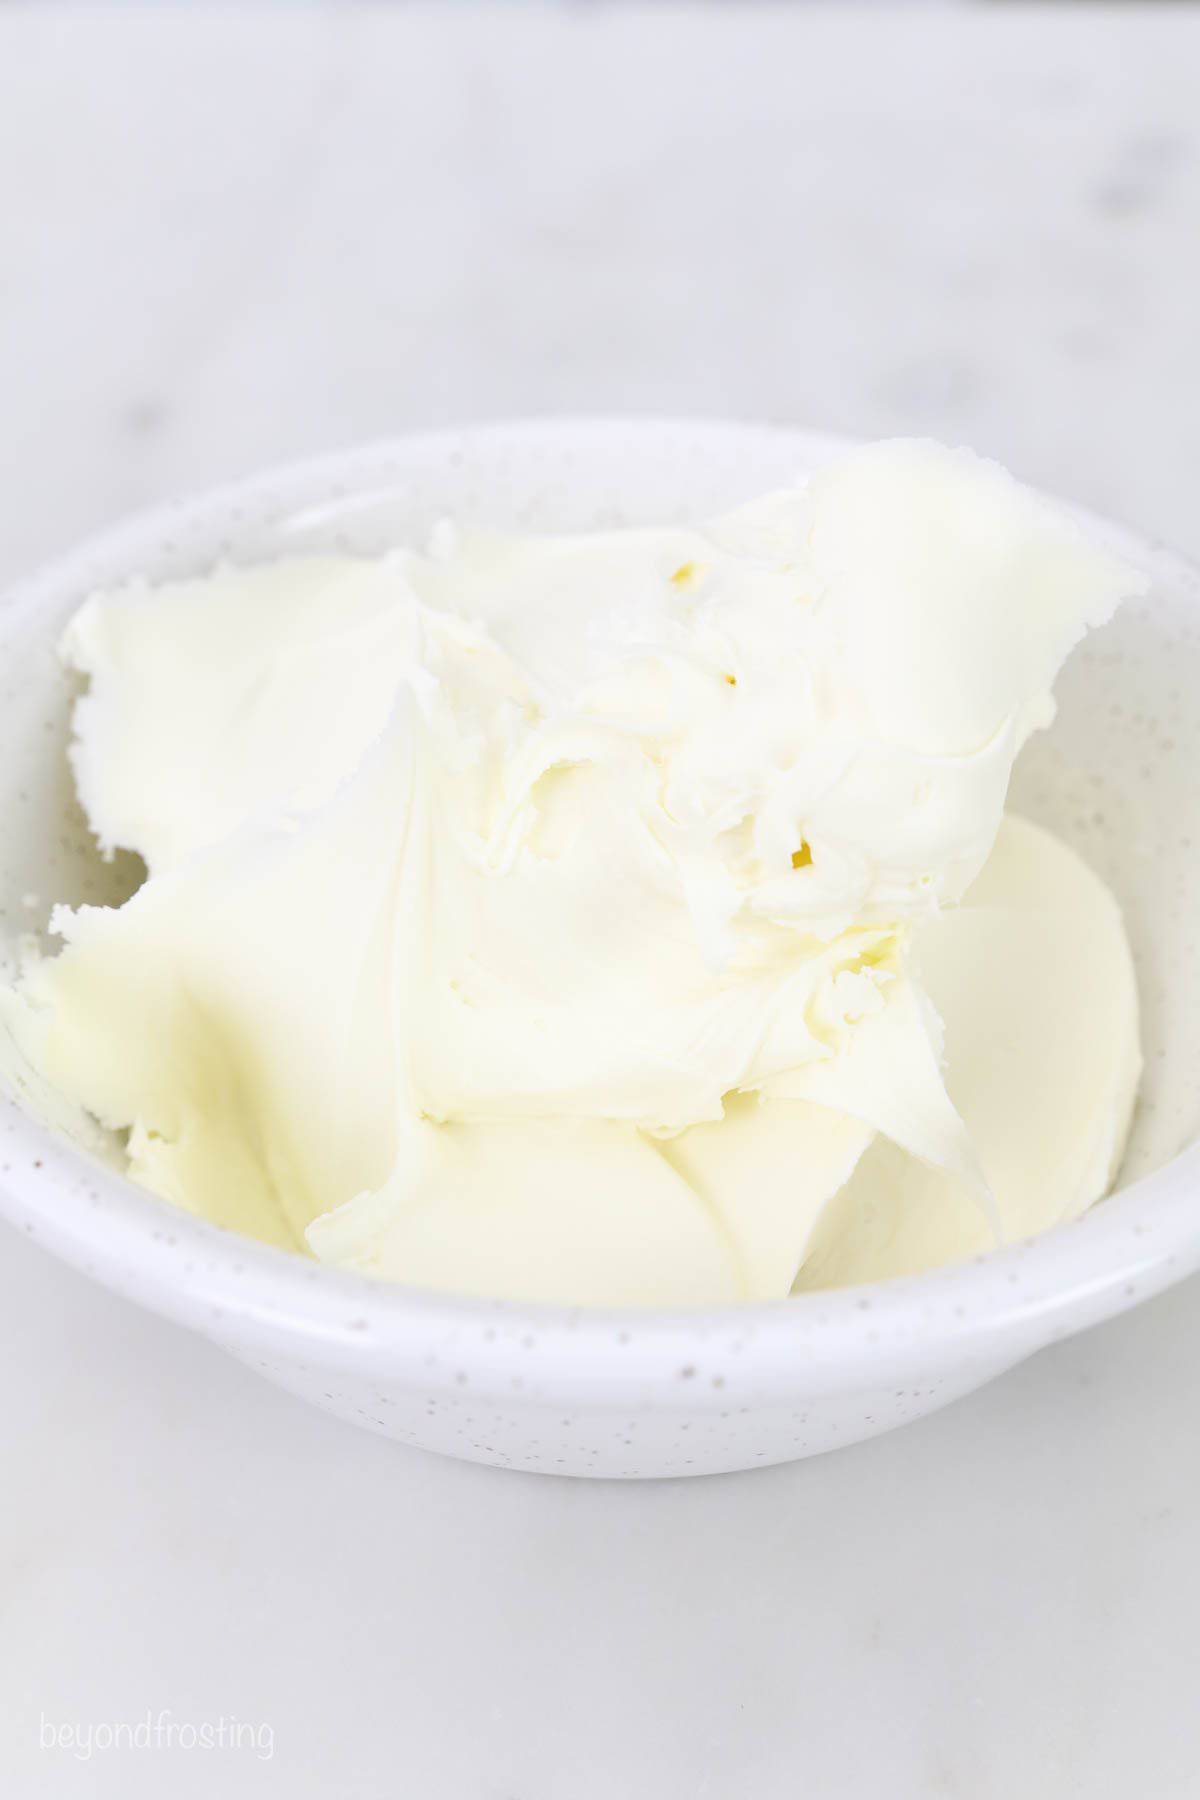
- Mascarpone cheese– you’ll need two 8-ounce containers
- Heavy whipping cream– you’ll need at least a quart (32oz) for the filling and topping
- Powdered sugar
- Pure vanilla extract
- Cocoa powder – an optional garnish
Can I Make This Without Coffee?
Yes! Just swap out the coffee for milk! I like the coffee for the added flavor, but Oreos dipped in milk is never a bad idea.
Can I Make This with Cream Cheese Instead?
Cream cheese is definitely an acceptable substitute for mascarpone. I’d probably recommend using 12 ounces (about 1 ½ blocks) of cream cheese. Mascarpone has a much more subtle flavor than cream cheese, so you will notice a bit of a difference flavor-wise, but it will still be super good!
Let’s Make Oreo Mousse Cake
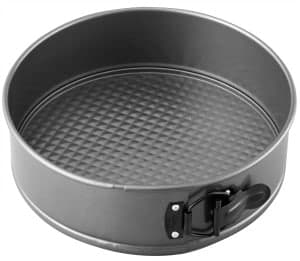
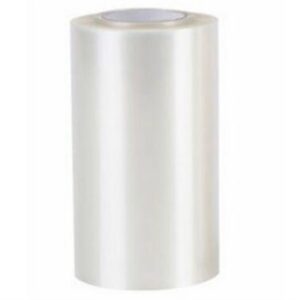
Prep the pan: You’ll need a 9-inch springform pan. I recommend lining the bottom with parchment, which just make it easier when it’s time to serve, the Oreos won’t be sticking to the bottom. For the sides, you can line with either parchment paper or a cake collar (affiliate link). A cake collar makes the nicest, cleanest edge.
Prepare the mousse:
- Prep the Oreos: Grind 10 Oreos into a fine crumb using a food processor or blender. Set aside.
- Chill the bowl: Place your mixing bowl in the freezer or refrigerator for 5-10 minutes before starting.
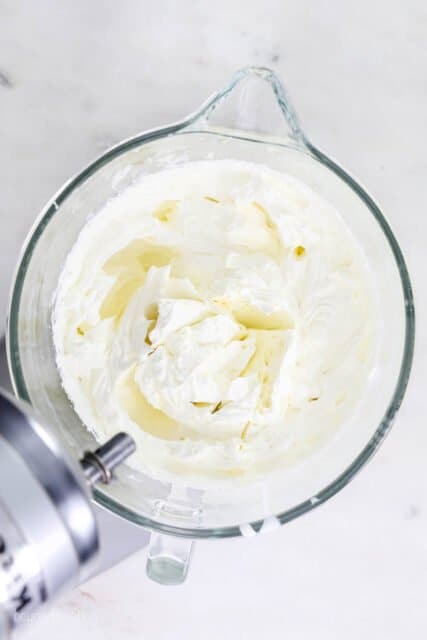
- Make the whipped cream: Spoon the mascarpone cream into your bowl and beat on a medium-low speed while slowly pouring in the heavy cream. This allows the mascarpone cheese to turn to a liquid consistency, which helps prevent a lumpy whipped cream.
- Add all remaining heavy cream and increase the mixing speed to high (speed 8-10) and beat it until soft peaks form.
- Next add the vanilla extract, powdered sugar, and Oreo crumbs. Beat until well combined, and mixture reaches stiff peaks.
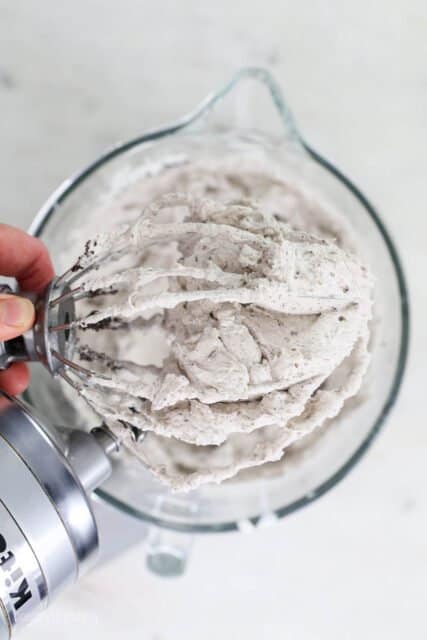
- Fill the piping bags: Divide the mousse between two large piping bags. Cut the tip of the piping bags off, about ¾” up from the bottom.
How to assemble
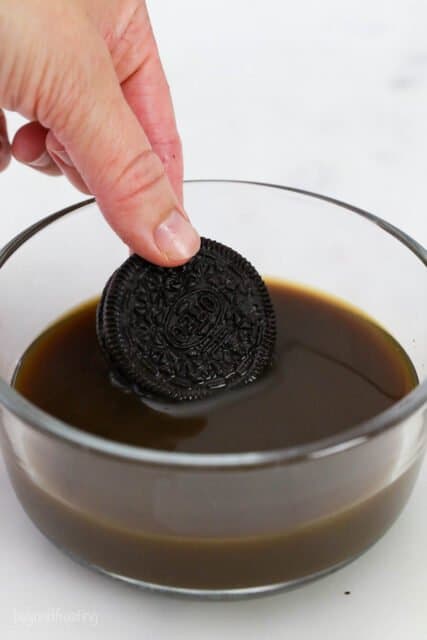
Step 1: In a small bowl, combine the coffee and milk, stir to combine.
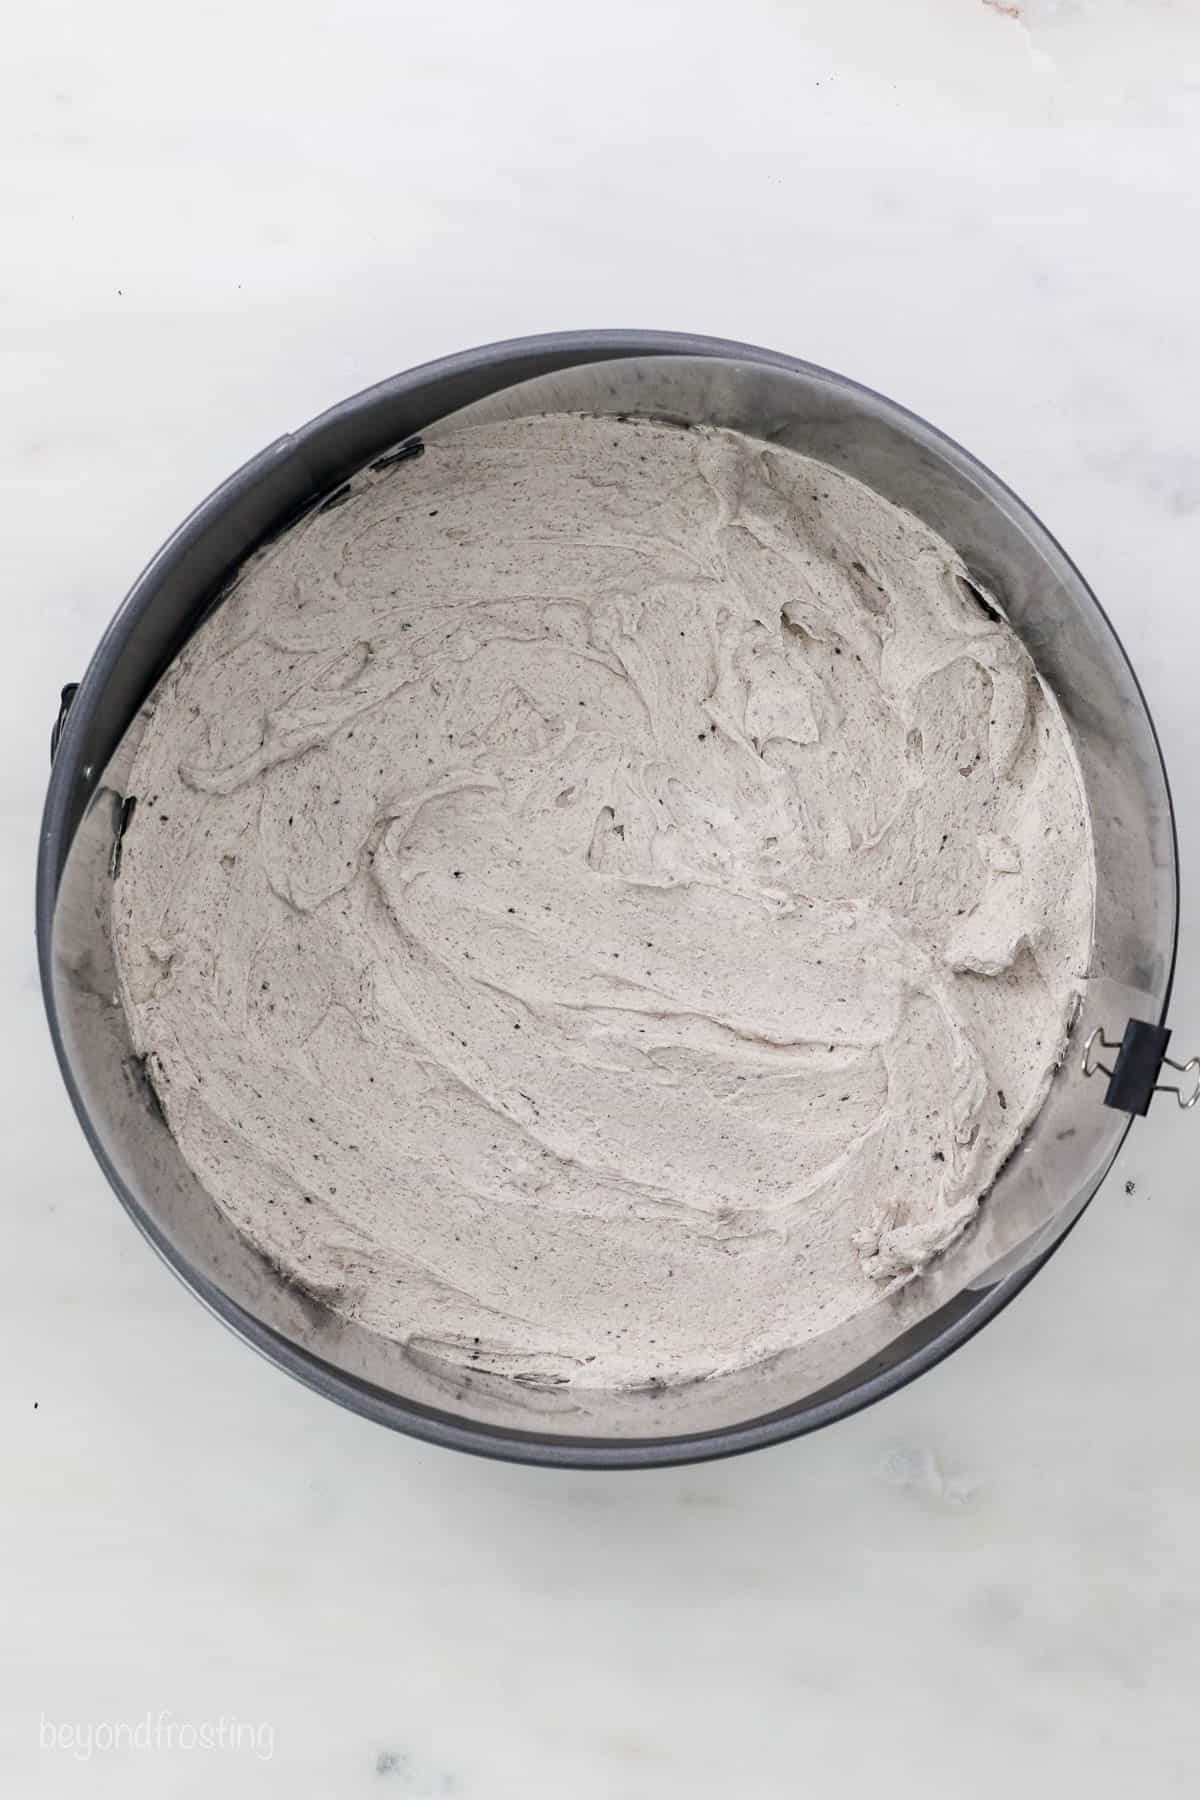
Step 2: Pipe a very thin layer of mousse on the bottom of the pan and spread evenly. This is just a little “glue” to hold the Oreos in place.
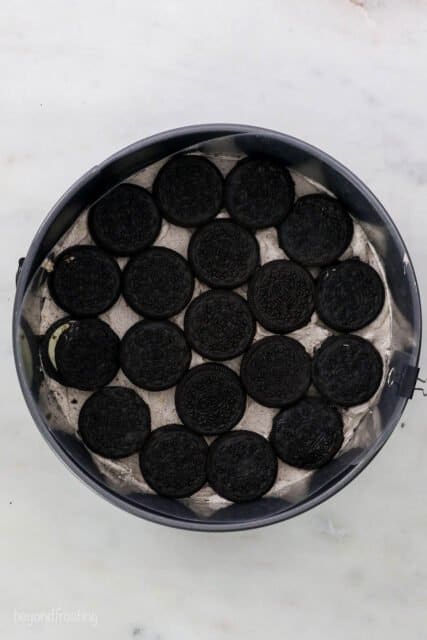
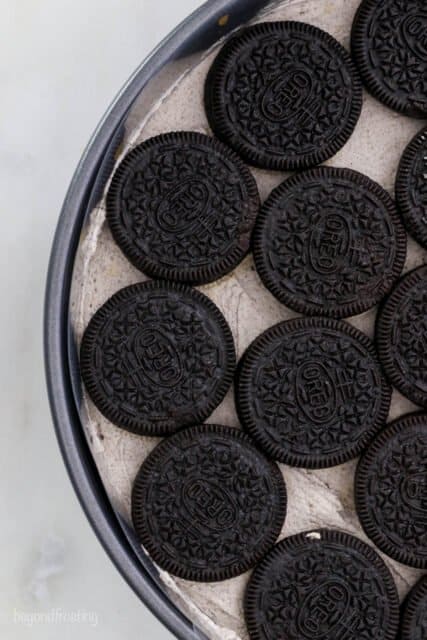
Step 3: Each layer will have 19 Oreos. Quickly dunk each Oreo in the prepared bowl of coffee and milk. Starting with the outside edge, place the cookies just inside the edge of the pan and work your way into the middle so they are tightly fit. Nudge them around as needed so it’s a nice and tight fit.
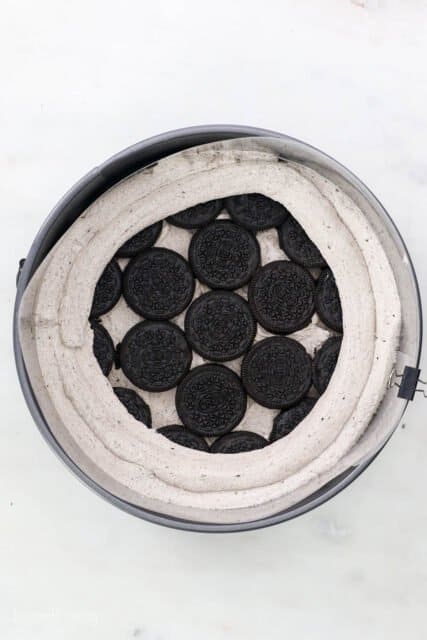
Step 4: Starting on the outside edge, pipe the mousse in an even layer working your way towards the middle Then use an offset spatula to smooth out the mousse, creating a nice even layer.
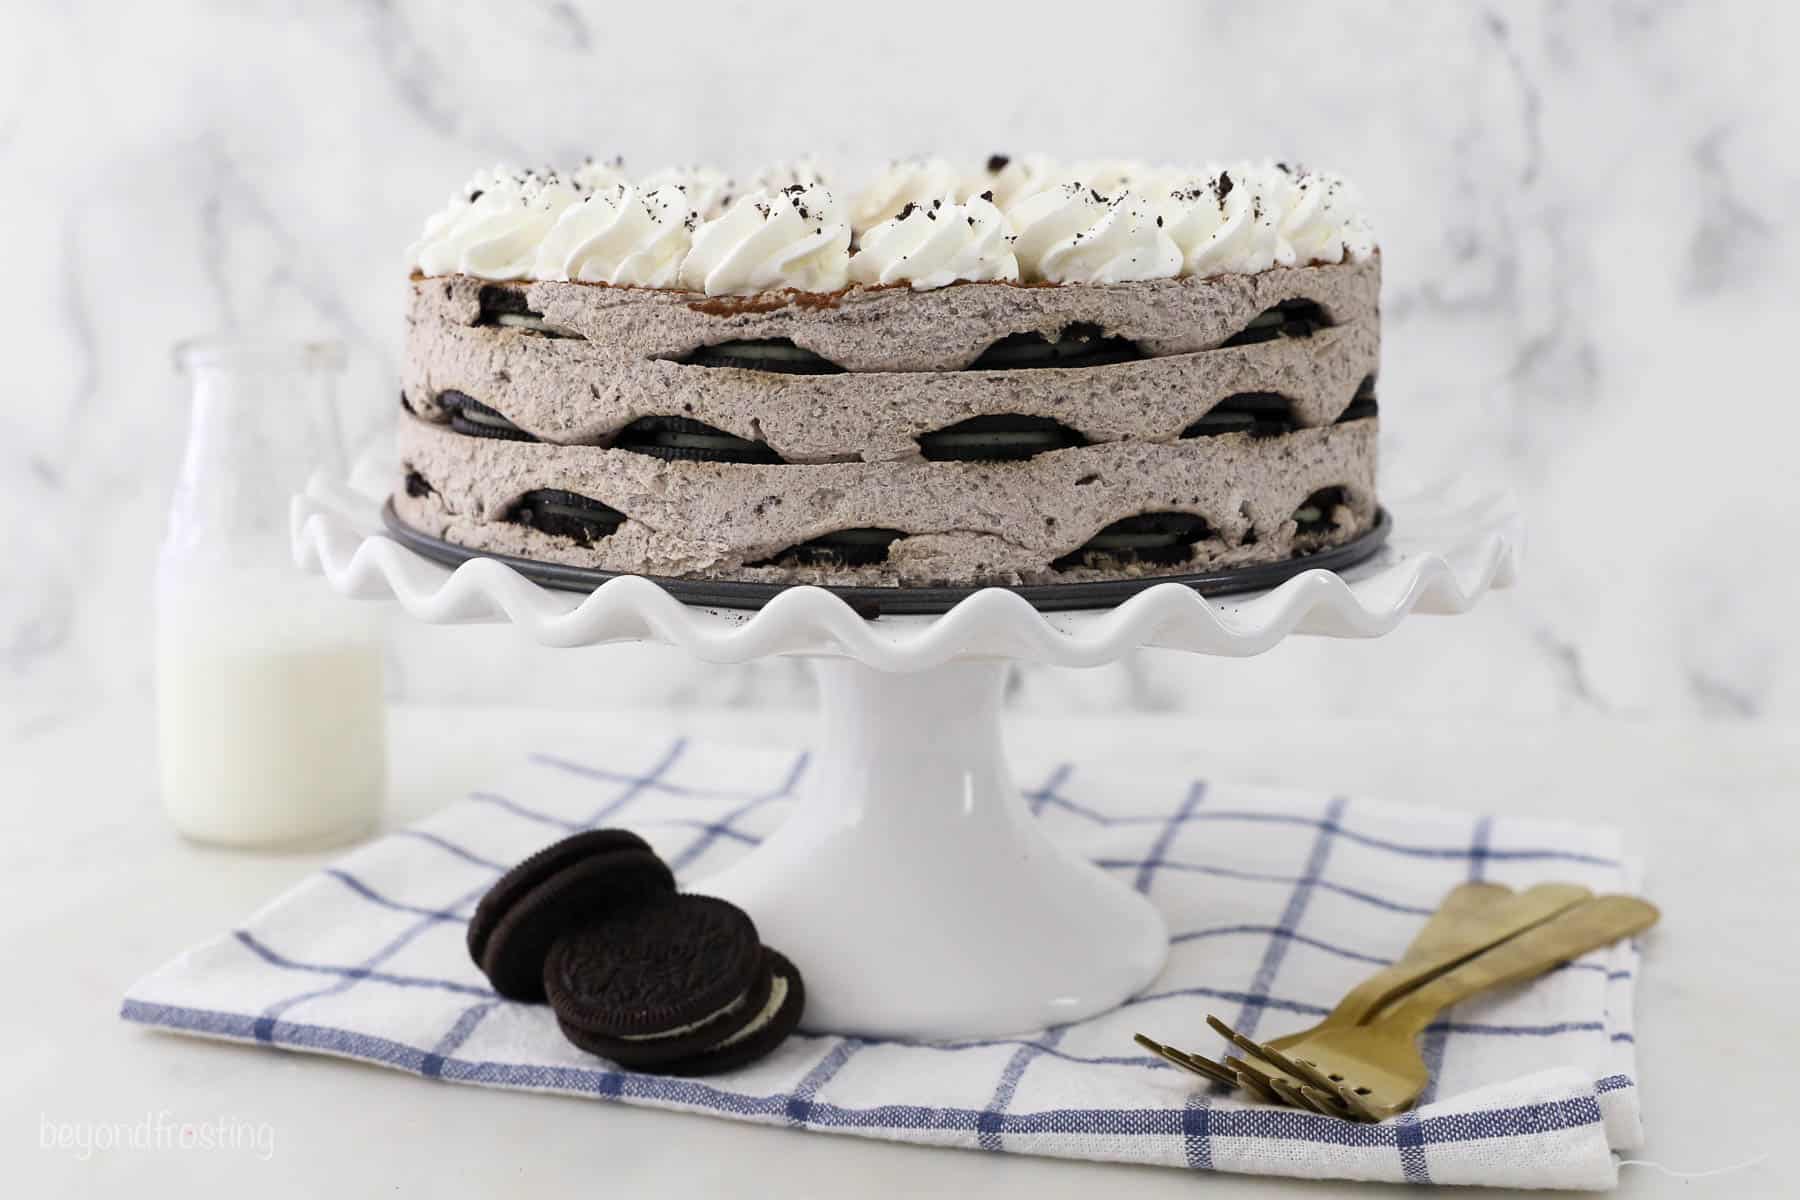
Step 5: Repeat this process two more times. There are 3 layers of Oreos and 4 layers of mousse. The top layer of mousse may be the thinnest.
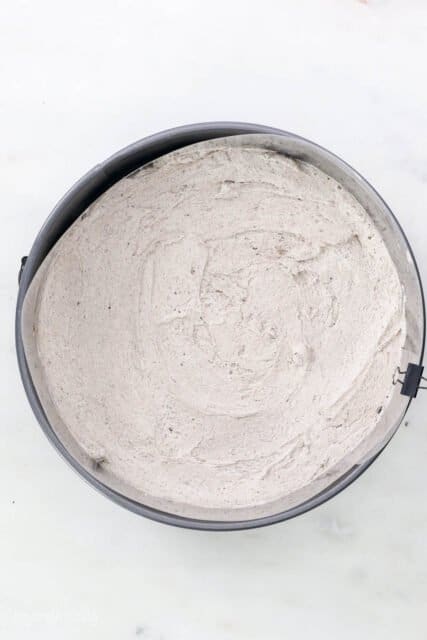
Step 6- Chill: Cover tightly with plastic wrap and refrigerate for at least 4 hours. Prepare the topping prior to serving.
Decorate
- Dust the top with cocoa powder if desired. Prepare a batch of whipped cream.
- Place the mixing bowl and whisk attachment in the freezer for 5 to 10 minutes to chill. Pour the heavy whipping cream into the chilled bowl and use an electric mixer to beat the heavy cream at medium-high speed until soft peaks start to form. Slowly add the powdered sugar and continue beating at high speed until stiff peaks form.
- Pipe a border around the outside edge. If you have any leftover Oreos, you can use them for garnish or crush them up and sprinkle on top. Keep refrigerated.
How Far in Advance Can I Make This?
This dessert gets better if it has time to sit! So, you can make this up to 2 days in advance of serving. Just be sure to tightly wrap the pan in plastic wrap. Keep refrigerated. Hold off on adding the cocoa powder and whipped cream topping until you’re ready to serve. Remove the sides of the springform pan and add the toppings.
Can I Freeze This?
You sure can! I recommend letting the dessert sit in the refrigerator for at least 2 hours before freezing. This gives everything time to set. Tightly wrap the pan twice in plastic wrap. Freeze for up to 1 month and then thaw in the refrigerator overnight.
What if I Don’t Have a Springform Pan?
You can still make this without a springform pan. To do all 3 layers, you need a pan at least 3-inches tall. Most 9-inch pans are not that tall, so you can cut it down to 2 layers and cut the mousse recipe in half. You’ll likely have 2 layers of cookies and 3 layers of mousse. You’ll need just a very thin layer on the bottom.
The Best Way to Slice it
I recommend removing the side of the springform pan. Use a sharp knife and clean the knife between each cut. Use a pie server or something similar to lift it out of the pan. You just want to make sure you get your server under the cookies all the way, and above the parchment paper lining.
For more recipes, information, dairy nutrition and to meet Ohio and West Virginia dairy farmers, visit www.Drink-Milk.com, and follow the American Dairy Association Mideast on Facebook, Twitter, Pinterest and Instagram.
Print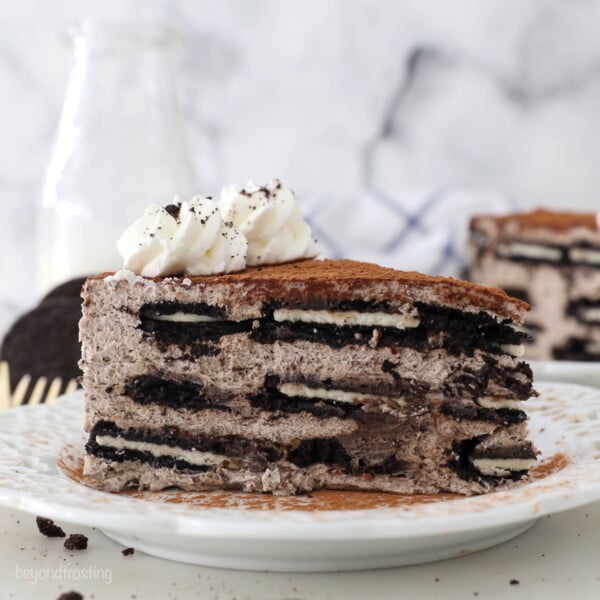
No-Bake Oreo Mousse Cake
- Prep Time: 30 minutes
- Chill Time: 4 hours
- Total Time: 4 hours 30 minutes
- Yield: 10 slices
- Category: No-Bake
- Method: Refrigerator
- Cuisine: American
Description
This No-Bake Oreo Mousse Cake has layers of Oreo cookies that are soaked in coffee and layers of a decadent Oreo mascarpone mousse.
Ingredients
For the Mousse:
- 2 packages (14oz) Oreo cookies
- 3/4 cup (177ml) brewed coffee, cooled
- 2 tablespoons milk
- 16 ounces (452g) mascarpone cheese, cold
- 2 1/2 cups (590ml) heavy whipping cream, cold
- 1 cup (130g) powdered sugar
- 1 teaspoon (5ml) pure vanilla extract
Topping
- 1–2 tablespoons (7-14g) cocoa powder
- ¾ cup (98g) heavy whipping cream
- 3–4 tablespoons (24-32g) powdered sugar
Instructions
- Prepare a 9-inch springform pan by lining the bottom with parchment paper and line the sides with either parchment paper or a cake collar. Set aside.
- Prepare the mousse: Place your mixing bowl in the freezer or refrigerator for 5-10 minutes before starting.
- Grind 10 Oreos into a fine crumb using a food processor or blender. Set aside.
- Spoon the mascarpone cream into your bowl and beat on a medium-low speed while slowly pouring in the heavy cream, allowing the mascarpone cheese to turn to a liquid consistency, then add the remaining heavy cream.
- Once all the cream has been added, increase the mixing speed to high (speed 8-10) and beat it until soft peaks form.
- Next add the vanilla extract, powdered sugar and Oreo crumbs. Beat until well combined, and mixture reaches stiff peaks.
- Divide the mousse between two large piping bags. Cut the tip of the piping bags off, about ¾” up from the bottom.
To Assemble:
- In a small bowl, combine the coffee and milk, stir to combine.
- Pipe a very thin layer of mousse on the bottom of the pan and spread evenly.
- Each layer will have 19 Oreos. Quickly dunk each Oreo in the prepared bowl of coffee &milk. Starting with the outside edge, place the cookies just inside the edge of the pan and work your way into the middle so they are tightly fit.
- Starting on the outside edge, pipe the mousse in an even layer working your way towards the middle Then use an offset spatula to smooth out the mousse, creating a nice even layer.
- Repeat this process two more times. There are 3 layers of Oreos and 4 layers of mousse. The top layer may be the thinnest. Cover and refrigerate for at least 4 hours. Prepare the topping prior to serving. Dust the top with cocoa powder if desired.
- Make the topping: Place the mixing bowl and whisk attachment in the freezer for 5 to 10 minutes to chill. Pour the heavy whipping cream into the chilled bowl and use an electric mixer to beat the heavy cream at medium-high speed until soft peaks start to form. Slowly add the powdered sugar and continue beating at high speed until stiff peaks form. Pipe a border around the outside edge. If you have any leftover Oreos, you can use them for garnish or crush them up and sprinkle them on top. Keep refrigerated.

Notes
- Lining the bottom and sides of the pan will help prevent the mousse and cookies from sticking. It also gives you the cleanest finish. I recommend using cake collars for the sides if available.
- Substitute for coffee: If you’d prefer not to make this with coffee, just use milk instead
- Substitute for mascarpone: Cream cheese is an acceptable substitute for mascarpone. I’d probably recommend using 12 ounces (about 1 ½ blocks) of cream cheese. The rest of the recipe remains the same.
- Don’t have a springform pan? To make this without a springform pan, please refer back to the blog post
- Freezing instructions: I recommend letting the dessert sit in the refrigerator for at least 2 hours before freezing. Tightly wrap the pan twice in plastic wrap. Freeze for up to 1 month and then thaw in the refrigerator overnight.
- Storage instructions: You can make this up to 2 days in advance of serving. Just be sure to tightly wrap the pan in plastic wrap. Keep refrirderated.
Nutrition
- Serving Size: 1 Slice
- Calories: 575
- Sugar: 24.1 g
- Sodium: 91.5 mg
- Fat: 49.7 g
- Carbohydrates: 27.9 g
- Fiber: 0.3 g
- Protein: 4.5 g
- Cholesterol: 144.2 mg


