
This Oreo ice cream cake recipe is an easy semi-frozen dessert made from fudgy homemade chocolate cake layered with cold and creamy no-churn Oreo ice cream. Perfect for birthdays!
Looking for more Oreo cake ideas? Check out this decadent Oreo chocolate cake or my Oreo cookies and cream cake.

Homemade Oreo Ice Cream Cake
Ice cream cakes are a childhood favorite! If you love chocolate, ice cream, and Oreos (who doesn’t!?), today’s Oreo ice cream cake recipe is right up your alley. This is a moist and decadent chocolate cake topped with a thick layer of cookies and cream ice cream. It’s surprisingly easy to make from scratch, right down to the chocolate ganache layer and swirls of whipped cream. This homemade ice cream cake is perfect for your next special occasion!
Why You’ll Love This Oreo Ice Cream Cake Recipe
- Cookies and cream flavor. Rich layers of homemade chocolate cake and creamy no-churn vanilla ice cream loaded with Oreo cookies are totally irresistible.
- No ice cream maker. The Oreo ice cream you’ll make for this cake recipe is no churn, meaning that you can skip the ice cream maker.
- Customizable. Change up the cake and ice cream flavors and decorate this cake any way that you’d like. See further in the post for ideas.

Ingredient Notes
Below is a quick overview with notes on the important ingredients for the moist chocolate cake, homemade Oreo ice cream, and cake toppings. Don’t forget to scroll to the recipe card for the full recipe amounts and detailed instructions.
For the Cake
- Oil – Replacing butter with vegetable oil in cake recipes yields an exceptionally moist, tender cake crumb. Canola oil is another good option.
- Sour Cream – You can use full-fat or reduced-fat sour cream. If you don’t have sour cream, use Greek Yogurt instead.
- Cocoa Powder – Use any natural unsweetened cocoa powder (learn the differences between natural vs. Dutch-processed cocoa powder). I use Hershey’s Special Dark for this recipe.
- Brewed Coffee – Adding hot brewed coffee to chocolate cakes intensifies the chocolate flavor. Substitute brewed coffee with milk or hot water if needed.
For the Oreo Ice Cream
- Whipping Cream – The creamiest no-churn ice cream calls for full-fat heavy whipping cream.
- Cream Cheese – Like your whipping cream, make sure to use full-fat cream cheese.
- Sugar – You’ll use both powdered sugar and regular granulated sugar.
- Oreo Cookies – Roughly crushed up. Feel free to substitute name-brand Oreos with your preferred store-brand version. You can also use another type of cookie entirely (see the section later on for recipe variations).
Toppings
- Chocolate Ganache – You’ll make homemade chocolate ganache from dark chocolate and heavy whipping cream.
- Whipped Cream – Homemade whipped cream or Cool Whip for decorating.
How to Make Oreo Ice Cream Cake
This ice cream cake starts with the best homemade chocolate cake ever. It’s so good, that I use it as the base for my chocolate ice cream cake and Bailey’s ice cream cake, too!
Step 1: Make the Chocolate Cake Layer
The cake layer is super simple to make and the flavors are just the right amount of chocolatey next to the cookies and cream ice cream.
- Mix wet ingredients. First, cream together the sugar, vegetable oil, eggs, and vanilla. Next, beat in the sour cream.
- Add dry ingredients. Sift your dry ingredients into a separate bowl, and then add these to your wet batter, alternating with brewed coffee until combined. Pour the cake batter into a lined 8” round cake pan.
- Bake. Bake your chocolate cake at 350°F for 28-30 minutes, and then cook the cake completely.
Step 2: Make the Oreo Ice Cream
Sure, you could always use store-bought ice cream for this cake. But once you’ve tried this easy no-churn Oreo ice cream, there’s no going back!
- Make the whipped cream. To make whipped cream from scratch, start by whipping heavy cream in a chilled bowl until soft peaks form. Next, slowly add the powdered sugar and beat until you reach stiff peaks. Set the finished whipped cream aside for now.
- Combine. Now, you’ll whip softened cream cheese with granulated sugar and vanilla. Afterward, fold in the prepared whipped cream.
- Add Oreos. Finally, crush up your Oreo cookies and fold them into the ice cream base.


Step 3: Assemble and Freeze the Cake
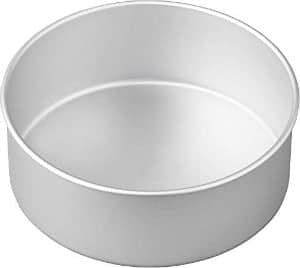
I recommend assembling this Oreo ice cream cake in an 8” springform pan lined with parchment paper or a cake collar (affiliate link). If you don’t have a springform pan, you can use a regular 8” round pan lined with plastic wrap. This makes the cake easier to lift out of the pan once it’s frozen.
- Prepare the chocolate cake layer. First, level the cake using a serrated knife or a cake leveler, and place the cake into the bottom of your springform pan.
- Add the ice cream layer. Now, spread the prepared ice cream base evenly over the chocolate cake.
- Freeze. Place the whole cake into the freezer to chill for 2-4 hours, or until the ice cream is completely set.


Step 4: Decorate!
The last step in making your ice cream cake is adding your toppings. You can prepare a fresh batch of whipped cream following the same directions as in the ice cream recipe. Then, you can prepare a simple chocolate ganache for decorating:
- Make the ganache. Combine heavy cream with chopped chocolate in a microwave-safe bowl, and heat the mixture at 50% power until melted and smooth. That’s it!
- Top the cake. Give the ganache a few minutes to cool down, pour it over the cake, and then return your ice cream cake to the freezer.
- Decorate. Once the chocolate has set, release the cake from the pan. Use a piping bag fitted with an open star tip to pipe swirls of whipped cream over the cake. Garnish with crushed cookies, and serve!

Recipe Tips and Variations
You’re well on your way to making a cookies and cream ice cream cake just like the kind you’ll find in your favorite parlor or bakery. Keep the following tips and potential variations in mind:
-
- Use another sized pan. I make the chocolate cake layer in an 8” round cake pan. Alternatively, you can use a 9” round pan without adjusting the recipe. However, you’ll need to decrease the baking time by a few minutes, as the cake layer will be thinner.
-
- Don’t burn the ganache. Microwave your ganache ingredients at reduced power to prevent the ganache from scorching.
-
- Give the ganache time to cool. Allow the chocolate ganache to cool down before spreading it over the ice cream cake. This way the hot ganache won’t melt the ice cream.
-
- Save time with store-bought ice cream. If you want to streamline this ice cream cake recipe, use store-bought ice cream, let it soften, and spread it over the cake. You can also use an 8-ounce container of Cool Whip in place of the whipped cream.
-
- Use another ice cream flavor. In place of Oreo ice cream, use any flavor of ice cream you prefer. Try my homemade strawberry ice cream,
-
- Customize the add-ins. You can fill this no-churn ice cream base with just about any add-ins you’d like. Substitute Oreos with chopped chocolate chip cookies, Snickerdoodle cookies, or any type of cookie you’d like.
-
- Make a layer cake. If you’d prefer to make your cake with more layers, cut the cake layer in half horizontally, and alternate the cake and ice cream layers.
More Ways to Decorate
There really isn’t a limit to the possibilities, here. Go ahead and garnish your Oreo ice cream cake any way that you’d like! Chopped cookies, colorful sprinkles, chocolate shavings, crushed nuts, and mini chocolate chips are all good options.
You can choose to leave off the ganache and get straight to the whipped cream, or try another type of frosting. My chocolate whipped cream and cream cheese whipped cream would also taste awesome alongside the fudgy cake and Oreos. Or, go all in with swirls of creamy homemade Oreo frosting!
If you’re new to frosting and decorating cakes, check out my tutorials on how to use a piping bag and how to use piping tips for lots of helpful tips and tricks.
How to Serve Oreo Ice Cream Cake
When serving an ice cream cake, I recommend taking the cake out of the freezer 15-20 minutes ahead so that it can soften a little for slicing. For clean slices, run a sharp knife under hot water and clean the blade in between cuts.

Can I Make This Oreo Ice Cream Cake Ahead?
Yes! You can make the chocolate cake and Oreo ice cream in advance and store them separately. Keep the chocolate cake wrapped tightly in plastic wrap in the fridge up to 2 days ahead, and the ice cream base stored airtight in the freezer. When you’re ready to assemble the cake, thaw the ice cream until it’s soft enough to spread, and then follow the assembly instructions as written.
Alternatively, prepare and assemble the cake and ice cream layers, and keep the ice cream cake covered airtight in the freezer. Whenever possible, I recommend preparing and adding the toppings just prior to serving.
How to Store Ice Cream Cake
If you’d like to have the whole cake ready in advance, or if you need to store any leftovers, store the finished cake in an airtight container or cake carrier and return it to the freezer.
More Ice Cream Cake Recipes to Try
- Homemade Funfetti Ice Cream Cake
- Peanut Butter Cup Ice Cream Cake
- S’mores Ice Cream Cake
- Fruity Pebbles Ice Cream Cake
- Lemon Ice Cream Cake

Oreo Ice Cream Cake
- Prep Time: 4 hours, 30 minutes
- Cook Time: 28 minutes (up to 30 minutes)
- Total Time: 5 hours
- Yield: 10 slices
- Category: Cake
- Method: Frozen
- Cuisine: American
Description
This easy Oreo ice cream cake recipe is a decadent semi-frozen dessert made from fudgy homemade chocolate cake topped with cold and creamy no-churn Oreo ice cream.
Ingredients
For the Cake:
- ¾ cup (143g) granulated sugar
- ¼ cup (59ml) vegetable oil
- 2 large eggs
- 2 teaspoons (10ml) vanilla extract
- ¼ cup (48g) light sour cream
- 1 cup (140g) all-purpose flour
- ¼ cup (28g) cocoa powder (I use Hershey’s Special Dark)
- 1 ¼ (5g) teaspoons baking powder
- ¼ teaspoon baking soda
- ½ teaspoon salt
- 2/3 cup (158ml) brewed coffee
For the Ice Cream
- 1 1/4 cup plus 2 tablespoons (325ml) heavy whipping cream
- 1/2 cup (65g) powdered sugar
- 8 ounces full-fat cream cheese
- 1/2 cup (95g) granulated sugar
- 1 teaspoon (5ml) pure vanilla extract
- 16–18 crushed Oreo cookies, roughly crushed
For the Chocolate Ganache
- 2 ounces dark chocolate (chocolate bar or chips)
- 6 tablespoons (90ml) heavy whipping cream
For the Whipped Cream Topping
- 1 cup (236ml) heavy whipping cream
- 1/2 cup (65g) powdered sugar
Instructions
For the Cake Layer:
- Preheat the oven to 350°F. Line an 8-inch cake pan with parchment paper or a silicone baking mat and grease and flour the edges.
- In a large mixing bowl, combine the sugar, vegetable oil, eggs, and vanilla extract. Beat on medium speed until the eggs and oil are well incorporated and the batter is lighter in color.
- Next mix in the sour cream and beat until well combined.
- In a separate bowl, sift together the dry ingredients. Then add half the dry ingredients followed by half of the coffee and mix just until the flour starts to incorporate.
- Finally add the remaining dry ingredients, mixing on low speed while pouring in the remaining coffee and beating until all of the ingredients are well combined.
- Use a spatula to scrape down the sides of the bowl and stir the batter from the bottom to the top to ensure it’s well mixed.
- Bake at 350°F for 28-30 minutes. Test the cake for doneness by inserting a toothpick into the center of the cake. If the toothpick comes out clean, the cake is done. Cool Completely.
For the Ice Cream:
- Prepare a batch of whipped cream. Chill the bowl in the freezer for 5-10 minutes. Pour 1 1/4 cups heavy whipping cream into the chilled bowl. Use an electric mixer to beat the heavy cream on medium-high speed until soft peaks form.
- Slowly add the powdered sugar and continue beating at high speed until stiff peaks form. Set it aside.
- To soften the cream cheese in the microwave, unwrap and microwave on a plate for 15-20 seconds.
- Beat the softened cream cheese until it’s completely smooth and free of lumps. Next add the granulated sugar, 2 tablespoons heavy cream, and the vanilla extract and continue beating until well mixed.
- Then fold in the prepared whipped cream until it’s fully incorporated.
- Finally, roughly crush the Oreos by placing them in a Ziploc bag and smashing them with a rolling pin or something similar. Add the crushed Oreo cookies and stir until well-mixed.
To Assemble:
- Transfer the cake layer to an 8-inch springform pan, lined with parchment paper or a cake collar. Or line your cake pan with plastic wrap along the bottom and up the sides of the pan.
- Cut the dome off the top of the cake so it’s flat on top. Place the cake in the bottom of the pan. Pour the prepared ice cream base over the cake, spread evenly, and freeze until the filling is set, 2-4 hours.
For the Chocolate Ganache:
- In a microwave-safe bowl, combine the chocolate and 6 tablespoons of heavy whipping cream. Melt the chocolate in the microwave at 50% power in 30-second increments and stir until completely melted. Allow to cool.
- Pour the chocolate over top of the ice cream layer and spread evenly. Return the cake to the freezer until the ganache has set.
For the Whipped Topping:
- Prepare a second batch of whipped cream following the same instructions as above. Pipe the whipped cream into a border using a large open star tip. Garnish with crushed cookies.

Notes
Cake size: This is prepared using 8-inch pans. You can also use a 9-inch pan and adjust the baking time to be a few minutes less. Your cake will not be as tall. If you don’t have a springform pan, you can use a regular 8” round pan lined with plastic wrap to build the ice cream cake.
Ingredient substitutions:
- The sour cream in the cake can be substituted with Greek Yogurt. Full-fat sour cream can be used if needed
- The brewed coffee in the cake can be substituted with milk or hot water if needed.
- You can skip the homemade whipped cream for the ice cream and use an 8-ounce container of Cool Whip instead
Make ahead and storage options: To make this ahead of time, you can prepare the cake and ice cream layer and keep it in the freezer. Then keep it tightly wrapped in plastic wrap. I recommend adding the toppings prior to serving. Once the toppings have been added, return this to the freezer and store it in an airtight container or cake carrier.
Nutrition
- Serving Size: 1 slice
- Calories: 1008
- Sugar: 82.5g
- Sodium: 648.5mg
- Fat: 52g
- Saturated Fat: 20g
- Carbohydrates: 128g
- Fiber: 1.5g
- Protein: 9.7g
- Cholesterol: 109mg


Do we have to use the coffee?
No you can also use milk
Sounds delicious! I’m curious about freezing the cake with ice cream. Won’t the cake be completely frozen (hard to cut/chew) when serving the ice cream cake?
The cake does freeze, but it’s actually easier to but through than the ice cream. I recommend giving it about 20 minutes at room temperature prior to cutting.
It’s not really ice cream your putting on top, it more like Oreo cream cheese/whipped cream icing? Do you make extra whipped cream to pipe on top of ganache?
Thanks for your note. This is a standard “no-churn” ice cream recipe. But you could certainly make a traditional ice cream or even use something from the store if you prefer. Yes, in the recipe card it is specified “For the whipped cream topping” is what goes on top of the ganache.
I made your recipe for my twins birthday today. And it was perfect! I am not a big fan of ice cream but your recipe was perfection 😋 I did cut the cake in half and did two layers. So glad I found your recipe.
Oh I love that! Thank you for sharing!
Will it be too sour? Cuz ive tried other recipe for ice cream cake using yogurt… IT TASTES SOUR🤢
I am not sure what you mean, there’s no yogurt in this recipe
How many days ahead can you make this cake?
Since it’s frozen, I’d say 3-5 days if properly stored for best results. I would hold off on adding the whipped topping until the day you’re serving, but everything else should keep just fine.
Thank you. For some reason my ganache just slipped off my cake about 1 min after I placed it. Do you why that happened and how I can fix it?
Did you let it cool before applying to the cake? Might have been too hot or too thin. I pour it in the middle and then use a knife to spread it out to the sides
My family loved it. They are still snacking on it three days later. They all agree that the filling with the Oreo part tastes just like a Dairy Queen Blizzard!
Amazing Rachael!! Thank you so so much!
Is the batter for the cake suppose to be runny? Baked more than 30 min. More like 40-45. Help!
Yes the batter is very thin. Did you use an 8inch pan? Baking times will vary by oven and pan type. It’s possible your oven was not fully preheated to actual temperature when you started, or your oven temperature may be off.
Oh my goodness this ice cream cake looks and sounds amazing! Perfect on hot summer days. I am SO going to make this! Thank you for sharing 🙂
You’re welcome Tiffany