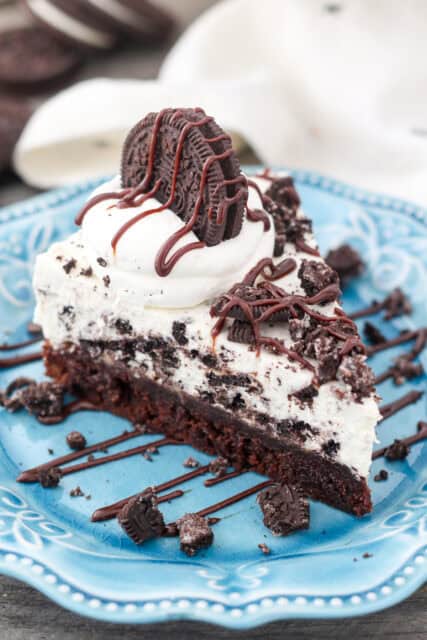
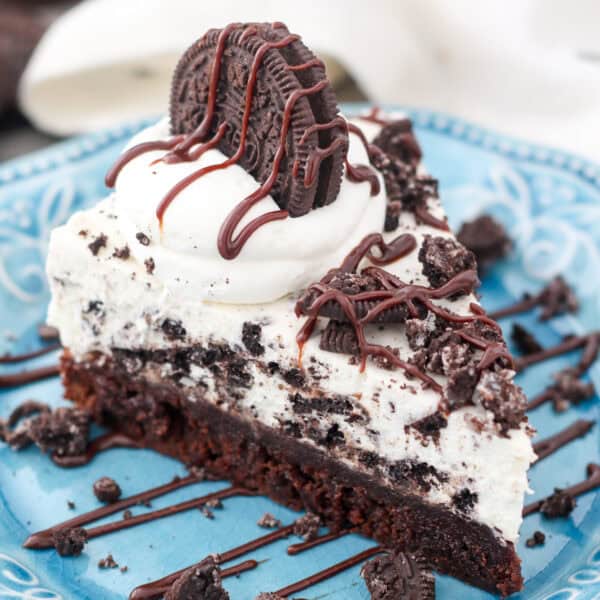
This Oreo mousse pie recipe has a fudgy brownie bottom with a creamy white chocolate mousse layer loaded with crushed cookies! Make this easy Oreo dessert in either a springform pan or as bars in a 9-inch baking pan.

This Oreo mousse pie is one of my favorite Oreo recipes. It’s a fudgy brownie base topped with pillowy white chocolate mousse that’s loaded with crushed Oreo cookies. Of course, I topped my pie with even more Oreos, whipped cream, and hot fudge. I can’t be stopped when it comes to Oreo desserts! I usually assemble this mousse pie in a traditional springform pan like my no-bake Oreo cheesecake. However, you can make it in a 9-inch square pan to cut into bars instead. The second option is great for potlucks and parties.
Why Oreo Mousse Pie Is the Best Make-Ahead Dessert
- Thick, fudgy brownie bottom. The brownie on the bottom makes this dessert sound a bit fancy, but really, it’s very easy to do. Especially with a box of brownie mix as a semi-homemade shortcut.
- Make it as pie or bars. The choice is yours. I love the option to make this mousse pie in a square pan when I’m baking for a crowd.
- Take the pressure off. Making this Oreo mousse pie a day or two ahead of serving takes the pressure off during the holidays. The mousse needs time to chill in the fridge.

Ingredient Notes
These are the important ingredients you’ll need to make this Oreo mousse pie with a decadent brownie bottom. Scroll to the recipe card for the printable recipe with the full details and amounts.
- Brownie Mix – You can make the brownie layer from a box or from scratch. I usually grab a boxed brownie mix because it’s quick, but if you prefer a homemade version, I’d recommend my cocoa powder brownies or these fudgy homemade brownies made with melted chocolate.
- White Chocolate – Choose a high-quality baking chocolate that melts smoothly, like Lindt or Ghirardelli. Chocolate chips have a waxy coating that can turn grainy when melted.
- Gelatin – If you’ve never worked with gelatin before, don’t worry, it’s easier than you think! You’ll need to dissolve the gelatin in cold water.
- Heavy Whipping Cream – Make sure to use full-fat heavy cream that’s specifically for whipping, not pouring.
- Cream Cheese – This should also be full-fat and softened to room temperature.
- Oreos – To crush up for the mousse layer and topping. I also like to drizzle my Oreo mousse pie with chocolate ganache or hot fudge sauce.
- Whipped Cream – Also for decorating the finished pie. I use homemade whipped cream, but you can use store-bought or Cool Whip if you’d like.

Tips for a Perfect Brownie Bottom
- Remember the other ingredients on the box. If you’re using a box mix, be sure to pick up the eggs, oil, or any other ingredients listed on the box that are necessary to make your brownies.
- Make sure your pan is watertight. You’ll bake the brownie in a 9-inch springform pan. It’s important that you have a secure seal on your pan, otherwise the brownie batter will leak in your oven. To test if your pan seals, fill it with water. If the water leaks, that means your batter will leak, too. In this case, double-wrap the bottom edge of the pan tighly with foil, like you would if you were going to bake in a water bath.
- Line the pan to prevent sticking. I also suggest lining the bottom of the pan with parchment paper, so your brownie layer doesn’t stick to the bottom of your pan. I have a tutorial on preparing a springform pan that covers how to line the pan easily (the tutorial is for a no-bake crust in a springform pan, but the same steps apply here!).
How to Assemble an Oreo Mousse Pie
Once the brownie has baked and cooled, it’s time to add the mousse layer. I like to line the edges of my pan with cake collars (acetate sheets), which helps get that nice smooth edge. It’s not necessary, but it’s a nice touch. You can also use parchment paper, but it doesn’t peel away quite as nicely.
- Melt the chocolate. Melt white chocolate in the microwave at 50% power, stirring every 30 seconds to prevent it from scorching. See my tutorial on how to melt chocolate.
- Prepare the gelatin. Sprinkle the gelatin over cold water. Do not stir! Leave it to sit until the gelatin turns solid, then heat it for 8-10 seconds in the microwave until it’s liquid again. Watch it carefully as it bubbles up quickly.
- Make the mousse. Next, prepare a batch of homemade whipped cream. In a separate bowl, beat the cream cheese until it’s smooth, and mix in the melted white chocolate. Lastly, fold in the whipped cream and crushed Oreo cookies. Pour the Oreo mousse over the brownie base, spreading it evenly. Then, move the pie to the fridge to chill and set.
How Long Does a Mousse Pie Take to Set?
This Oreo mousse pie will need to chill in the fridge for at least 4 hours so it can firm up before serving. I like to make it the day before and refrigerate it overnight for best results.

Frequently Asked Questions
You’ll want to choose a high-quality melting chocolate. Good brands are Lindt, Guittard, and Ghirardelli. There’s also the option to make this recipe with a dark chocolate mousse instead of white chocolate, as you find in my no-bake chocolate Oreo mousse pie.
If your Oreo mousse pie still hasn’t firmed up after a few hours in the fridge, it could be due to the temperature of the ingredients or that the whipped cream wasn’t whipped enough before you folded it in. Make sure to allow the melted chocolate to cool, and don’t overheat the gelatin. Also, be sure to whip the heavy cream into stiff peaks (they shouldn’t droop over when you hold the whisk upright).
Optional Toppings and Serving Suggestions
I topped my pie with crushed Oreos, tall swirls of whipped cream, even more Oreos (this time whole ones), and a drizzle of chocolate. But you can use Oreo crumbs, chocolate whipped cream, or any of these ideas:
- Frosting. Instead of whipped cream, pipe swirls of vanilla buttercream, whipped ganache frosting, or Oreo frosting on top of the pie.
- Caramel sauce. In addition to or instead of a chocolate drizzle, top the pie with salted caramel sauce.
- Wait until it’s time to serve. I prefer to add the toppings just before serving, so I can remove the sides of the springform pan before I decorate the pie.
- Serve à la mode. This dreamy Oreo mousse pie would be delicious served with a scoop of vanilla ice cream or homemade brownie batter ice cream!

How to Store
- Refrigerate. Keep this Oreo mousse pie refrigerated for up to 2 days. I recommend storing it covered in a cake carrier or similar.
- Freeze. You can freeze this mousse pie for up to 2 months. Allow the pie to chill for at least 4 hours in the fridge before you freeze it. Wrap the whole pan in plastic wrap, then foil to protect the dessert from freezer burn.
More Oreo Desserts to Try
Brownie Bottom Oreo Mousse Pie
- Prep Time: 30 minutes
- Cook Time: 30 minutes
- Total Time: 1 hour
- Yield: 8 slices
- Category: Pies
- Method: Oven
- Cuisine: American
Description
This Oreo mousse pie layers a fudgy brownie with silky white chocolate mousse and loads of crushed cookies! Make it ahead in a springform pan, or prepare it in a 9-inch square pan that’s perfect for sharing.
Ingredients
For the brownie:
- 1 package fudgy chocolate brownie mix (19.9 oz)
- Ingredients listed on the box: oil, eggs, water
For the mousse:
- 4 ounces white chocolate
- 1 tablespoon cold water
- 1 teaspoon gelatin
- 1 ¼ cups heavy whipping cream
- ½ cup powdered sugar
- 4 ounces cream cheese, softened
- 12 Oreos, crushed
For the topping:
- 1 cup heavy whipping cream
- ¼ cup + 2 tablespoons powdered sugar
- 12 Oreos (8 whole and 4 crushed)
- Hot fudge sauce for garnish (optional)
Instructions
For the brownie:
- Preheat the oven to 350°F. Line the bottom of a 9-inch springform pan with parchment paper.
- In a medium-sized bowl, combine the brownie mix, with the ingredients listed on the box. Stir until the batter is well combined and there are no dry ingredients left.
- Pour the batter into the springform pan and spread evenly. Bake at 350°F for 30-35 minutes until the center is baked but still slightly fudgy. Allow the brownie to cool completely.
For the mousse:
- In a microwave-safe bowl, microwave the white chocolate at 50% power in 30 second increments until the chocolate is melted, stirring occasionally. Once melted, stir until smooth. Set aside to cool.
- In a small dish, combine 1 tablespoon of cold water with 1 teaspoon gelatin. Sprinkle the gelatin over the cold water and allow it to set to a solid.
- Microwave the gelatin for 8-10 seconds until it turns back to a liquid, watch closely.
- To prepare the whipped cream, place the metal mixing bowl and whisk in the freezer for 5-10 minutes.
- Pour the heavy whipping cream into the chilled bowl and use an electric mixer to beat the heavy cream on medium-high speed until the cream starts to thicken. Slowly add the powdered sugar and liquid gelatin and continue beating on high speed until stiff peaks form. Set the whipped cream aside.
- Beat the softened cream cheese on medium-high speed for 2-3 minutes, until the cream cheese is free of lumps, scraping the bowl occasionally.
- Next, add the melted chocolate and mix thoroughly into the cream cheese mixture.
- Finally, fold the prepared whipped cream into the cream cheese and stir gently until the mixture is well combined.
- Fold in the crushed Oreos then spread the mousse over the cooled brownie (in the springform pan) and refrigerate for 3-4 hours.
For the topping:
Prepare a second batch of whipped cream as instructed above. Use a large pipping bag fitted with an open round tip to pipe 8 tall round peaks on the boarder. Top with a whole Oreo and drizzle with hot fudge. Sprinkle additional crushed Oreos in the middle.


I read through the recipe twice but did not see when to add in the dissolved gelatin. Possibly when the powdered sugar to added to the whipping cream or, when the melted white chocolate is added to the cream cheese? This sounds like something I would like to make, soon.
Hi Stephanie, thank you for pointing this out! It is actually added to the whipped cream. This should be updated now!