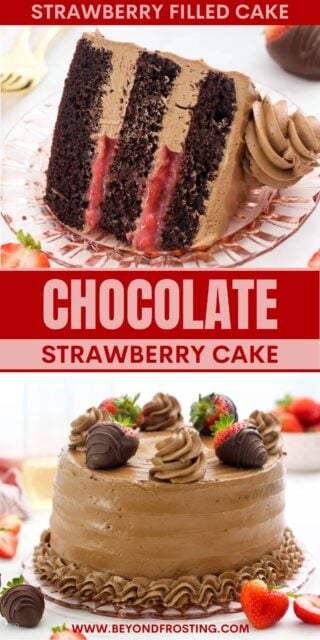
This chocolate strawberry cake is a moist chocolate layer cake filled with sweet homemade strawberry sauce and frosted with the silkiest chocolate Swiss meringue buttercream. Finish this cake with real chocolate-dipped strawberries for an extra romantic touch!
If you love this chocolate strawberry cake recipe, wait until you try my decadent chocolate strawberry cupcakes.

Moist Chocolate Cake With Strawberry Filling
My husband orders me a box of chocolate-covered strawberries every Valentine’s Day because he knows they’re my favorite treat. I guess you can say it inspired this cake and while it’s definitely on theme as a Valentine’s Day dessert,the fresh strawberry flavors are delicious year-round. Especially in the summertime when berries are in season.
This cake has moist chocolate cake layers wrapped around a sweet and fruity strawberry filling, smothered with chocolate Swiss meringue frosting and garnished with chocolate-dipped strawberries, of course. It’s the sister to one of my most popular cakes, this Strawberry Mascarpone Cake.
I will be real with you, this is not the easiest recipe to prepare because of the steps involved. However, the cake itself it pretty simple to make, as the the strawberry filling. It’s just three separate components to put together, but you can save yourself the headache with some preparation tips I’ve included.

Ingredient and Substitutions
Here are some notes on the ingredients you’ll need to make a stunning chocolate strawberry cake. Scroll down to the recipe card after the post where you’ll find a printable list with the full recipe details.
- Sour Cream – A key ingredient for super moist cakes and cupcakes. If you don’t have sour cream in the fridge, you can use plain yogurt or Greek yogurt instead.
- Cocoa Powder – I use a natural unsweetened cocoa powder or Hershey’s Special Dark cocoa powder in the chocolate cake.
- Brewed Coffee – Freshly brewed, hot espresso (or regular coffee) “blooms” the cocoa powder, boosting the chocolate flavors without actually tasting like coffee. It also adds lots of moisture to the chocolate cake layers. If you’d prefer, swap it with warm milk instead.
- Espresso Powder – In addition to brewed coffee, espresso powder is my secret weapon in chocolate cakes. It helps intensify the fudgy flavor even more. It’s optional, though, and you can substitute it for fine ground coffee or leave it out if needed.
- Strawberries – The strawberry cake filling is made from scratch with fresh or frozen strawberries. If you’re using frozen strawberries, make sure to thaw them and drain any excess liquid first.
- Egg whites (and lots of them) – This is frosting with the best chocolate Swiss meringue buttercream frosting. For this you’ll need 10 eggs, just the whites, as this is a large batch of frosting.
- Dark chocolate- The frosting requires high-quality chocolate, 12 ounces to be exact. Please use chocolate bars and not chocolate chips for best results.

How to Make a Chocolate & Strawberry Cake
There are a few steps involved, so I’ll sometimes prepare the cake layers and filling first, and then whip up the frosting and assemble the cake the next day. It’s totally up to you. Be sure to check out the printable recipe card after the post. You can also refer to my original chocolate cake recipe for more tips.
Step 1: Bake the Cake Layers
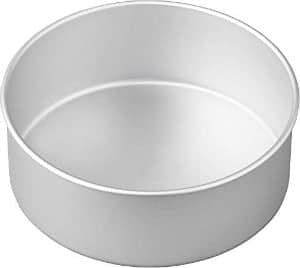
This cake has three 8” layers. Prepare your chocolate cakes according to the recipe. After you’ve baked the cakes, you’ll need to allow them time to cool completely to room temperature before you go ahead with assembling and frosting the cake.
Cake Tips
- Ingredient temperatures. Pay attention to which items needs to be at room temperature, while things like the brewed coffee should be hot for best results.
- Sift the dry ingredients. Sifting dry ingredients, like flour and cocoa powder, helps to avoid clumps in the chocolate cake batter.
- Divide the batter evenly. Make sure that the finished cake batter is evenly divided between the three round cake pans. For me, this is usually about 1 ⅔ cups of batter per pan.
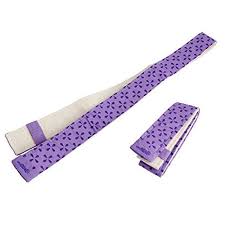
- Use bake-even stripes. If want level cakes (or to minimize the domes of the cake), grab a pair bake-even stripes, I rarely bake a cake without them.
- Make-ahead. If you need to prepare ahead, the cake layers can be stored at room temperture up to 2 day before serving or up to one month in the freezer. In either case, you’ll want to keep them tightly wrapped (twice for the freezer) and stored in an airtight container. Avoid refrigeration for advance preparation, as it can lead to dryness in the cakes.
Step 2: Make the Strawberry Cake Filling
The easy strawberry filling I use to fill the cake layers brings just the right amount of fruity sweetness to this chocolate dessert. It’s the same filling that I use in my rosé cupcakes. This is best when prepared ahead of time, you can refrigerate in an airtight container up to 2 days in advance.
To make it, all you need to do is puree strawberries, and then reduce them in a pan over medium heat along with sugar, lemon juice, and a little flour to thicken. You can also use cornstarch. Afterward, let the strawberry filling cool.
Step 3: Make the Buttercream
If you’ve never made a Swiss Meringue Buttercream before, it can seem intimidating. Cooking egg whites, beating them into a meringue and then combining with butter and chocolate.
Whenever I approach a new recipe that requires a different technique, I find it helpful to read all about it before I start. No one likes wasting time and money on ingredients. See my helpful tips below.
What I love about this frosting is that it’s less sweet. Instead of going into great detail about how to make it, you can get some pretty detailed instructions in this post, but I will provide a few key things to not.
Swiss Meringue Buttercream- What You Need to Know
Now there’s a lot more helpful tips, including how to fix a buttercream that looks curdled, but I have already covered most of that in my Swiss Meringue Buttercream tutorial, but my top 3 pieces are advice are:
- The tools you’re using have to be grease-free. Wipe down the mixing bowl and any utensils like thermometers, beaters and spatulas with white vinegar. Grease can quickly ruin a meringue.
- Butter temperature. It needs to be room temperature, which is actually about 65-68 degrees F. Butter that is too warm can cause the buttercream to curdle.
- A candy thermometer is helpful. You want to cook the egg whites until they reach about 160 degrees F. Don’t spend a ton of money, the one I have is about $10 and I’ve had it for years.

Frosting and Assembling a Strawberry-Filled Cake
When it comes to filling cake layers with a puree, there’s a few key steps I want you to pay attention to for a successful setup. If you’re new to baking and assembling layer cakes, I have an in-depth tutorial on how to make a layer cake that goes deeper into the techniques I use here.
- Level off the cake layers. Begin by trimming the domes from the cake layers using a serrated knife or a cake leveler. This makes the cakes easier to stack and helps prevent it from sliding.
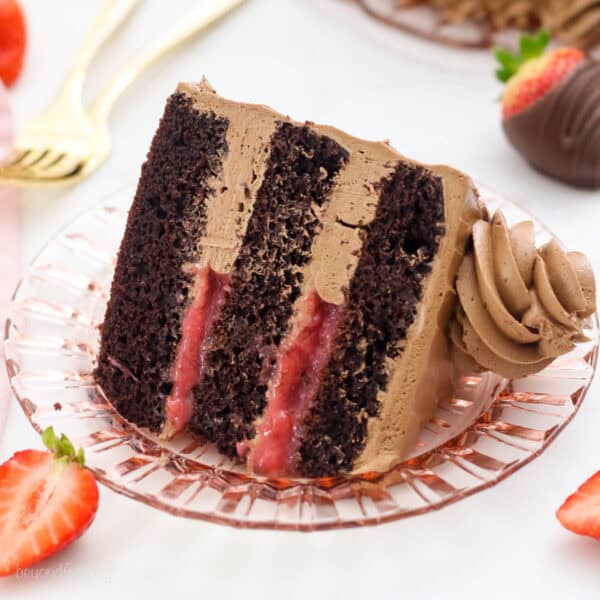
- Dam the frosting then fill. Before adding the strawberry filling, you’ll want to pipe a thick frosting border of buttercream around the outside edge of the cake. This “dam” keeps the filling from seeping out the sides of the cake. If you don’t have a piping bag, you can use a large Ziploc bag with the corner snipped off. Notice in my photo the sliced piece has an extra thick dam of frosting.
- Add a crumb coat. Once your cake is filled and stacked, use your piping bag to fill in any gaps between the layer and then smooth away the frosting to create a crumb coat. This crumb coat is meant to be a thin layer of frosting that catches any crumbs, preventing them from finding their way into the final layer of frosting.
- Frost the cake. Use the piping bag and an offset spatula to frost the top and sides of the finished cake. To create an indent effect like you see pictured, I ran the angled spatula around the outside of the cake while spinning the cake on a turntable.
Decorating Ideas
When it comes to decorating this chocolate layer cake, you can really take it in any direction. I used a jumbo Ateco 846 (large open star tip) to create pretty little florets on top of the cake. If you need a deeper dive into decorating tools, check out my posts on how to use piping tips and how to use a piping bag.
Next, I’ll garnish the cake with chocolate covered strawberries, or plain fresh strawberries if I’m pressed for time. For a little something extra, you can always add a sprinkle of chocolate shavings or a drizzle of chocolate ganache (you’ll want to chill the cake first). This white chocolate ganache would also add some nice contrast.

Frosting Ideas


The frosting I chose for this cake is my favorite chocolate Swiss meringue buttercream. It’s silky, light, and creamy, and not too sweet, made with real melted chocolate. Making Swiss meringue frosting isn’t difficult, but it does take a little more effort than your regular chocolate frosting (which would also taste amazing on this cake!). You can frost this cake with pretty much any frosting you’d like, including any of the ideas you see here.
How to Store
This chocolate strawberry cake stores well at room temperature for up to 2 days. Keep the frosted cake covered airtight, in a container or cake carrier.
Unless your kitchen is especially hot or humid, I don’t recommend keeping frosted cakes in the fridge. The high butter content in the buttercream causes the frosting to harden in the cold. If you must refrigerate your cake, take it out ahead of serving so that it comes to room temperature.
Preperation Tips
I’ve already shared this information about, but in case you missed it, here it is.
- Cake layers: Cool completely, can be stored at room temperature for 2 days (do not refrigerate) or in the freezer for up to one month. In either case wrap tightly in plastic (double wrap for freezer method).
- Filling: Cool completely, can be stored in the refrigerator for 2 days or the freezer up to one month. Keep in an airtight container
- Frosting: This is best when made fresh, I don’t recommend making in advance. Prepare the frosting when you’re ready to assemble.
Chocolate Strawberry Cake
- Prep Time: 45 minutes
- Cook Time: 22 minutes
- Total Time: 1 hour 7 minutes
- Yield: 12 slices
- Category: Cake
- Method: Oven
- Cuisine: American
Description
This chocolate strawberry cake is a moist chocolate cake with strawberry filling and silky chocolate buttercream frosting. Decorate with chocolate-dipped strawberries for a romantic touch!
Ingredients
For the cake:
- 1 ½ cups (285g) granulated sugar
- ½ cup (118 ml) vegetable oil
- 3 large eggs, at room temperature
- 1 tablespoon (15 ml) pure vanilla extract
- ½ cup (120g) full-fat sour cream, at room temperature
- 2 cups (280g) all-purpose flour, sifted
- ½ cup (40 g) natural unsweetened cocoa powder, sifted
- 1 tablespoon (5g) espresso powder (optional)
- 2 ½ teaspoons (9 g) baking powder
- ½ teaspoon (2 g) baking soda
- 1 teaspoon (5 g) salt
- 1 ¼ cup (296 ml) hot brewed coffee
For the Strawberry filling:
- 2 cups (303g) strawberries, pureed
- 1 tablespoon (15 ml) lemon juice
- 2 tablespoons (24g) granulated sugar
- 1 tablespoon (9g), all-purpose flour, sifted
For the frosting
- 10 large egg whites
- 2 ½ cups (475 g) granulated sugar
- 3 cups (680g) unsalted butter, at room temperature
- 1 tablespoon (15ml) vanilla extract (or vanilla bean paste)
- 12 ounces (452 g) dark chocolate bar
Instructions
For the cake:
- Preheat the oven to 350°F. Prepare 3 8-inch round baking pans, line the bottom with parchment paper and grease the sides. Then dust with a light coating of equal parts flour and cocoa powder.
- In a large mixing bowl, combine the sugar, vegetable oil, eggs and vanilla extract. Beat on medium speed until the eggs and oil are well incorporated and the batter is lighter in color. Next mix in the sour cream and beat until well combined.
- In a separate bowl, sift together the dry ingredients. Add half the dry ingredients to the wet ingredients, followed by half of the coffee, and mix until the flour is incorporated at a low speed. Then add the remaining dry ingredients and coffee. Beat until all of the ingredients are well combined. Use a spatula to scrape down the sides of the bowl and stir the batter from the bottom to the top to ensure it’s well mixed.
- Divide the batter evenly between the three pans, about 1 2/3 cups of batter per pan. Bake at 350°F for 20-24 minutes. Test the cake for doneness by inserting a toothpick into the center of the cake. If the toothpick comes out clean, the cake is done. Remove from the oven and allow to cool completely.
For the filling:
- Chop and puree the strawberries using an immersion blender or food processor.
- In a medium-sized saucepan, combine pureed strawberries, lemon juice sugar and flour, stir well. Cook over medium-high heat until the mixture starts to boil, stirring frequently.
- Reduce heat and simmer for another 5 minutes, stirring occasionally until the strawberry puree starts to thicken. If the puree seems to thin, add up to 1 tablespoon of additional flour.
- Allow the puree to cool completely, refrigerating to help speed up the process.
For the frosting:
- Wipe down the inside of your stainless-steel bowl with vinegar to remove any grease. Chop the chocolate bars into smaller pieces, about the size of a nickel, set aside.
- Combine sugar and egg whites in the bowl with candy thermometer attached. Set the bowl over top of a pot with 1 ¼ cups water covering the bottom. Place over medium heat.
- Stir constantly with a whisk until the mixture reaches 140°-160° The sugar should be dissolved in the egg whites. You can test this by placing a drop on your fingertips and rubbing them together. The mixture should be completely smooth.
- In a microwave-safe bowl, microwave the chocolate 50% power in 30-second increments, stirring each time until the chocolate is melted and smooth. Set aside to cool.
- Immediately place the mixing bowl on your stand. Using the wire whisk attachment, beat the eggs white on low for 2 minutes then increase to medium-high. Beat for another 5 minutes. At this point, the egg whites should have turned white and the body of the meringue starts to form. Increase the mixing speed to high. It will start to look glossy as the peaks begin to form. Beat for another 5-8 minutes until the bottom of your bowl is cool to the touch and your meringue has stiff peaks.
- Turn your mixer down to medium-low. Slowly add the butter, 1 tbsp at a time. As you add more butter, the frosting might appear to have curdled and lost its body, that’s ok. Scrape down the sides of the bowl.
- Switch to the paddle attachment, add the vanilla extract and continue beating on medium-high speed until the buttercream comes together. Slowly drizzle in the chocolate and continue beating until stiff peaks form, about 3-5 minutes.
Assemble
- Level off the cakes by removing any domes. Place a dollop of frosting on a cake board and place the bottom layer of cake over that.
- Pipe a thick border (a dam) along the outside edge of the layer. You may need to do this twice. Spread half of the strawberry mixture over the cake, carefully filling the inside of the dam. Pipe another thin layer of frosting over the strawberry sauce and spread evenly with your offset spatula.
- Add the second layer of cake and repeat the above steps using all of the remaining strawberry sauce. Then, add the final layer of cake on top.
- Use a piping bag to fill in any gaps between the layers, then use an offset spatula to create a thin crumb coat around the outside and top of the cake. Chill for 15 minutes.
- Proceed to frost the top and sides of the cake using an offset spatula. Once fully frosted, run the spatula around the outside edge of the cake while turning the turntable to create the indent in the frosting.
- Use the remaining frosting to pipe the florets on the top of the cake using an Ateco 846 tip (large open star). Garnish with strawberries if desired.

Notes
Storing and Preparation Tips
- Cake stores well at room temperature for up to 2 days. Keep the frosted cake covered airtight, in a container or cake carrier. For warmer or humid climates, the cake should be refrigerated in that airtight container and brought to room temperature before serving.
- Cake layers: Cool completely, then it can be stored at room temperature for 2 days (do not refrigerate) or in the freezer for up to one month. In either case, wrap tightly in plastic (double wrap for freezer method).
- Filling: Cool completely, can be stored in the refrigerator for 2 days or the freezer up to one month. Keep in an airtight container
- Frosting: This is best when made fresh, I don’t recommend making in advance. Prepare the frosting when you’re ready to assemble.
Substitutions:
- Sour Cream: Use non-fat Greek or plain yogurt .
- Brewed Coffee: I recommend using milk instead, but only if needed.
- Chocolate bars: I do not recommend using chocolate chips.
Helpful Reference post
- Be sure to read my tutorial for how to make Swiss meringue buttercream if you’ve never made this frosting before. For a deeper dive, you can also read more about the Chocolate Swiss Meringue Buttercream here.
- How to Make a Layer Cake– Covers things like how to properly level and stack cakes.
Nutrition
- Serving Size: 1 slice
- Calories: 899
- Sugar: 70g
- Sodium: 328mg
- Fat: 58g
- Carbohydrates: 91g
- Fiber: 2g
- Protein: 8.5g
- Cholesterol: 171mg


Do you put both the cake and filling in the fridge over night when doing it in steps?
Usually just the filling. The cake layers I wrap in plastic or store in an airtight container.
Made this for my husband’s birthday. I like that the strawberry puree isn’t overly sweet because this cake is SO rich.
I forgot the sour cream but the cake still turned out okay they were just a little flatter than they should have been. Not sure if I will make this again because all the parts took me about 3 hours but I will bookmark this recipe in case he asks.
Hi Amber, so glad you enjoyed this recipe!
Any idea how long the cake stay without the strawberry filling making it soggy?
Hi Carol, 3-4 days is usually fine.
Looks beautiful — and delicious! But please proofread. I don’t think you meant to make a “heavy DAMN,” lol.
I actually meant heavy “dam”, so without the n. And as much time as I spend reading post, a spelling error here and there is bound to happen. Thanks for pointing it out so I could fix it! Have a great day.
Quick question- about how thick should each layer of cake be?? Mine are about 3/4” . Did I do something wrong; should they have risen more? (but the tiny piece i tried that broke off was absolutely delicious!)
What size pans did you use? About 1-inch thick along the outside edge is what I would expect for an 8-inch cake
Hi, I plan to bake this as a single layer cake.. Can i use a 9inch pan for it keeping the quantity of ingredients same.
Regards Madhurima
Yes, you can bake this in two 9-inch pans
Recipe says white chocolate but description says chocolate?