Try this easy Homemade Ice Cream Cake with layers of fluffy Funfetti Cake, baked from scratch, cake batter ice cream and a whipped cream frosting. It’s the perfect birthday cake!
This post is sponsored by ADA MidEast. All opinions are my own.
Easy Ice Cream Birthday Cake
Ice cream cakes were a staple in our house for birthdays growing up. Who doesn’t love ice cream with their cake? This is the best of both worlds.
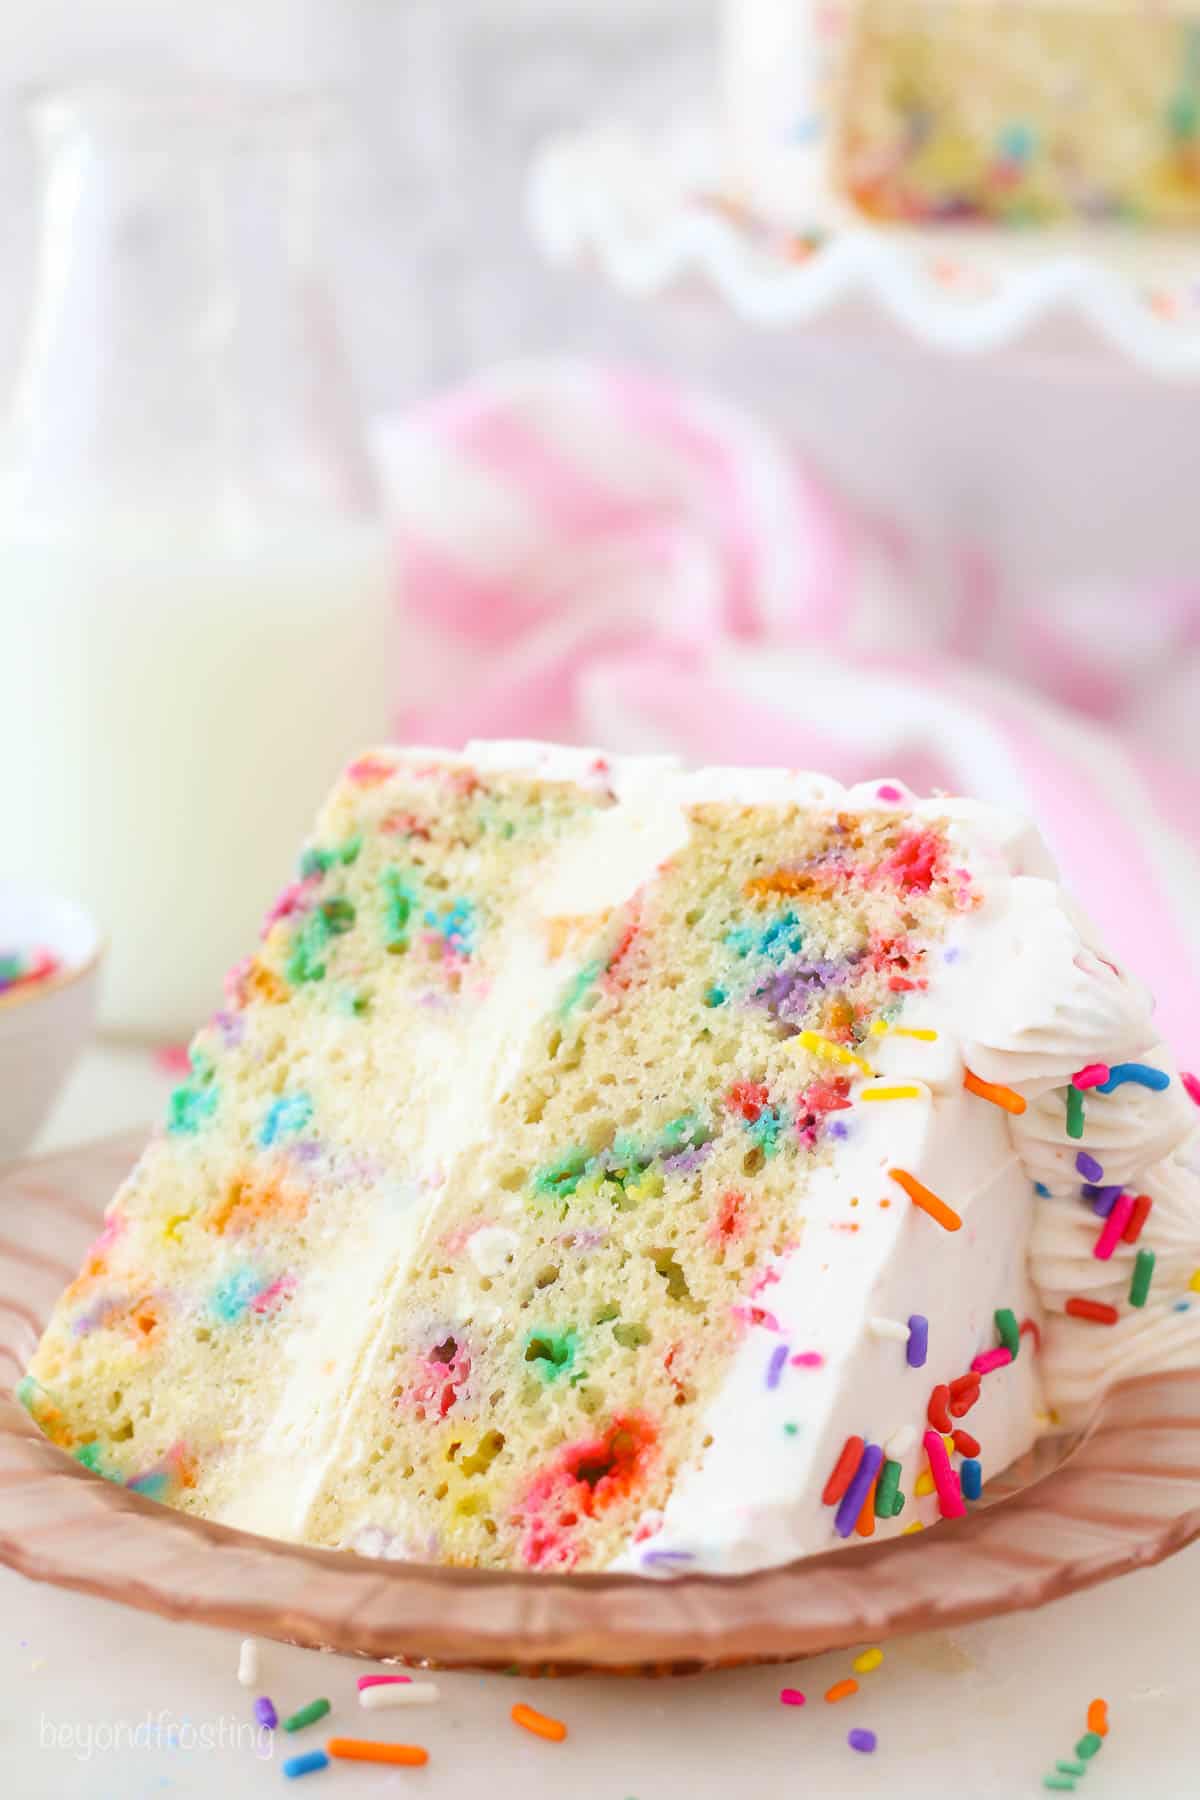
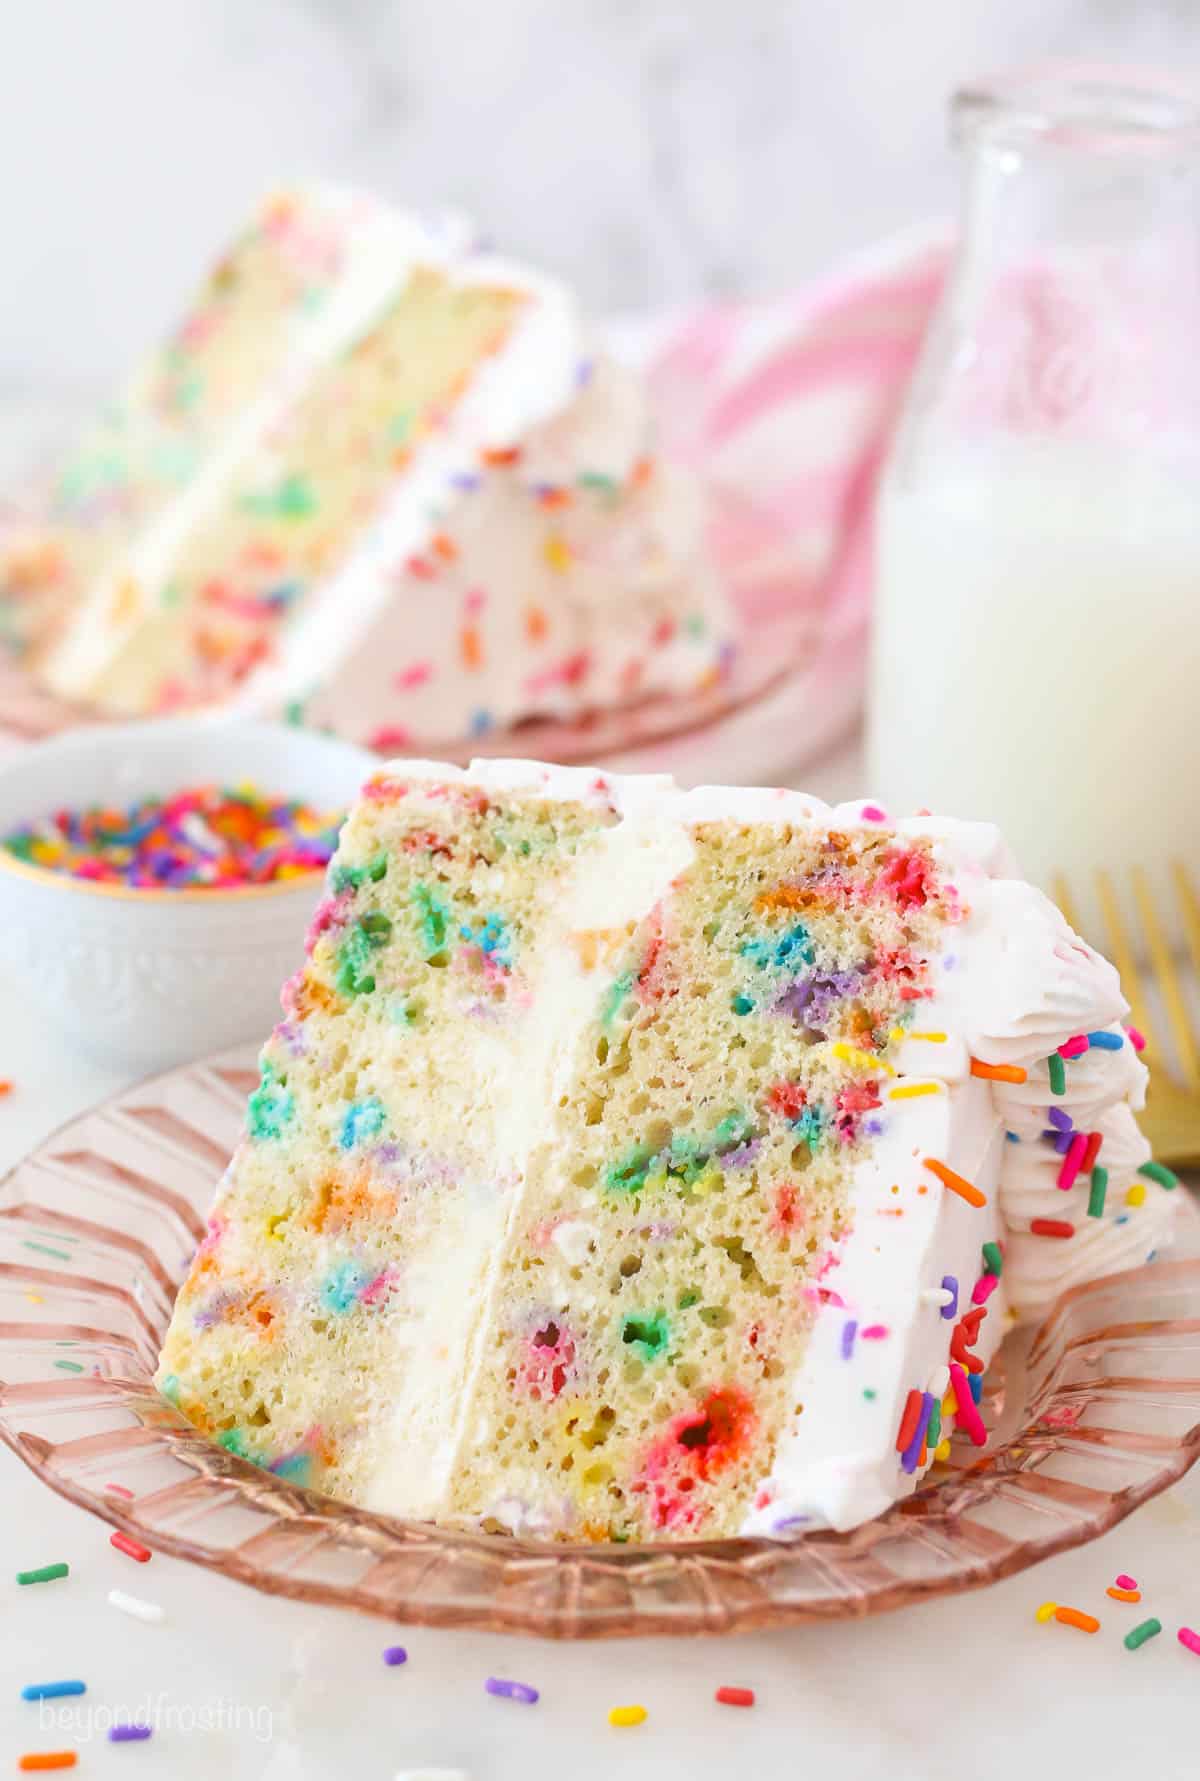
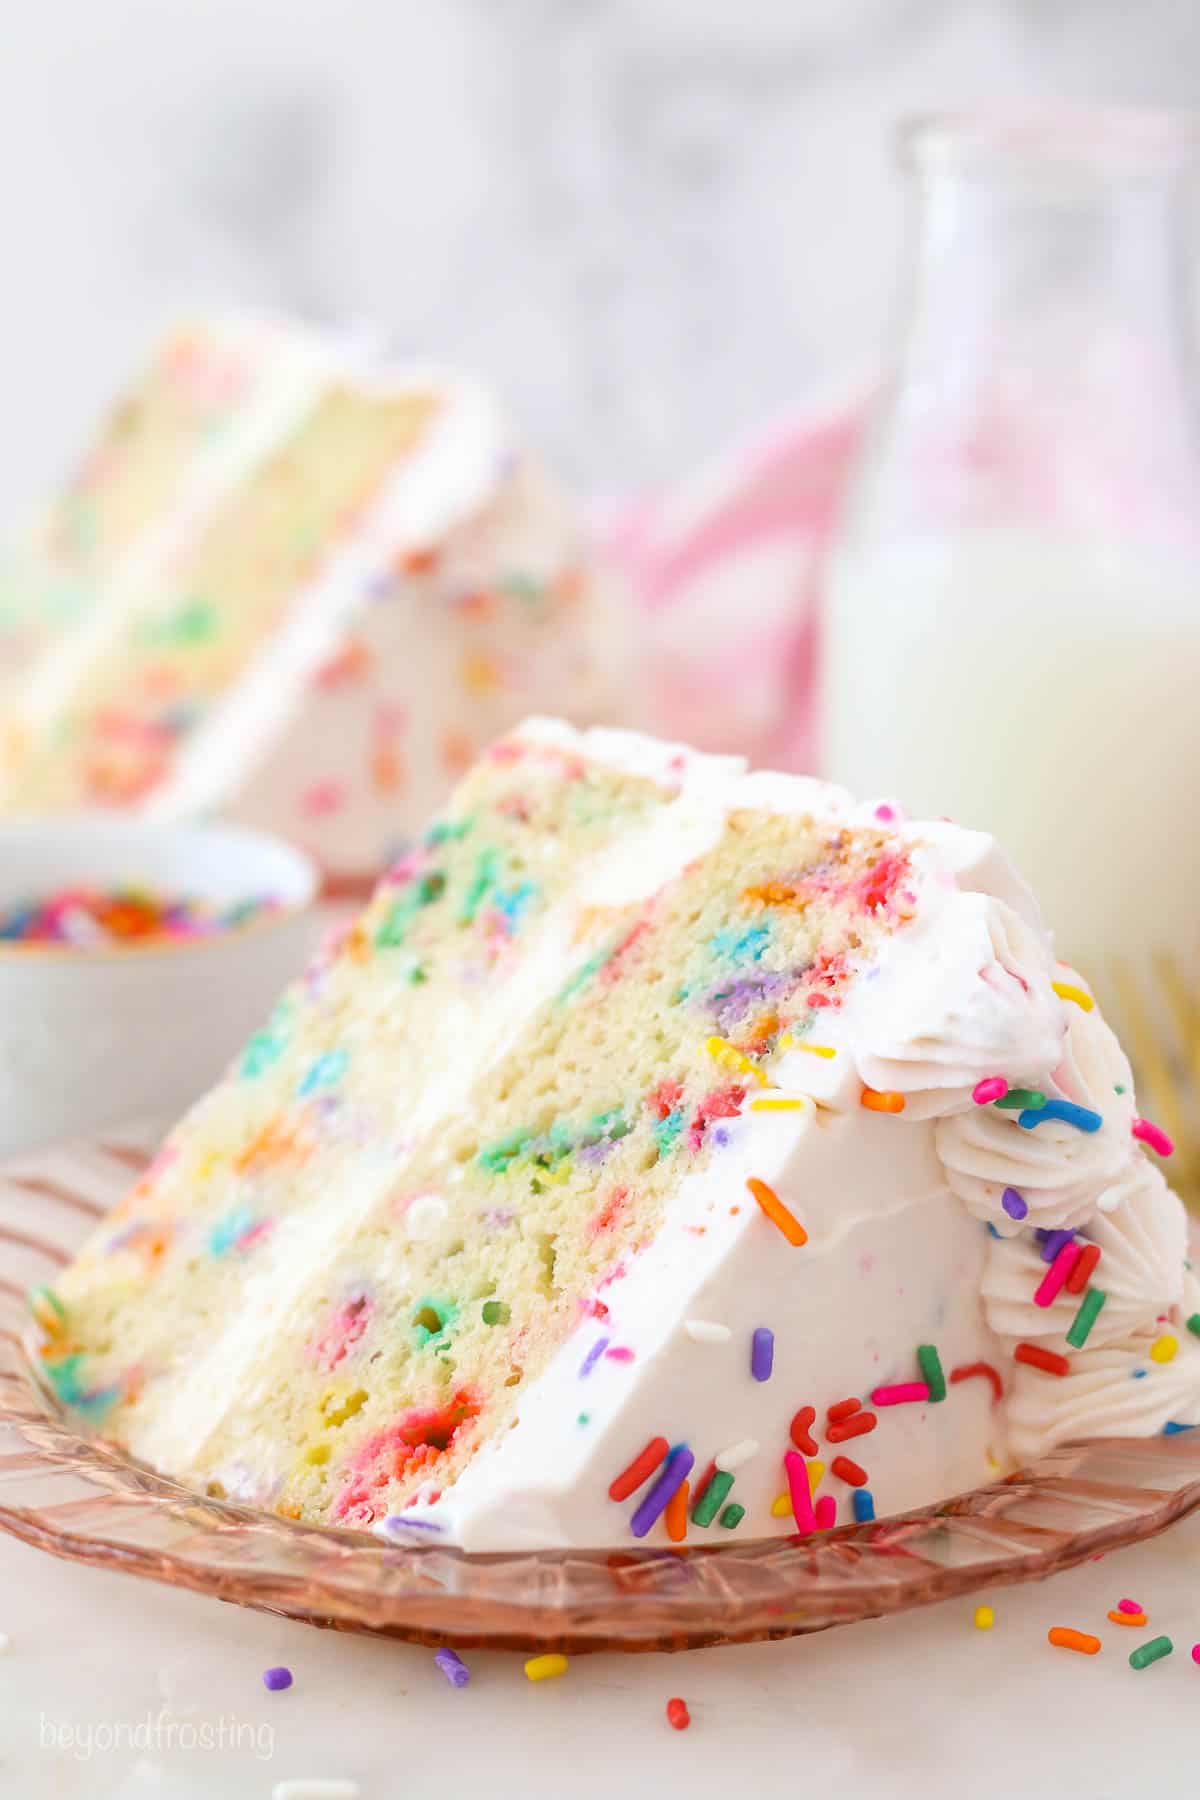
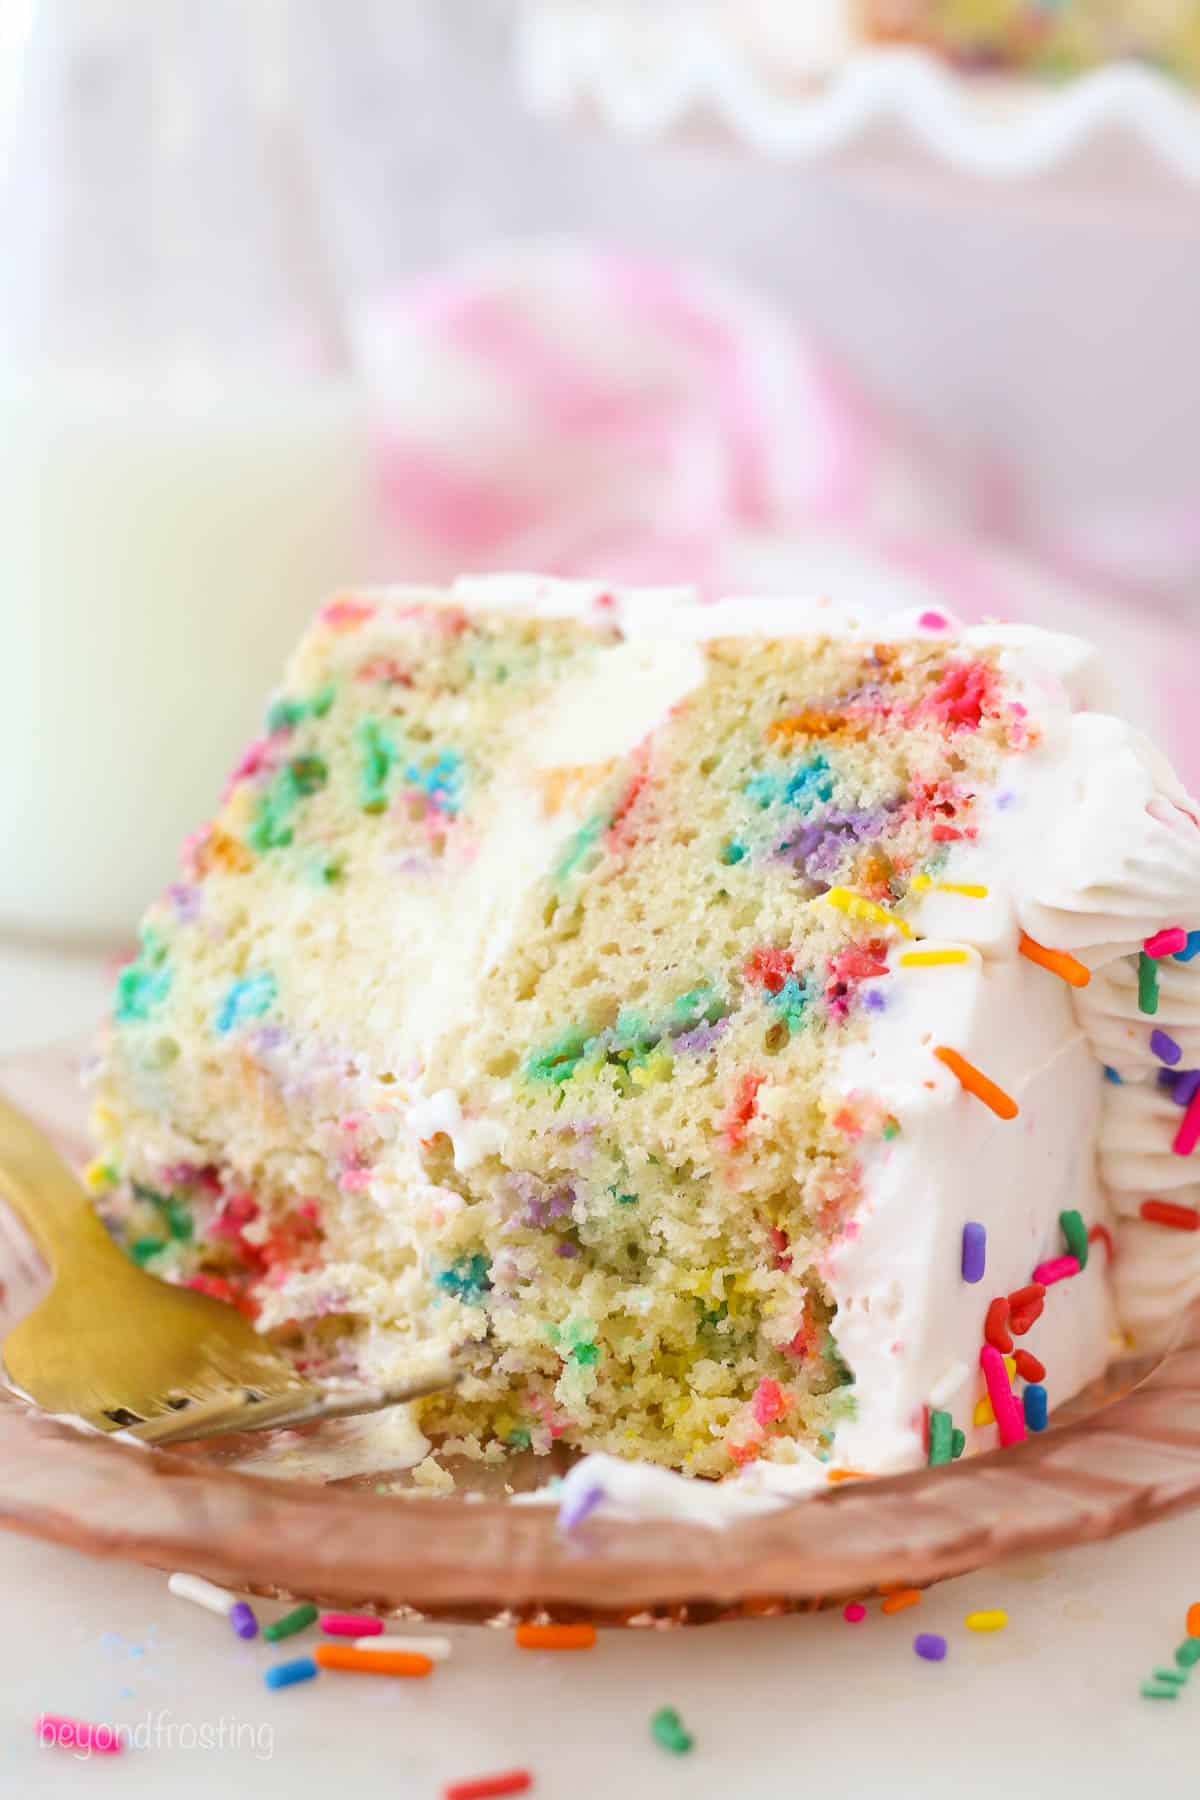
For this Funfetti Ice Cream Cake, I am combining my moist and fluffy Funfetti Cake, made from scratch of course with some store brought ice cream. This means you can customize this cake to any flavor variation that you prefer.
I’m partnering with my ice cream-loving friends from American Dairy Association MidEast to bring you this recipe. Did you know it takes about 12 pounds of milk to make one pound of ice cream? That means About 9% of all the milk produced by U.S. dairy farmers is used to produce ice cream. Crazy right? I am obsessed with watching ice cream be packaged. You can check out this quick video showing you how ice cream is made.
If you think you can’t make something like this at home, I am here to how you just how easy it is. The average American eats about 20 quarts of ice cream a year, so let’s get started.
A Few Key Ingredients
Melted Butter & Vegetable Oil- This cake used a combination of both for flavor and texture.
Sour Cream– This keeps the cake moist and fluffy. A good substitute would be plain or Greek yogurt.
Buttermilk- The tanginess of the buttermilk give the Funfetti cake the best texture. If you don’t have any on hand, you can use this easy substitute.
Sprinkles– I recommend using jimmies instead of nonpareils. The colors tend not to run, whereas nonpareils bleed pretty quickly after coming into contact with the liquid batter.
Heavy Cream– This recipe calls for a homemade whipped cream topping. If you’d prefer, you can use Cool Whip.
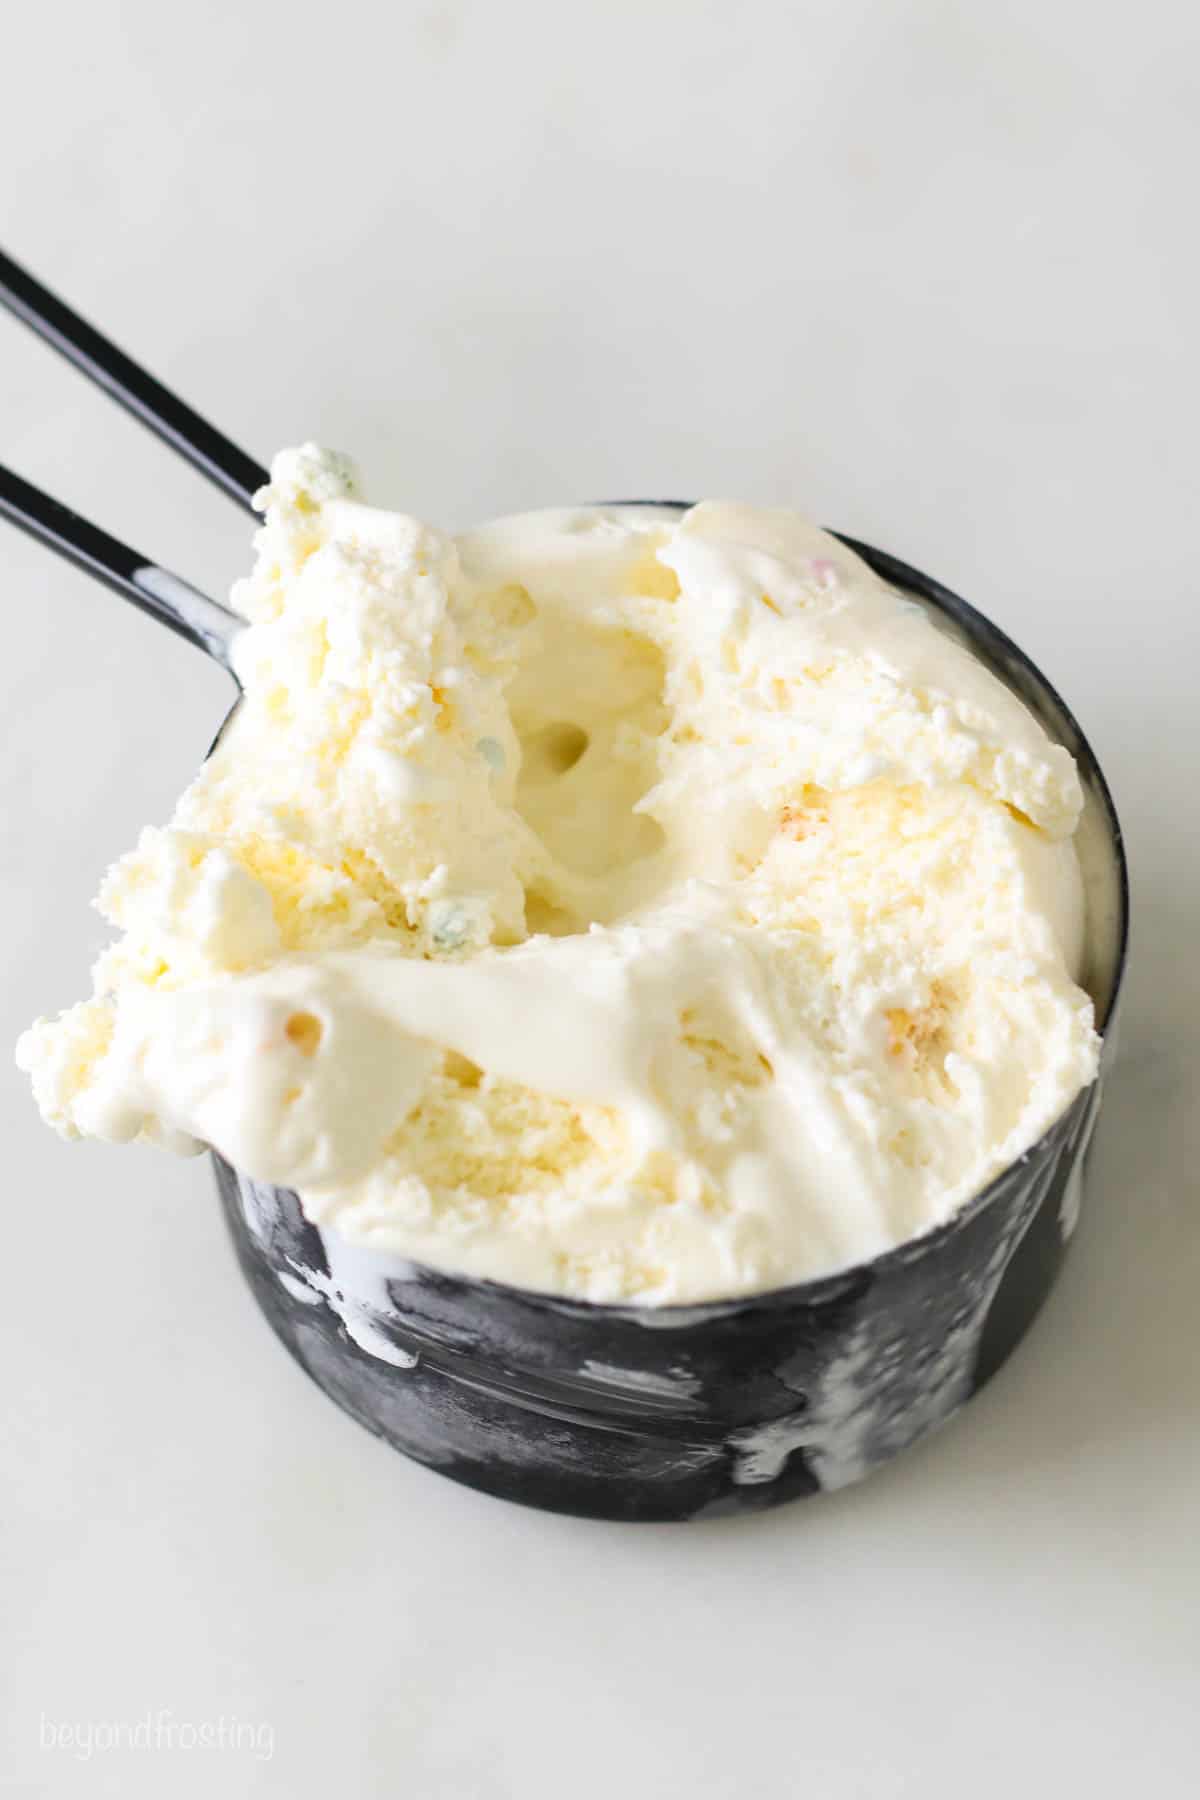
Ice Cream– Pick your favorite flavor! This is where you can get creative. I made this using Tillamook Birthday Cake ice cream. I used 3 cups for this cake, which is almost a full container, about 1.5quarts (48oz). You could go ahead and use the whole container.
How to Assemble an Ice Cream Cake
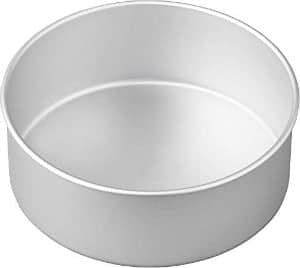
If you have a springform pan that is the same size as your baking pan, that’s my preferred method. However, you can absolutely do this without a springform pan.
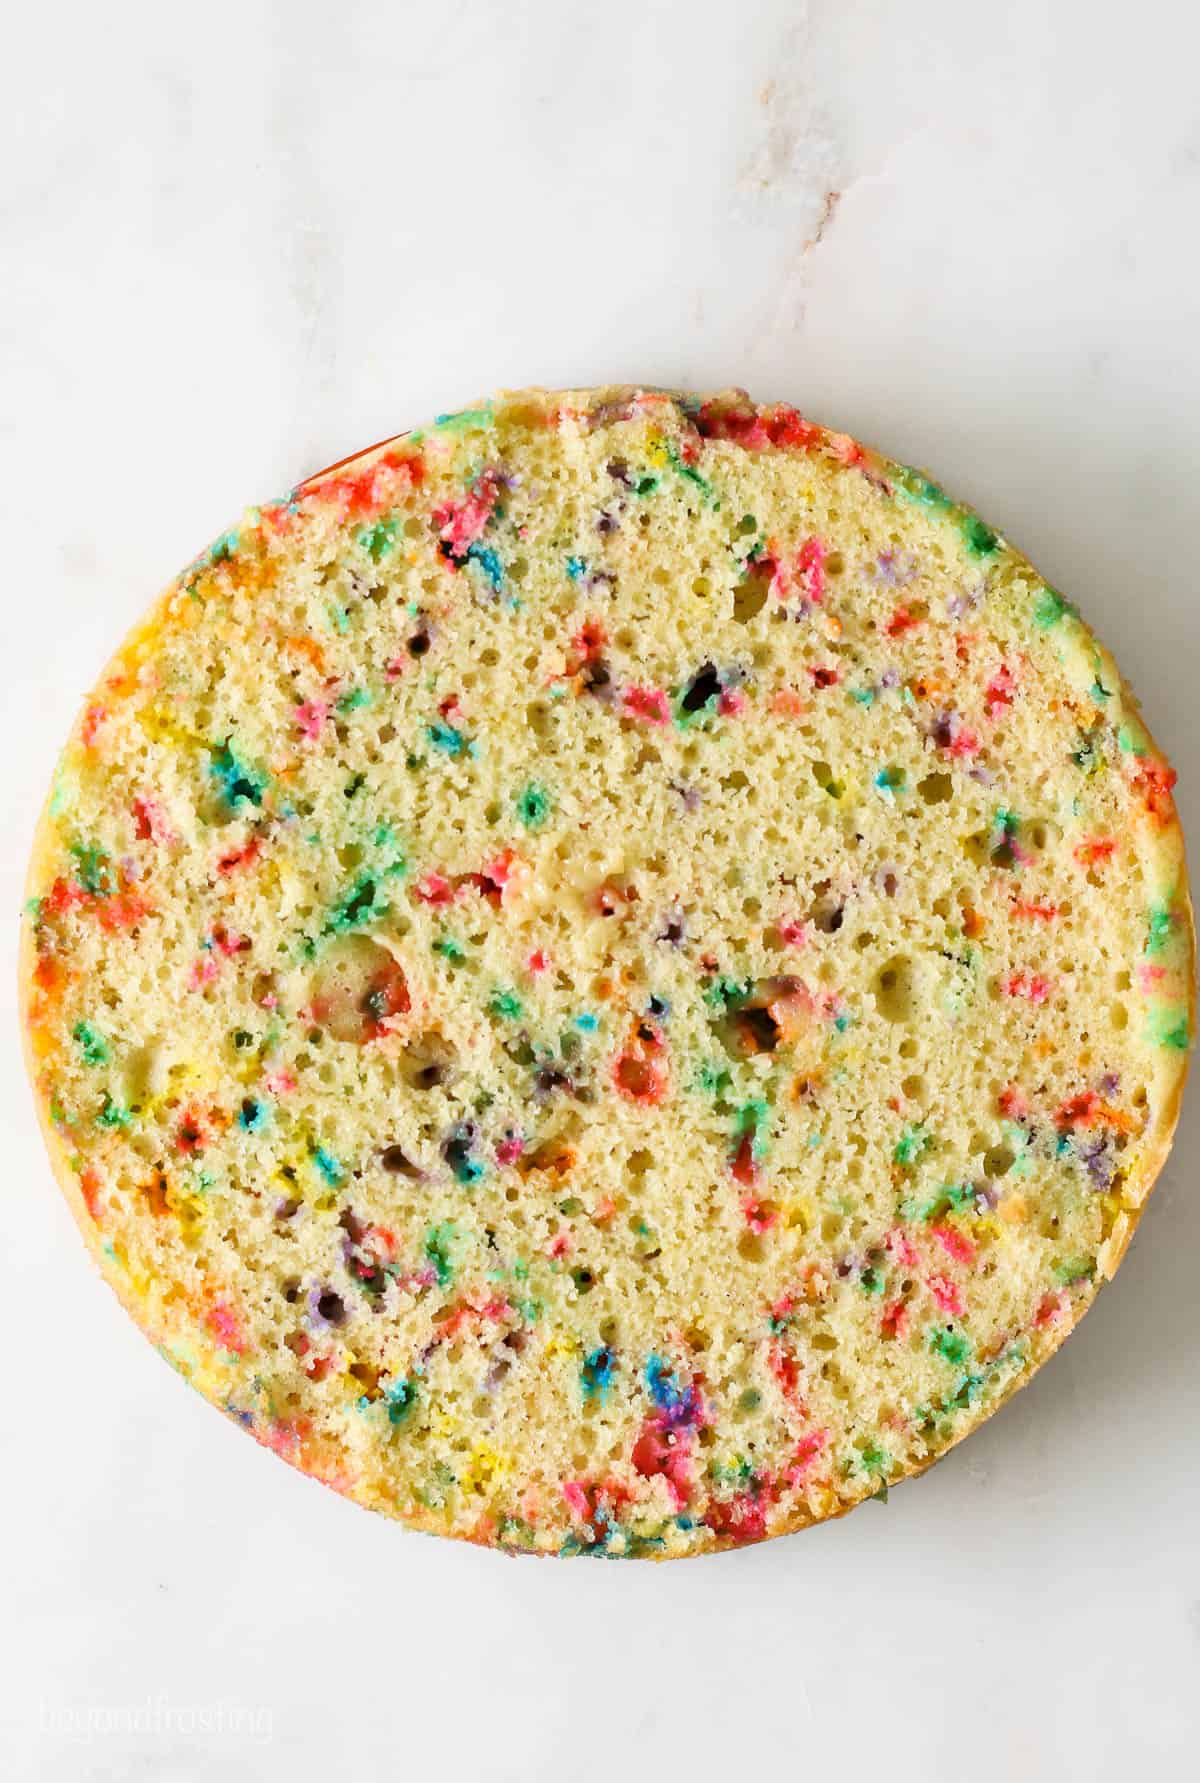
Step 1: Prepare the cake as instructed and cool completely and level it so the top is flat.
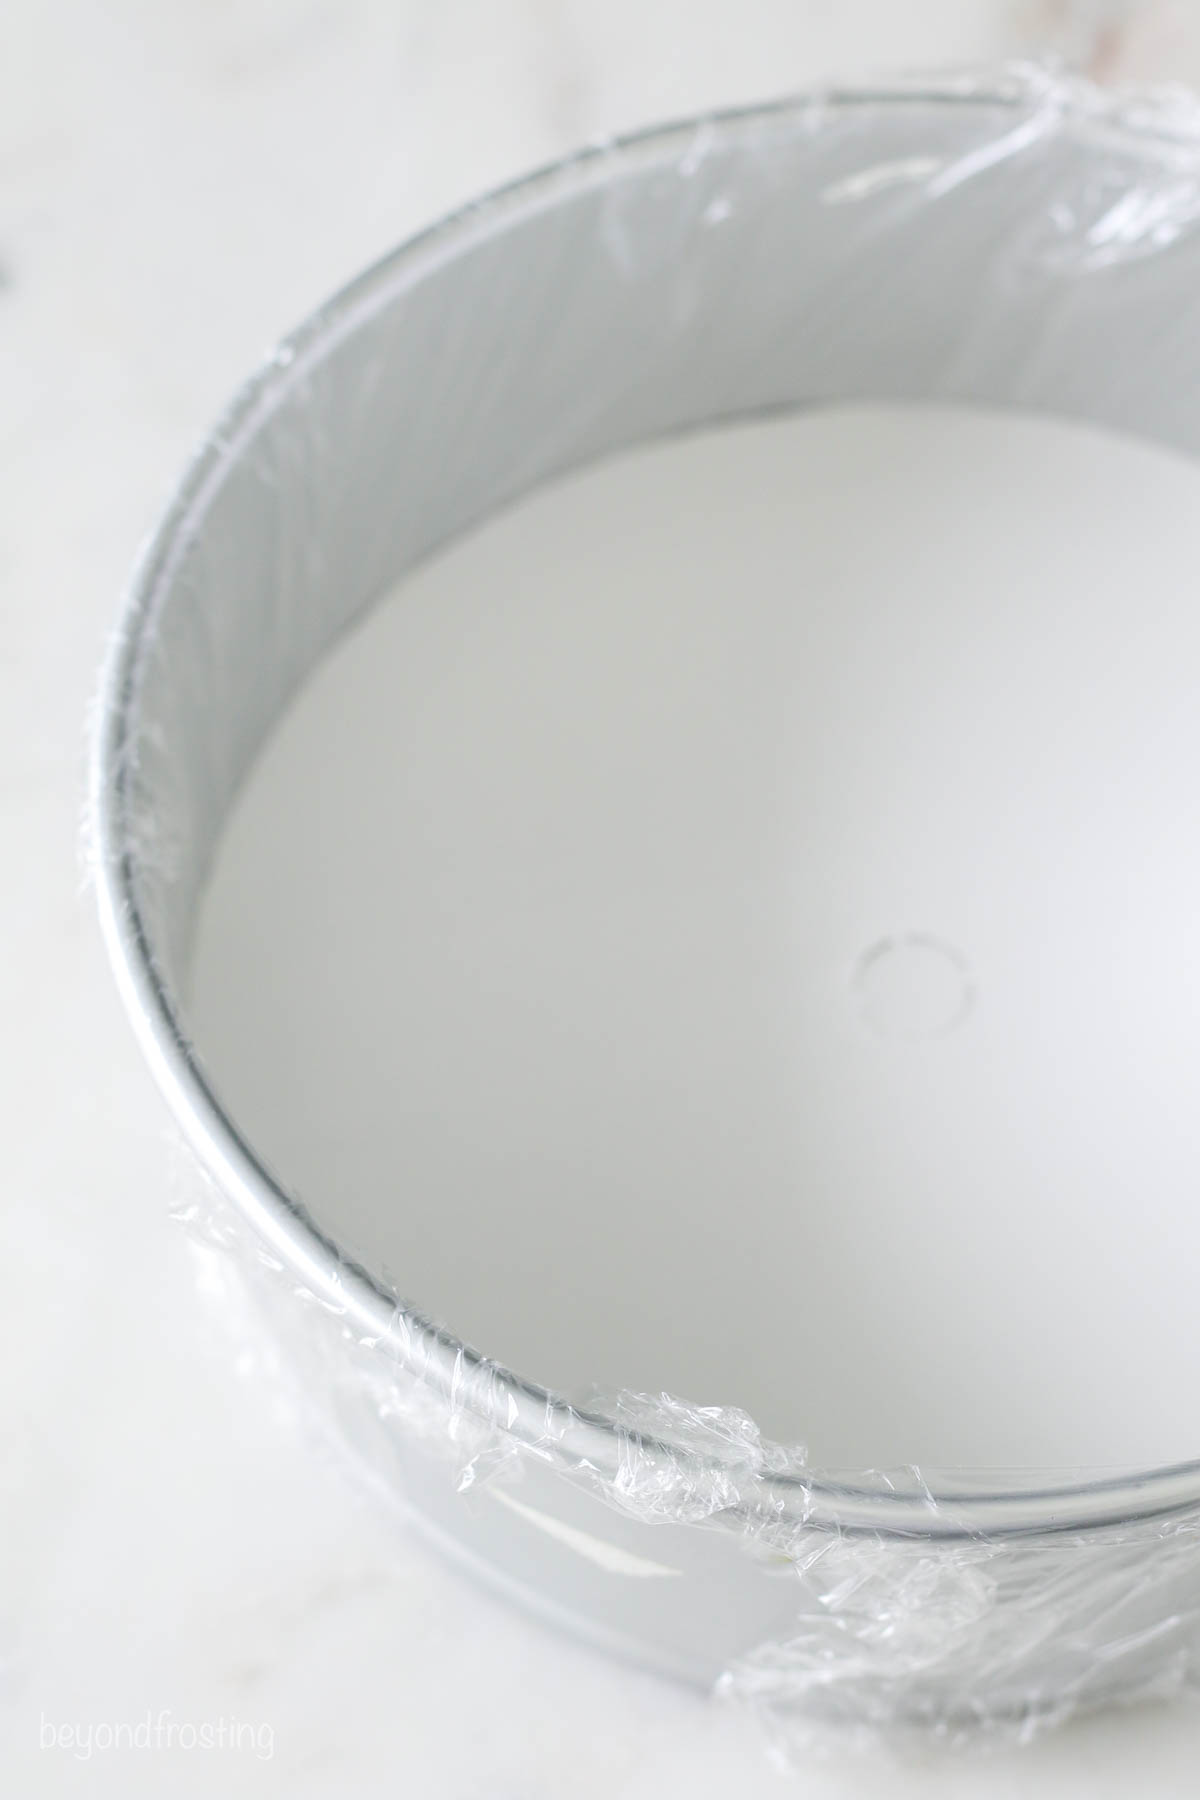
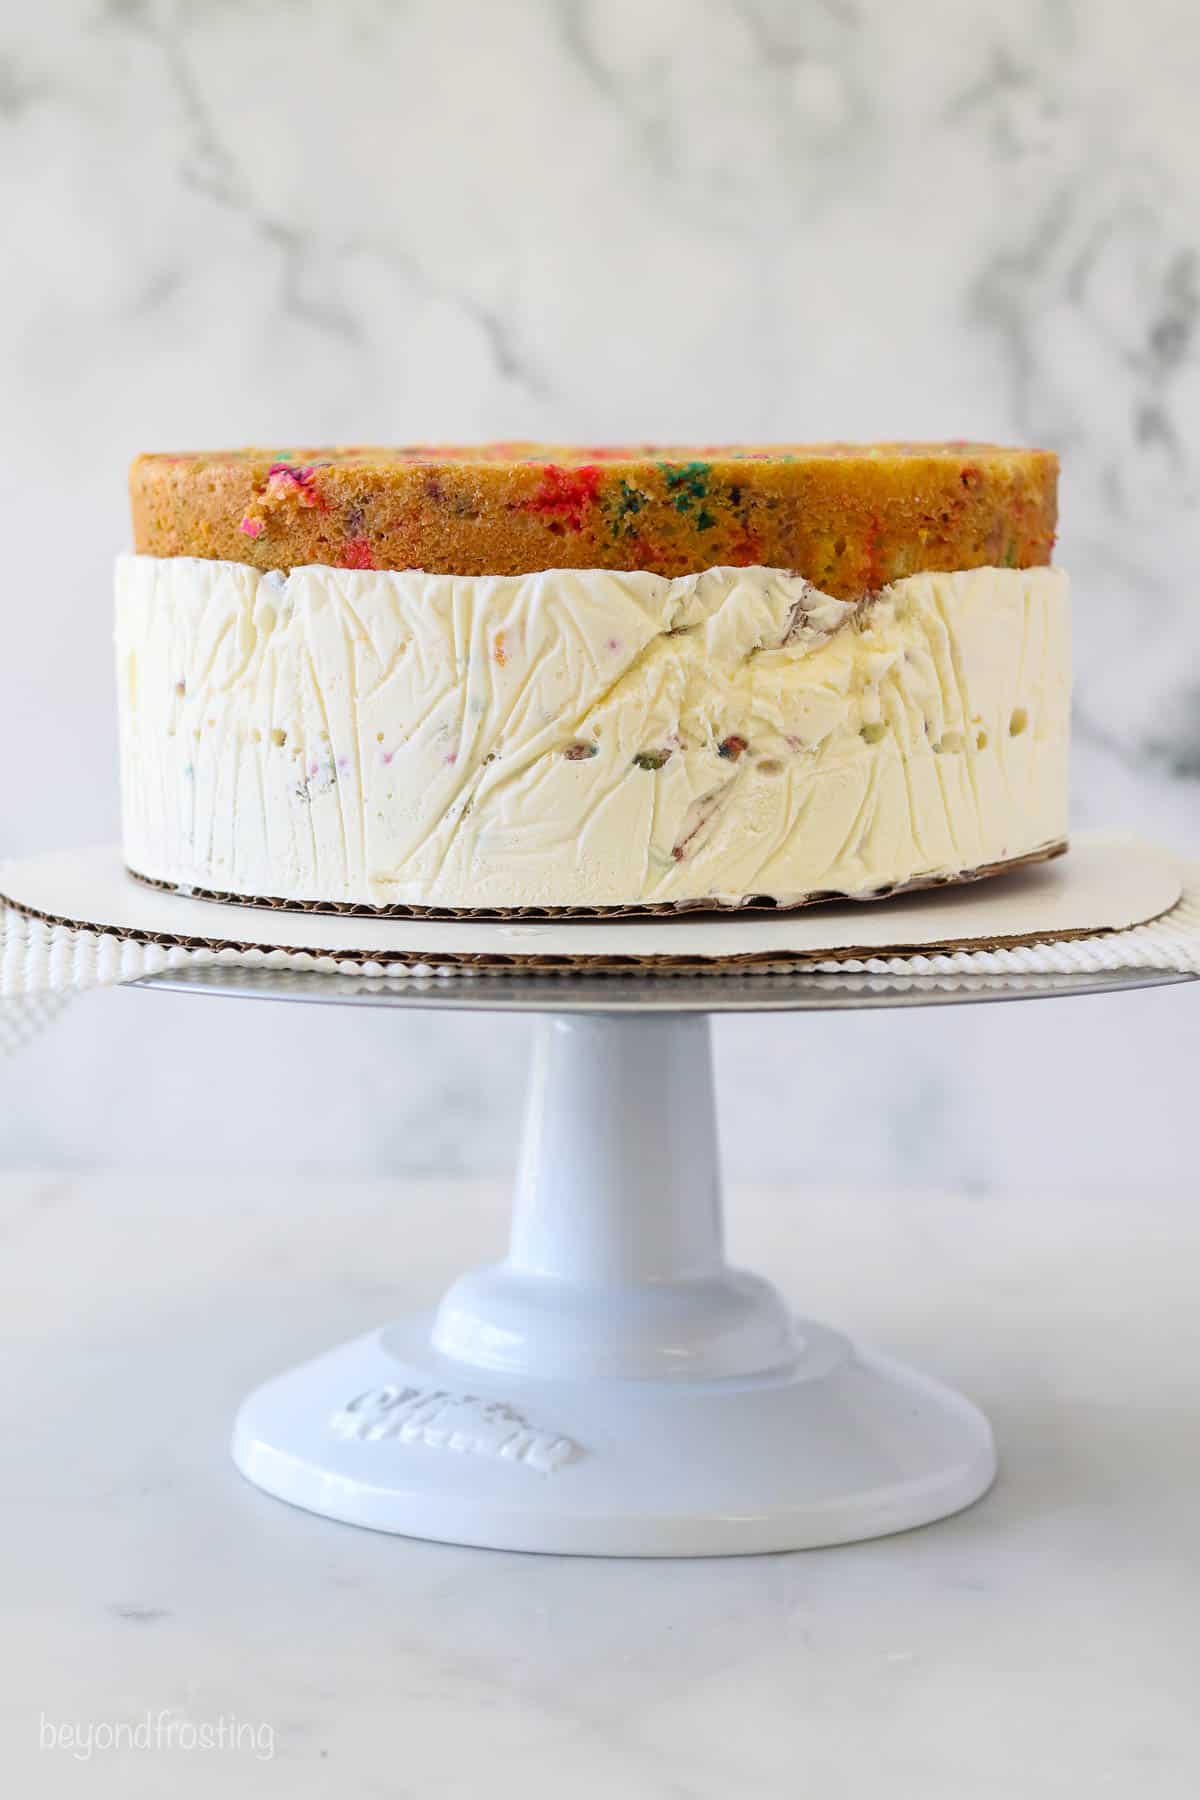
Step 2: Remove the ice from the freezer and allow it to soften. Line the bottom and sides of the pan with plastic wrap, hanging out over the edges. Place a cake board in the bottom of the pan that is the same size as the pan itself.
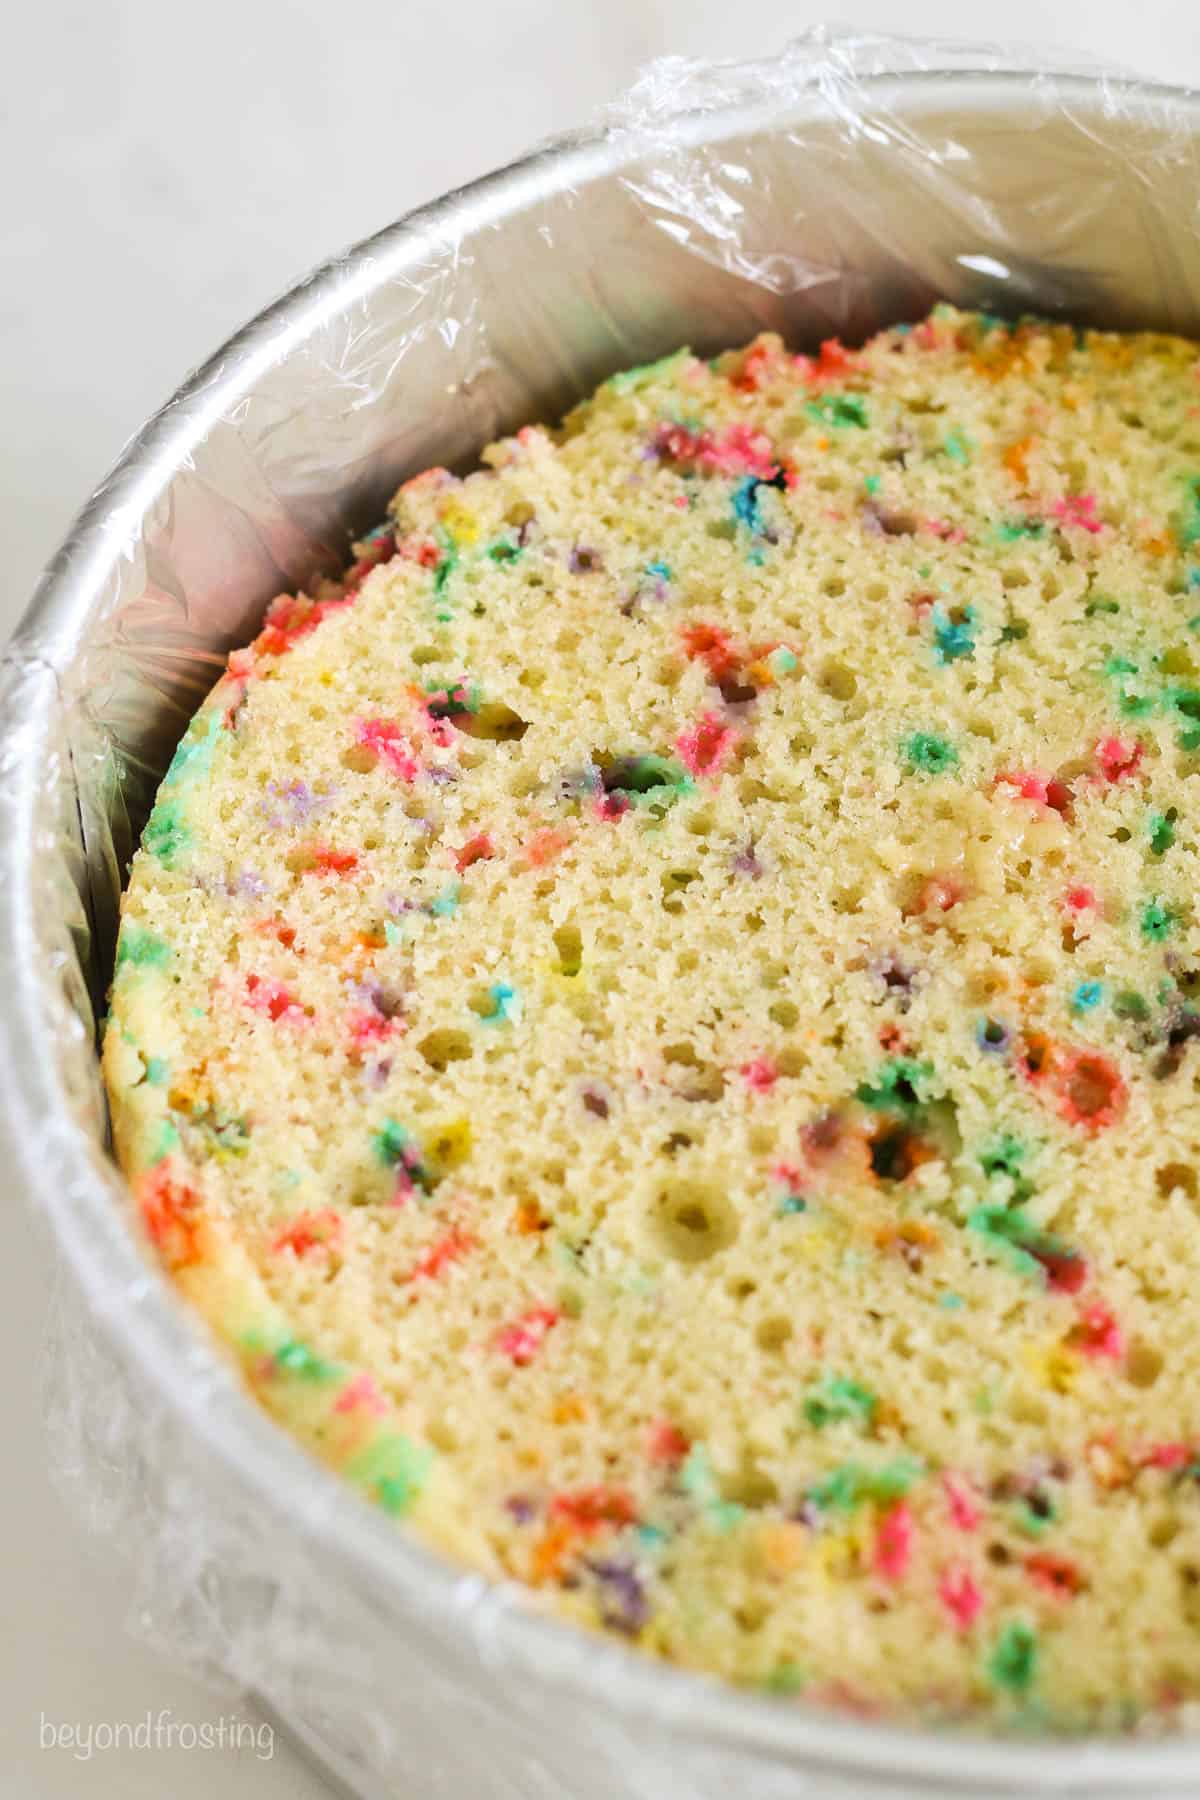
Step 3: Place the bottom layer of leveled cake in the pan.
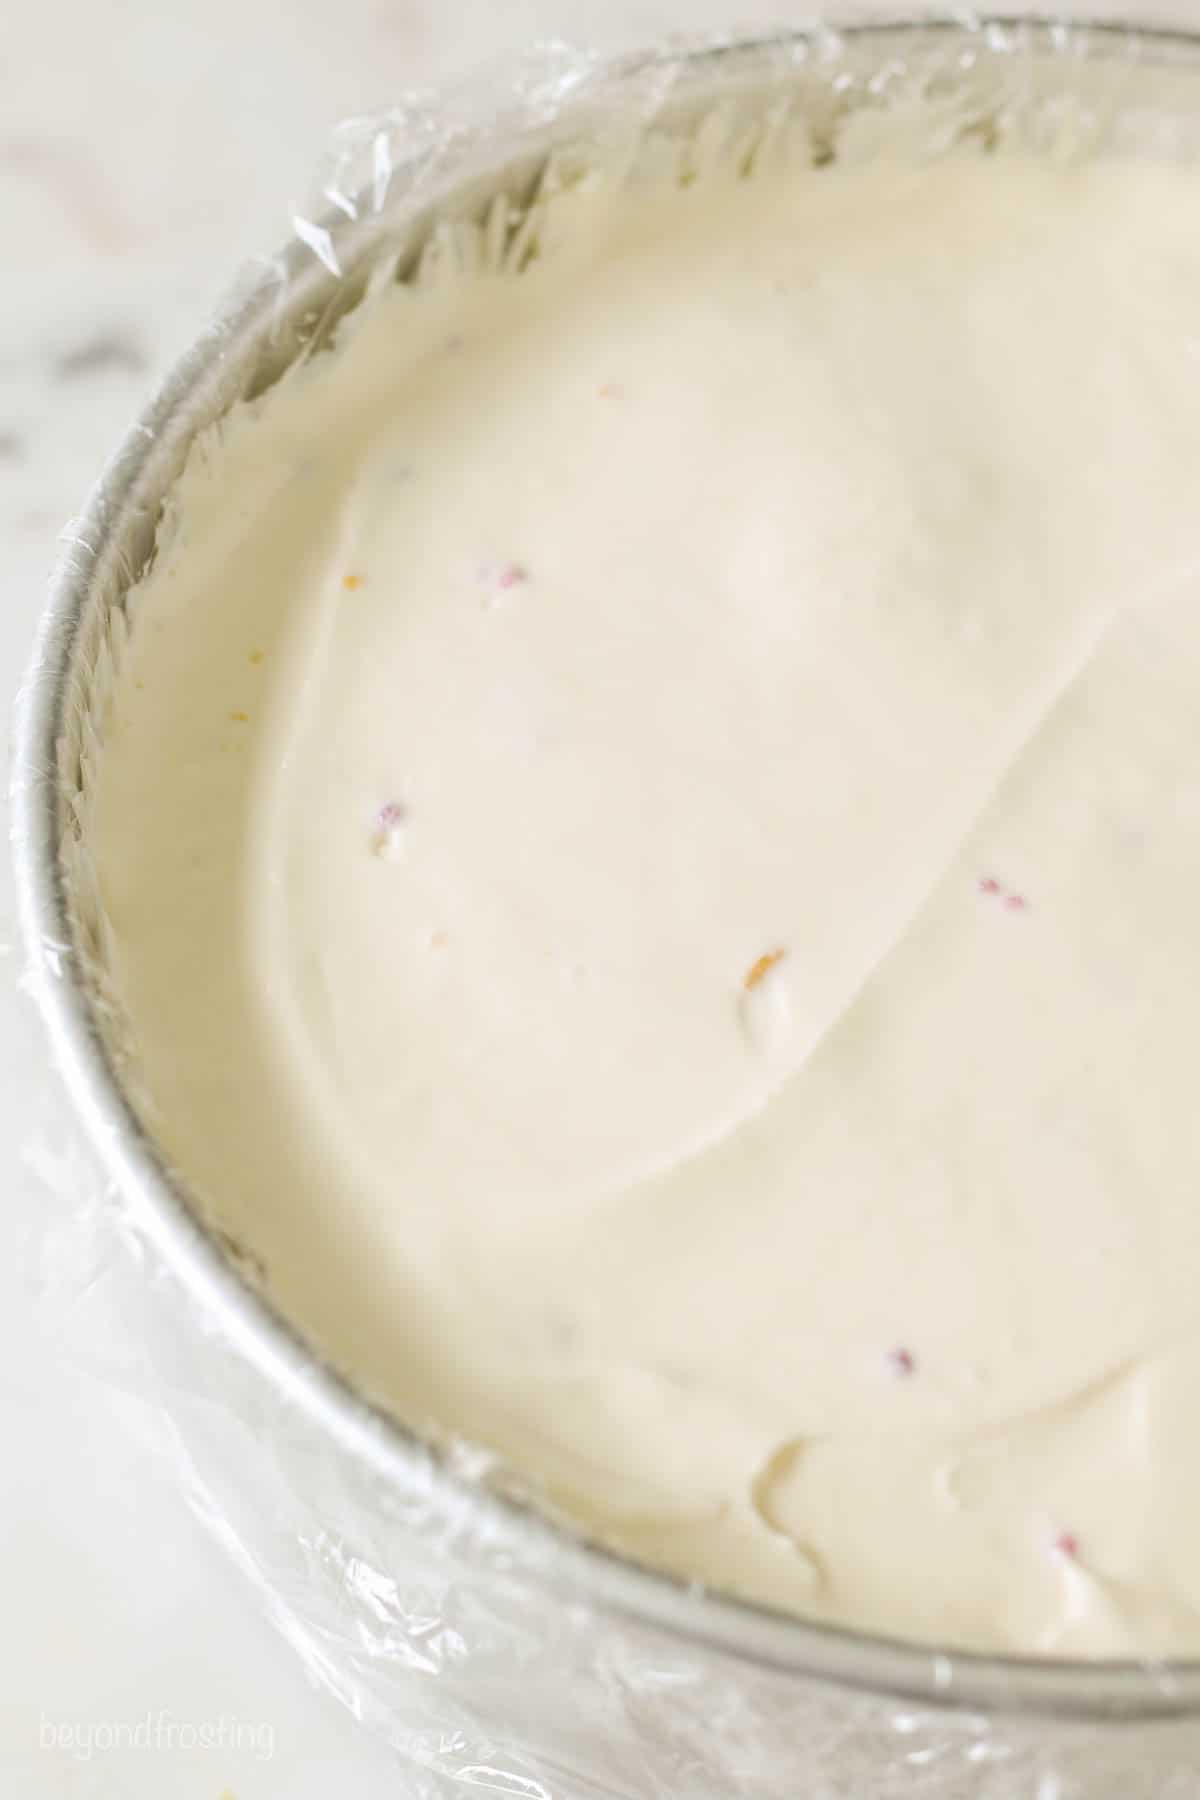
Step 4: Spread the ice cream over the layer of cake.
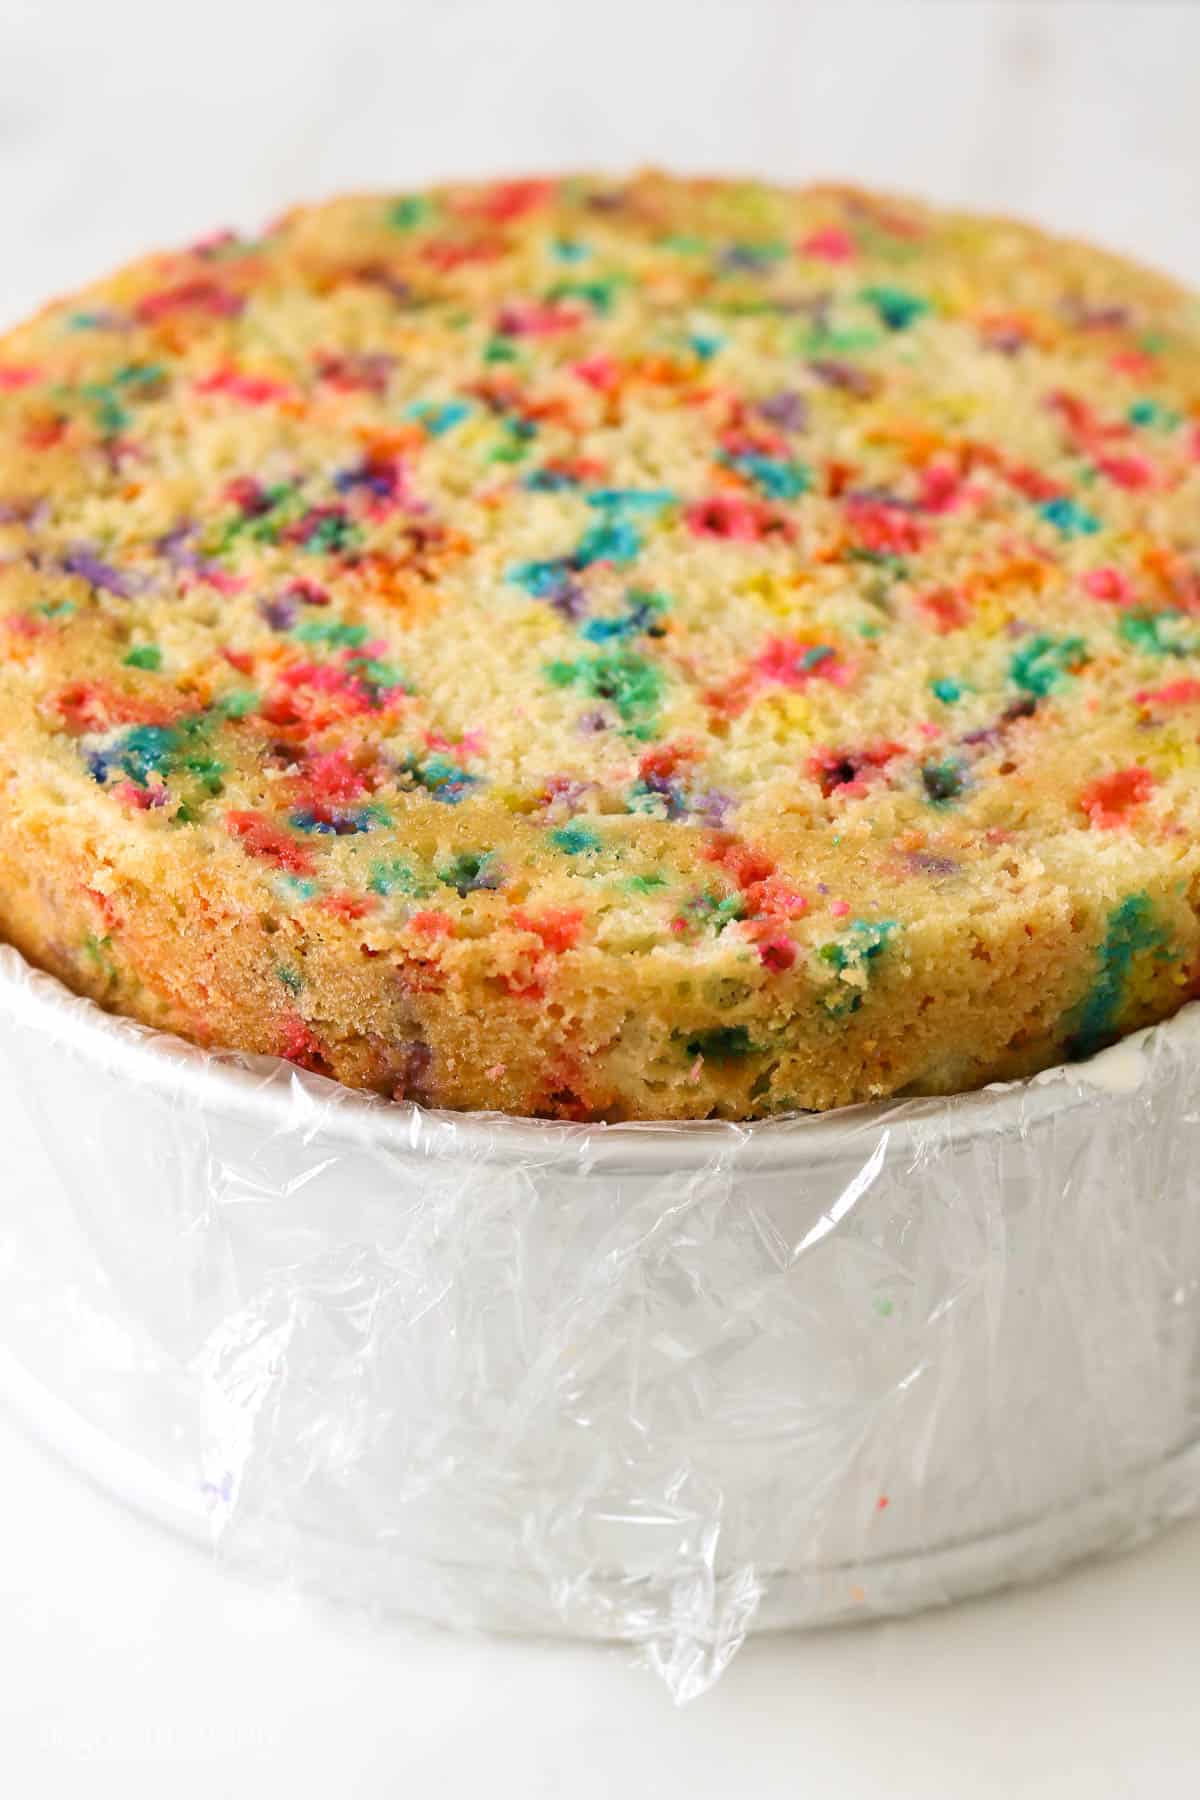
Step 5: Place the next cake layer over the ice cream, inverted, so the top of the cake is nice and flat.
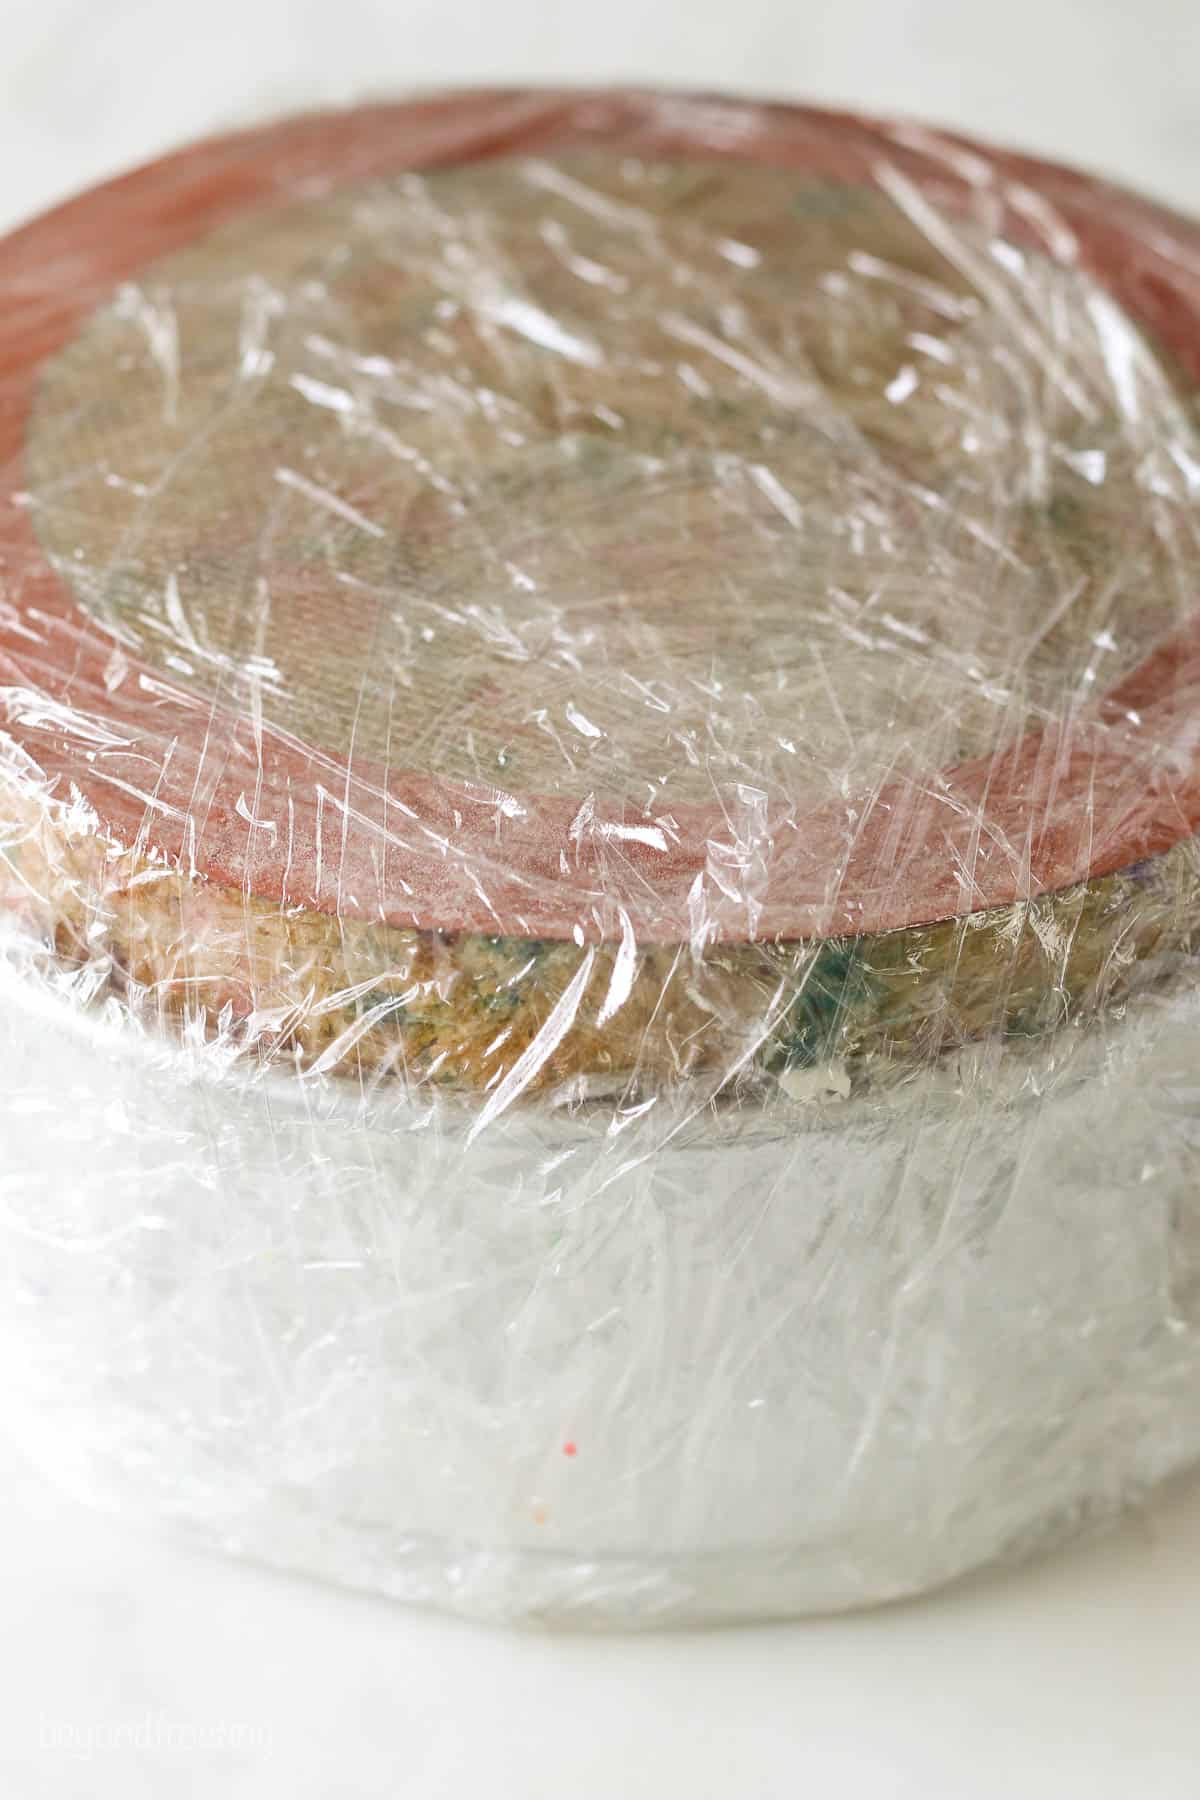
Step 6: Wrap the entire pan in plastic wrap. It’s helpful to place a piece of parchment paper or another cake board over top of the cake to help tightly wrap it without the cake sticking to the plastic.
Step 7: Prepare the whipped cream frosting and decorate. Then refreeze before serving.
Why Do I Need to Level My Cake Layers?
This cake can bake up with quite the dome on top, especially if you are not using bake-even stripes.
You want to level the cake so they’re flat on top, ensuring that when they’re stacked, there are no gaps along the outside edge of the cake between the layers. You’ll also find that if you don’t level them, the centers of the cake could touch in the middle, and you won’t have any room for ice cream.
Use the leftover cake! Once you level the cake, you’ll have some scraps. Mix that into the softened ice cream as I did in this chocolate ice cream cake.
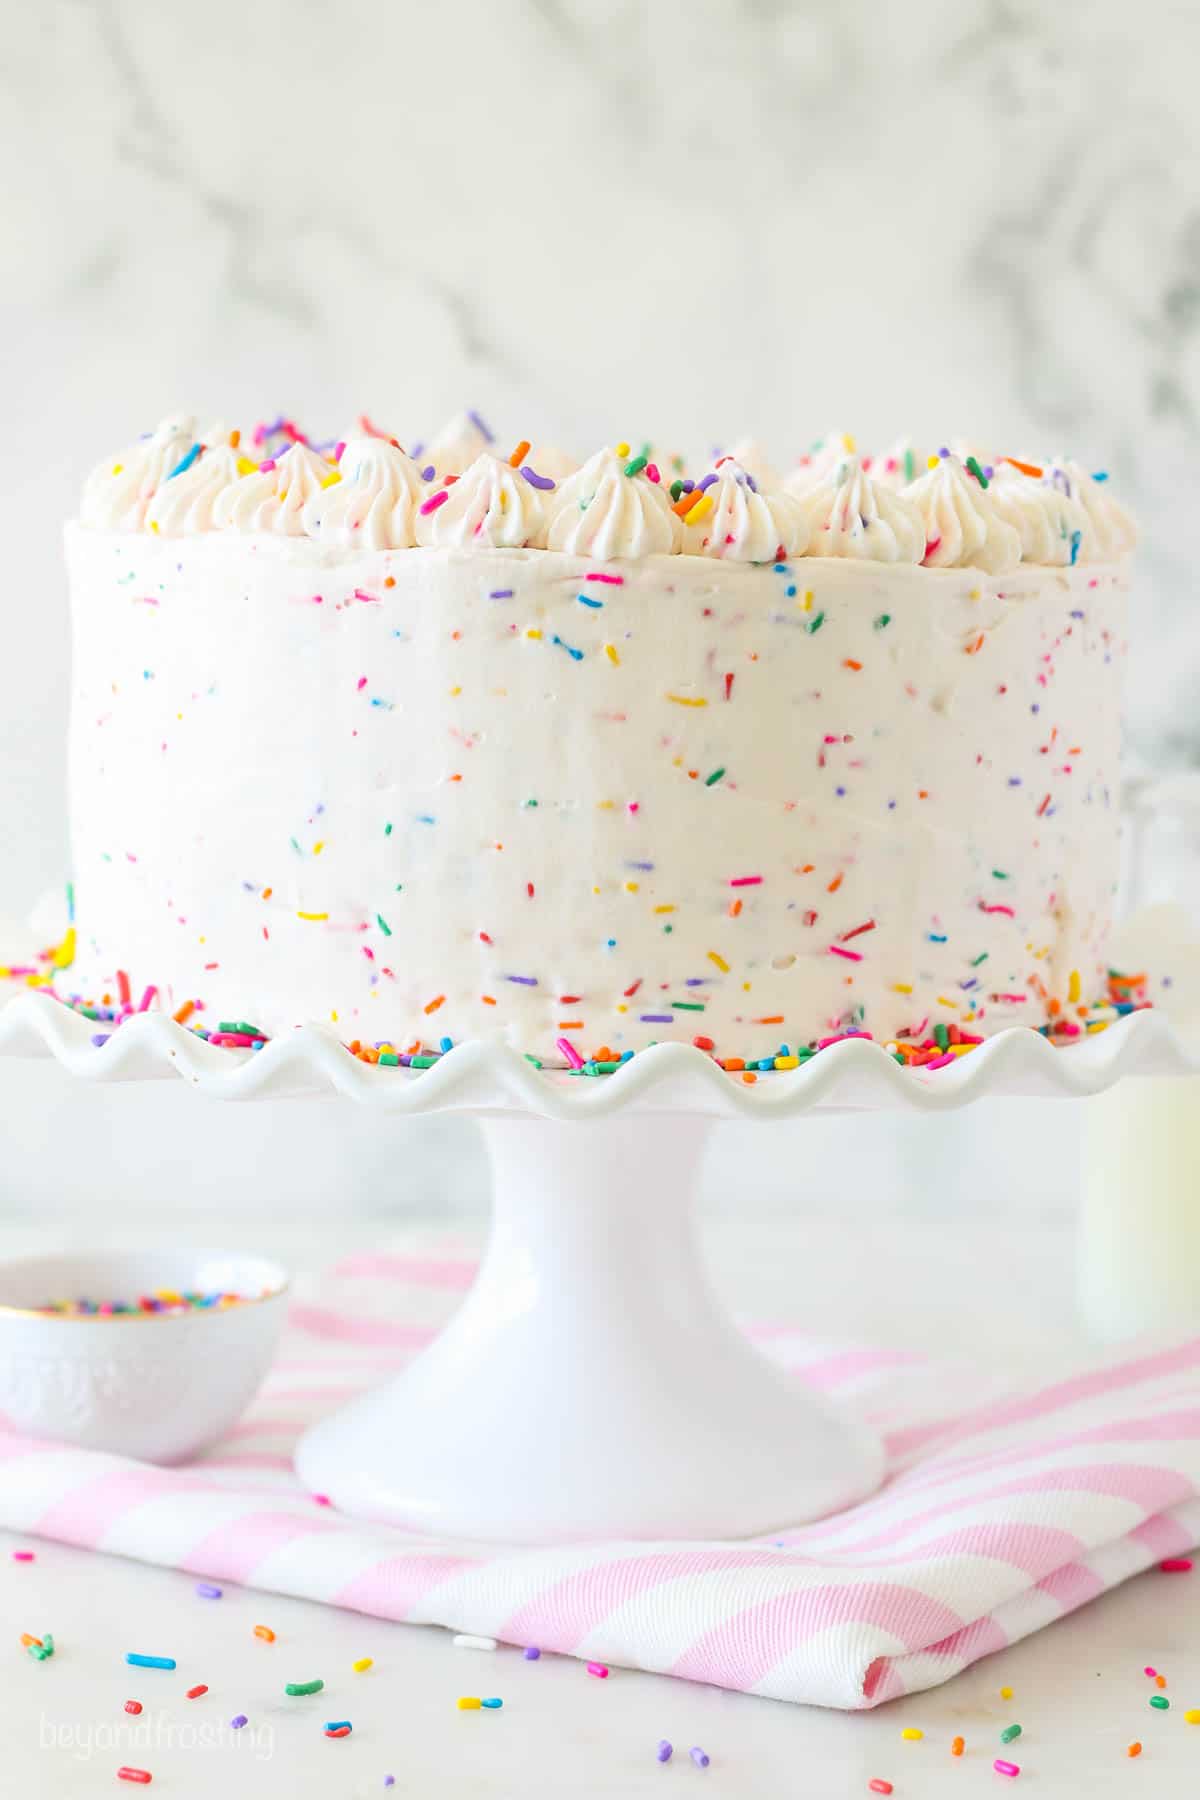
How to Frost an Ice Cream Cake
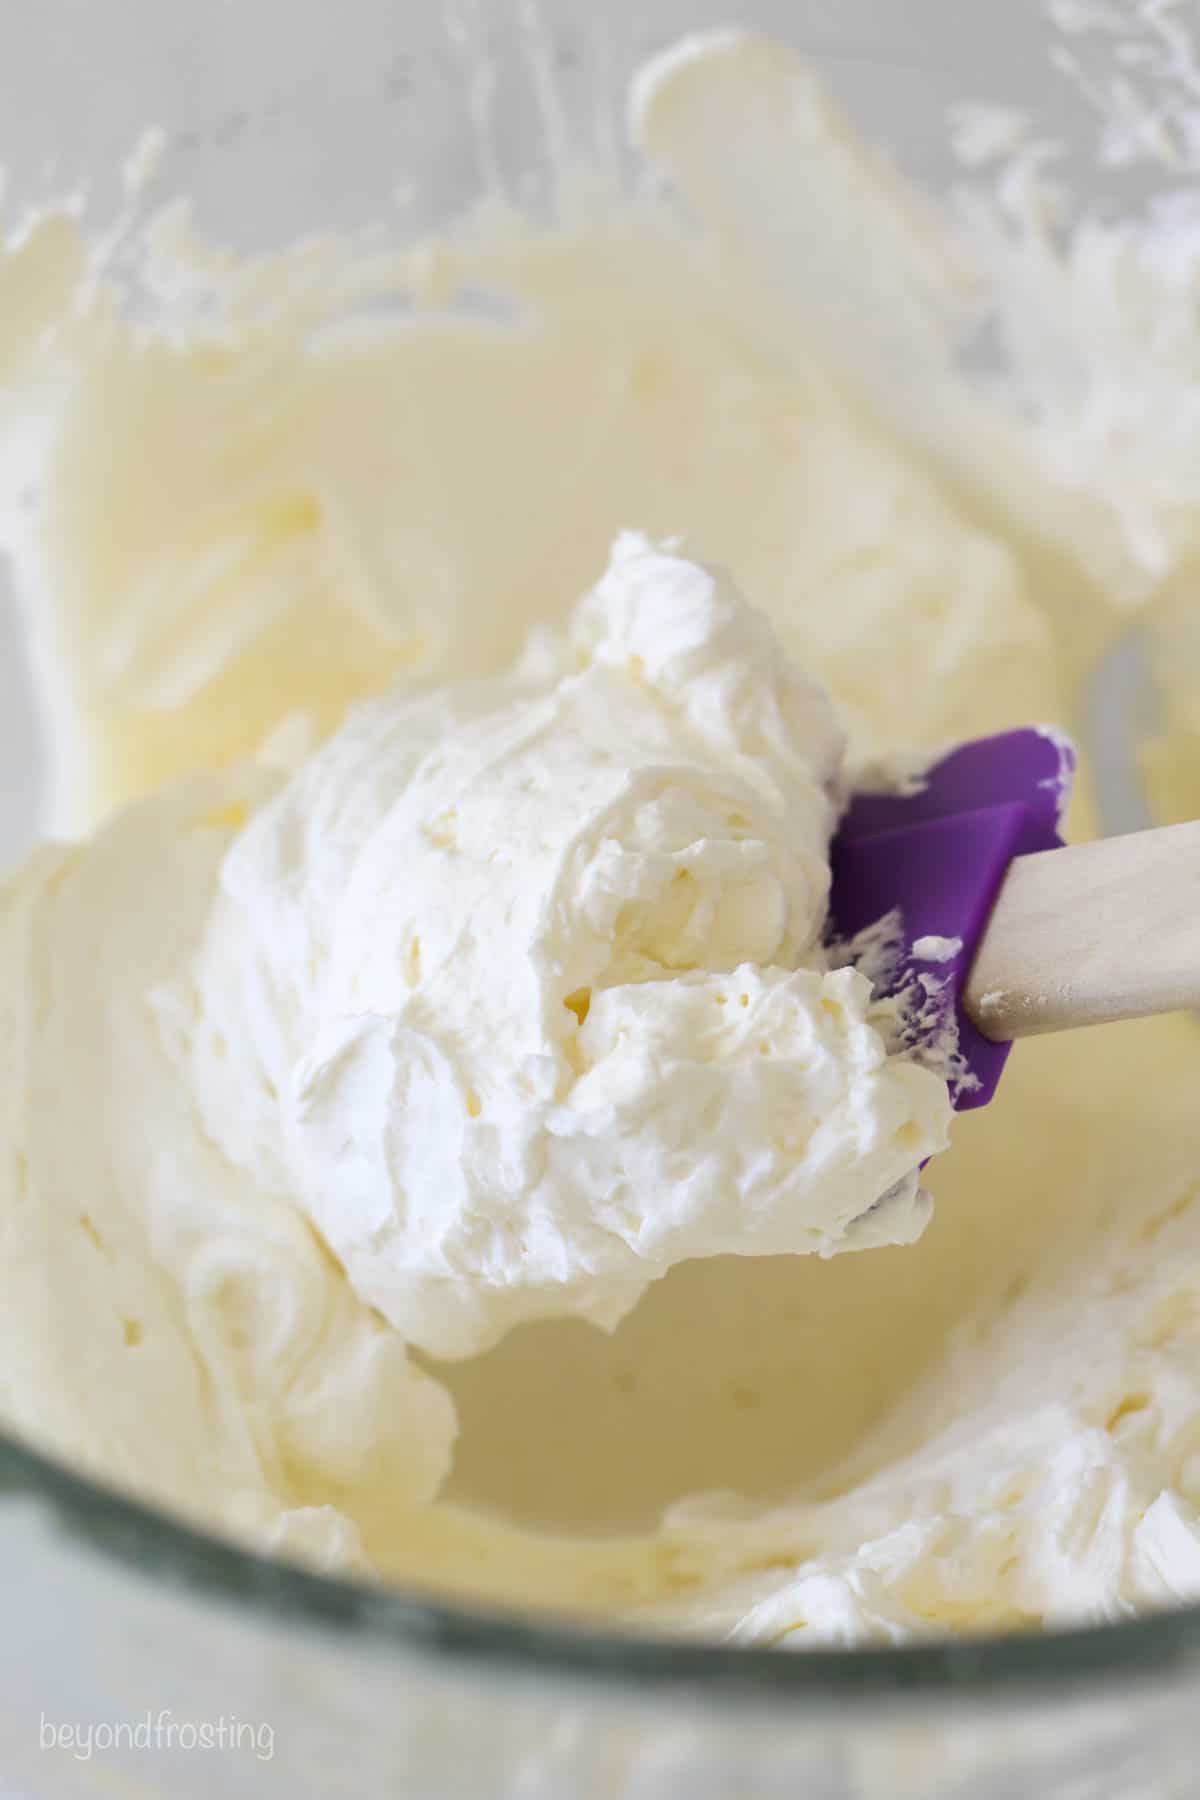
This cake is frosted with a whipped cream frosting. The key to using whipped cream as a frosting is to ensure it’s whipped to stiff peaks. I use powdered sugar as a thickening agent to allow the whipped cream to stiffen. If you don’t feel like making it from scratch, you can use Cool Whip.
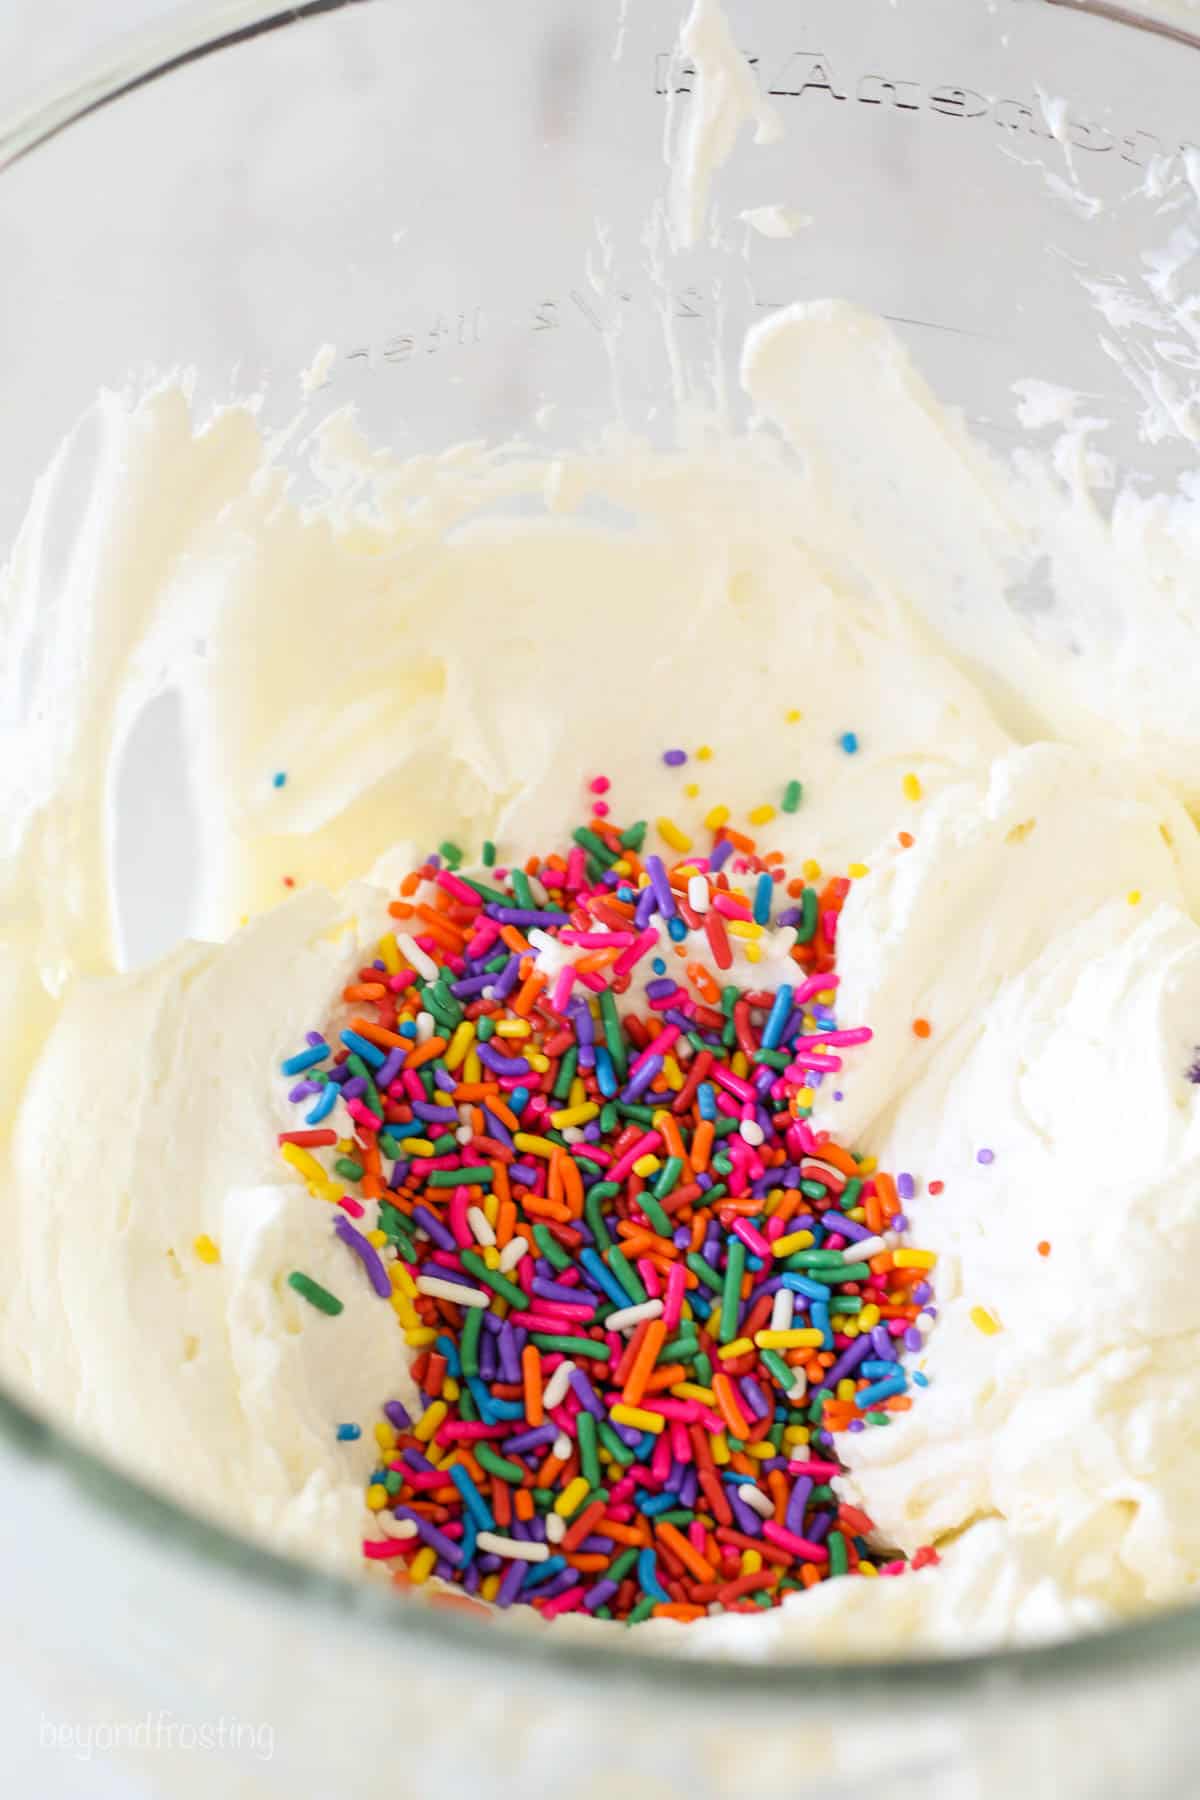
Step 1: Prepare the whipped cream. It helps to chill the bowl and beaters first to keep the cream nice and cold at its whipped. Add the powdered sugar after the cream reaches soft peaks. Then gently fold in the sprinkles after it reaches stiff peaks. Place the whipped cream in a large piping bag and cut off the tip.
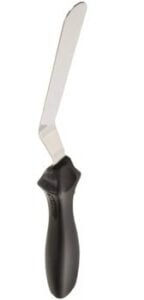
Step 2: Unwrap the ice cream cake. You may notice the ice cream freezes around the outside edge of the cake. I recommend actually using a hot knife to remove the excess ice cream on the outside of the cake, as it’s difficult for the whipped cream to stick there. Pipe the frosting along the outside edge of the cake working your way from the top to the bottom.
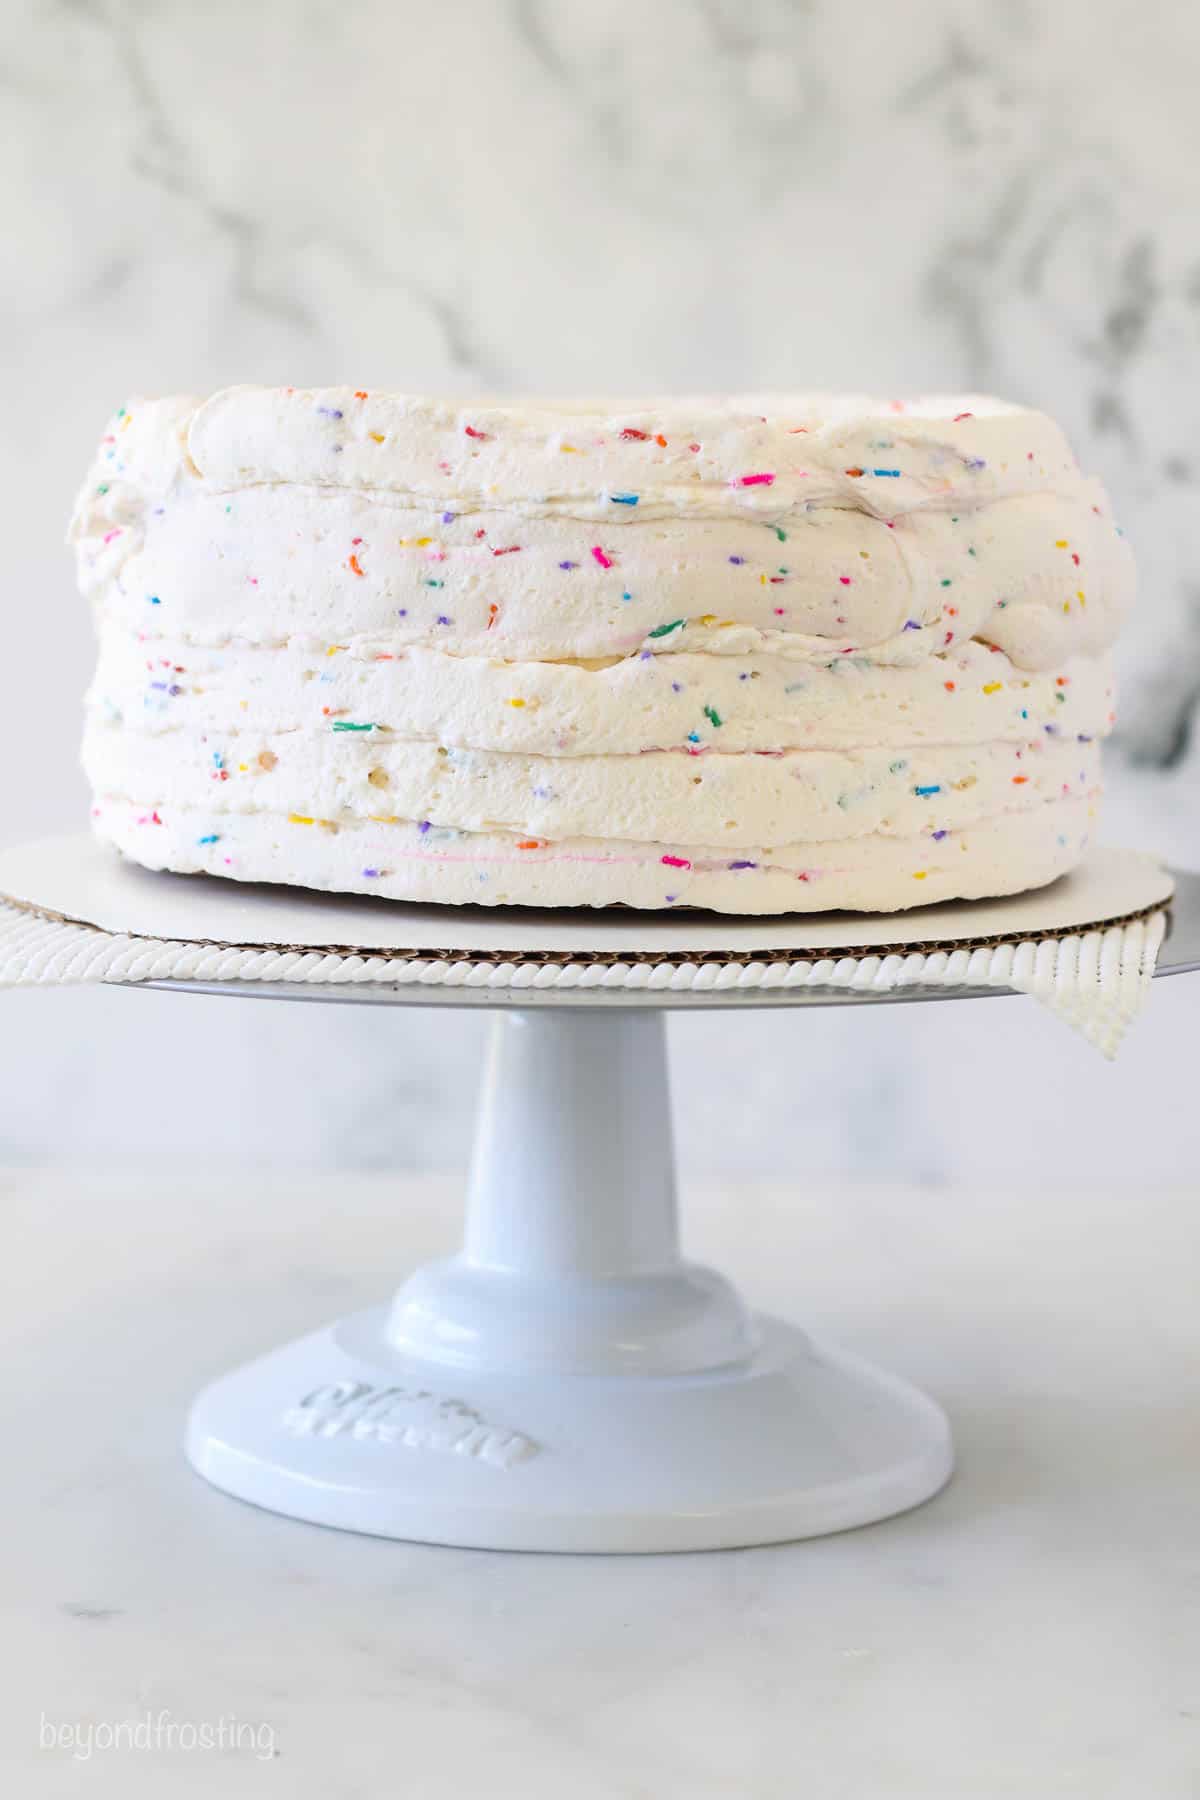
Step 3: Using a bench knife or angled spatula very gently smooth out the edges. Whipped cream is not a frosting that you can handle very much, so try not to overdo it with the decorating.
Step 4: Frost the top and then use any leftover whipped cream for decorating.
Step 5: Immediately refreeze the cake for at least 60 minutes.
Must-Read Tips for Decorating
You may find that the outside edge of the ice cream cake melts quickly, making it difficult to work with. Here are a few tips to prevent that from happening.
- Make sure the ice cream cake is fully frozen before attempting to frost it.
- Remove the excess ice cream on the outside of the cake, as it’s difficult for the whipped cream to stick there. Use a hot sharp knife and just cut it away.
- Prepare the whipped cream and fill the piping bags before you begin.
- Set up your workstation so it’s ready to go.
- As soon as you unwrap the ice cream cake, start frosting and keep working until it’s finished.
- Don’t overhandle the whipped cream.
- Immediately return the ice cream cake to the freezer.
How to Customize this Cake
I remember the best part of our birthday cake was getting to pick the flavors of the cake and ice cream.
Change the cake flavor: If you’d prefer you can also make this cake with either a vanilla or chocolate-based cake instead and follow the instructions to bake in two 8-inch pans.
Change the ice cream flavor: Here are a few flavor options I would love with this: Vanilla, Cookie and cream, strawberry, and my personal favorite, cookie dough.
Use homemade ice cream: If you want easy no-churn ice cream, this Fruity Pebble Ice cream is insane. Or if you have an ice cream maker, this homemade strawberry ice cream is also super good.
For more recipes, information, dairy nutrition and to meet Ohio and West Virginia dairy farmers, visit www.Drink-MIlk.com, and follow the American Dairy Association Mideast on Facebook, Twitter, Pinterest and Instagram.
Print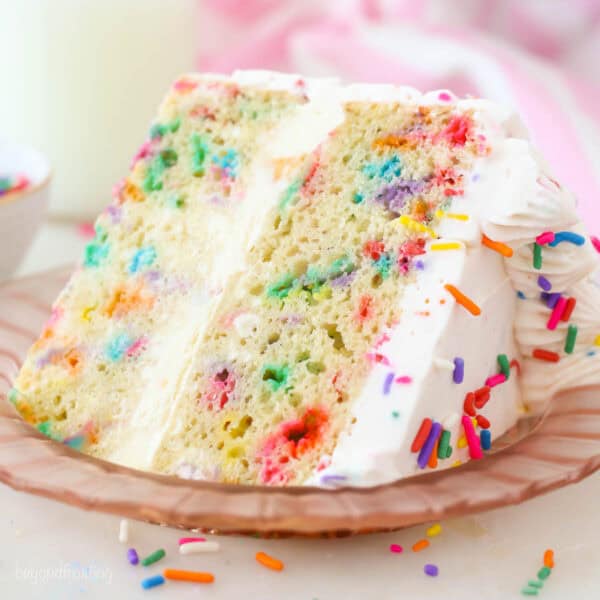
Funfetti Ice Cream Cake
- Prep Time: 45 minutes
- Chill Time: 6 Hours
- Cook Time: 28 minutes
- Total Time: 7 hours 13 minutes
- Yield: 10-12 servings
- Category: Cake
- Method: Oven
- Cuisine: American
Description
Cream Cake with layers of fluffy Funfetti Cake, baked from scratch, cake batter ice cream and a whipped cream frosting.
Ingredients
For the Cake
- 1 1/2 cups (285g) granulated sugar
- ½ cup (118 ml) vegetable oil
- 2 tablespoons (28g) unsalted butter, melted
- 2 large eggs
- 2 egg yolks
- 1 tablespoon (15ml) pure vanilla extract
- 1/2 cup (118ml) sour cream (or plain Greek yogurt)
- 2 ½ cups (350g) all-purpose flour
- 2 teaspoons (7.5g) baking powder
- 1 teaspoon (4g) baking soda
- 1 teaspoon (5g) salt
- 1 1/3 cup (315ml) buttermilk or milk
- ½ cup sprinkles
Filling and Topping
- 1 1/2 quarts (48oz) ice cream of choice
- 1 ¾ cups (413ml) heavy whipping cream
- 1 cup (130g) powdered sugar
- 1/2 cup sprinkles
Instructions
For the Cake
- Preheat the oven to 350°F. Grease two 8-inch cake pans with Crisco and dust with flour to help easily release the cake after it is baked. I also line the bottom of the pans with parchment paper to ensure they don’t stick.
- In a large mixing bowl, combine the sugar, vegetable oil, butter, eggs, egg yolks and vanilla extract. Beat on medium speed until the eggs and oil are well incorporated and the batter is lighter in color, about 2 minutes. Scrape down the bowl as needed. Next mix in the sour cream and beat until well combined.
- In a separate bowl, combine the remaining dry ingredients. Alternate adding half the dry ingredients and half the buttermilk at a time and mix just until the flour starts to incorporate. Then add remaining dry ingredients and buttermilk and beat until well combined. Use a spatula to scrape down the sides of the bowl and stir the batter from the bottom to the top to ensure it’s well mixed. Mix in the sprinkles by hand.
- Divide the cake batter evenly between the two 8-inch pans. Bake at 350° F for 25 to 32 minutes. Check the cakes for doneness by inserting a toothpick into the center of the cake. If the toothpick comes out clean, the cake is done. Allow the cake to cool in the pans for 15 minutes. Then gently run a knife around the edges of the cake and flip them out of the pan and onto a rack to cool completely. Once the cake is cooled, you can prepare the ice cream.
Fill and Assemble
- Allow the ice cream to soften on the counter for 15-20 minutes so it’s spreadable.
- Cut off the domes on top of the cake layers so they’re relatively flat. Prepare an 8-inch springform pan. If you don’t have a springform pan, use the pan that you baked the cake in. Line the whole pan with plastic wrap, then place the cake board in the bottom of the pan.
- Place one layer of cake in the bottom of the pan.
- Spread the ice cream over the cake and spread evenly, and then place the second cake layer inverted on top of the ice cream.
- Wrap the entire cake with plastic wrap twice and freeze the cake for at least 2 to 4 hours until the ice cream is frozen.
Decorate
- Prepare a batch of whipped cream. Chill the bowl in the freezer or refrigerator for 5-10 minutes. Beat the heavy whipping cream in the chilled bowl at medium-high speed until soft peaks form. Slowly add the powdered sugar and sprinkles and continue beating at high speed until stiff peaks form. Place the whipped cream in a large piping bag with the tip cut off.
- To frost the cake, remove it from the pan and pipe it around the outside edge of the cake and on the top. Gently smooth with an angled spatula. Decorate with leftover whipped cream and additional sprinkles.
- Refreeze for 30-60 minutes before slicing.

Notes
- Sprinkles: I recommend using jimmies instead of nonpareils. The colors tend not to run, whereas nonpareils bleed pretty quickly after coming into contact with the liquid batter.
- Tips for frosting: Very detailed and helpful hints for frosting an ice cream cake are in the blog post, I highly recommend reading them before attempting to frost this cake. Most importantly, make sure your station is ready to go, and your frosting is already in the piping bags before pulling you cake from the freezer.
- Ice Cream: Choose any flavor you’d prefer. Slow-churned ice cream is going to be lighter and airier, and you may find it compresses more in the cake. I used 3 cups of ice cream, which is nearly the whole container (1.5 quarts/48oz). You can use the full gallon without compromising anything.
- For two 9-inch cakes, they baked from 25-30 minutes or until a toothpick inserted into the center of the cake comes out clean.
Nutrition
- Serving Size: 1 slice
- Calories: 696
- Sugar: 58.3 g
- Sodium: 463.1 mg
- Fat: 40.1 g
- Carbohydrates: 86.7 g
- Fiber: 1.2 g
- Protein: 9.5 g
- Cholesterol: 152.3 mg
Filed Under:
More Frozen Desserts You’ll love
- Oreo Ice Cream Cake
- Oatmeal Cream Pie Ice Cream
- No-Churn Lucky Charms Ice Cream
- Raspberry Rosé Sorbet