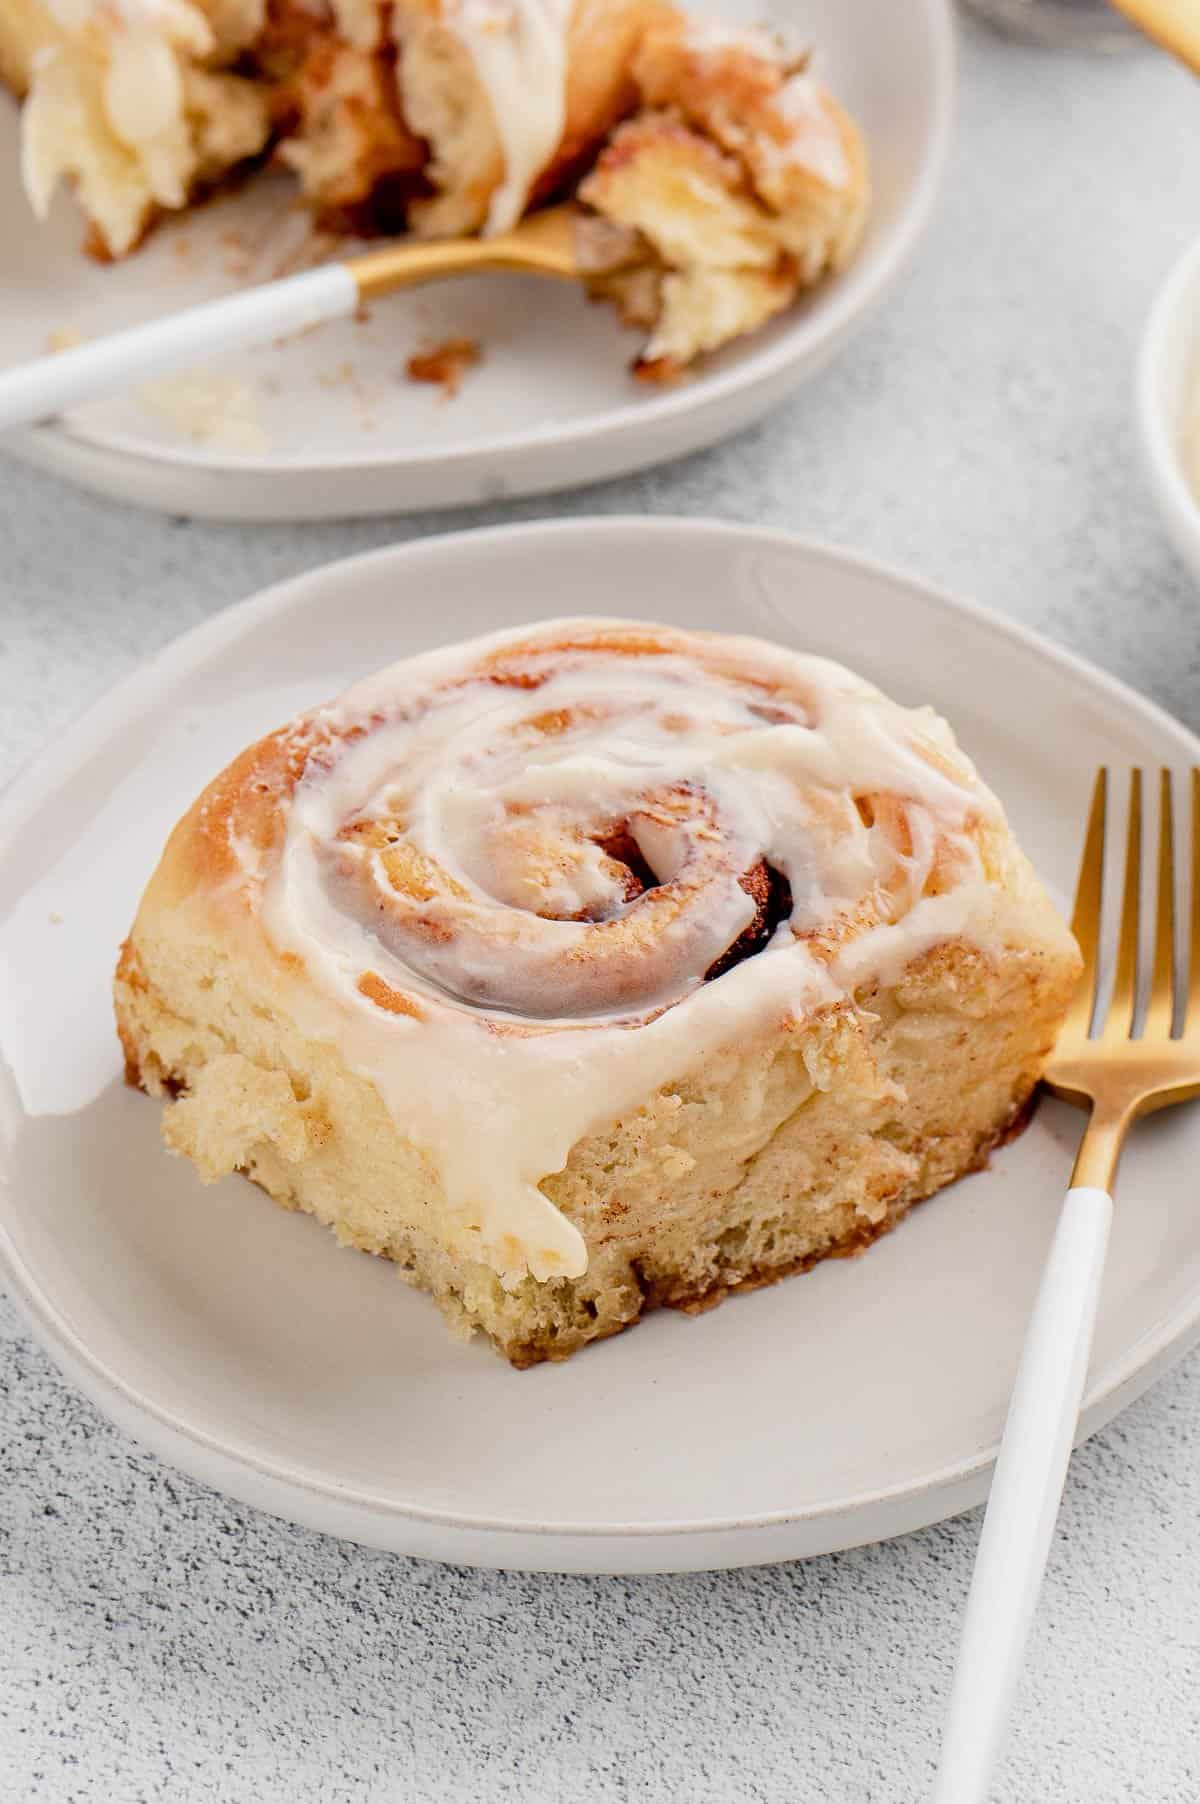
You’re going to love my family’s favorite Overnight Cinnamon Rolls! This make-ahead breakfast turns out the most fluffy, sweet, and tender homemade cinnamon rolls filled with mouthwatering cinnamon sugar. Ready to bake first thing in the morning!
Easy, Make-Ahead Homemade Cinnamon Rolls
Today I’m sharing my best cinnamon rolls recipe! These overnight cinnamon rolls take a bit of prep, but the fluffy and delicious results are so worth it.
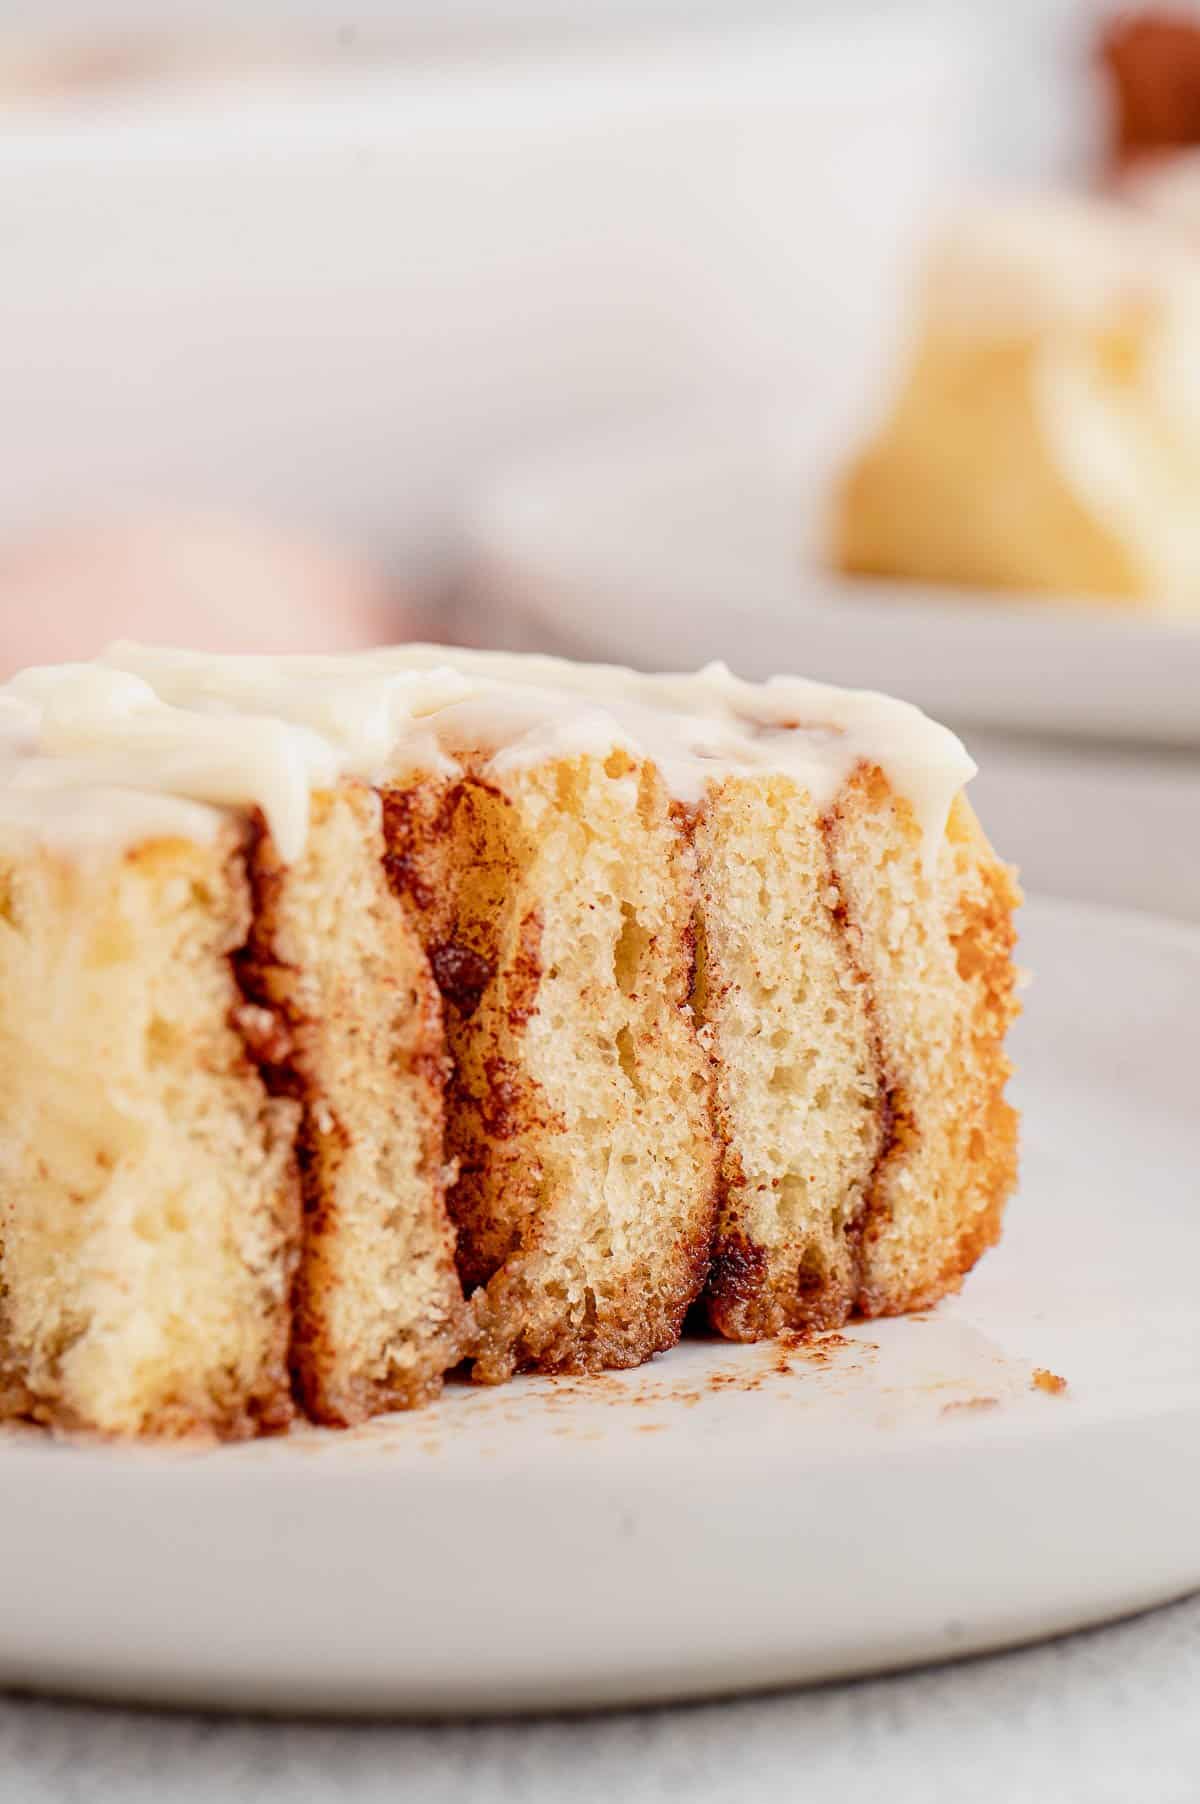
Luckily, despite the time it takes, it’s easy to prepare the rolls the night before, and they’re ready to pop into the oven when you wake up! These homemade cinnamon rolls come out buttery and tender, filled with sweet cinnamon sugar rolled up in a delightfully flaky dough. One bite and you’re in heaven.
I adapted this recipe from my great-grandmother’s sweet rolls. The original is a generational recipe that “Mama Girl” passed down to all of us, so it’s definitely stood the test of time! This is a Christmas morning tradition in our house. You’ll see why.
This satisfying cinnamon rolls recipe is the ultimate alternative to ready-to-bake, refrigerated cinnamon roll dough. It never disappoints.
Why You’ll Love This Recipe
What makes these the best-ever cinnamon rolls? Here’s why this recipe is a keeper:
- It’s easy. This recipe shows you, step-by-step, how to make perfect, fluffy cinnamon rolls from scratch.
- It’s ready the night before. Your cinnamon rolls are prepped and in the pan ahead of time. This way they’re ready for a quick rise before baking the following day.
- Perfect for the holidays. Overnight cinnamon rolls are the best way to make breakfast special without having to stress about it the morning of.
Cinnamon Roll Ingredients
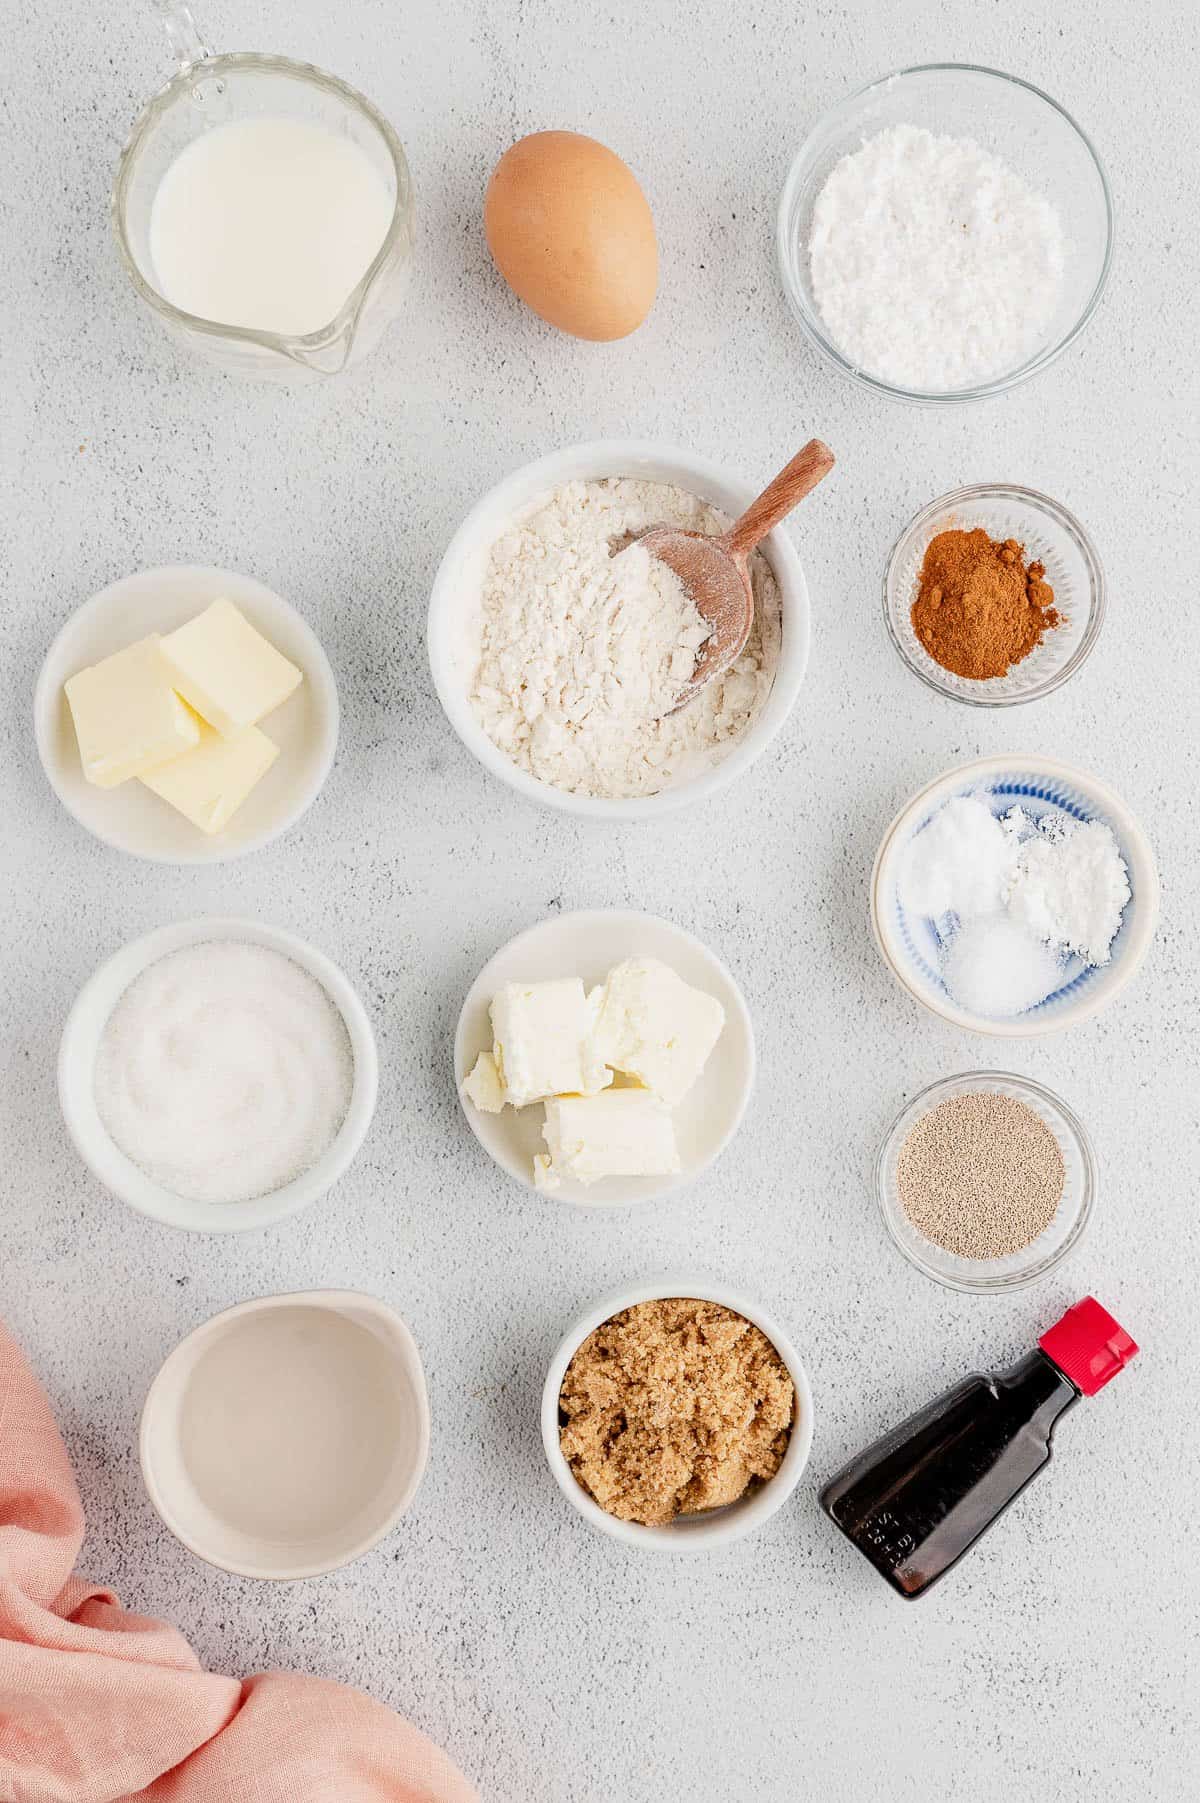
These overnight cinnamon rolls call for just a few pantry ingredients. Below are the primary ingredients you’ll need to make the rolls as well as the delectable cream cheese frosting. Don’t forget to check out the recipe card with the full amounts:
For the Dough
- Milk – My family always makes this recipe with whole milk, however, 2% milk will also work.
- Butter – I prefer baking with unsalted butter, to have better control of the overall saltiness.
- Granulated Sugar – You’ll need sugar for the dough itself as well as when activating the yeast.
- Active Dry Yeast – Make sure to check the expiration dates to be sure the yeast is fresh
- All-Purpose Flour – I highly recommend sifting the flour through a mesh sieve beforehand, to remove any lumps.
- Baking Soda and Baking Powder, Salt: The combination of the two helps the dough rise and bake into a light, flaky roll.
For the Filling
- Butter – Again, I usually stick to unsalted. Make sure that the butter is at room temperature so it’s easier to spread.
- Light Brown Sugar and Ground Cinnamon – Combined, these ingredients make up the cinnamon sugar filling for the cinnamon rolls.
Cream Cheese Frosting
- Cream Cheese – I recommend using full-fat cream cheese for the creamiest results. Like the butter for the filling, you’ll want your cream cheese also at room temperature.
- Butter – Melted so that it’s easy to combine.
- Powdered Sugar – Also called confectioner’s sugar, sifted to remove any lumps.
How to Make Overnight Cinnamon Rolls
Mama Girl’s overnight cinnamon rolls come together in three rises: two rises the day before, and a third rise prior to baking the next day. Below we’ll go over how to make these legendary cinnamon rolls completely from scratch.
Step 1: Prepare the dough
Let’s start by preparing the cinnamon roll dough for its first and second rise. Here’s what to do:
Dissolve sugar in warm milk: Begin by heating the milk with butter and sugar in a saucepan. The sugar should dissolve and then leave the mixture to cool until it reached 110ºF or less. I usually pop my milk mixture into the fridge to speed things up a little. This process is called “scalding the milk,” and it’s an old-timey method to ensure fluffy, airy cinnamon rolls!
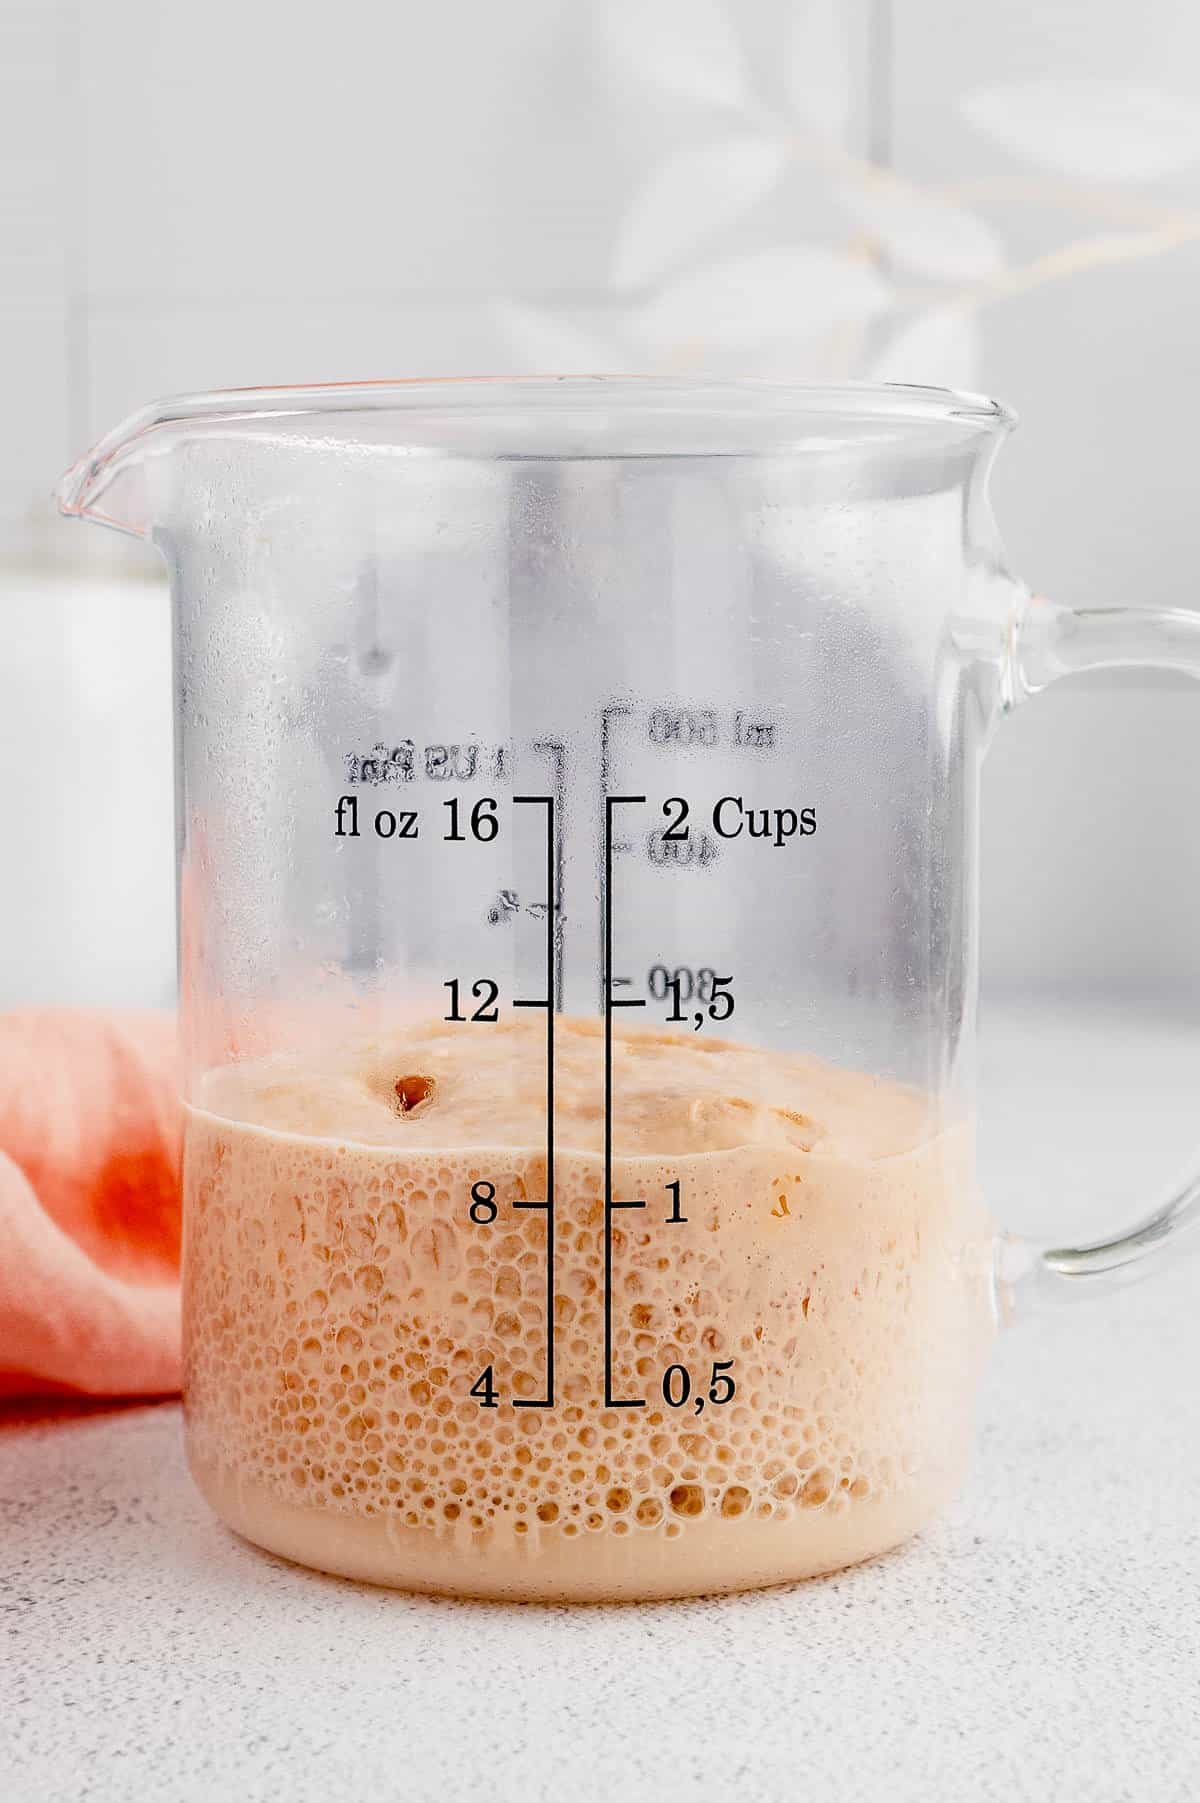
Activate the yeast: Meanwhile, activate the yeast with a bit of sugar in a glass of warm water (You’ll want the temperature to be 100-110ºF, any higher and it risks killing the yeast).
After about 8-10 minutes, the mixture should be foaming and bubbly, growing to about 1 cup of foam. If it hasn’t activated, this could be a sign that your yeast is expired. In this case, discard the mixture and start again with fresh yeast.
Step 2 First rise
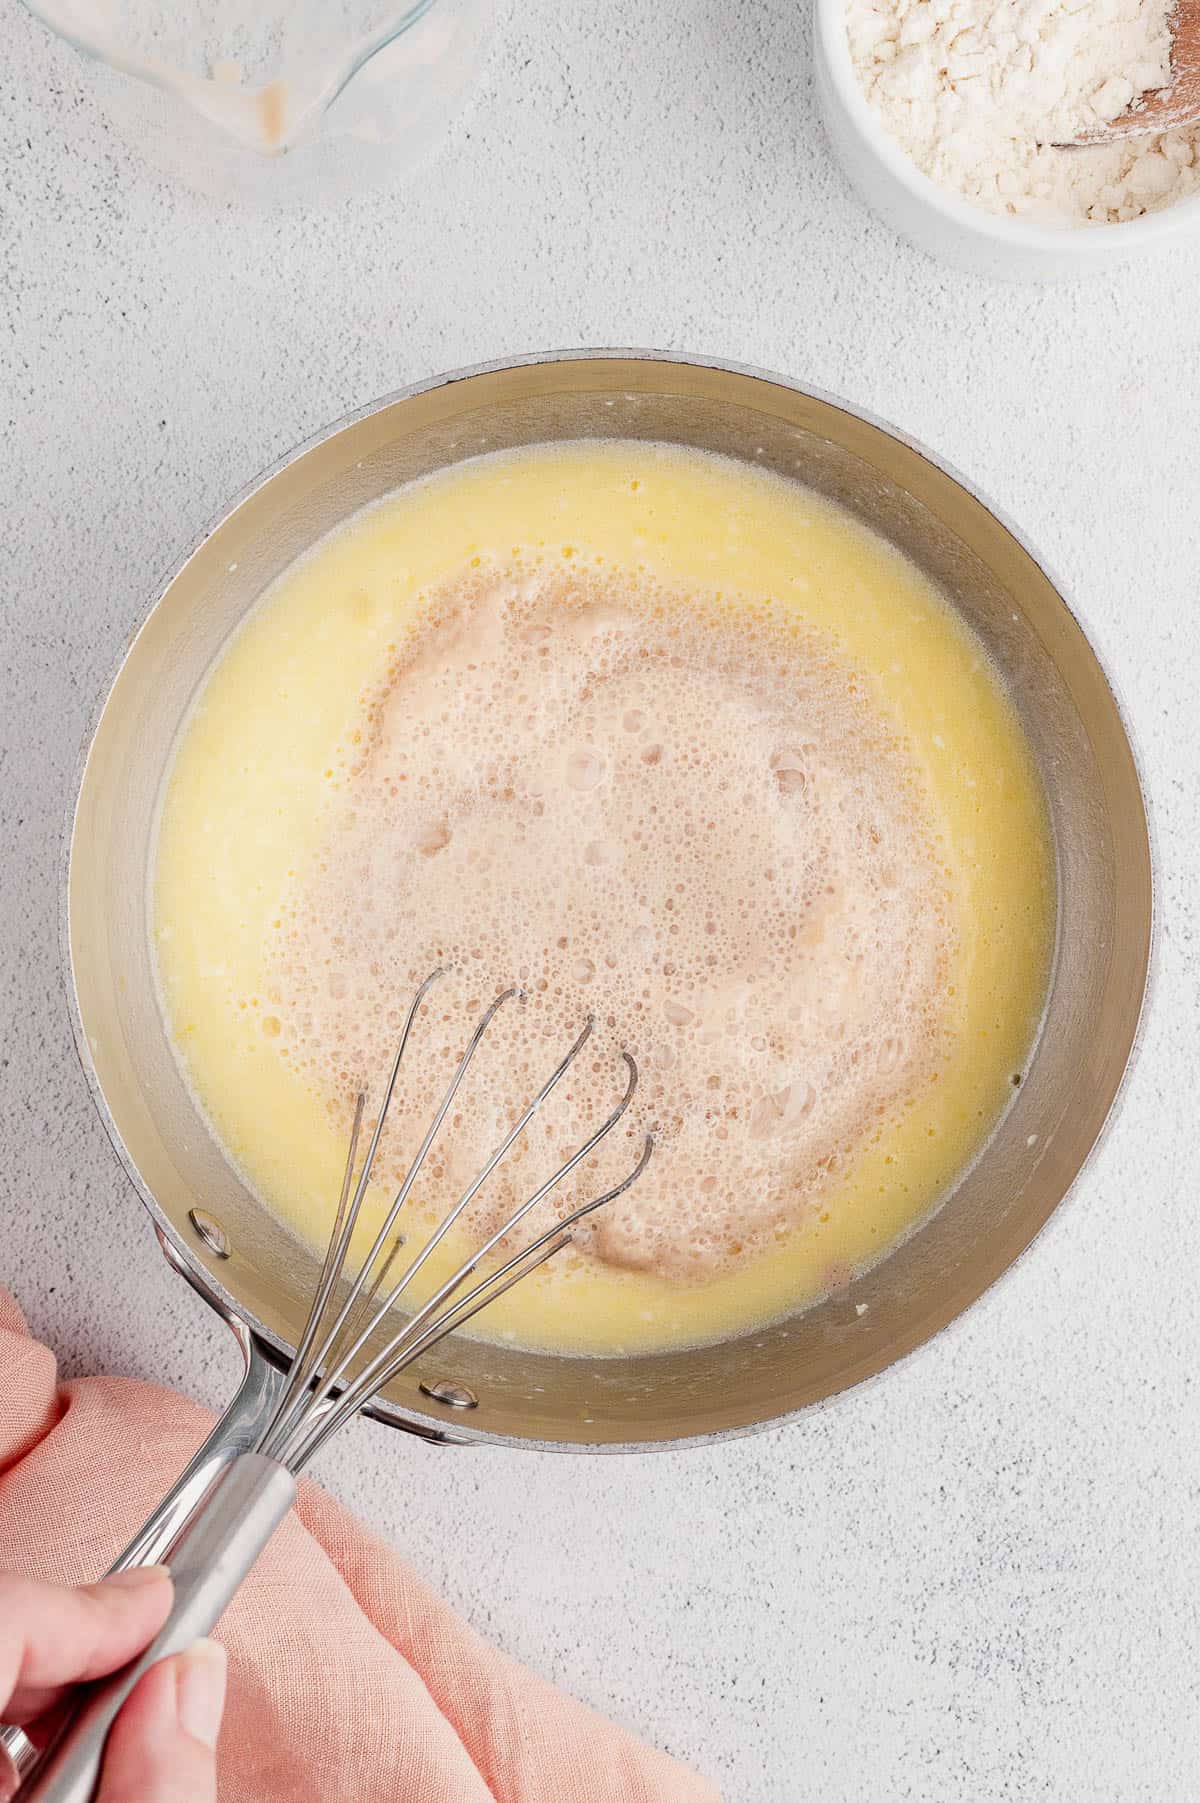
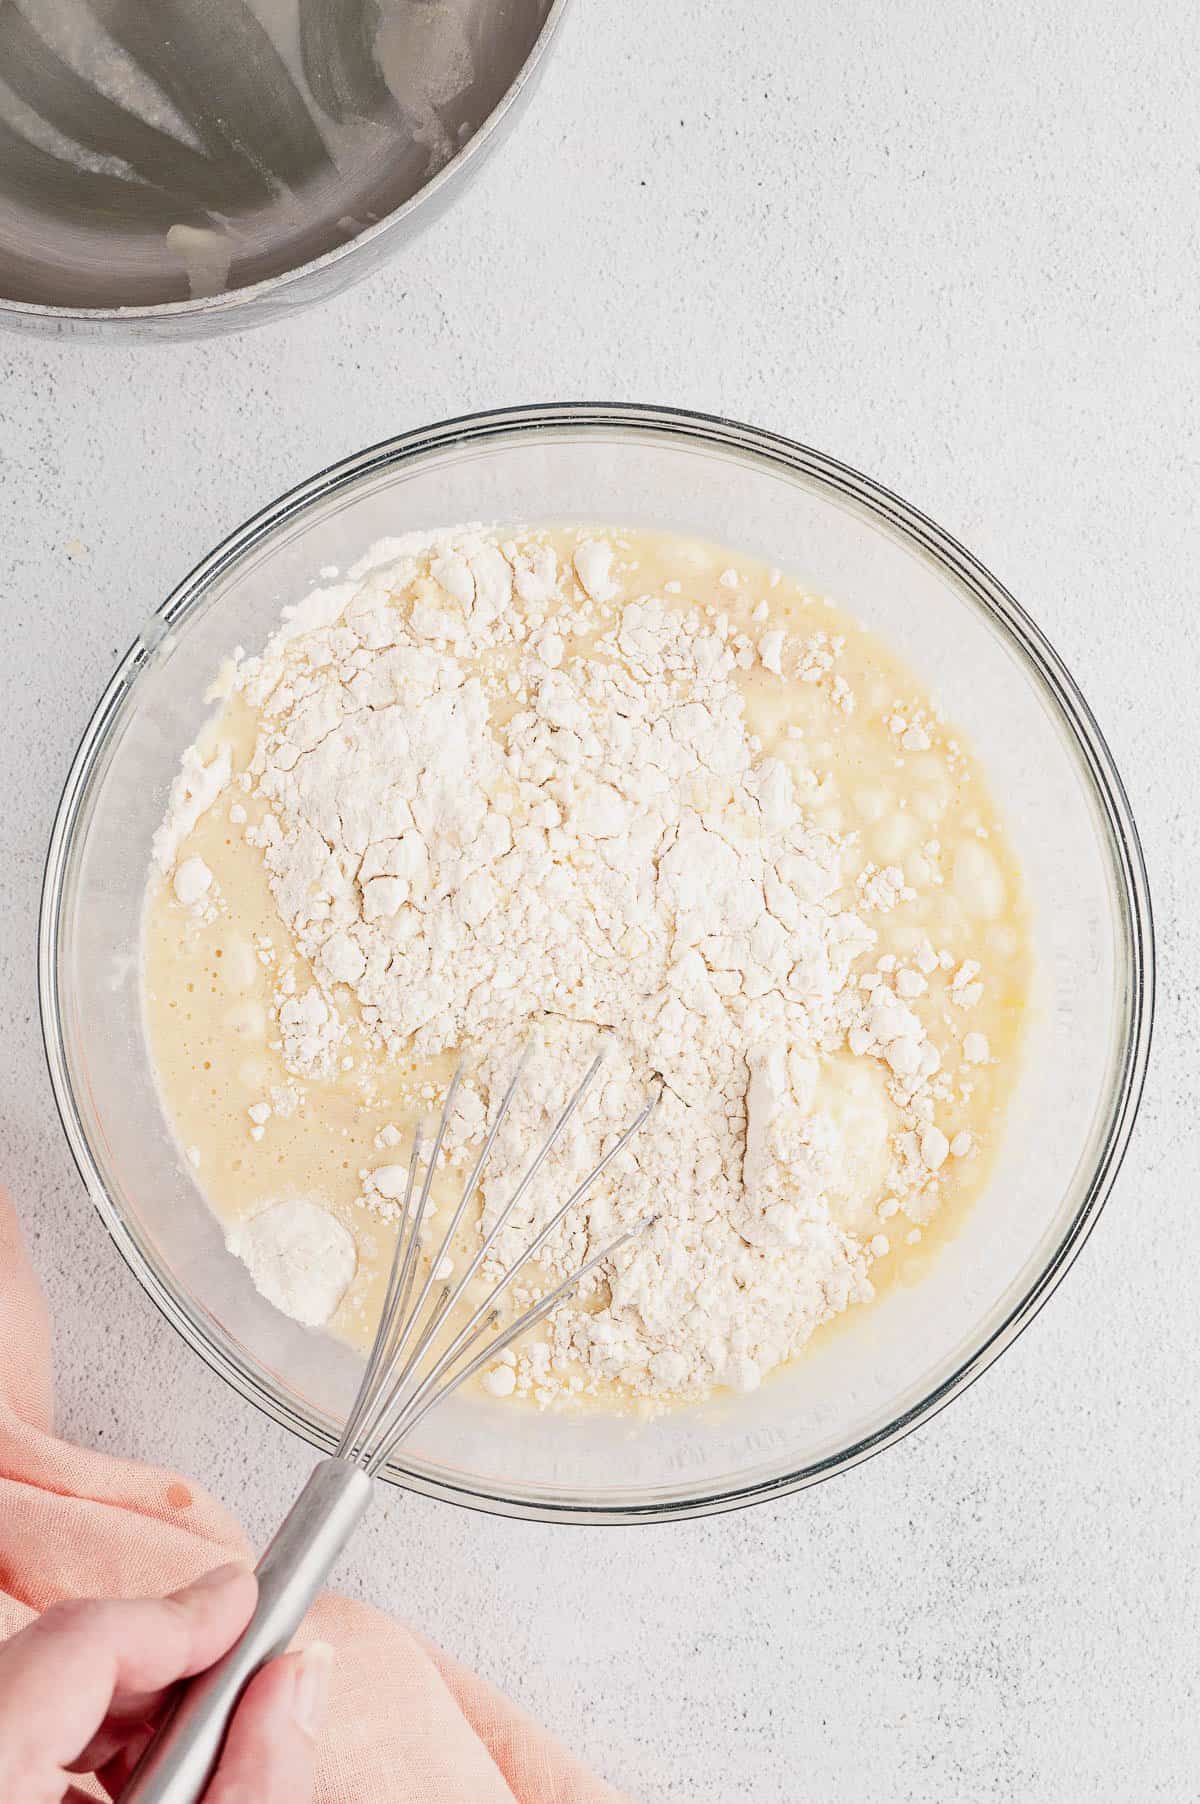
Once the milk mixture has cooled, whisk in the egg followed by the yeast mixture. Next, you’ll combine the flour with the milk mixture until you reach a thick, wet consistency. Cover the bowl with plastic wrap, then move it to a warm place to rise for one hour.
Step 3: Second rise
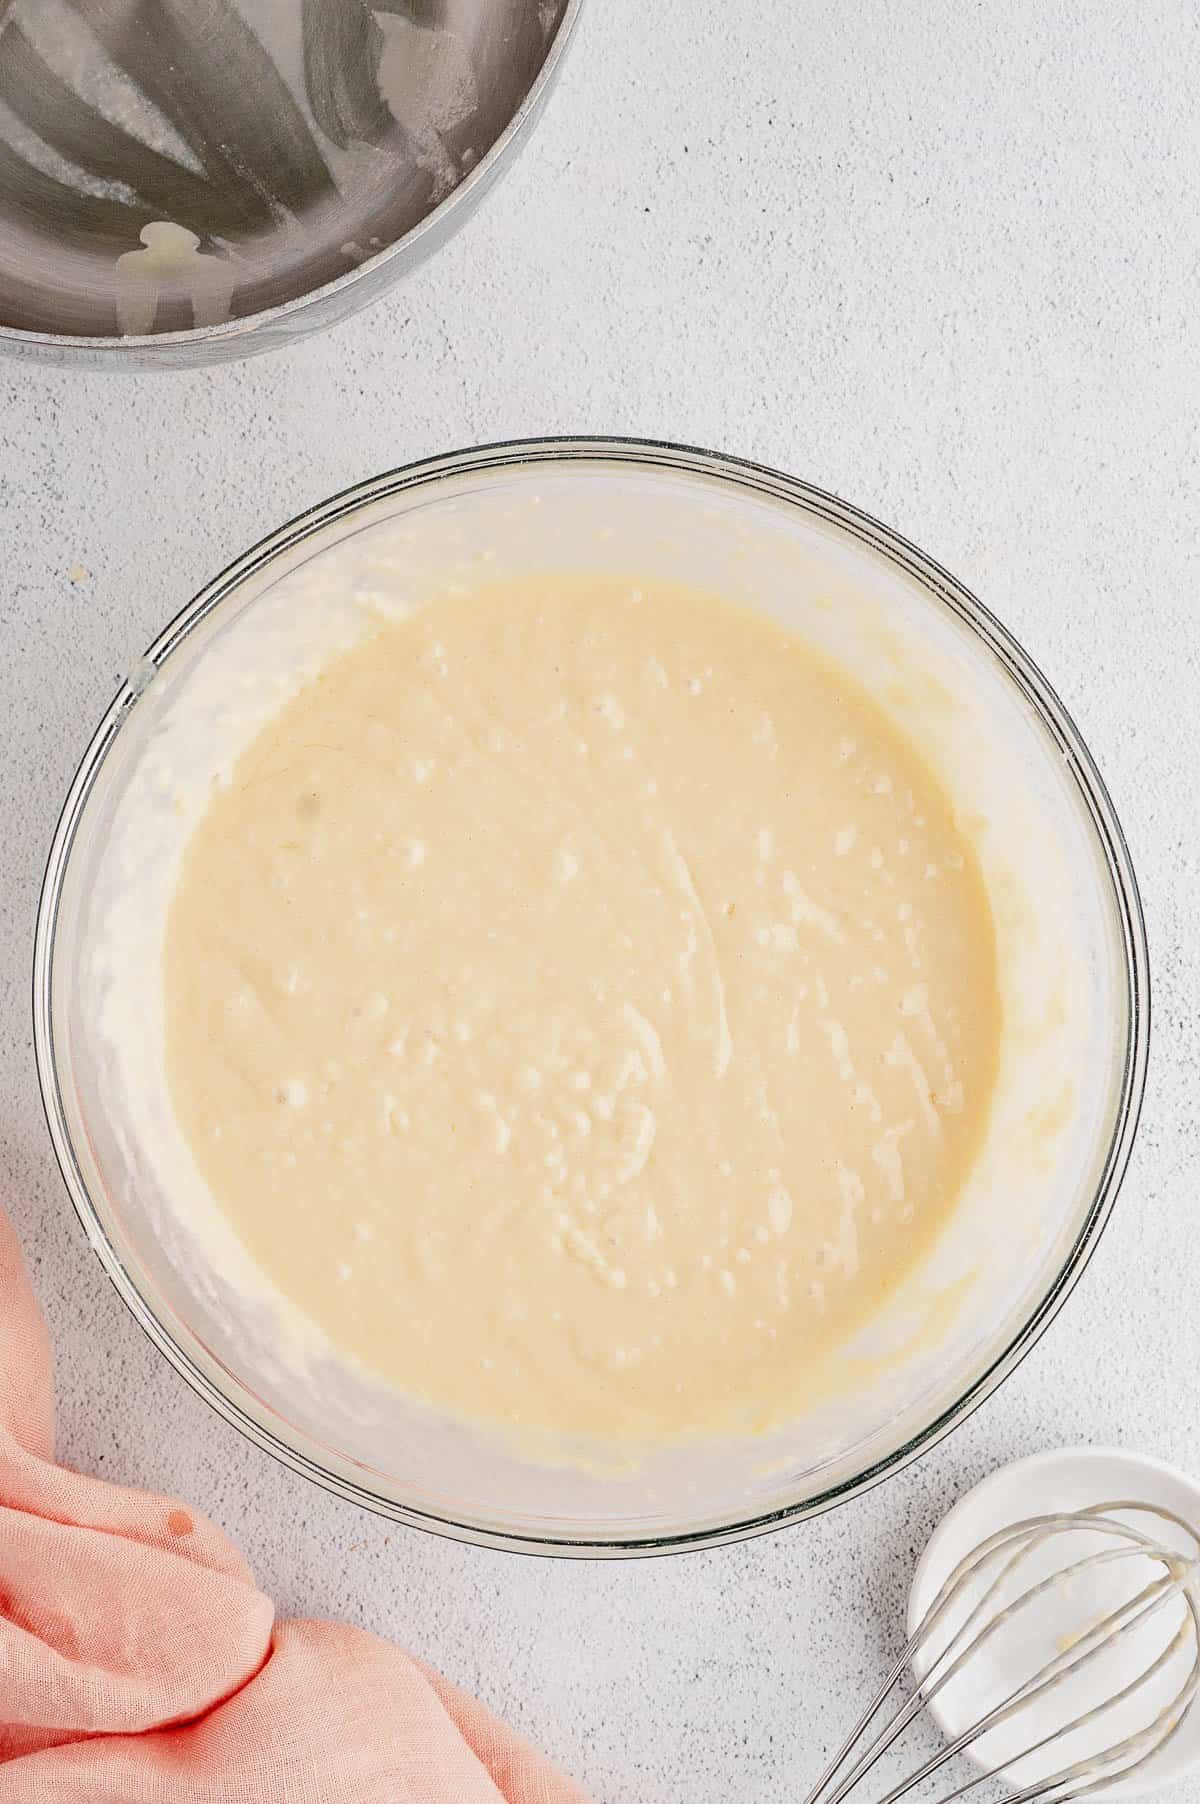
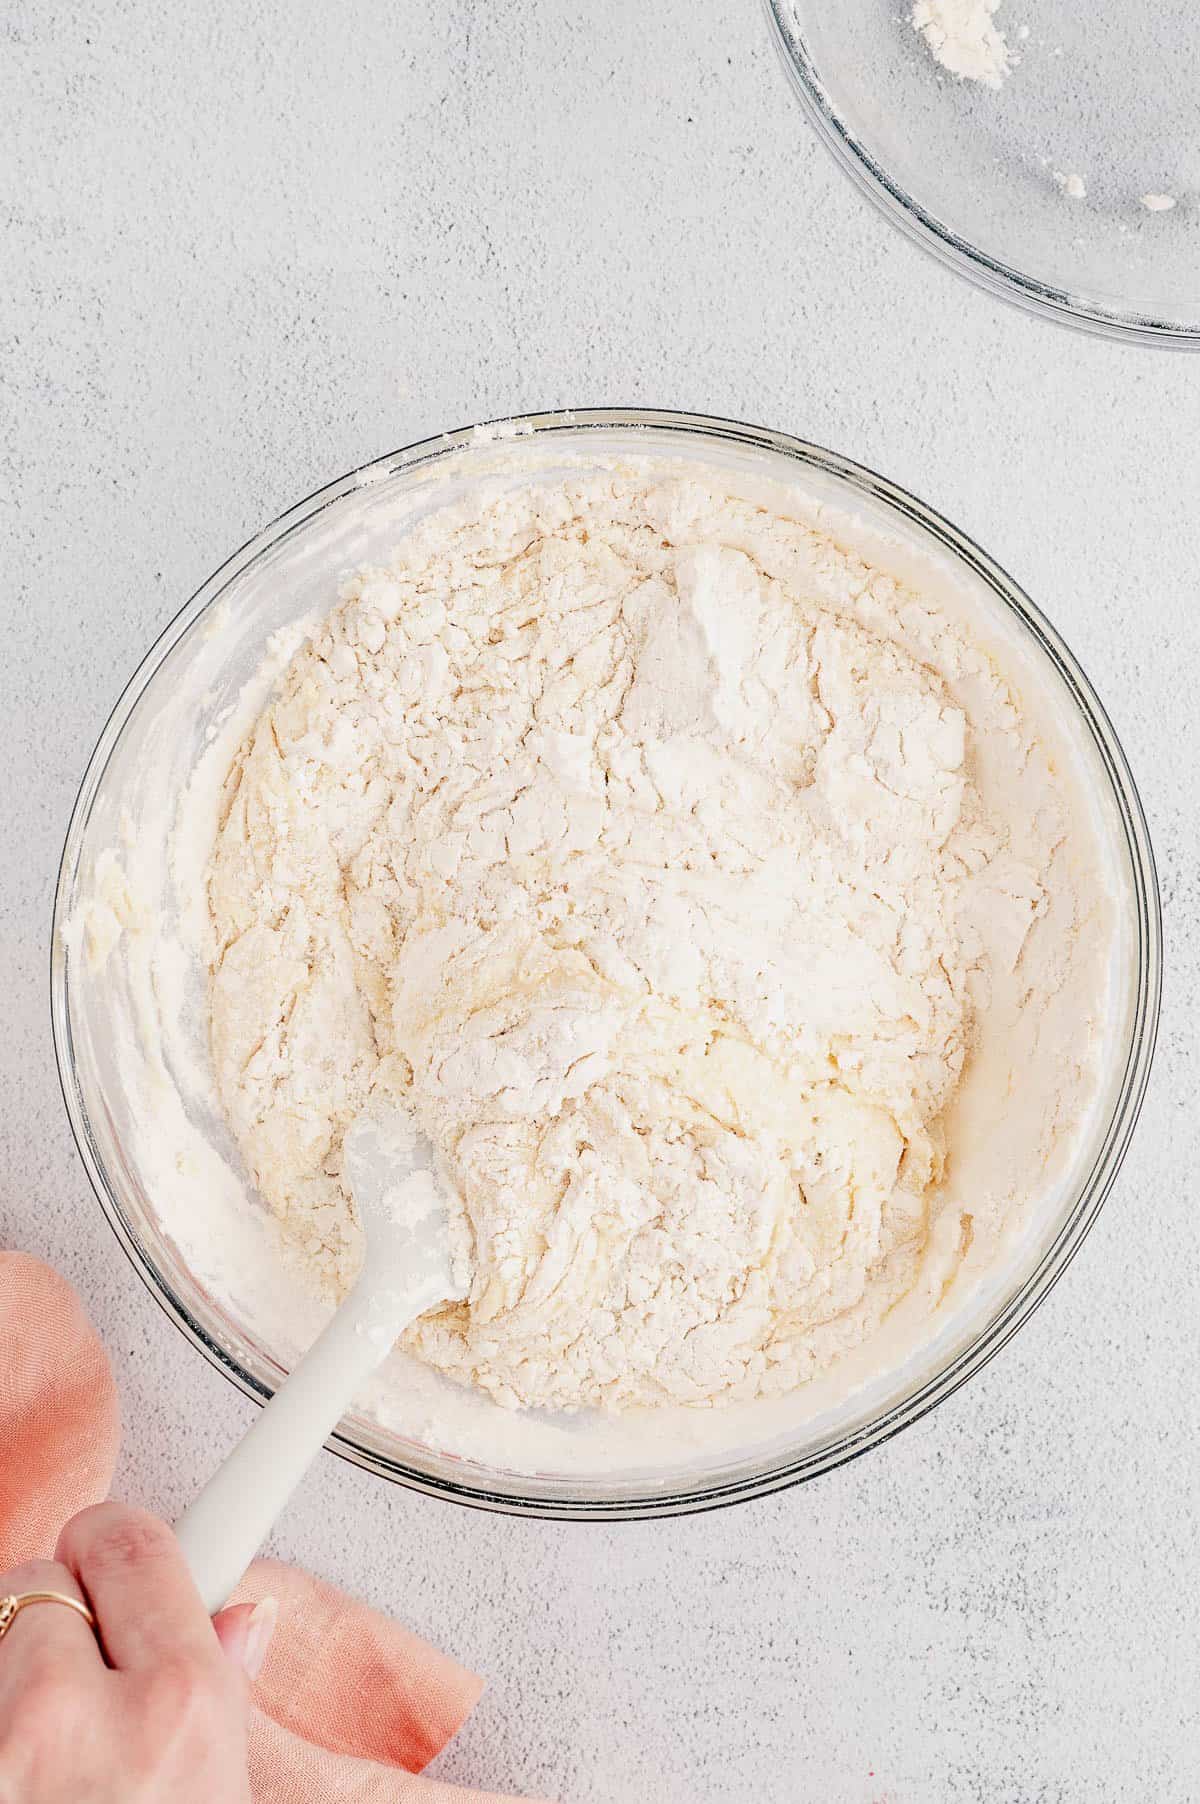
This is what your dough should look like after the 1st rise. It’s grown in size, but still quite a soft and more liquid like consistency.
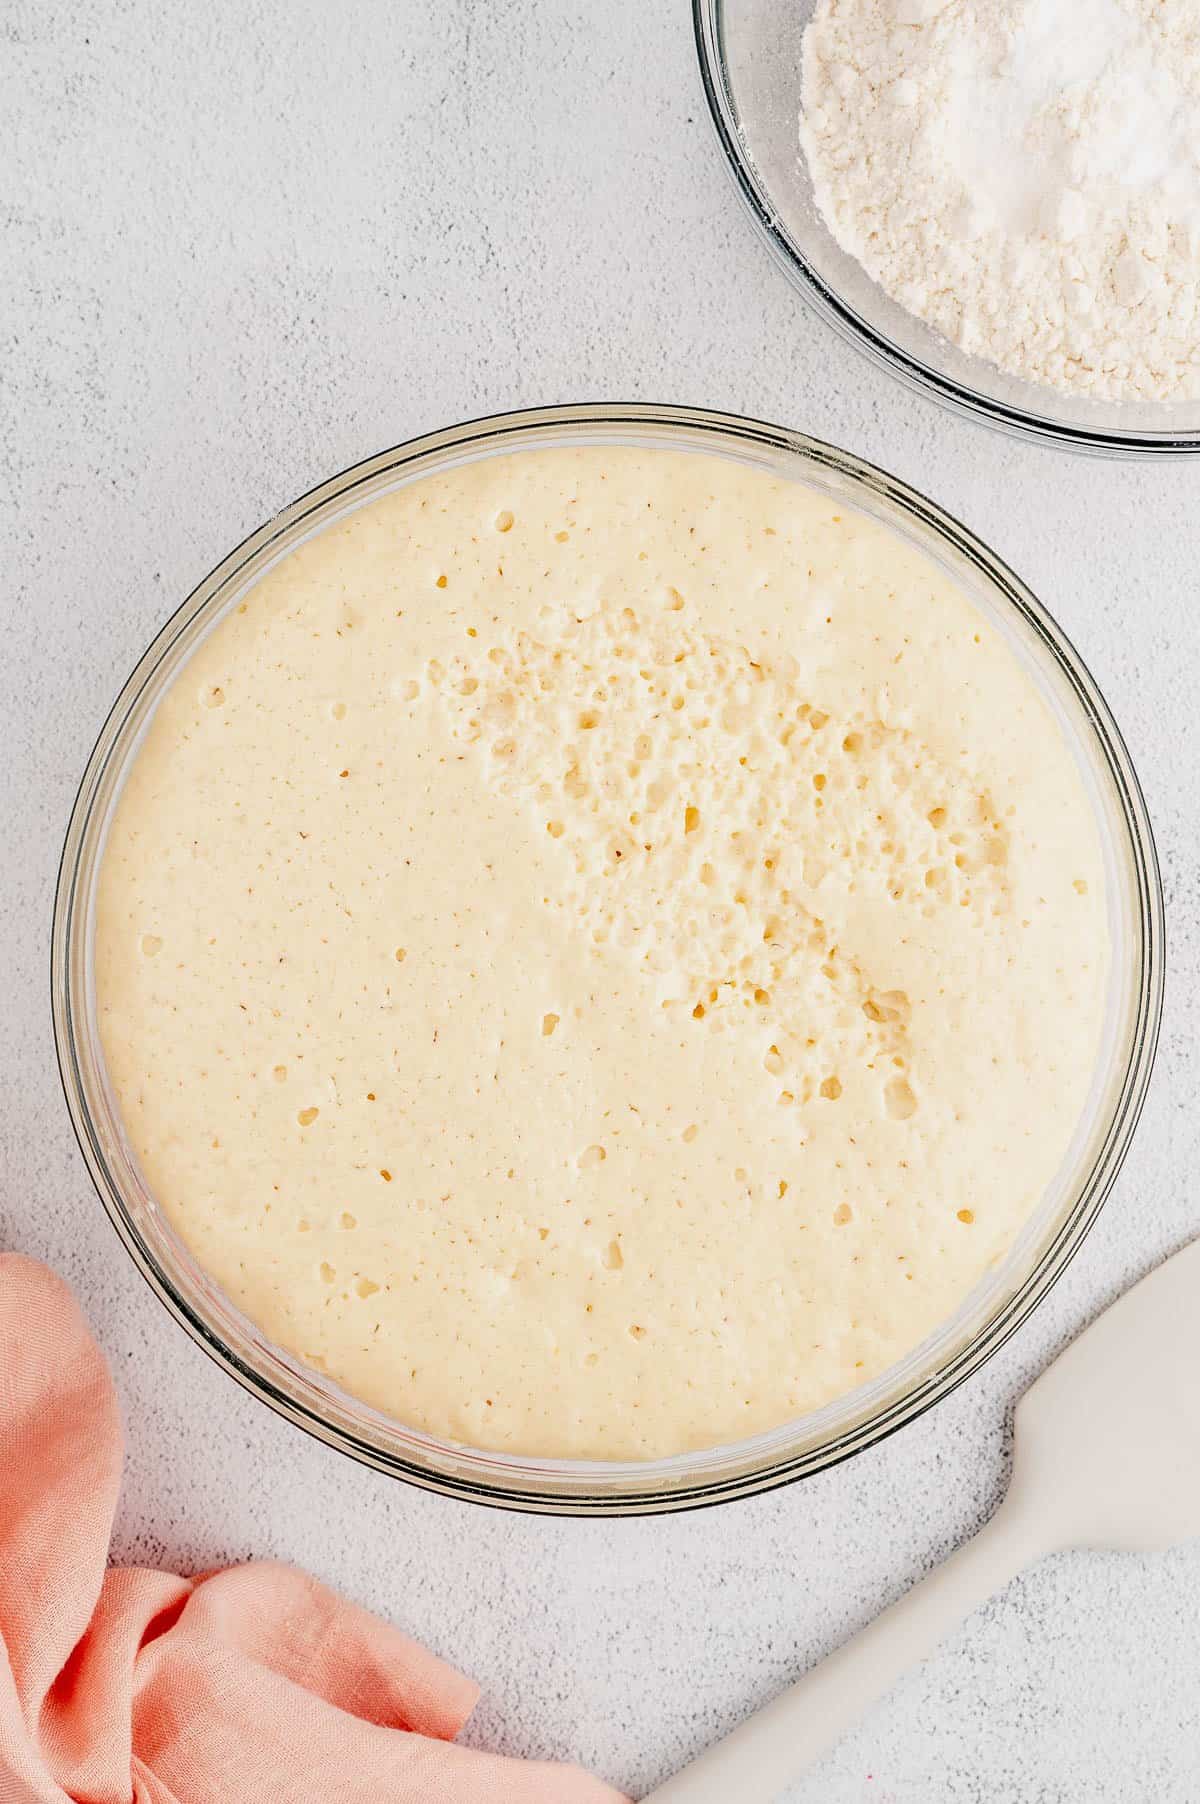
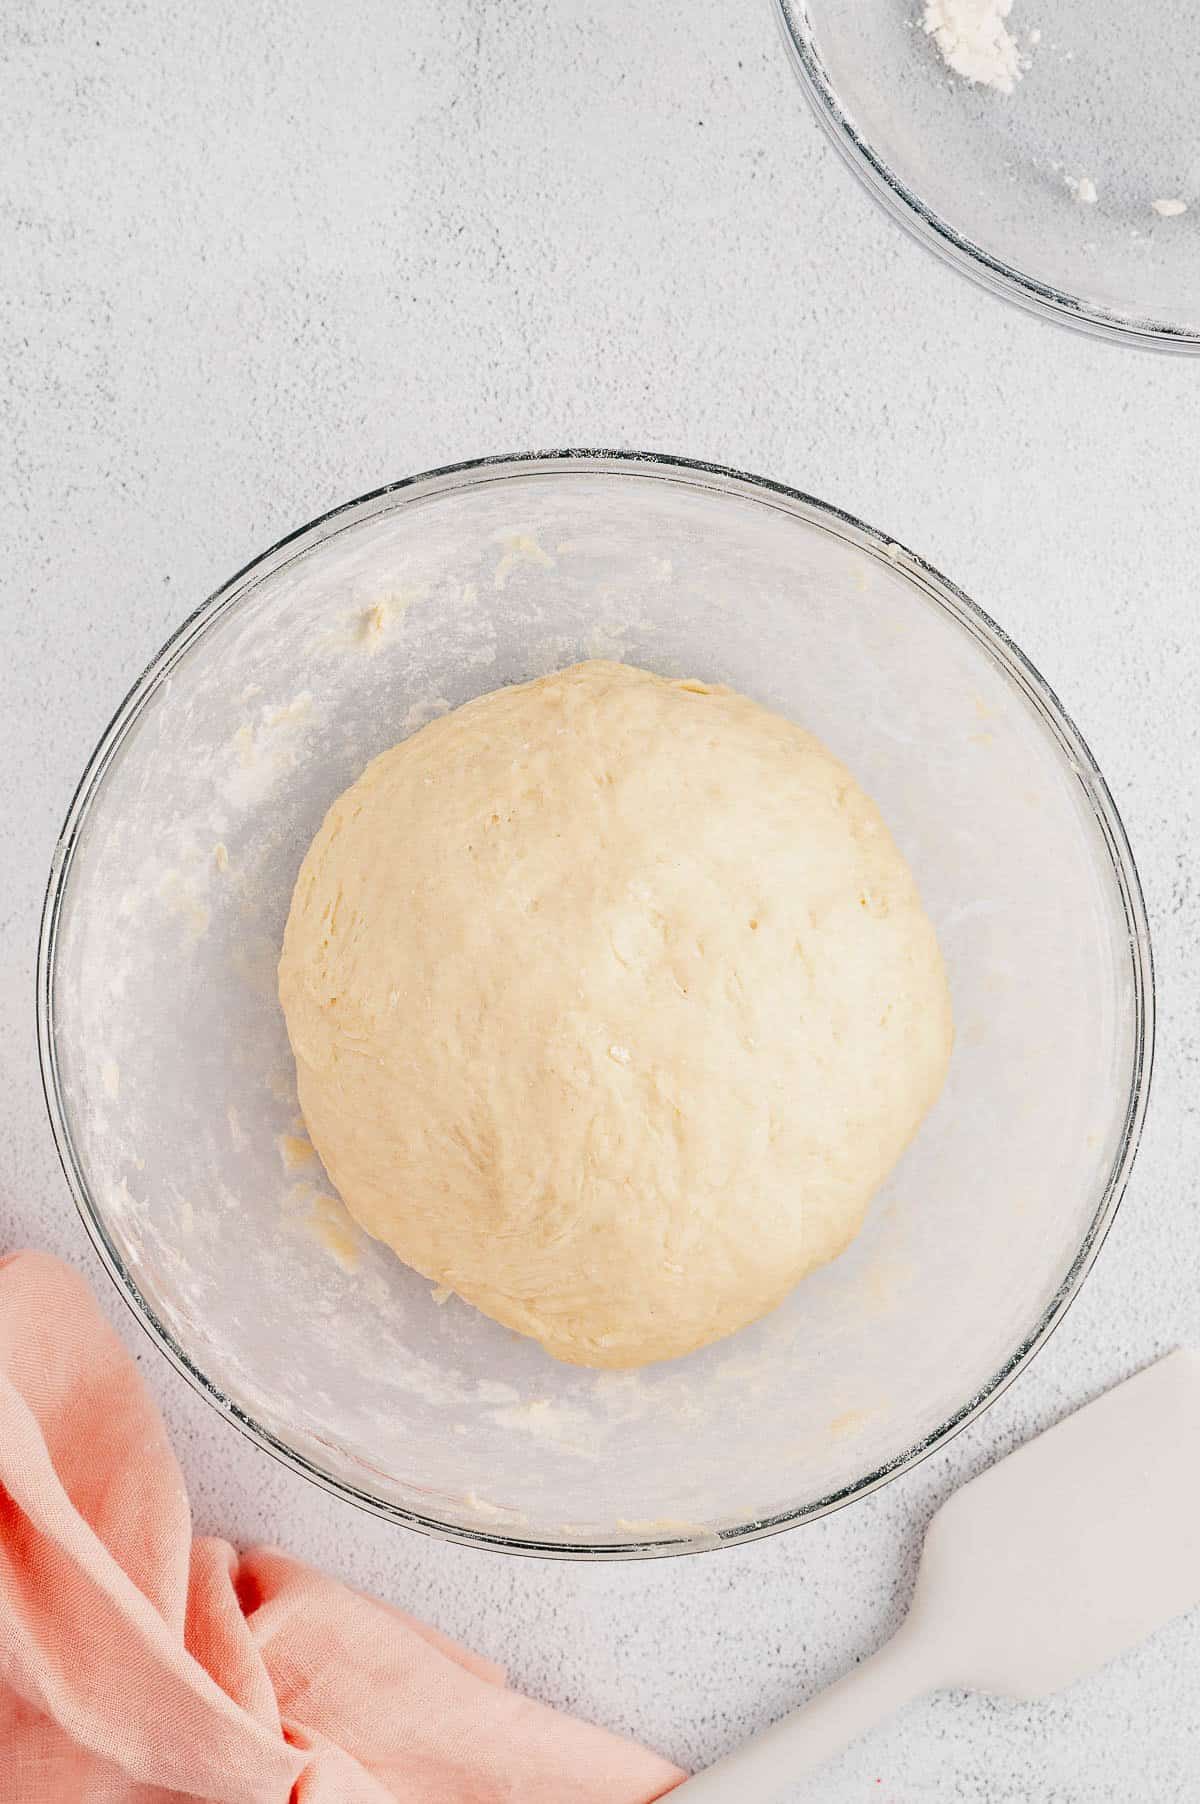
Add the additional dry ingredients: After about an hour, the dough will be ready for the second rise. First, whisk together the flour, baking soda, baking powder, and salt. Add these dry ingredients to the wet dough and form a ball. You may need to add additional flour if your dough is still on the wetter side. The dough ball is ready to knead when it no longer sticks to the sides of the bowl.
Lightly knead: Knead the dough on a floured work surface to get it soft and pliable. Then, place the kneaded dough ball into a large bowl and cover it with a fresh layer of plastic wrap.
Rise: Leave the bowl in a warm spot until the dough is doubled in size (this usually takes about 3 hours).
Step 4: Shape, Fill, Cut
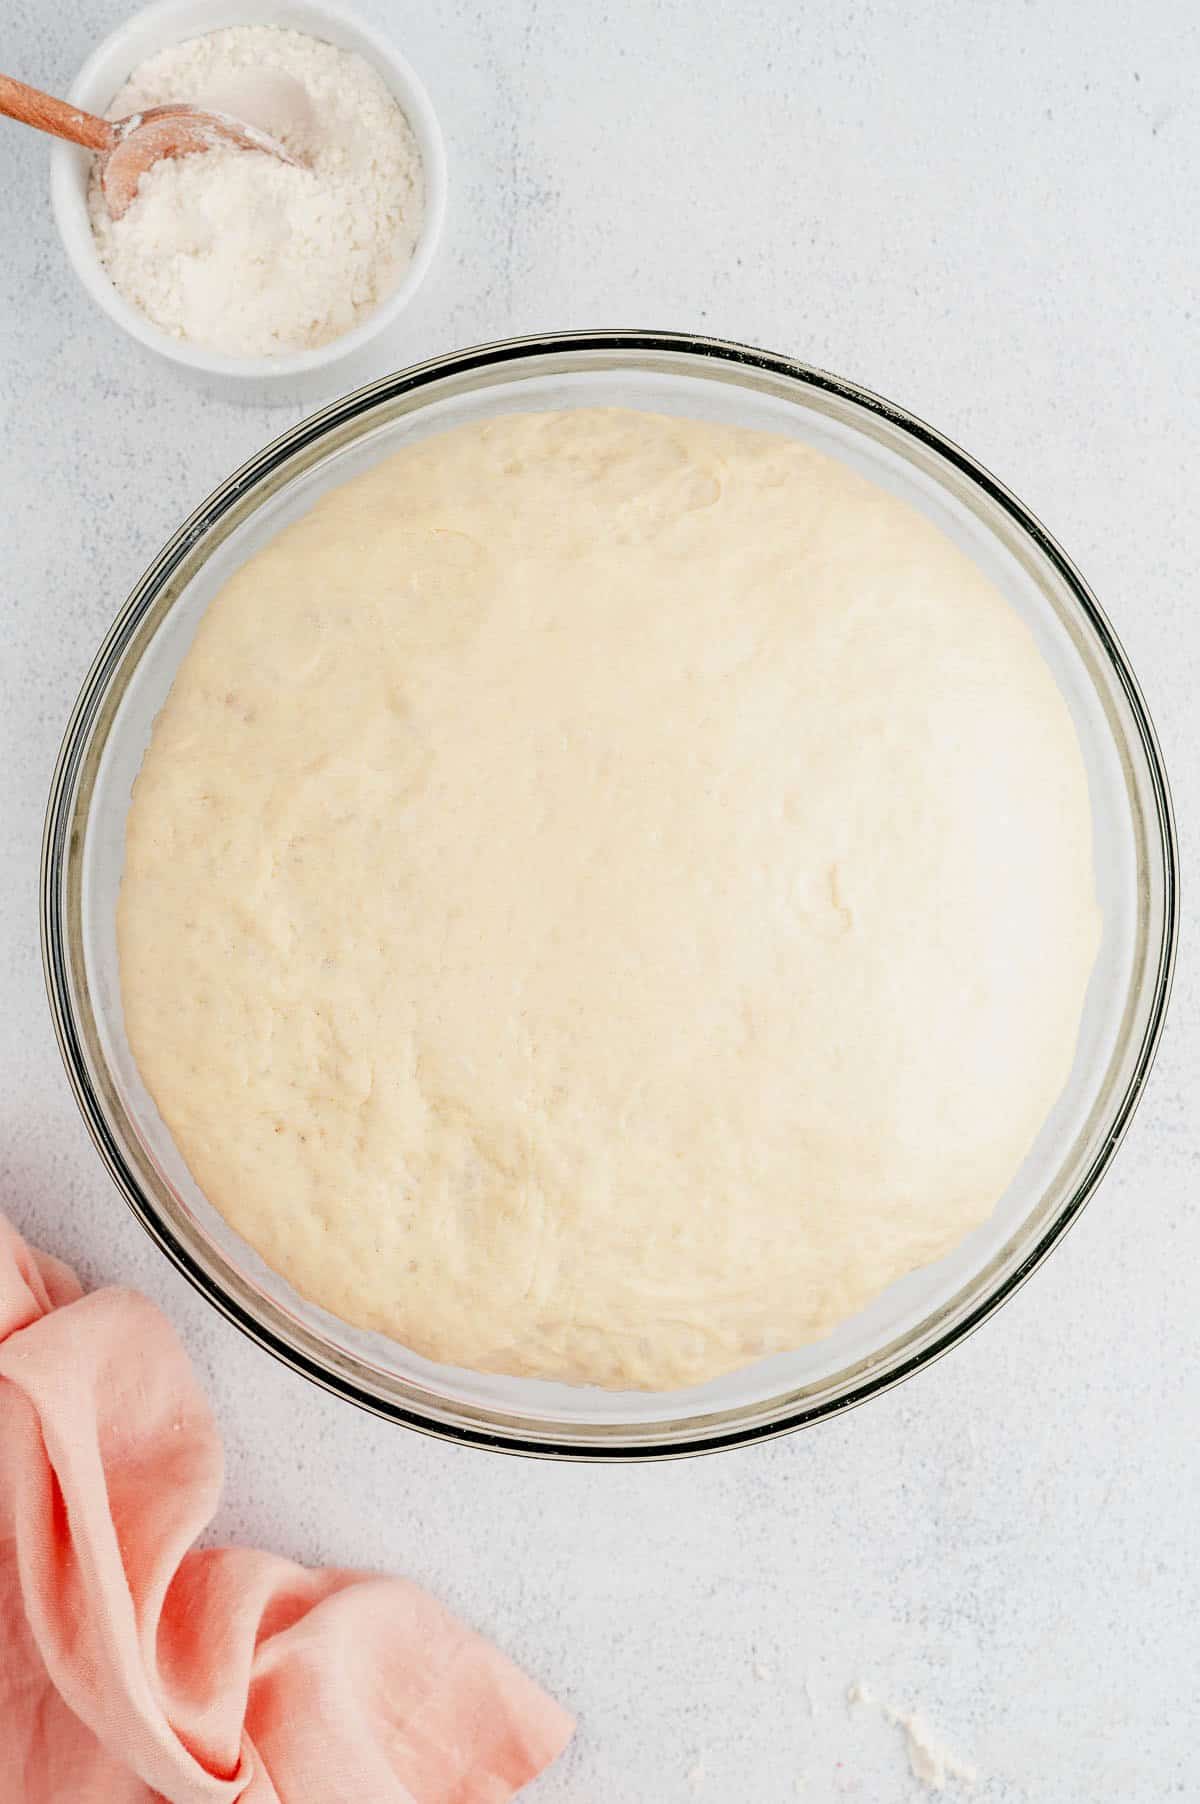
After the second rise (about 3 hours later) the dough should have grown to fill the mixing bowl and the consistency will resemble a true yeast dough.
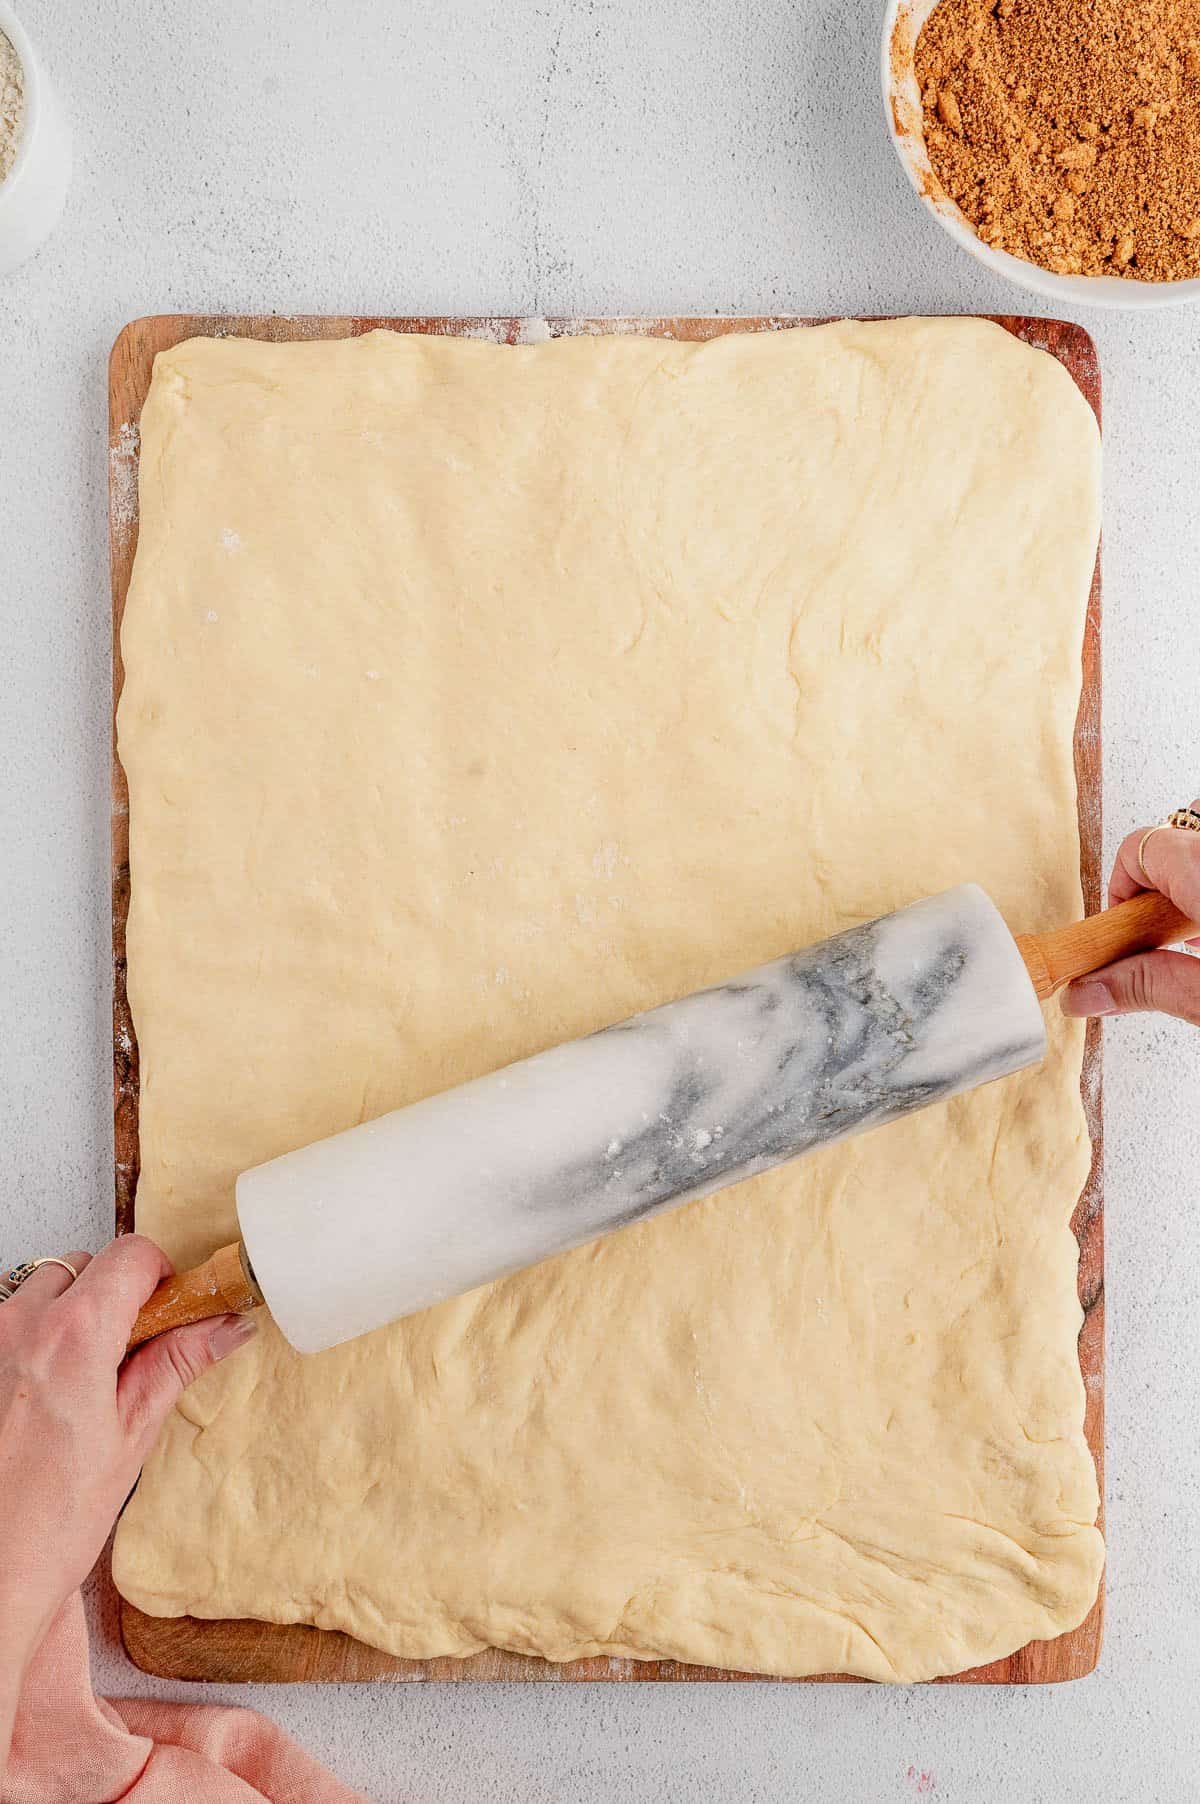
Shape the dough: Once again, knead the dough on a floured surface. Next, shape and roll the dough into a large, flat rectangle about a ¼ inch thick. Now, it’s ready for the cinnamon roll filling!
Filling the Rolls
This recipe keeps it classic with a buttery cinnamon sugar filling. Here’s how easy it is to fill and roll your cinnamon roll dough:
- Add butter: Smear an even layer of butter all over the dough.
- Add the cinnamon filling: Mix together the cinnamon sugar filling, then press the filling generously over the butter. Remember to leave about a half-inch of dough uncovered on the long edge, as this is will be the edge you use to seal the log once it’s rolled.
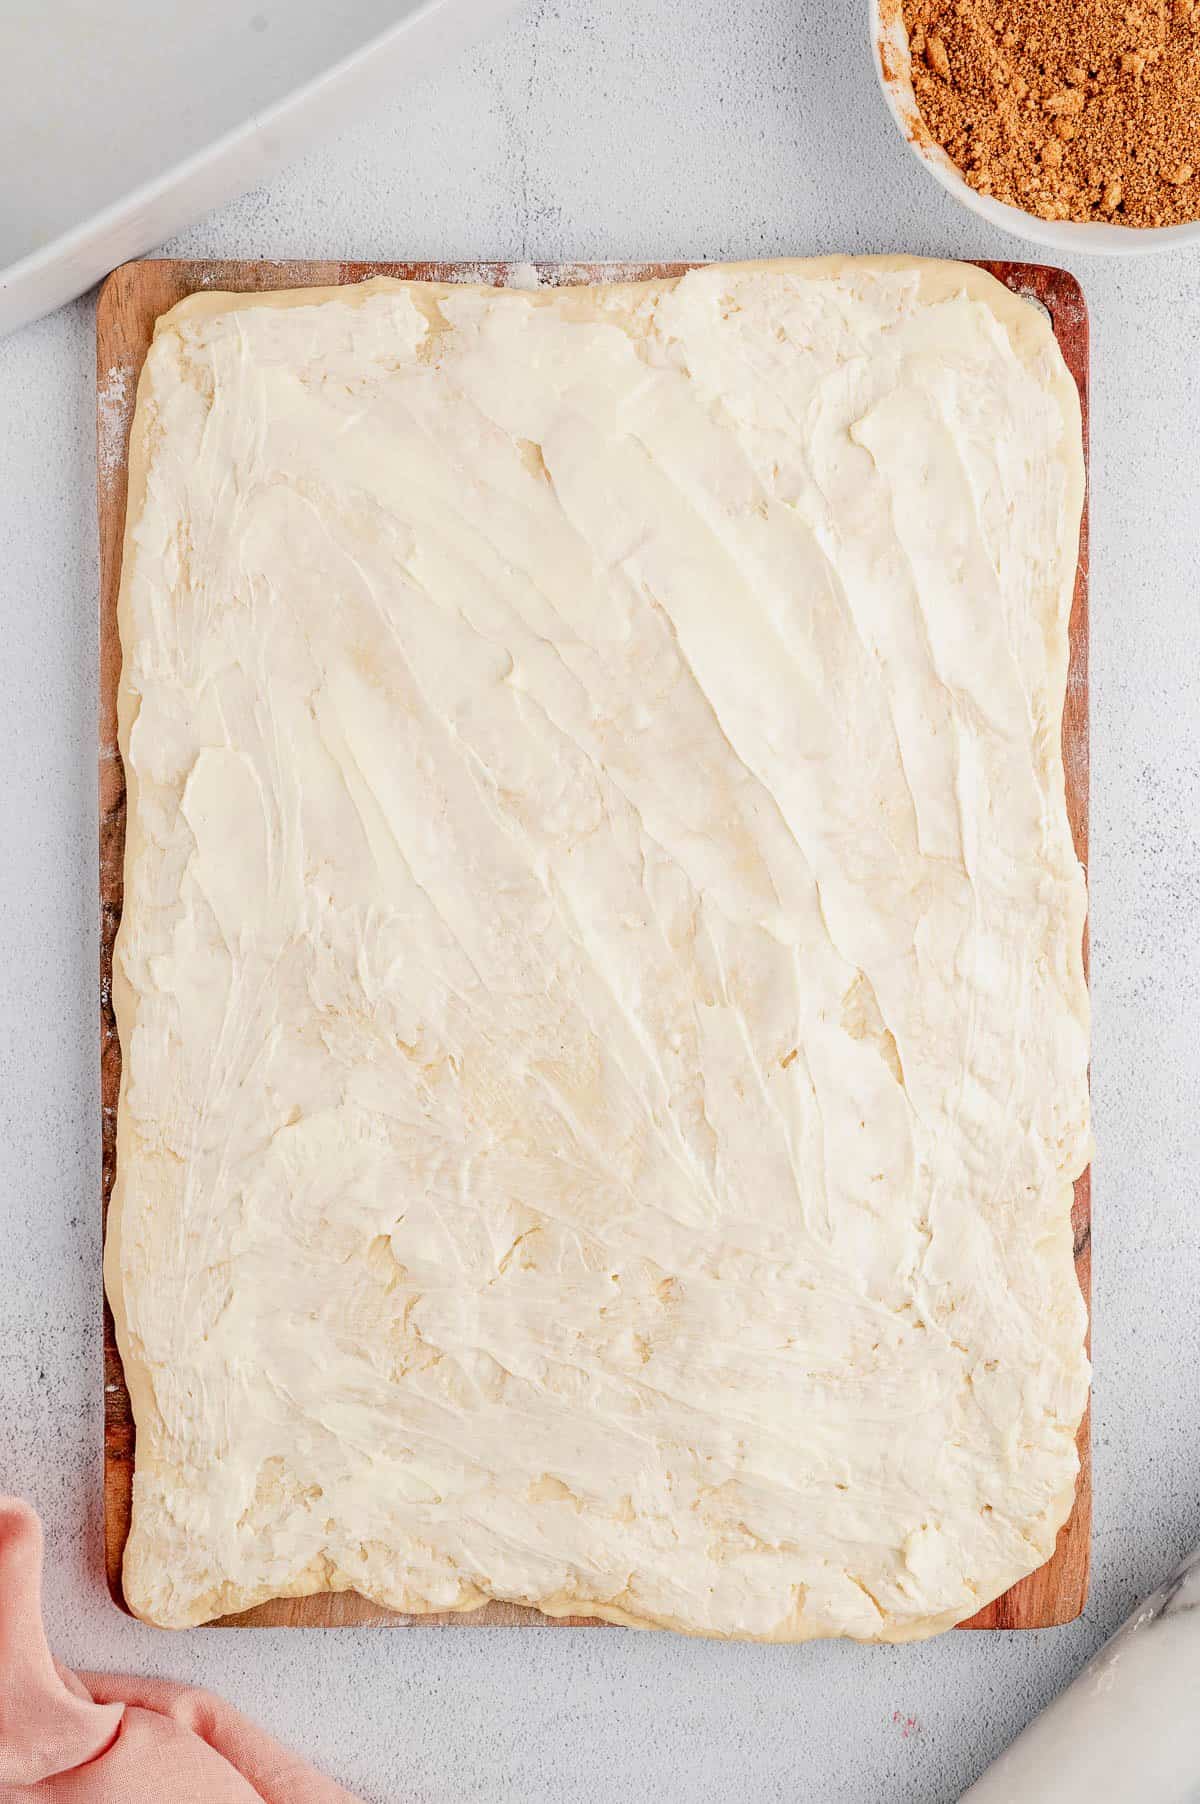
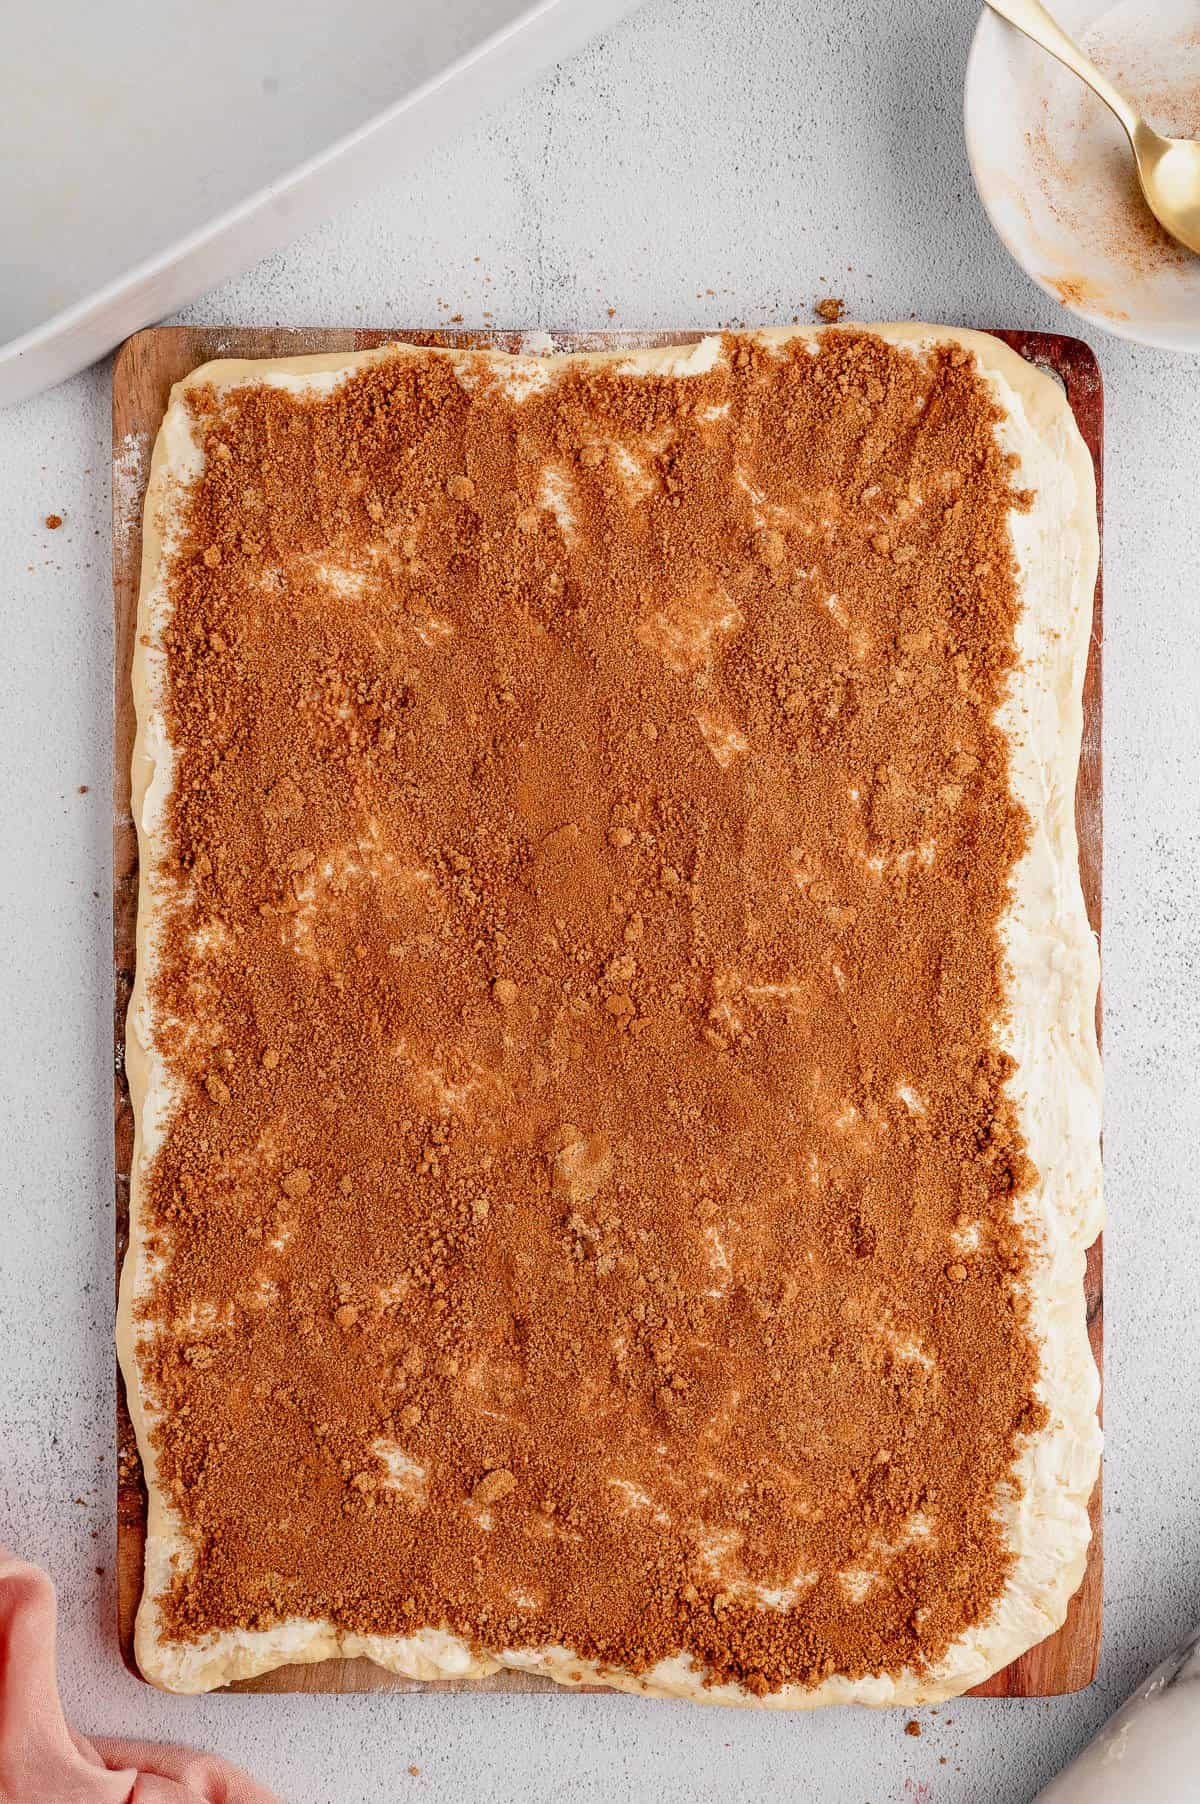
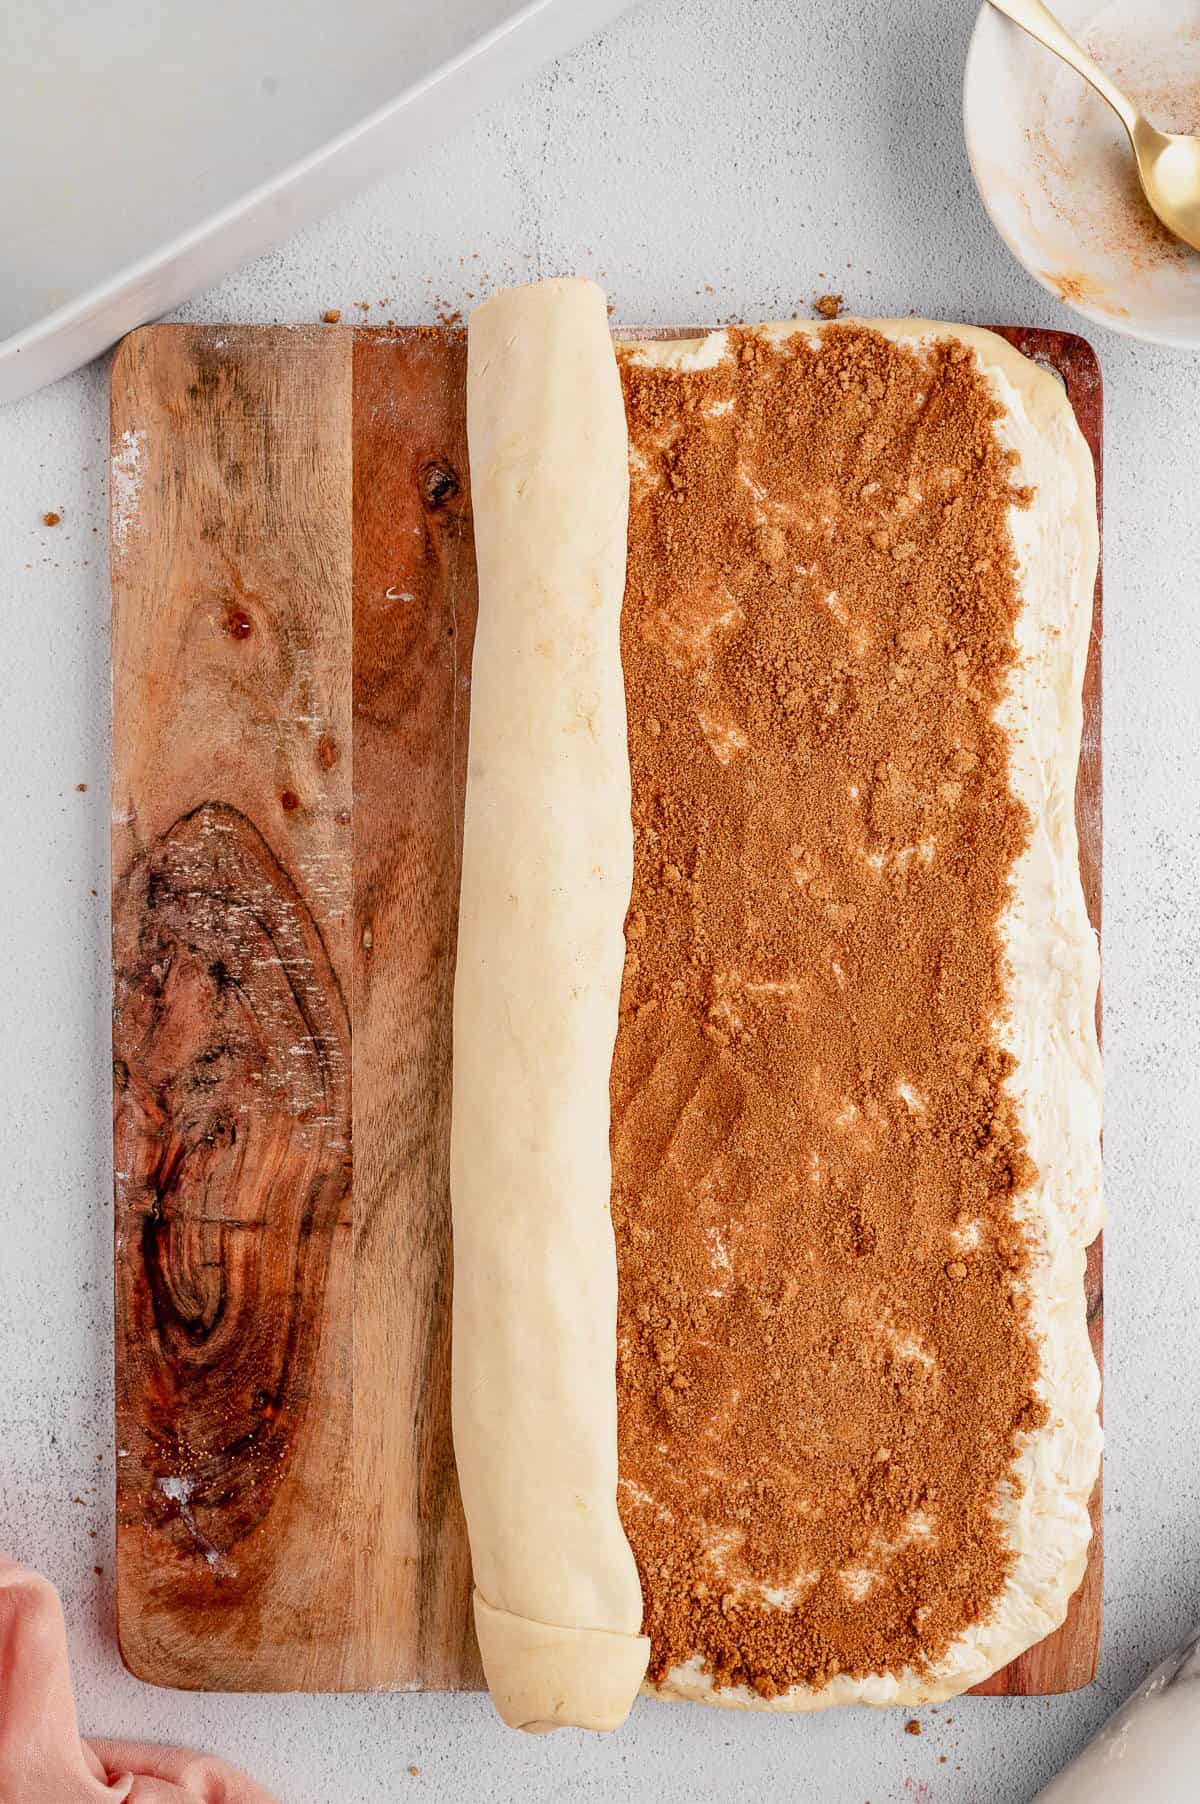
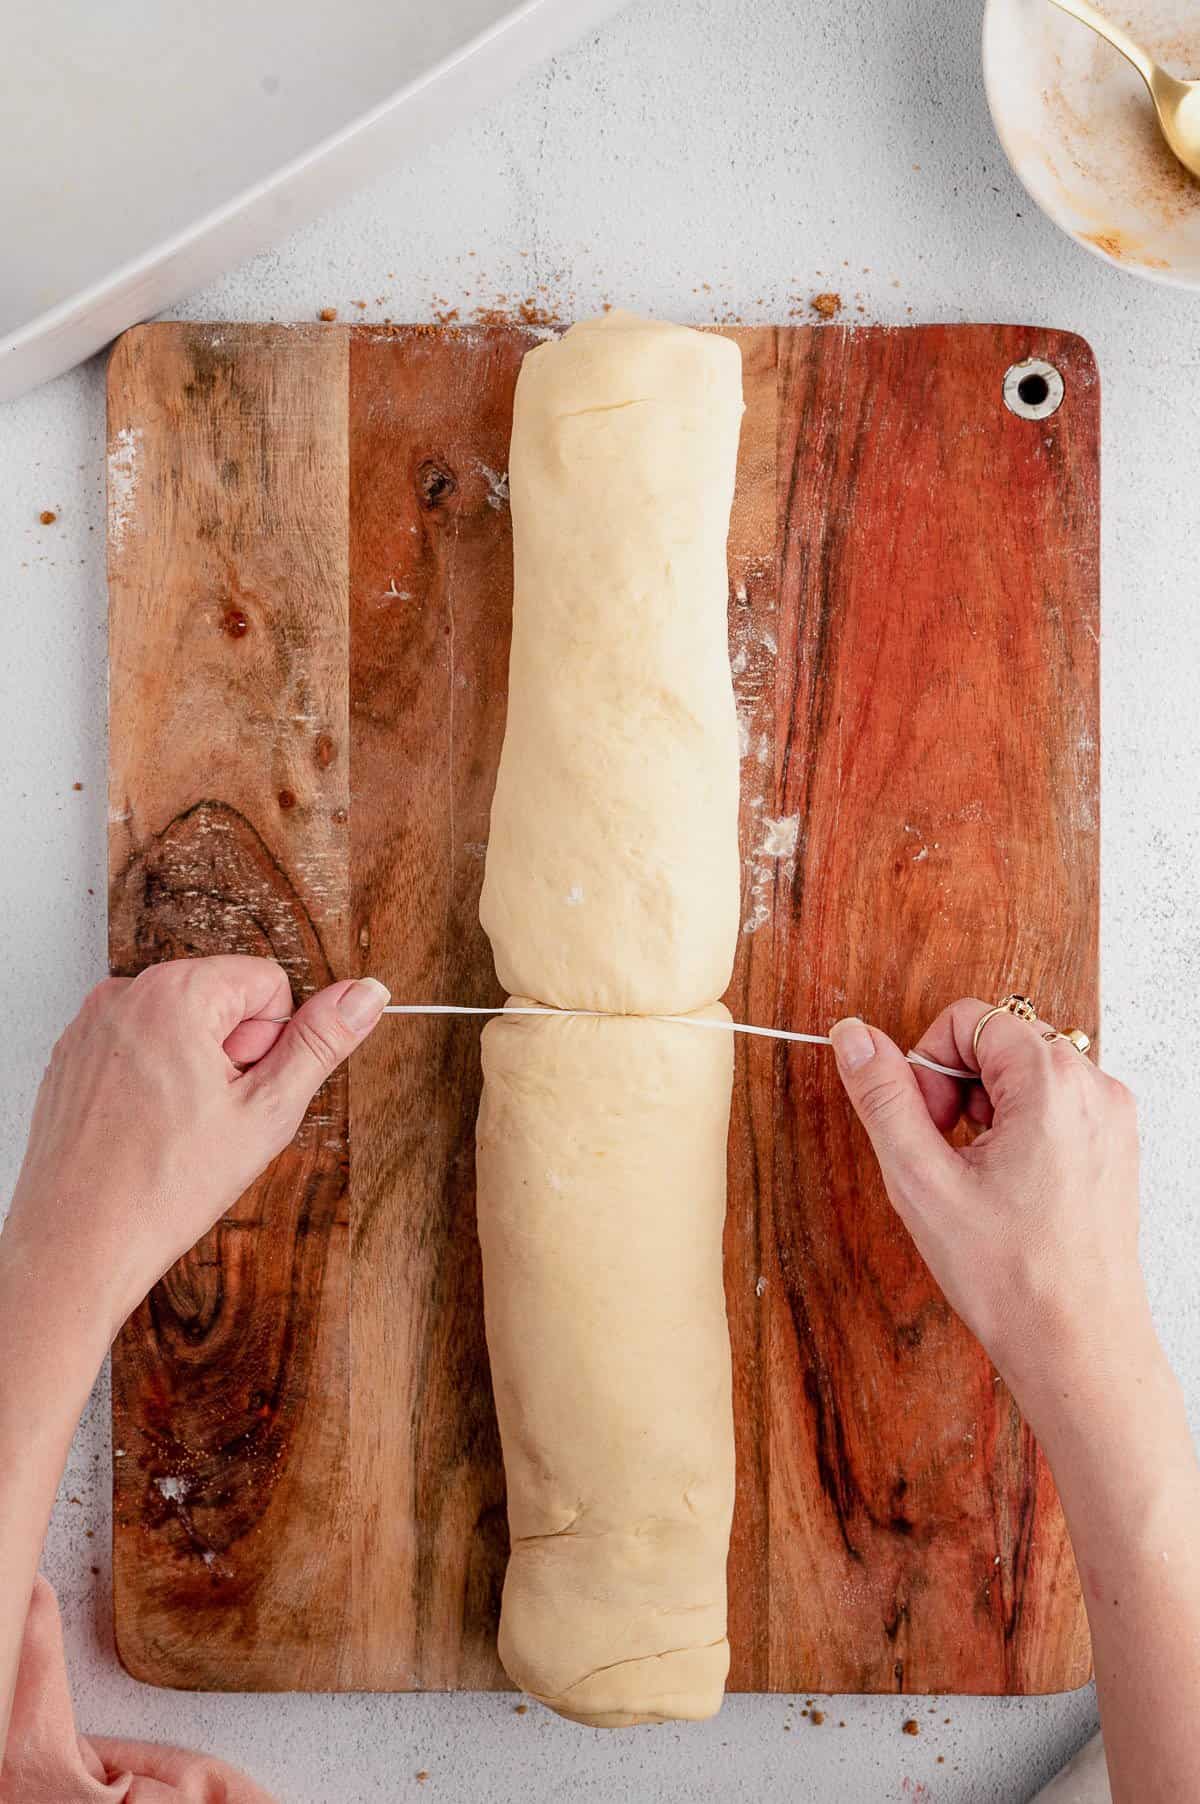
Roll and cut the dough: Next, roll the rectangle up lengthwise into a tight log and pinch it closed with the bare, buttered edge from earlier. Finally, cut the log into 12 even-sized sections. These are your cinnamon rolls!
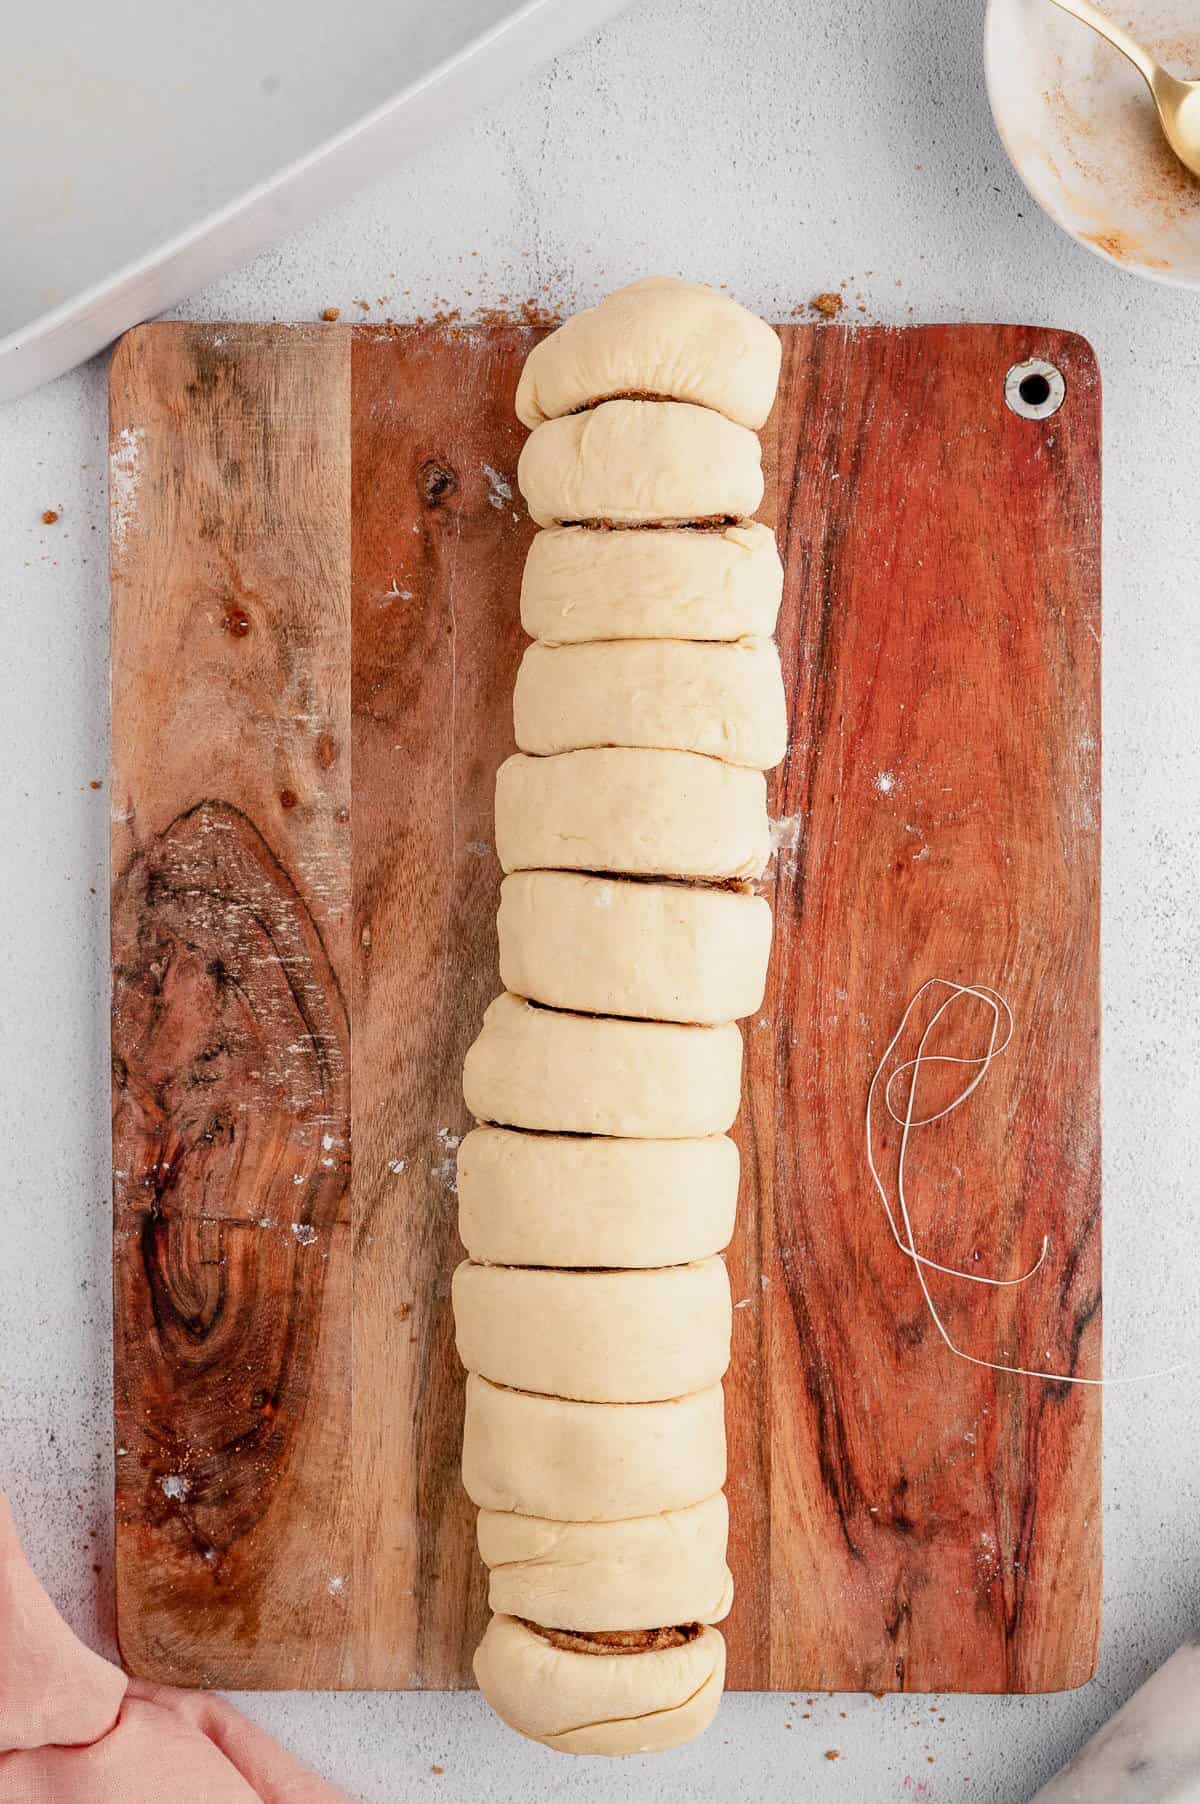
Refrigerate: Place the rolls into a lined or greased baking dish, cover them with plastic, and pop them into the fridge overnight.
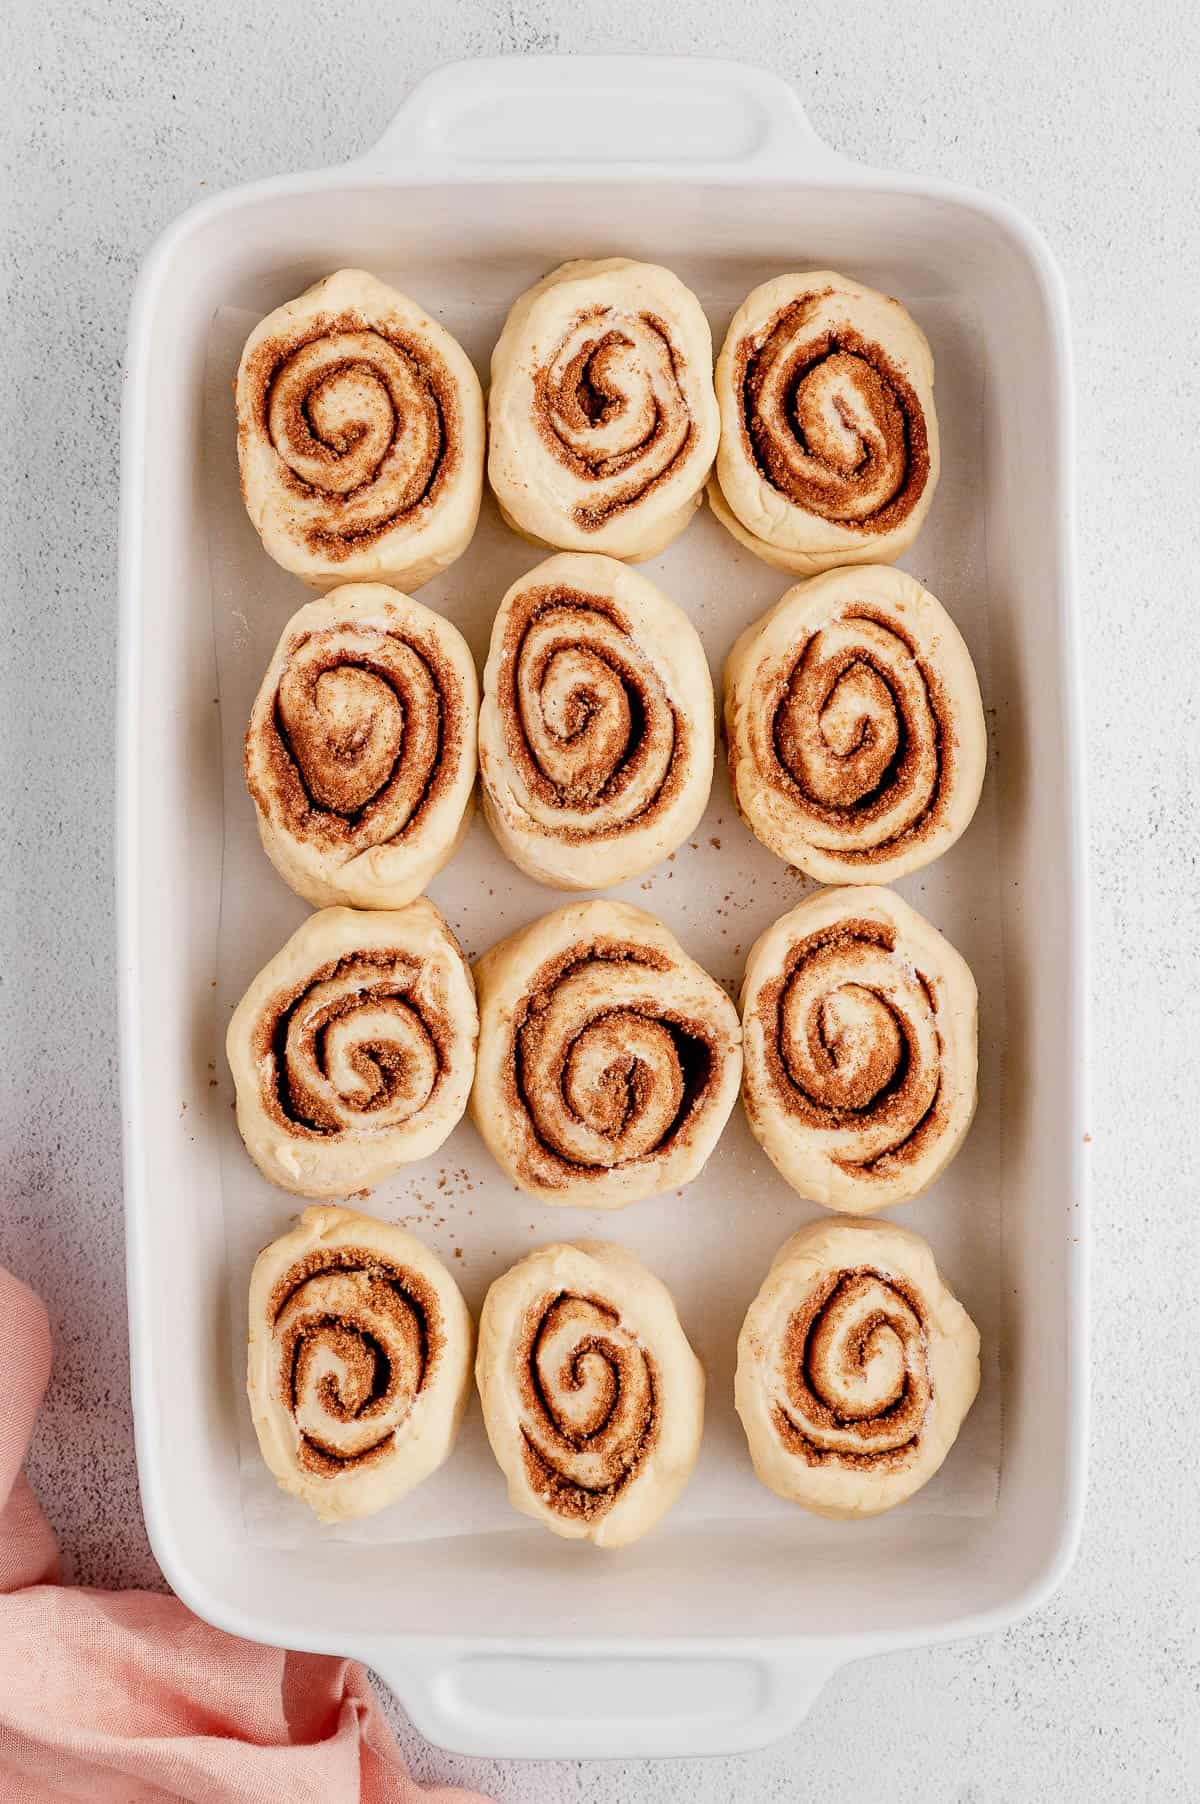
Step 5: Rise and Bake the Cinnamon Rolls
Before you bake them, the cinnamon rolls will need to undergo a third and final rise the next morning:
Third rise: Take your cinnamon rolls out of the fridge and swap the plastic covering for a light dishcloth or towel. Place the rolls in a warm location to rise for an additional 1-2 hours. After this time, your cinnamon rolls should have risen to the point that they’re touching each other in the pan.
Bake: With the oven preheated to 375ºF, bake the cinnamon rolls until they’re lightly golden brown. Once they’re out of the oven, they’ll need to cool for a bit before you frost them.
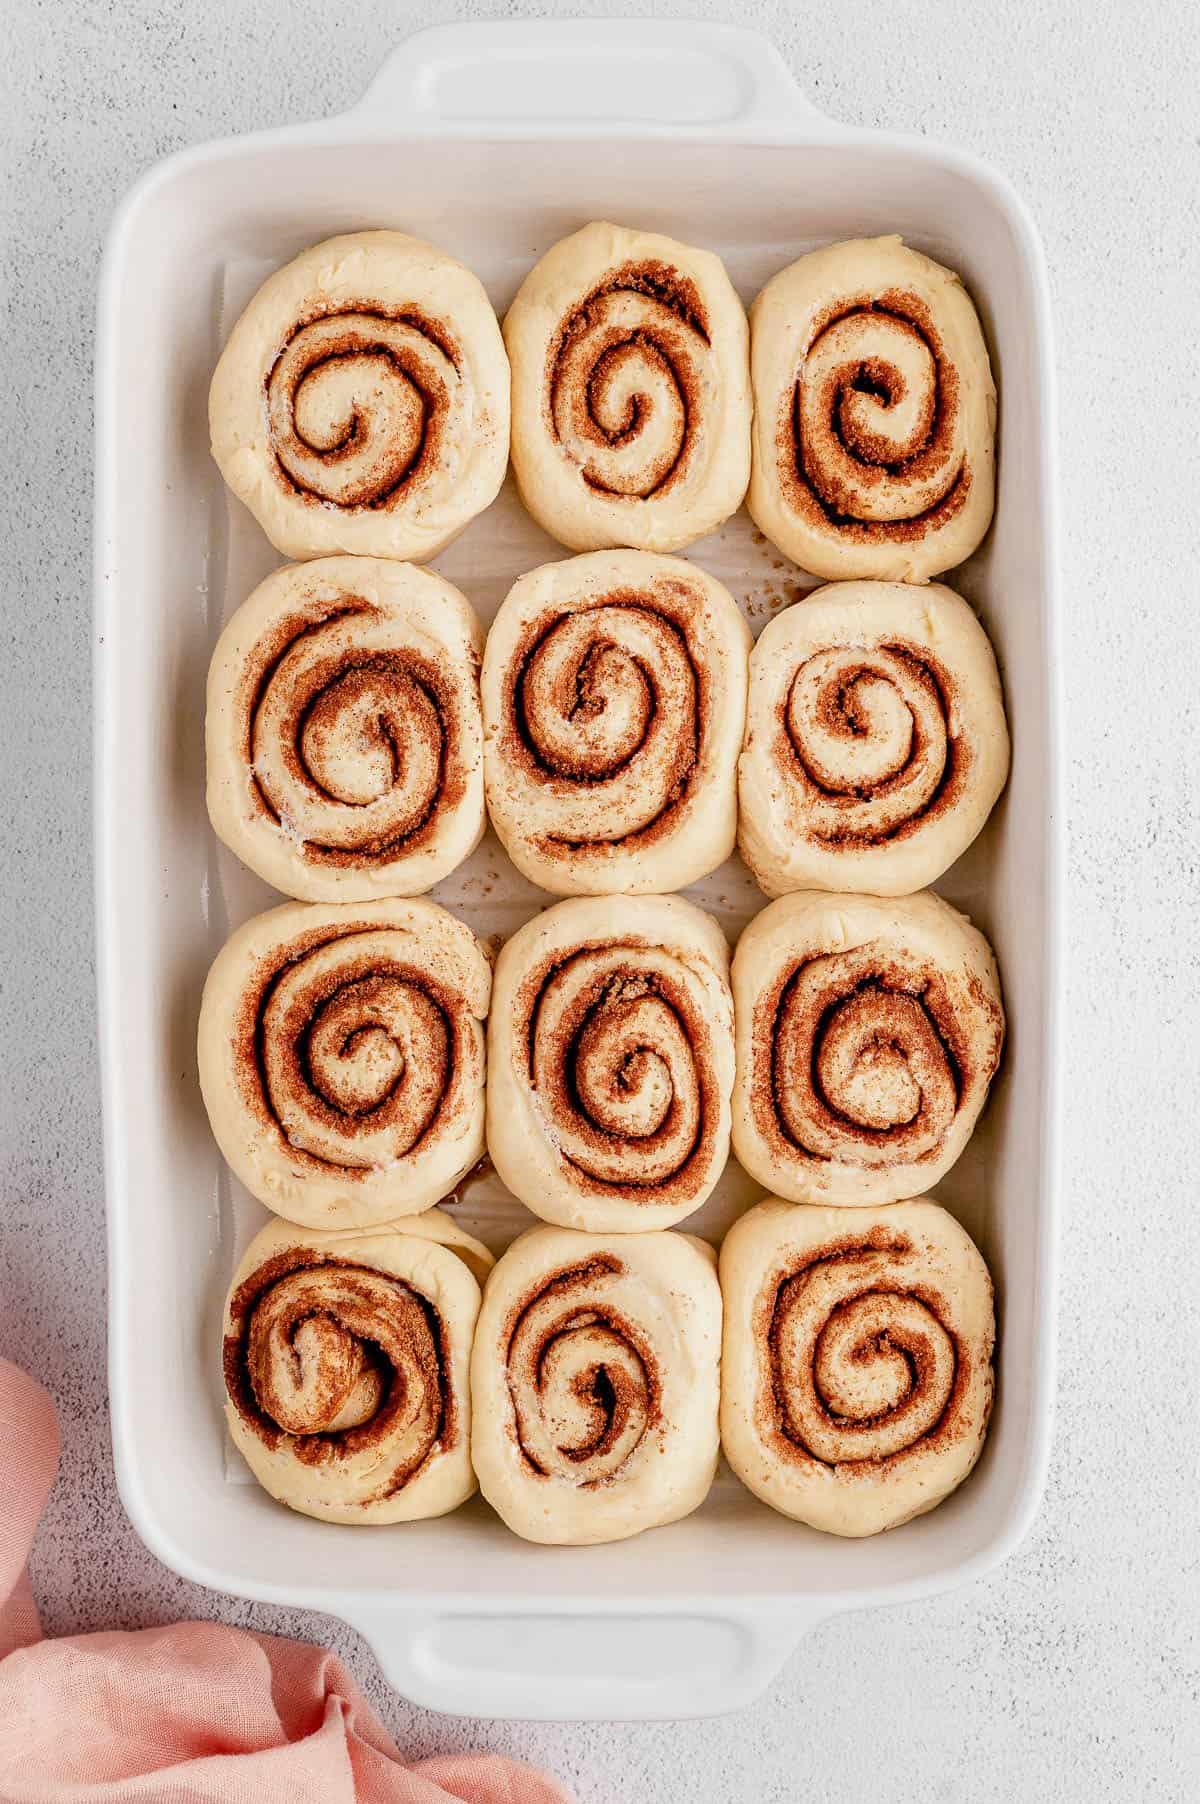
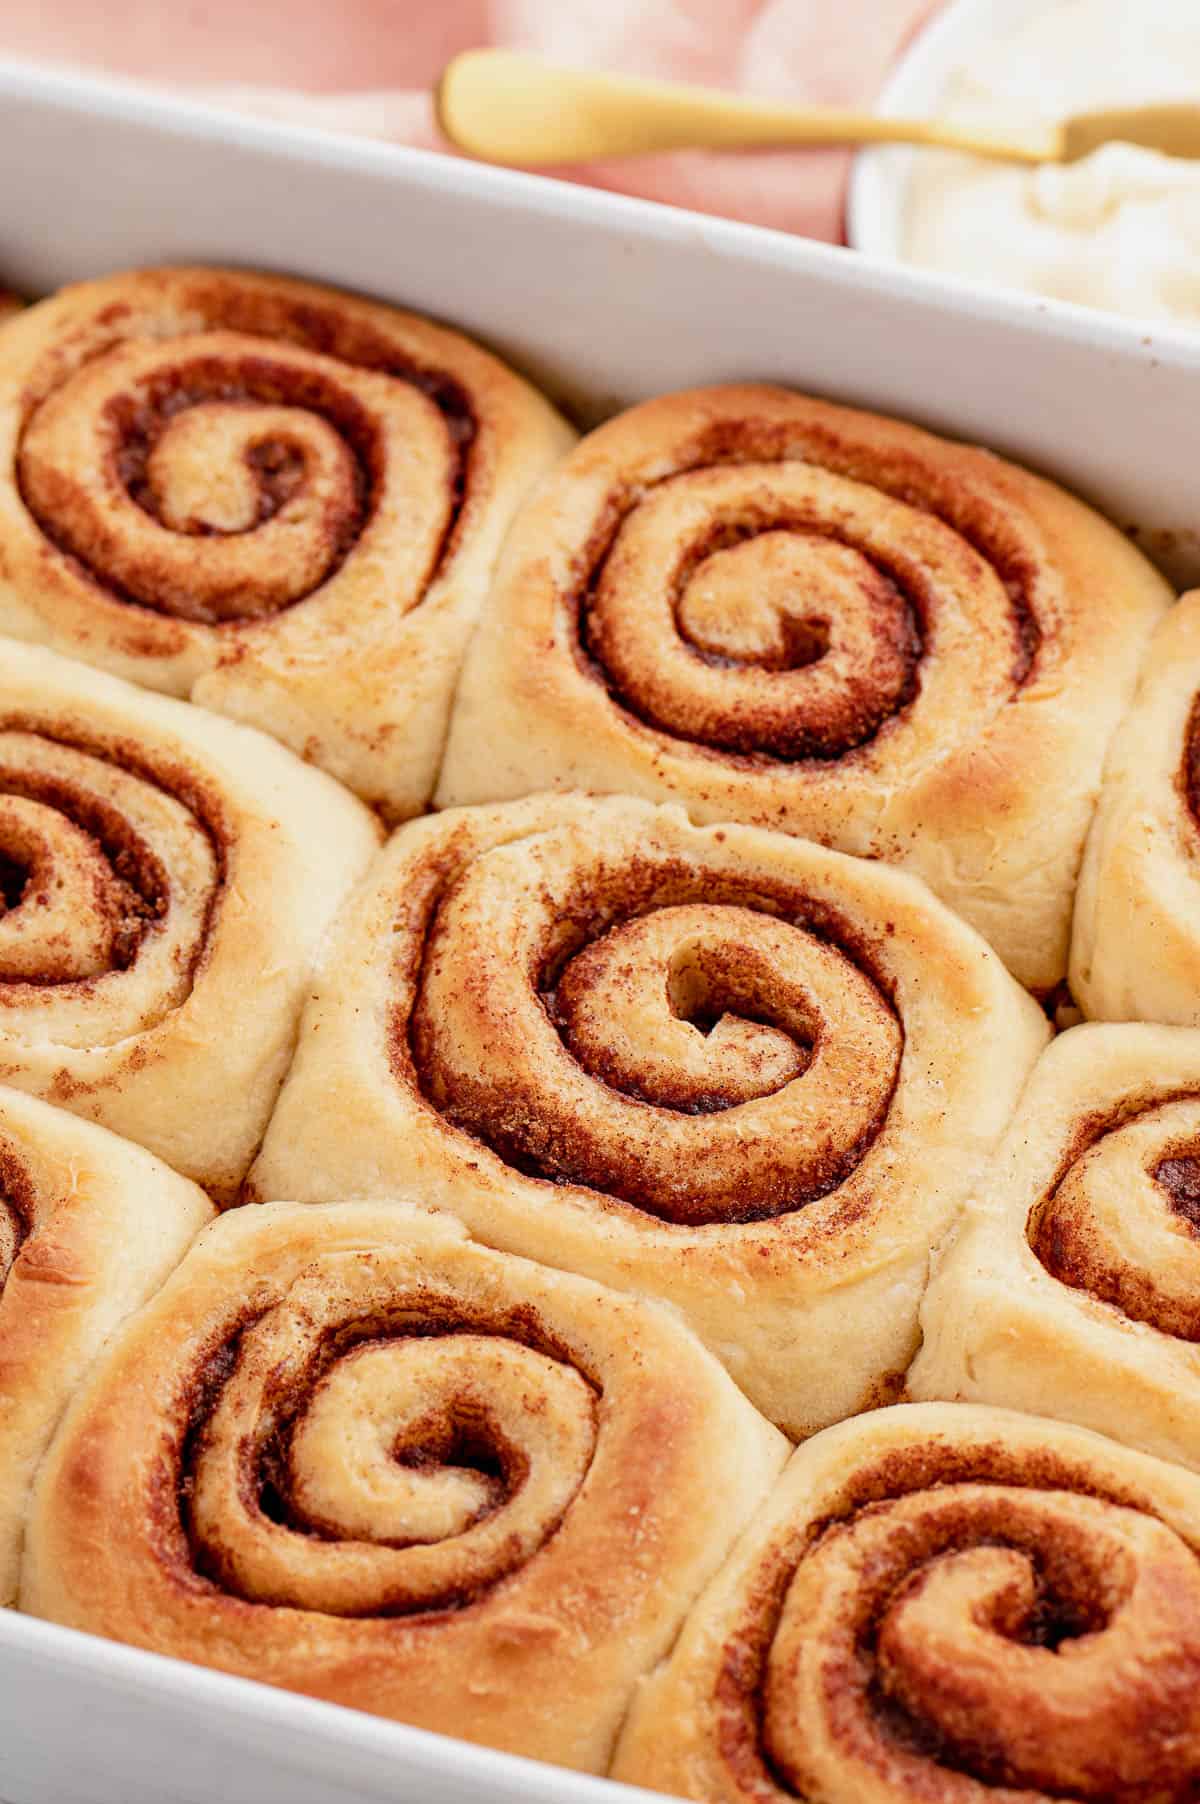
Step 6: Frost and Serve
Once the cinnamon rolls have cooled off a little, it’s time to frost them!
Make the frosting: To make a quick icing, beat together cream cheese, melted butter, milk, and vanilla, then finally add the powdered sugar. Beat until the frosting is smooth and combined.
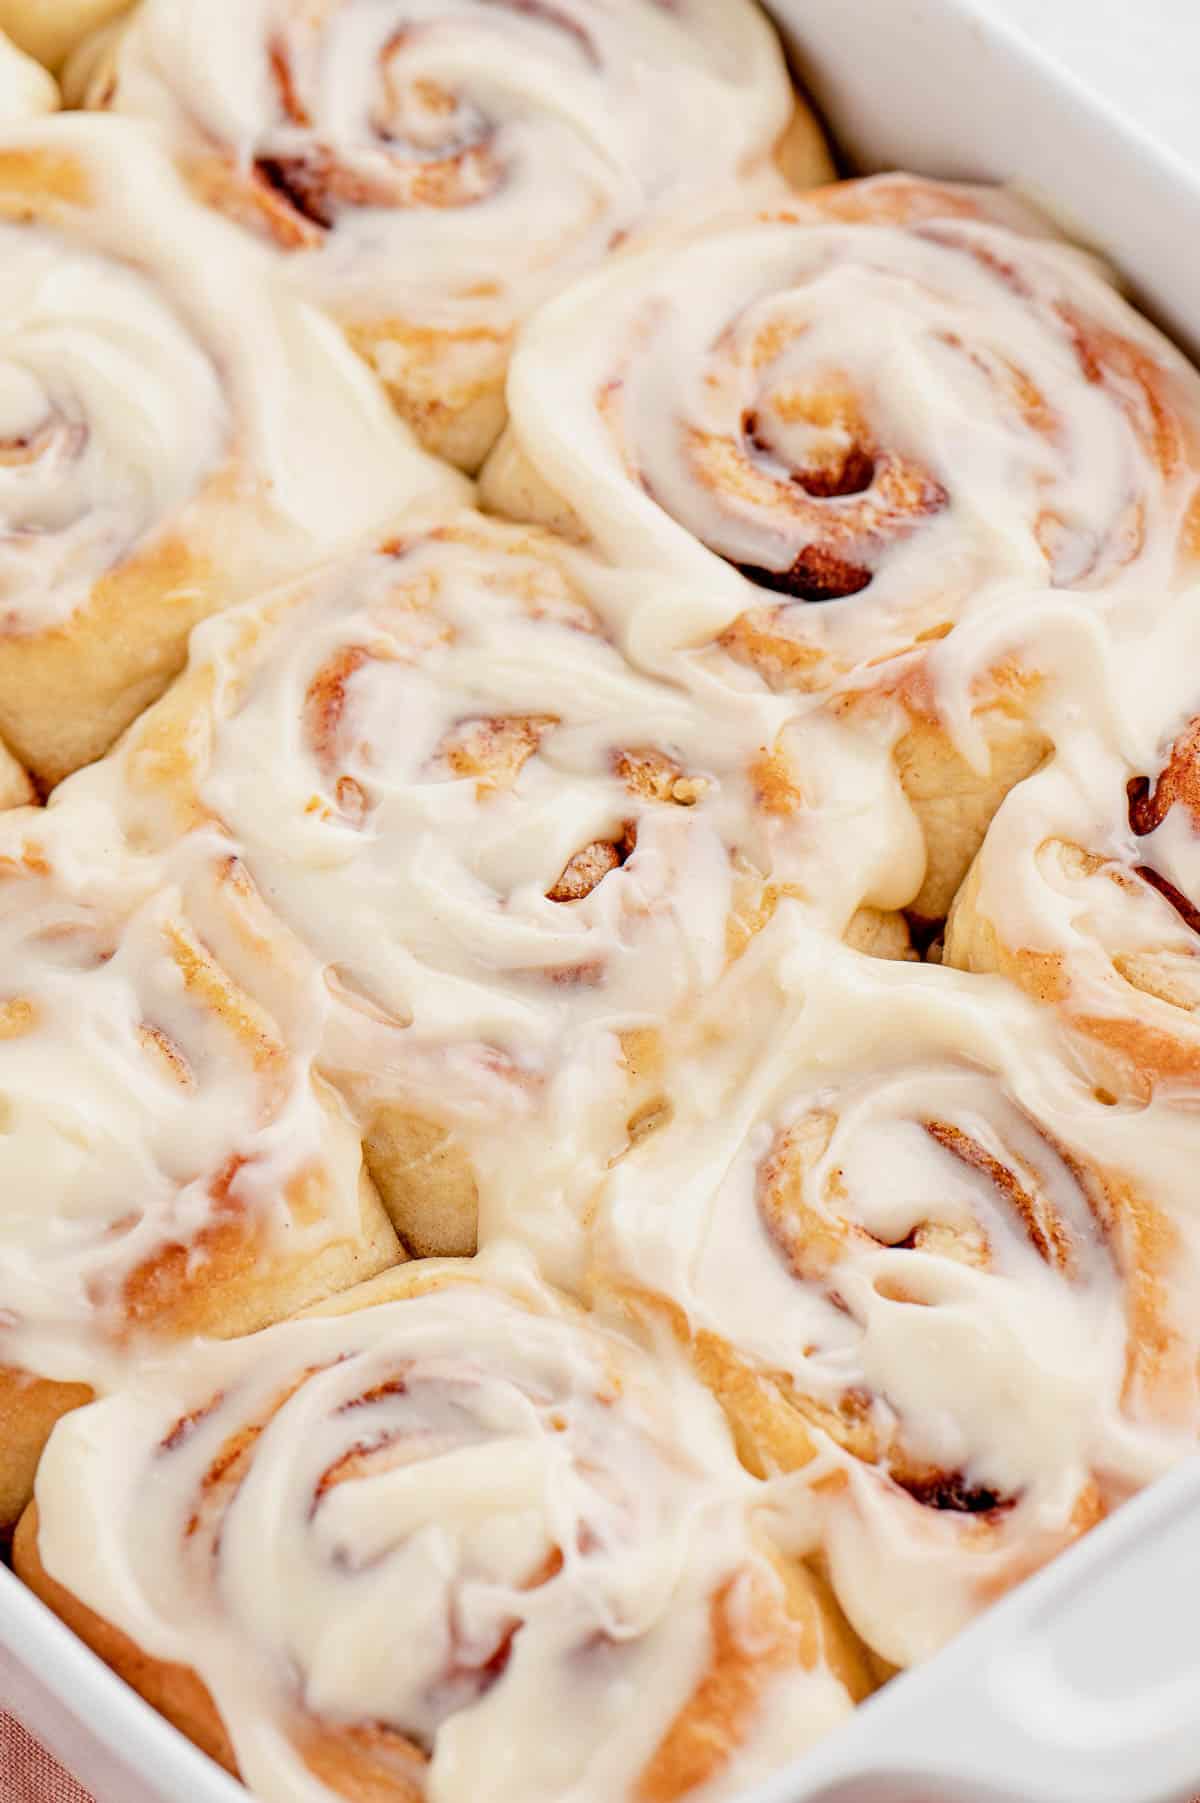
Spread over the rolls: While the rolls are still warm, smother them with a generous layer of cream cheese frosting. Then, they’re ready to serve!
Helpful Recipe Tips
Here are some bonus tips to ensure that your overnight cinnamon rolls come out perfect:
- Use a bench scraper when working more flour into the dough before the second rise. A flexible bench scraper makes it easier, otherwise, use your hand to turn the flour over in the bowl as it picks up the flour.
- Placing the dough inside the oven with the light on will encourage it to rise. During colder months, you can also run the dryer for about 20-30 seconds to get it warm, then place the dough into the dryer to rise.
- Use a glass or ceramic baking dish. The bottoms of the rolls will brown too quickly in a metal baking pan. And don’t forget to grease your baking dish with butter or Crisco! I also like to line mine with parchment paper for easy clean-up.
- Cut the dough with floss. I use floss to cut my dough logs into rolls as I find it makes a cleaner cut. A sharp serrated knife will also work.
- Thicken or thin out the frosting. Depending on how you like your frosting, you can add a spoonful of milk at a time to thin it out. Alternatively, beat in additional spoonfuls of powdered sugar to thicken.
Common Questions
What’s the difference between cinnamon rolls and cinnamon buns?
The truth is, not much! Cinnamon rolls and cinnamon buns are mostly interchangeable. One difference is that some cinnamon bun or sticky buns recipes contain pecans, while traditional cinnamon rolls contain only cinnamon sugar.
How long can I keep unbaked cinnamon rolls in the fridge?
These unbaked make-ahead cinnamon rolls can be kept in the fridge for up to 24 hours. After that, you may find that the filling leaks out.
Serving Suggestions
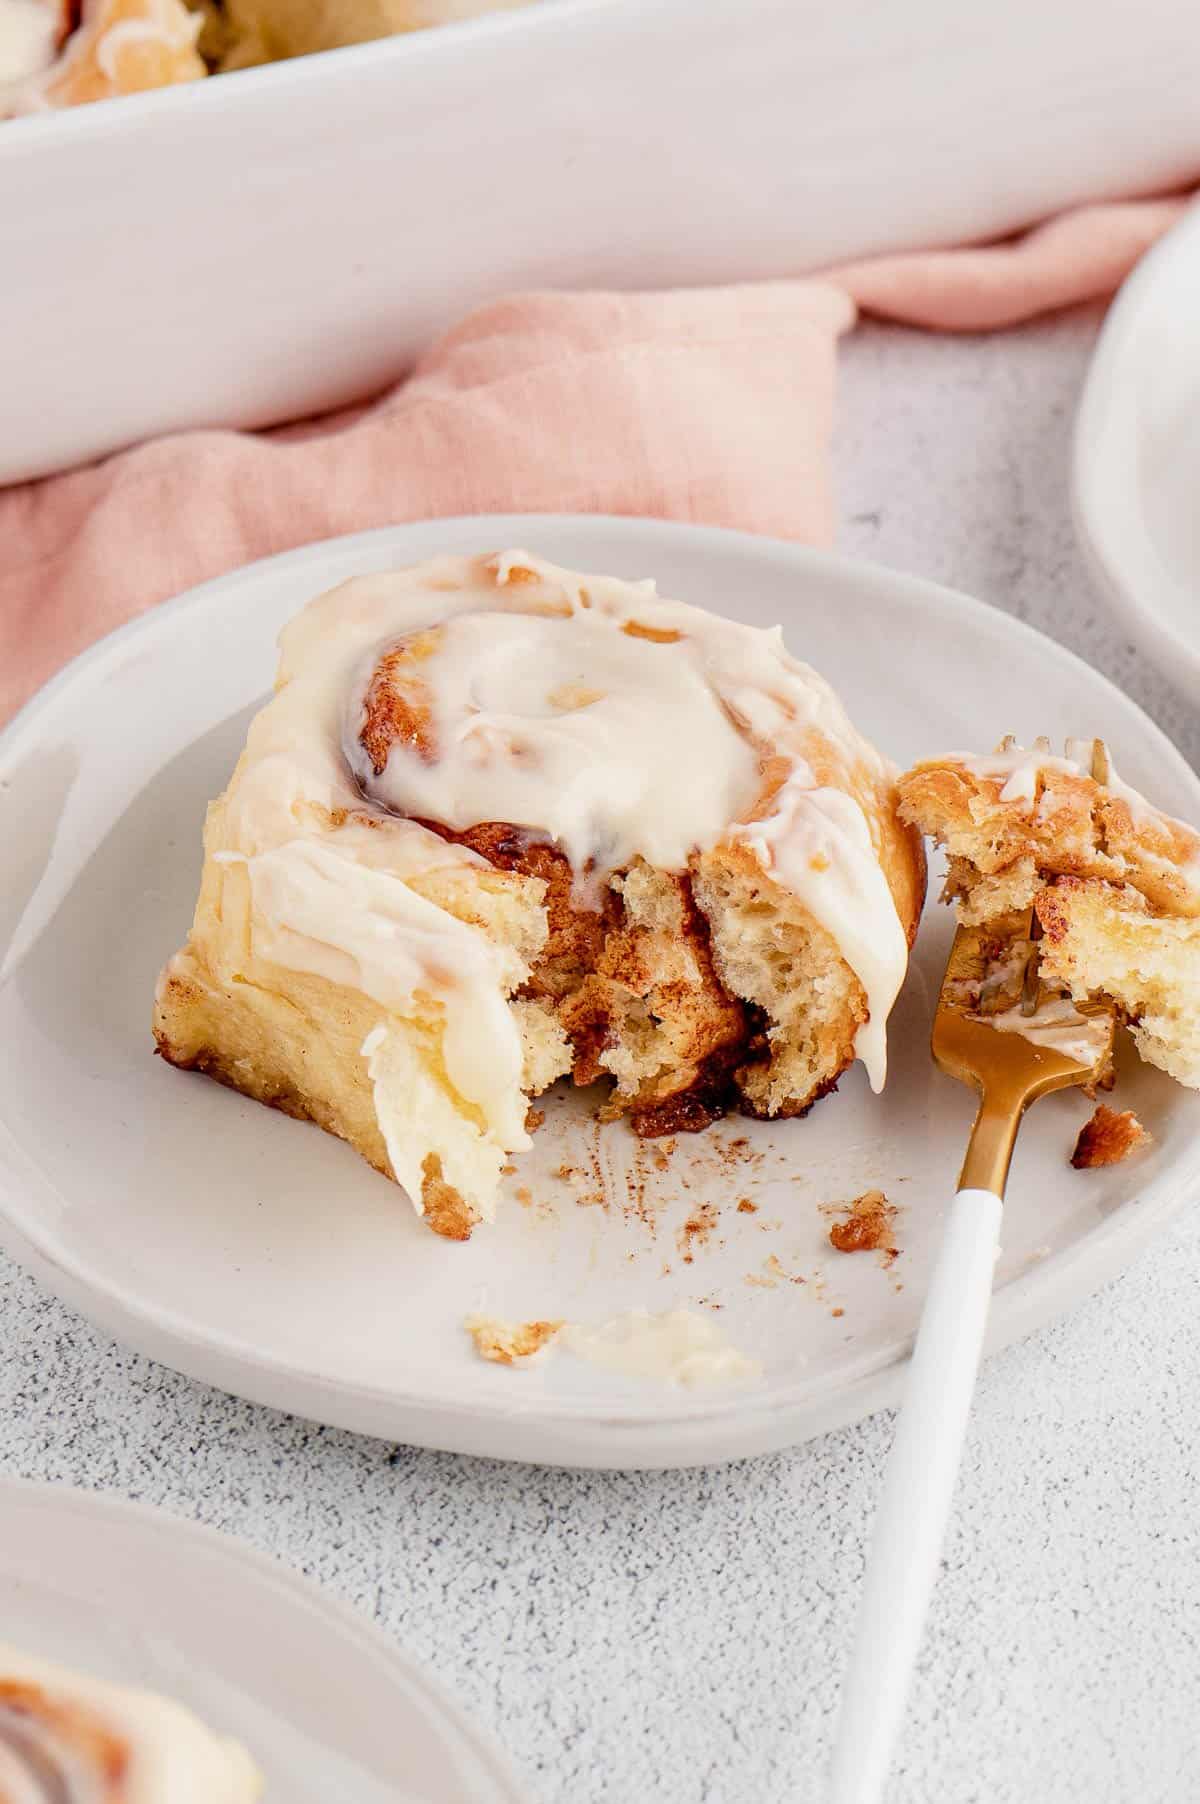
I can’t think of a better combination than Mama Girl’s overnight cinnamon rolls and a cozy, warm cup of coffee in the morning.
These easy overnight cinnamon rolls always make an appearance over the holidays in our house. I love serving fluffy homemade cinnamon rolls for family brunch with bacon and eggs, and other favorites like Crispy Lemon Potatoes and Quiche Florentine.
Of course, no brunch (festive or otherwise) is complete without Prosecco Mimosas!
Storing and Reheating Leftovers
Store these homemade cinnamon rolls airtight at room temperature for up to 2 days. They’ll also last up to 4 days in the fridge.
To reheat, I pop my cinnamon rolls into the microwave for a few seconds until warmed through. If you do plan on having quite a few rolls left over, you should consider leaving the frosting off until you’re ready to serve them. This way the frosting won’t melt off when you go to warm them up!
Can I Freeze Cinnamon Rolls?
I recommend freezing these rolls while they’re still unbaked. Once the rolls are cut and in the pan, wrap them tightly in plastic wrap and freeze them instead of placing them in the fridge overnight. They can be stored frozen for up to 1 month.
Thaw frozen cinnamon rolls in the fridge overnight. Before baking, take the cinnamon rolls out of the fridge to complete the third rise, and then bake and frost as usual.
Print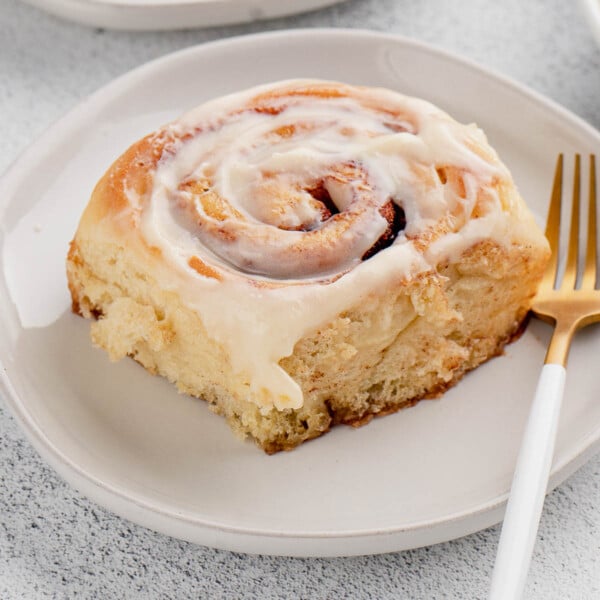
Overnight Cinnamon Roll Recipe
- Prep Time: 20 minutes
- Rise Time: 7 hours
- Cook Time: 20-25 minutes
- Total Time: 0 hours
- Yield: 12 rolls
- Category: Breakfast
- Method: Oven
- Cuisine: American
Description
Fluffy and sweet Overnight Cinnamon Rolls are prepared ahead of time for a less stressful morning! An easy homemade cinnamon rolls recipe with cinnamon sugar and creamy frosting.
Ingredients
First Rise
- 1 cup (236ml) milk (whole milk preferred)
- ½ cup (113g) unsalted butter
- ¼ cup (48g) granulated sugar
- ¼ cup (15ml) lukewarm water (100-110°F)
- 1/4 teaspoon granulated sugar
- 1 tablespoon active dry yeast
- 1 large egg
- 1 ¾ cups (210g) all-purpose flour, sifted
Second Rise
- 1 ¾ cups (210g) all-purpose flour, sifted
- 1/2 teaspoon baking soda
- 1/2 teaspoon baking powder
- 1/2 teaspoon salt
- Additional ½ cup (60g) flour as needed, see notes
Filling
- ½ cup (113g) unsalted butter, at room temperature
- ⅔ cup (147g) light brown sugar
- 2 tablespoons (7.5g) ground cinnamon
Frosting
- ½ cup (113g) full-fat cream cheese, at room temperature
- 2 tablespoons (28g) unsalted butter, melted
- 1 tablespoon (15ml) milk
- 1 teaspoon (5ml) pure vanilla extract
- 1 cup (130g) powdered sugar, sifted
Instructions
First Rise
- In a small saucepan, heat the milk over medium heat just until it starts to bubble. Remove from heat and stir in butter and sugar until both are dissolved. Remove from the stovetop and allow the mixture to cool until it reaches about 110°F or less. The milk mixture can be refrigerated to help speed up the cooling process.
- Microwave the water for 10-15 seconds until it reaches 100-110°F. Stir the sugar and yeast into the water and allow the yeast to activate until the foam grows to 1 cup, about 8-10 minutes.
- Whisk the egg into the milk mixture once it has cooled, and then whisk in the yeast mixture.
- In a medium-sized bowl, combine the flour with the milk mixture. Whisk until the mixture is combined, it will be a thick liquid consistency.
- Cover with plastic wrap and place in a warm place to rise for 1 hour.
Second Rise
- Combine the remaining dry ingredients: 1 3/4 cups flour, baking soda, baking powder, and salt. Add the dry ingredients to the dough and stir until all the flour is incorporated and a ball of dough is formed. If the dough is wet, add additional flour 1 tablespoon at a time. Continue until the dough comes together in one ball and does not stick to the bowl.
- Turn the dough out onto a lightly floured surface and knead the mixture gently until the dough is soft and pliable in one consistent ball. Add additional flour if needed only to prevent the dough from being sticky.
- Place the dough in a large clean bowl, cover it with plastic wrap, and put it in a warm place for three hours until the dough is doubled in size.
- Turn the dough out onto a well-floured surface. Knead the dough back into a large ball, then use your hands to press the dough into a rectangle. Then use a lightly floured rolling pin and roll the dough into a rectangle, about 14×18 inches. It should be at least ¼-inch thick.
For the Filling
- Spread the softened butter onto the dough from edge to edge. Combine the brown sugar and cinnamon in a bowl, and mix to combine. Pour the sugar mixture over the butter and press into the butter. Leave at least ½ -inch of the buttered dough uncovered with sugar on one of the long edges. This is the side you’ll use the seal the log after it’s rolled.
- Tightly roll the dough along the longer edge to form a log, and use the buttered edge to pinch it closed. Use a sharp knife or floss to cut the rolls into 12 even rolls.
- Place the rolls in a well-greased (or parchment paper lined) 9×13 inch pan. Cover with plastic wrap and refrigerate overnight.
3rd Rise and Bake
- Remove the cinnamon rolls from the refrigerator, remove the plastic and cover with a lightweight towel. Let it rise for 1-2 hours in a warm place. After rising, the dough should be touching from one roll to another in the pan.
- Preheat the oven to 375∞F. Bake for 20-24 minutes until the tops are lightly browned. Remove from the oven and cool for 10 minutes, then add the frosting.
For the Frosting
- Beat the softened cream cheese until it’s free of lumps. Then add the melted butter, milk, and vanilla extract and mix until combined. Next, add the powder sugar and beat until combined. If you prefer a thicker frosting, add additional powdered sugar 2 tablespoons at a time. To make it thinner, add additional milk 1-2 teaspoons at a time. Frost the rolls while they’re still warm.
Notes
Dough tips:
- For 1 tablespoon of yeast, you’ll need 2 individual packets (2 1/4 tsp size)
- A good active yeast will foam up to around 1 cup of foam within 8-10 minutes.
- Leave at least ½ -inch of the buttered dough uncovered with sugar on one of the long edges will help to seal the dough when it’s wrapped
- To help facilitate rising the dough, you can place the dough in the oven with the oven light on. Or try running your dryer for 15-30 seconds, and then place the dough in the dryer. These warm environments help the dough to rise, especially in the colder months.
More Helpful Tips
- Storing: Store leftover rolls in an airtight container at room temperature for 2 days or in the refrigerator for 4 days. Reheat in the microwave for 15-20 seconds. If you are planning for leftovers, I recommend not frosting them and instead adding the frosting to warm rolls after reheating.
- The best pans to use: I recommend using a glass or ceramic baking dish, as a metal baking dish will cause the bottoms of the rolls to brown much faster.
- Preparing the pan: Baking dishes should be greased with butter or shortening. Lining the pan with parchment paper is my preferred method, it makes the clean-up super easy.
- Cutting the rolls: It is easiest to cut the dough with a sharp serrated knife or floss.
- Why slice them before refrigerating? I tested this recipe overnight after rolling and slicing the dough, and before rolling out the dough entirely. I found that preparing the rolls and slicing them, then refrigerating not only produced a lighter and fluffier roll, but it significantly cuts down on the prep time the next morning.
Nutrition
- Serving Size: 1 Roll
- Calories: 443
- Sugar: 26.5 g
- Sodium: 202.5 mg
- Fat: 22.1 g
- Carbohydrates: 56.3 g
- Fiber: 2 g
- Protein: 6.2 g
- Cholesterol: 73.1 mg





I’m going to make them. Yummy
Let us know how it goes!
I love this recipe it turned out delicious and it was so easy to make, thank you so much!!!
Awesome Brake, thank you so much for tackling this recipe and sharing your feedback!
I made these last night, very easy to put together. These rolls were wonderful, my entire family loved them. This is a keeper! Thank you for sharing this recipe.
Thank you so much Teresa! That means so much to me!
Hi! I *love* your blog and have made many of your recipes, all with great results! I really, really want to make these for my Husband! I did notice that the link you posted for the icing, no longer works. I know it’s been a while since you originally posted this recipe, but wondered if you still have the recipe information for the icing?! I would love to make them exactly as you do!
Thanks in advance!
Hi Amanda. Thank you SO much for your feedback. I am very thankful that you keep coming back! It looks like the link might have been broken but it is email active! I hope you enjoy!
http://www.theslowroasteditalian.com/2013/11/cinnabon-cinnamon-rolls-copycat-recipe.html
Hello. When we get it out of the refrigerator, do we need to let it sit for a while or we can just start working with it straight away?
Great recipe.
Hi Hala! Yes, you can start working with the dough right when you take it out of the fridge. If you find the dough is retracting a lot, let it rest for five or so minutes before working again. Thank you and have a wonderful day!
These look amazing!!!! I am in the process of making them now!!!!! 🙂 Could you tell me how many cinnamon rolls you cut it into, or about how big of a rectangle you roll out?
Hi Brienne- Sorry for the delay! I cut them about 1.5″ thick because I like a big cinnamon roll. For the rectangle, I roll it out until it is about 1/4″ thick. I do not want it to be too thin.
I usually am too tempted to just pull out the tube of cinnamon rolls from the fridge but I may have to try these instead! I’m all about fresh foods!
You for certain have made your mamagirl proud! I am seriously falling love with these cinnamon rolls!
Those rolls are insane looking! I am seriously drooling over how soft and fluffy and perfect they look. And that melty frosting on top…girl, you did this recipe proud!!!! I love recipes that have been handed down from family members like this!!!
These are so lovely! I adore recipes that are passed down like these. I can’t wait to try them!
OH my goodness that is so fun! I wish we had recipes that passed down generation to generation like that. This rolls look delicious Julianne and love how special they are in your family! 🙂 Pinned
I have a friend who is crazy about cinnamon rolls! I am going to share this recipe with her – YUM!
Did you know your recipe is formated twice? Cinnamon rolls are my all-time most favorite thing. I love all different recipes, shapes sizes, flavors and your’s have me drooling!!!! Pinned and stumbled
Hi Paula! I did not, thank you. This is so weird, it was not like this the past couple of days. Thanks for letting me know!
4th Generation to make these…then they are terrific! Beautiful and would love one with a steaming hot cup of coffee.
These are amazing! Handed-down recipes are the best, especially when they’re cinnamon rolls. I think you’ve none Mamagirl proud!
I love that these have been passed down and I LOVE cinnamon rolls. Bring me one in a couple weeks? Pretty please? They look awesome!
Your photos turned out stunning! You totally need to show me your tricks!
Love cinnamon rolls. And we too have them every Christmas morning. Total tradition now.
Pinned.
Happy Valentine’s Day friend!
If there’s any best way to start a holiday or birthday, this is it! That’s a great story, too, about the recipe being passed down through generations. I love it, Julianne! And these look amazing.