These Monster Jam playdough kits are easy to make with homemade playdough! I share my easy playdough recipe and how to customize these sets for each Monster Jam character. They make great party favors for a Monster Truck fan’s birthday.
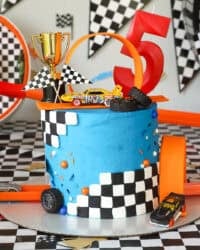
If your kids are also obsessed with all things trucks, cars, and construction, you might also like this DIY Hot Wheels cake and my racing party favors, too.

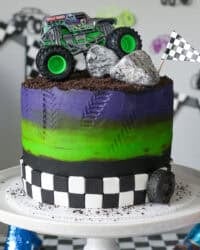
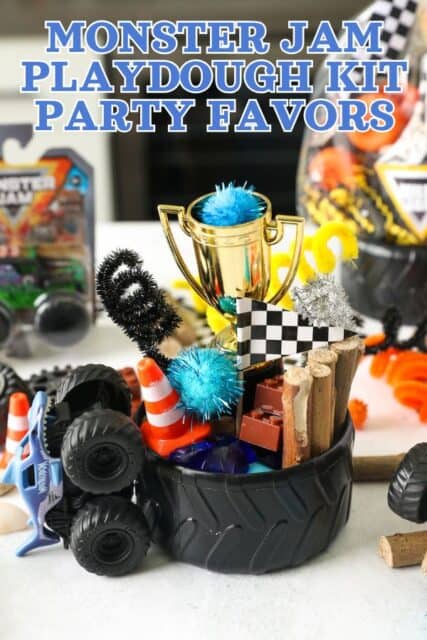
My two boys are completely obsessed with Monster Jam. Monster trucks are part of playtime all day, every day. After I made a Monster Jam cake for my son’s Gravedigger birthday party, I was inspired to make these fun monster truck playdough kits that double as party favors.
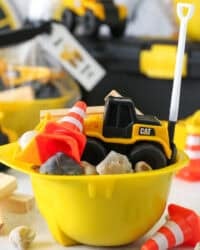
I love sourcing party supplies, and when I found the large tire bowls (pictured above), I knew they would be PERFECT for playkits of some kind. I opted for playdough so I could make it myself and customize the colors to match the Monster Jam trucks. If you’d prefer to make these kits with kinetic sand (like my construction-themed party favors), my advice is to wait for sales like BOGO 50% off for the best price.
Buckle Up, We’re Making Monster Truck Play-Dough Sets!
- Budget-friendly party favors. I’ve previously made sensory kits with kinetic sand (linked earlier), and playdough is an inexpensive alternative, especially when you make it yourself. These kits make wonderful Monster Jam party favors for a monster truck birthday.
- Made from scratch. I include my easy playdough recipe that kids love! It’s soft, squishy, and lasts for months when you store it airtight. I share the playdough-making tips I picked up along the way, plus how I customized the colors to match these Monster Jam-themed kits.
- Customize for each truck. I made a few different versions of these playdough sets, and I’ve included the tools, toys, and packaging options the viral Dollar Tree 1:72 scale Monster Trucks, including Megalodon, Dragon, Monster Mutt and more. It’s easy to adapt the play kits for different ages and themes.

DIY Playdough Recipe
You can absolutely make these kits with store-bought playdough, but homemade is cost-effective and easy. To make homemade playdough, you’ll need:
- Boiling Water– I just heat it up in the microwave for about 90 seconds.
- All-Purpose Flour – I don’t recommend substituting other types of flour here (I haven’t tested this recipe with alternatives. If you do, let me know in the comments!)
- Salt – For the salt, you’ll want to use a very fine grain, like iodized table salt. Coarse salt will give the dough a grainy texture.
- Cream of Tartar – The combination of cream of tartar and oil makes the dough incredibly soft and eliminates any dryness.
- Vegetable Oil – Choose a neutral oil, like canola.
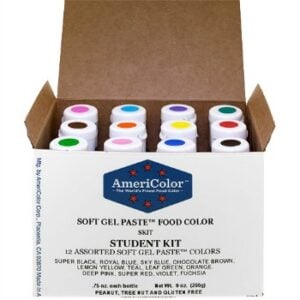
- Food Coloring – Your choice of food colors. Gel food dyes (like you’d use to color buttercream) are the best for coloring playdough. See below.
The Best Colors to Use
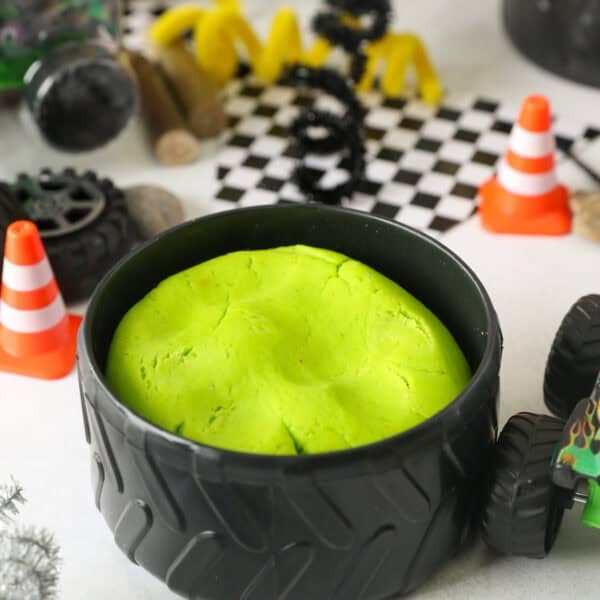
For bright and vibrant playdough colors, I recommend using food gel colors (which are also non-toxic). You can purchase individual colors as needed from Amazon or stores like Hobby Lobby or Michaels. This Electric Green color is perfect for a Gravedigger-themed kit. You can find my full list of recommended gel colors on Amazon.
If you don’t want to customize the colors to match the Monster Trucks, I’d suggest coloring the playdough brown. It’ll look like dirt!

How to Make Playdough
This playdough recipe worked out so well in these party favors! It’s also great for everyday play. Make it in about 20 minutes following the steps below:
- Heat the water. First, heat water in a microwave-safe glass for 60-90 seconds, until it’s boiling. You could also do this on the stovetop. Stir in the food coloring.
Julianne’s Tip For Coloring Playdough
Mix the gel colors with boiling water for the best results when incorporating color into the dough. You can always add a little bit more color to the dough as it’s mixing afterward, but I’ve found it works best to color the water beforehand.
- Combine the dough ingredients. Next, add the dry playdough ingredients to a stand mixer fitted with the paddle attachment. Beat on medium speed while streaming in the colored boiling water. Then, add the oil.
- Beat for 10 minutes. Continue mixing as the dough comes together. Beat at medium to medium-high speed for another 10 minutes. Adjust the consistency as you go: Add more water if the dough seems dry, or more flour if the dough seems wet or slimy.
- Cool and store. Mix until the playdough has a soft, pliable consistency (it’s fine if it’s a little oily, as this will settle as it sits). Finally, leave it to cool to room temperature before storing it in a container with a tight-fitting lid.
The Secret to Soft Playdough
I must have tried half a dozen playdough recipes from across the internet and spent a few hours combing forums for tricks to keep the playdough soft but also pliable so it wouldn’t crumble. One way to achieve the best texture is to mix the dough in a stand mixer for an extended period of time. This helps the gluten in the flour develop and bond, similar to if you were making bread dough.
How to Store It
Homemade playdough can be made in advance and kept in an airtight container at room temperature. Refrigerating can help extend the shelf life and keep the dough soft for longer. Properly stored, playdough lasts for 2-3 months in the fridge.

Monster Jam Playdough Kit Accessories
You don’t need to go all out and buy everything on the list below, but I’ve included some notes to serve as inspiration when planning your kits. These are the supplies I used:
- Homemade Playdough – The recipe above makes enough playdough for 6 play kits. Feel free to double or scale the recipe for the number of kits you need. You could also use kinetic sand in these kits.
- Tire Bowls – I found these large tire bowls that are the perfect size for party favors. They are sold as ice cream bowls but are great for play kits, too!
- Mini Plastic Tires – I’ll admit, the quality of these mini tires isn’t great. However, it’s perfect for a playkit.
- Mini Traffic Cones – I love these mini orange cones for sensory kits. I used them for my son’s Construction birthday cake and party favors as well.
- Mini Flags – These mini checkered flags are cupcake toppers from Hobby Lobby! Amazon also has a ton of options.
- Mini Logs – I use these mini wood logs. You’ll find lots of available options on Amazon in similar price ranges.
- Mini Trophies – You can purchase toy trophies from Walmart, Target, or Hobby Lobby.
- Pipe Cleaners and Pom Poms – You’ll find these at Hobby Lobby, Dollar Tree, or any craft store. These are great options for customizing the kits (see my note below).
- Toy Monster Trucks – I use the 1:72 Scale Monster Jam trucks from Dollar Tree. If you need a large quantity, I recommend ordering a case online. It’s free to ship to a store, but it does take a while to arrive. Plan accordingly!
- Gemstones or Rocks – Grab a bag from Dollar Tree. You may find other colors available at Hobby Lobby or Michaels as well.
- Lego – I throw in a few mini Legos from Dollar Tree, to make backflip ramps or jumps. They sell these in a variety of colors as well.
Customize For Each Monster Truck
If you want to customize your playdough kits by truck, it’s easy to do that with colored gemstones, pipe cleaners, and pom poms. Simply pick colors that suit each truck, like electric green and black for Gravedigger, orange for El Toro Loco and Dragon, etc. Otherwise, black, yellow, and silver are great for general Monster Jam colors, so I incorporated though colors as well.


Playdough Kit Assembly
I used 6 ounces of homemade playdough per kit. One batch of dough made enough for 6 kits. The instructions below are more of a guideline, and you can customize your party favors in whichever way works for you and the items you’ve chosen for the kits.
- Start with the playdough. First, place 6 ounces of colored dough in the bottom of the tire.
- Add larger items first. Place larger items, like the trophy and logs, on top of the playdough. Then, add smaller pieces, like rocks and Legos.
- Next, add the smaller items. Add a traffic cone and toy tire, and fill in the kits with pom poms. Place a flag on top of each kit. You may have to move things around once you put the kits in the bag. To add the pipe cleaners, I leave one end straight and stick them in the back of the bowl, standing up, after I put it in the bag.
- Add a Monster Truck to each kit. To place the truck, you can stand it up on the side once it’s in the bag.
- Wrap it up. To package it up, I mixed some yellow and black crinkle paper in the bottom, and then I used the twist ties that came with the bags to keep them tight. Wrap first with the yellow ribbon and then the checkered ribbon. Place the sticker onto the kit last. See my party favor packaging details below.
Julianne’s Tip For Preventing Dry Playdough
: If you are going to go with the cello favor bags, then you’ll want to use a snack size Ziploc bag to keep the playdough airtight. Please the bag seam side down, and then you can still layer everything on top. Portion out the dough ahead of time for a quicker assembly.


Packaging Ideas
- Custom Stickers – I ordered this template and then printed it with my Cricut on sticker paper. You can order large printed stickers as well.
- Clear Cello Favor Bag – These cellophane bags are the perfect size, and they’re pleated so they fit the truck and tire inside.
- Plastic Jars – I found these 16-ounce jars that are great for keeping the playdough airtight. They fit most of the items apart from the trophies, which I attach separately.
- Crinkle Paper – Dollar Tree and Hobby Lobby are the best bet, and you’ll find plenty of colors available on Amazon. Crickle paper isn’t necessary, but it’s a good way to prop up the truck.
- Checkered Tape – Hobby Lobby also sells this, or you can get checkered duct tape on Amazon.
- Checkered Ribbon – I prefer the satin quality from Hobby Lobby, but I’ve also seen it at Michaels.

I hope you have as much fun putting together these Monster Jam party favors as I did!
More Kids’ Birthday Party Ideas
- Construction Cake
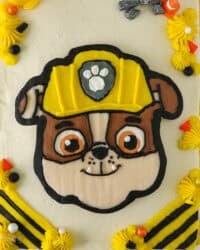
- Rubble Paw Patrol Cake
- Dinosaur Cake
- Elmo Cupcakes
- Cookie Monster Smash Cake
- Cookie Monster Cupcakes
Homemade Playdough
- Prep Time: 20 minutes
- Total Time: 20 minutes
- Category: Tutorial
- Method: Microwave
Description
This easy playdough recipe makes brightly colored, soft, and squishy homemade playdough from common household ingredients! It’s perfect for play kits and DIY party favors.
Ingredients
- 1 cup boiling water
- 2 ½ cups all-purpose flour
- ½ cup table salt (finely ground)
- 2 tablespoons cream of tartar
- 3 tablespoons vegetable oil
- Food coloring of choice
Instructions
- Heat the water in a microwave-safe glass until it’s boiling, around 60-90 seconds. Mix the food coloring together with the water.
- In a stand mixer bowl, combine the dry ingredients. Using the paddle attachment, turn the mixer to medium speed, stream in the boiling water, then add the oil. Once the mixture has combined into a dough, continue mixing at medium to medium-high speed for an additional 10 minutes. If the dough seems dry, add additional water 1 teaspoon at a time. If the dough is wet or slimy, add additional flour one tablespoon at a time.
- Playdough consistency should be soft and pliable, slightly oily (this will settle as it sits). Let the playdough cool down before storing in an airtight container.
Notes
- Playdough can be made in advance, at kept in an airtight container.
- For the salt, you want to use a very fine grain, like an iodized table salt. Any type of coarse salt results in a grainy texture in the dough.
- For bright and vibrant colors, I recommend using food gel colors. You can purchase individual colors as needed from Amazon or stores like Hobby Lobby or Michaels.