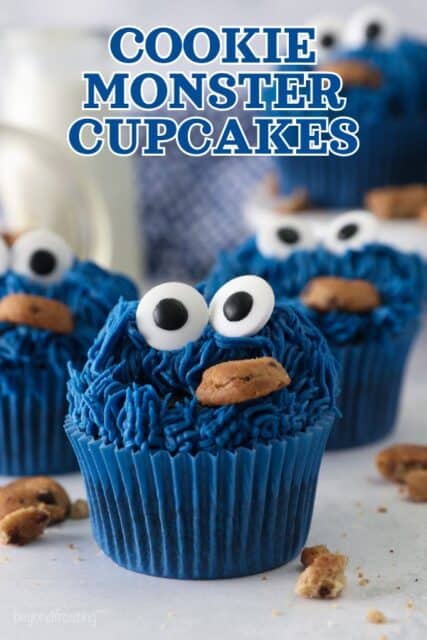
Follow this quick and easy tutorial to make fun Cookie Monster cupcakes from scratch. Use your favorite cupcake recipe, a batch of bright blue buttercream, and the easiest decorating technique.
Once upon a time, I made a Cookie Monster cake for my son’s first birthday. I followed that up with my Cookie Monster cookies, and now these easy Cookie Monster cupcakes!

Easy Cookie Monster Cupcakes for Beginners
If you haven’t guessed, we are huge Cookie Monster fans in our house. It was even my son’s first Halloween costume. As someone who gobbles cookies regularly, I feel like the Cookie Monster was always the most relatable Sesame Street character.
I made these Cookie Monster cupcakes recently and I’m super pleased with how cute and fun they turned out! I used my favorite homemade chocolate cupcakes and a big batch of vanilla buttercream. There are no fancy tools (except one piping tip!) or techniques needed, and I’ll walk you through how to make them step-by-step.
Reasons to Love These Cookie Monster Cupcakes
- Simple technique. Even if you’re just starting out using piping bags and piping tips, you’ll have loads of fun making and decorating these Cookie Monster cupcakes. The technique is very easy, and I’ll share my tips and tricks along the way.
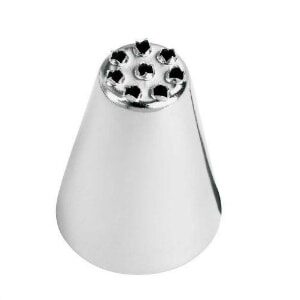
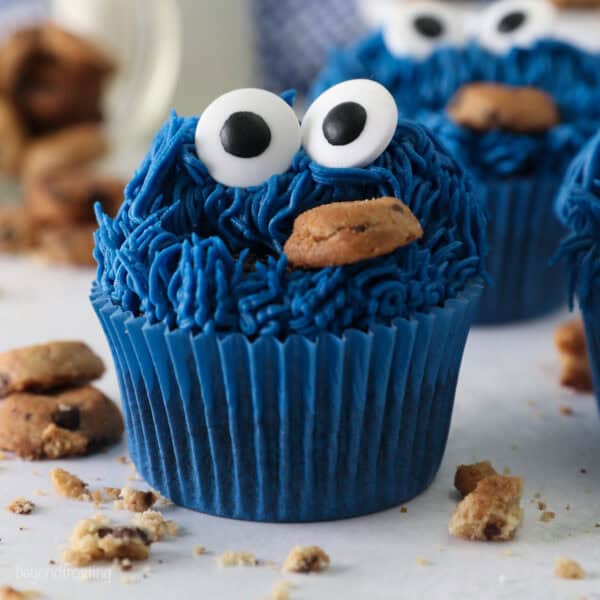
- Just like the TV character. I think these Cookie Monster cupcakes nailed the likeness, don’t you? Right down to the mini chocolate chip cookies in mid-bite. Gel food dyes are the secret to the cupcakes’ bright blue coloring, and a grass piping tip worked perfectly for the fur.
- Great for parties. These are perfect for a Cookie Monster birthday party, especially if you’re serving younger kids.

What You’ll Need
This is a quick overview with some notes on what you’ll need to make adorable Cookie Monster cupcakes like the ones pictured. Scroll down to the recipe card after the post, where I’ve included the full recipes for my cupcakes and frosting, along with the printable tutorial and instructions.
- Cupcakes – For this tutorial, I include the recipe for my easy chocolate cupcakes (I also have a gluten-free version). I included a few more options below. I found the perfect Cookie Monster blue grease-free cupcake liners from Shop Sweet Treats. I love their liners because the color holds up when baking.
- Frosting – I use my classic vanilla buttercream frosting recipe. It makes rich, stable buttercream that’s ideal for coloring and piping. All you need is cold unsalted butter, powdered sugar, a splash of heavy cream, and vanilla. For a less sweet option, I used this mascarpone whipped cream for my cookie monster cake.
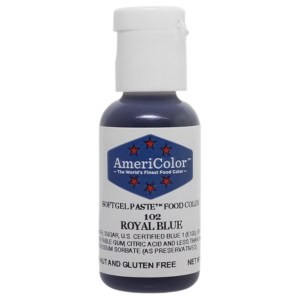
- Gel Colors – Concentrated gel food dyes, like AmeriColor or Wilton, yield the most vibrant colors without thinning out the frosting (compared to liquid-based food coloring, like you find in grocery stores). See below for more.
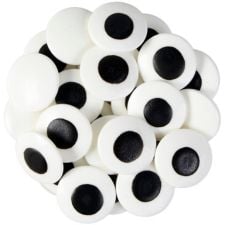
- Candy Eyes – I love these large candy googly eyes. You could also use M&Ms, or pipe the eyes on using white frosting and black gel icing.
- Mini Chocolate Chip Cookies – I use mini Chips Ahoy cookies. You could also use the standard-size cookies and cut or break them in half.
Not a Fan of Chocolate? Try These Cupcakes Instead
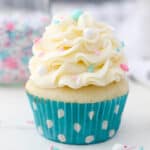


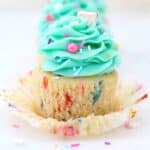
If you’d prefer to decorate a different cupcake using the techniques in this Cookie Monster tutorial, feel free to use your favorite recipe, or you can try any of the homemade cupcakes from my site. These are just a few ideas. And if you really want to take your cookie monsters to the next level, try adding a cupcake filling, like these chocolate ganache cupcakes. Or, fill the center of the cupcake with edible cookie dough after baking!

Vanilla Buttercream – What You Need to Know
Once you have a batch of cupcakes baked and cooled to room temperature, you’ll need to prepare and color the blue buttercream frosting for decorating.
My recipe uses cold butter, not room-temperature butter. This is key to getting the right consistency.
- Beat the butter. Start by beating cold, cubed butter for 5-7 minutes to get it light and fluffy. Cold butter takes a bit longer to soften, but it helps create a fluffier, airier frosting. Do not rush this step and scrape down the bowl as needed.
- Add powdered sugar. Next, gradually add powdered sugar 1 cup at a time, alternating with the vanilla and heavy cream. Beat the frosting for 1-2 minutes in between adding more sugar.
- Give it a final whip. After all the sugar has been added, add the color to the frosting. A little goes a long way here, so start with a couple of drops (around 1/2 a teaspoon) and add more as needed. You’ll be whipping the frosting for an additional few minutes at medium to high speed as you add the color. This also helps to achieve the fluffy consistency.
- Remove the air bubbles: When you’re happy with the color, reduce the mixing speed to the lowest setting and beat for another minute or two, followed by a final stir by hand, to get rid of any air bubbles.
The Secret to Cookie Monster Blue Icing
For these cupcakes, I recommend the Royal Blue gel color from AmeriColor. You can use it as-is, but I like adding a touch of black to deepen the color to match my cupcake liners. Since this is a larger batch of blue, you’ll need a fair amount to get the dark color. Start with around 1/2 teaspoon and add more as needed.
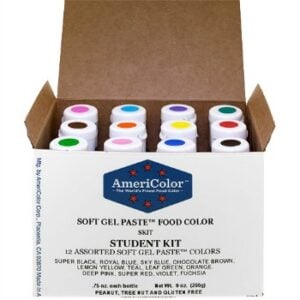
I recommend dipping a toothpick into the black gel color and running the toothpick through the frosting. Mix that in first, and if you still wish to go darker, repeat the process with a clean toothpick. This avoids coloring the frosting too dark right off the bat. Both of these colors are also a part of my favorite 12-pack starter kit.
Looking for more? See my full tutorial on how to color buttercream for helpful tips and details.
How to Decorate Cookie Monster Cupcakes (Step-by-Step)
With your blue frosting ready to use, fill a large piping bag about ¾ of the way full, and snip off the tip. If you’re new to frosting and decorating cupcakes, I have a full tutorial on how to use a piping bag that can set you up for success. You could also use a large Ziploc bag with the corner snipped off. Then, gather your cupcakes, and let’s get started on these Cookie Monster cupcakes:
- Make a rough base layer. Hold your piping bag above your first cupcake, and roughly pipe the blue frosting over the top half of the cupcake to create a small dome. You’ll cover this with Cookie Monster’s “hair” in a minute, this just helps to give some height to the frosting.
- Fit the piping tips. Next, prepare a smaller piping bag (no frosting) with a coupler and a grass tip. I use a Wilton #233. Prepare separate bags with only the colored frosting, which you can place inside the bag with the piping tip. This double piping bag technique makes it easy to change out the empty bags without changing the piping tip every time.


- Frost the cupcake. With your frosting inside the piping bag with the grass tip, pipe around the dome of blue frosting you created earlier. You can start at the base of the dome and pull upward, or pipe downward, whichever you’re most comfortable with.
- Leave space for the mouth. When the whole dome is covered, pipe a small edge around the bottom half of the cupcake. You can cover the entire cupcake with blue frosting, but I purposely leave a small portion undecorated (see photo) to repeat the mouth without having to dye and pipe more frosting.


- Finish the cupcakes. Once all the cupcakes are frosted, place a mini chocolate chip cookie inside each open “mouth”, and add a set of two candy eyes to each cupcake. You may need a dollop of frosting on the backside of the cookie to help it stick. If you aren’t serving these right away, do not add the candy eyeballs, they will bleed due to the moisture in the cupcake.

Julianne’s Decorating Tips
- Wait to add the candy eyes. If you aren’t serving these Cookie Monster cupcakes right away, leave off the candy eyes untl it’s closer to serving time. When the cupcakes are stored airtight, the moisture causes the candy eyeballs to expand and/or bleed into the frosting.
- Adapt the hair length. The longer you drag the piping tip, the longer Cookie’s hair will be! You can make shorter hair by placing the piping tip against the cupcake and pulling it away quickly.
- Do a practice round. If you’re a decorating beginner, you can always fill your piping bag with frosting, fit it with a piping tip, and pipe a few practice rounds on a piece of parchment paper. Get a feel for applying pressure to the bag and pulling the tip away from the paper before you take your newfound skills to the cupcakes. Just add that frosting back into the bowl when you’re done.
- Use the double piping bag method. As I mentioned above, it’s much easier to work with smaller amounts of frosting for this technique and using one bag with the coupler and tip and one bag with frosting is much easier than trying to refill the bag.

How to Store
- At room temperature. Store the frosted cupcakes in an airtight container for up to 3 days. You can also keep them in the fridge if your kitchen is particularly warm, though I recommend serving them at room temperature.
- Freeze. You can freeze the unfrosted cupcakes once they’ve cooled. Store the baked cupcakes airtight and freeze them for up to 2 months. Defrost them at room temperature before frosting as usual.
- Storing frosting. The prepared buttercream frosting is fine to store at room temperature up to 24 hours ahead. You can also keep it airtight in the fridge for up to 1 week, or the freezer for up to 2 months. Bring it to room temperature before you use it. You’ll need to rewhip the frosting with a mixer before using
More Cake Decorating Ideas
Cookie Monster Cupcakes
- Prep Time: 45 minutes
- Cook Time: 15 minutes
- Total Time: 1 hour
- Yield: 24 cupcakes
- Category: Cupcakes
- Method: Oven
- Cuisine: American
Description
These fun Cookie Monster cupcakes are so easy to make from scratch! Follow this decorating tutorial using a batch of chocolate cupcakes, bright blue buttercream, and simple decorating techniques.
Ingredients
For the Cupcakes
- 1 ½ cups (285g) granulated sugar
- ½ cup (118 ml) vegetable oil
- 3 large eggs, at room temperature
- 1 tablespoon (15 ml) pure vanilla extract
- ½ cup (120g) full-fat sour cream, at room temperature
- 2 cups (280g) all-purpose flour, sifted
- ½ cup (40 g) cocoa powder, sifted
- 1 tablespoon (5g) espresso powder (optional)
- 2 ½ teaspoons (9 g) baking powder
- ½ teaspoon (2 g) baking soda
- 1 teaspoon (5 g) salt
- 1 ¼ cup (296 ml) hot brewed coffee
For the Frosting and Decorations
- 2 cup (454 g) unsalted butter, cold
- 7–8 cups (911-1041g) powdered sugar
- 1 tablespoon(15ml) pure vanilla extract
- 2 tablespoons (30 ml) heavy whipping cream or milk
- Blue gel colors (see notes)
- Large candy googly eyes
- 24 Chips Ahoy cookies (standard size or mini)
Instructions
For the Cupcakes
- Preheat the oven to 350°F. Line a cupcake pan with cupcake liners.
- Combine the sugar, vegetable oil, eggs, and vanilla extract in a large mixing bowl. Beat on medium speed until the eggs and oil are well incorporated and the batter is lighter in color. Next mix in the sour cream and beat until well combined.
- In a separate bowl, sift together the dry ingredients. Add half the dry ingredients to the wet ingredients, followed by half of the coffee, and mix until the flour is just incorporated at a low speed. Then add the remaining dry ingredients and coffee. Beat until all of the ingredients are well combined. Use a spatula to scrape down the sides of the bowl and stir the batter from the bottom to the top to ensure it’s well mixed.
- Using a large cookie scoop, divide the batter evenly, filling each liner 2/3 full. Bake at 350°F for 14-16 minutes. Test the cupcakes for doneness by inserting a toothpick into the center of the cupcake. If the toothpick comes out clean, the cupcakes are done. Cool Completely.
For the Frosting
- Cut butter into pieces. Using the paddle attachment, whip the butter for 5-7 minutes, scraping down the bowl occasionally. Beat until the butter looks light in color.
- Alternate adding 2 cups of powdered sugar at a time with the liquid ingredients: vanilla extract & heavy cream. Ensure the powdered sugar is well combined, then whip for 1-2 minutes before adding more powdered sugar.
- Once all the powdered sugar has been added, increase speed to medium-high and beat for another 3 minutes or so to whip additional air into the frosting. Reduce the mixer to the lowest speed and beat for 1-2 minutes to eliminate air bubbles. Use a spatula to stir to remove any remaining air bubbles.
- Finally, dye the frosting blue using blue gel colors. See note.
To Decorate
- Fill a large piping bag ¾ full, cut off the tip about 1/2-inch up, and roughly cover the top half of the cupcake with frosting (this gives some height to the frosting).
- Prepare a small piping bag with a coupler and grass tip (#233). Then prepare a couple of separate bags with just the colored frosting, and place them inside the bag with the piping tip. Using a double piping bag allows you to change out the bag easily without removing a piping tip.
- Next, work your way around the dome of frosting, pulling the frosting in either an upward or downward position. The longer you drag it, the longer the hair will be.
- Once the dome of frosting is covered, pipe a small edge around the bottom half of the cupcake, leaving a blank, open space in the middle for the mouth. Once finished, place a cookie inside the mouth and place 2 large candy eyes on top.

Notes
Substitutions
- Sour cream- use plain for Greek yogurt
- Coffee– use milk instead, any type will work
- Gluten-free: You can use a measure for measure (1cup:1cup) gluten-free AP flour.
Storage
- At room temperature. Store the frosted cupcakes in an airtight container for up to 3 days. You can also keep them in the fridge if your kitchen is particularly warm, though I recommend serving them at room temperature.
- Freeze. You can freeze the unfrosted cupcakes once they’ve cooled. Store the baked cupcakes airtight and freeze them for up to 2 months. Defrost them at room temperature before frosting as usual.
- Storing frosting. The prepared buttercream frosting is fine to store at room temperature up to 24 hours ahead. You can also keep it airtight in the fridge for up to 1 week, or the freezer for up to 2 months. Bring it to room temperature before you use it. You’ll need to rewhip the frosting with a mixer before using
Additional Decorating Tips
- Gel colors for the frosting: You can use only royal blue, similar to Americolor, but I often mix colors to get the frosting exactly how I want it. For instance, I added a touch of black to the frosting in this tutorial to deepen the color to match my cupcake liner. When adding black, start with a toothpick dipped into the black gel color, and run that toothpick through the frosting. Mix to incorporate the color, and if you still want to go darker, repeat the process with a clean toothpick.
- Wait to add the eyes. You’ll want to wait to add the eyes until it’s closer to serving time. If these are stored in an airtight container, the moisture from the cupcake will cause the candy eyeballs to expand or bleed.
- Adding the mouth. You can cover the entire cupcake with blue frosting, but I purposely left a small portion undecorated to repeat the mouth without having to dye and pipe more frosting,
- Cupcake liners: I used these blue cupcake liners.
Nutrition
- Serving Size: 1 Cupcake`
- Calories: 427
- Sugar: 47 g
- Sodium: 140.4 mg
- Fat: 22 g
- Carbohydrates: 57.5 g
- Fiber: 0.8 g
- Protein: 2.7 g
- Cholesterol: 67 mg


easily one of my favorite recipes and love the great, i will use this at my next family reunion.
Thank you so much, Gav! I’m so glad to hear you enjoyed it and will make them again.
Love it. Can’t wait to make them. I will follow the instructions to a t. Thank you.
Thanks Carmen, let me know how it goes!