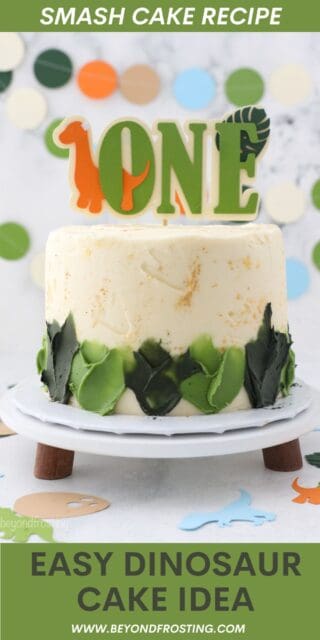
This dinosaur cake is an easy smash cake recipe perfect for your little dinosaur lover’s birthday! This recipe has fluffy banana cake layers (made without added sugar) and creamy vanilla buttercream frosting. Feel free to use your favorite homemade cake!
If you love themed birthday cakes, you’ll also want to try this hot wheels cake.

Easy Dinosaur Smash Cake
I pondered for weeks over what theme to make for my youngest son’s 1st birthday. After the success of this Cookie Monster birthday cake for my firstborn, I wanted it to be just as special but honestly, it plagued me for weeks. Finally, I decided on a Dinosaur theme and it came out so dang cute! I was really happy with it, and even though he won’t remember it, I will always have these photos to look back on.
I also wanted to try a naturally sweetened cake to offer my readers who might be looking for an alternative cake for their little one’s birthday. The fluffy cake layers are incredibly moist and sweet enough even though there’s no added sugar. We ate plenty of cake even without the frosting on it.
Since this is a dinosaur birthday cake, I decided that I wanted to use my favorite vanilla buttercream for decorating as opposed to a lower-sugar option, but I did provide some suggestions here for you if that’s what you’re looking for. Funnily enough, my birthday boy wasn’t at all interested in the cake and only cared about the balloons. But my 3-year-old dug right in after the baby was done with his smash!
This cake comes together easily with basic decorating techniques, and you don’t need any special tools.

Why I Love This Dinosaur Cake
- Baby (or toddler)-friendly. Its small size makes this mini cake perfect for a baby’s birthday, but also you can serve quite a few people if that’s what you need to do.
- Naturally Sweetened. The moist banana cake layers have zero added sugar, sweetened with bananas and maple syrup.
- Easy to decorate. I had a ton of fun decorating this dinosaur cake, and you will, too. I’ve included an easy tutorial on how I achieved the cake design you see in the photos. Go ahead and put your spin on this cake, any way that you’d like.
- Customizable. I use a 6-inch, 3-layer banana cake recipe because I wanted the added height for the decoration, but you can always make this dinosaur cake with a 2-layer mini vanilla cake or small chocolate cake. Both are the perfect size for a smash cake.

Ingredient and Substitutions
There are a handful of important ingredients you’ll need to make the layer cake. I’ve put down some notes here. Scroll down to the recipe card for a printable list of ingredients.
- Coconut Oil – Melted and cooled. You can also substitute coconut oil with another oil, like vegetable or canola oil.
- Bananas – Like banana bread, a banana cake requires overripe bananas.
- Maple Syrup – Make sure to use real maple syrup. Honey or agave could be an option but I have not tested that specifically.
- Plain Yogurt – Regular plain yogurt or Greek yogurt. If you don’t have yogurt, you can replace it with sour cream.
- Cinnamon – Optional, for a touch of warm spice. You can substitute cinnamon with nutmeg or pumpkin pie spice, or leave it out altogether.
- Milk – Any kind of milk works here, whether you have whole milk, 2%, or dairy-free milk.

How to Assemble and Frost a Cake
Maybe you’re making a layer cake for the first time for your child’s birthday, or maybe you’re looking for some tips to make your cakes even better. You’ve come to the right place. The techniques I show below are all further explained in this tutorial for how to make layer cakes if you need a little more of a deep-dive.
Bake the cake according to the instructions and allow it to fully cool, get your frosting prepared and we’re ready to go.
Before you Begin, Do This
Level the cake layers: You’ll need to trim off any “domes” using a serrated knife or a cake leveler so that the layers stack evenly and flat.
How to stack the layers and make a crumb coat.
- For the thin layers of buttercream between the cake layers, you’ll need 1/2 cup of frosting for each. You can use a knife to spread that evenly. It’s okay to spread that out right to the edges because you’re going to need it for the crumb coat.
- Once you have the three layers stacked, you can start to crumb coat. The crumb coat is meant to be a rough, thin coat of frosting that picks up any crumbs and makes it easier to apply the final layer of frosting. Use a flat edge knife and as little buttercream as possible to coat the edges and top of the cake. You can reuse any frosting that you wipe away on other parts of the cake but just don’t mix it back into the main bowl of buttercream if it has crumbs in it.
- Once you have the cake crumb coated, chill it in the fridge for 15 minutes until it’s firm to the touch. Chill the crumb coat makes it easier to apply the final layer of frosting.


Add the final layer of frosting
- After the cake has chilled, pipe a thick layer of frosting around the outside of the cake. If you don’t have a piping bag, try using a Ziploc bag to apple the frosting to the cake.
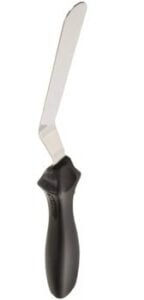
- Smooth the frosting using an offset (or flat edge) spatula or bench knife if you have it.
- Chill again for about 30 minutes before you decorate.


How to Decorate a Dinosaur Birthday Cake
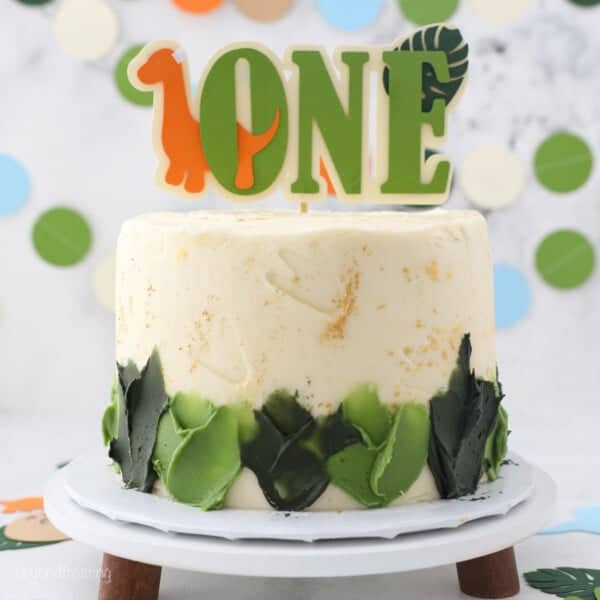
I kept the decorations for this dinosaur smash cake very simple, but I have to say I LOVE how it turned out. When planning the design, I came across this TikTok video that shows how to make a skirt of green “plants” around the bottom edge of a cake. It’s easy to recreate at home!
Throw some glitter and dinosaur prints into the mix, and this cake comes together just like *that*. Let’s walk through the easy decorating techniques below.
Step 1: Add the gold splatter first
Making a glimmery gold splatter is easy! Simply mix edible gold luster dust (you can find this at your local baking store, or online) with a couple of drops of clear extract, like lemon or almond extract. Use a clean, and preferably food-safe paintbrush to shake splatters of gold across the chilled cake. Another option would be to try using a silicone basting brush.
Before you begin, do this
Do a test run. Test the consistency of the gold splatter on a plate or parchment paper before you apply it to the cake. You don’t want it to be too runny. Add more gold dust to thicken or a drop of liquid to make it thinner.
Step 2: Add the green plants
Next, I use light and dark green gel colors to color about ¼ cup of frosting in each color. The colors that I used for this cake (pictured) are AmeriColor Avocado and Moss. To make the Moss color darker, I mixed in a little Super Black. Use a toothpick to add the black, just a touch at a time. Check out my in-depth guide on how to color buttercream.

- Step 1: Using the back of an offset spatula and the light green frosting, press the frosting to the bottom edge of the cake, and pull it up to create “leaves”. Angle the spatula to the right or left and repeat the same motion. You just need a touch of frosting on the back of the knife. Practice on a piece of parchment paper first, then you can just add the frosting back into your bowl.
- Step 2: Repeat around the bottom of the cake, I found it best to add one color at a time and then layer the other one on top.
- Step 3: Repeat the above with the second color.


Step 3: Add dinosaur footprints
My boys have so many toy dinos of various sizes lying around. So, I used the foot of one of the larger toys to press dinosaur prints into the side and top of the cake. Too cute! You could even leave a smaller toy dinosaur on the cake as a cake topper. The sky’s the limit.

Dinosaur Party Decor
When it comes to décor, I wanted everything to tie in with the dinosaur cake design. So, I based the cake colors on an adorable dinosaur-themed 1st birthday bundle that you can purchase from Etsy. Finish off your party decorating with a balloon arch from Amazon, and voila!
Don’t forget to round out your table spread with fun party snacks like cheesy chicken empanadas and veggies and dip, and more sweet treats like Dinosaur-shaped sugar cookies.

Frequently Asked Questions
Can I Use Another Flavor of Cake?
Absolutely! The banana cake recipe I use here is a 3-layer cake, and you can make this dinosaur cake with any flavor you’d like. My vanilla cake, chocolate cake, yellow cake, or even strawberry cake are all good options. You can bake the batter for these recipes in three 6-inch layers.
Can I Use Another Frosting?
Like the cake, feel free to switch up the frosting you use to frost and decorate this cake. The key is to choose a frosting that’s sturdy and spreadable, like the vanilla buttercream in this tutorial. You can use chocolate buttercream if you’d like. My cream cheese frosting or this chocolate cream cheese frosting would also work well here.
This cream cheese whipped cream also works as a low-sugar option. However, since it’s a softer frosting, I’d only recommend it for a smash cake with minimal decoration.

Make-Ahead and Storage
- Cake layers. These can be made up to 2 days in advance of serving. Cool completely and double wrap tightly in plastic wrap.
- Store the frosted cake. Your frosted dinosaur cake is best enjoyed within 2-3 days of when it’s prepared. Store the cake in an airtight container, like a cake carrier, at room temperature. I only recommend keeping cakes in the fridge if you live in a warm or humid climate. Take the cake out ahead of time to serve at room temperature.
- Store leftover frosting. Buttercream frosting can be prepared and refrigerated up to 7 days in advance. Make sure to keep it airtight. The buttercream needs to be brought to room temperature and re-whipped in a stand mixer prior to using.
- Freezing. To freeze the individual cake layers (after they’ve cooled and before they’re frosted), double-wrap the cakes in plastic and freeze them for up to 1 month. The frosted cake can be frozen for up to 1 month also.
More Birthday Cakes and Cupcakes
- Construction Cake
- Confetti Cake
- Buttercream Flower Cake
- Unicorn Cupcakes
- Rainbow Cake
- Rainbow Cupcakes
Dinosaur Cake
- Prep Time: 60 minutes
- Cook Time: 28 minutes
- Total Time: 1 hour 28 minutes
- Yield: 8-12 servings
- Category: Cake
- Method: Oven
- Cuisine: American
Description
This dinosaur cake is an easy smash cake recipe perfect for a dinosaur lover’s birthday. It’s made from fluffy banana cake layers decorated with creamy vanilla buttercream frosting. Feel free to use your favorite homemade cake!
Ingredients
For the Cake
- ½ cup (118ml) Coconut oil, melted and cooled
- 1 cup Mashed banana (about 2 medium bananas)
- ½ cup (118ml) Pure maple syrup
- 2 Large eggs, at room temperature
- 1 tablespoon (15ml) Pure vanilla extract
- ½ cup (120g) Plain yogurt, at room temperature
- 2 ½ cups (300g) All-purpose flour, sifted
- 3 teaspoons Baking powder
- 1 teaspoon Baking soda
- ½ teaspoon Salt
- Pinch of cinnamon (optional)
- ½ cup (118ml) Milk (any type), at room temperature
For the Frosting
- 2 cup (454 g) unsalted butter, cold
- 7–8 cups (911-1041g) powdered sugar
- 1 tablespoon(15ml) Pure vanilla extract
- 2 (10 ml) tablespoons heavy whipping cream or milk
- Pinch of salt
Cake Decorations
- Gold luster dust
- Lemon or almond extract (any type of clear extract or vodka will work)
- Gel colors of choice
Instructions
For the Cake
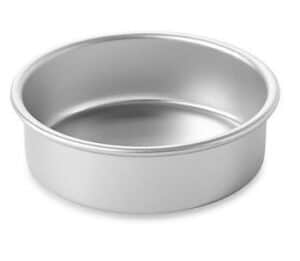
- Preheat the oven to 350°F. Prepare three 6-inch round pans, line the bottom with parchment paper, and grease the sides. Melt the coconut oil and allow it to cool.
- In a large mixing bowl, mash and measure the bananas then combine with the oil, maple syrup, eggs, and vanilla extract. Beat on medium speed until well incorporated. Scrape down the bowl as needed. Next mix in the sour cream and beat until well combined.
- In a separate bowl combine the dry ingredients and sift. Add half the dry ingredients, and half the milk, and beat on low speed just until the flour starts to incorporate. Add remaining ingredients (dry and milk). Use a spatula to scrape down the sides of the bowl and stir the batter from the bottom to the top to ensure it’s well mixed.
- Divide the batter evenly between the three pans, about 1 1/3 cups of batter per pan. Bake at 350°F for 22-28 minutes. Test the cake for doneness by inserting a toothpick into the center of the cake, it should be completely dry. Remove from the oven and allow to cool completely.
For the Frosting
- Cut butter into pieces. Using the paddle attachment, whip the butter for 5-7 minutes, scraping down the bowl occasionally. Beat until the butter looks light in color.
- Alternate adding 2 cups of powdered sugar at a time with the liquid ingredients: vanilla extract & heavy cream. Ensure the powdered sugar is well combined, then and whip for 1-2 minutes before adding more powdered sugar.
- Once all the powdered sugar has been added, increase speed to medium-high and beat for another 3 minutes or so to whip additional air into the frosting. Reduce the mixer to the lowest speed and beat for 1-2 minutes to eliminate air bubbles. Use a spatula to stir to remove any remaining air bubbles.
To Assemble
- Use a cake leveler to cut the domes off the top of the cake. Place a dollop of frosting on your cake board and place the bottom layer of cake on top of that.
- Set aside 1/2 cup of frosting to color for the leaf decorations. Then, spread ½ cup of frosting evenly on the first layer. Place your second layer on top, and spread another ½ cup of frosting. Place the third layer on top, inverted so the top of the cake is flat.
- Fill in any gaps between your layer of frosting using an offset spatula. Crumb-coat the entire cake with a thin layer of buttercream, using a knife or scraper to remove the excess. Chill in the refrigerator for 15 minutes.
- Use the remaining frosting to frost and decorate. Pipe around the outside edge of the cake from the bottom to the top. Once the sides of the cake are roughly covered, use a knife or scraper to remove any excess frosting and smooth it out. Chill the cake in an airtight container until the frosting is firm to the touch, about 30 minutes.
To Decorate
- To make the gold splatter: Once the cake has chilled, mix some gold luster duster with a couple of drops of extract. Use a paintbrush to mix together. The consistency should be a thicker liquid, where when you shake the brush towards the cake, the gold will splatter onto the cake.
- To make the plants: Mix ¼ cup of frosting with the desired colors, a drop at a time until the desired color is reached. Use the back of a flat edge spatula with a dollop of buttercream, about ½ teaspoon or so. Starting at the bottom of the cake, pull straight up. Take another dollop of buttercream and pull at an angle on both sides of the straight line. Repeat around the edge of the cake. I found it easier to do all one color and then switch to the other.
- Add dinosaur prints. If you have a large dinosaur lying around, gently press the foot into the outer layer of frosting to make an indent, randomly around the cake.
Notes
- It is important to measure the mashed bananas ensuring you have 1 cup. More or less will alter the results of the cake.
- Using bake-even stripes will help bake these cakes level, and reduce the amount of dome that needs to be removed from the layers.
- If you only have two 6-inch pans, simply bake 2 layers, and allow the cake to cool for about 10 minutes. Remove from the pan, wash and dry the pan, and bake with the remaining batter.
- Chill the cake before decorating to help maintain the integrity of the first layer of buttercream.
- Gold splatter: Test on a plate before applying it to the cake. You don’t want it to be a runny or liquid consistency.
- Colors used for this cake: Americolor Avocado and Moss. To make the Moss color darker, I mixed in some Super Black. Use a toothpick to add the black, just a touch at a time.
Make Ahead and Storage
- Cake layers. These can be made up to 2 days before serving. Cool and double wrap in plastic wrap. Store at room temperature.
- Store the frosted cake. Your frosted dinosaur cake is best enjoyed within 2-3 days of when it’s prepared. Store the cake in an airtight container, like a cake carrier, at room temperature. I only recommend keeping cakes in the fridge if you live in a warm or humid climate. Take the cake out ahead of time to serve at room temperature.
- Store leftover frosting. Buttercream frosting can be prepared and refrigerated up to 7 days in advance. Make sure to keep it airtight. The buttercream needs to be brought to room temperature and re-whipped in a stand mixer prior to using.
- Freezing. To freeze the individual cake layers (after they’ve cooled and before they’re frosted), double-wrap the cakes in plastic and freeze them for up to 1 month. The frosted cake can be frozen for up to 1 month also.
Nutrition
- Serving Size: 1
- Calories: 738
- Sugar: 70.3 g
- Sodium: 232 mg
- Fat: 38 g
- Carbohydrates: 95.5 g
- Fiber: 1.4 g
- Protein: 5.7 g
- Cholesterol: 105.3 mg


Could I double this recipe? I just adore the colors and have ordered them and the edible glitter.
What size are you looking to make or how many layers? This would make two 8-inch layers or one 9×13 cake.