
Valentine’s Day Chocolate Covered Oreos are the cutest! Only 2 ingredients required and there are endless ways to decorate. This is an easy Valentine’s Day dessert idea.
If you’re looking for more easy Valentine’s day dessert ideas, you’ll love Chocolate Covered Strawberries or homemade chocolate truffles.

Easy Valentine’s Day Oreos
Valentine’s day is the perfect holiday to make homemade treats. These feel so decadent but they’re actually quite easy to make at home. Plus there’s no baking required, and aren’t those some of the best kinds of dessert?
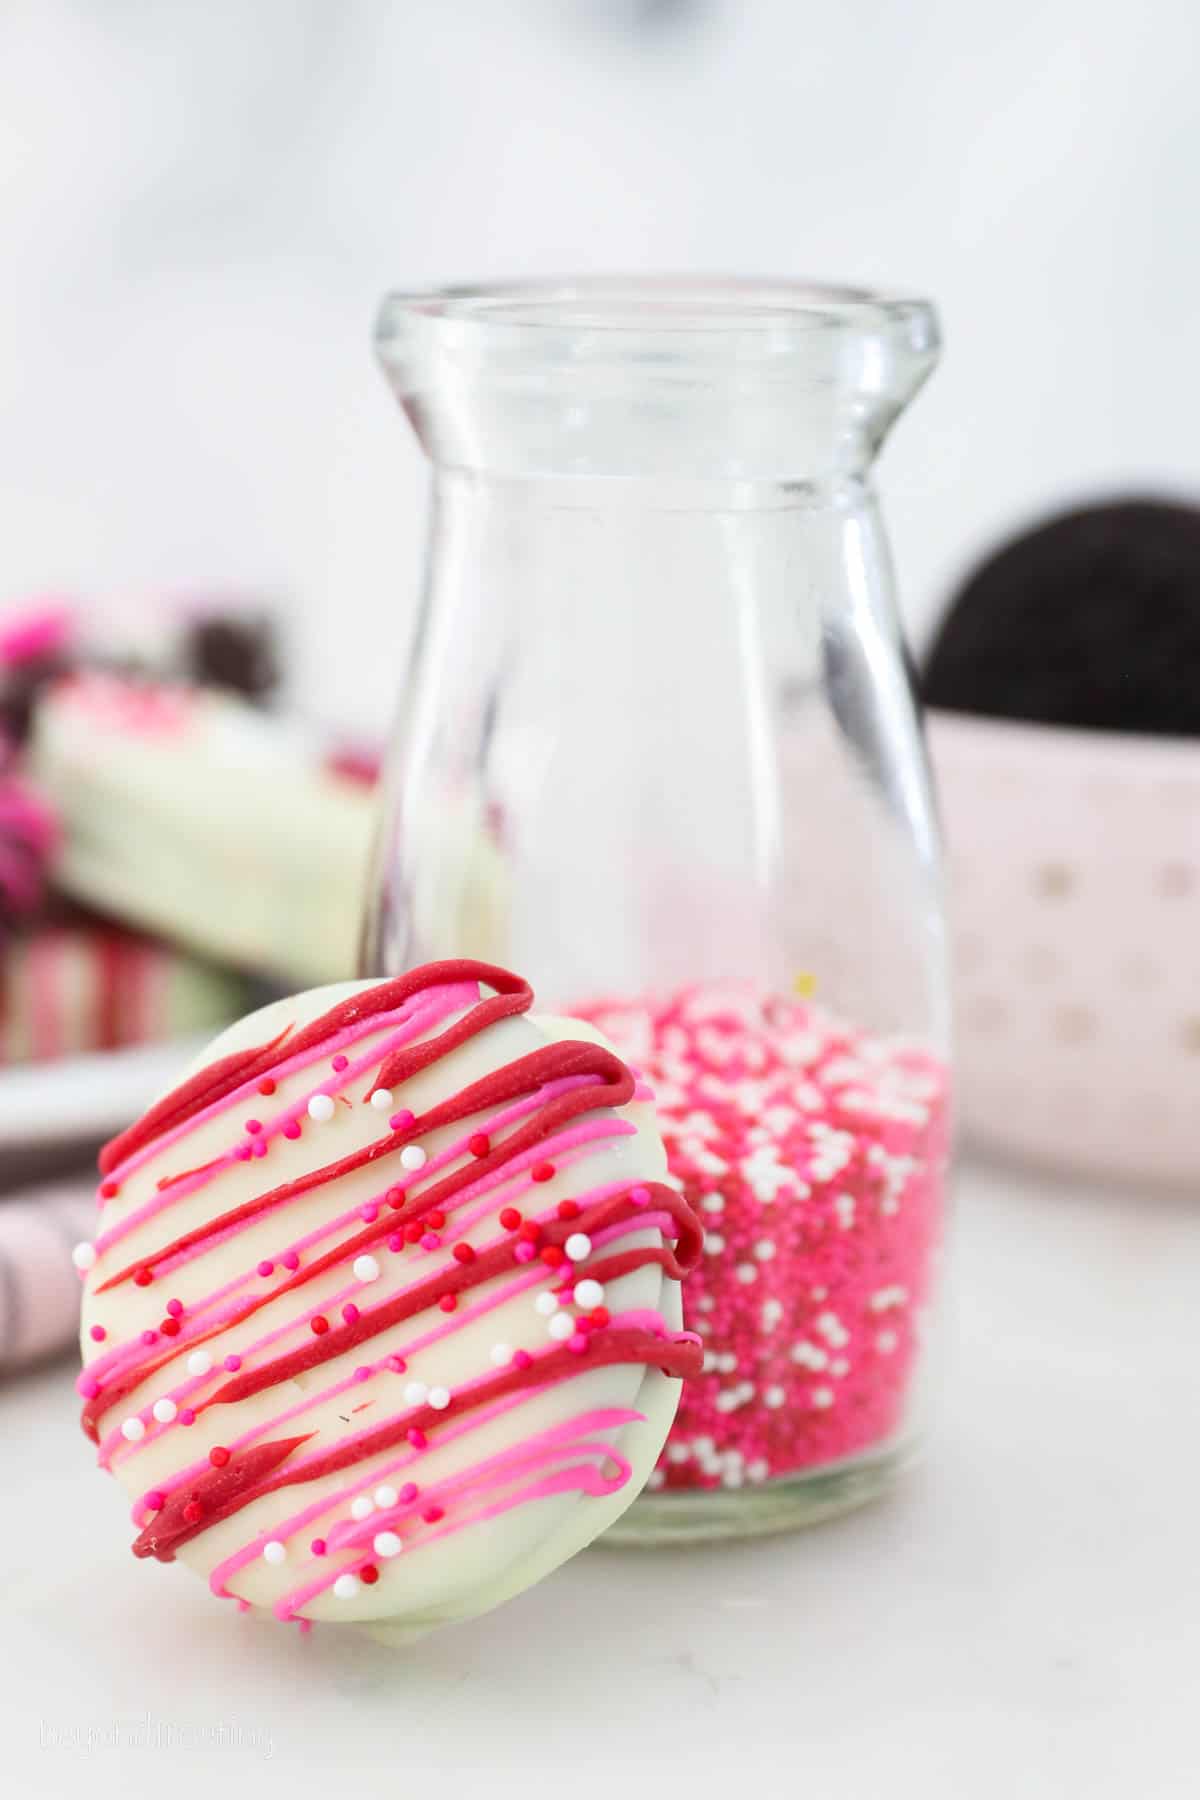
You can get as festive as you want with these chocolate-covered Oreos and there are plenty of topping options to choose from. I chose some red and pink sprinkles and added some colored chocolate for drizzling. Plus, I made the little love bug Oreos for a fun twist.
Are these not the cutest Oreos you’ve ever seen? They’re so simple to do, but elegant and fun. You can package these up in a cute bag with a ribbon or in a treat box.
Let me share with you a few of my favorite tips for making chocolate-covered Oreos. Be prepared to get a little bit messy but have lots of fun! This is the perfect treat to get the kids to help with to.

What Type of Chocolate is Best for Dipping?
You can use milk, dark or white chocolate.
It’s best if you can use melting wafers, which are made by Ghirardelli or Guittard. These are made with high-quality chocolate, taste the best and have the smoothest texture when melted. You can also melt smaller quantities which is perfect when you want to add a drizzle.
White chocolate tends to be thicker when melted. When dipping Oreos in white chocolate, you’ll notice crumbs from the Oreos tend to accumulate in the chocolate. So, if you are planning to use some white chocolate for a drizzle or to create different colors, you may want to set some aside before you start dipping.
Wilton does make Candy melts, but they’re not the same. Taste-wise, they’re not as good, and while they can be for making candy, they tend to be a thicker consistency which makes it harder to dip and get a smooth texture.
The Easiest Way to Melt Chocolate
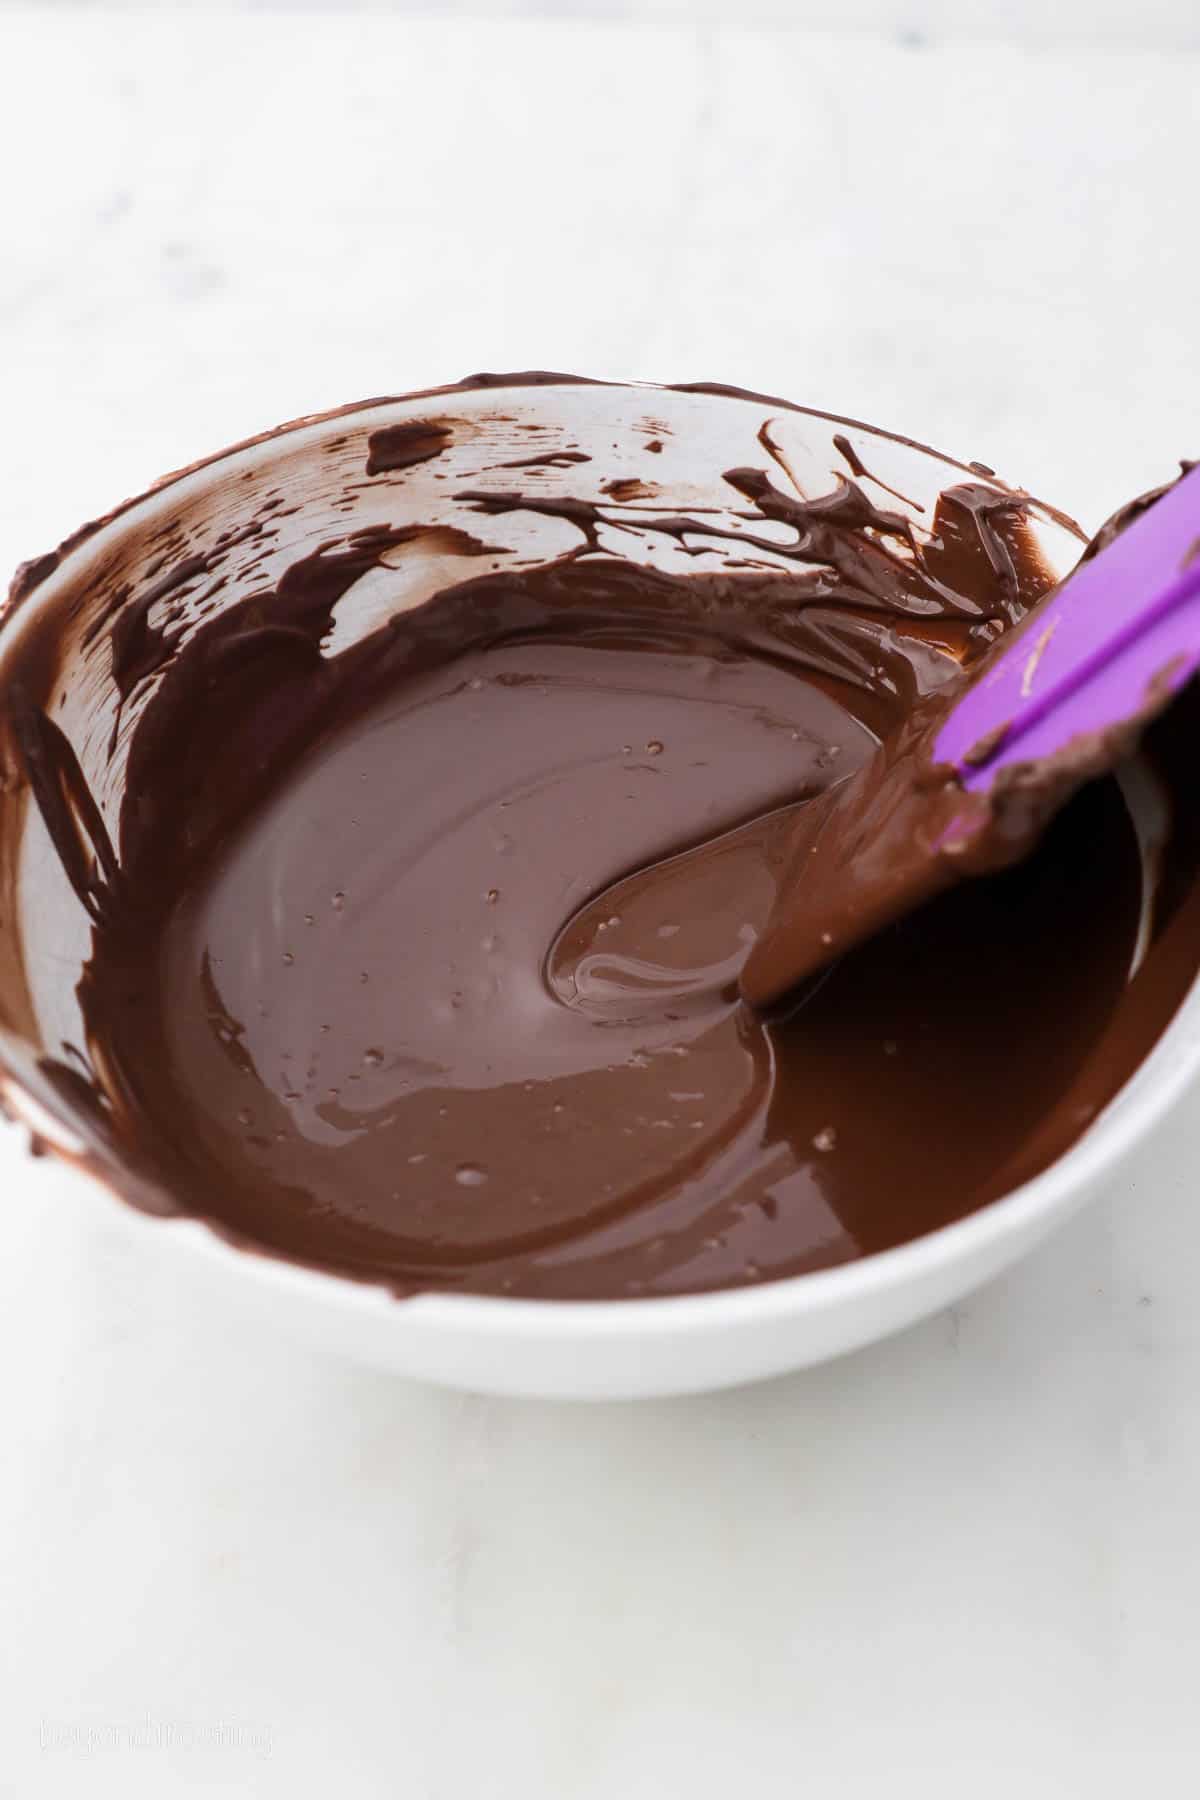
It’s so easy to melt chocolate in the microwave. While you can use a double boiler, I find this method is the quickest and easiest.
In a microwave-safe bowl, melt the chocolate wafers at 50% power in 30 second intervals; stir between each interval and continue until the chocolate is melted. Reduce microwave time as needed so the chocolate does not burn. Stir until it’s completely smooth.
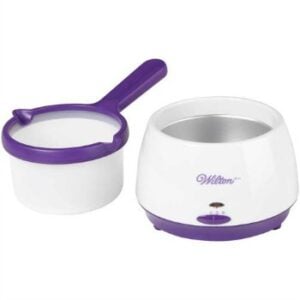
How to Use a Candy Melting Pot
I love my melting pot, it’s perfect for keeping the melted chocolate and just the right temperature without burning it. Melting wafers will harden after sitting at room temperature for certain period of time, but the melting pot actually prevents that from happening.
First add the melting wafer and turn it on the high setting until the chocolate has melted, stirring occasionally. Then change the setting to warm, so that the chocolate stays a consistent temperature.

How to Make Chocolate-Covered Oreos
Melt the chocolate: In a microwave-safe bowl, melt the chocolate wafers at 50% power in 30 second intervals; stir between each interval and continue until the chocolate is melted. Reduce microwave time as needed so the chocolate does not burn.
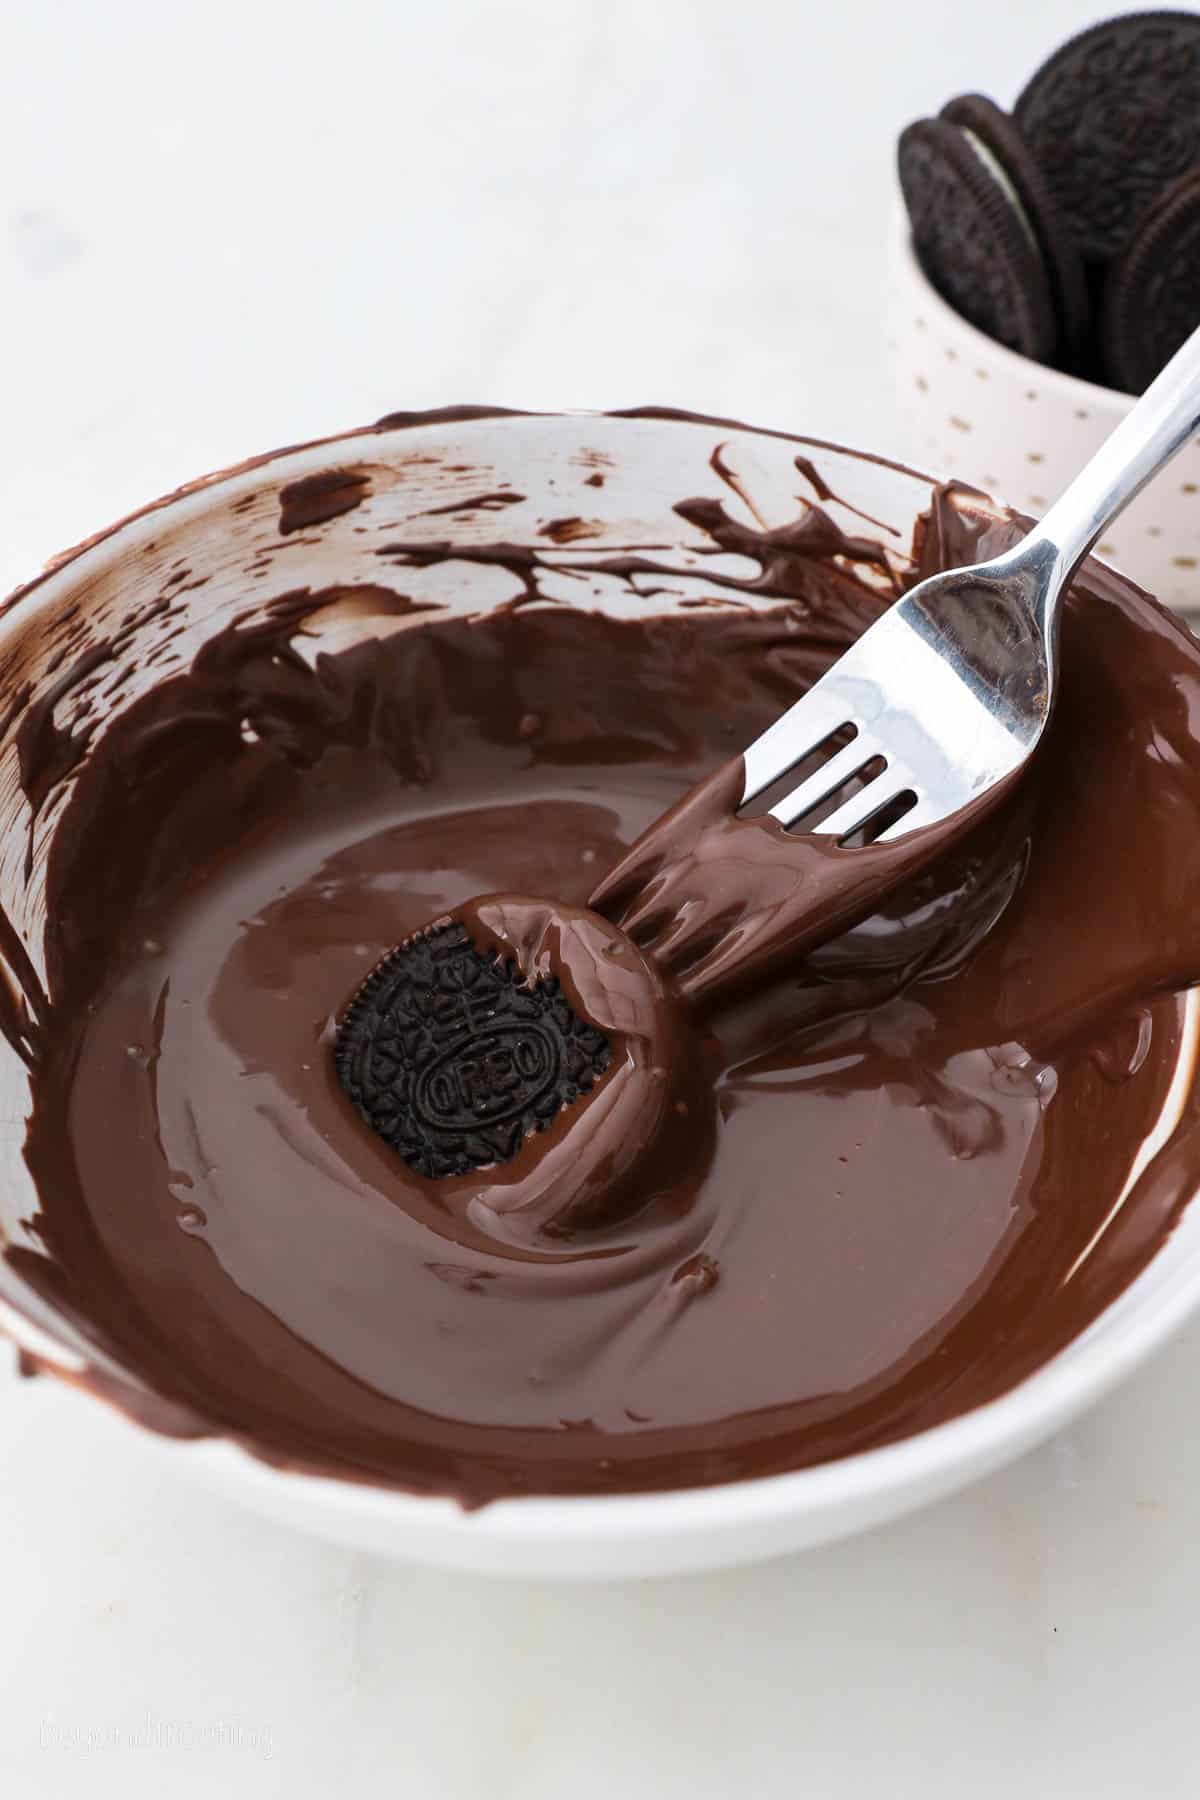
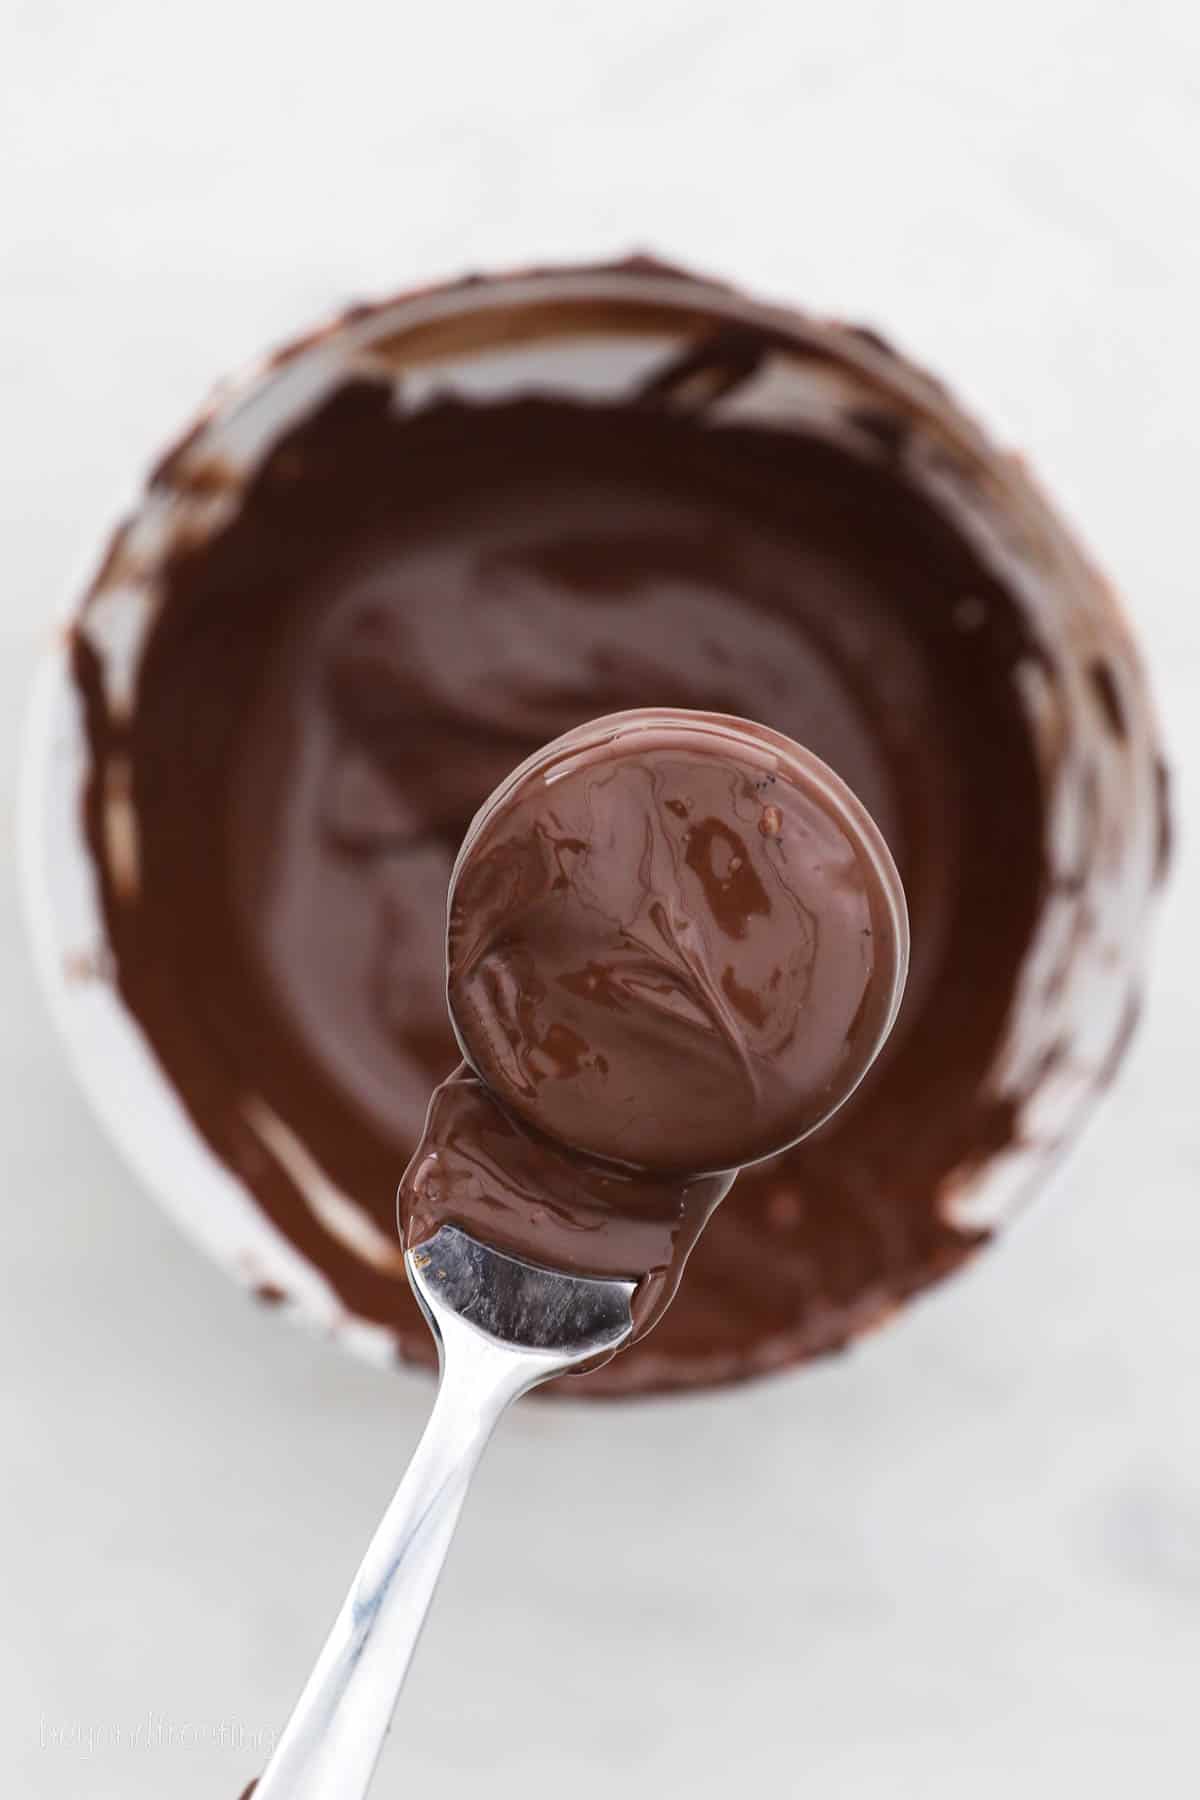
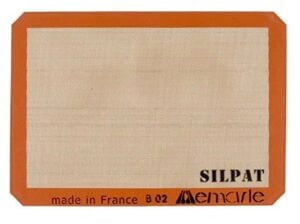
Dip the Oreo: Place the Oreo in the bowl of chocolate and use a fork to flip the Oreo around until it’s completely covered. Use the fork to lift the Oreo out of the chocolate, tap the fork on the side of the bowl to remove excess chocolate and scrape the bottom of the fork on the edge of the bowl to remove additional chocolate. Place on a piece of parchment paper or silicone baking mat.
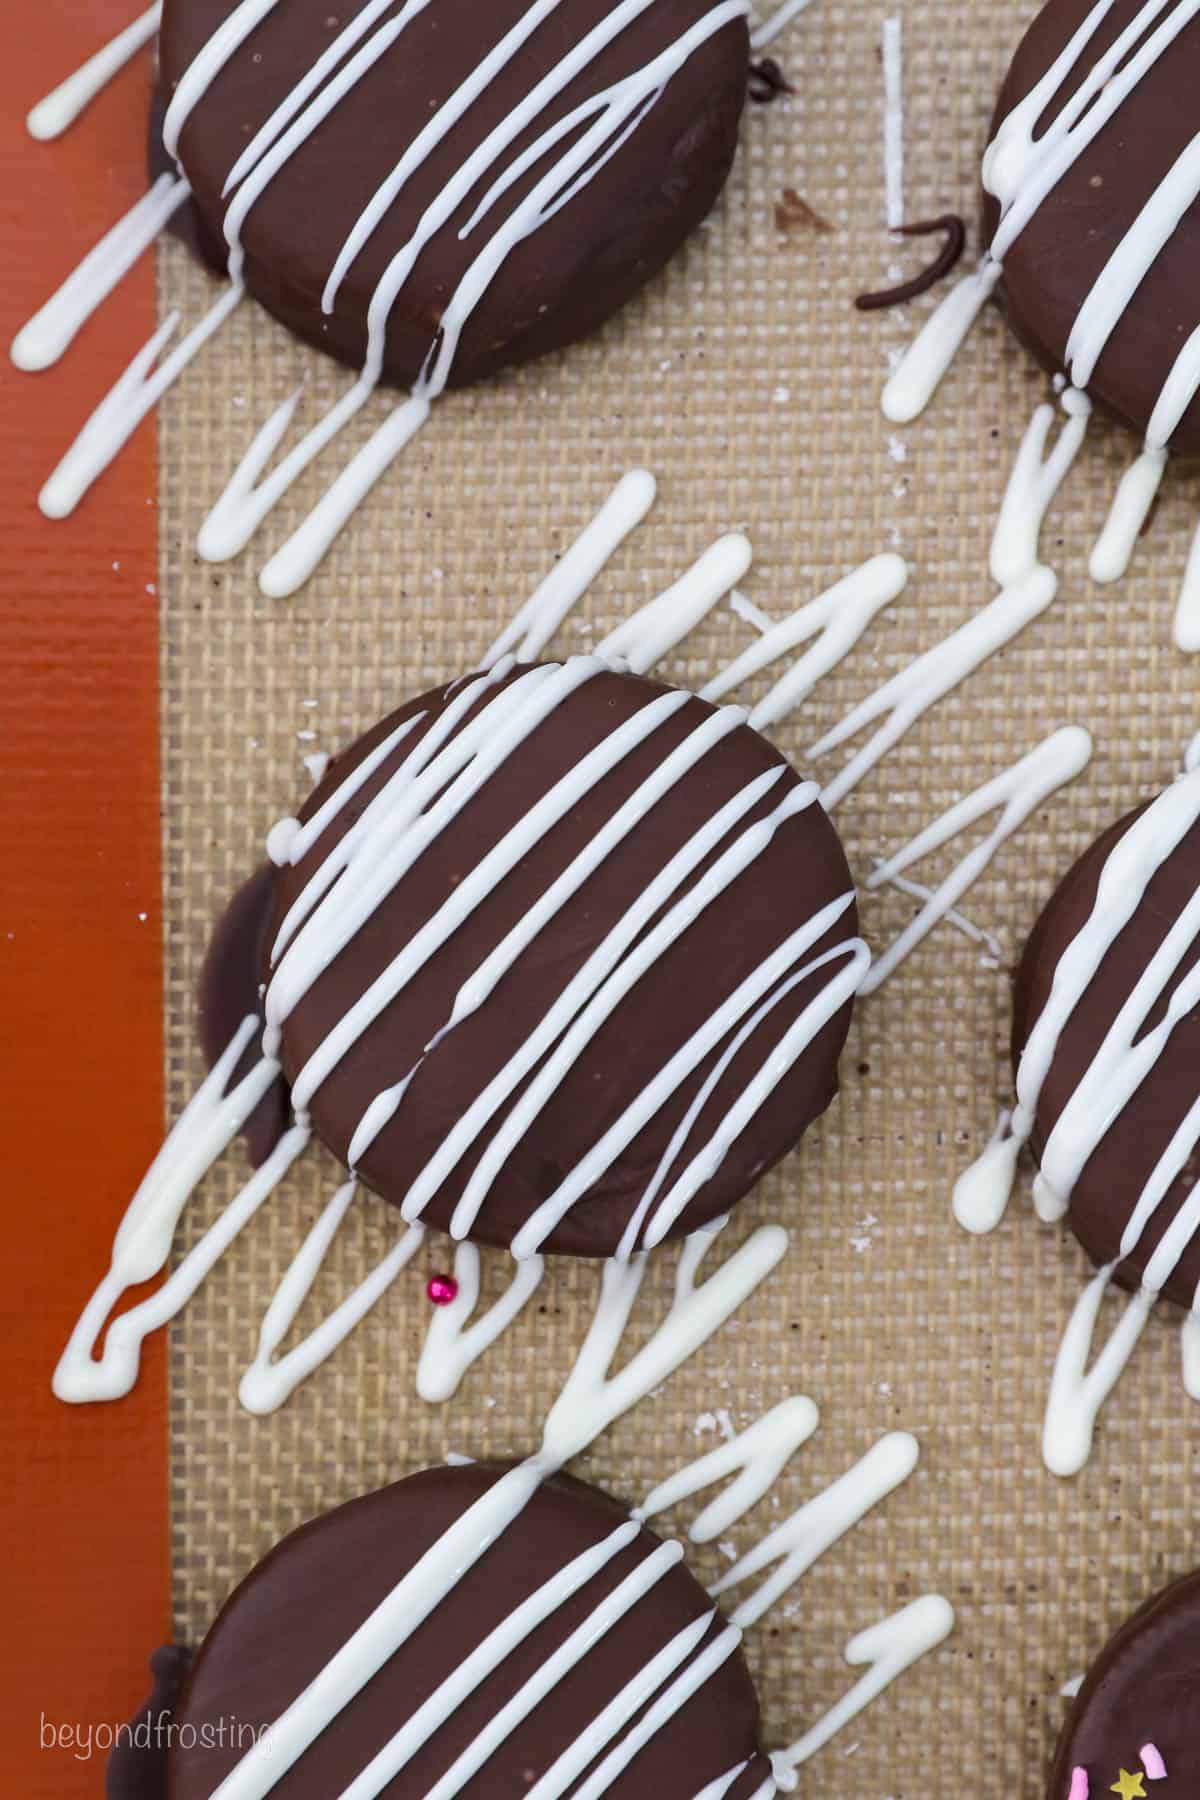
Decorate: Chocolate wafers tend to set quickly, so if you’d like to add sprinkles or other toppings, then it’s best to do so right away. Or you can add a chocolate drizzle and then add sprinkles to the drizzle.
To add a Chocolate Drizzle: Wait until the chocolate has fully set, then apply the drizzle with leftover melted chocolate. Do this by filling a small piping bag or Ziploc bag with 2-3 tablespoons of melted chocolate and cut off the tip/corner of the bag. Drizzle and allow to set. I recommend drizzling it off the sides of the Oreo for the best look.
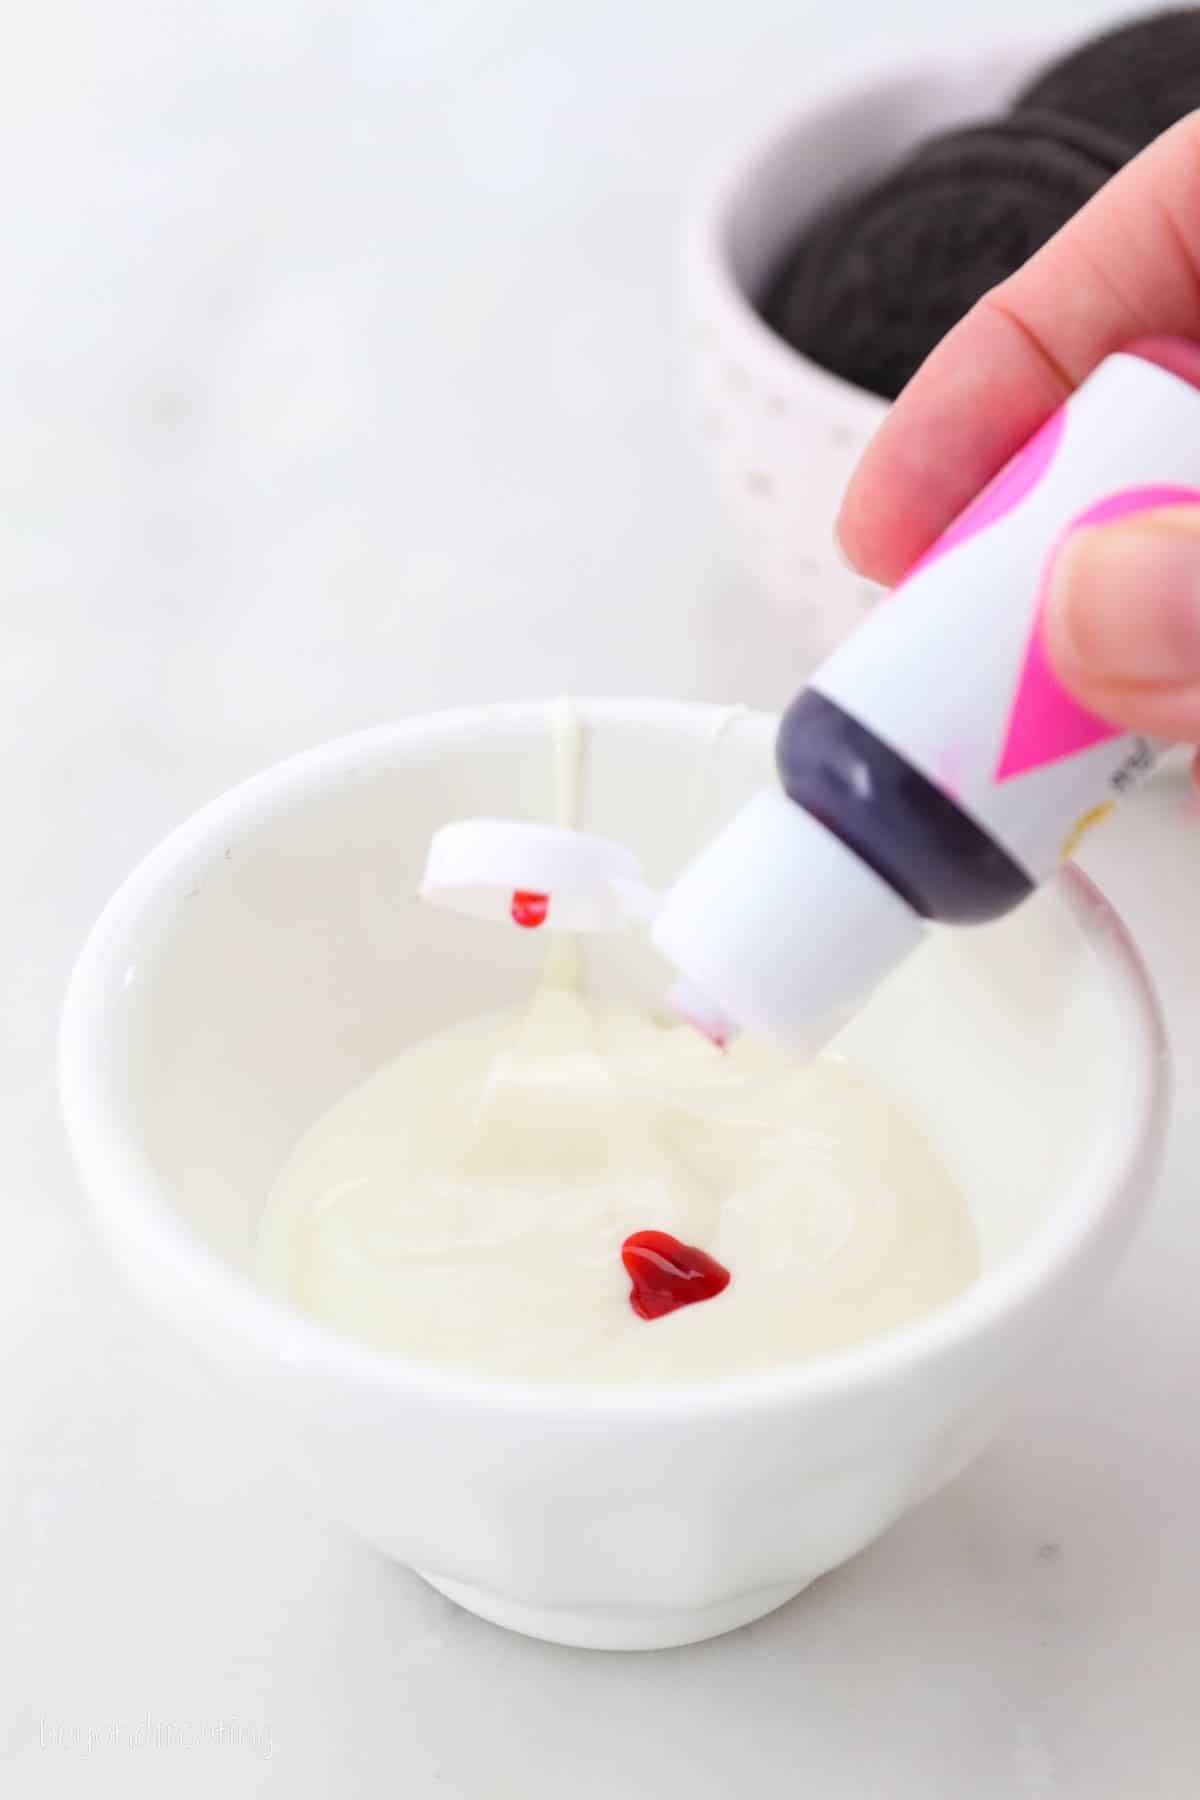
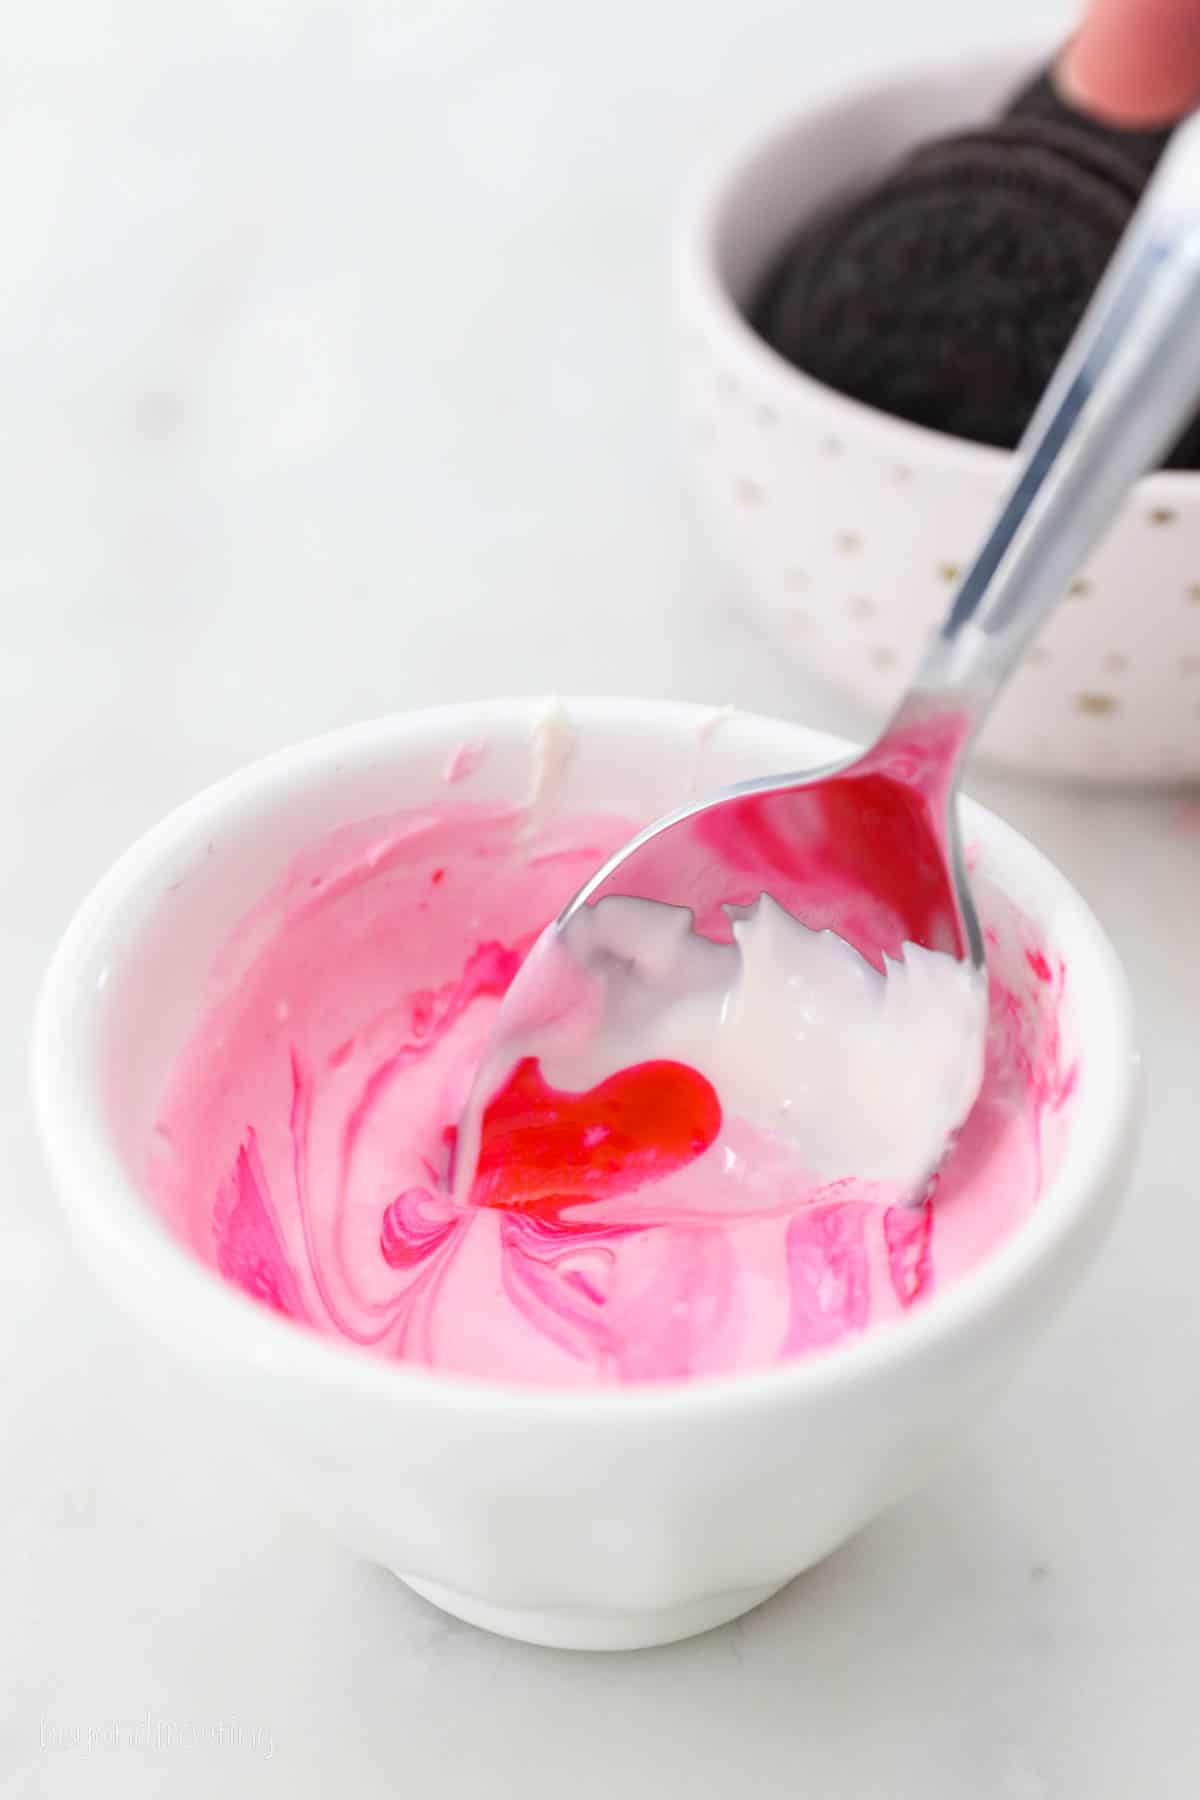
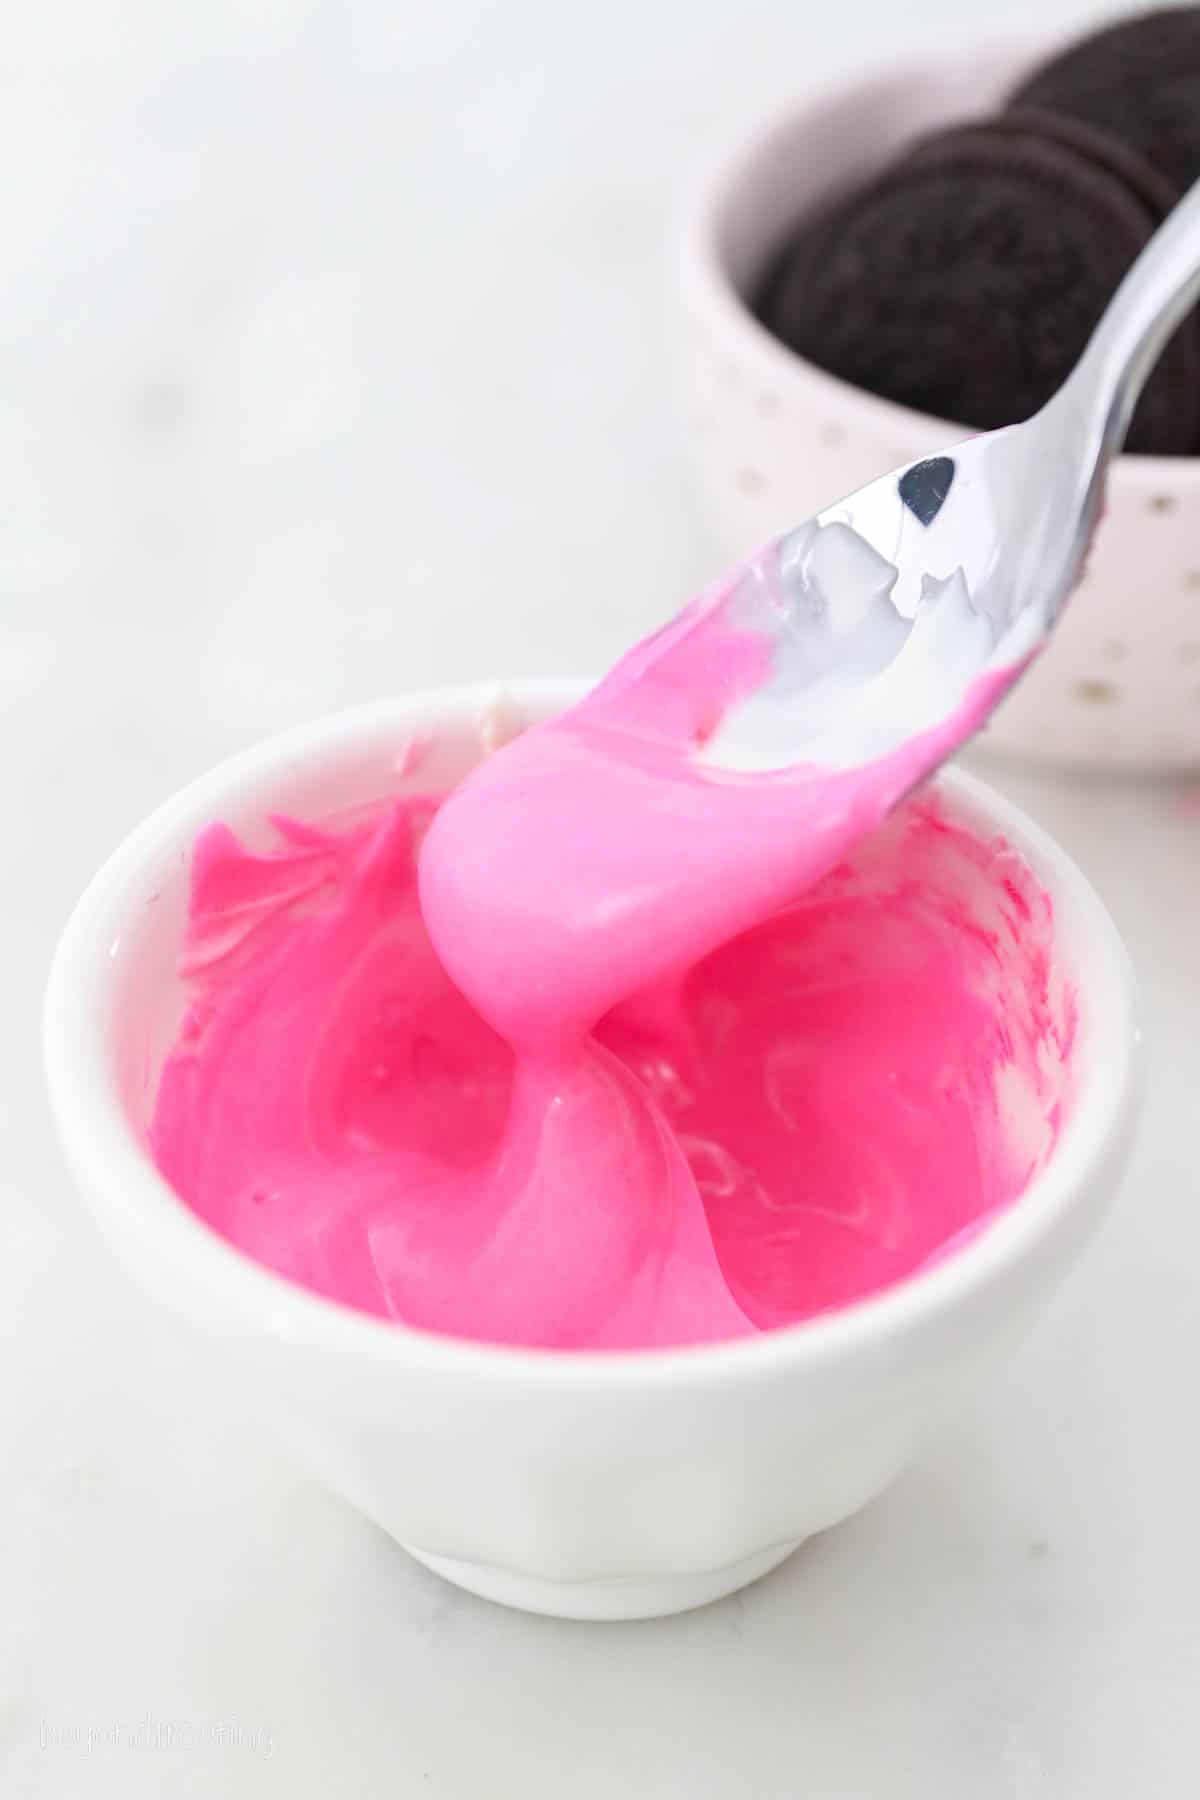
How to Color White Chocolate
If you’d like to use accent colors for decorating, you can easily color some white chocolate using gel colors like Americolor or Wilton.
To add a colored drizzle, you only need a small amount of chocolate, 2-3 tablespoons will be more than enough to cover a dozen Oreos and then some.
Use just a drop of color at a time, mix the color and if you want it to be a little darker, add another drop of color. Use immediately.
How to Decorate Oreos for Valentine’s Day
- Dip in sprinkles – check your local craft store or the target dollar section for seasonal colors. Or if you want to splurge, my favorite sprinkles are from Sweetapolita.
- Drizzle with colored chocolate
- Decorate with googly eyes and lips, or icing decorations
- Dip in crushed nuts

How to Store Finished Oreos
Store in an airtight container for several days at room temperature. Otherwise, these can be stored in the refrigerator for a longer period of time.
More Valentine’s Day Dessert Ideas
- Chocolate Strawberry Cake
- Ombré Heart Cake
- Valentine’s Day Sugar Cookies
- Strawberry Rosé Cupcakes
- Pink Champagne Mini Bundt Cakes

Valentine’s Day Oreos
- Prep Time: 10 minutes
- Cook Time: 2 minutes
- Total Time: 12 minutes
- Yield: 36 cookies
- Category: Dessert
- Method: Microwave
- Cuisine: American
Description
Easy Chocolate Covered Oreos are decorated for Valentine’s Day. These are the perfect homemade dessert.
Ingredients
- 1 bag (14oz) Oreo (flavor of choice)
- 10 ounce (283g) chocolate wafers
- 10 ounces (283g) white chocolate wafers
- Garnishes (Sprinkles etc)
Instructions
- Melt the chocolate: In a microwave-safe bowl, melt the chocolate wafers at 50% power in 30 second intervals; stir between each interval and continue until the chocolate is melted. Reduce microwave time as needed so the chocolate does not burn.
- Dip the Oreo: Place the Oreo in the bowl of chocolate and use a fork to flip the Oreo around until it’s completely covered. Use the fork to lift the Oreo out of the chocolate, tap the fork on the side of the bowl to remove excess chocolate and scrape the bottom of the fork on the edge of the bowl to remove additional chocolate. Place on a piece of parchment paper or silicone baking mat.
- Decorate: Chocolate wafers tend to set quickly, so if you’d like to add sprinkles or other toppings, then it’s best to do so right away. Or you can add a chocolate drizzle and then add sprinkles to the drizzle.
- To add a Chocolate Drizzle: Wait until the chocolate has fully set, then apply the drizzle with leftover melted chocolate. Do this by filling a small piping bag or Ziploc bag with 2-3 tablespoons of melted chocolate and cut off the tip/corner of the bag. Drizzle and allow to set. I recommend drizzling it off the sides of the Oreo for the best look.
Notes
- How to decorate:
- Dip in sprinkles – check your local craft store or the target dollar section for seasonal colors. Or if you want to splurge, my favorite sprinkles are from Sweetapolita.
- Drizzle with colored chocolate
- Decorate with googly eyes and lips, or icing decorations
- Dip in crushed nuts
- How to store chocolate covered Oreos: Store in an airtight container for several days at room temperature. Otherwise these can be stored in the refrigerator for a longer period of time.
- Make these ahead of time: They’re the perfect dessert to prepare ahead, up to 3 days. Store in an airtight container.


