
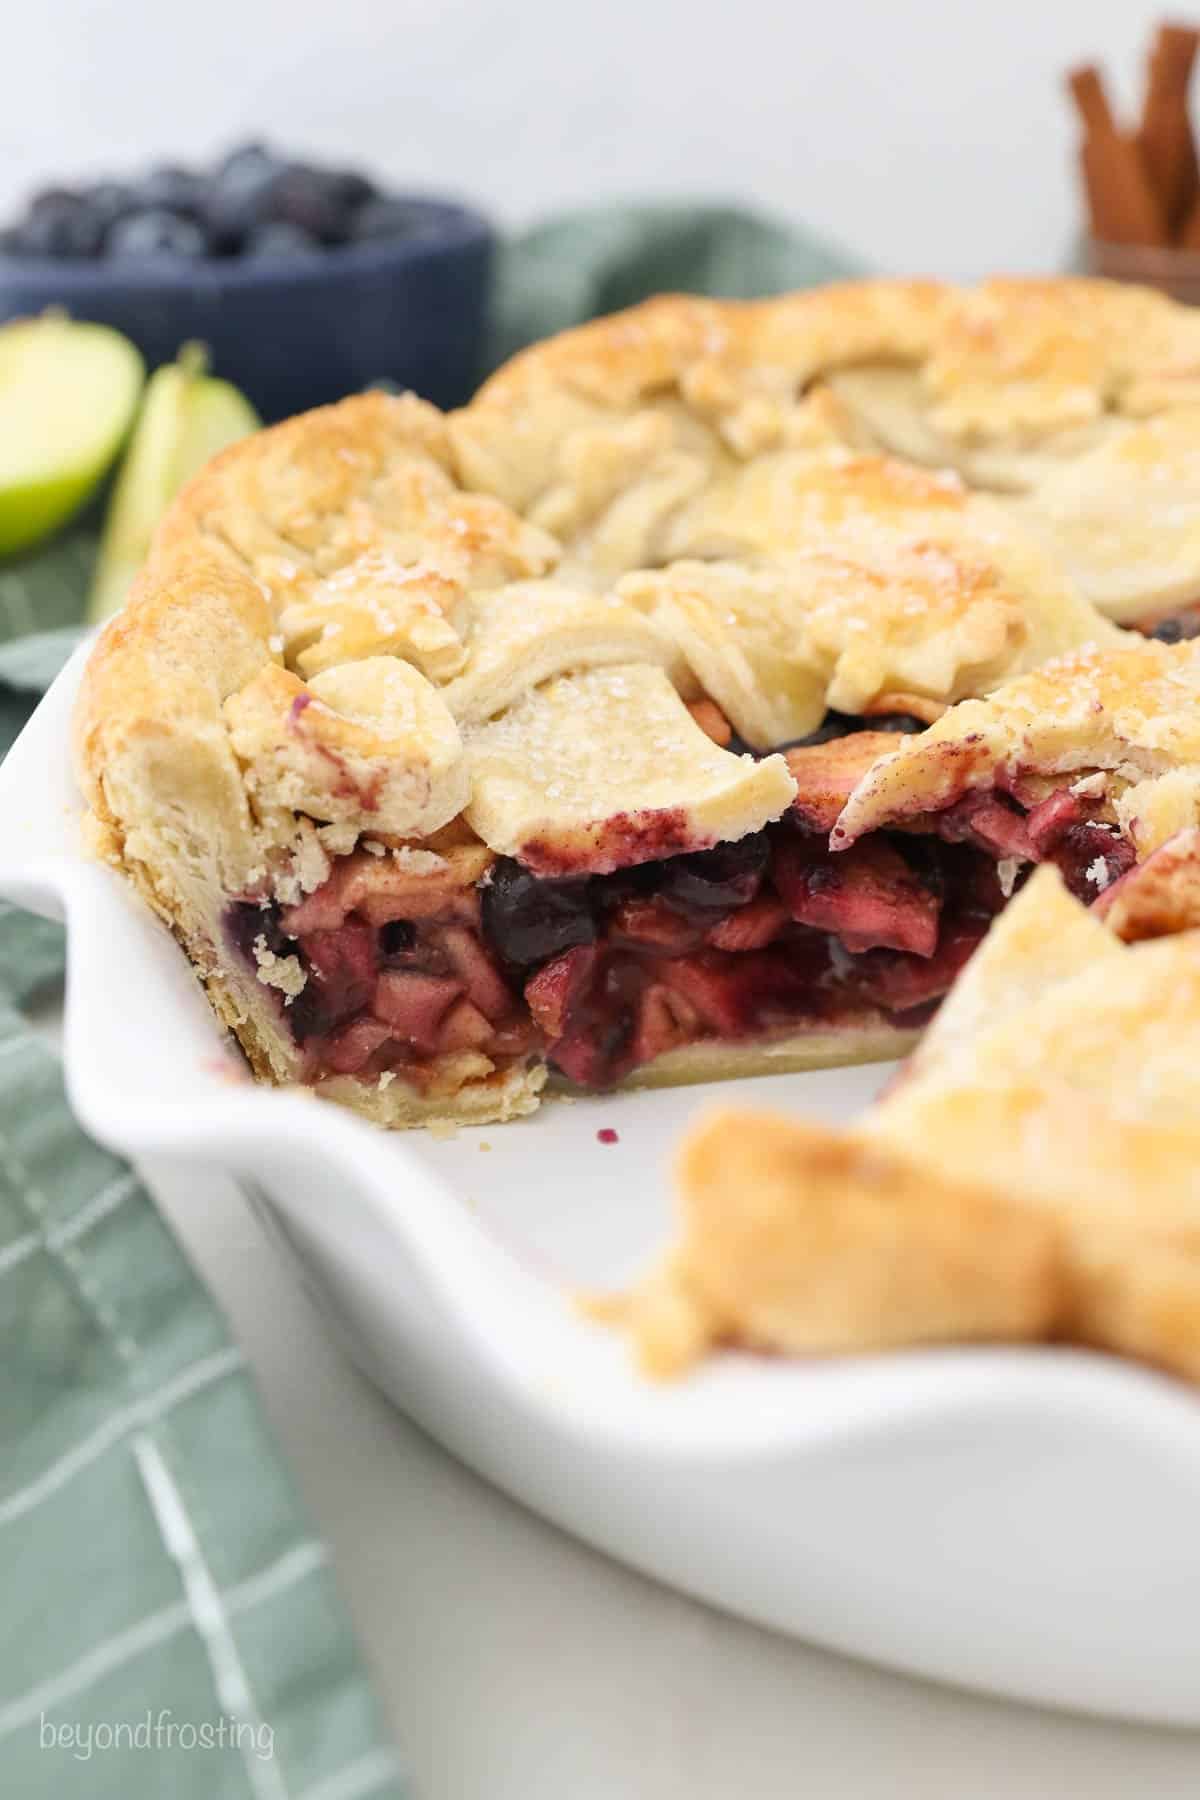
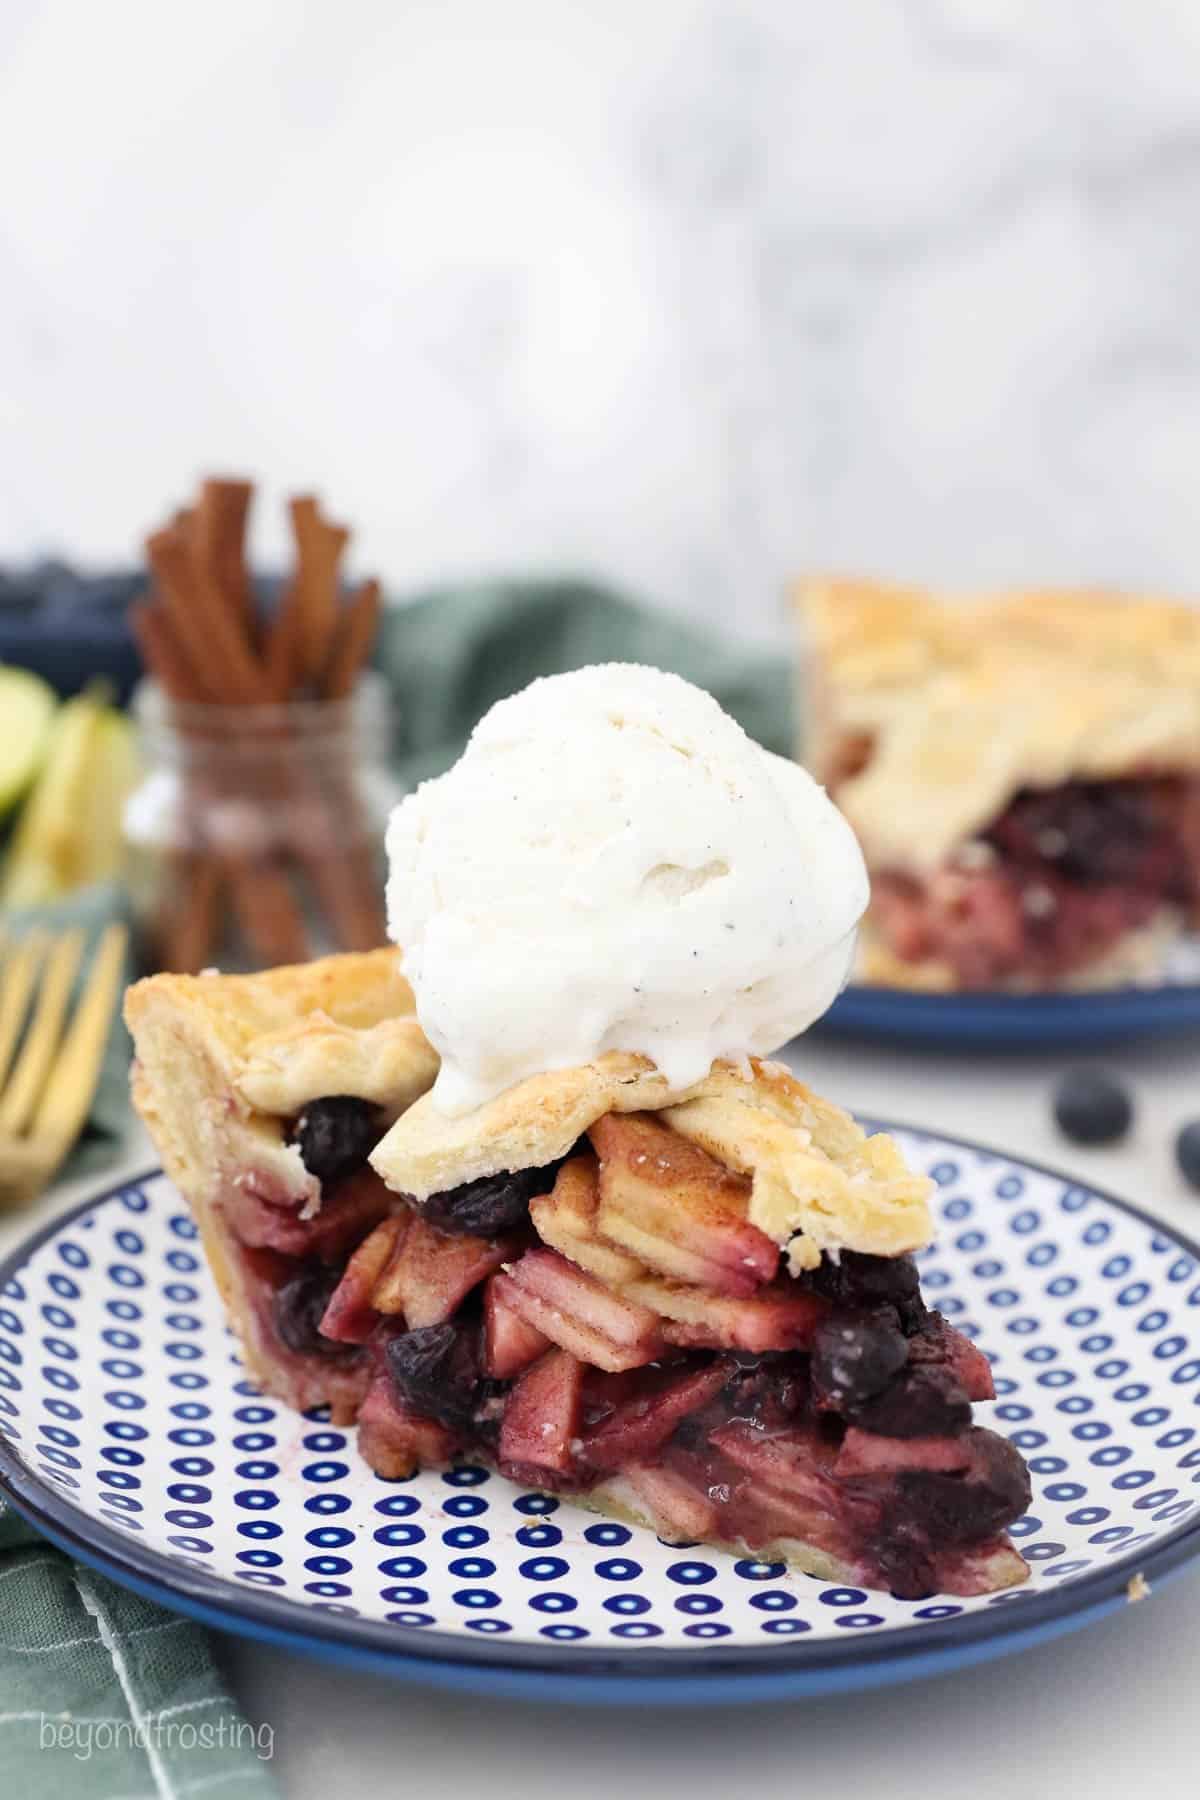
This Apple Blueberry Pie is a fun twist on a classic apple pie recipe. The fresh apples and blueberries are coated with cinnamon, sugar, and a touch of maple syrup.

Easy Apple Blueberry Pie
Whether it’s the middle of summer, a crisp fall day, or sitting around the Thanksgiving table, there’s always a place for apple pie.
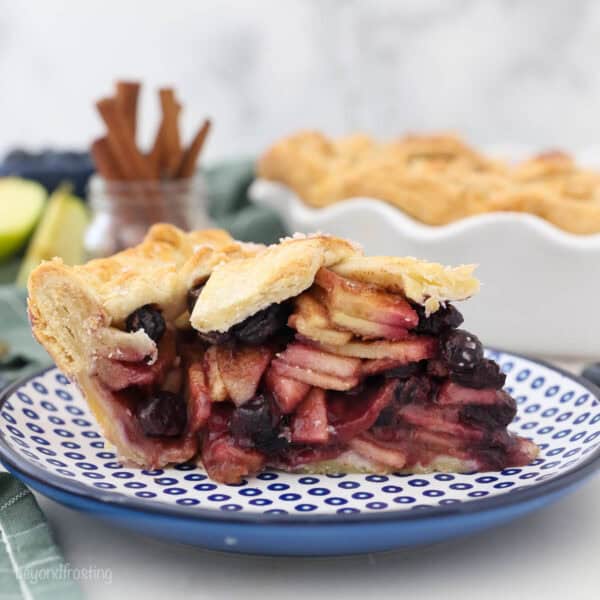
Every so often I like to change it up. This time I added some blueberries which is a great compliment to the crispness of the apples. Once baked, the blueberries release their juices and every bite is the perfect combination of sweet with a little bit of tart.
This Apple Blueberry Pie is topped with an easy lattice crust (is there such a thing as too much crust?). If you’ve never made a lattice crust before, I am sharing all the step-by-step photos you need to knock it out of the park. Plus my easy, no-fail pie crust, you don’t have to worry about it falling apart. A lattice is much easier than you’d think, but if you’d prefer something different, this would also be good with a crumble topping.
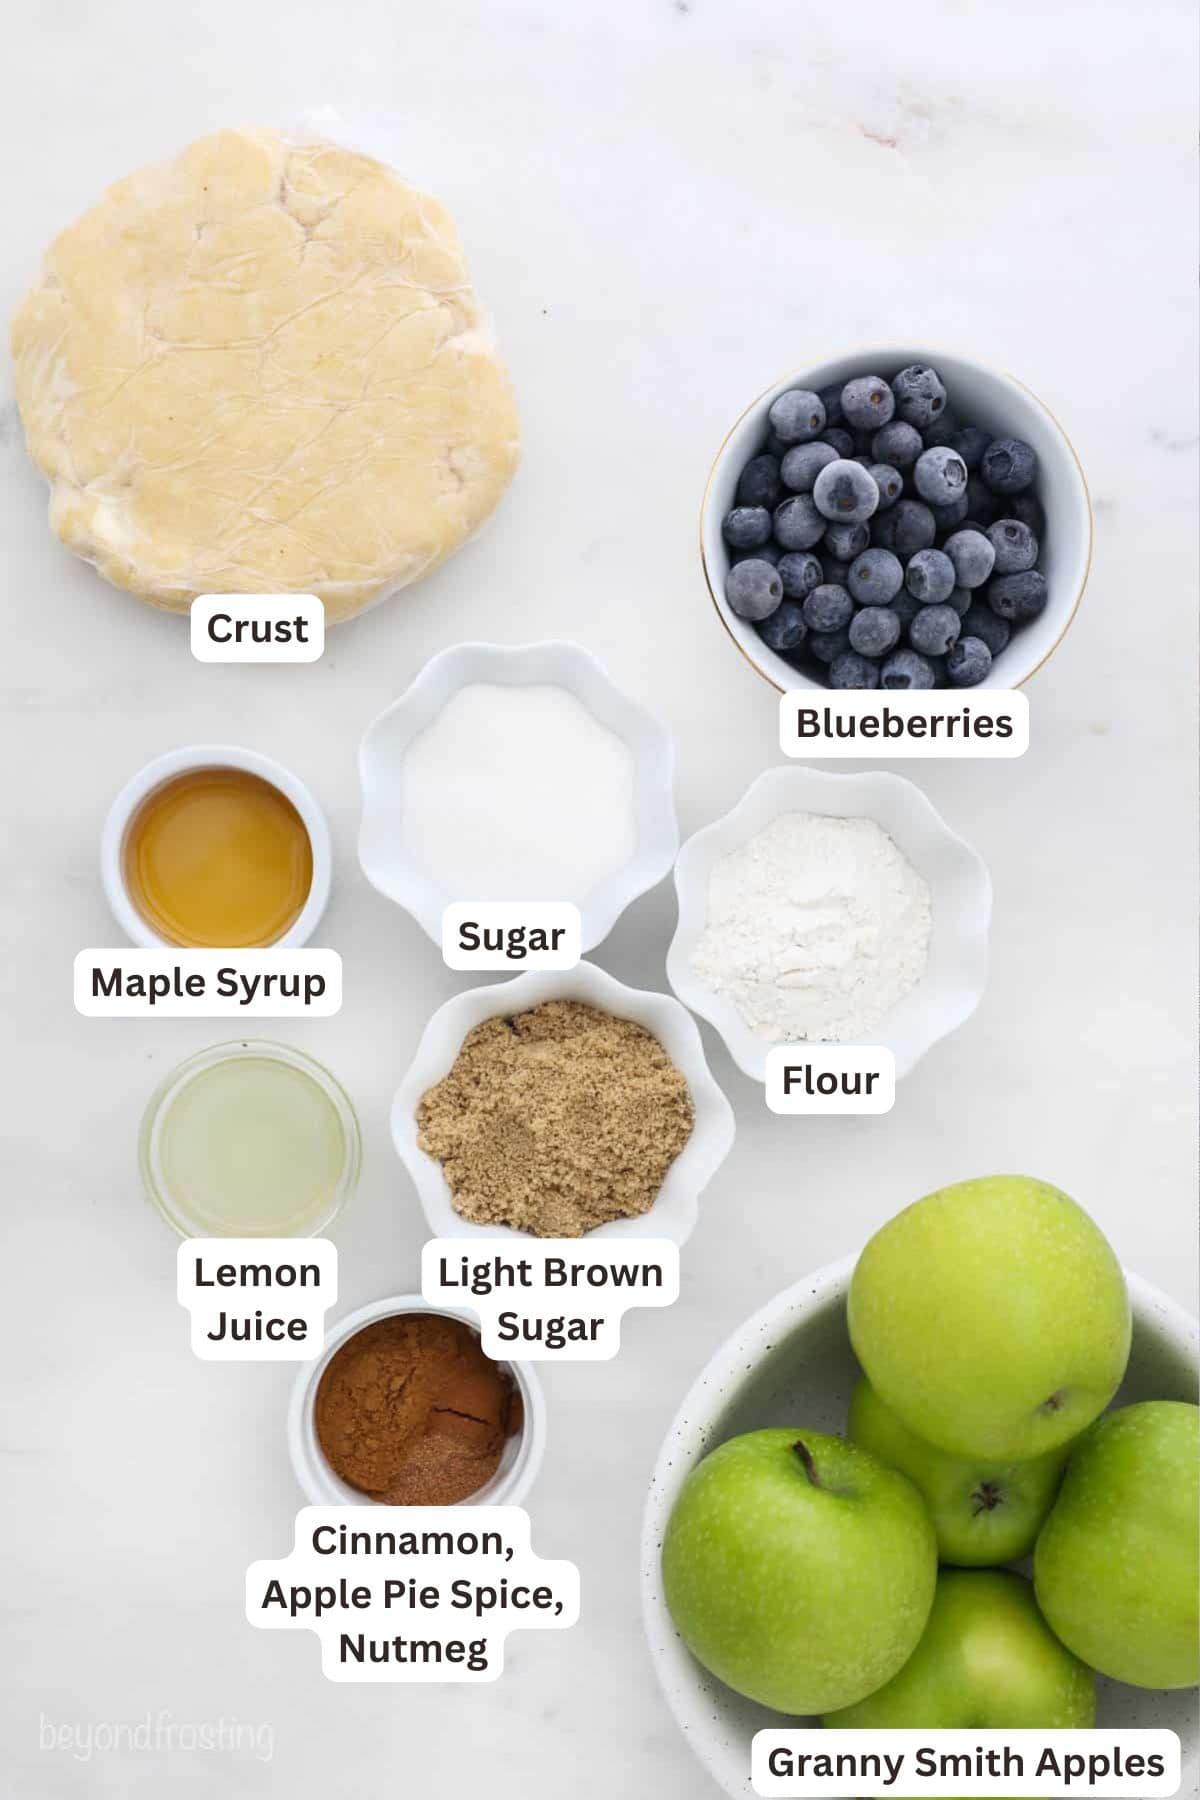
What You’ll Need
For The Crust
You’ll need two Single Crust Recipes, one for the bottom and one for the lattice. You can also make it gluten-free.
Unsalted butter, cold
All-purpose flour
Salt
Eggs
Distilled white vinegar
Ice water
Apple Blueberry Filling
Granny smith apples– medium-sized apples, peeled and diced. Feel free to swap out your favorite type of apple.
Fresh or frozen blueberries
One lemon– juiced
All-purpose flour
Granulated & Light brown sugar
Ground cinnamon
Apple pie spice
Nutmeg
Maple syrup– optional but love adding a touch of maple syrup for flavor
Egg- to brush over the top of the pie crust
How to Make Apple Blueberry Pie from Scratch
Prepare The Pie Crust
In order to make the lattice crust, you’ll need to prepare two 9-inch pie crusts. I suggest making one at a time.
- Cut the butter into cubes, about ½ inch thick. Butter should be very cold.
- In a food processor, combine the flour and salt and butter and pulse gently to combine. Mixture should have dime-sized pieces of butter.
- Next add the egg, vinegar and 1 tablespoons water, pulse until the dough starts to form, add additional water as needed
- Press the dough into a ball, flatten into a disc, about 5-inches wide. Wrap in plastic wrap and refrigerate for a minimum of 45 minutes.
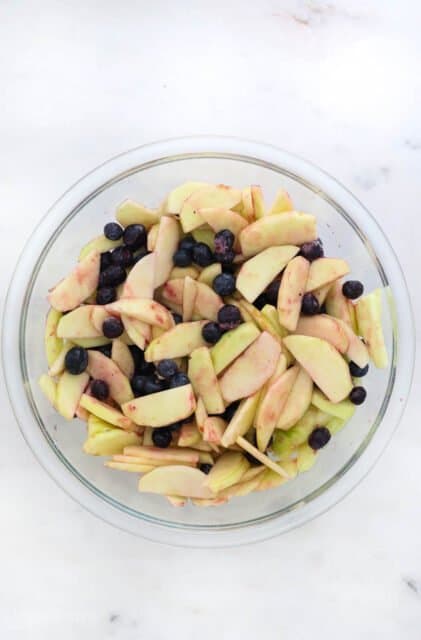
Prepare The Apples
- Peel, then slice the apples about 1/8-inch thick then squeeze the juice of a whole lemon over the apples. Add the blueberries.
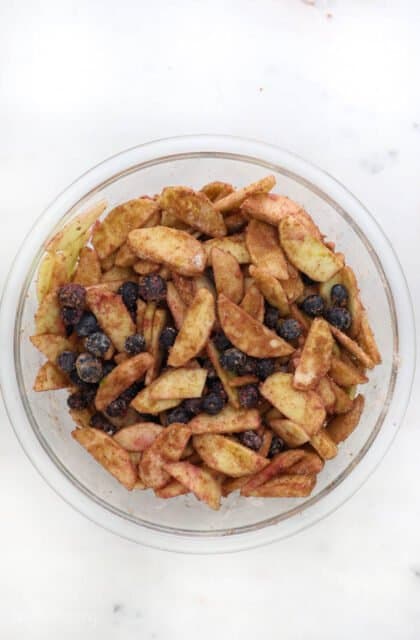
- Combine the dry ingredients and then toss in the apples and bluberries until they’re fully coated, then add in the maple syrup and stir to combine.
Assemble The Pie
Roll out the dough: Roll the dough onto a lightly floured surface, rolling from the center to the edges and rotating occasionally. Roll it out so it’s about 11 inches in diameter then place in a 9-inch pie plate.
Add the filling: Place the apple filling into the prepared crust then make the lattice crust (detailed instructions below).
Bake: Bake the finished pie in an oven preheat to 375°F for approximately 60 minutes. Cool for a couple hours before slicing.
How to Build a Lattice Crust.
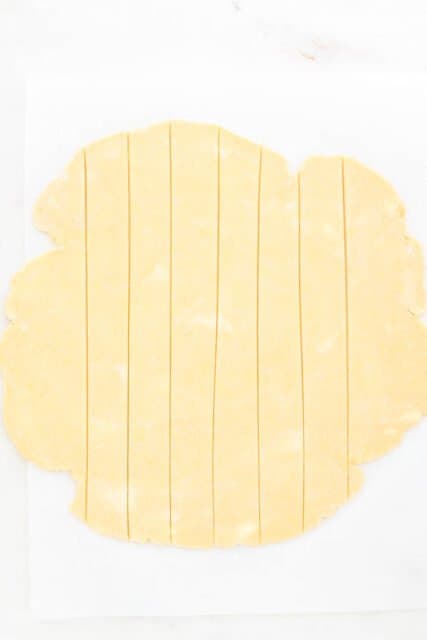
Roll out the dough: Roll out the pie crust into a circle at least 11” in diameter and at least 1/8-inch thick.
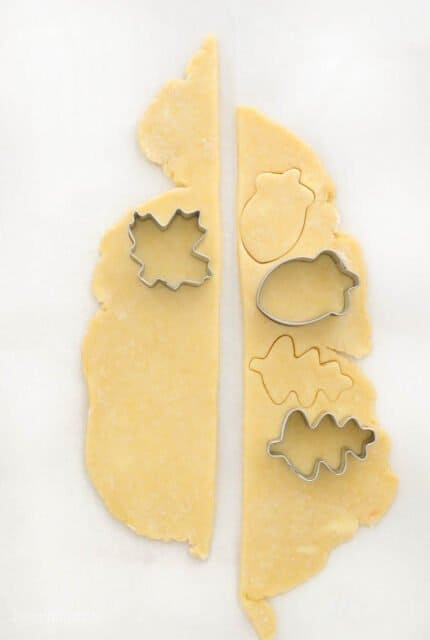
Cut the dough into strips. It’s up to you how thick or thin you’d like to make them. The thinner they are, the more stripes you’ll be able to fit on the pie. I did 6 thick strips for this pie. You can use any excess pie crust to cut out mini shapes.
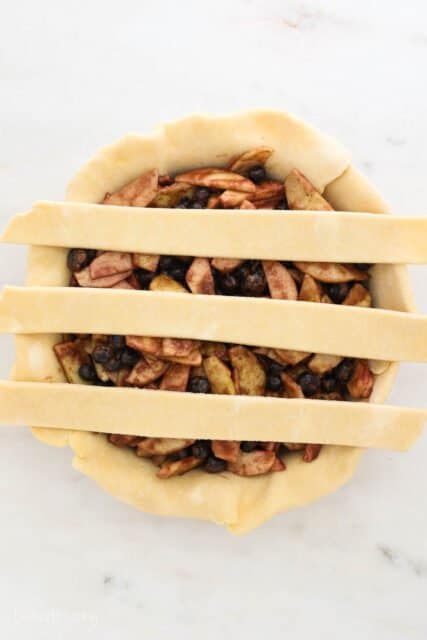
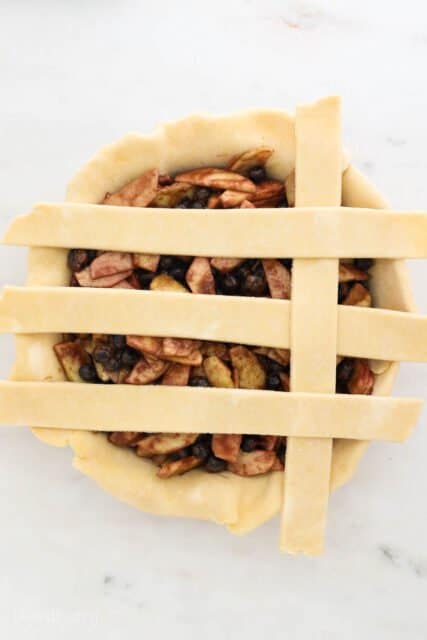
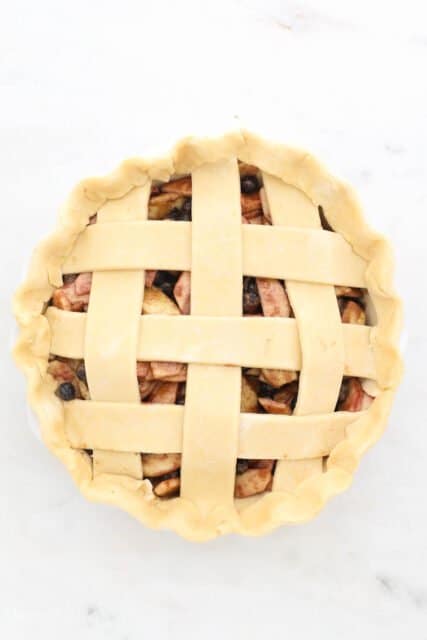
Assemble: Place 3 strips horizontally and equally spaced across the pie. Place longer stripes across the middle of the pie and shorter strips on the outside.
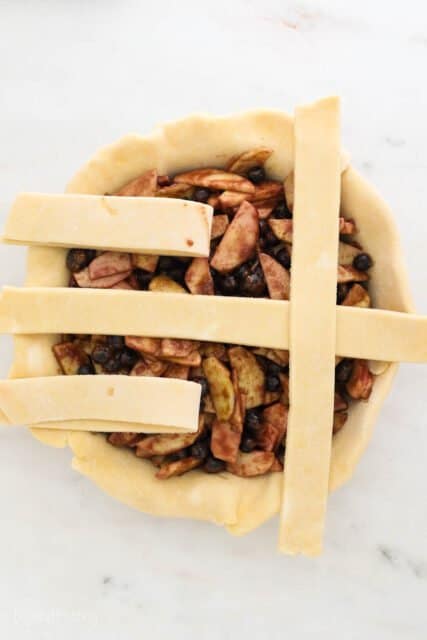
Fold back every other horizontal strip (for a large lattice, this might just be a single strip but for a smaller lattice this might be multiple ones).
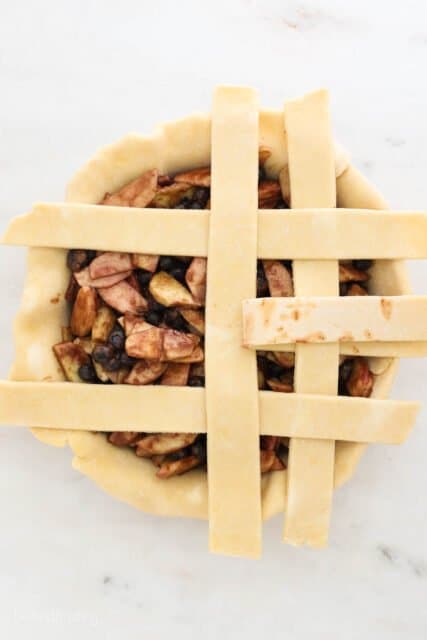
Then lay one strip perpendicular (vertically) to the others across, and fold the horizontal strips back on top of it so it lays over top of the one you just laid down.
Next, fold up one center horizontal stripe and lay down another vertical stripe in the center. It’s best to use a long piece of dough for the center. Then fold the horizontal strip back down.
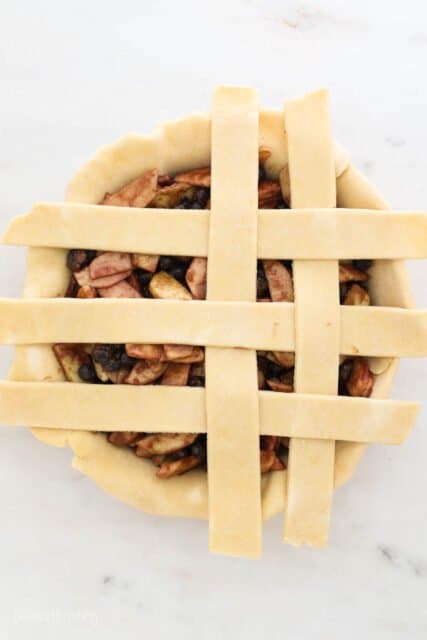
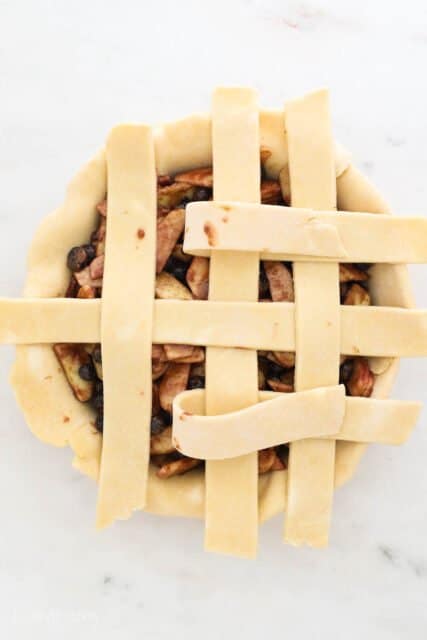
Repeat this process until all the strips have been used and the top of the pie is covered with the lattice crust.
Trim away excess edges of the dough strips. Then fold over the edges of the bottom crust on top on top of the lattice and press together, crimping the edges as you go. Place pie crust shapes those around the edges of the crust.
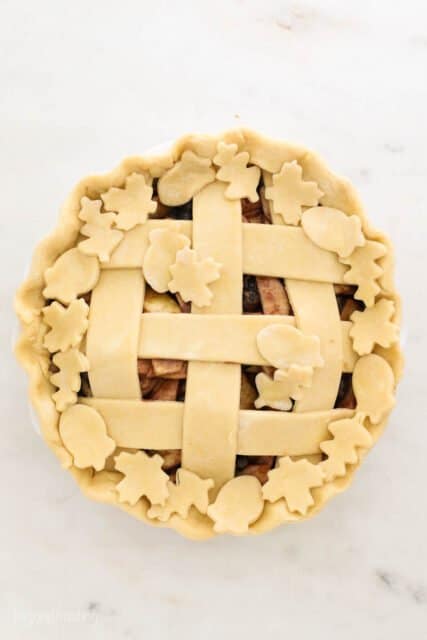
Add the egg wash: Brush the lattice crust and the cut-out shapes with an egg wash and sprinkle with sanding sugar. This gives the crust a little sparkle and a little crunch.
Tips for Success
Make pie crust ahead of time: Pie crust freezes well, so if you plan to do some pies for the holidays, make the crust ahead of time and keep it stored in the refrigerator until you’re ready to use.
Overfill the pie plate: As the pie bakes, the apples soften and shrink, so don’t be afraid to pile the filling high above the edge of the pie plate.
Don’t skip the egg wash: Brushing the unbaked crust with the egg wash gives it that golden brown color on top.
Use a pie shield: If the edges of the crust are getting too brown, you can cover it with a pie shield for the last 20 minutes of baking.
How to Store Homemade Pie
I prefer cold pie, so I keep my pie stored in the refrigerator, covered tightly with plastic wrap for up to 5 days. However, it can be stored at room temperature for 3 days. Keep it tightly wrapped in plastic wrap or stored in an airtight container.
Can I Freeze This
Baked pies can be frozen for up to one month. Bake and cool the pie completely. Double wrap the pie plate with plastic wrap. Thaw overnight in the refrigerator and then let the pie come to room temperature prior to serving.

Apple Blueberry Pie
- Prep Time: 30 minutes
- Cook Time: 55 minutes
- Total Time: 1 hour 25 minutes
- Yield: 8-10 servings
- Category: Pie
- Method: Oven
- Cuisine: American
Description
This Apple Blueberry Pie is a fun twist on a classic apple pie recipe. The fresh apples and blueberries are coated with cinnamon, sugar, and a touch of maple syrup.
Ingredients
Single Crust (you’ll need two crust for the lattice)
- ½ cup (113g) unsalted butter, cold
- 1 1/2 cups (210g) all-purpose flour
- ¼ teaspoon salt
- 1 large eggs
- 1 tablespoon (15ml) distilled white vinegar
- 2–3 tablespoons (30-45ml) ice water
Apple Blueberry Filling
- 6 medium granny smith apples- about 5 cups diced
- 2 cups (296g) fresh blueberries, frozen or fresh
- 1 tablespoon (15ml) lemon juice
- ¼ cup (35g) all-purpose flour
- ¼ cup (48g) granulated sugar
- ¼ cup (55g) packed light brown sugar
- 1 tablespoon (7.5g) ground cinnamon
- ½ teaspoon apple pie spice
- ¼ teaspoon nutmeg
- 1 tablespoon (15ml) maple syrup
Instructions
For the crust
- Cut the butter into cubes, about ½ inch thick. Butter should be very cold.
- In a food processor, combine the flour and salt and butter and pulse gently to combine. The mixture should have dime-size pieces of butter.
- Next add the egg, vinegar and 1 tablespoon water, pulse until the dough starts to form, add additional water and needed.
- Press the dough into a ball, flatten it into a disc, about 5 inches wide. Wrap in plastic wrap and refrigerate for a minimum of 45 minutes.
Apple Blueberry Filling
- Peel and slice the apples about 1/8” thick and toss with the lemon juice. Then add the blueberries.
- In a separate bowl, combine the dry ingredients and then toss the apples thoroughly in the dry ingredients. Finally, drizzle the maple syrup over top then pour your apples in your prepared crust.
Assemble
- Preheat the oven to 375°F .
- Roll the dough onto a lightly floured surface, rolling from the center to the edges and rotating occasionally. Roll it out so it’s about 11 inches in diameter, leaving you at least 1 inch on each side of the pie plate. Place in a 9-inch pie plate.
- Add the filling to the prepared pie crust.
- Make the lattice: Roll out the second crust at least 10-inches wide and cut it into strips. Use remaining dough to make small cut-out shapes if desired.
- Place 3 strips horizontally and equally spaced across the pie. Fold back every other horizontal strip. Then lay one strip perpendicular (vertically) to the others across, and fold the horizontal strips back on top of it so it lays over top of the one you just laid down.
- Next, fold up one center horizontal stripe and lay down another vertical stripe in the center. It’s best to use a long piece of dough for the center. Then fold the horizontal strip back down.
- Repeat this process until all the strips have been used and the top of the pie is covered with the lattice crust.
- Trim away excess edges of the dough strips. Then fold over the edges of the bottom crust on top on top of the lattice and press together, crimping the edges as you go. Place cut-out shapes around the outside edge if desired.
- Add egg wash: lightly beat the egg and brush it over top of all the pie dough. Sprinkle with coarse sanding sugar if desired.
- Bake for 50-60 minutes until the apples reach a soft consistency. After 30 minutes of baking, place a silicone pie shield around the outside edge to prevent the crust from browning too quickly.
- Cool for at least 2 hours prior to cutting.
Notes
- You can also make this gluten-free with my gluten-free pie crust, and use the same gluten-free flour in the filling.
Nutrition
- Serving Size: 1 serving
- Calories: 459
- Sugar: 30g
- Sodium: 171mg
- Fat: 25g
- Carbohydrates: 77g
- Fiber: 6.3g
- Protein: 7.9g
- Cholesterol: 107mg