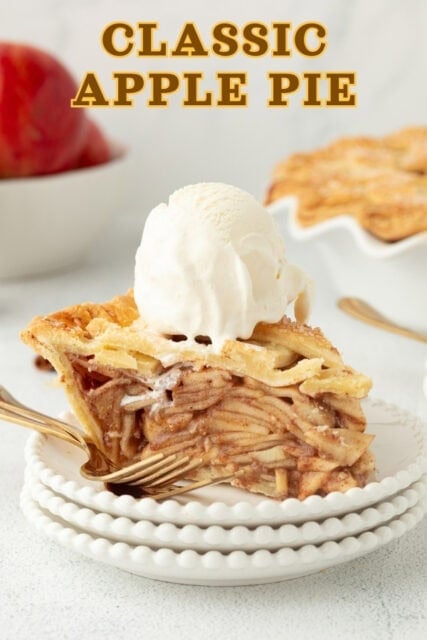
This easy recipe makes the best homemade apple pie! It has a juicy cinnamon apple pie filling baked in a classic flaky crust, the old-fashioned way. It’s my favorite fall dessert, and everyone in the family always goes for a second slice.
Tender, flaky pie crust filled with soft, spiced apples? There’s truly nothing like it. Try these apple hand pies, easy apple pie egg rolls, and my classic pumpkin pie, too.

Classic apple pie is easily my favorite fall dessert. It runs in the family. My dad is the inspiration behind this apple pie recipe with lattice crust. He requested an old-fashioned pie overflowing with cinnamon apples, with a homemade crust just like his grandmother used to make. When Dad’s slice disappeared and he immediately went in for seconds, I knew I’d nailed it.
I make this apple pie several times throughout the year, especially when fresh apples are in season. It’s great for family gatherings, and the only grand finale I want at a holiday dinner!
This Classic Homemade Apple Pie at a Glance
- Simple ingredients. Classic apple pie recipes are pantry-friendly, without any fancy ingredients. You don’t need special tools or equipment for this pie, either.
- Beginner-friendly. From the crust to the apple filling, this apple pie is a dream to make from scratch. You can also make this easy apple pie recipe with store-bought crust for extra convenience.
- A crust that won’t tear. My crust recipe is a DREAM to work with. It’s stays soft and doesn’t tear when rolling. No more frustrated pie bakers.

Ingredient Notes
The best apple pie comes down to a few simple but important ingredients. Scroll to the recipe card for a printable list.
- Pie Crust – I’ve linked my favorite homemade flaky pie crust recipe below and in the recipe card. A store-bought pie crust will also work. You’ll need a double crust (two) for the bottom and top of the pie. Alternatively, if you wanted, you can make apple crumble pie with a quick and easy crumble topping instead of a pastry crust.
- Apples – Refer to my helpful guide below if you need help choosing apples for apple pie. They should be large or medium-sized.
- Lemon Juice – Freshly squeezed or bottled, whichever is available. If you’re using fresh lemons, consider zesting the lemon before you juice it and tossing the fresh zest with the apple pie filling.
- Flour – To thicken the filling. You can substitute flour with half the amount of cornstarch or tapioca starch if needed.
- Sugar – This recipe uses equal parts brown sugar and granulated sugar.
- Spices – Cinnamon and nutmeg, or you can use apple pie spice. Pumpkin pie spice also shares many of the same ingredients.
- Maple Syrup – Make sure to use real maple syrup. You can also sweeten the pie with additional sugar or honey.
- Butter – Butter does a couple of things in this apple pie recipe. First, it adds flavor. Secondly, dotting the apple pie filling with butter is a baking trick that keeps the filling from oozing up through the lattice top.
- Egg – Whisked to form an egg wash for a glossy finish on the crust. I also like to add coarse sugar for a little extra caramelization.

Best Apples for Apple Pie
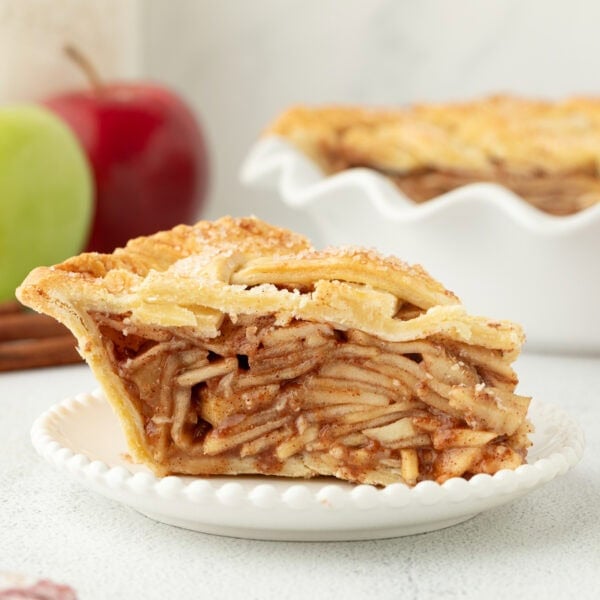
You’ll find many apple varieties that are great for making apple pie. In general, the best apples for baking will be firm, crisp varieties. I prefer to use a 2:1 ratio of tart to sweet apples. These are some common types you’ll find at the grocery store and farmers’ markets:
- Granny Smith – These are tart apples with higher acidity, making them great for baking. Granny Smith apples are also firmer, unlike McIntosh apples, which tend to turn mushy. I like to use a mix of Granny Smith and Gala apples in my pie.
- Pink Lady – Also on the tart side, but sweeter than Granny Smith.
- Honeycrisp – Another great apple for making pie that’s crisp, sweet, and tart.
- Golden Delicious, Gala, and Fuji – These are your sweeter varieties, which are great for balancing out whichever tart apples you choose.

Easy Homemade Pie Crust
I love my homemade pie crust and gluten-free pie crust for all kinds of pies, from pecan pie to lemon meringue, and not just apple. It’s a blender pie crust recipe, meaning you don’t need to worry about mixing by hand, which can warm up the butter. Keeping the butter cold is the first rule of a perfectly tender, flaky pastry crust.
Secondly, the perfect all-butter pie crust includes vinegar to create a strong yet tender dough. Refer to the linked recipes for details on how to make your pie crust.
Alternatively, if you’re using a store-bought pie crust, remember to check the packaging for instructions on how to thaw and prepare the crust for baking.

How to Make Classic Apple Pie From Scratch
Whether you’re using homemade or store-bought double crust, keep the dough refrigerated until it’s time to fill and bake it. Take out the first crust, roll it out, and press it into a 9-inch pie plate. I give the option for a second chill time which does help the integrity of the crust. Now, follow the steps below to make your pie:
- Prepare the apples. Peel, core, and slice your apples into ⅛ to ¼-inch slices. Try to make the slices the same thickness, as this ensures that the apples bake evenly. Afterward, toss the apples with lemon juice, flour, sugar, cinnamon, and nutmeg. Drizzle over the maple syrup and toss again.
- Fill the crust. Transfer the apple pie filling to your prepared pie crust. Top that with small pieces of butter, evenly distributed over the apples. You’re ready to add your top crust!


How to Lattice a Pie Crust
Now, you can roll out the second pie crust and add it to the pie as a full crust, or weave a lattice like the one pictured. If you use a full top crust, be sure to cut small slits in the top for the steam to vent while the pie bakes.
If you’ve never latticed a crust before, follow my in-depth tutorial on how to make a lattice pie crust. To weave the crust, you’ll place strips of dough evenly over the top of your pie. Alternate folding these strips back while placing new strips perpendicular to the strips underneath, until you’ve created a woven pattern.


Bake, Cool, and Serve Your Apple Pie
Once you’ve added your top crust, pinch the crusts together and trim/flute the edges, and let’s get this pie in the oven. For optimal crust performance, consider an additional quick chill time of 30-60 minutes.
- Prepare for baking. Brush the crust with an egg wash. If you’d like, give the top a light sprinkle with coarse sugar for a little sparkle.
- Bake. Bake this apple pie at 400ºF for 15 minutes. Then, lower the oven temperature to 350ºF and bake for another 30 minutes. Starting the pie in a hot oven browns the crust, while lowering the temperature afterward allows the apple filling to bake through and avoids burning.
- Cool and serve. Cool the pie completely to room temperature before you cut into it for clean, thick slices. Serve this pie topped with homemade whipped cream or drizzled with caramel sauce. I also love my apple pie a la mode with a scoop of vanilla ice cream!

Julianne’s Tips for Perfect Homemade Apple Pie
- Chill the pie dough. If your dough isn’t chilled and completely set, it will be difficult to work with. Place it in the fridge for at least an hour before rolling, and keep it in there until you’re ready to use it. Roll it out in the pan and place back in the fridge while preparing the filling.
- Make sure that the apples are well-coated. Toss the apples with lemon juice after you first cut them, as it prevents browning. Then, coat the apples thoroughly with the other ingredients. It’s sometimes easier to whisk the dry ingredients separately before adding them to the apples, so you know the flour, sugar, and spices are evenly distributed.
- Use leftover dough to decorate. I like using any leftover pie dough to make small, festive shapes with a cookie cutter. Place the shapes around the edges of the pie as desired. It’s helpful to brush some of the eggwash on the back and front of each piece to help them stick to the dough.

How to Store
- Store the pie airtight. Cover your cooled apple pie and keep it on the counter for up to 2 days. Or, transfer the pie to the fridge for up to 5 days.
- Reheat. To warm the entire pie or a large portion of it, bake it at 350°F for about 15 minutes, or until warmed through. Individual slices can be reheated in the microwave.
- Freeze. Wait until the pie has cooled completely. When I freeze apple pie, I wrap the entire pie (or slices) in two layers of plastic wrap before freezing. It’ll last for up to 4 months. Thaw the pie in the fridge before reheating.
More Easy Apple Dessert Recipes
Classic Apple Pie
- Prep Time: 120 minutes
- Cook Time: 45 minutes
- Total Time: 2 hours 45 minutes
- Yield: 8-10 slices
- Category: Dessert
- Method: Oven
- Cuisine: American
Description
Make this easy homemade apple pie recipe with fresh apples and a buttery, flaky pie crust. This beginner-friendly pie is a classic holiday dessert, and a Thanksgiving tradition in our house!
Ingredients
- 2 single pie crusts, dough prepared
- 4 medium granny smith apples
- 2 medium gala apples
- 1 tablespoon (15ml) lemon juice
- ¼ cup (30g) flour
- ¼ cup (48g) granulated sugar
- ¼ cup light brown sugar, packed
- 2 tablespoons cinnamon
- ¼ teaspoon nutmeg
- 1 tablespoon (15ml) pure maple syrup
- 1 tablespoon (14g) butter (salted or unsalted)
- 1 large egg, whisked
- Coarse sanding sugar (optional)
Instructions
- Prepare two single-size pie crust doughs. Refrigerate for 1 hour.
- Remove one crust from the refrigerator, roll and prepare the crust in your pie plate. Place back in the fridge while preparing the filling (chill for 30-60 minutes).
- Slice the apples about 1/8” thick and toss with the lemon juice.
- In a separate bowl, combine the dry ingredients, and then toss the apples thoroughly to coat. Drizzle the maple syrup over top, toss and add to the prepared crust. Cut the butter into 9 small pieces and distribute over the apples. Return the crust to the refrigerator.
- Remove the second disc of dough and on a lightly floured surface, roll it into a 12” circle at least 1/8-inch thick. Using a pizza cutter, pastry wheel, or sharp knife, cut the circle into 12 even-width strips about 1” wide. Build the lattice crust (here’s a handy tutorial).
- Brush the crust with the egg, and then sprinkle with a coarse sugar (optional).
- Use any remaining dough and small cookie cutters to make cut outs of the pie dough and place along the edges of the crust. Brush the front and back sides with egg wash.
- Bake at 400° for 15 minutes and then reduce the temperature to 350° and bake for another 30 minutes. Allow the pie to cool for a couple of hours before serving.
Notes
Storing and Reheating
- Store the pie airtight. Cover your cooled apple pie and keep it on the counter for up to 2 days. Or, transfer the pie to the fridge for up to 5 days.
- Reheat. To warm the entire pie or a large portion of it, bake it at 350°F for about 15 minutes, or until warmed through. Individual slices can be reheated in the microwave.
- Freeze. Wait until the pie has cooled completely. When I freeze apple pie, I wrap the entire pie (or slices) in two layers of plastic wrap before freezing. It’ll last for up to 4 months. Thaw the pie in the fridge before reheating.
Nutrition
- Serving Size:
- Calories: 552
- Sugar: 26.8 g
- Sodium: 316.6 mg
- Fat: 26.4 g
- Carbohydrates: 72.3 g
- Fiber: 5.9 g
- Protein: 7.7 g
- Cholesterol: 111.3 mg


This look delicious! Could you tell me if the apples in the cooked apple pie are soft or crunchy? Thanks.
They should be soft but not mushy. A thicker cut might results in a crunchier texture
Thank you so much!
Hi! Thank you for the recipe!! I want to try your classic apple pie for Thanksgiving. Instruction #4 says to return the pie to the fridge. The last instruction says to bake at 400°. Is placing the lattice on the top enough time to reduce the cold temp of the pie plate before putting it in the oven? I have glass pie plates.
That’s a great question, since I use ceramic pie plates. If the crust is not chilled enough you can expect that it won’t hold a great shape. You may need to allow additional time for you particular pan if it cannot be baked cold
What rack of the oven do you bake the pie on?
Middle rack always!
This recipe will be my first apple pie recipe! I like apple pie with a bit syrupy juiciness. Will it become juicy during the baking process or would I need to add something?
Thanks!
Hi Lizzy, yes it does become juicy and bubbly but it will settle as it cooles as well
Omg i just made your Apple Pie and it is the best! Next time i wont put in as much cinnamon, but i have no complaints!
Thank you so much Sandra! I am so glad you enjoyed it!
This recipe is fabulous, Julianne! I am known for my pies and am always designated to make them for gatherings. I used this recipe for my son-in-law’s 60th birthday. My family requests pie for their birthdays in lieu of cake, especially my grandchildren. I used my own crust recipe, that I always do, and followed the filling recipe to a T. I ended up baking one of your delicious chocolate chip cookie recipes as well. Thank you for always being my go to place for recipes! (By the way, 2 T of cinnamon is not too much – as you mentioned that is a lot of apples.)
Thank you so much Cathy!! I am so honored to be a resource for recipes for you!
Did I read this correct, 2 TABLESPOONS of Cinnamon??? that seems like a lot….I did it, I hope it turns out ok!!!
That is correct, there are a lot of apples in this recipe to cover! But if you feel it’s too much you can reduce it next time.
Never tried the maple goo, but seems good for flavor.is pumpkin pie spice ok if that’s all we have.
Yes, you may want to add a little extra
Did you blind bake this crust?
Nope!