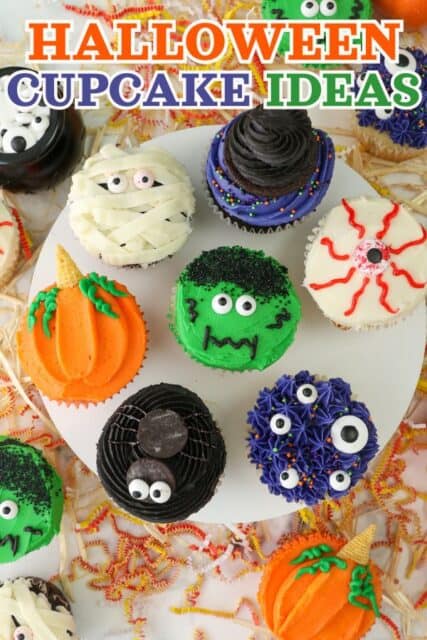
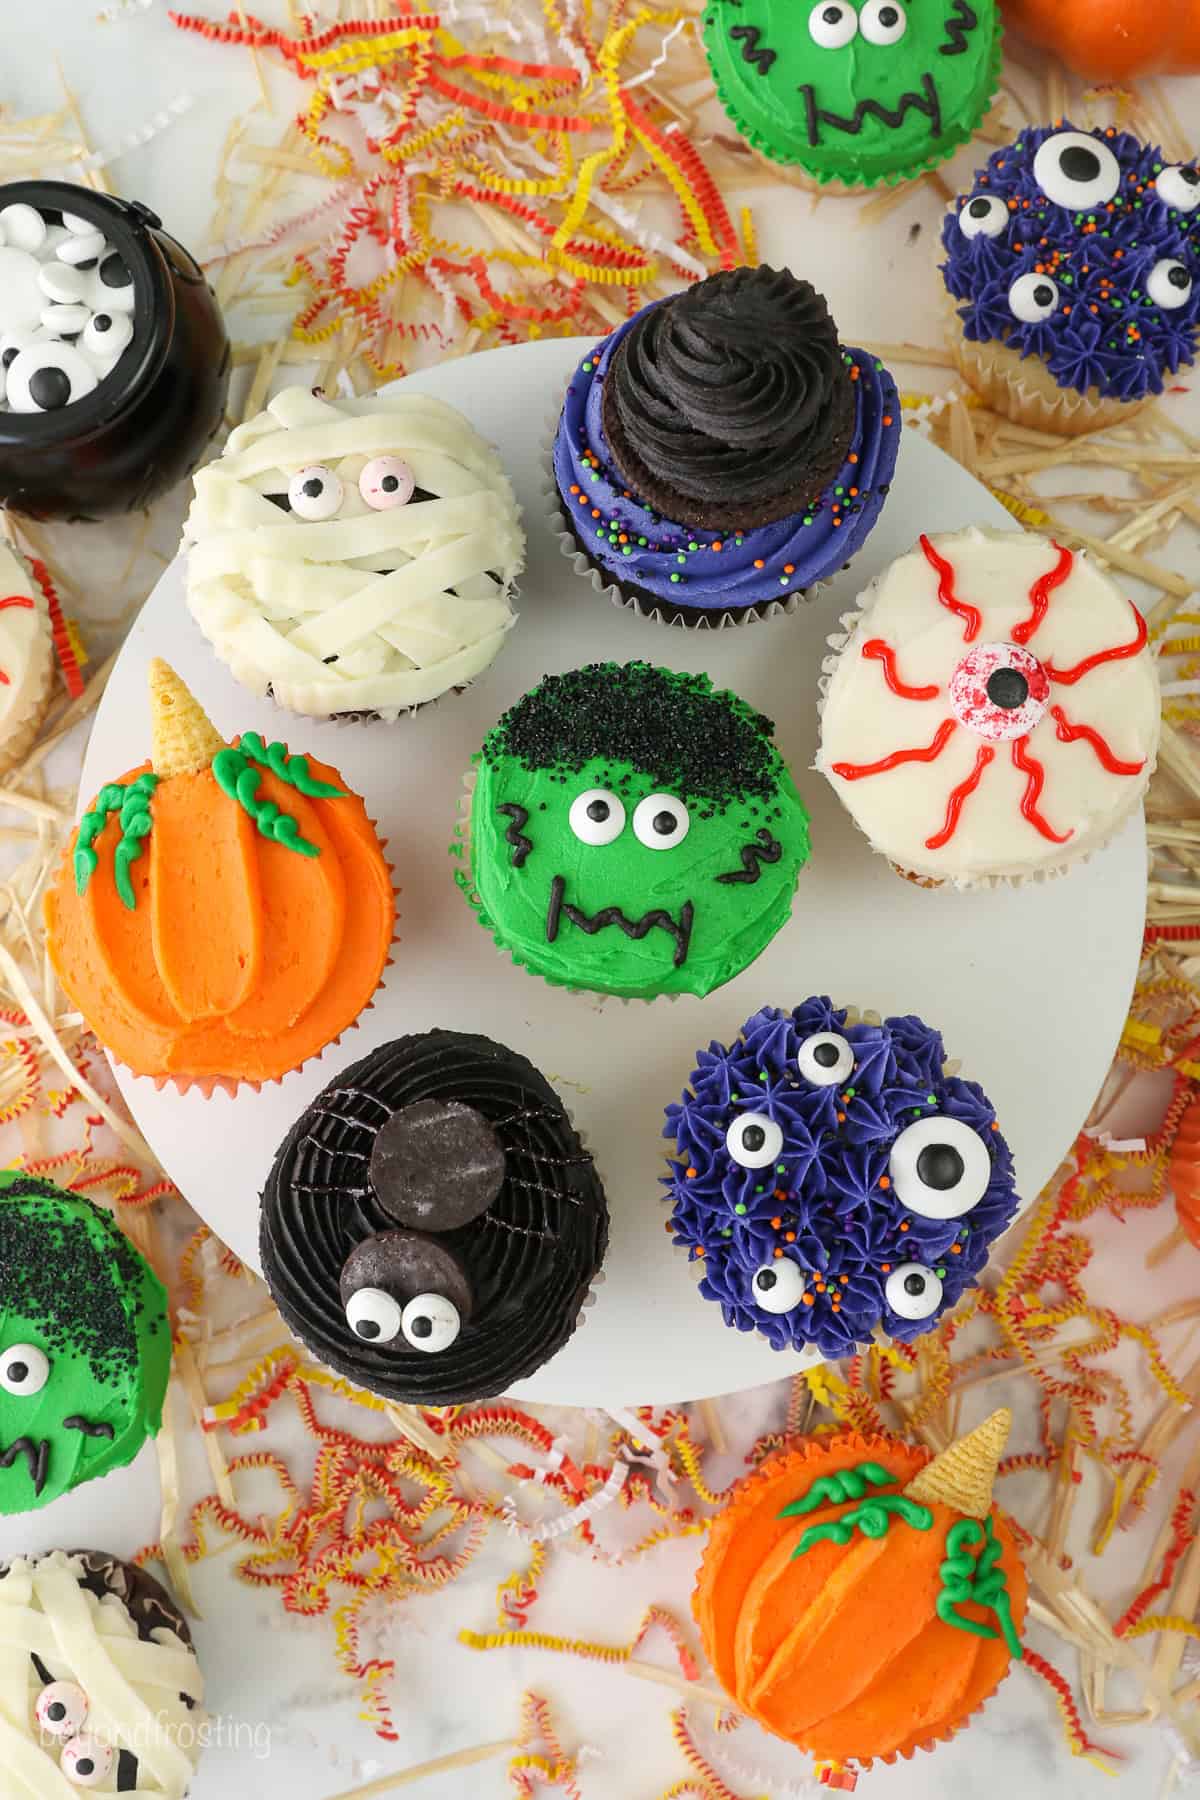
We are brewing up some fun over here with these easy ideas for Halloween Cupcakes! From witch hats to spooky mummies, get ready for 8 simple cupcake designs that will add some extra ‘boo’ to your celebration!
Easy and Fun Halloween Cupcake Ideas
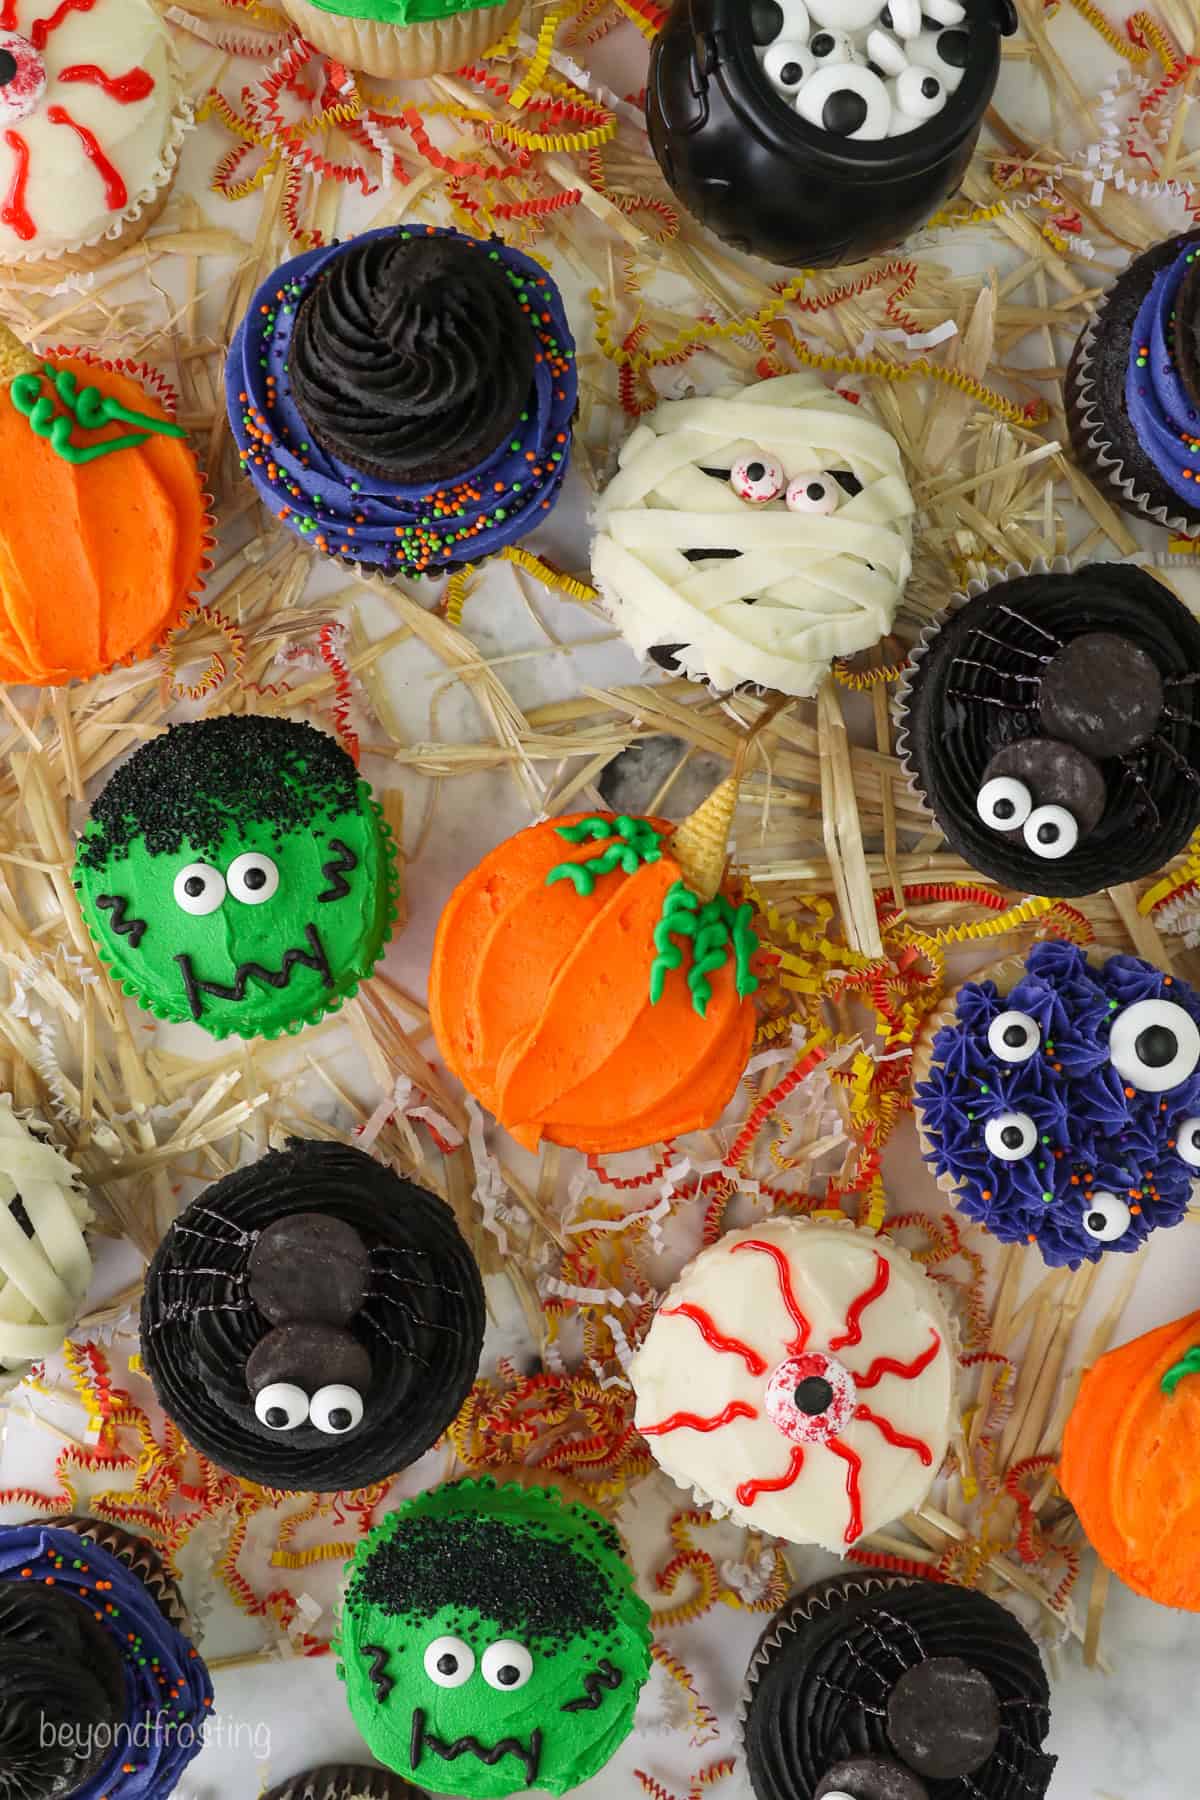
If you’re searching for Halloween dessert ideas, you’re in the right place. Using my favorite cupcake and frosting recipes, I’ve created 7 easy Halloween cupcakes. Some, like the monster and eyeball cupcakes, are super simple, while others, like the spiders, start with a quick swirl of frosting.
I’ve got everything you need right here—from my go-to cupcake and frosting recipes to tips for coloring buttercream. You’ll also find my favorite sprinkles and edible decorations! Just scroll through the ideas to discover your favorites. No tricks, only delicious treats!
Looking for more Halloween desserts? If you’re throwing a party, you can pair these with Monster Eye Cookies, decorated sugar cookies or even an easy Monster Munch. Kids also love Halloween Dirt, and the individual servings are party-friendly. Don’t forget the Mummy Dogs for appetizers.
What You’ll Need
Here is just a basic list of the items needed. For a specific cupcake design, check there to see the individual products I used.
- Cupcakes: A batch of your favorite ones, but I’ve included plenty of suggestions below.
- Frosting: I recommend a large batch of my vanilla buttercream, so you’ll have plenty to play around with. I even used this base to make the black buttercream (detailed instructions below). Any extras can be frozen or used to decorate Halloween sugar cookies.
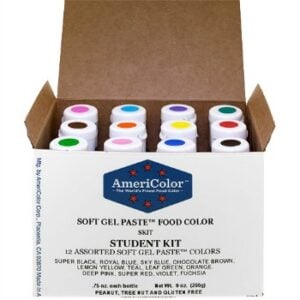
- Gel icing color: Unless you’re picking one specific color, grab the 12-color variety pack and you’ll have plenty of options to choose from. More on that below as well.
- Decorations: More than just sprinkles, you can use regular or mini Oreos, edible candy eyes, gel icing and more. See below in the decorating tutorials for link to the items I used.


Dying Buttercream- What You Need to Know
Playing around with buttercream is like a science experiment for me, you can combine colors to adjust hues or use the smallest touch of black gel to make a color darker or richer. For more detailed instructions, I have a handy tutorial for How to Color Buttercream, but most importantly, wearing gloves on your hands will prevent any (temporary) staining. Don’t forget, I also have tutorials explaining how to use prepare and fill piping bags.
What Is the Best Food Coloring for Frosting?
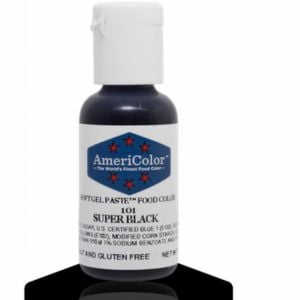
For the cupcake designs, you’ll need to color a basic buttercream frosting. The good news is that you can make one giant batch of frosting and then divide it up to color them individually. I’ve found that the brightest, most vibrant colors always come from gel food dyes, like AmeriColor gels or Wilton Color Right Gels.
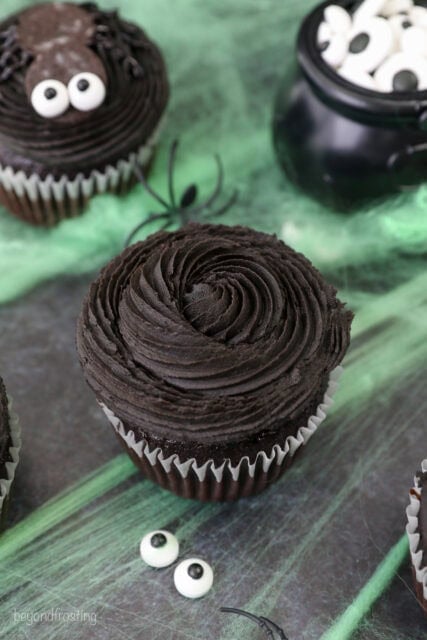
How to Make a Black Buttercream with Minimal Food Coloring
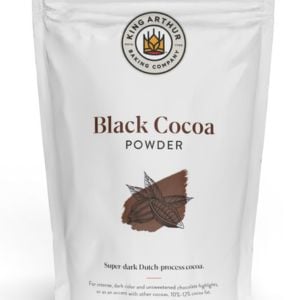
Getting a rich black color without overusing black icing (and staining your teeth!) can be tough. The trick? Use chocolate frosting with black cocoa powder for a deep, dark color instead of traditional cocoa, which turns frosting brown. Plus, black cocoa powder is great for any recipe that calls for Dutch-processed cocoa.
For these cupcakes specifically, I started with vanilla buttercream, then added cocoa powder and a bit of black gel icing to achieve this color. If you only need black buttercream, skip the vanilla and start with chocolate buttercream

Recommended Tools, Sprinkles and Decorations
While I have an arsenal of products in my studio, you may or may not have all these items. I will say that the large piping tips I linked below the my go-to tips for decorating. Your best bet for the smaller items, individual piping tips and even sprinkles is to head to your local craft supply store for the most afforable prices. This list of piping tips represents the entire collection of Halloween cupcakes, so check the tutorial for the individual designs to see which ones were used.
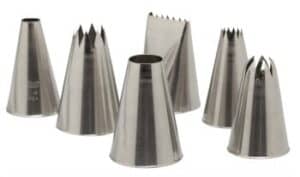
This 6pc set of jumbo piping tips includes two plain tips, one star, one French star, one closed star and one basket weave tube
Small 12-inch piping bags are perfect for decorating with buttercream, whipped cream or for filling molds.
Large 18-inch piping bags are perfect for decorating with buttercream, whipped cream or for filling molds.
Couplers are plastic pieces that are fitted with a piping tip and allows you to use different decorating tips with the same bag of icing.
The size 21 piping tip is a small closed star piping tip is used to pipe basic flower and star shapes.
This piping tip is also known as a basketweave tip. It has one flat edge and one decorative edge that can be used.
A size 3 piping tip is part of the open-round series and is the third biggest in the collection. It’s great for small details.
The size 5 piping tip is part of the open round collection. It’s great for writing and decorating small details.
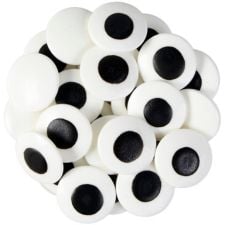
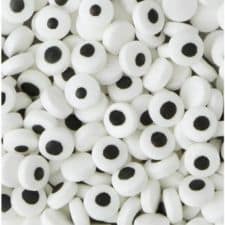
Edible candy eyeballs make a great decoration for cookies, cupcakes and more.
These large candy eyeballs are perfect for decorating these are 2cm/0.79 inches in diameter.
Create a sparkle design with this black sanding sugar,
This black writing gel makes writing on cakes and cookies so easy!
Make easy designs with a vibrant red writers gel.
How to Make Halloween Cupcakes
Okay, you’re new to this whole decorating thing but still want to make cute cupcakes? Try starting with these easy ideas before moving onto the next.
Simple Monster Cupcakes
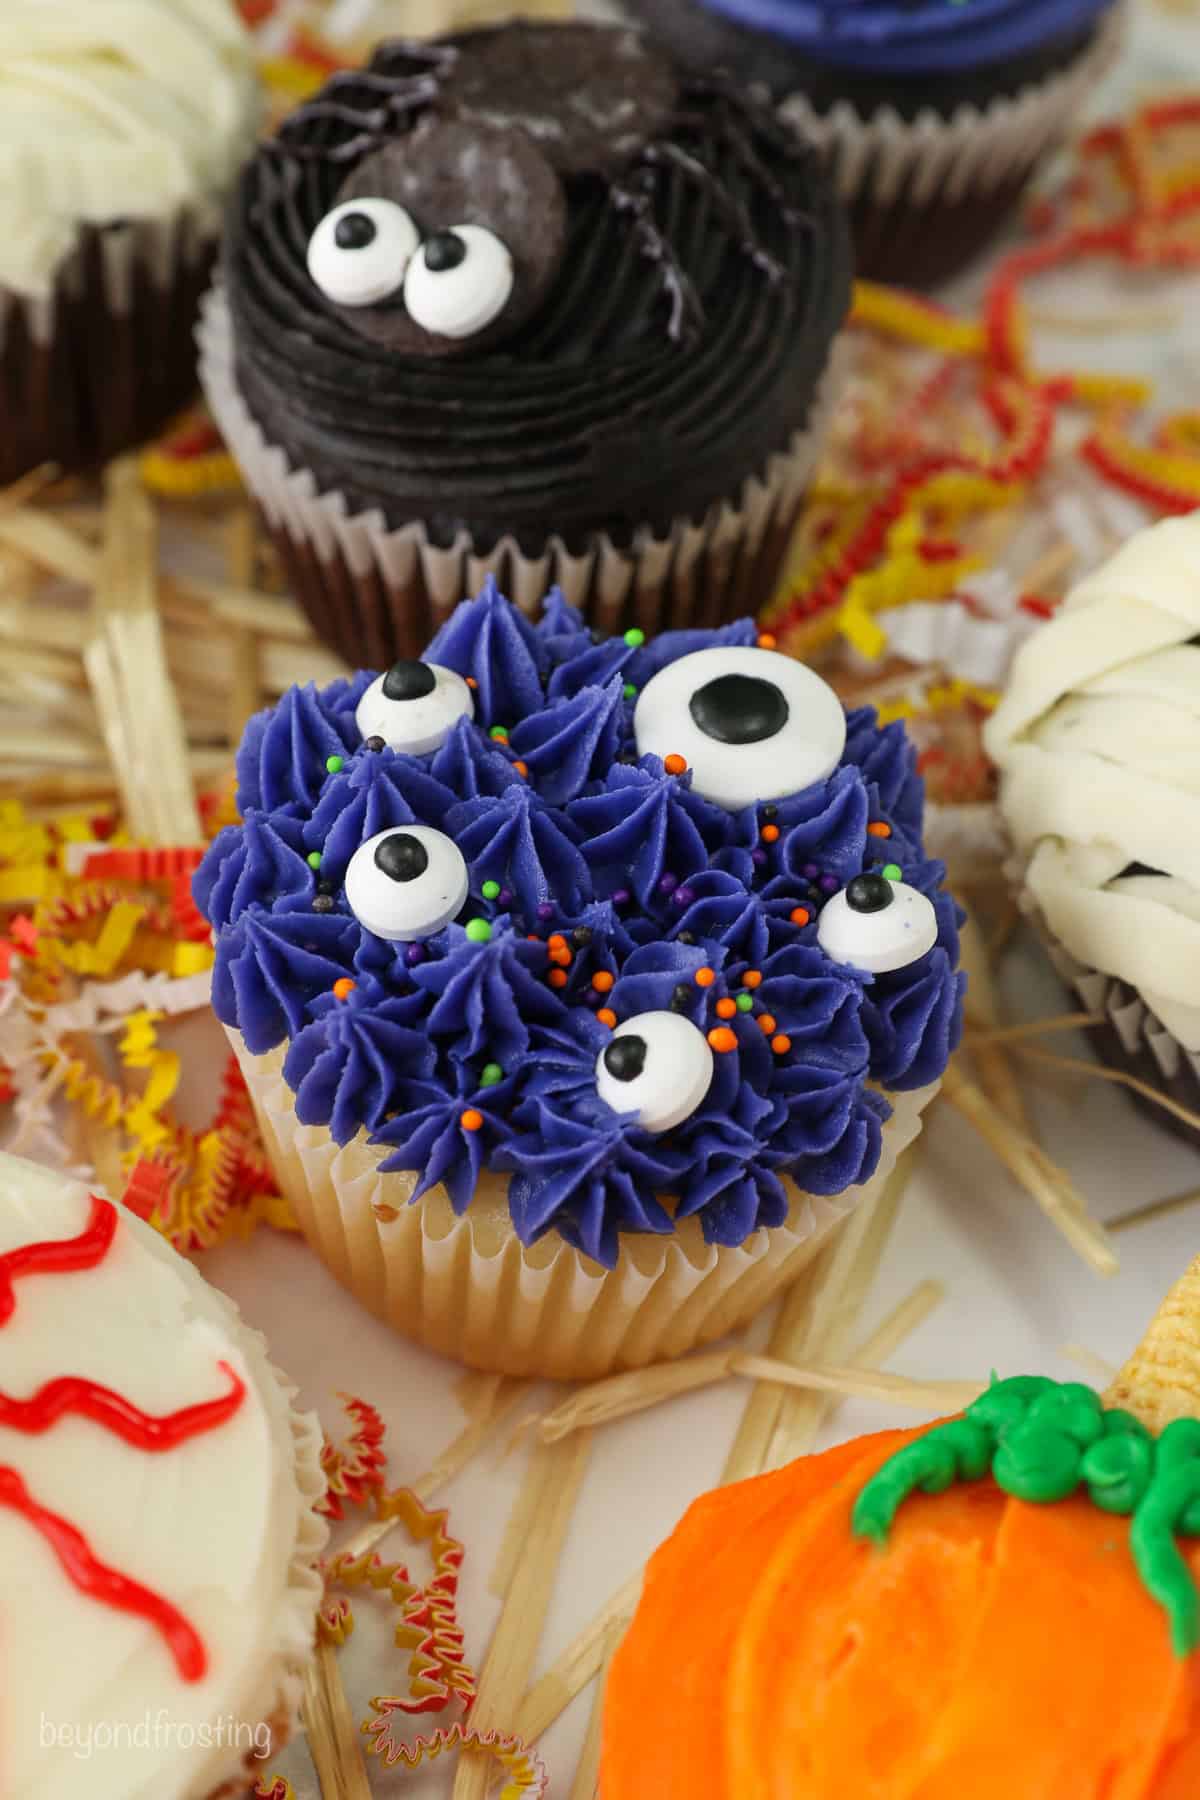
These cupcakes are hard to mess up, and if you have kids, this one is fun for them to try. You can use any color buttercream—think green, purple, blue, or even red. You’ll need a piping bag and a small open star tip (I used tip 21, but you could use an 18). A coupler is handy but optional.
To create the design, pipe stars all over the top of the cupcake. Vary the pressure and how long you squeeze to change the size of the stars. You can also layer them for more texture. To decorate, add some sprinkles and edible candy eyes (linked above).
Bloody Eye Cupcakes
Begin with white buttercream to frost the top of the cupcake, then smooth it out using a knife. Place a large edible blody candy eye in the center. Then use a red decorating/writer’s gel (linked above) to make very thin and squiggly lines all the way around the eye. The only thing you need to know here is not to overdo it with the red gel. The thicker the lines, the more likely it is to run.
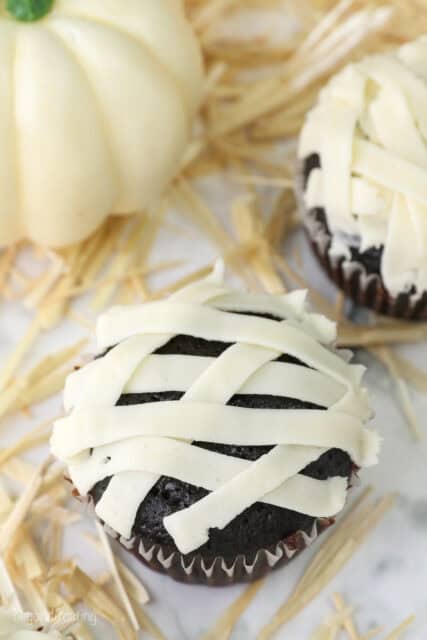
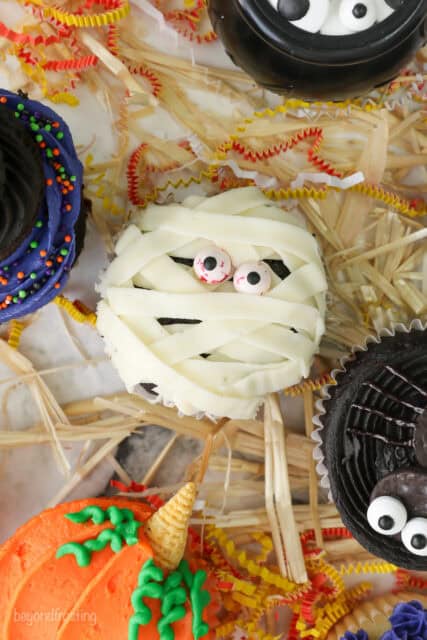
Spooky Mummy Cupcakes
Fill a piping bag with white buttercream fitted with a basketweave tip (Tip 47 linked above), flat side facing up. Pipe short lines across the cupcake, varying their direction. Once the cupcake is mostly covered, place two edible eyes on top and add a few more lines around them. Use the flat edge of a knife to trim any rough edges.
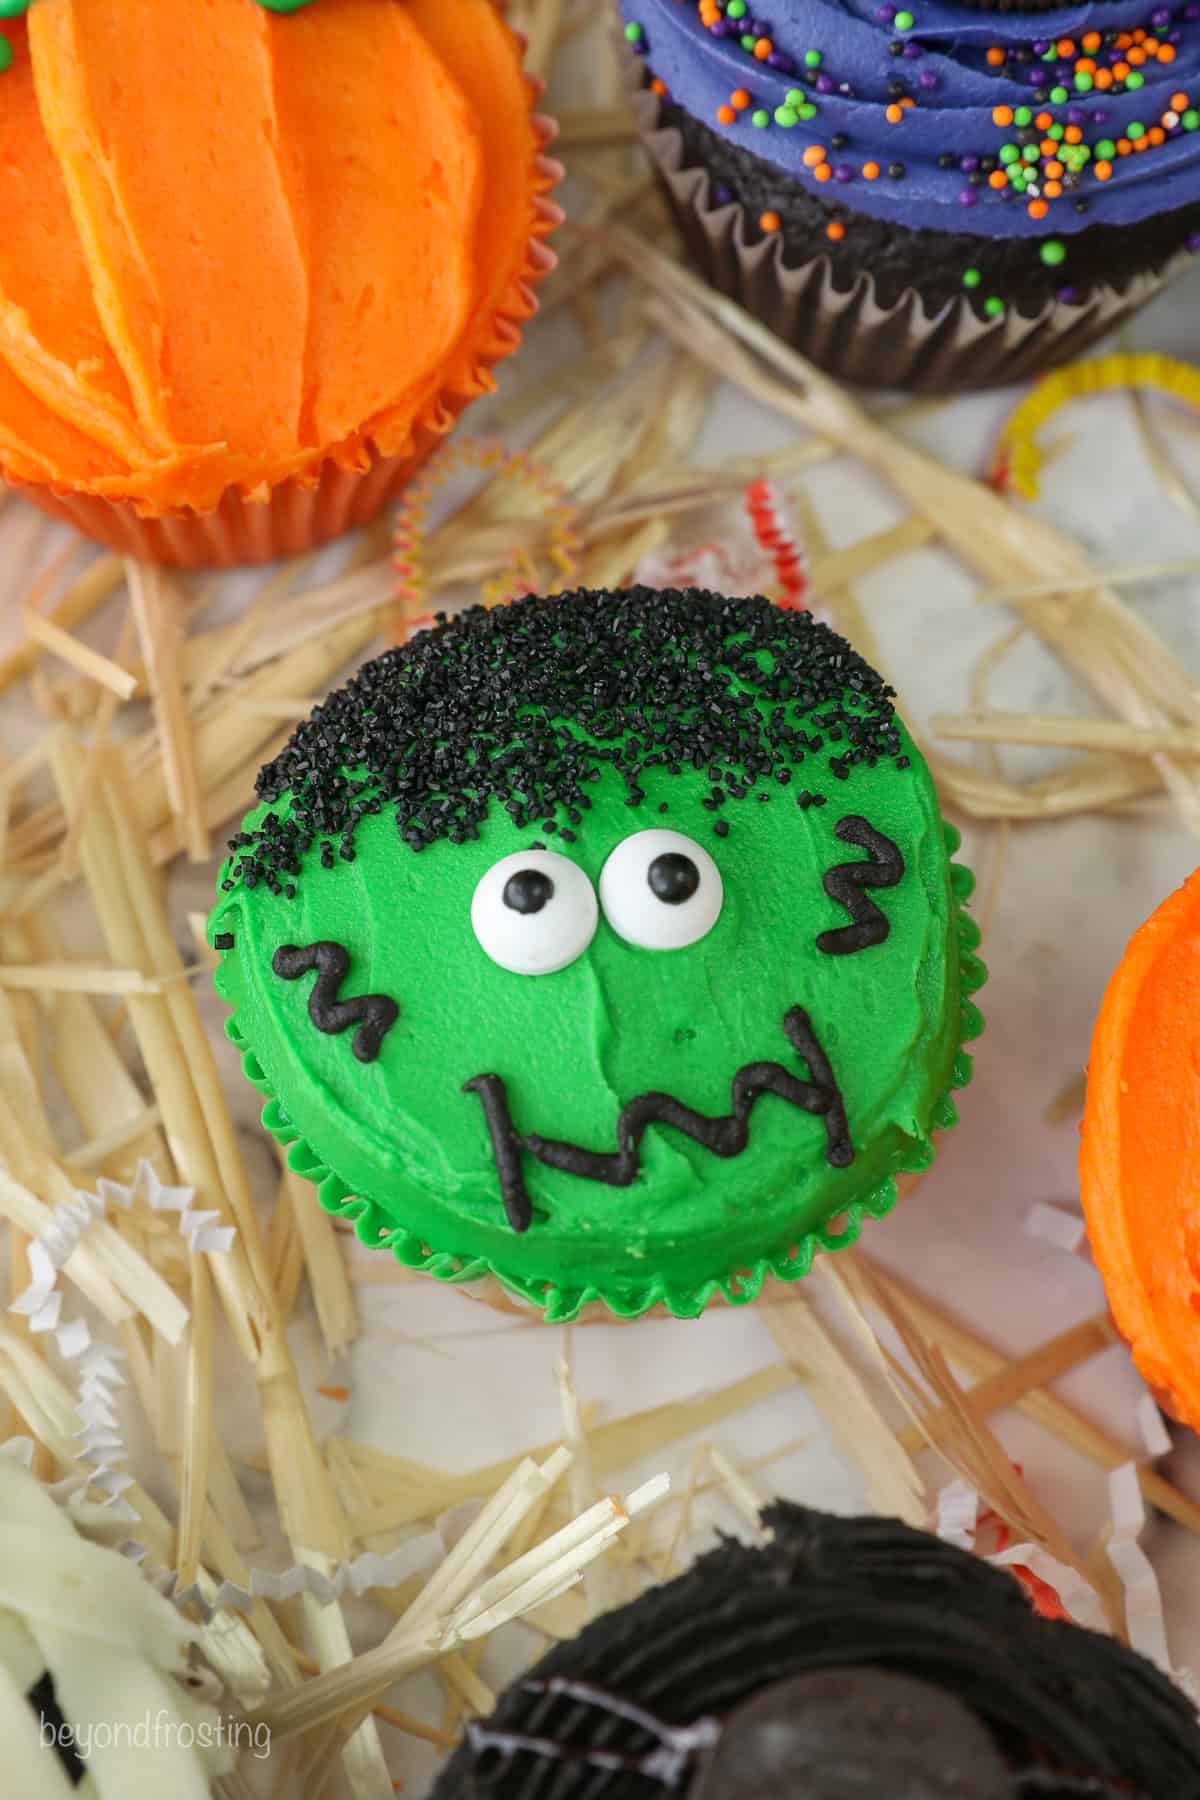
Easy Frankenstein Cupcakes
Start by frosting the cupcake with green buttercream, and smooth over the top using a flat-edge spatula. Dip the top of the cupcake in black sparkling sanding sugar. Then use black buttercream with a small open round tip (tip size 3 is best) and draw the facial features, then add the candy eyes.
For the green color, I used a combination of leaf green and electric green gel with a toothpick-sized touch of black to darken it.
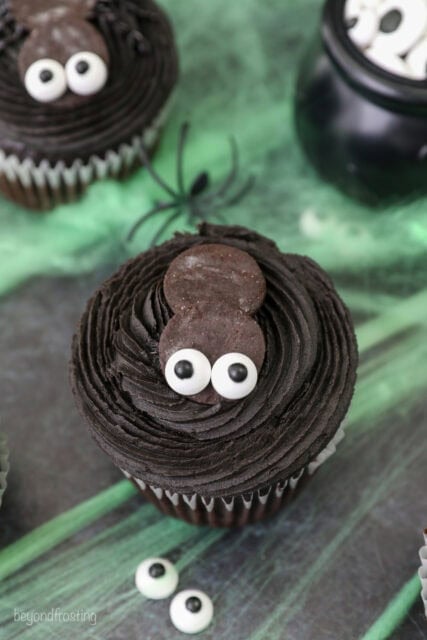
How to Make Spider Cupcakes
These cupcakes are one of my favorites—they’re so cute!
- Start with black buttercream and use a large French star piping tip (like Ateco 846 or 849, or even a 1M). Begin in the center and pipe outward to the edge. If you don’t have a large tip, simply spread the black frosting on top.
- For the spider, use mini Oreos with the filling removed. Place the two cookie halves on top, layering the head on top of the body. Dot the back of the candy eyes with frosting and attach them to the Oreo.
- Use black writing icing (linked above) to draw thin legs; be careful not to use too much icing gel, or the legs will spread. If you don’t have black gel, you can use black buttercream and a size 2 open round piping tip instead
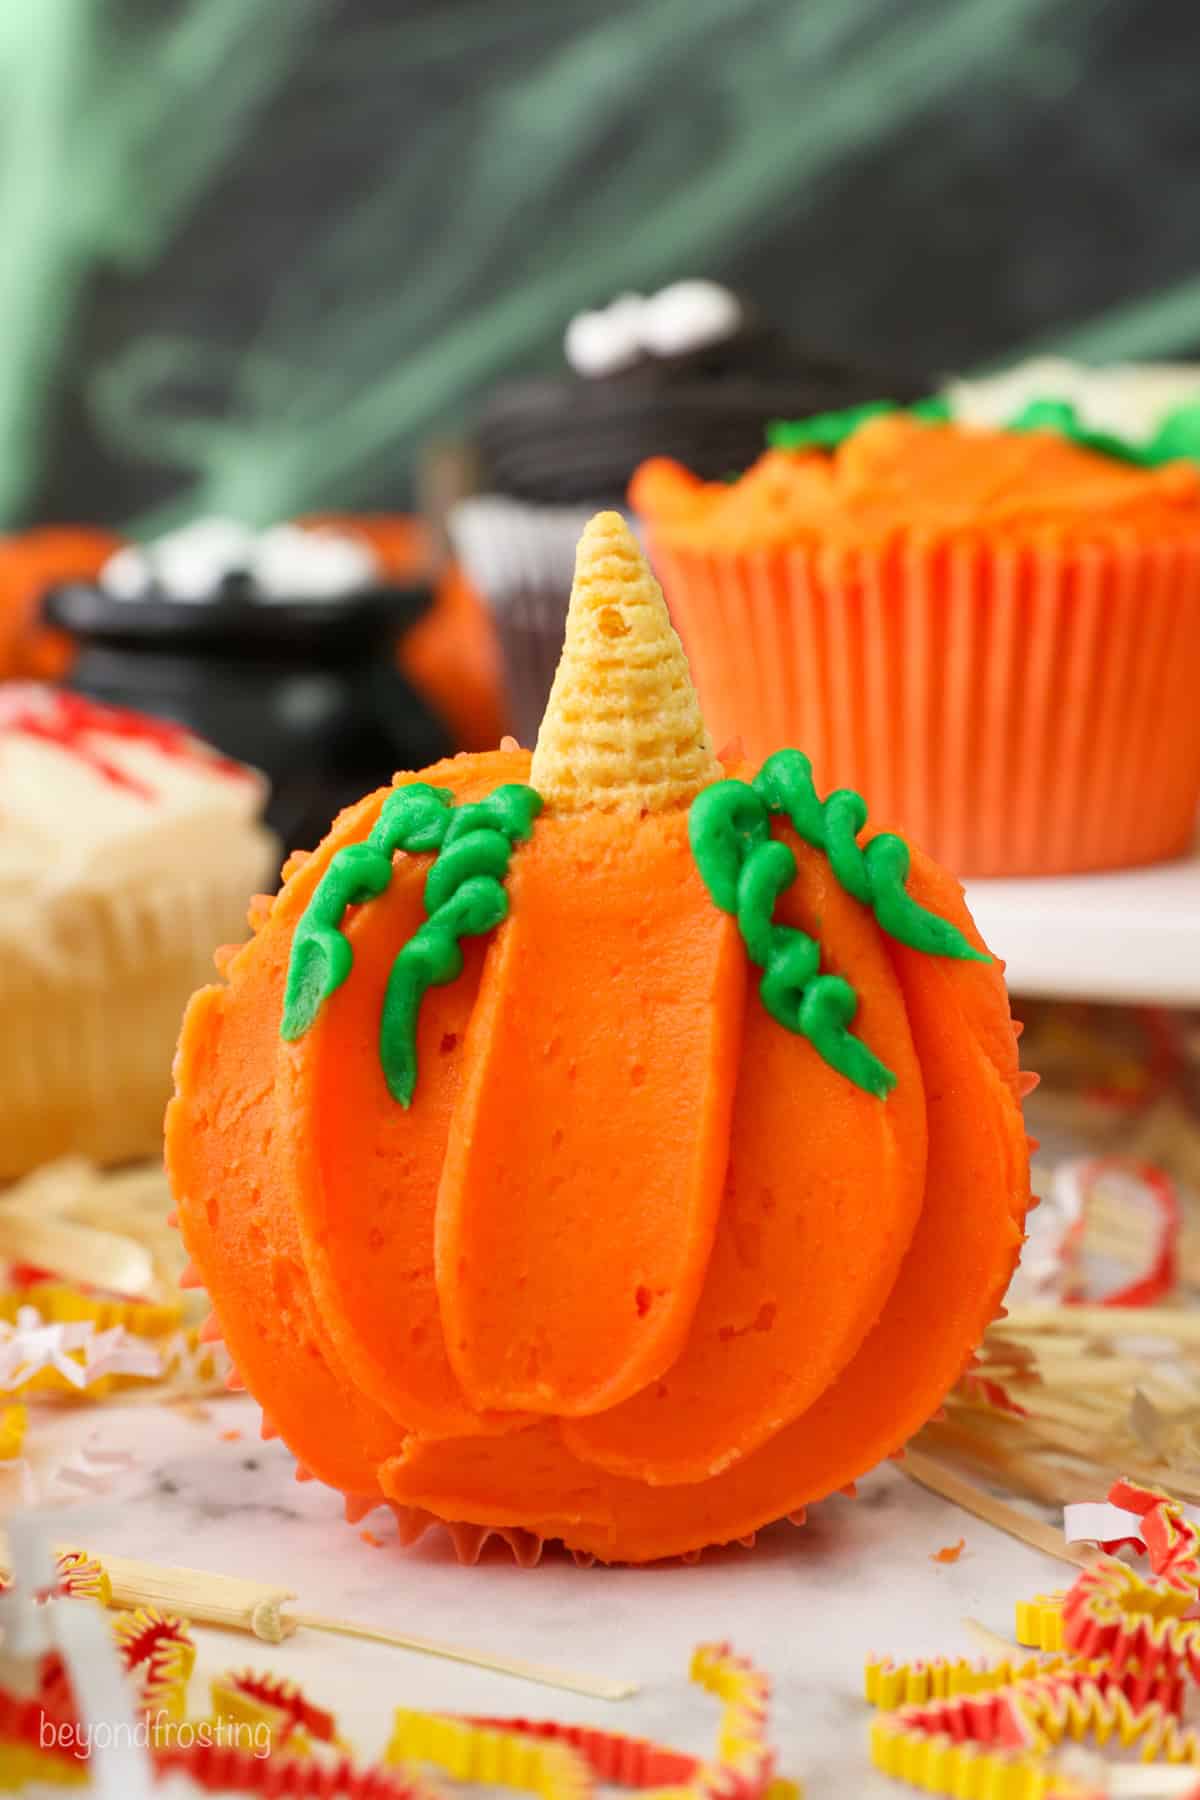
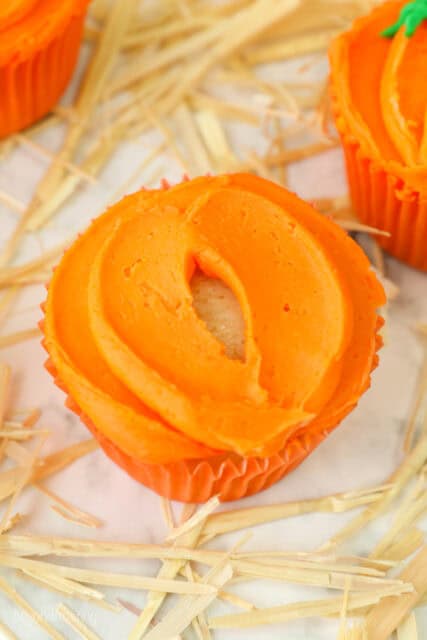
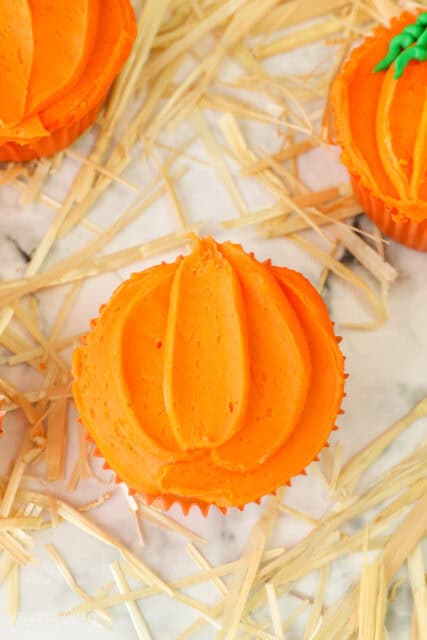
How to Make Pumpkin Decorated Cupcakes
I love how these turned out, and the piping technique is easy but may take some practice. As with any design, you can practice by piping it onto a piece of parchment paper first, then you can easily reuse the frosting. For these, I used an Ateco 806/Wilton 1A). Any large open round tip will do.
- Begin at the outside edge and pipe from top to bottom, applying even pressure. Use a flat angled spatula or a spoon to gently press the frosting down. For the second row, slightly overlap the first row and repeat the process. To finish, pipe a solid line of frosting down the middle and flatten it as needed
- For the stem of the pumpkin, I used Bugles and just broke the tip off (I also ate way too many Bugles in the process). Gently press into the top of the cupcake. To add the vines, use a small open round tip (this is size 5), and pipe a couple of squiggly lines.

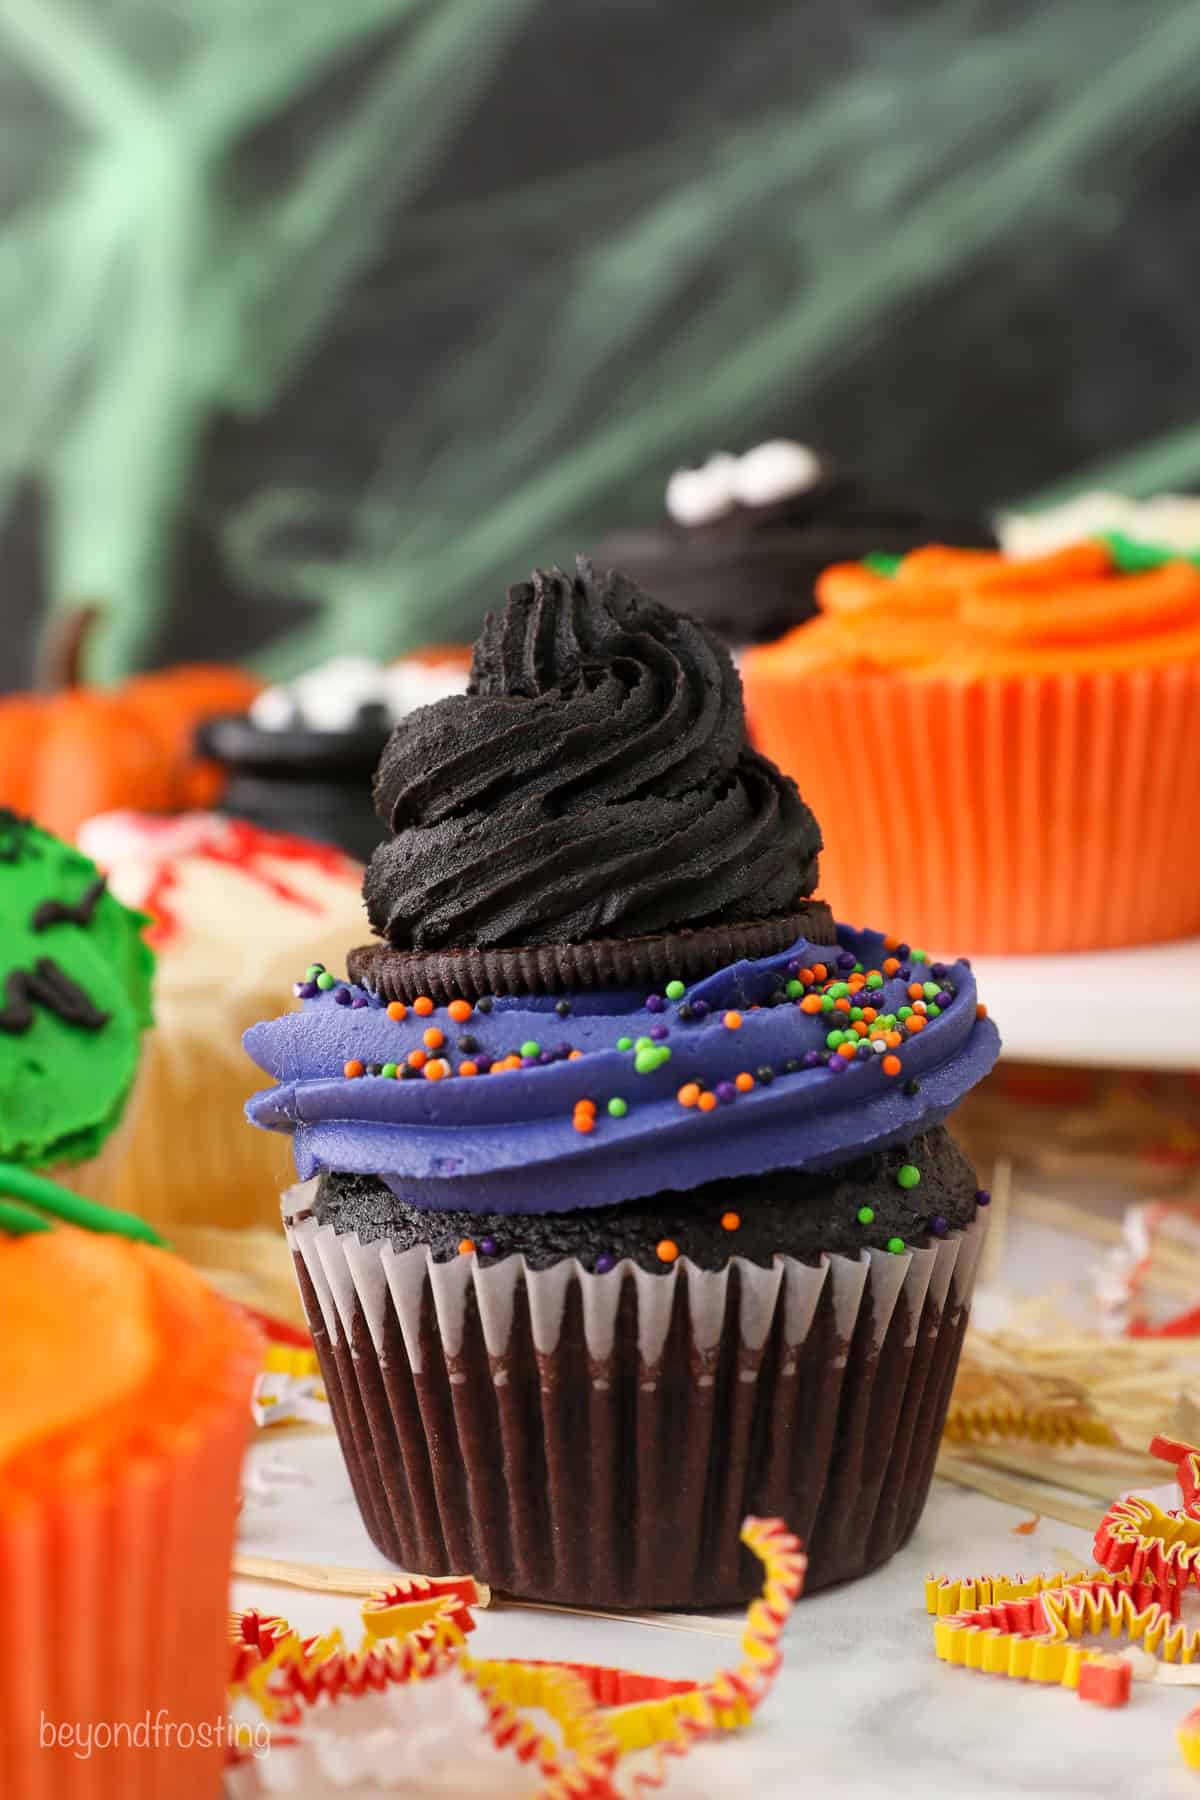
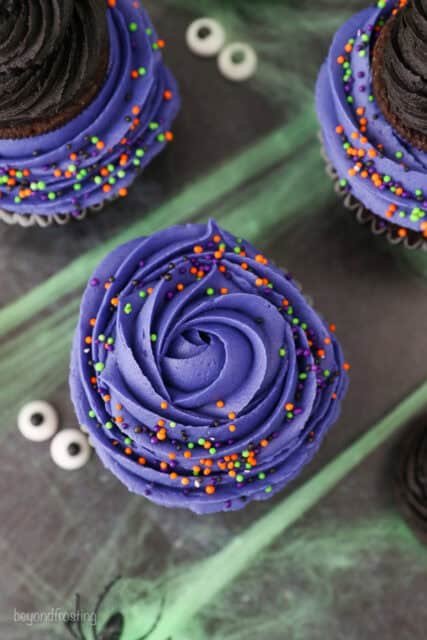
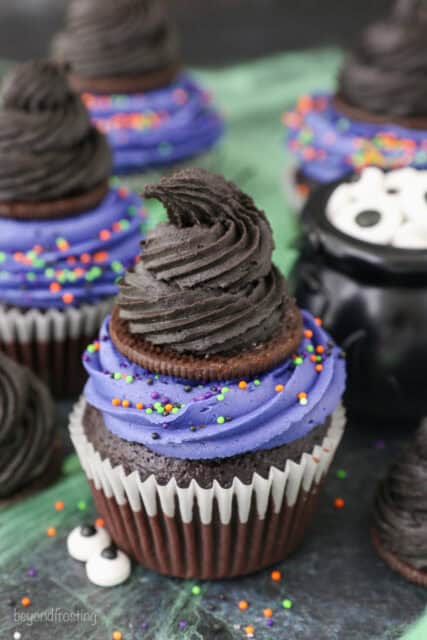
Easy Witch Hat Cupcakes
For these cupcakes, you’ll need colored buttercream, black buttercream, a large piping tip (like Ateco 846 or 1M), sprinkles, and a regular-sized Oreo.
- Start by piping a rosette on the cupcake, beginning in the center and working outward, then add sprinkles.
- To create the hat, remove the cream filling from an Oreo and use just one half. Pipe black buttercream on top of the Oreo using an Ateco 866 tip (a large French star tip), then place it on the purple buttercream and gently press it into the cupcake with a knife.
Keep in mind that the Oreos will soften and take on a cake-like texture when it touches the frosting, so assemble the hat and apply it to the cupcake right away.
Make Ahead and Storing Suggestions
Storing and Freezing: Frosted cupcakes can be stored in an airtight container at room temperature for up to 3 days or in the fridge for 5 days (they are best served at room temperature). Frosted or unfrosted, cupcakes can also be frozen in a freezer-safe, airtight container. Bring to room temperature before frosting or serving.
Planning Ahead? Read These Tips
- Preparation tip Cupcakes: Cupcakes can be made 24 hours in advance and stored in an airtight container.
- Buttercream Preparation: Buttercream can be prepared up to 7 days ahead and kept in the refrigerator. Be sure to bring it to room temperature before using and rewhip it in the mixer if it has been a few days. If you’re using the buttercream the next day, simply leave it at room temperature in an airtight container. Keep in mind that buttercream color improves over time, especially black, so dyeing it in advance can enhance the final look.
- Regarding the sprinkles and decorations: Oreos soften quickly when in contact with buttercream, and candy eyes may bleed due to moisture in an airtight container. It’s best to add these the day you’re serving the cupcakes rather than the night before.

Halloween Cupcakes
- Prep Time: 60 minutes
- Total Time: 1 hour
- Yield: 24 cupcakes
- Category: Cupcakes
- Method: Oven
- Cuisine: American
Description
From witch hats to spooky mummies, get ready for 8 simple Halloween Cupcake Ideas that will add some extra ‘boo’ to your celebration!
Ingredients
Instructions
- Cut cold butter into 1 tablespoon size pieces. Using the paddle attachment of a stand mixer, whip the butter for 5-7 minutes, scraping down the bowl occasionally. Beat until the butter is whipped, fluffy and easily spreadable.
- Add 3 cups of powdered sugar and the salt, beating into the butter until well combined, and scraping down the bowl as needed. Add 3 additional cups of powdered sugar with the vanilla extract, beating until well combined. For the remaining powdered sugar, add 1 cup at a time, and add the heavy cream if needed to help thin out the frosting, starting with 1 tablespoon and only adding the second if needed.
- Once all the powdered sugar has been added, increase speed to medium-high and beat for another 2-3 minutes beating the frosting until it’s fluffy. Reduce the mixer to the lowest speed and beat for 1-2 minutes to eliminate air bubbles. Use a spatula to stir to remove any remaining air bubbles.
- Divide the frosting up as needed for each color and add liquid gel colors to tint the buttercream. Add sprinkles and decorations.
Notes
- See the blog post for individual decorating tutorials and products used for each item. If this is your first time making my vanilla buttercream, I recommend reading the tutorial linked here. The cold buttercream method is wonderful but requires a lot more mixing.
- Once the Oreos come in contact with the buttercream, they will soften to a cake-like texture.
- If you are preparing 24 hours or more ahead of time, consider waiting to place the candy eyes on the cupcakes until closer to serving. The moisture from the cupcakes and frosting can cause them to bleed, making the black dot much larger. You may need to dab the back with leftover frosting to help them adhere
Storing and Preparing Ahead
- Storing Frosted cupcakes can be stored in an airtight container at room temperature for up to 3 days or in the fridge for 5 days (they are best served at room temperature).
- Freezing: Frosted or unfrosted, cupcakes can also be frozen in a freezer-safe, airtight container. Bring to room temperature before frosting or serving.
- Leftover Buttercream: This frosting recipes make much more than you’ll need, but that intentional so you don’t run out. Leftover buttercream can be placed in a freezer-safe bag, removing any extra air and frozen for up to 2 months. Use it to decorate Halloween Sugar Cookies.
- Preparing Cupcakes: Cupcakes can be made 24 hours in advance and stored in an airtight container.
- Preparing Buttercream: Buttercream can be prepared up to 7 days ahead and kept in the refrigerator. Be sure to bring it to room temperature before using and rewhip it in the mixer if it has been a few days. If you’re using the buttercream the next day, simply leave it at room temperature in an airtight container. Keep in mind that buttercream color improves over time, especially black, so dyeing it in advance can enhance the final look.