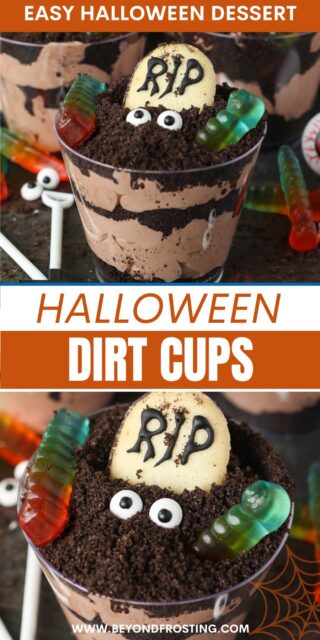
Fun and spooky Halloween dirt cups are such an easy Halloween treat! With layers of creamy Oreo mousse topped with a graveyard of edible goodies, these dessert cups are great for kids and perfect for parties.

Eek-tastic Halloween Oreo Dirt Cups
Get in, Hallow-queens and goblins. We’re going grave-digging! Ok, so… not really. But by the end of this post, you’ll definitely be digging into these delicious Halloween dirt cups.
This is the easiest Halloween dessert ever and it’s SO fun to make. All it takes is a few layers of Oreo mousse and some sweet and spooky toppings.
It’s an inexpensive dessert that’s great for making ahead! If you’re looking for a yummy treat to make for this year’s Halloween party or a fun activity to do with kids, this recipe for haunted Oreo dirt cups is hard to beat.
Why You’ll Love These Halloween Dirt Cups
- Quick to prep. These fab-boo-lous dessert cups are the easiest no-bake treat to make for Halloween. The Oreo mousse is quick to prepare, and then it’s a matter of chilling your cups in the fridge for an hour or so before serving.
- Chocolatey and delicious. Rich and creamy chocolate Oreo mousse layered with Oreo crumbs takes these graveyard dirt cups over the top. It takes just a few simple ingredients to make and the fudgy flavors are always a hit. Honestly, this is one of my favorite desserts to make!
- Fun to customize. Once your dirt cups are assembled, there’s no right or wrong way to decorate them. I top mine with cookie “tombstones”, gummy worms, and candy eyes, but really, the sky (or, in this case, the grave?) is the limit.

Dirt Cup Ingredients
Here, I’ve included some notes on the important ingredients you’ll need to make these Halloween dessert cups. Be sure to scroll to the recipe card below the post for the full amounts and detailed instructions.
- Oreos – Technically, you can make this Oreo dirt pudding with any kind of Oreos you’d like, or any generic brand of chocolate sandwich cookies.
- Chocolate Pudding – You’ll need one package of instant chocolate pudding mix, plus milk to prepare it with.
- Whipped Cream – Cool Whip is a great option for convenience’s sake, or you can use homemade whipped cream (which is also pretty quick and easy).
- Milano Cookies – Milano cookies inscribed with black writing icing work perfectly as mini headstones in our Halloween dirt cup “graveyard”! You can buy store-bought black icing or use homemade icing, dyed using color dyes from AmeriColor or Wilton.
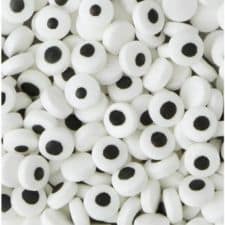
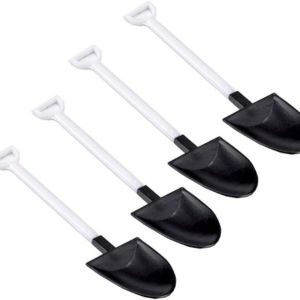
- Garnishes – I bring edible candy eyes into the mix, along with gummy worms and these cute plastic shovels that I found on Amazon. I quickly discovered that the tiny shovels aren’t the best for actually eating the dessert, since they come apart at the handle! But they’re adorable nonetheless.


How to Make Halloween Dirt Cups
These graveyard dirt cups are super simple yet so much fun to make. Let’s get started:
- Crush the Oreos. First, grind a dozen Oreos into a fine crumb using a food processor. Meanwhile, add the remaining Oreos to a ziplock bag and crush them up with a rolling pin. This is a fun task to pass on to the kiddos!
- Make the Oreo mousse. Next, whisk together the pudding mix and milk, then pop the pudding into the fridge to set. After about 10 minutes, fold in the whipped cream followed by the crushed cookies (not the fine crumbs).
- Prepare the garnishes. Cut the Milano cookies in half, these will be your tombstones. Use black gel icing to write “RIP” on each half.

- Assemble. When you’re ready to assemble your Halloween dirt cups, start with a layer of Oreo crumbs. Top this with a generous layer of Oreo mousse and more Oreo crumbs. Repeat, adding a final layer of Oreo crumbs on top.
- Chill. For best results, place the assembled dirt cups into the fridge to chill for 1-2 hours. Alternatively, you can chill the mousse before assembling your cups. When you’re ready to serve, top each cup with a tombstone cookie, candy eyeballs, gummy worms, and a shovel.


How Much Does This Recipe Make?
This recipe makes enough to fill six 8-ounce tumblers right to the top. This is a perfect portion for an adult. If you’re making these dirt cups for kids, consider stretching the recipe over more tumblers by filling them halfway, or use smaller glasses.
Another option is to adapt this recipe for an 8×8 or 9×9-inch square pan. In this case, I suggest simply layering the mousse and adding the cookie crumbs over top (as opposed to multiple layers). After chilling in the fridge, garnish as desired and get scooping.

Recipe Notes and Tips
Here are some helpful tips for the best dirt cups, that I picked up while recipe testing:
-
- Reduce the milk for a thicker mousse. Instant pudding mix usually calls for 2 cups of milk. I recommend reducing the amount of milk to 1 ½ cups so that the mousse turns out a bit thicker.
-
- Use homemade whipped cream in place of Cool Whip. See the recipe card notes and my tutorial on how to make whipped cream for more details.
-
- Use clear tumblers. They can be plastic or glass. This way, you’ll be able to see all the chocolatey layers in each dirt cup.
-
- Decorate just before serving. I recommend waiting until you’re ready to serve your cups to add the decorations, so the cookie tombstones don’t get soft in the fridge.
-
- Get creative with flavors. Chocolate pudding is an obvious choice for that layered “dirt” look, but don’t let that stop you from getting creative. You can make the Oreo mousse from any instant pudding flavor you’d like. If you use vanilla, go ahead and color it orange!

What To Serve with Halloween Dirt Cups
Nothing says “Happy Halloween” like getting amped up on all the sugary treats! Whether you’re hosting a Halloween bash or entertaining your ghoul friends this year, let these Halloween dirt cups be the star of the party. Here are some more Halloween food ideas and easy serving suggestions:
- More Decorations – Top these Halloween dirt cups with any spooky garnishes your heart desires! For a fun Halloween party idea, make a candy bar where guests can DIY their cups with a variety of toppings, such as gummy worms, candy pumpkins, sprinkles, marshmallows, candy corn, etc.
- Cookies – Make a colorful cookie platter filled with Halloween monster sugar cookies and Halloween sugar cookies.
- Cakes and Cupcakes – These festive candy corn cupcakes are a firm favorite in our house. Or, try easy fall desserts like these mini pumpkin cheesecakes or a scrumptious pumpkin poke cake.
- Snacks and Appetizers – Serve next to sweet Halloween party snacks like spooky Oreo dip and Halloween monster munch, and try these mummy hot dogs with dips as a savory option.
- Drinks – I love these creepy Halloween hot chocolate bombs decorated to look like bloodshot eyeballs! For an adult twist, why not shake up a batch of blood-red French 75 cocktails?
How to Store Leftovers
- Fridge. If you have leftover dirt cups or leftover mousse, keep everything covered airtight in the fridge for up to 4-5 days.
- Freezer. Yes, you can even freeze your Halloween dirt ingredients for longer-term storage. Leave off the toppings, and make sure to wrap the tops of the cups tightly with plastic wrap. Or (if you haven’t assembled them yet), store the mousse in an airtight container. It will keep frozen for up to 3 months. Defrost in the fridge before assembling and/or serving.
More Festive Halloween Food Ideas
Print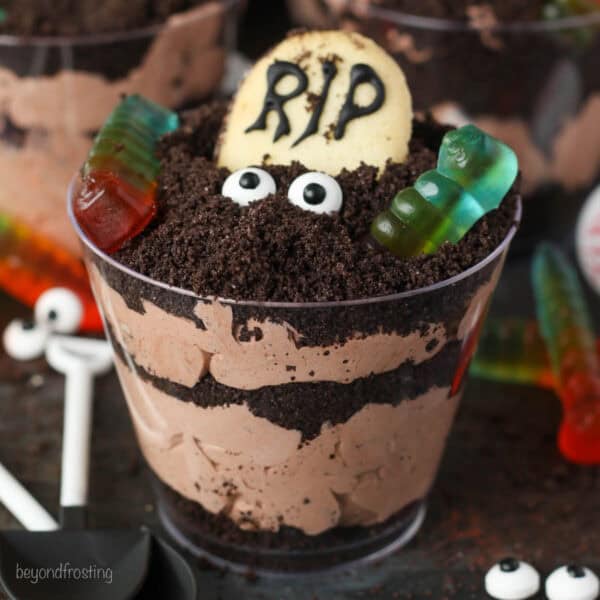
Halloween Dirt Cups
- Prep Time: 30 minutes
- Chilling Time: 1-2 hours
- Total Time: 0 hours
- Yield: 6-8 servings
- Category: Dessert
- Method: No-bake
- Cuisine: American
Description
Halloween dirt cups are such a fun and easy Halloween dessert! Layered with Oreo mousse and topped with a graveyard of edible goodies, they’re great for kids and perfect for parties.
Ingredients
- 1 bag (14oz/305g) Oreos
- 1 pkg (3.4oz) instant chocolate pudding
- 1 ½ cups milk
- 1 container (8 oz) Cool Whip (see notes for homemade option)
- 4 Milano Cookies
- Gummy Worms
- Black writing gel icing
- Edible candy eyes
Instructions
- Using a food processor, grind 12 Oreo cookies into fine crumbs. Then crush the remaining cookies into smaller pieces using a large Ziploc bag and a heavy object to smash the cookies. Set them aside.
- In a medium-sized bowl, combine the pudding mix and milk and whisk until the powder has dissolved. Refrigerate until the pudding has set, about 10 minutes or so.
- Once the pudding has set, fold in the whipped cream until is mostly mixed, then add in the crushed cookies (not the fine crumbs) and fold into the mousse. Assemble next or set the mousse in the refrigerator to chill. The mousse should be chilled for 1-2 hours for best results. This can be done before or after assembly.
- To make the tombstones, cut each Milano cookie in half with a sharp knife. Then use the black writing icing to spell “RIP”.
- To assemble, place 1 tablespoon of Oreo crumbs in the bottom of the cup, then add one or two heaping scoops of Oreo mousse, and smooth with a spoon. Add another tablespoon of Oreo crumbs, followed by more mousse, and a final layer of Oreo crumbs on top. To decorate, place a cookie in the middle with gummy worms, and eyeballs.
Notes
- Instant pudding generally calls for 2 cups of milk. I reduced it to 1 ½ cups to make the mousse a little thicker.
- Homemade Whipped Cream: You’ll need 1 cup heavy whipping cream and ½ cup powdered sugar. Chill the bowl and whisk attachment in the freezer for 5-10 minutes. Pour the heavy whipping cream into the chilled bowl and use an electric mixer to beat the heavy cream on medium-high speed until the cream starts to thicken. Slowly add the powdered sugar and continue beating at high speed until stiff peaks form. Mix into the set pudding in place of the Cool Whip. See my post on how to make whipped cream for more details.
- Storing: The mousse should be chilled for 1-2 hours for best results. This can be done before or after assembly. If you have leftover dirt cups or leftover mousse, keep everything covered airtight in the fridge for up to 4-5 days.
-
Serving size: This recipe makes enough to fill six 8-ounce tumblers right to the top. This is a perfect portion for an adult. If you’re making these dirt cups for kids, consider stretching the recipe over more tumblers by filling them halfway, or use smaller glasses. Another option is to adapt this recipe for an 8×8 or 9×9-inch square pan. I suggest simply layering the mousse and adding the cookie crumbs over top (as opposed to multiple layers). After chilling in the fridge, garnish as desired.
Nutrition
- Serving Size: 1 Cup
- Calories: 222
- Sugar: 25.6 g
- Sodium: 345.6 mg
- Fat: 8 g
- Trans Fat:
- Carbohydrates: 35.2 g
- Fiber: 0.6 g
- Protein: 2.7 g
- Cholesterol: 1.2 mg


Yummy and very fun! Made them for my Halloween party! 😀👻
Thank you Shannon! So glad you enjoyed them!