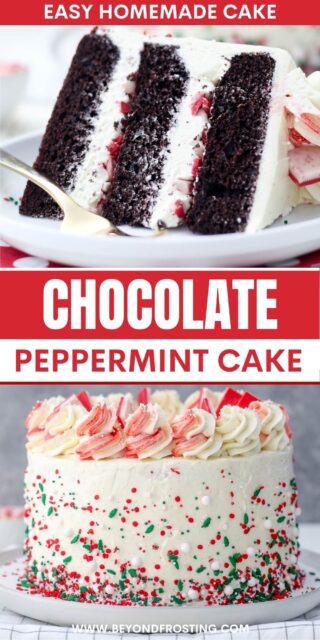
This festive chocolate peppermint cake is the perfect holiday dessert! It has rich and fudgy chocolate cake layers filled with frosty Swiss meringue buttercream and irresistible peppermint crunch.

The Best Chocolate Peppermint Cake
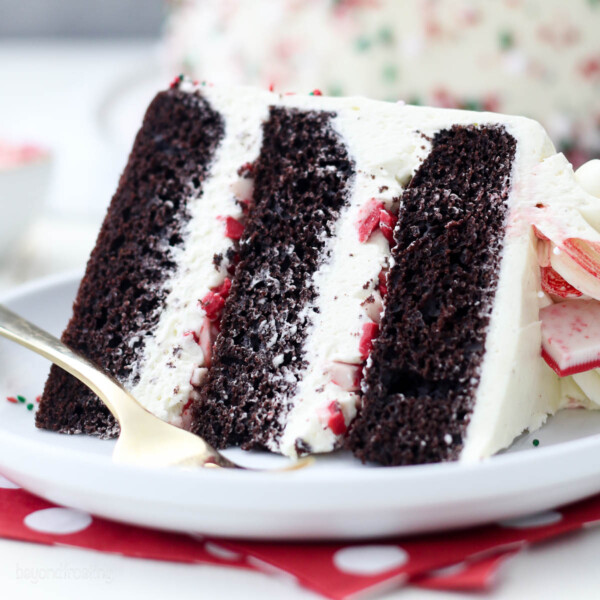
I have loads of Christmas cake recipes, from my annual Christmas tree cake to these festive Christmas cupcakes. This chocolate peppermint cake is high on my list of favorites! It’s a decadent holiday dessert made from homemade chocolate cake layered with creamy white chocolate Swiss meringue buttercream and crushed peppermint bark. The freshness of peppermint fills every bite with cheerful, wintery zing.
Why I Love This Peppermint Cake
- Soft and fudgy cake layers. This cake is light, fluffy, and full of chocolate flavor without being too rich. The peppermint chocolate combination is one of my favorites– the flavors in this chocolate peppermint cake always remind me of peppermint patties!
- Creamy Swiss meringue frosting. Balancing out the chocolate cake is the BEST homemade Swiss meringue buttercream. The frosting is light, sweet, and delicate, and the peppermint bark adds a little bit of crunch. I could eat it by the spoonful!
- Easy to assemble. If the idea of layering a cake sounds intimidating, don’t worry. This recipe is very approachable if it’s your first time making a layer cake or working with Swiss Meringue Buttercream. I break it down step by step.
If you love the flavors in this fudgy homemade peppermint cake, give these double chocolate peppermint cookies and my no-bake peppermint cheesecake a try, too!

Ingredient Notes
Here are some helpful recipe notes before you begin. The full list of ingredients can be found in the printable recipe card below the post.
- Sour Cream – Sour cream is the key to a super moist cake. I use light sour cream, but regular will work too.
- Cocoa Powder – I love Hershey’s Special Dark cocoa powder, but you can use any natural unsweetened cocoa powder.
- Brewed Coffee – Adding freshly brewed coffee to chocolate cake adds moisture and brings out the chocolate flavor. And no, it doesn’t make the cake taste like coffee! I also add a little espresso powder to my cake to further amp up the flavor (optional, but recommended). Ground coffee also works.
- White Chocolate Bars – I make the Swiss meringue frosting with melted white chocolate. I highly recommend a high-quality chocolate bar, like Lindt or Ghirardelli, over white chocolate chips. Chopped chocolate melts much more smoothly.
- Red Food Coloring – Optional, but you can use food coloring gel to color the frosting to make it look extra festive! I like the gel dyes from Wilton and AmeriColor.
- Andes Peppermint Baking Chips – Andes baking chips can sometimes be hard to find, so I also buy the little peppermint squares and chop those up. Either one will work!

How to Make a Chocolate Peppermint Cake
This chocolate peppermint cake is perfect for the holidays and so simple to make! I’ll go over the steps here, and remember to scroll to the printable recipe card for the full instructions.
Make the Cake Layers
The cake component in this recipe is my favorite homemade chocolate cake. It’s super simple to make:
- Mix the cake batter. Start by creaming together sugar, oil, eggs, and vanilla, followed by the sour cream. Sift the dry ingredients into a separate bowl, and then gradually add the dry mixture to the wet batter, alternating with brewed coffee. Mix until the cake batter is just combined.
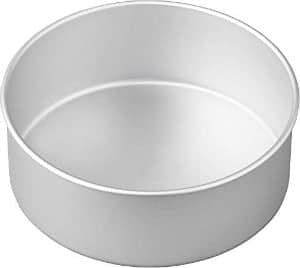
- Bake the cakes. Divide the batter between three greased and lined round cake pans. Bake the chocolate cakes at 350ºF for 20-24 minutes. Afterward, let the cakes cool completely.
Frost and Assemble the Cake
While the cakes are in the oven, you’ll have plenty of time to make a version of my chocolate Swiss meringue buttercream with white chocolate. Afterward, assembling the cake is relatively straightforward. If you need some extra guidance, I have a detailed tutorial on how to make a layer cake that you can refer to.
- Prepare the frosting. Heat sugar and egg whites in a double boiler, stirring frequently until the temperature reaches 140-160ºF. Meanwhile, melt white chocolate in the microwave. To finish the frosting, beat the egg white mixture into stiff peaks. Slowly add room-temperature butter, then vanilla, and finally stream in the melted chocolate. Give that a good whip, and it’s ready to use.
- Level the cake layers. Remove the cooled chocolate cakes from the pans and use a serrated knife to level off the domes, so the layers are nice and flat. Add your first cake layer to a plate or cake board, with a dollop of frosting underneath to hold it in place.
- Fill the layers. Next, pipe or spread a thick layer of your prepared frosting over the cake. Sprinkle over chopped peppermint candy, and add the second cake layer. Repeat.
- Frost the cake. Now, use additional frosting to cover the top and sides of the cake, smoothing it out with an offset spatula.
Decorate!
If you’re just getting into frosting and decorating cakes, I have helpful tutorials on how to use a piping bag and how to use piping tips to walk you through the basics. Here’s the easy technique that I use to decorate this chocolate peppermint cake:
- Add sprinkles. Gently press sprinkles into the bottom edge of the cake to make a “skirt”.
- Pipe the rosettes. First, drizzle red food gel down one edge of a large empty piping bag. Spread that out using a toothpick or knife. Then, fill the piping bag with the remaining Swiss meringue frosting and use an open star tip to pipe out the red-tinted frosting rosettes on top.
- Garnish. Sprinkle over any leftover crushed peppermint candy, or press whole candy pieces into the top of the cake. You can also add a drizzle of chocolate ganache (or white chocolate ganache). Feel free to be as creative as you’d like.
More Frosting Ideas


In place of Swiss meringue buttercream frosting, you can fill and frost your chocolate peppermint cake with any frosting you’d like. Even a can of store-bought frosting will work in this recipe, or you can use one of the frosting recipes you see here.

Recipe Tips
- Line and grease the baking pans. I like to line the bottom of each pan with parchment paper, then grease the sides. This makes it so much easier to release the cakes from the pans after baking.
- Make even cake layers. Bake-even strips help to keep the cakes from doming too much while baking, for nice, flat layers. The less we have to trim off to level the cakes, the less cake we waste!
- Rotate the cakes halfway through baking. If your oven has hot spots, I recommend rotating each cake pan halfway through the baking time to make sure everything cooks evenly.
- Avoid a dry cake. Make sure you don’t over-bake the cake. If it cooks too long, it will dry out. Take the cakes out as soon as a toothpick comes out clean!
- Clean the bowls and utensils for the frosting. Ensure that the bowl you’re using to make your Swiss meringue buttercream is squeaky clean. Meringue is delicate, and the slightest bit of grease can throw off the frosting. Clean your bowl and mixer attachments by wiping them inside and out with a paper towel dampened with vinegar.
- Use room temperature butter. The temperature of the butter is really important. It should be at room temperature but not too soft or melting.
- Whip the meringue well. Make sure that your meringue has reached the stiff peaks phase before you beat in the butter. “Stiff peaks” means that you can run the beater through the meringue, and it will hold it’s shape. See my original Swiss meringue buttercream recipe for more tips.

Make-Ahead
- Cake: If you want to prep this chocolate peppermint cake ahead of time, bake the cakes, allow them to cool, and then wrap them tightly in a double layer of plastic wrap. Store the cakes in the freezer for up to 3 months. When you’re ready to assemble the cake, thaw the layers either in the fridge or at room temperature.
- Frosting: The frosting can be kept in an airtight container at room temperature for up to 2 days or in the fridge for up to 7 days. Before using, re-whip the frosting with your mixer’s paddle attachment until it’s silky and creamy again.

How to Store
Finished chocolate peppermint cake will last covered on the counter for up to 3 days. It should not be stored in the fridge or the frosting will get hard. However if you live in an environment that is hot or humid, then it is recommend to refrigerated and then serve at room temperature.
More Christmas Desserts
Chocolate Peppermint Cake
- Prep Time: 1 hour
- Cook Time: 20 minutes
- Total Time: 1 hour 20 minutes
- Yield: 12 slices
- Category: Cake
- Method: Oven
- Cuisine: American
Description
This easy chocolate peppermint cake is the perfect holiday dessert! It has rich chocolate cake layers filled with Swiss meringue buttercream and crunchy crushed peppermint bark.
Ingredients
For the Cake
- 1 ½ cups (285g) granulated sugar
- ½ cup (118 ml) vegetable oil
- 3 large eggs
- 1 tablespoon (15 ml) pure vanilla extract
- ½ cup (118 ml) light sour cream
- 2 cups (280g) all-purpose flour
- ½ cup (55 g) cocoa powder
- 1 tablespoon (5g) espresso powder (optional)
- 2 ½ teaspoons (9 g) baking powder
- ½ teaspoon (2 g) baking soda
- 1 teaspoon (5 g) salt
- 1 ¼ cup (355 ml) brewed coffee
For the Frosting
- 10 large egg whites
- 2 ½ cups (475 g) granulated sugar
- 3 cups unsalted butter (24 oz), at room temperature
- 1 tablespoon (15ml) vanilla extract (or vanilla bean paste)
- 12 ounces white chocolate bar, melted
Decorations
- 1 cup chopped Andes Peppermint Bar Chocolate
- Sprinkles
- Red food gel (optional)
- 8–10 Andes Peppermint Bar Chocolate for garnish
Instructions
For the Cake
- Preheat the oven to 350°F. Prepare three 8-inch round baking pans, line the bottom with parchment paper, and grease the sides. Prepare your bake even stripes if desired.
- In a large mixing bowl, combine the sugar, vegetable oil, eggs, and vanilla extract. Beat on medium speed until the eggs and oil are well incorporated and the batter is lighter in color. Next mix in the sour cream and beat until well combined.
- In a separate bowl, sift together the dry ingredients. Then add half the dry ingredients followed by half of the coffee and mix just until the flour starts to incorporate. Then add the remaining dry ingredients and coffee. Beat until all of the ingredients are well combined. Use a spatula to scrape down the sides of the bowl and stir the batter from the bottom to the top to ensure it’s well mixed.
- Divide the batter evenly between the three pans, about 1 2/3 cups of batter per pan. Bake at 350°F for 20-24 minutes. Rotate your pans in the oven halfway through baking.
- Test the cake for doneness by inserting a toothpick into the center of the cake. If the toothpick comes out clean, your cake is done. Remove from the oven and allow to cool completely.
For the Frosting
- Wipe down the inside of your stainless-steel bowl with vinegar to remove any grease. Combine sugar and egg whites in the bowl with the candy thermometer attached.
- Set the bowl over top of a pot with 1 ¼ cups water covering the bottom. Place over medium heat.
- Stir constantly with a whisk until the mixture reaches 140°-160° The sugar should be dissolved in the egg whites. You can test this by placing a drop on your fingertips and rubbing them together. The mixture should be completely smooth.
- In a microwave-safe bowl, microwave the chocolate 50% power in 30-second increments, stirring each time until the chocolate is melted and smooth. Set aside to cool.
- Immediately place the mixing bowl on your stand. Using the wire whisk attachment, beat the egg whites on low for 2 minutes then increase to medium-high.
- Beat for another 5 minutes. At this point, your frosting should have turned white and the body of the meringue starts to form. Increase the mixing speed to high. It will start to look glossy as the peaks begin to form. Beat for another 5-8 minutes until the bottom of your bowl is cool to the touch and your meringue has stiff peaks.
- Turn your mixer down to medium-low. Slowly add your butter, 1 tbsp at a time. As you add more butter, the frosting might appear to have curdled and lost its body, but that’s ok. Scrape down the sides of the bowl.
- Switch to the paddle attachment, add the vanilla extract, and continue beating at medium to high speed until your frosting starts to form. Slowly drizzle in the chocolate and continue beating until stiff peaks form about 3-5 minutes.
Assembly
- Level off your cakes by removing any domes. Place a dollop of frosting on your cake board and place the bottom layer of cake over that.
- Pipe the first layer of frosting, pipe in circles filling working outside edge to the middle. Spread evenly with an offset spatula. Sprinkle each layer with ½ cup chopped peppermint bark. Add the second layer of cake and add the remaining frosting. Place the third layer of cake on top.
- Use your offset spatula to press any excess frosting onto the edges of the cake. To finish, pipe the frosting along the outside edge of the cake using a large open round tip or a cake icer tip. Then use an offset spatula or icing smoother to create a smooth edge.
- Gently press sprinkles into the bottom edge of the cake. To pipe, the rosettes on top, use a large piping bag, drizzle red food gel down one edge of the bag, and spread using a toothpick or knife. Fill the piping bag with the remaining frosting and pipe the border of the cake.


Notes
- Substitutions:
- Sour cream can be substituted with Greek or Plain yogurt but it adds moisture and texture to the cake, so don’t skip it.
- Brewed coffee helps bloom the cocoa, you won’t notice the coffee flavor, It simply enhances the chocolate flavor. If you have to, you can substitute it with milk.
- Storing frosted cakes: Desserts that are frosted with Swiss Meringue Buttercream can be stored at room temperature unless it’s hot or humid. In that case, store in an airtight container in the refrigerator, and bring to room temperature before serving.
- It’s recommended to use a chocolate bar instead of chocolate chips.
Nutrition
- Serving Size: 1 Slice
- Calories: 1433
- Sugar: 128 g
- Sodium: 404.7 mg
- Fat: 90.7 g
- Carbohydrates: 149.4 g
- Fiber: 3.2 g
- Protein: 14.6 g
- Cholesterol: 189.7 mg


I made this cake for Christmas. For chocolate and peppermint lovers it is a perfect match. The Swiss buttercream is delicate and silky.
Did not deviate from the recipe and came out perfectly!
That’s awesome Kym! Thank you so much!
Could I add a drop of peppermint oil to the frosting for a consistent peppermint flavor?
I’ve never used peppermint oil, but as long as it’s edible I don’t see why you couldn’t.
I made this cake (with a few tweaks to be gluten free) for our family Christmas. It was delicious! Thank you!
That’s wonderful Demetra, thank you so much!
I made this cake recipe and it did not at all turn our like the photo above. The batter was watery and not enough for three fluffy layers. Instead, I got three layers, not even an inch thick. Shame on me for not trying it out prior to Christmas Eve for what I ended up with was a disappointment to say the least.
Hi Karen- The batter is thin, that’s the way it’s suppose to be. What size pans did you use? This is my standard chocolate cake recipe and works great for 3 8-inch layers, plenty of batter.
Super excited to bake this for Christmas! Thank you for the amazing recipe!
You’re so welcome Fiona!
Going to make this for Christmas dinner! If I make the cakes and icing tomorrow, do you recommend waiting to assemble/decorate the cake till Christmas Day? Or do it all tomorrow and just leave cake covered on counter?
Thanks!
This will be fine on the counter overnight and up to 3 days. If you have an airtight container, that is preferable. PLEASE let me know how it goes!
Everyone is raving about this cake, including me (still in a blissful food coma )! The cake was so moist/rich in flavor and the Swiss merengue buttercream was out of this world! I will make this cake for many occasions to come and just swap the peppermint bark for other flavors!
Thank you for this recipe…it was a real Christmas treat!
Can’t wait to see what else you have in store for me to bake 🙂
Meredith, that is AMAZING!! Thank you you so so much!! Happy holidays!
For the peppermint bark between the layers, did you use real peppermint bark, or the Andes candies? Looking forward to making this!!
Hi Kristy- I use Andes!! Happy baking!
Do you know of a dairy free substitute that may work in this recipe in the cake?
Unfortunately I am not familiar enough with dairy free products to recommend one, and the frosting itself is entirely butter. I am so sorry it couldn’t be more help!