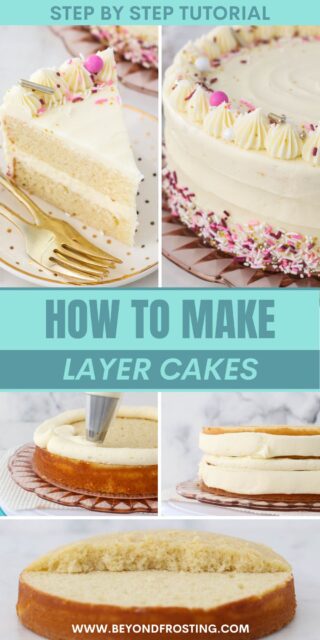
If you’ve ever wondered How to Make a Layer Cake, today is your day! With this quick and easy tutorial, I show you how to build the perfect double-layer cake, from preparing the pans to leveling your cakes to frosting the layers. Plus, more helpful cake-making tips and tricks.
Ready to decorate your layer cake? Check out my other tutorials on How to Use a Piping Bag and how to decorate a Buttercream Flower Cake!

The Beginner’s Guide to Making Layer Cakes
It probably comes as no surprise, but I absolutely love making layer cakes. It’s a labor of love, but there’s no better feeling than enjoying the end result with family and friends. There’s something so satisfying about presenting a perfect, beautifully frosted cake.
Of course, I didn’t get here overnight. My journey started with cake decorating classes over 10 years ago and continues every day. It’s taken many (many) years of practice and many (many) successes and failures. The good news is, I picked up loads of tips and tricks along the way. The better news is, I can share them with you!
Whether you’re a beginner baker, or simply looking to brush up on your layering skills, I can’t wait for you to try out this step-by-step tutorial on how to make a layer cake. I break everything down so that you can follow along, and ace each step as you go.
Without further adieu, let Layer Cake 101 commence!

Layer Cake Terminology
To begin, let’s take a look at some of the terms associated with cakes and layer cakes. What are the different parts of a cake? What on earth does “torting” mean? There’s a lot of terminology floating around in the cake-making and decorating world. But don’t worry, I’ll keep it simple.
For the purpose of this tutorial, here are the main terms we’ll be using:
- Cake Layers: These are the baked layers inside a cake. You’ll find that most layer cakes have anywhere between 2-6 layers. These layers can also be sliced in half (called “torting”, see below) to create thinner layers, which are filled and frosted.
- Dome: A dome is created when the edges of a cake bake faster than the middle, which causes the center of the cake to rise into a dome. These domes are trimmed off before you stack your cake. I share my tips on ways to keep your cakes from doming further on, as well as how to trim them so that your layers are level.
- Torting: Torting is slicing a cake layer in half to create more layers. It also refers to leveling off the dome on top of each cake layer so that the layers stack more evenly.
- Filling: Filling is what goes between the cake layers. Cakes can be filled with frosting (like in this tutorial), mousse, ganache, whipped cream, fruit preserves, custard, and more.
- Frosting: Aside from being used as a filling, buttercream frosting is used to decorate the outside top and sides of the cake. Frosting can be spread, smoothed, piped, etc.

What Flavor of Cake Should I Make?
In short: any flavor you’d like! You can use a boxed cake mix, or a recipe made from scratch, whichever you’re most comfortable with.
If you’re new to baking layer cakes, you may wish to stick to something basic to start, like my Moist Vanilla Layer Cake (recipe included in the card further down) or Easy Chocolate Cake. This way you can get the hang of working with the layers without any extra add-ins or fillings getting in the way. Another good beginner option is my classic Yellow Birthday Cake.
Once you’re comfortable with filling and stacking, the sky’s the limit! Try out different combinations of cakes and frostings, fillings, and decorating techniques. Incorporate fruit into your layer cakes as I do in my Lemon Blueberry Cake, or this lush Strawberry Mascarpone Cake. Or, try a tropical twist with a Coconut Custard Cake. You can even play around with colors to make a Red, White, and Blue Layer Cake. There are so many possibilities at your fingertips!

Tools You’ll Need
There are countless cake-making tools on the market that you can buy, but don’t necessarily need. So, let’s have a look at some of the basic tools that I use in this layer cake tutorial.
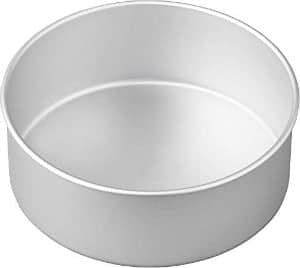
- Cake Pans – I recommend starting with three 8-inch round cake pans. See below for more details on choosing the right pan for your cake.
- Parchment Paper – For lining the pans. This makes it much easier to remove the cakes once they’ve baked. I used to line my pans with parchment circles until I discovered silicone mats. Game changer! However, you can still cut your own parchment circles by tracing the width of the pan on a piece of parchment paper and cutting it out, or purchase precut liners online.
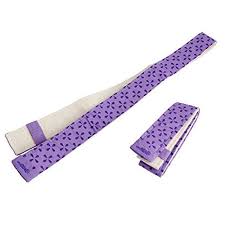
- Bake-Even Strips – Another game changer. I use these cake strips from Wilton to wrap the outside of the pans. Insulating the outside helps the edges bake slower, and prevents the cakes from doming too much (remember that term from above?).
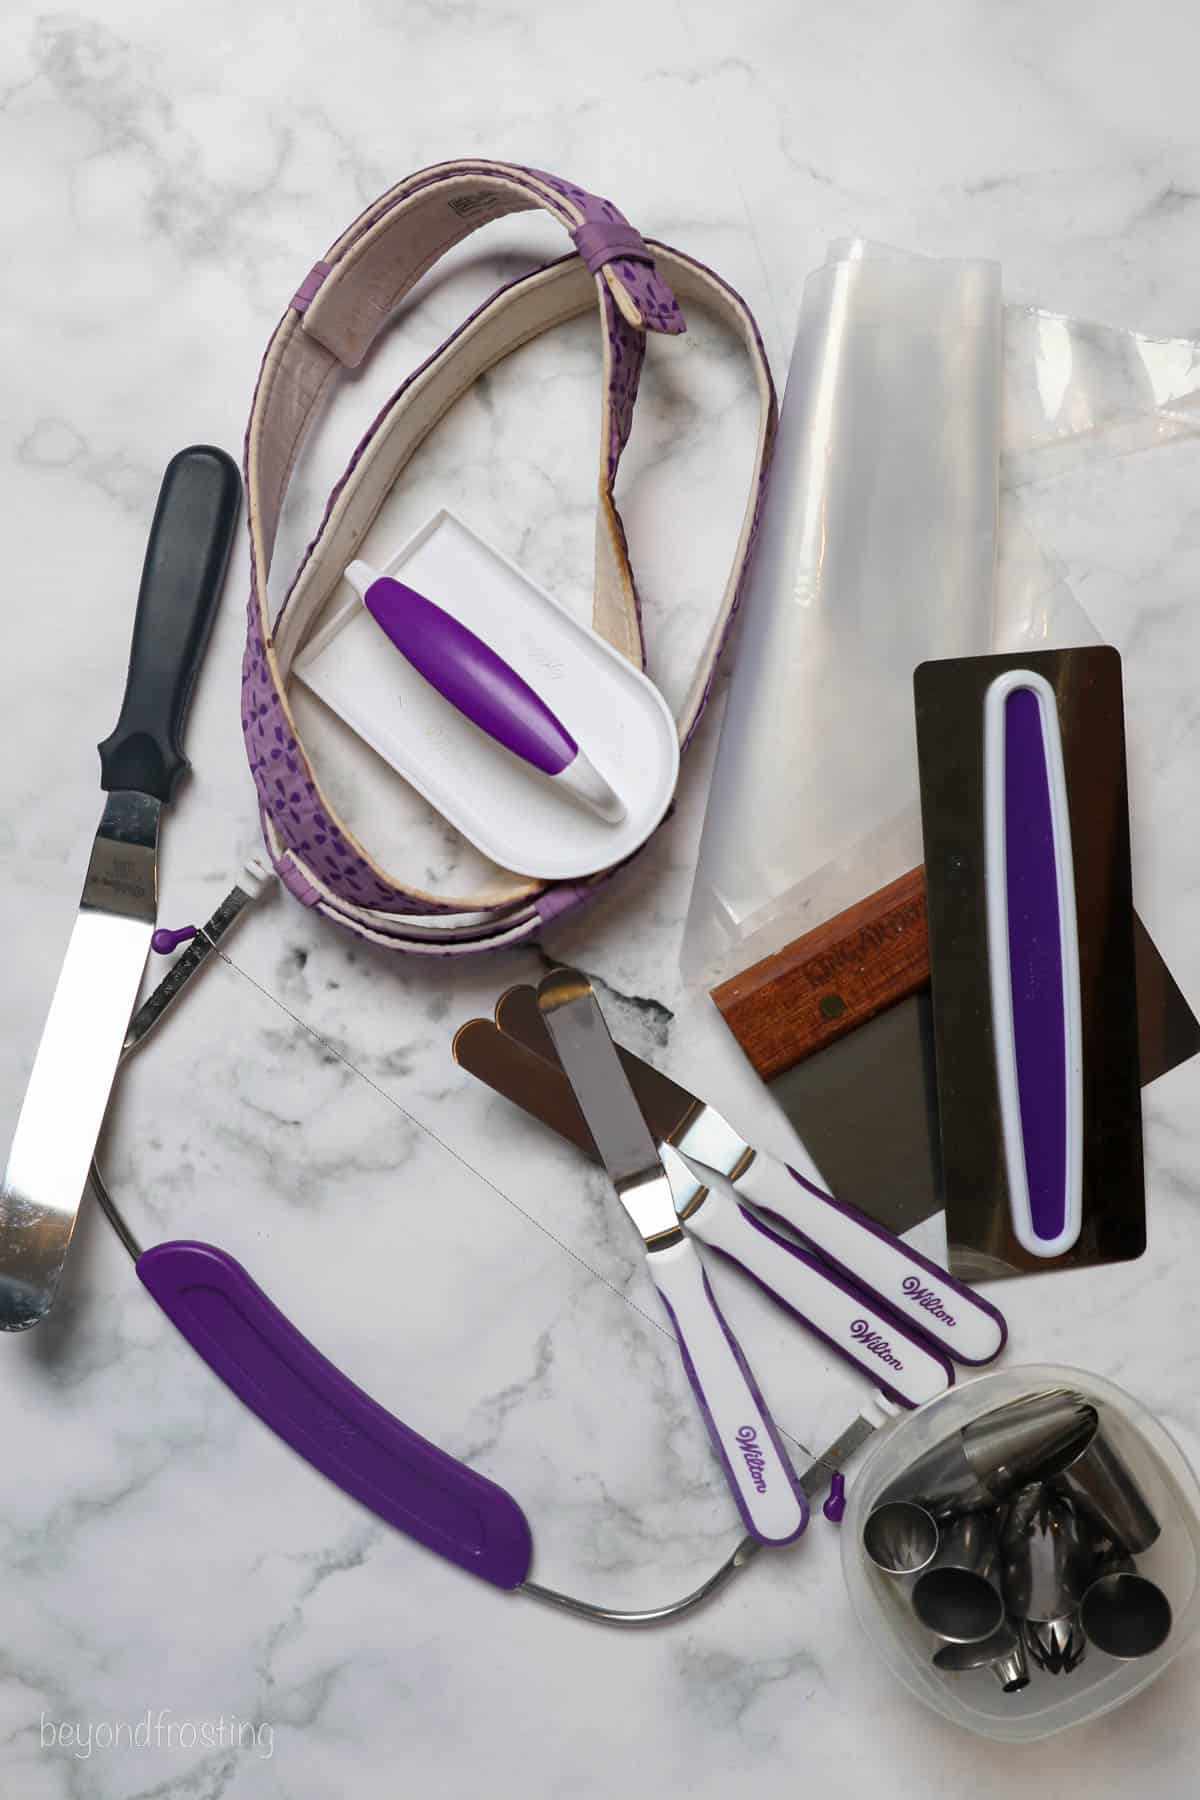
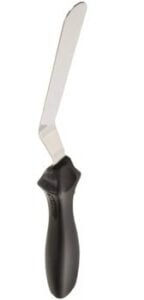
When it comes to decorating your cakes, those who are just starting out can often get away with an angled spatula and some large piping bags fitted with open round piping tips or a cake icer tip. You can also simply snip off the corner of the bag.
Below are some more useful decorating tools that I love, but that are optional:
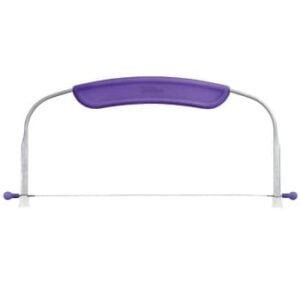
- Cake Level – You’ll see me use one in this tutorial. While you can level your cake using a bread knife or similar, a cake level makes the process that much easier.
- Cake Board – Many bakers prefer to build layer cakes on flat cake boards instead of a plate. I recommend using a cake board that is 1-2 inches wider than your cake.
- Cake Lifter – Helpful for moving the layers around, but not required. Two spatulas work great in most cases.
- Turntable – A rotating cake stand makes frosting the cake a breeze, as you can simply turn the cake while your tools can stay still.
- Cake Scraper – For smoothing out the frosting. Scrapers come in many different heights and widths, but the one you choose should be taller than the cake you’re assembling.
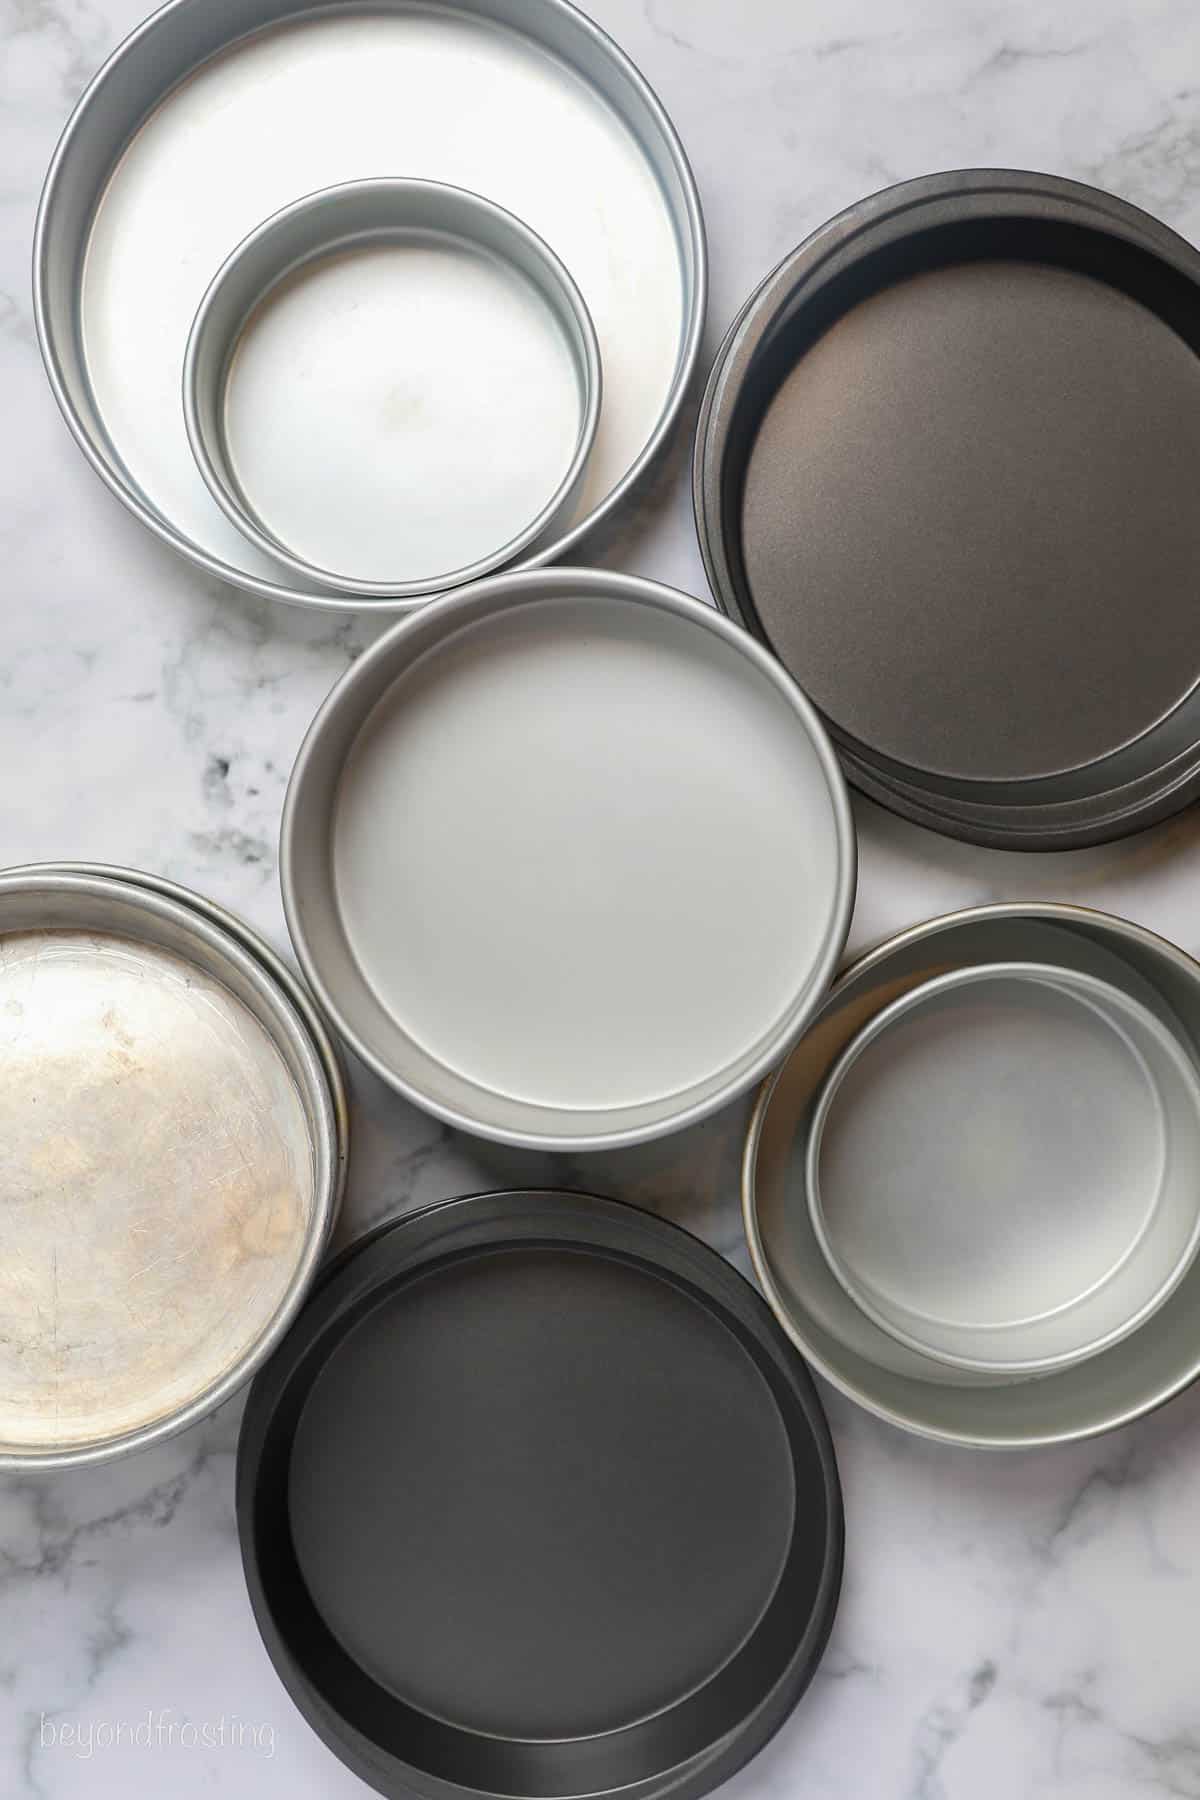
Choosing the Right Size Cake Pan
For this tutorial, I use two 8-inch baking pans, for a double-layer cake. This is a common size you’ll find at your local bakery (bakeries generally sell cakes in 6-, 8-, 10-, or 12-inch sizes). I’ve also included some guidelines for baking with different pan sizes in the recipe card at the end of this post.
I’m partial to working with 8-inch cakes because the layers are taller and I find them easier to handle than 9- or 10-inch cakes. Most of the cakes on this blog are 2-3 layers, made with 8-inch pans (unless I’m making a 6-inch Mini Chocolate Layer Cake).
While most recipes can be adapted to different-sized pans, it’s best to refer to the individual recipe to be sure. Whichever diameter you choose, though, I recommend pans that are two to three inches high, to leave enough space for the batter to rise.
Step 1: Prepare the Pans for Baking
Alright, it’s time to get this layer cake show on the road! First things first: getting your pans ready. Here’s how to prepare your cake pans for the oven:
- Grease and flour your pans. Use your hands to generously grease and flour the bottoms and sides of the pans. This helps to prevent the cake from sticking, along with lining the pans with parchment paper or silicone mats, see the next point. You can use cooking spray or shortening (like Crisco vegetable spread) to grease, and regular all-purpose flour.
- Line the pans. Place parchment circles or round silicone baking mats into the bottom of each cake pan. This is extra insurance against the cakes sticking to the bottom of the pans, and it makes it much easier to remove the cakes once they’re baked.
- Wrap with bake-even strips. This step is optional, but I love using these cake strips to help the cake layers bake more evenly, with minimal doming. Note that the bake-even strips should be wet when applied to the outside edge of the pan. Alternatively, you can line the outside of the cake pans with a double layer of foil if you’d like.


Step 2: Baking the Cakes
Once your pans are prepped and you’ve filled them with your cake batter of choice, it’s time to bake! How long you bake your cake layers will vary depending on the recipe, so always refer to the individual baking directions. Here are some quick cake-baking tips:
- Baking times are affected by the type of pans used. Darker pans tend to bake faster than lighter metal pans, and as a result, the edges and bottom of a cake will brown more quickly.
- Not all ovens bake the same. Getting acquainted with yours is your best bet to achieve consistent results when baking. This is true for any baked goods, not just cake! For instance, if you have a hot spot, you might want to rotate the pans in the oven halfway through baking to ensure that the layers bake evenly.
- Measure out the batter. You may also notice that not all of your layers will bake for the same amount of time. This is usually because the pans are not evenly filled (we are human, after all). An easy tip is to use a measuring cup when adding the liquid batter to each pan.
- Set your timer for the minimum time suggested. It’s always better to err on the side of caution! Check your cake, and add additional minutes as needed.
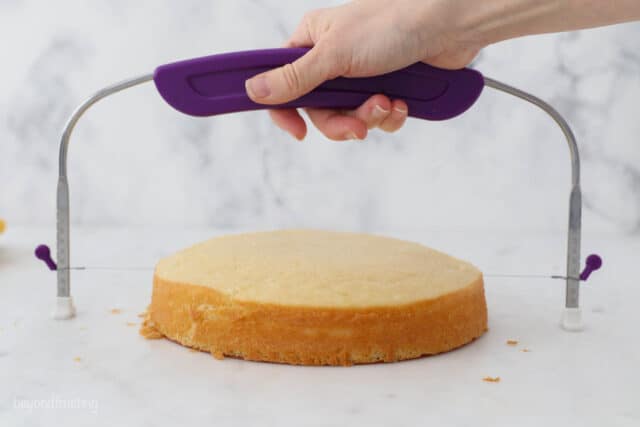
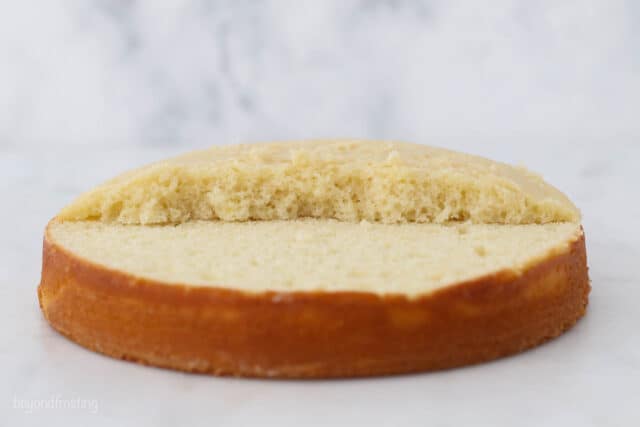
Step 3: Leveling the Cake Layers
If your cake layers have domes when they come out of the oven, you’ll want to level (tort) them once they’ve cooled completely. Torting, as explained earlier, is slicing or trimming a cake layer to either divide it into thinner layers or, in this case, to even out the top.
Leveling the cakes prevents the layers from slipping and sliding around when stacked. I have a handy cake level tool that helps ensure the layers are even. Otherwise, use a serrated knife to trim away the domes. Here’s how to easily level a layer cake:
- Get at eye level with your cake. Position your cake level or knife where the dome begins to rise up from the cake.
- Trim. Use your knife to gently cut into the cake horizontally, until your knife reaches about 1 inch from the edge. Then, rotate the cake slightly, and repeat, working your way around the cake and towards the center. If you have a cake level, you can usually use it to cut straight through.
- Once the dome is loose, saw through the middle. If you’re not assembling your layer cake right away, I recommend leaving the loose dome in place or wrapping the cake layers in plastic wrap to retain moisture.
Torting can be a bit challenging if your cake is particularly moist or uneven because it has berries or something like that. But stick with it. Remember to work patiently, and your cakes will be level and ready for assembly in no time.
Step 4: Assembling and Frosting a Layer Cake
Once your cakes are baked, cooled, and leveled, it’s time to frost. The key to building a stable layer is evenly frosted layers and using the right frosting.
There are hundreds of frosting variations out there, and you’ll come to learn which ones work better than others. I have an easy guide for How to Make Buttercream that pipes perfectly and holds its shape. Below are some more basic frosting recipes that are easy to make and work well in layer cakes:
- Perfect Vanilla Frosting (included in the recipe card)
- Chocolate Buttercream Frosting
- Cream Cheese Frosting
- Mascarpone Whipped Cream
- Whipped Cream Frosting
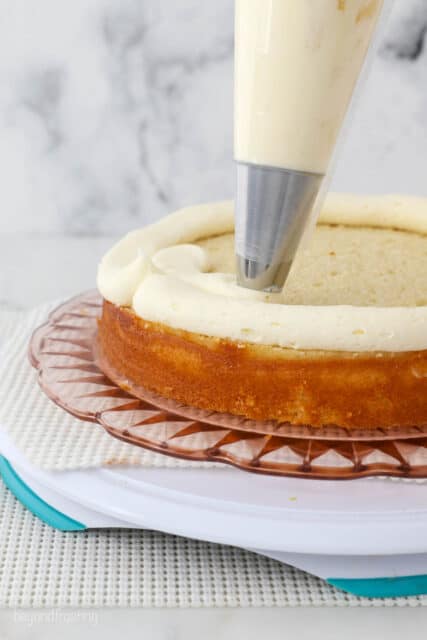
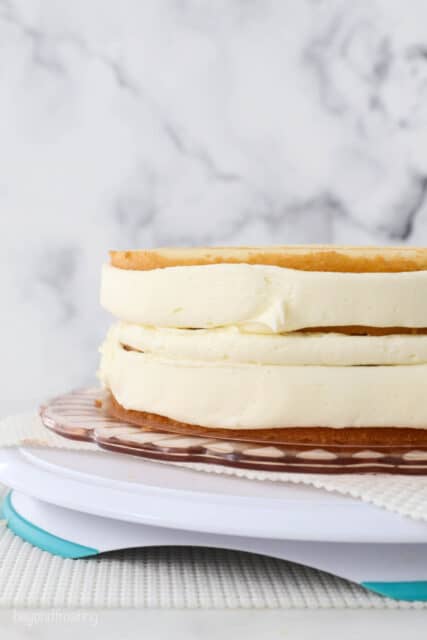
Adding the First Layer
Ready to build a picture-perfect layer cake? Let’s start with the bottom cake layer:
- Prep. First, place a dollop of frosting in the center of the cake board or plate you’re using. This keeps the cake from sliding around while you work. Then, place the first cake layer over the frosting.
- Frost. Using a piping bag fitted with a large open piping tip (or a bag with the corner snipped off), pipe frosting in an even layer from the outside edge of the cake into the middle. See my tutorial on How to Use a Piping Bag if you need some pointers! Next, use an angled spatula to smooth out the top.
Layering the Cakes
Afterward, you’ll add your remaining layers over top. I stop at two layers in this tutorial for simplicity’s sake, but you can use this method for any number of layers:
- Stack. Gently place your second cake layer over the first. If you’re making a three-layer cake, repeat piping and smoothing frosting in between.
- Repeat. Once you reach the last layer, I recommend inverting the final cake layer so that the top of the cake is the flattest it can be.
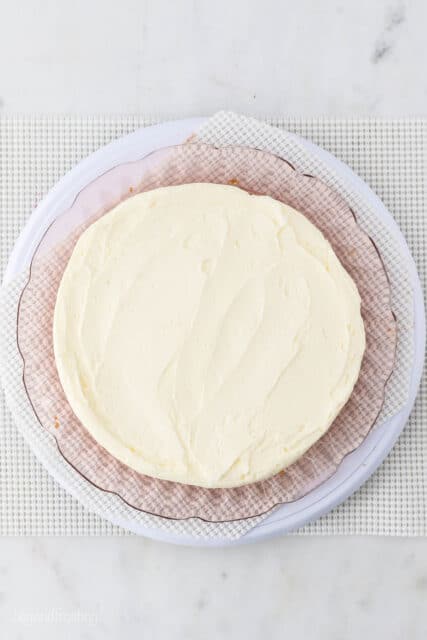

Filling the Gaps and Adding a Crumb Coat
Stand back, and admire your handiwork. Your layer cake is taking shape! You’ll notice some gaps or spaces between the layers, and that’s totally normal. This next step is where we’ll fix them and prepare the layer cake for frosting with a crumb coat.
What is a crumb coat? A crumb coat is a thin coat of frosting added to the cake before it’s frosted fully. This crumb coat picks up any loose crumbs so that they don’t get mixed into the final layer of frosting. It’s optional, but I always recommend it. Here’s how to make one:
- Fill. Using your piping tip, pipe frosting into any gaps that remain between the cake layers.
- Coat. Use an angled spatula to scrape a thin layer of excess frosting lightly around the sides of the cake to create the crumb coat. You don’t have to be too precious here, as this is really just the “underwear” for your actual frosting!
- Chill. Refrigerate the cake for 5-10 minutes, so that the crumb coat can set.
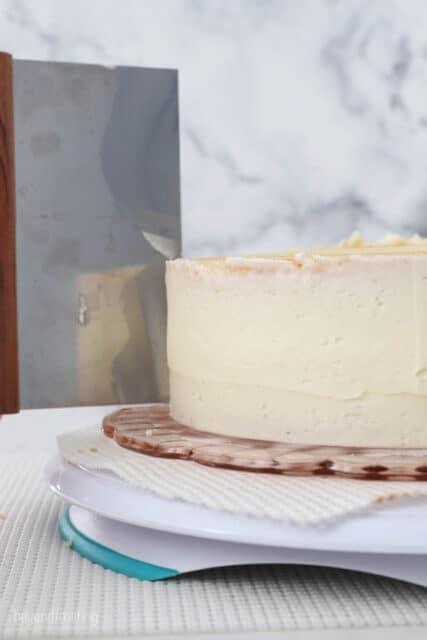
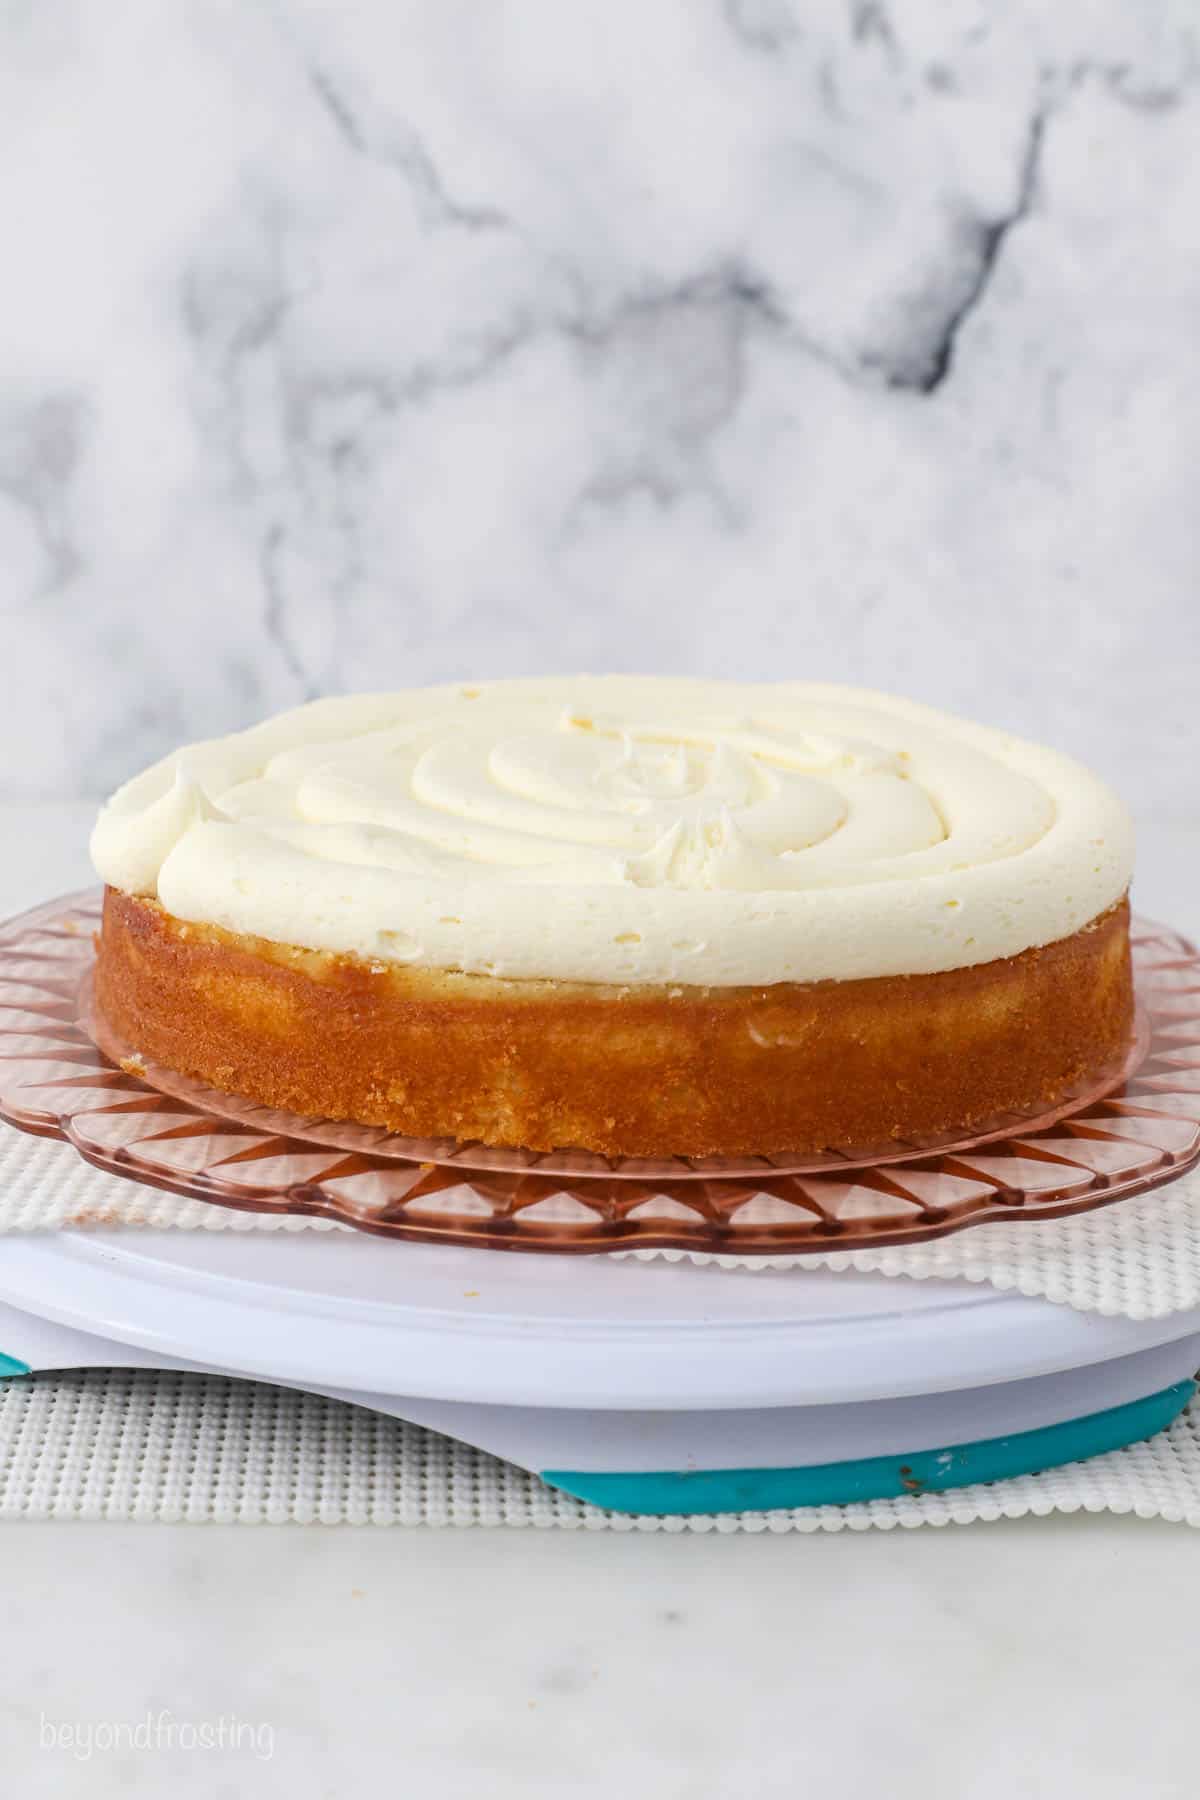
Frosting the Layer Cake
With your crumb coat in place, it’s time to add the final layer of frosting. You can do this by hand, though I find it’s easiest to continue with a piping bag. It’s up to you!
- Add frosting to the sides. Pipe or spread a thick, even layer of frosting over the sides of the cake.
- Smooth. Using a cake scraper or angled spatula, scrape the frosting at 90 degrees, or perpendicular to your cake. This is when a turntable comes in handy, to rotate the cake while you hold the scraper still. However, your cake will come out just as beautifully if you use a spatula and some elbow grease.
- Frost the top using the remaining frosting. Continue to use the scraper or angled spatula to remove any excess frosting and smooth out the top. You don’t need to apply a lot of pressure when frosting, and you’ll likely make a couple of passes in order to get it nice and smooth.

How to Decorate a Layer Cake
There are so many ways that you can decorate a frosted cake. Pipe swirls of frosting or whipped cream in sweet little rosettes, top your cake with sprinkles or color your buttercream to suit any holiday or occasion.
You can also add a drip of chocolate ganache (like in my Chocolate Drip Cake recipe) or pour over a glaze, along with tons more fun techniques.
Check out my helpful tutorial on How to Decorate with Piping Tips and my Buttercream Flower Cake for more in-depth cake-decorating tips.

Layer Cake Troubleshooting
If you start off with nice, level layers as mentioned above, you should have an evenly stacked cake. Nonetheless, here are some common FAQs and troubleshooting tips for layer cakes:
How do I fix a leaning layer cake?
If you notice that your cake is sliding a bit while you’re assembling, don’t panic. This can sometimes happen if the frosting becomes too warm. Try resetting the layers and placing the cake in the fridge for 15-30 minutes, to help it set up.
How can I stabilize a layer cake?
Once a cake is fully stacked, another option is to use a plastic drinking straw or dowel to help hold the cake layers in place. I’ll often do this when a cake is four layers or more. Cut the straw a bit shorter than the total height of your cake, and press it into the center of the cake, or use 3 of them in a triangle shape. This keeps the cake layers from slipping! It’s best to do this before adding the final layer of frosting so that you can cover the hole left by the straw.
How to Store a Frosted Cake
Store your frosted layer cake covered airtight on the counter. Most cakes will keep for 2-3 days at room temperature but always check the specific storage instructions to be sure.
A cake carrier is a great investment, as it seals the cake with an airtight lock and makes transporting the cake from A to B super easy. I place some grippy material (like the kind you would use to line a drawer) on the base of the cake carrier to prevent the cake from sliding.
If you’re preparing your cake layers ahead, I recommend freezing the individual layers before they’re assembled and frosted. Simply wrap the cakes tightly in plastic wrap (twice) with an extra layer of foil, and store them frozen for up to 1 month. Defrost the layers in the fridge completely before assembling your cake.
Print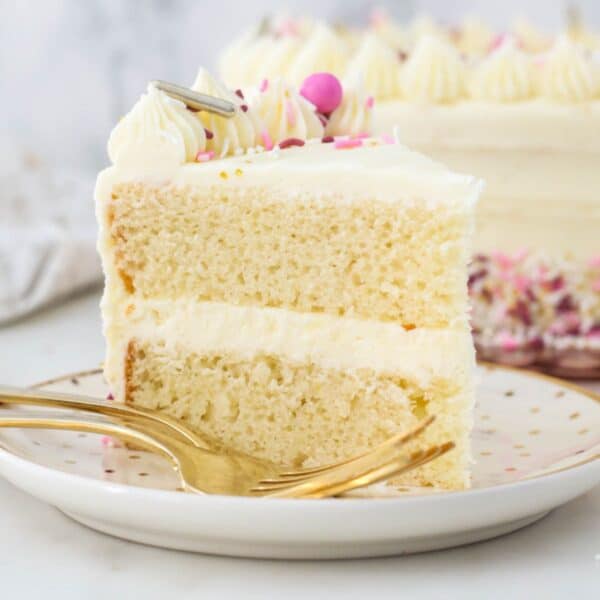
Easy 2-Layer Cake
- Prep Time: 30 minutes
- Cook Time: 30 minutes
- Total Time: 60 minutes
- Yield: 12 slices
- Category: Cake
- Method: Baked
- Cuisine: American
Description
Learn how to make a 2-layer cake with this easy step-by-step tutorial. Everything you need to know, from preparing the pans to leveling the cakes, frosting the layers, and more helpful tips. Follow the directions for my favorite vanilla layer cake below!
Ingredients
For the Cake:
- 2 cups (380g) granulated sugar
- ½ cup (118 ml) vegetable oil
- 3 large eggs, at room temperature
- 1 tablespoon (14.8 ml) pure vanilla extract
- ½ cup (118 ml) light sour cream, at room temperature
- 2 ½ cups (350 g) all-purpose flour, sifted
- 3 teaspoons (11.2 g) baking powder
- 1 teaspoon (5 g) salt
- 1 ¼ cups (296 ml) milk, at room temperature
For the Frosting
- 1 1/2 cups (339 g) unsalted butter, cold.
- 5 cups (650 g) powdered sugar
- 2 1/2 teaspoons (12 ml) pure vanilla extract
- 2 tablespoons (30ml) heavy whipping cream (or milk)
Instructions
For the cake:
- Preheat the oven to 350°F. Prepare two 8-inch round baking pans, line the bottom with parchment paper, and grease the sides. Prepare your bake even strips if desired.
- In a large mixing bowl, combine the sugar, vegetable oil, eggs, and vanilla extract. Beat on medium speed until well incorporated. Scrape down the bowl as needed. Next, mix in the sour cream and beat until well combined.
- In a separate bowl, combine the remaining dry ingredients and sift together the flour, baking powder, and salt. Add half the dry ingredients and half the milk, and beat on low speed just until the flour starts to incorporate. Repeat until all ingredients are added and combined. Use a spatula to scrape down the sides of the bowl and stir the batter from the bottom to the top to ensure it’s well mixed.
- Divide the batter evenly between the pans, about 2 1/2 cups per pan. Bake at 350°F for 28-32 minutes. Test the cake for doneness by inserting a toothpick into the center of the cake. If the toothpick comes out clean, the cake is done. Remove from the oven and allow to cool completely.
For the Frosting:
- Cut bthe utter into pieces. Using the paddle attachment, whip the butter for 5-7 minutes, scraping down the bowl occasionally. Beat until the butter looks light in color.
- Add the powdered sugar 2 cups at a time, alternating with the liquid ingredients (heavy cream and vanilla). Mix on low speed until incorporated into the butter, then add the vanilla extract and mix to combine. Beat for about 60-90 seconds before adding additional powdered sugar.
- Once all the ingredients have been added, increase speed to medium-high and beat for another 3-5 minutes to whip additional air into the frosting.
Assemble the 2-Layer Cake:
- Use a cake leveler to cut the domes off the top of the cake. Place a dollop of frosting on your cake board and place the bottom layer of cake on top of that.
- Place about 2 cups of frosting in a large piping bag fitted with a large open round tip, or simply cut off the end of the piping bag. Pipe a layer of frosting on top of the cake, starting at the outside edge and working your way into the middle. Spread evenly with an offset spatula. Place the next layer on top.
- Use your piping bag to fill in any gaps between your layers and to create a crumb coat. Using an offset spatula or icing smoother, wipe away the excess frosting, leaving you just enough to coat the outside of the cake. Do not mix your crumb-coating frosting back into your icing if it has cake debris in it.
- Proceed to frost the top and sides of the cake using your offset spatula. Once the sides of the cake are covered, use your icing smoother to remove any excess frosting.

Notes
- Sour cream substitute: Sour cream helps keeps these cupcakes very moist, I do not recommend omitting it. Substitute with with non-fat Greek Yogurt if you do not have sour cream. Full-fat sour cream is also workable, but I prefer low-fat or fat-free.
- To make this as a single layer, please see my other vanilla cake recipe.
- This frosting is for a 2 layer cake. The frosting recipe would need to be adjusted if you are making adjustments to the size of the pans or number of layers.
- Baking pan substitutes:
- For two 9-inch cakes, they baked from 28-32 minutes. Baking times will vary due to how full the pans are, type of pans and true oven temperature. Please note these did “crust” a little more on the outside edge due to extended baking times and they rose quite a bite in the middle, so you’ll lose more of the “dome” of the cake.
- For three 8-inch pans: divide the batter evenly, about 1 2/3 cups per each pan. Bake for 20-23 minutes. See my Moist Vanilla Layer Cake for more details.
- For 6-inch pans: a full recipe will make four 6-inch layers, filling each one with about 1 1/3 cup of batter and baking for approximately 24-30 minutes.
- For 10 inch pans: I’ve never tested this with 10 inch pans, but I would recommend a 2 layer cake so you still have nice, thick layers. Trying baking for 18-20 minutes and assessing additional time needed from there.
Nutrition
- Serving Size: 1 slice
- Calories: 752
- Sugar: 83.9g
- Sodium: 236.4mg
- Fat: 35g
- Saturated Fat: 23g
- Carbohydrates: 106.5g
- Fiber: .8g
- Protein: 6g
- Cholesterol: 111.4mg


Excellent tutorial. I”m so glad to have this reference as I will be baking up your Coconut Custard Cake. Thank you so much.
Thank you Josie!
This recipe cooks very well overall but have you experimented with different extracts such as almond or coconut with the recipe???? I would be interested in any experiences before I try.
Hi there! I am glad you enjoyed it. I have a coconut cake based on this recipe and also lemon
I love that you say to cut the dome off. Why are we teaching these young bakers to simply flip the cake over? That creates an entirely different set of issues! I’m looking at you Food Network!
Seems everyone has a different way of doing it I guess? I did a whole experiment based on everyone’s suggestions
This cake is amazing and i am going to attempt it 🙂 can i please ask how you get the sprinkles around the bottom edge of the cake? i can just see me making a huge mess trying to do this, i have tried to search for it myself but couldn’t find it. Thanks
It’s messy either way but I put a large sheet pan under my cake to collect the sprinkles and then I can pour them back into the bowl to keep using on the cake. If you have a turntable you can put the sheet pan on the turn table and then the cake on the sheet pan
i love this recipe
Thank you!
Thank you so much for writing such an informative post! I’m also a food blogger, but I only bake layer cakes occasionally for family get togethers. While my cakes taste good, they are never anything I’d want to photograph! 🤣 I’m working on a red velvet cake post now and was determined to learn how to make it more photogenic. Your tips were super helpful and I’m pleased with how the cake is turning out so far!
Yea! That’s wonderful Lisa, thank you so much. I’ve practiced a lot and my cakes are still lopsided all the time but every cake has a “pretty” side haha
Hi! How could I make this cake fit into three 6’’ pans?
Hi Rachel, with 3 pans they would work but be quite full
Hi!
How high is your 8 inch cake? How high is each layer with this recipe? Is it higher than 2 inches?
Thanks!
I can’t recall specifically, but maybe close to 2 inches
My family is having a major argument about the appropriate way to slice a frosted layer cake. One big issue is whether or not the knife is cleaned after each slice through the cake so that the next slice is clean and sharp.
HAHA! Yes, always clean the knife for a clean slice!
This was an amazing cake for my nephew she loved it! Thank you so much for the recipe 10/10
Thank you so so much Molly! I am so glad.