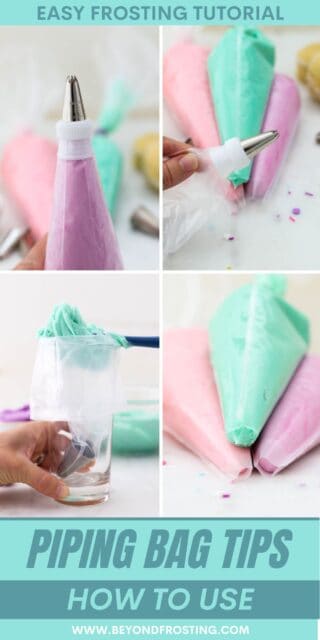
Let’s dive into How to Use a Piping Bag with this step-by-step tutorial! We’re going over everything from filling the piping bag, fitting it with piping tips, working with couplers (affiliate link), and more. You’ll be piping beautiful designs over your favorite cakes and cupcakes soon enough!
I love sharing my baking knowledge with you all. Don’t forget to check out my other helpful tutorials for Homemade Buttercream Frosting and How to Color Buttercream!
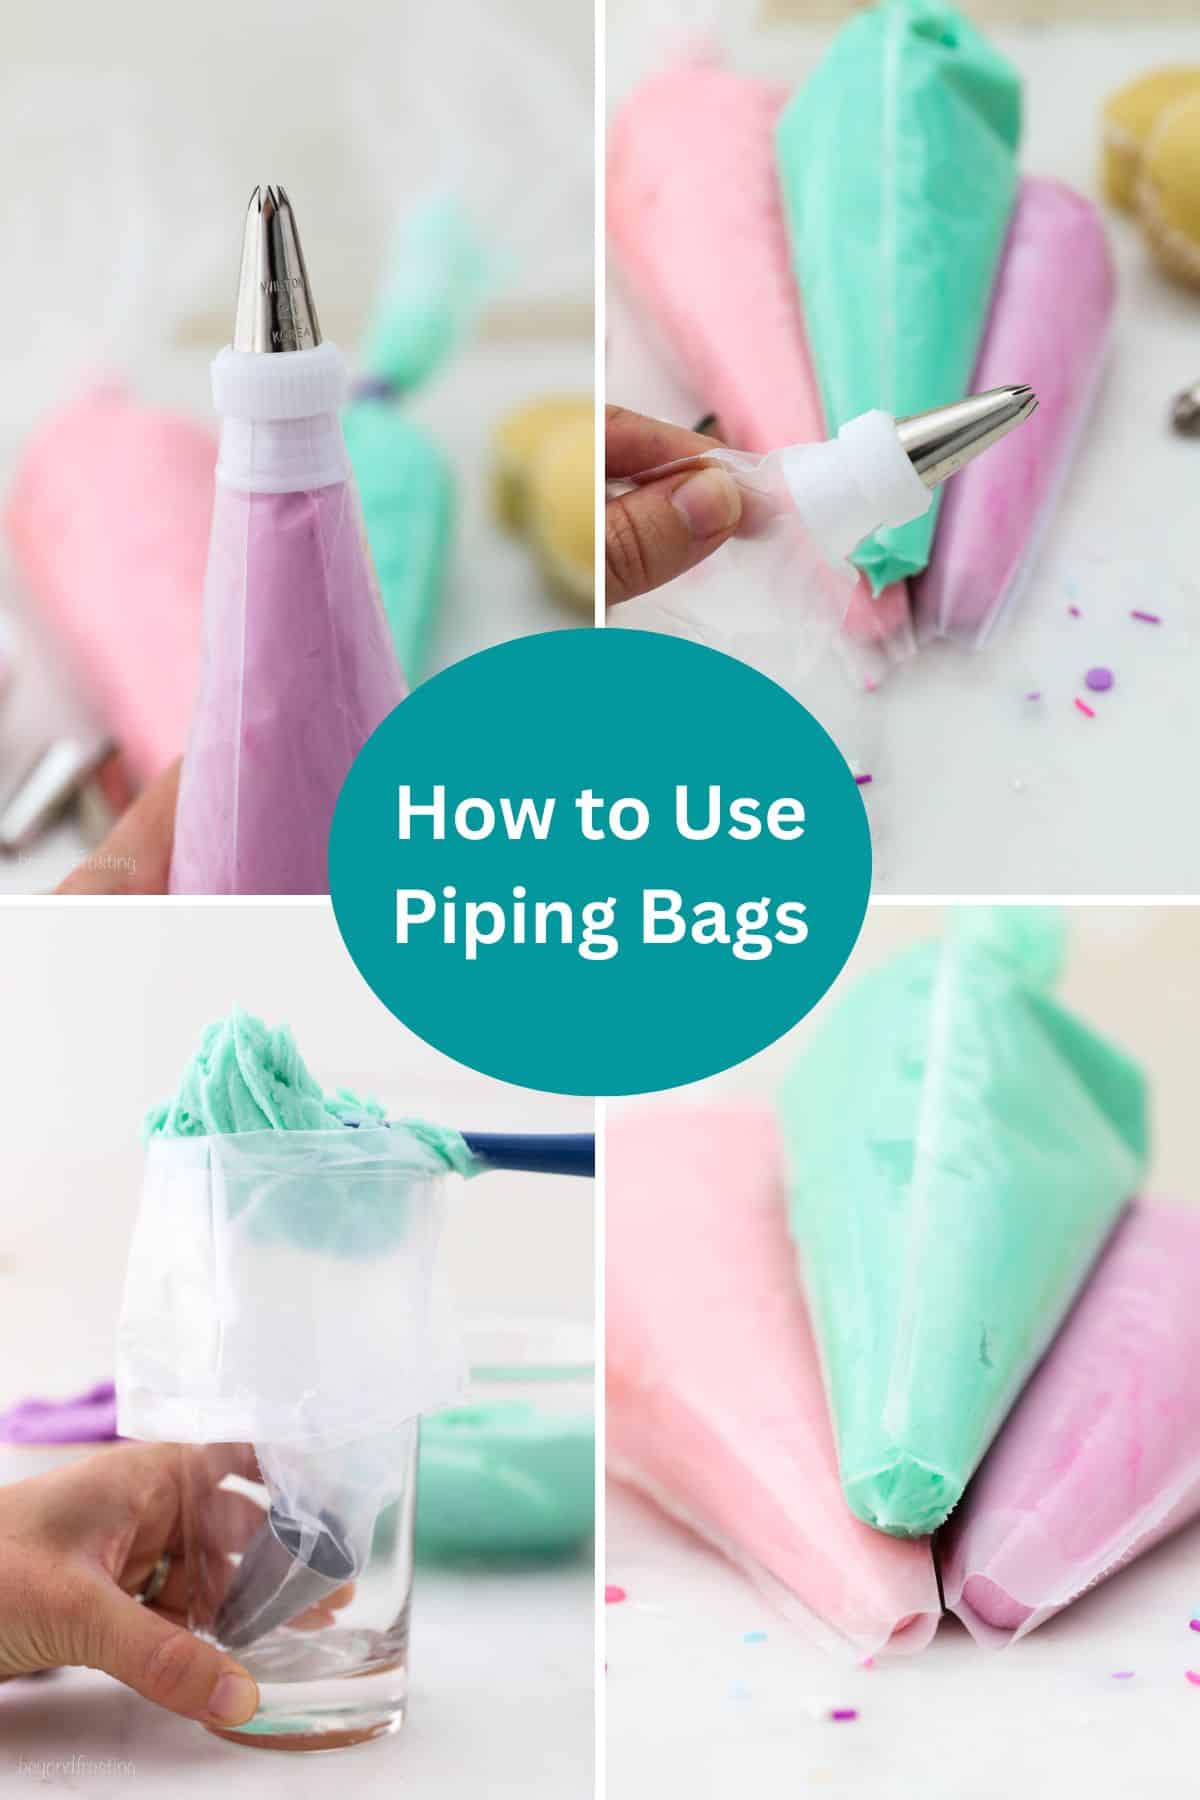
Learn How to Use a Piping Bag (the Right Way!)
Have you ever wished that you could pipe beautiful swirls, rosettes, ruffles, and more over your favorite cakes and cupcakes? Or, maybe you’re looking to fill homemade pastries with pastry cream. It all starts with a piping bag!
If you’ve ever found yourself lost in a sea of scattered plastic piping bags and tips while trying to follow a recipe, don’t worry. We’re officially taking the mystery out of this handy baking tool. Today, I’m walking you through how to fill and use a piping bag, along with some handy tips and tricks along the way.
Which Size Piping Bag Do I Need?
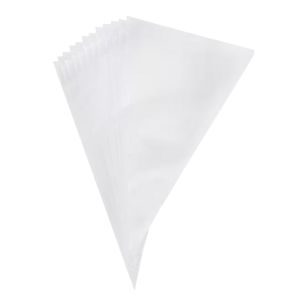
First things first, you’ll need to choose a bag. Piping bags come in many different sizes, quantities, and materials ranging from polyester to plastic. Which size and bag you choose depends on what you’re using it for.
- The largest-sized piping bag is the 18-inch. This size holds a large amount of frosting, making it perfect for frosting large surface areas on cakes, or a whole batch of cupcakes. I buy Daymark’s 12-inch (small) and 18-inch (large) disposable piping bags in bulk, since their bags are durable and come in rolls that make them easy to use and store. If you can’t find 18” bags, the 16” piping bags from Wilton (linked below) also work great. You can find Wilton’s disposable piping bags in craft stores like Michaels and Joann Fabrics or Walmart and they’re available in a variety of sizes.
- Meanwhile, 12-inch piping bags are best for finer details like piping letters onto cakes, decorating cookies with royal icing, and drizzling.


How to Fill a Piping Bag
Before filling your piping bag, remember to fit the bottom/end of the bag with a piping tip or coupler first (see below). If you’re using a new bag, you’ll need to snip about ½-inch off the very tip of the bag before positioning the piping tip (be careful to not snip off too much, otherwise the tip will slide through). Next, follow these steps to fill your piping bag:
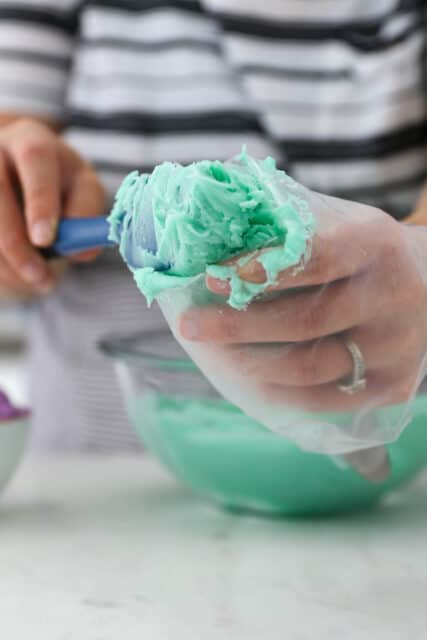
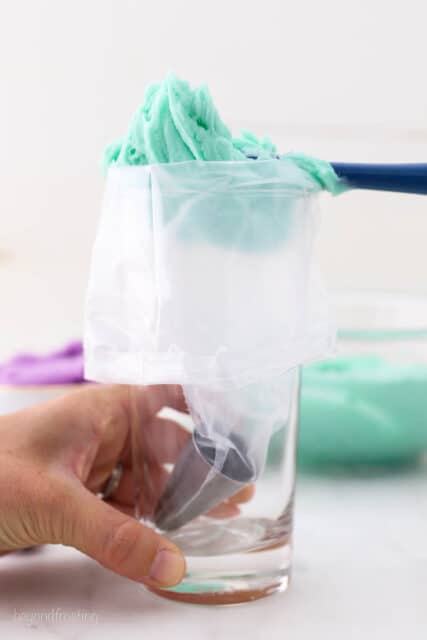
- Fold. Hold the middle of the bag, then fold the top half of the bag down over your hand to make a “cuff”. If you’re uncomfortable working one-handed, you can also place the empty piping bag into a tall glass, and fold the top down around the sides of the glass to open it up.
- Fill. Use a spatula to scoop and press the filling into the bag. Scrape any excess filling off the spatula using the side of your hand or the edge of the glass. It’s best to only fill your piping bag 1/2 to 2/3 of the way up to avoid overfilling.
- Close. Once your bag is full, fold the cuff back up and use your hands or a rolling pin to press the filling down into the bag and remove any air bubbles. Lastly, twist the top of the bag closed or use rubber icing bag ties to seal it shut.
Using a Tip Coupler
A tip coupler consists of two pieces of plastic (similar to a nut and bolt) fitted to the end of the piping bag. One piece is inserted into the opening in the bag, while the other piece, fitted with your piping tip of choice, screws into place from the outside. This allows you to seamlessly change out the piping tips and also helps secure the tip to the bag. Here’s how to use a coupler set:
- First, snip off the tip of the piping bag just enough so that the coupler fits through the opening.
- Place the larger of the two coupler pieces into the tip of the bag. Next, fit the piping tip overtop of the plastic, and slide the smaller piece over the tip, screwing it into place. Fitting the plastic inside the tip is one way to prevent the bak from exploding.
- To change piping tips, simply unscrew the smaller plastic piece, swap out the tips, and screw the part back in place. Voila! A coupler set comes in handy when you’re piping multiple designs with the same filling.


Using a Piping Bag Without a Coupler
If you’re using a piping bag without a coupler set, no worries! The key thing to remember is to not snip your bag too high. Snip the bag just enough so that the piping tip fits through, but isn’t covering any opening of the tip. If the hole is too large, the frosting might pop out when you give the bag a squeeze.
When it comes to changing tips without a coupler, another option is to use the double bag method. Fill one piping bag with frosting, snip off the end, and drop it into a second empty piping bag fitted with a piping tip. This way, you can simply swap the frosting bag between bags with different tip designs, with no mess involved!

Choosing the Right Piping Tip
Piping tips for piping bags come in tons of shapes and sizes, for varying uses. The small piping tip you use to add a border to your Christmas cookies is different from the star-shaped tip used to pipe cute roses onto your Easter cupcakes. I get into the details of choosing the best piping tips in my tutorial on How to Decorate with Piping Tips, but here are some basics:
- When it comes to detailed decorating, small piping tips are the way to go. You’ll find metal and plastic tips that come in plain (round), petal, leaf, and star shapes that can be used to pipe everything from frosting lines to whipped cream ruffles onto cakes, cookies, cupcakes, and other goodies. You can also use smaller piping tips to fill delicate desserts, like eclairs, with pastry cream and other fillings.
- Large piping tips are preferred for frosting layer cakes and cupcakes, and also for filling pastries and tarts. A plain round tip and a star tip are perfect to start when it comes to frosting and filling most desserts.
More Tips for Success
You’ll be a piping bag pro in no time! Once you get the hang of filling and using your piping bags, the possibilities are endless. Here are some bonus tips:
- Don’t squeeze too hard. Applying too much pressure when piping out your frosting can cause the tip to pop out. Work slowly and remember, patience is key!
- For large batches of frosting: When working with large batches of frosting, I recommend using the double bag method mentioned above. This way, you can fill two separate bags with frosting, and use a third empty bag fitted with the piping tip. Refilling the piping bag can be messy. Once you get through the first bag, pull it out and replace it with the second bag.
- Use a Ziploc bag as a piping bag. Substitute a plastic Ziploc bag in a pinch. Simply snip off the corner of the bag, fit it with a plastic tip, and fill it as usual. Keep in mind that Ziploc bags aren’t made for this purpose, however, if you over-fill the bag or squeeze too hard, the piping tip is more likely to fall out

When to Use a Piping Bag
So, your piping bag is filled and ready, now what? Below are some easy dessert ideas that you can dress up with piped frosting.
Frosting Cakes and Cupcakes
You can use a piping bag with a large tip to frost the whole cake or cupcake, or you can use a smaller tip to add finer details. For assembling cakes, I use piping bags to fill and frost the cakes from the crumb coat to the final decoration. Here’s a tutorial for how I prepare my layer cakes.
When it comes to decorating, I have a tutorial dedicated to How to Decorate Cupcakes that offers tons of tips and tricks. Looking for a perfect cake recipe to give it a go? Try my easy Moist Vanilla Cake! Or, hone those piping skills with my Buttercream Flower Cake tutorial. It’s also handy if you’re adding a topping to pies.
Filling Pastries
Use your piping bag to neatly fill homemade pastries like eclairs and cream puffs. This can be done by slicing a pastry in half, piping the filling, and then replacing the top. Alternatively, you can use a piping bag and tip to “inject” filling into a hole on the bottom or side of the pastry. Work carefully with pastries and do your best to not overfill them!
Decorating Cookies
A piping bag makes decorating cookies a breeze! I love the precision that comes from piping designs onto cookies, whether I’m piping Sugar Cookie Icing onto Christmas cookies or buttercream onto Frosted Sugar Cookies.

How to Clean a Piping Bag
So, are piping bags reusable? Yes and no. If you’re using bags that are labeled as disposable, you don’t necessarily need to clean them. Meanwhile, reusable piping bags, also called featherweight or pastry bags, are made from polyester and can be cleaned.
To clean and reuse your piping bags, turn them inside out and rinse them thoroughly in hot, soapy water. Leave the clean bags to dry completely before you store them away again.


Excellent info! I’ve had problems with this…far too long! I’ve ruined many bags, and I mean even the more costly ones that are durable and feel like a heavy duty material. I’d cut them off, THEN try and put things together! Sad, so sad. I’m an avid baker, but not a decorator. This wasn’t too long or crazy detailed and made me feel able to do this! Also, your icing tips; sooo helpful! I’d learned that the items should be room temp, but, as you said, that caused me to have to add too much powdered sugar! So 5 stars on both! I’m looking forward to learning more from you. Your way of teaching works well for this older, dyslexic, MS southern girl! Thank you so much:)
Hi Dee, thank you for such a thoughtful review! I’m so glad you found my piping bag and icing tips helpful. 🙂 I hope you are able to bake more recipes soon.
I’m baking my first cross cake as a surprise for my church, Resurrection Sunday and don’t want to mess it up. Do you know how many cake boxes I have to use for a large cross cake,can I add pudding to it how many, I’m sorry just nervous. Then there’s the piping bag is there another way other than using a piping bag or zip lock bag? Thank-you!
Hi Shelia, I can’t answer this question. I don’t know how big you are trying to make the cross, which size pans you’re using etc. A piping bag is much easier to use than a ziploc bag.
Any tips on using two pipping bags each with a different color at one time with the special coupler? I always have frosting squeezing out of the bag. Makes a huge mess. Thanks.
Hi Karen, I would personally recommend the saran wrap method.You can see an example here with my rainbow cupcakes. I pipe each color onto one sheet of saran wrap and then roll and twist it up, and then drop it into a piping bag with a single tip.
https://beyondfrosting.com/rainbow-cupcakes/
I was hoping to read about how, exactly, to use the bag. How far to hold the tip from the cake, when to squeeze, etc.
This is better explained via video. In regards to specific about where to place and hold the tip, that will be different depending on design and tip needed. There is no one answer for a lot of the questions oyu mentioned unfortunately. A very soft frosting like Swiss Meringue buttercream would require a lot less pressure than an American buttercream or a stiffer frosting.
You are so amazing. I am new to baking cakes and you make it so easy to follow. Thank you for your inspiration and support!!!!
I am so happy to hear that, it sounds like this reached just the person who needed it, and that makes me so happy!
I love following your posts. You make the recipes so easy and delicious 😋 And as a teacher you are wonderful ❤️
Thank you so much Debbie
Are there any advanced techniques for using a piping bag that can take my decorating skills to the next level? I want to impress my friends and family with intricate designs, so any tips or tricks would be greatly appreciated.
I would start on Youtube and look for the type of decorating skills you’re looking to learn
I am a slow decorator, often my icing will start drying up near the tip. Any advice how to rehydrate the icing?
Is it royal icing or buttercream? You can place the piping tips/bags under a damp towel. For buttercream you can place a towel over the mixing bowl, but you may just need to rewhip, It shouldn’t dry up in the bag
When you’re done decorating,what’s the best way to get the coupling out of the bag without getting frosting all over the place .Thank you 🎂🤗
Hi Bonnie, great question. I use the bag and my finger to push out any remaining frosting that is in the tip. Then I use my hand to separate and remaining frosting in the bag and push it back upwards and away from the coupler. I snip the bag just above the coupler. Transfer any remaining frosting from the bag back into the storage container if needed. To remove the piping tip I usually wash the entire thing under hot water to remove any remaining frosting, then I just push the coupler up or pull the sides of the bag down. I hope this makes sense but please reach out with any more questions.
How do you use piping bags to decorate chocolate covered pretzels? Also how do you tie the bag?
I fold the bag over a cup, fill it with chocolate and then twist the bag closed, snip the end and then use it to drizzle. I don’t actually tie them but I do sometimes use bag ties which are little silicone rubber bands.
hi! i have accidentally put the entire coupler into my piping bag! what should i do?
I am so sorry this comment went through my spam folder and I am just seeing it
I need to practice. My piping bags always ‘leak’. I even bought a metal ‘professional’ cookie and piping apparatus. Epic fail! Maybe you could do a video tutorial for folks like me that are visual learners? Thank you! Love your work!💞
Hi Maggie, I think trying to cut off LESS of the bag, so it overlaps the coupler or tip will help prevent leaking. I followed up with you via email to send the link for the video (which is also added into this post!)
What brand of piping tips would you recommend? I didn’t see that mentioned but may have just missed it. I’m a total novice to piping and am interested in piping danish butter cookies. Thank you!
Hi Kathleen, I buy mine in bulk from Amazon, the brand is DayMark. However, to start off I would just get Ateco or Wilton bags from your local craft store, there is nothing wrong with those bags at all!
Excellent tutorial ! I also love using Wilton products.
Thank you so much,
Roxanna
You’re welcome!
You are so cleaver! I have learned a lot and was always afraid of trying over the years. Now I’m ready . . . will practice with different tips. Thank you and love your blog.
That’s wonderful Mary, I am beyond excited to hear that!
Thanks for all the information. This was very helpful. Love you’re site. Rick Sullivan.
You’re so welcome! I am very happy to hear this has been a good resource!
What is the easiest way to ice the side of a cake using 3 different colors?
Place each color in it’s own piping bag, and then use the piping bag to apply the frosting to the sides of the cake, go around one or two times for each color depending on the height of your cake