Learn How to Color Buttercream like a pro! This comprehensive tutorial walks you through how to create beautiful colored buttercream that’s rich, vibrant, and perfect for decorating cakes, cupcakes, cookies, and more.
Once you’ve mastered coloring your buttercream, level up your skills with my guide on How to Use a Piping Bag.
How to Color Buttercream Frosting Like a Pro
Who’s come across a beautifully frosted cake or a batch of brightly frosted cupcakes and thought, HOW?! My mom made cakes for every birthday when I was growing up, and they were always themed, always frosted with homemade buttercream in every color imaginable. In my eyes, there was nothing more awe-inspiring.
So, you could say that I’m a little passionate about buttercream frosting. It’s what inspired this series of frosting tutorials, where I cover everything from How to Use and Decorate with Piping Tips and then leveling it up with How to Decorate Cupcakes. Today, we’re deep-diving into how to color buttercream frosting.
I’ve made many, many homemade desserts over the years, and many of them involve beautifully colored buttercream. I mean, colored frosting is a must when decorating desserts for holidays and themed parties. It also makes such a difference when piping designs onto cakes and cupcakes.
There are so many reasons why you should learn to color buttercream! Let’s get into it.
What Buttercream Frosting Should I Use?
For this tutorial, I recommend using a basic vanilla buttercream frosting (although my recipe is anything but basic if I do say so myself- and readers agree!). I’ve included my go-to recipe for Perfect Vanilla Buttercream below the post. My vanilla frosting is colorless and versatile, and you only need 4 ingredients to make it. It’s the perfect blank canvas!

What Can I Use to Color Buttercream?
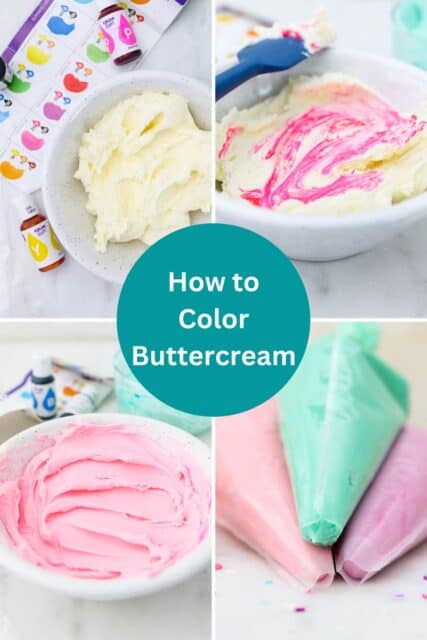
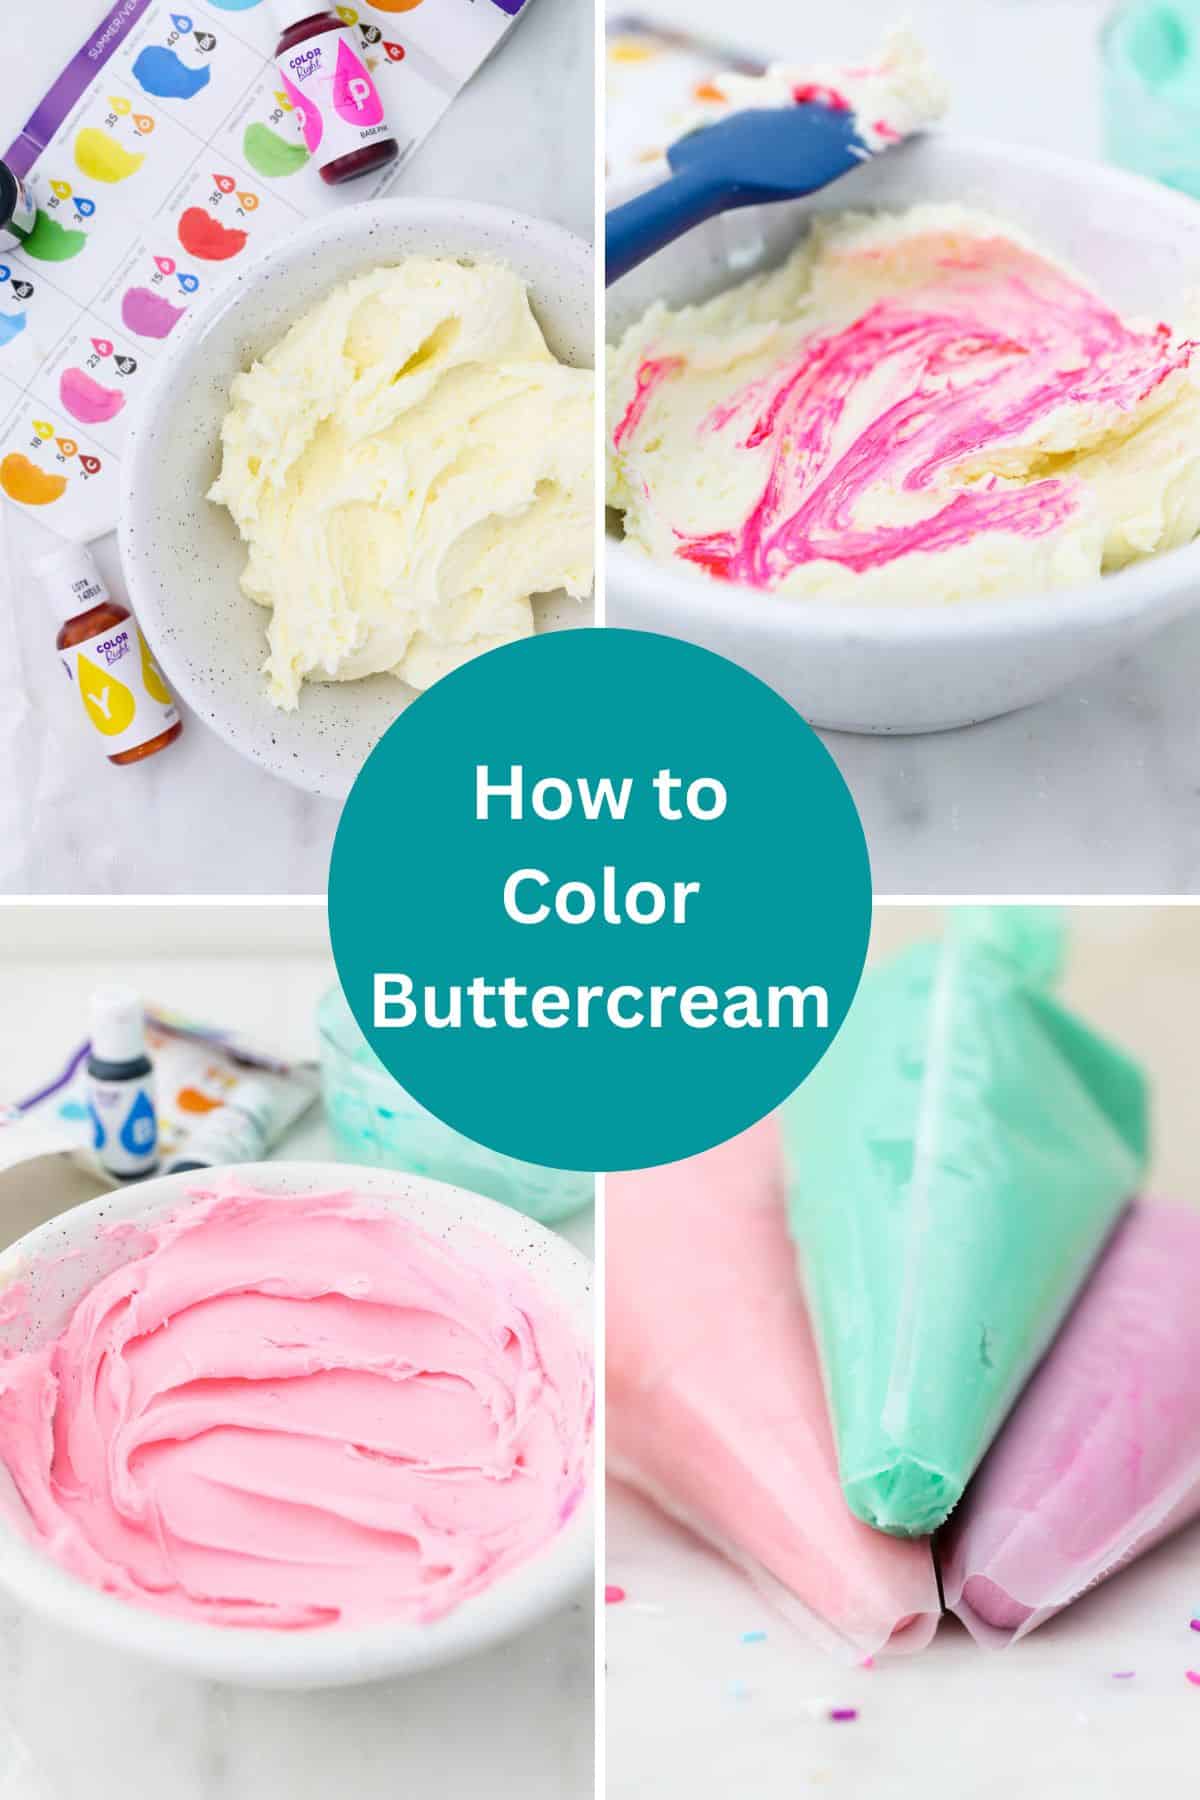
To color your buttercream frosting, you’re going to need food-grade dyes. I recommend gel colors over traditional food coloring, and there are two types of colors I primarily use: the Wilton Color Right Color System and AmeriColor.
Gel dyes are highly concentrated with a thicker consistency, and you only need a small amount to achieve bold, rich colors. On the other hand, food coloring is less concentrated and also water-based, and it’s more likely to thin out your frosting as a result. Let’s take a more in-depth look at the different dye options below.
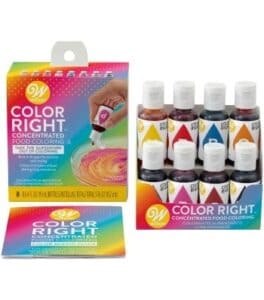
Wilton Color Right Color System
The Wilton Color Right Color System includes 8 basic colors, along with a guide for making 50+ different colors from those original 8. It’s a great option for experienced bakers and beginners alike since you don’t need to invest in a bunch of individual colors. You’ll also find refills for Wilton’s color gels at craft stores like Michaels, and at cake decorating suppliers.
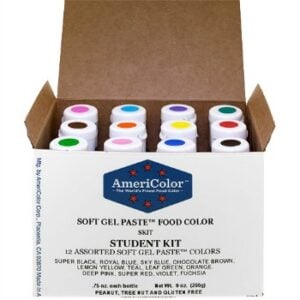
AmeriColor
AmeriColor gels are best for finding unique, pre-mixed colors and shades (ie. teal, turquoise, pumpkin, terracotta, champagne, dusty rose, etc). They have well over 50 colors to choose from and also offer a starter kit of 12 basic colors (linked above). You can find AmeriColor dyes at craft stores, or online.
Food Coloring
Food coloring is commonly found in grocery stores and usually comes in 4 primary colors: red, yellow, green, and blue. It has a thinner, more liquid consistency, and I generally don’t recommend it for coloring buttercream. If you must use food coloring, consider adding a bit more powdered sugar to your frosting to balance out the additional liquid.


The Best Way to Color Buttercream Frosting
How much dye you add to your buttercream depends on the amount of frosting, and the color you’re looking to achieve. Generally speaking, I’ll use up to 3 colors at a time, with white or natural buttercream as the 4th color.
A rule of thumb to remember is that you can always add more, but you can’t take it away. Keep in mind that the color of your frosting will also deepen the longer it sits. Here’s the easiest way to color buttercream:
- Prepare the buttercream frosting. Follow the directions to make your buttercream. I recommend a stiff buttercream like my Perfect Vanilla Frosting (recipe below). If you’re making multiple colors, divide your frosting according to how much you’ll need for each.
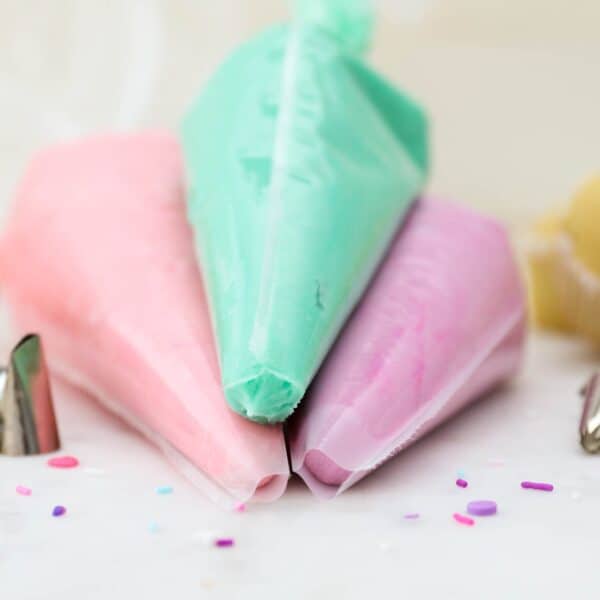
- Add color. Start by adding 1 drop of your color of choice to each bowl, and gradually add more as needed. For lighter shades or smaller batches of frosting (1 cup or less), I recommend using toothpicks when adding gel coloring to your buttercream. After a toothpick comes in contact with the frosting, do not return it to the gel bottle.
- Mix. Use a spatula or spoon to gently fold the color into the frosting. Afterward, transfer the frosting to piping bags or use it to decorate as is.


Frosting Color Variations
There is an infinite number of colors, hues, shades, and tints that you can dye a batch of frosting. Let’s have a look at some common variations and the best ways to achieve them:
Solid Colors
To dye an entire batch of frosting (4 ½ cups) a single pastel color, I recommend 2 drops of gel color for cup of frosting. If you’re aiming for a darker shade, I recommend gradually adding more as needed. If you’re dying less than 1 cup of frosting, you’ll need less than ¼ drop of gel. Sometimes it’s easier to use a toothpick to add just a touch of color to a small bowl of frosting.
Mixing Colors
When it comes to combining different dyes to create a uniquely colored buttercream, start with the lightest color first before adding your secondary colors. To make purple buttercream, for example, add your pink coloring first before adding blue.

Bold Colors
Achieving bold colors, like red, is sometimes a bit more challenging. When dying your buttercream in more saturated colors, I recommend using tasteless gels that won’t leave a bitter aftertaste (since you’ll need more dye to achieve a rich, saturated color). My go-to when dying red buttercream, for example, is AmeriColor Super Red.
When it comes to brighter colors, aim to prepare your frosting ahead of time and store it airtight. The color will become richer and darker the longer it sits. Once it’s on your cake, the buttercream will also set a little bit darker than how it looks in the bowl.
Black Buttercream
Like bolder colors, creating black buttercream frosting can be tricky. But it is doable! I recommend using a potent gel dye, like AmeriColor Super Black. Another trick is to start with a Chocolate Buttercream Frosting that’s already dark and add black dye. You’ll use less dye, and the color will be closer to black than if you begin with a base of white buttercream.
Can I Make Perfectly White Buttercream?
Vanilla buttercream is naturally off-white, sometimes yellowish, due to the butter and vanilla extract in the recipe. For this reason, if you’re looking to achieve vibrant, snowy-white frosting, there are a few ways to do it:
- Use clear vanilla extract. Unlike real vanilla that’s brown in color, this is an artificial flavoring that won’t alter the color of your buttercream.
- Add white dye. Wilton also offers a white liquid color that you can add to your frosting to make it appear whiter.
- Add purple. You heard right! One more “baker’s hack” for white frosting is to add a teensy amount of purple color to your natural buttercream. The purple will offset the yellow in the frosting to make it appear more white. Use a toothpick to add the purple color in order to avoid tinting the buttercream.

More Tips for Color Buttercream
Once you’ve learned how to color your buttercream frosting, the sky’s the limit when it comes to decorating your favorite cakes, cookies, cupcakes, and more. Below are some final tips for perfect colorful buttercream:
- Always color more buttercream than you need. It’s very difficult to get the same color twice. You can always store or freeze any leftover frosting, see the section below for details.
- Color your buttercream ahead of time. As mentioned earlier, it’s best to dye your buttercream 2-3 hours ahead of when you plan to use it. Because buttercream is a fat-based icing, colored buttercream will often darken 1-2 shades while it rests. Dying it in advance gives the gel coloring enough time to emulsify with the frosting and reach its final color beforehand.
- Start with a thicker frosting. Since you’ll be mixing colors in by hand, it’s best to start with a stiffer buttercream so that the final result will be the right consistency.

Ways to Use Colored Buttercream
Use your newfound buttercream coloring skills to decorate all of your best homemade desserts:
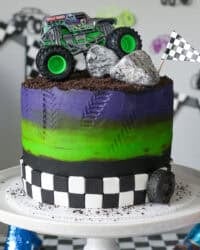
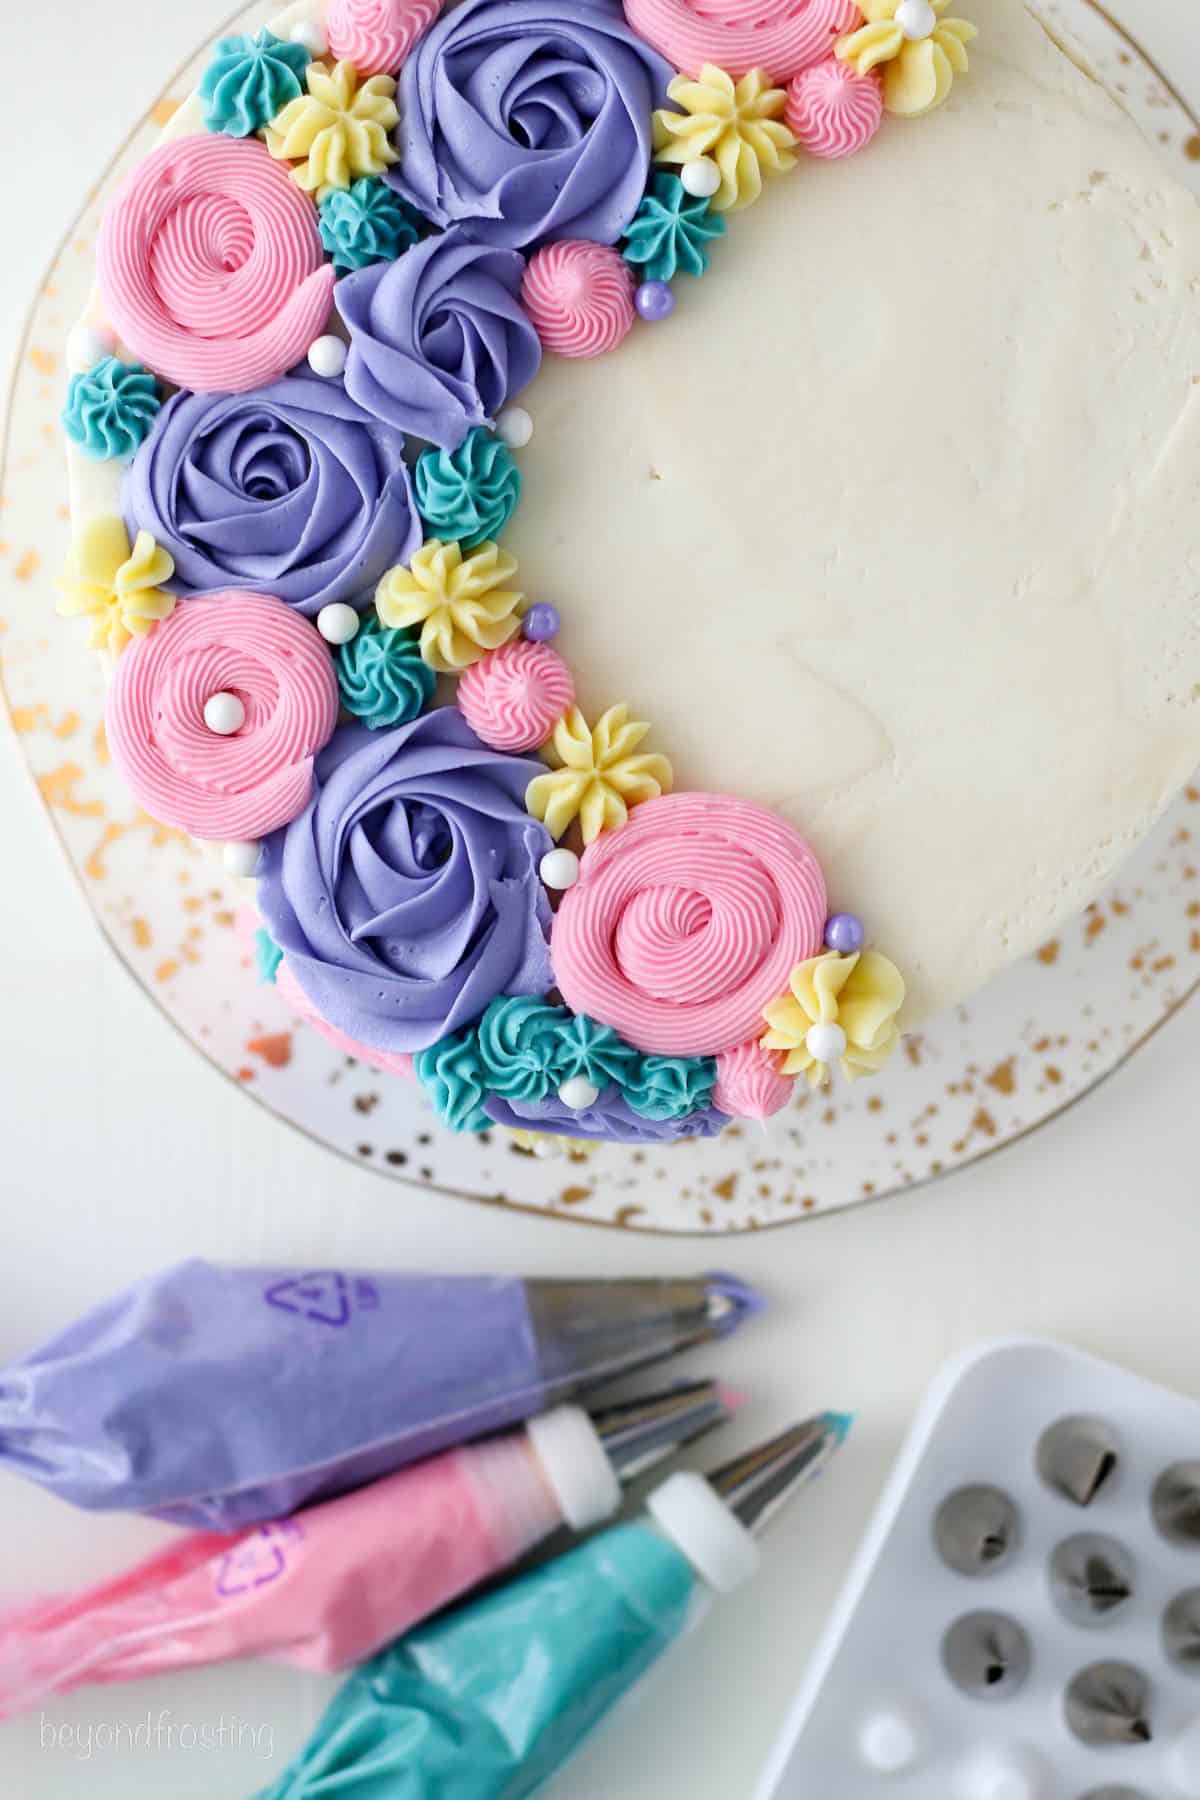
- Cakes – Liven up your favorite homemade cake recipes using colored buttercream. Try this tutorial for a gorgeous Buttercream Flower Cake! Need a recipe for the 4th of July? Here’s a red, white and blue cake where you can match the frosting to the cake colors.
- Cupcakes – Make green buttercream for Christmas Tree Cupcakes, pastels for Magical Unicorn Cupcakes, or combine all the colors to frost Rainbow Cupcakes.
- Cookies – Use colored icing to frost Sugar Cookies for any occasion or holiday. Cookies for Valentines day , Halloween Cookies, or even this Turkey Cookie Cake for Thanksgiving! Check out my tutorial on How to Decorate Sugar Cookies for more details.

Storing Colored Buttercream Frosting
Once your colors are mixed into your frosting, I recommend storing your buttercream airtight at room temperature for 2-3 hours, to let the colors settle or up to 24 hours. For longer storage, transfer your frosting to the fridge to keep chilled for up to 7 days. Keep each color stored in a separate container, to prevent them from bleeding into one another.
Take your buttercream frosting out of the fridge and let it come to room temperature before you use it. You’ll also want to give it another quick whip either with a spatula or your stand mixer to stir before decorating your cake or cupcakes.
Can I Freeze Buttercream?
Yes. Most buttercream frosting freezes well, simply store it in a freezer-safe airtight container or freezer bag and keep it frozen for up to 1 month. Thaw the frosting in the fridge and let it warm to room temperature before you use it.
Basic Vanilla Buttercream
- Prep Time: 15 minutes
- Total Time: 15 minutes
- Yield: 4 1/2 cups
- Category: Frosting
- Method: Stand Mixer
- Cuisine: American
Description
My best-ever Vanilla Buttercream Frosting is super versatile and perfect for customizing with your favorite color gels! Made with a handful of ingredients, this basic frosting recipe is easy to pipe onto cakes and cupcakes.
Ingredients
- 1 1/2 cup (339 g) (3 sticks) unsalted butter, cold.
- 5 cups (650 g) powdered sugar
- 2 1/2 teaspoons (12 ml) pure vanilla extract
- 2 tablespoons (30ml) heavy whipping cream (or milk)
Instructions
- Cut the butter into pieces. Using the paddle attachment, whip the butter for 5-7 minutes, scraping down the bowl occasionally, and beating until the butter look light in color.
- Add 2 cups of powdered sugar and mix on low speed until incorporated into the butter then add the vanilla extract and mix to combine. Beat for about 60 seconds.
- Next, add an additional 2 cups of powdered sugar and beat on low speed until sugar is incorporated. Increase speed to medium-high and beat for 3 minutes.
- Add the last 1 cup of powdered sugar along with the heavy whipping cream. Beat on low until the ingredients start to mix together. Increase speed to medium-high and beat for another 3-5 minutes to whip additional air into the frosting.
- Color your buttercream using your preferred brand of food coloring (see post for tips and tricks).

Notes
- Store frosting in an airtight container. This frosting can be stored at room temperature if served within 24 hours. Otherwise, refrigerate until you’re ready to use it.
- This frosting can be made ahead of time and kept refrigerated for 7 days. Store it in an airtight container. Bring the frosting back to room temperature and re-whip the frosting before use.
- To freeze buttercream, seal in an airtight container or bag for up to one month. Thaw to room temperature and rewhip before using.
- Flavor with different extracts or zest of lemon, orange, or lime.
- This recipe makes enough to frost 24 cupcakes. If you need to scale this recipe up to down, visit my tutorial for my vanilla buttercream, which includes scaled recipes.
Nutrition
- Serving Size: 1/2 cup
- Calories: 540
- Sugar: 65g
- Sodium: 6mg
- Fat: 31.3g
- Saturated Fat: 19.5g
- Carbohydrates: 66.7g
- Fiber: 0g
- Protein: 0g
- Cholesterol: 82mg