
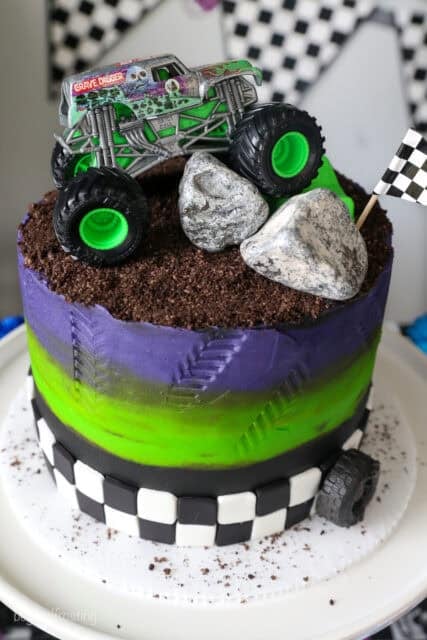
This Monster Jam Gravedigger cake stole the show at my son’s 2nd birthday party. It’s a classic chocolate layer cake decorated with black, purple, and electric green buttercream and checkered fondant. It’s inspired by Gravedigger’s signature colors. Follow this fun monster truck cake tutorial, where I share all my DIY decorating tips and tricks!

Monster Jam Birthday Cake Tutorial
IFor months I had been planning my son’s second birthday with a Monster Jam theme. He loves Monster Trucks but has always loved Gravedigger the most. We were lucky enough to go to our first Monster Jam show right before his birthday which made for a pretty special week.
I’m so excited to finally share the details of this Monster Jam Gravedigger cake. It’s a chocolate layer cake decorated with creamy buttercream colored black, purple, and electric green to match Gravedigger’s signature colors, decorated with checkered fondant and topped with his favorite version of the truck.
A Few Details About This Cake
- Minimal fondant. After scouring the internet and socials for Monster Jam birthday cake ideas, I found many layer cakes that were heavy on the fondant and sheet cakes similar to my construction cake. I knew I wanted a layer cake, but more buttercream-forward, so I set out to create my own.
- Simple technique. This Monster Truck cake design uses basic buttercream decorating techniques and pre-colored fondant. It doesn’t require any piping tips at all, just a few piping bags with the tip cut off.
- Easy to customize. You can do this with any version of the truck using any colors for the buttercream to match the theme. The checkered fondant, edible tires and edible rock decoration translate well to any Monster Jam truck. Plus, I am sharing some DIY decorations you can tie into the theme.

What You’ll Need
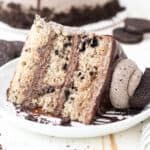
This is a three-layer, 6” chocolate layer cake frosted with buttercream. Although the frosting starts with a vanilla buttercream base, most of the frosting is actually chocolate flavored, thanks to cocoa powder (but more on that later).
I’ve included notes below on what you’ll need to make and decorate this Monster Jam cake. You’ll find the full recipe and instructions in the printable recipe card after the post.
- Cake – I use my chocolate cake for the layers in this tutorial, but you can use any flavor of cake you’d like.
- Buttercream Frosting – You’ll need a batch of vanilla buttercream, which you’ll color using a combination of cocoa powder and gel food coloring.
- Gel Colors – I use purple, electric green, and black gel food dye to match Gravedigger’s signature colors. You can adapt this tutorial with more colors to match your child’s favorite Monster Truck characters.
- Fondant – This Monster Truck cake uses black and white rolled fondant to create the checkered flag detail around the bottom edge of the cake. You’ll find ready-made fondant in baking and craft stores or online in small quantities, you don’t need much!
- Oreos – Finely crushed to make the “dirt” on top of the finished cake. Any chocolate cookie works.
- Decorations – These can be Monster Truck toys (remember to wash them well first!) and any other decorations you’d like to add to your Monster Jam cake. I include detailed decorating tips later on in the tutorial.

How to Make a Monster Jam Gravedigger Cake
First, you’ll need to prepare three 6-inch chocolate cake layers (or the flavor of your choosing). Bake the cake layers until a toothpick stuck into the center of the cakes comes out clean. Afterward, the cakes will need to cool completely before you level the layers, assemble the cake, and create a crumb coat.
If you’re new to making layer cakes, I have a helpful post on how to make a layer cake that goes over the steps in full detail.
Instead of Chocolate Cake, Try These


If you aren’t a fan of chocolate cake, you can make this Monster Jam cake using my classic vanilla cake recipe or any of the homemade cake recipes from my site, including the ones I suggest here. Of course, if you’re pressed for time, even a boxed cake mix does the trick.
Prepare the Buttercream
My frosting recipes start with cold, cubed butter, which creates a stable base for the buttercream. It takes a bit of extra whipping to soften it, but it’s worth it. Once you’ve made your frosting, you’ll divide and color it. See my tips below, and refer to the recipe card for detailed instructions.
Frosting Tips and Colors
The frosting can be made up to 7 days in advance and kept refrigerated. It does need to come back to room temperature and be rewhipped before decorating the cake.
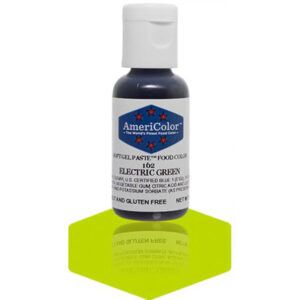
Frosting colors get better the longer they sit. For this reason, I recommend coloring the buttercream at least one day before you plan to decorate, especially for the black color. If needed, check out my in-depth tutorial on coloring buttercream for details. Then, dye the frosting for this Gravedigger cake following the coloring guide below. All the colors mentioned here can be found in my favorite 12-pack of gel colors with the exception of electric green, which you can purchase separately.
- Green – To achieve the perfect Gravedigger green, I used a combination of electric green gel colors (also similar to Chef Master Neon Green) and just a touch of leaf green to slightly darken it.
- Purple – For the purple, I used violet and a touch of black gel to darken it. You can add a little bit of red gel for a deeper purple color.
- Black – I recommend adding black cocoa powder to the frosting base to achieve a deep black color with minimal gel colors. It gives the black frosting a chocolatey flavor, but I prefer that over adding heaping amounts of gel color. After you add the cocoa powder, stir in your black gel to achieve the desired color.
Filling the cake: You may not see it at first, but the cake layers are frosted with the chocolate buttercream, which I choose to not dyed black. This means that I needed to dye a much smaller amount of frosting which can be easier to work with.
Leftover buttercream: If it feels like you made a ton of frosting, you’d be correct, but it’s much easier to freeze leftover buttercream then to try and match colors if you come up short.

Cut Out the Fondant
I used precolored fondant to make the black and white checkered flag pattern on the bottom of the cake. You’ll find fondant in craft stores like Michaels or Hobby Lobby, and at Walmart.
- Roll out the fondant. I used my fondant roller to roll out both colors to a thin, even thickness (not less than ⅛” or the fondant might tear).
- Use a cookie cutter. Next, use a square cookie cutter to cut out ⅝” squares. You’ll need approximately 30 squares of each color, but cut a few extra in case they bend. Initially, I cut squares that were closer to ¾”, but I felt they were a bit too large for the 6-inch cake.
- Or use a pizza cutter. Alternatively, you can use a ruler and pizza cutter to measure and cut the squares (I’ve also seen plunger cutters and these multi-cutter squares, but I have not personally used them).
Once you have your fondant cut-outs, set them aside for now (in an airtight container), or you can store them for later. Fondant decorations can be prepared 48 hours in advance and kept in a flat, airtight container until you’re ready to use them.

Decorate the Cake
After assembling the layer cake and applying a crumb coat, it’s a good idea to chill the cake in the fridge for 15-30 minutes before you decorate it. Then, it’s time to bring this Gravedigger birthday cake to life:
- Prepare the piping bags. Next, add your 3 buttercream colors to small piping bags. If needed, check out how to use a piping bag for details.
- Pipe the buttercream. Starting at the bottom edge of your assembled layer cake, pipe 3 rows of black buttercream. Then, pipe 2 rows of green, followed by purple buttercream. If you happen to come up short without finishing the row, don’t stress. It’s an ombre effect! Just start the next color right where you left off.


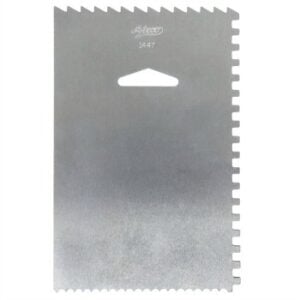
- Smooth it out. Run an icing scraper under very hot water, then wipe it dry. Place the scraper at a 90º angle against the side of the cake, and using light pressure, rotate the cake to smooth out the frosting. Clean the scraper with hot water at the halfway mark and start again until everything is even and smooth. For any frosting along the top edge, just pull it into the middle of the cake since we’re covering that with Oreo crumbs anyway.
- Add the fondant. Next, press the fondant squares around the bottom edge of the cake, alternating black and white to create a checkered pattern. This is best done before the buttercream sets.
- Add tire marks. This step is optional, but if you’d like to add tire treads for extra texture, use a Monster Truck toy or similar, place the wheels gently against the sides of the cake, and run the truck lightly through the buttercream. This works best once the buttercream forms a light crust, otherwise, if it’s too soft it will just stick to the tires.
Julianne’s Tips for Working With Fondant
After doing two different cakes with this fondant checkered pattern, here’s a few things you should know if you’re new to working with it.
- Chilling the cake effects the fondant. When the cake comes back to room temperature, you may notice that the fondant looks wet and soft at first. As the cake comes back to room temperature it should reset. If you’re planning to make the cake ahead and freeze it, I would wait to add the fondant until it’s fully thawed.
- Attaching the fondant to the cake: You may need to rough up the buttercream underneath with a toothpick if you find that the fondant isn’t sticking to the smoothed cake. Alternatively you can use a toothpick and add some leftover buttercream on the back of the squares or use piping gel. Pro tip: If you have a flat angled spatula, you can press the fondant into the cake to help the square line up a little better.
- It’s best within the first couple days. You’ll notice that after a few days, the moisture from the cake may cause the fondant to wilt a bit, which is why I recommend not adding it too early.


Don’t Make This Mistake!
You need to add at least 3 layers of black buttercream on the bottom edge, otherwise it will be fully covered by the fondant checkers and you won’t see any of the black.
- Decorate. To the frosted cake, I added a thin layer of chocolate buttercream on top and covered that with Oreo crumbs that I ground up in the food processor (creme filling and all). Then, I topped the cake with a crushable car, my son’s favorite Gravedigger truck, a mini flag topper and edible chocolate boulders. You’ll find the boulders on Amazon, and I also recently found them at Hobby Lobby.
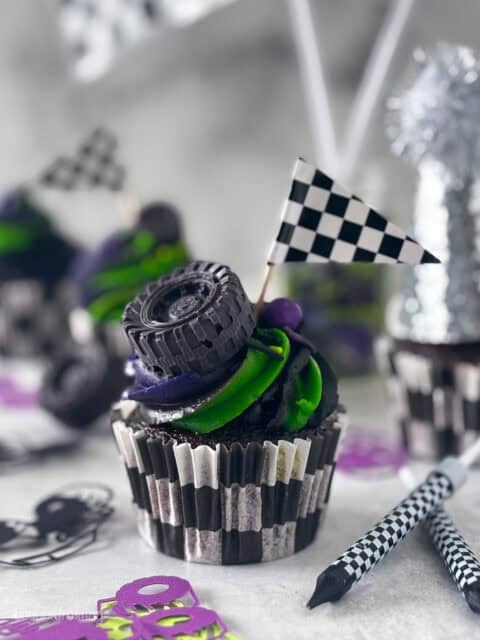
- Edible Tires. The tire you see on the cake is edible. I uses these tire molds, you can make them with either leftover fondant or chocolate. For the chocolate ones, you can buy either black candy melts or Ghirardelli Chocolate Wafers. Chocolate wafers will be brown, so if you want to do them as chocolate, then you’ll want to get some oil-based black food coloring that is meant to coloring chocolate. These also make great cupcake toppers. When I made them again for my older son’s Hot Wheels Cake, I painted the middle of the tires with edible silver dust, it looks really cool!
Monster Jam Birthday Party Decor
Just like I did for my son’s dinosaur birthday cake for his 1st birthday, I tied the decor for his 2nd birthday into this Monster Jam-themed cake. I bought this Monster Truck confetti and these adorable custom logo stickers from sellers on Etsy, and this racing-themed number 2 balloon from Amazon. I did the balloon arch using a couple of different bags of balloons I had or purchased, but there’s lots of options available on Amazon.
Then, I strung up this “Two Fast” banner in front of the checkered table cloth, triangle flag banner, and balloons I found at Hobby Lobby. My son’s Monster Truck toys got to wear mini party hats, and I topped his cake with these cute checker candles. It’s safe to say he was thrilled! I also found the perfect sprinkles for my cupcakes to match.
I also custom-made the number 2 sign using a cardboard platter (like you’d see for Charcuterie), I purchased it at Hobby Lobby I covered the inside with checkered vinyl (also purchased from Hobby Lobby but there are similar options at Michaels and it may also work with checkered tape, but it would take more work to line up the pattern. I glued down some Monster Jam trucks from Dollar Tree and grabbed a skateboard ramp (also from Dollar Tree) to look like a jump. I am kinda of obsessed with how it turned out.

Make-Ahead and Storage
- Cake layers. You can bake your cake layers up to 2 days in advance. After they’ve cooled, wrap the cakes tightly in plastic wrap and store them at room temperature. You can also freeze the unfrosted cake layers for up to 1 month.
- Store leftover cake. Leftover frosted cake can be kept at room temperature in a cake carrier or tightly covered. I usually only suggest storing frosted cakes in the fridge if you happen to live somewhere hot and humid. Remove any plastic decorations before storing.
- Leftover frosting. You can prepare your buttercream frosting up to a week ahead and keep it airtight in the fridge. Bring the frosting to room temperature and re-whip it before you use it. Any leftover buttercream and be frozen for up to 2 months in an airtight container.
More Birthday Cake Ideas

Monster Jam Gravedigger Cake
- Prep Time: 120 minutes
- Cook Time: 28 minutes
- Total Time: 2 hours 28 minutes
- Yield: 12-15 servings
- Category: Cakes
- Method: Oven
- Cuisine: American
Description
Follow this monster truck cake tutorial to make a Monster Jam birthday cake decorated with Gravedigger’s black, purple, and green colors, and checkered fondant icing.
Ingredients
For the Cake
- 1 ½ cups (285g) granulated sugar
- ½ cup (118 ml) vegetable oil
- 3 large eggs, at room temperature
- 1 tablespoon (15 ml) pure vanilla extract
- ½ cup (120g) full-fat sour cream, at room temperature
- 2 cups (280g) all-purpose flour, sifted
- ½ cup (40 g) cocoa powder, sifted
- 1 tablespoon (5g) espresso powder (optional)
- 2 ½ teaspoons (9 g) baking powder
- ½ teaspoon (2 g) baking soda
- 1 teaspoon (5 g) salt
- 1 ¼ cup (296 ml) hot brewed coffee
For the Buttercream
- 2 cups (453g) unsalted butter, cold
- 7–8 cups (910-1041g) powdered sugar
- 1 tablespoon (15ml) pure vanilla extract
- 1–3 tablespoons (15-44ml) heavy whipping cream (or milk)
- 1/8 teaspoon salt
- ½– 1 cup (40-80g) black Cocoa powder
- Gel colors
For the Decorations
- 4oz White and black fondant
- 8 Oreos, crushed into a fine crumb
Instructions
For the Cake
- Preheat the oven to 350°F. Prepare three 6-inch round baking pans, line the bottom with parchment paper, and grease the sides.
- In a large mixing bowl, combine the sugar, vegetable oil, eggs, and vanilla extract. Beat on medium speed until well incorporated. Next, mix in the sour cream and beat until well combined.
- In a separate bowl, sift together the dry ingredients. To the batter, alternate adding half the dry ingredients followed by half of the coffee and mix just until the flour starts to incorporate. Repeat with the remaining ingredients. Use a spatula to scrape down the sides of the bowl and stir the batter from the bottom to the top to ensure it’s well mixed.
- Divide the batter evenly between the three pans, about 1 2/3 cups of batter per pan. Bake at 350°F for 25-32 minutes. Test the cake for doneness by inserting a toothpick into the center of the cake. If the toothpick comes out clean, the cake is done. Remove from the oven and allow to cool completely.
For the Buttercream
- Cut the butter into pieces. Using the paddle attachment, whip the butter for 5-7 minutes, scraping down the bowl occasionally. Beat until the butter is whipped to a soft and spreadable consistency.
- Alternate adding 3 cups of powdered sugar at a time with the liquid ingredients: vanilla extract & heavy cream. Add the salt. Ensure the powdered sugar is well combined, then and whip for 1-2 minutes before adding the next cups of powdered sugar.
- Once all the powdered sugar has been added, increase the speed to medium-high and beat for another 2-3 minutes to whip additional air into the frosting. Then turn the mixer down to the lowest speed and beat for about 2-3 minutes, which helps eliminate some of the air bubbles.
- In two bowls, separate out 1 heaping cup of buttercream for each color (purple and green. For the purple, dye with a violet gel color and to darken it, add a toothpick tips’ worth of black until the desired color is reached. For the green, use electric green gel and add a toothpick tip of leaf green until the desired color is reached. Set aside.
- To the remaining buttercream, add ½ of the black cocoa powder and beat until well combined. Add additional cocoa powder as needed to achieve a dark chocolate color. Separate out 1 ¼ cup cups of the frosting, to that add the black gel color until the desired color is reached. The remaining buttercream will be used to frost between the cake layers and for the crumb coat and it doesn’t require you to color it.
To Assemble
- Use a cake leveler to cut the domes off the top of the cake so all 3 layers are even and flat. Place a dollop of frosting on a cake board and place the bottom layer of cake on top of that.
- The middle of the cake is frosted with the chocolate buttercream (not colored black). Using 1 cup of frosting between each layer, spread it evenly with an offset spatula. Add the second cake layer and add the remaining buttercream. Place the third layer of cake on top.
- Next, add a crumb coat to the entire cake. First, use an offset spatula to press any excess buttercream onto the edges of the cake. Next, fill a large piping bag and cut off about 1 inch from the bottom. Pipe a thin layer of frosting along the outside edge of the cake, filling in additional gaps between the layers, and a thin layer of buttercream on top of the cake. Then, use an offset spatula or icing scraper to wipe away the excess frosting, leaving just enough to coat the outside of the cake. Do not mix the crumb-coating frosting back into the bowl if it has cake debris in it. Refrigerate the cake for 15-30 minutes until the outside layer is chilled.
To Decorate
- Prepare the black and white fondant squares by rolling out each color to a thin but even thickness, but not less than 1/8” thick. Use a square cookie cutter (mine was 5/8” wide) and cut the squares out (estimate about 30 squares of each color). Set aside or place in a single layer in a flat, airtight container to be used later.
- Fill 3 small piping bags with each of the 3 buttercream colors. Starting at the bottom edge, evenly pipe 3 rows of black buttercream. Next, pipe 2 rows of green buttercream and then 2 layers (or more as needed) of the purple buttercream.
- Next, use an icing scraper to smooth out the frosting. First, run it under very hot water and dry it thoroughly. Lightly press the scraper up against the side of the cake at a 90-degree angle, rotate the cake in a circle, applying even pressure on the scraper. Stop halfway through and clean off the scraper, run it under hot water, and dry it before starting again. Repeat these steps until the buttercream is smooth. Any gaps can be filled in with the additional frosting and rescraped. Pull the top layer of purple frosting into the middle of the cake. Allow the buttercream to set for 15 minutes.
- If you want to add tire treads, gently place the wheels up against the edges of the cake and very gently run it through the buttercream. This works best once the buttercream forms a light crust.
- Next, place the fondant squares along the bottom edge, alternating black and white. If you find they are not sticking, use a toothpick to gently rough up the buttercream so the fondant can stick to it.
- Add a very thin layer of the remaining chocolate buttercream to the top and cover with Oreo crumbs then place any remaining decorations on top.


Notes
- For a very detailed and more thorough explanation (and tips) of the cake assembly, please refer back to the blog post.
- For the buttercream, when adding the heavy cream, start with 1 tablespoon and add more only if needed to adjust the consistency.
Make-Ahead and Storage
- Cake layers. You can bake your cake layers up to 2 days in advance. After they’ve cooled, wrap the cakes tightly in plastic wrap and store them at room temperature. You can also freeze the unfrosted cake layers for up to 1 month.
- Store leftover cake. Leftover frosted cake can be kept at room temperature in a cake carrier or tightly covered. I usually only suggest storing frosted cakes in the fridge if you happen to live somewhere hot and humid. Remove any plastic decorations before storing.
- Leftover frosting. You can prepare your buttercream frosting up to a week ahead and keep it airtight in the fridge. Bring the frosting to room temperature and re-whip it before you use it. Any leftover buttercream and be frozen for up to 2 months in an airtight container.
Nutrition
- Serving Size: 1 slice
- Calories: 691
- Sugar: 75.5 g
- Sodium: 241.6 mg
- Fat: 35.9 g
- Carbohydrates: 93.4 g
- Fiber: 2.2 g
- Protein: 4.5 g
- Cholesterol: 109.1 mg


I made this for my grandsons second birthday. I followed the directions, they were very easy to follow!! He was so surprised and happy when he saw it!! I have never made anything like this before. Thank you for all the hard work you did putting this together.
Kathy, this makes me immensely happy to hear it, thank you for also sending me a picture!