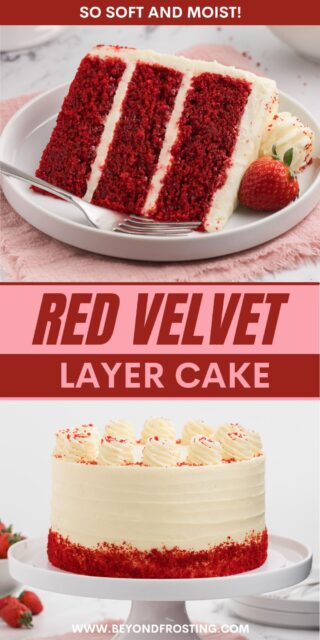
This lush red velvet layer cake is three tiers of decadent red cake flavored lightly with cocoa powder and filled with smooth and silky cream cheese frosting.
If you love red velvet desserts, these easy red velvet cake mix cookies are another must-try recipe.

The Best Red Velvet Layer Cake
If you’ve ever pined over a perfect red velvet layer cake in your local bakery window, you’re not alone. But, did you know that you can make a homemade version that’s even better? This easy red velvet layer cake recipe has the richest, most melt-in-your-mouth-tender, vibrant red crumb filled with chocolatey, tangy flavor.
All the decadent layers are rounded out by smooth cream cheese frosting that’s perfectly sweet and soft. This is a to-die-for dessert you’ll want to make over and over again.
Why You’ll Love This Red Velvet Cake Recipe
- Rich red velvet flavor. The rich flavor in red velvet cake is more subtle than a fudgy chocolate cake, but just as decadent. A handful of easy ingredients contribute to a soft and flavorful cake crumb.
- Moist and Tender Crumb– Readers rave about Red Velvet Cupcakes, calling them “Truly moist and flavorful”. This layer cake uses the same base recipe.
- Easier than it looks. With just a few easy steps, baking and stacking a red velvet layer cake is way simpler than you think.

What Makes a Red Velvet Cake Red?
Compounds called anthocyanins, found in cocoa powder, appear red when they come into contact with acidic ingredients like vinegar and buttermilk. Traditionally, this resulted in a reddish tint in chocolate cake recipes like red velvet and Devil’s Food Cake. Nowadays, it’s common to add red food coloring to the batter for an even brighter red color, instead of relying on the reaction alone. That’s what we do here!
Ingredient Notes
A homemade red velvet cake isn’t complicated, but there are a handful of ingredients that make all the difference. I’ve outlined these below. Scroll to the recipe card for a printable ingredients list and instructions.
- Oil – Replacing a portion of the butter in this cake recipe with oil yields an extra moist, tender cake crumb.
- Eggs – At room temperature before you start. If you forget to take the eggs out ahead of time, place the cold eggs in lukewarm (not hot) water for a few minutes to bring them quickly to room temperature.
- Sour Cream – Room temperature sour cream (or Greek yogurt) adds even more moisture to the cake layers.
- White Vinegar – Don’t worry, your cake won’t taste like vinegar! Using vinegar in a cake recipe might sound strange, but it’s essential for kickstarting the chemical reactions in a red velvet cake.
- Cocoa Powder – Natural unsweetened cocoa powder is best for red velvet cake. Natural cocoa powder has a higher acidity that reacts with the leavening and buttermilk for a lighter, more tender cake.
- Buttermilk – Like your other ingredients, this should be at room temperature. If you don’t have buttermilk, making a homemade substitute with whole milk and something acidic, like vinegar or lemon juice is easy. See my tutorial on how to make buttermilk for details.
- Food Coloring – Adding a small amount of red food coloring enhances and brightens the color of the cake. See below.
- Frosting – I frost this red velvet cake with a variation of my best cream cheese frosting that’s ultra-rich, smooth, and stable. Be sure the cream cheese is a full-fat block of cream cheese, not any type of spreadable or whipped cream cheese.
What Food Coloring Is Best for Red Velvet Cake?
When it comes to coloring a red velvet cake, I recommend using gel food coloring, like AmeriColor Super Red (linked in the recipe card, too). Other brands such as Wilton and Chefmaster also offer good gel food dyes. Gel colors are super concentrated, so a little goes a long way to producing a bright, vibrant-hued cake. Remember the batter might look super red at first but it will adjust when you add the dry ingredients.
How to Make a Red Velvet Layer Cake
Making a three-layer cake from scratch might seem intimidating, but I promise you’ll be blown away by how this cake turns out. I share my easy step-by-step instructions below. As always, you’ll find printable directions in the recipe card below the post.
- Mix the wet ingredients. First, combine oil, butter, egg, and vanilla in a large bowl. Next, cream in the sugar, followed by sour cream, vinegar, and buttermilk. Lastly, mix in red food coloring.


- Add the dry ingredients. Combine sifted flour, cocoa powder, and the remaining dry ingredients in a separate bowl and whisk everything together. Beat the dry ingredients into the wet batter, but be careful to not overmix.


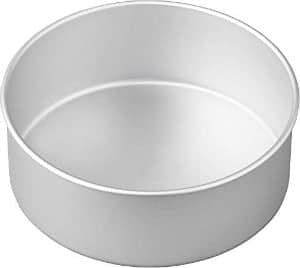
- Bake. Pour the batter into three greased and lined 8-inch round baking pans. Bake the cakes at 350ºF for 25-32 minutes. Allow the baked cakes to cool in the pans for about 15 minutes before loosening and transferring the cakes onto a wire rack. You can also invert the layers to help them flatten a bit more, although since they are moist, I recommend placing a piece of parchment paper down on the rak first.


Assembling and Frosting a Layer Cake
When your cake layers are 100% cooled to room temperature, it’s time to stack and frost your red velvet cake. If you need extra guidance, this tutorial on how to make a layer cake offers loads of helpful tips.
- Make the frosting. Using your stand mixer, beat cubed butter for 3-5 minutes to get it whipped and fluffy. Afterward, beat in cream cheese and then slowly add powdered sugar, alternating with the vanilla and milk until the frosting reaches your desired consistency.


- Fill a piping bag. You’ll need 2 cups of frosting for the layers, 1 cup per layer in a large piping bag. Fit in a piping bag with a large open round tip, or simply snip the end of the piping bag 1/2-inch to 1-inch up.
- Stack the cake layers. Starting with the first cake layer, pipe frosting over top of the cake from the outside edge inward. Then place the second cake layer over the first, and repeat. Invert the top layer for a nice flat surface.


- Add a crumb coat. Finish off with the third and final cake layer. Use additional frosting to create a crumb coat over the outside edges of the assembled cake (see photo). Fill in any gaps with a piping bag and scrape away the excess frosting. Chill the cake for 15 minutes.
- Frost the cake. Set aside 1 cup of frosting to decorate with. The remaining frosting is used to decorate the sides and top of the cake. Using an offset spatula or a knife, spread frosting evenly over the sides and top of the cake. Decorate the top by piping rosettes, see the section further on for decorating tips.


Recipe Tips
You’ll be so impressed by this easy red velvet layer cake! Here are my final tips for best results:
-
- Measure the flour correctly. The number one reason for a dry, crumbly cake is adding too much flour to the batter. If you don’t have a food scale to measure with, see my tutorial on how to measure flour correctly to avoid overmeasuring.
-
- Sift the dry ingredients. Pass the flour, cocoa powder, and dry ingredients through a fine mesh sieve to break up any lumps before adding them to the batter.
-
- Use bake-even stripes. Bake even stripes are a handy baking tool that helps to prevent cakes from doming too much in the oven.
-
- Level the cake layers. If needed, use a serrated knife or a cake leveler to trim any domes from the baked cakes. Level cake layers are easier to stack and frost.
-
- Use full-fat ingredients in the frosting. Full-fat cream cheese and heavy cream will yield the smoothest, creamiest frosting.
- Use the correct cream cheese. Make sure you grab the blocks of cream cheese, not anything in a plastic container that is whipped or spreadable.
-
- Make this cake gluten-free. For a gluten-free version of this cake recipe, see my gluten-free red velvet cake. The ingredient amounts are slightly different for a two-layer cake. If you still want to make a three layer cake, simply swap out the flour with an all-purpose gluten-free 1:1 replacement flour.

Ways to Decorate Red Velvet Layer Cake
Decorate your layer cake depending on the occasion. I love making red velvet cake for Valentine’s Day! There are so many easy ways to finish a homemade cake:
- Piping. Use the excess cream cheese frosting to pipe swirls over the top of the cake. If you’re just getting the hang of piping frosting, check out my tutorials on how to use piping tips and how to use a piping bag for guidance.
- Add a skirt. I crumbled up leftover cake trimmings and pressed the crumbs around the bottom edge of the cake to create a skirt. Easy and fancy!
- Rosettes. See my buttercream flower cake for a full tutorial on how to decorate this layer cake with beautiful buttercream flowers.
- White chocolate ganache. Drizzle the top of this cake with homemade white chocolate ganache. Or, make a white chocolate drip cake (see my chocolate drip cake recipe).
- Different frosting. Cream cheese frosting is the classic choice for red velvet cake, but you can frost this cake with any kind of frosting you’d like. Try vanilla frosting or mascarpone whipped cream.

Frequently Asked Questions
The flavor of a red velvet cake falls somewhere between a chocolate cake and a vanilla cake. It’s a subtle cocoa flavor with a touch of vanilla, plus some richness and tang from the buttermilk.
The best cocoa powder to use for red velvet cakes is natural cocoa powder. Its high acidity works with baking soda and buttermilk to lift the cake and make the crumb tender. Learn about the different kinds of cocoa powder in my post, natural vs. Dutch-processed cocoa powder.
Vinegar encourages the reaction of the baking soda to leaven the cake. If you’re looking to replace the white vinegar in this red velvet cake recipe, substitute the vinegar 1:1 with lemon juice.

How to Store
- To Store. Store this red velvet layer cake on the counter for 1-2 days, in a cake carrier or covered tightly. If your kitchen is on the warmer side, I recommend keeping the frosted cake in the fridge but serving at room temperature.
- Freeze. While I don’t recommend freezing the assembled and frosted cake, the individual cake layers can be frozen for up to 1-2 months. Wrap them tightly in a double layer of plastic wrap (or foil) and defrost the layers at room temperature before decorating.
More Layer Cake Recipes
Print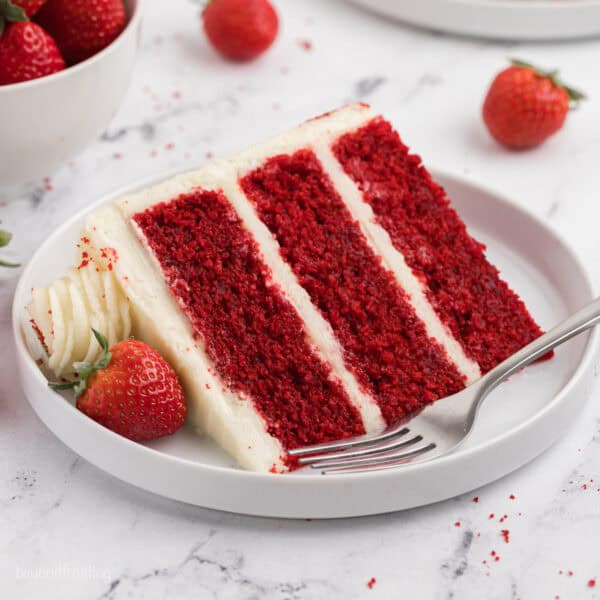
Red Velvet Layer Cake
- Prep Time: 45 minutes
- Cook Time: 30 minutes
- Total Time: 1 hour 15 minutes
- Yield: 12-15 servings
- Category: Cake
- Method: Oven
- Cuisine: American
Description
This is the best red velvet layer cake made from three tiers of luscious homemade cake filled with the silkiest cream cheese frosting.
Ingredients
For the Cake
- ½ cup (118ml) vegetable oil
- 6 tablespoons (84g) unsalted butter, melted
- 3 large eggs, at room temperature
- 1 tablespoon (15ml) pure vanilla extract
- ¼ cup + 2 tablespoons (90g) sour cream, at room temperature
- 1 tablespoon (15ml) distilled white vinegar
- 2 1/4 cups (428g) granulated sugar
- 2–3 teaspoons Americolor Super Red gel coloring (affiliate link)
- 3 1/2 cups (420g) all-purpose flour, sifted
- 1 ½ tablespoons (7g) cocoa powder, sifted
- 3 teaspoons (12g) baking powder
- 1 ½ teaspoons (6g) baking soda
- 1 ½ teaspoons (7g) salt
- 2 cups (472ml) buttermilk, at room temperature
For the Frosting
- 1 ½ cups (339g) unsalted butter, cold
- 1 1/2 cups (12oz /340g) full-fat cream cheese, cold
- 9– 10 cups (1841g) powdered sugar
- 1 tablespoon (15ml) pure vanilla extract
- 1 tablespoon (15ml) milk
- Pinch of salt
Instructions
For the Cake
- Preheat the oven to 325°F . Prepare three 8-inch round baking pans, line the bottom with parchment paper, then grease and flour the pan.
- In a large mixing bowl, combine the vegetable oil, butter, egg, and vanilla extract. Beat on medium speed until well incorporated. Next, add the sugar and beat until well combined. Scrape down the bowl as needed, Next mix add the sour cream, vinegar, buttermilk, and red gel color and beat until well combined.
- In a separate bowl, combine and sift the remaining dry ingredients and add to the batter, beating at a low speed until well combined. Use a spatula to scrape down the sides of the bowl and stir the batter from the bottom to the top to ensure it’s well mixed.
- Divide the cake batter evenly between the three 8-inch pans, approximately 2 cups of batter per pan. Bake at 325°F for 28-32 minutes. Check the cakes for doneness by inserting a toothpick into the center of the cake. If the toothpick comes out clean, the cake is done. Allow the cake to cool in the pans for 15 minutes. Then gently run a knife around the edges of the cake and flip them out of the pan and onto a rack to cool completely.
For the Frosting
- Cut the butter into pieces, about 1 tablespoon size. Using the paddle attachment, whip butter for 3-5 minutes, scraping down the bowl occasionally until the butter is light and fluffy. Then add the cream cheese and cream together with the butter for 2-3 minutes until they are whipped and free of lumps, scrape down the bowl occasionally.
- Slowly add confectionary sugar, 3-4 cups at a time, alternating with the liquid (vanilla extract and milk), and beat until desired consistency is reached. Add the salt with the powdered sugar.
For the Assembly
- Level the cake layers if needed. Place a dollop of frosting on your cake board and place the bottom layer of cake on top of that. Place 2 cups of frosting in a piping bag for the two layers. Pipe in circles working outside edge to the middle. Spread evenly with an offset spatula. Add the second layer of cake and add the remaining frosting. Place the third layer of cake on top, and invert the top layer.
- Use the piping bag to fill in any gaps between the layers and to create a crumb coat. Using an offset spatula or icing smoother, wipe away the excess frosting, leaving just enough to coat the outside of the cake. Place it in the freezer for 5-10 minutes to chill.
- With the remaining frosting, separate out at least 1 cup for decorating. Then proceed to frost the top and sides of the cake using an offset spatula. To add texture, turn an angled spatula 90 degrees, and gently press into the side of the cake, all the way around, working from the bottom to to the top. To pipe the rosettes on top, use an open star tip. Garnish the cake with leftover cake crumbs, gently pressing into the sides of the cake.
Equipment
 Buy Now →
  Buy Now →
  Buy Now →
  Buy Now →
  Buy Now →
  Buy Now →
 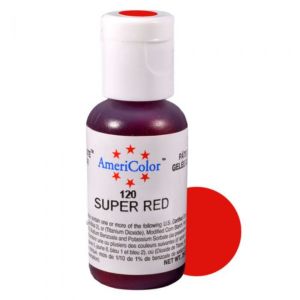 Buy Now →
 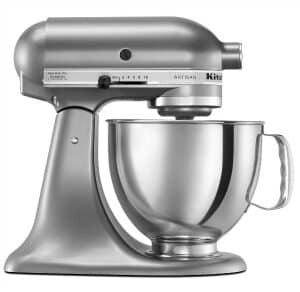 Buy Now →
 (affiliate link)
Notes
- This recipe produces nice tall layers, around 1 ¼ inch thick. I prefer to use bake even stripes, which make the cakes bake flat on top. If you don’t have them, simply cut off the domes of the cake to have even layers to stack with
- Frosting: This is a large batch of frosting, and depending on your mixer, you may consider doing it in two batches. If after adding the 9 cups of powdered sugar to the frosting, and it still seems thin, add an additional cup. To reduce the sweetness of the frosting, you can replace the milk with lemon juice. You’ll need 2 cups of frosting for the layers, 1 cup per layer and at least 1 cup of frosting to decorate with. The rest is used for crumb coating and frosting the layers.
- Storing: This can be kept at room temperature for 1-2 days, in an air-tight cake carrier or covered tightly. If your kitchen is on the warmer side, I recommend keeping the frosted cake in the fridge but serving at room temperature.
Nutrition
- Serving Size: 1 slice
- Calories: 1129
- Sugar: 129.1 g
- Sodium: 614.9 mg
- Fat: 51.9 g
- Carbohydrates: 161.2 g
- Fiber: 1.2 g
- Protein: 9.4 g
- Cholesterol: 159.2 mg


What size pan do you suggest if I halve the recipe? Trying to end up with not so much cake.
Thanks!
If you cut the recipe in half, you can do a single layer 8-inch cake or 2 layer 6-inch cake
Can this recipe be made into a sheet cake size? (9×13?)
Yep!
Hi, I need to make 3 9″ layers. Is there an easy way to do that??
Thanks, Susie
You could use this recipe as is.
O.K. Thank you.
I made this it is A M A Z I N G!!!!! Now my go to recipe for Red Velvet with my special flavour added. Thank you.
Wow! Thank you so much Ann-Marie! I really appreciate the feedback!