
Make perfect rainbow cookies from swirls of soft and buttery sugar cookie dough rolled up into brightly colored pinwheels. This rainbow cookie recipe is fun and easy, with just 30 minutes of chill time. Guaranteed to put a smile on everyone’s face!
If you love rainbow desserts, be sure to check out my pastel rainbow cupcakes or this rainbow sheet cake.

Easy Rainbow Cookies
These bright and colorful rainbow cookies turn my best cut-out sugar cookie dough into a fun treat that you can bake for parties, bake sales, or any other occasion. I am so excited about these, they came out even better than I expected! Soft and buttery like a classic sugar cookie and swirled with the colors of the rainbow, this recipe uses a similar technique to my pinwheel cookies to achieve that perfect roll.
Why You’ll Love This Rainbow Cookie Recipe
- Thick and soft. These rainbow sugar cookies are sliced quite thick, so they’re soft and tender and melt away in your mouth.
- Just sweet enough. My original sugar cookies are usually topped with icing, so there’s not a ton of sugar in this dough. In my opinion, it’s just the perfect amount of sweetness.
- Customize the flavor. There’s a light vanilla flavor from the extract as well but if you want an even stronger flavor, add an extra teaspoon of vanilla extract or add some almond extract too.

Ingredient Notes
You need just a few pantry staples plus gel colors to make these bright and colorful rainbow cookies. I’ve included some quick notes here. Be sure to scroll down to the recipe card for the full ingredient list and recipe details.
- Butter – I recommend unsalted butter, brought to room temperature.
- Baking Soda and Milk – Dissolving baking soda in milk before mixing it with the other ingredients kickstarts the leavening process.
- Flavoring Extract – You can use vanilla extract or almond extract. Feel free to use more or less flavoring to taste.
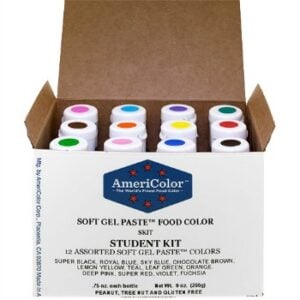
- Food Coloring – I recommend gel food dyes as they offer the brightest colors, see below.
What’s the Best Food Coloring to Use?
The best food coloring for cookies is gel colors, like the kind from AmeriColor or Wilton. Gel food coloring only requires a couple of drops and yields bright, vibrant colored dough as you see in the photos. I used 7 colors, but you could easily make this recipe with 6 colors if needed.
How to Make Rainbow Swirl Cookies
This rainbow cookies recipe requires a bit more hands-on time than regular sugar cookies, as you’ll need to roll out each color. But these slice-and-bake cookies are still super easy to make! You’ll start by preparing the sugar cookie dough:
- Combine the wet ingredients. Beat the butter and sugar until the sugar is creamy, then add the eggs and vanilla (or almond) extract. Next, dissolve the baking soda in milk before stirring this into the batter.
- Add the dry ingredients. Add the salt and flour one cup at a time, mixing to form a stiff dough. You may need to kick the mixer up a notch to get the dough to fully combine.
- Portion it out. Divide the dough into equal-sized balls. If you have a food scale, weighing the dough into equal sizes is best. My dough weighed 1250g, so about 178g per color (7 colors), bigger than a baseball but smaller than a softball. It’s a little more than a 1/2 cup of dough.

Color and Shape the Cookie Dough
Next, you’ll need to dye the prepared cookie dough with all the colors of the rainbow before rolling out and rolling up the dough for slicing:
- Dye the dough. Dye each dough ball an individual color. You can do this by hand or with a mixer. I’ve included more tips below, but this is how I did it by hand. Flatten each ball, add the color, smear it around, and then use your hands to combine. You may need to add additional gel colors to get the vibrancy you want. Doing this by hand is a bit labor-intensive, but 100% worth it!


- Roll out each color. Roll out each color into a rectangle approximately 12 inches long. You want it to be as thin as possible without ripping the dough.


- Stack the dough. Place the first on a piece of parchment paper and stack the rest on top of each other. Once they are all stacked on top of one another, it’s very thick.
- Flatten the dough. Cover with a second piece of parchment and roll it out again until the entire dough is 1/4″ to 1/2″ thick. Rotate the dough as you work so you can evenly roll it out.


- Roll the dough up into logs. Using a pizza cutter, trim any excess dough off the sides of your flattened dough stack. Then, cut the dough into two halves. Roll each one into a log as tightly as possible.


- Chill. Wrap each log in plastic wrap and place the logs seam side down in the refrigerator to chill for 30 minutes.
Slice and Bake the Cookies
Finally, all that’s left to do is slice and bake your rainbow cookies!
- Slice. Use a sharp knife to cut the chilled dough log into 1/2″ thick slices. Use your hands to shape the slices into a circle if needed. Place the cookies 1 inch apart on the baking sheet. These won’t spread very much, so you don’t need to worry about placing them too far apart.


- Bake. Bake at 350° for 9 to 11 minutes. The bottoms should be just slightly brown. Cool for 5 minutes on the sheet then transfer to a wire rack to cool completely.
Recipe Tips
If this is your first time working with dyed cookie dough, here are a few helpful tips.
- Use a stand mixer (if possible). Even though I showed this mixing by hand, I recommend using the stand mixer to dye the dough. If using the mixer, start with yellow and gradually work to the darker colors, cleaning the mixer as needed.
- Always wear gloves. If mixing by hand, be sure to wear gloves. Flatten the dough, add a couple of drops of color, smear with your hands and work the dough between your hands, add additional color as needed. This takes some work to do, and a lot of handling.
- Don’t worry about streaks. If you have some streaky dough, that’s fine you won’t even notice when it rolled out.
- Weigh the dough. If you have a food scale, weighing the dough into equal sizes is best. My dough weighed 1250g, so about 178g per color (7 colors), bigger than a baseball but smaller than a softball.
- Use parchment paper to roll out the dough. This helps to keep the dough from sticking. If you do find the dough is sticking, dust a little powdered sugar over the dough or on the rolling pin.
- Chill the dough. It’s important to chill the dough once it’s rolled so that you can easily slice them without damaging the shape. Don’t skip this step!

Variations and Decorating Ideas
You can enjoy these rainbow swirl cookies exactly as they are, especially if they’re warm from the oven! They’re the perfect accompaniment to a big, cold glass of milk.
- Add frosting. Since these cookies aren’t overly sweet, frost them with buttercream frosting. This strawberry frosting or marshmallow frosting would also be delicious.
- Add sprinkles. You can never go wrong with a finish of rainbow sprinkles, especially on rainbow cookies!
- Decorate with icing. Use my easy sugar cookie icing and get creative with designs.
- Holidays. Adapt your cookies for different holidays! I have a holiday variation of this recipe in the form of Christmas pinwheels. Also, see my festive tips on how to decorate sugar cookies and find loads of inspiration in my Valentine’s Day sugar cookies tutorial for more ways to decorate these rainbow cookies.

Can I Make The Dough in Advance?
Yes. Like most sugar cookie dough, you can prepare the dough for these rainbow swirl cookies up to 2 days in advance. Wrap it tightly in plastic wrap and keep it in the fridge until you’re ready to use it.
You can also freeze the rainbow cookie dough. Wrap in plastic wrap and then in foil to prevent freezer burn. Thaw overnight in the fridge. I recommend leaving the chilled dough on the counter for 10 minutes so it’s a bit easier to work with.
How to Store Rainbow Cookies
- To Store. These rainbow cookies will last for several days when stored in an airtight container at room temperature.
- Freeze. You can also freeze these cookies for a month in an airtight container. Thaw them on the counter before serving.
More Sugar Cookie Recipes
Print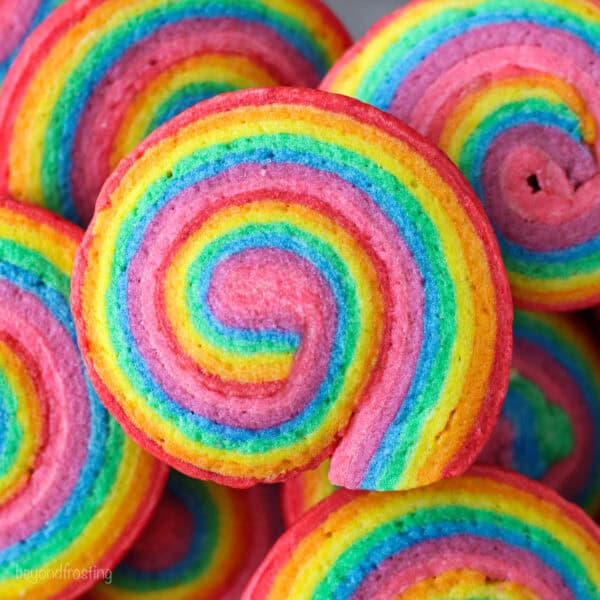
Rainbow Cookies
- Prep Time: 60 minutes
- Cook Time: 11 minutes
- Total Time: 1 hour 11 minutes
- Yield: 36 to 40 cookies
- Category: Dessert
- Method: Baking
- Cuisine: American
Description
Easy rainbow cookies made from swirls of buttery sugar cookie dough rolled up into brightly colored pinwheels. These are so fun to make with just 30 minutes of chill time!
Ingredients
- 1 cup (226g) unsalted butter, at room temperature
- 1 cup (190g) granulated sugar
- 1 teaspoon baking soda
- 4 tablespoons (60m) milk
- 1–2 teaspoon (5-10ml) almond or vanilla extract
- 2 large eggs
- ½ teaspoon salt
- 5 cups (600 g) all-purpose flour
- Gel colors for dying (see notes)
Instructions
- Beat the butter and sugar on medium-high speed until the sugar is dissolved and creamy.
- Add the eggs and flavored extract to the butter and beat until all ingredients are well incorporated. Then, in a small glass dish, dissolve the baking soda in the milk and add to the mixture, beating until combined.
- Finally, add the salt and the flour 1 cup at a time and mix until a stiff dough forms.
- Divide the dough into 6 or 7 equal sized balls. Dye each one the individual color using either your mixer or your hands (see notes for additional tips).
- Starting with the red, roll each individual color into a rectangular shape, about 12 inches long. Roll between two pieces of parchment paper and lightly dust with powdered sugar if needed to prevent sticking. Dough will be relatively thin when rolled, place the first one on piece of parchment paper and stack each color on top of the other.
- Once all the color are stacked, cover with a second piece of parchment paper and proceed with roll out the cookie dough again until it’s about ¼ – ½ inch thick, it should expand quite a bit.
- Trim off the excess sides and then cut the dough into two halves. Roll each one tightly into a log, about 9-10 inches long and about 2-inch in diameter at the thickest point. Wrap each log with plastic wrap and place seam side down and chill for at least 30 minutes.
- Pre-heat oven to 350°F. Line a baking sheet with a silicone baking mat.
- Remove the dough from the fridge. Using a sharp knife, cut them into ½ inch wide slices. If they are misshaped, gently roll between your hands to shape into a circle. Place about 1-inch apart on the baking sheet.
- Bake at 350° for 9-11 minutes just until the bottoms turn slightly brown. Allow to cool for 5 minutes before transferring to a wire rack to cool completely.


Notes
- See blog post for complete step-by-step photos.
- If you have a food scale, weighing the dough into equal sizes is best. My dough weighed 1250g, so about 178g per color (7 colors), bigger than a baseball but smaller than a softball. It’s a little bit more than 1/2 cup of dough.
- I used 7 colors, but you could easily do it with 6 colors. Use color from Americolor or Wilton for best results.
Nutrition
- Serving Size: 1 cookie
- Calories: 135
- Sugar: 5.7 g
- Sodium: 73 mg
- Fat: 5.6 g
- Carbohydrates: 18.9 g
- Fiber: 0.5 g
- Protein: 2.3 g
- Cholesterol: 23.9 mg


I loved that they are less sweet! I think people are used to the over the top sugary cookies from shops… sad… I love the recipe. I made it for my girls 5th birthday and everyone absolutely loved them. I wouldn’t call them bland, I guess it is a taste preference as well. I made similar cokies with much more sugar and it was horrible, way too sweet! Thank you for your recipe x
Thank you for sharing your feedback. I don’t need frosting with the sugar cookie base but then again I’ve been eating them for over 30 years LOL
Dough was nice and managed well – I put in less than 5 cups of flour, sifted four and then added to reduce stickiness when I mixed in the colour. The flavour is very plain and they do fluff up quite a bit.
Thanks for your feedback, Dorothy!
As a baker with some experience behind me,There’s no doubt that these cookies are absolutely adorable. They are, however, the blandest tasting homemade cookies I think that I’ve ever tasted. I would suggest adding at least another half a teaspoon if not more of salt if you’re using unsalted butter. They really are adorable, and are a very nice visual for a Rainbow themed party, if you don’t mind that they don’t taste good. Even the texture isn’t all that great.
Hi Susan, I appreciate the feedback. I grew up eating these as cut out sugar cookies. The cookie base is less sweet than a traditional sugar cookie, perhaps I am used to the taste. I do however note this and offer a couple suggestions to adjust the flavor profile or add sweetness using a glaze or sprinkles. The feedback is very mixed on this recipe, but perhaps going back to the drawing board with some adjustments or calling more attention to the flavor adjustments is needed.
We used all natural coloring and these are amazing! We also did 3/4 vanilla extract and 1/4 almond. It’s so good! Thank you! Would love to post a picture but it won’t let us!
Hi Ashley! I’m so glad these cookies turned out well for you! Feel free to send me a photo on social media 🙂
I made these with my granddaughter today. My take on this recipe: Needed more sugar, more liquid and/or less flour. While they came out looking as they should, they had no real taste. Recipe needs to be reworked.
Hi Deborah, I am partial to the recipe as written, because I grew up with these and prefer them to be less sweet. However I know that some do feel they need something else, so that I why I offered a few suggestions in the blog post to add sweetness.
This dough isn’t very nice. I tried 3 times, and I bake fairly often and it was just a waste of ingredients. I tried both by hand and with a thermomix. Taste wasn’t too bad but texture was not good
I am not sure what a thermomix mix is, but it looks like a food processor. I am not sure if that was meant to handle a batch of dough this large, but you would know better if this is what oyu usually use. But I will say if the texture wasn’t soft and light, then it could be an issue with mixing. If it was tough, then that could be a result of overmixing.
this was a great recipe, used it for easter supper and was a quick last minute desert. All the kids loved the colourfulness of it, they kept asking for more lol. we used the extra bits off the sides and rolled them up to make more cookies-for the kids that dropped them… the cookies did not need a full 30 minutes in the fridge, we took it out about 5 mins early. but overall these were quite good cookies.
That’s amazing Katrina, thank you!
These cookies had no real taste and need a lot more sugar. After you colour and roll them out they were tough and tasteless when baked.
I’ve been eating this sugar cookie for most of my life, so I might be a little bias, but I don’t mind them being less sweet. I think if you’re expecting a sweet sugar cookie, you’d be disappointed in the recipe, which I mentioned in the post. Several of those who commented also mentioned adding sprinkles or a glaze (as did I) for added sweetness. The toughness is likely due to over working the dough.
It was really good and the recipe was reallyyyyyyyyyyyyyyyyyyyyyyyyyyyyyyyyyy scrumdililumpshas
Thank you so much!
This recipe didn’t work out for me. I used my Wilton gel colors and the dough had a tough time mixing the colors. By the time the colors were worked in enough, with some color streaks still in them, the balls of dough were very stiff and tough.
It was very hard to roll them out. I don’t know how you mix the colors without over working the dough.
Once the dough was done mixing before the colors, it was already semi stiff.
I don’t know what I did wrong here.
Hi Carly, I am sorry to hear that. As I mentioned in the post, it’s okay to have steaks in the dough because when it’s rolled out, you won’t notice it on the individual cookies. Mine never got stiff and tuff, if anything they were a little stickier from being worked by hand and the gel. I do think (and stated) that a mixer might be easier.
This turned out so beautifully!! I used some different colors because I didn’t have a whole rainbow, but it still ended up being gorgeous! I’m just wondering how we can get the dough from becoming an oval when trying to cut it while it’s in its log? Mine are cute little ovals 😂 thanks so much!! I will definitely be making this again!!!
Hi Indy, thank you for sharing! I love that. One way to shape them is to stand the log upright in a glass instead of lay them flat. I also gently reshape them after I slice.
The cookies are beautiful. They are vibrant, and have a nice consistency – despite having to work the dough quite a bit to incorporate the gel color. But as you note, when I baked a trial cookie I confirmed they aren’t very sweet. So I used an egg wash and rolled the dough in course sanding sugar before slicing. They were a hit!
Love that Patty! Thank you for sharing! The egg wash is a great tip.
These came out just as beautiful as your photos! The recipes notes that they aren’t very sweet, and this is definitely true…I didn’t think they were sweet enough to serve (especially kids) without some extra sweetness, so I ended up making some simple glazes (vanilla, and chocolate and strawberry) and lightly drizzling them on top, which solved the problem.
Thank you so much for the feedback Jessica! The different flavors of glaze sound amazing!
Really easy recipe to follow and absolutely delicious! I opted for the almond extract and they tasted just like Dansk (blue tin) danish shortbread cookies.
Delicious!! Thank you for sharing!
These cookies are beautiful!! It does need a little sweetness, maybe with an icing border?
I love decorating my cookies. Any ideas?
Yea you could roll them in sanding sugar or sprinkles, or you could even dip them in a glaze on bottom side.
Huge hit with the four-year-old! We weighed the dough into zipper bags and then added the coloring and squished around the bags to avoid dying our hands…more.
This is the best news! I love this so much. Thanks for the tip on the bags!
I followed the recipe to the T and they came out exactly how it’s shown here
Thanks a lot for this recipe ♥️
Amazing Harshani! Thank you so so much!
Hi. What wilton coloring do you use to echive those colors? Can you plz write the colors name so I easily can order them home?
Hi Ninwa, if you want to use Wilton, I’d recommend getting their “Color Right” system. It comes with 8 colors. You can use the yellow, orange, red, pink as blue as is. However, for the green or purple, you’d need to combine the gel colors. Or buy the green or purple icing color separately.
Thanks for this recipe, they turned out GORGEOUS!! Seriously, I can’t stop looking at the pictures I took. 😂 They were a huge hit and gone within an hour!
I made these with my 4-year old niece so naturally it took quite a bit longer than it would have had I done it on my own, but was still relatively quick and surprisingly not too messy. I cook professionally so I admittedly skimmed the instructions (other than the ingredients and measurements), so my batch yielded about 2 dozen cookies that took a few minutes longer to bake and were probably much larger and thicker than the recipe says.
Bearing those two things in mind, my one recommendation would be to make a double or triple batch and freeze into a few logs for super quick and easy future batches!
This sounds amazing Lo! I am so happy you gave this recipe a shot! Thank you again for stopping by and leaving a review!
Mine turned out quite salty and dry and not very sweet.
I had to put icing on them.
Not sure if I over handled them when adding in the colouring but it was such a disappointment after it took so long to make them.
Dryness could be a result of over handling. Was the dough dry or crumbly to begin with? Over baking (especially if sliced too this) can also result in a dry cookie. I am not sure why they would be salty though, there isn’t very much salt in the recipe, did you use salted butter perhaps?