
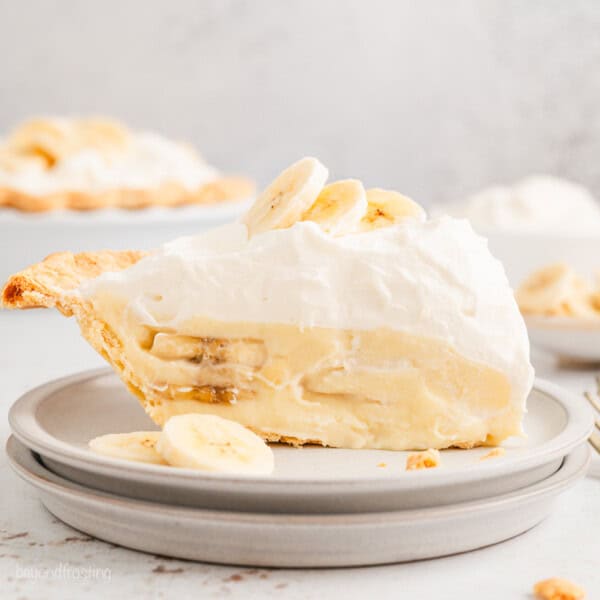
This homemade banana cream pie is a creamy dessert filled with smooth vanilla custard and fresh banana slices, topped with the fluffiest whipped topping. Make this classic pie 100% from scratch, right down to the flaky pie crust. It’s easier than you think!
If you love classic cream-filled desserts, be sure to try this boston cream pie next.

This classic banana cream pie is everything you want in a nostalgic, homemade dessert. It starts with a buttery, flaky crust, filled with layers of fresh banana slices and the creamiest vanilla custard. Then it’s piled high with fluffy whipped cream that’s just sweet enough to bring it all together. I’ve been on a banana dessert kick lately (looking at you, banana pudding), and this one might be my new favorite. It’s rich, smooth, and full of that nostalgic banana cream flavor that never gets old.
This Banana Cream Pie Is Always a Yes for Me
- Smooth and creamy filling. I make the vanilla pudding from scratch, and it’s seriously next-level. Super silky, with just the right amount of sweetness, and perfect with fresh banana slices layered in.
- 100% made from scratch (and worth it). Don’t let homemade pudding scare you. It’s easier than you think, and the flavor is so much better than anything from a box.
- One of my all-time favorite desserts. If banana cream pie is on the menu, I’m ordering it. I’ve had my fair share over the years, and this one absolutely holds up. I love making it for Easter, Mother’s Day, or anytime I’m in the mood for something creamy, comforting, and a little nostalgic.

Key Ingredients and Notes
Let’s start with some helpful notes on what you’ll need. Scroll to the recipe card for a printable list of ingredients and recipe details.
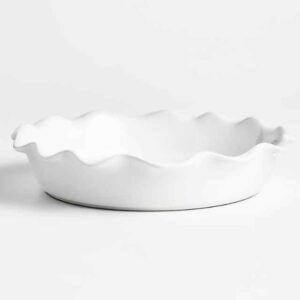
- Pie Crust – I prepare and blind-bake a deep dish pie crust. You can also make this recipe with a gluten-free pie crust, or a ready-made crust from the store.
- Egg Yolks – Just the yolks, to make the pudding filling. Bring the eggs to room temperature before you start. This way, the yolks combine more smoothly with the other filling ingredients.
- Heavy Cream and Whole Milk – Heavy whipping cream in addition to whole milk yields the silkiest, creamiest pie filling. You can use only whole milk or half-and-half instead, but the results are slightly different.
- Butter – Cut into cubes and brought to room temperature. I use salted butter, but unsalted works, too.
- Bananas – You’ll want to use ripe, yellow bananas for this recipe (see below). You’ll need 3 medium-sized bananas.
- Whipped Cream – For the pie topping. I make a version of my homemade whipped cream stabilized with cream of tartar. You can use regular whipped cream, Cool Whip, or even another flavor of whipped cream if you prefer.
Choose the Right Bananas
Unlike banana bread, where the riper the better, the best bananas for banana cream pie are fully yellow, but without too many brown spots. Overripe bananas will turn brown and mushy in this pie. Meanwhile, underripe bananas won’t have enough flavor.
Need to ripen bananas quickly? Place the whole bananas into a sealed paper bag and let them sit on the counter for 1-2 days. It helps speed up the ripening process!
Be Sure to Plan Ahead
Between prepping and pre-baking the crust and chilling the custard filling, you need to plan ahead. It makes a great make-ahead dessert, and below I’ve some preparation tips to break up the steps.

How to Make Banana Cream Pie Step-by-Step
Let’s walk through how to prepare this old-fashioned pie, step-by-step:
Prepare the Pie Crust
- Prepare and blind-bake a 9” pastry crust. Blind baking is quick and involves pre-baking the crust so it won’t become soggy under the no-bake filling. I have a tutorial on how to blind bake a pie crust that goes into it in more detail. The crust should be cooled completely before filling.


Use Another Type of Pie Crust
If you aren’t up for making a pastry crust, feel free to make your banana cream pie in a nilla wafer crust or graham cracker crust instead.
To make a cookie crust, combine 1 ½ cups of cookie crumbs with 3 tablespoons of granulated sugar and 6 tablespoons of melted butter. Press the crust into the bottom of the pie plate and par-bake for 10-12 minutes at 350ºF. See the recipe card for details.
Make the Homemade Pudding Filling
Next, you’ll prepare the custard for the filling. Let’s officially put any worries about making pudding from scratch to rest. It’s actually very easy! It just takes a little patience and elbow grease. But if you can whisk, you can make vanilla pudding. Follow the steps below:
- Whip the egg yolks. First, you’ll whisk the egg yolks until they’re light and foamy. This can take a couple of minutes.
- Combine the dry ingredients. Next, combine the dry ingredients in a saucepan, then add the milk and heavy cream. Whisk the ingredients together, heating over medium-low heat. Keep stirring until the filling is warm to the touch, and take the pot off the heat.
- Temper the yolks. Whisk a ½ cup of the warm mixture into the egg yolks to temper them. Then, whisk the tempered yolks back into the filling mixture. This keeps the yolks from curdling in the heat.


- Cook. Set the filling back over medium-low heat. Keep stirring until the top of the pudding starts to burp big bubbles, let the mixture cook for another 60 seconds or so (still stirring!). This process can feel slow, and you may even wonder if it’s ever going to thicken, but low and slow is the name of the game here. Once it’s close to reaching the bubbling stage it should really thicken up.
- Finish the pudding. Finally, you’ll stir in vanilla extract and butter until smooth. Strain the pudding through a fine mesh sieve. There’s no need to scrape the saucepan clean, you don’t want whatever’s stuck to the pan in your filling.
- Chill. Once strained, place a piece of plastic wrap directly on the surface of the pudding to prevent a skin from forming. I like to poke a couple of holes with a toothpick to let some of the warmth escape. Chill for at least one hour on the counter, then transfer to the refrigerator to cool completely, which can take up to 4 hours.


Troubleshooting: Why Isn’t My Pudding Smooth?
There are a few simple things that you can do to ensure that the custard filling for your banana cream pie turns out silky-smooth. Here’s what I’ve found makes a big difference in the texture of this pie:
- Temper the eggs slowly. The goal of tempering the egg yolks is to incorporate them into the warm filling without scrambling. Slowly stream a bit of the custard mixture into the yolks before slowly adding them back into the custard. And keep whisking!
- Wait for the bubbles. As the pudding cooks and thickens, it will start to burp big bubbles. At this point, keep stirring and wait another minute/minute and a half (no more or less than that) before you take the pan off the heat. This timing is key. Take the pudding off too soon, and it may not set properly.
- Let the pudding cool to room temperature. Make sure to let the pudding cool for at least one hour before you assemble your pie. You don’t want to add it to the crust while it’s still warm.
Strain the Filling Twice
If needed, give your banana cream pie filling a second pass through a fine mesh sieve to make sure all the lumps are out. I often use a spatula to help press the pudding through the sieve.

Assembling Your Pie
Now, it’s time to bring it all together. Gather your pie filling and slice up your bananas before assembling.
- Start with a pudding layer. Use a spatula to spread the first layer of pudding into the bottom of your prepared crust, about 1 cup of filling is perfect.
- Layer in the bananas. Next, slice up your bananas and arrange about half of the slices over the pudding base. Spread a second layer of pudding over the top (about 1 cup of filling). Repeat, finishing with a final layer of pudding.
- Chill. Cover and refrigerate the pie. I prefer to add the topping as close to serving as possible.


Want More Banana Flavor?
You’ll need 2-3 medium bananas which gives you just enough for the two layers, but since there’s quite a bit of filling, you may want to add in more bananas for additional flavor.
How to Serve Banana Cream Pie
Right before serving (or up to 1 hour ahead), whip up a fresh batch of whipped cream to top your pie. Here’s how to do it:
- Prepare the whipped cream. To make the topping, whip heavy cream in a chilled bowl until it reaches soft peak. Then, beat in powdered sugar, cream of tartar, and vanilla until stiff peaks form.
- Add the topping. Take out your pie, and spread the whipped cream over top of the filling. Garnish with extra banana slices, and serve!


You can be as simple or as fancy as you’d like when it comes to the topping for your banana cream pie. I’ll sometimes transfer the whipped cream to a large piping bag fitted with an open round piping tip to pipe swirls over my pie instead. It’s totally up to you! If you need some extra tips, check out my tutorials on how to use a piping bag and how to use piping tips.
Recipe Tips
- Prevent the pudding from forming a skin. Press a piece of plastic wrap directly to the surface of the pudding while it cools on the counter. This keeps it airtight and prevents a crust from forming.
- The pudding filling will be thick. Like, really thick. This is on purpose! I’ve found that as the bananas leak moisture into the filling, it starts to soften. Starting with a super thick pudding results in a perfectly sliceable, soft, and creamy texture (it also avoids a watery pie). To make the filling easier to spread, dollop it over the bananas and press it smooth with a silicone spatula.
- Add the whipped cream just before serving. If you know you’ll be making this pie in advance, leave off the whipped topping and make a fresh batch right before serving. You can keep the assembled banana cream pie in the fridge overnight.
- Enjoy within a day or two. Banana cream pie is best served right away or within 1-2 days of when it’s made. The whipped cream and pudding tend to wilt and leak the longer the pie sits and the bananas go brown. See below for storage tips.

How to Prep Ahead
Since this should be consumed rather quickly, here are 2 ways you can prepare ahead.
- Pie crust: Pie crust can be prepped 3 days in advance, and stored in the fridge or in the freezer for up to one month. If you’re planning to freeze, double-wrap the crust in plastic wrap.
- Filling: My best time-saving tip to prepare the crust the night before serving. Let the filling set overnight. Bake and fill the pie the next morning.
- Same day prep: Prepare the filling and while it’s chilling, make the crust. As long as the filling isn’t too warm, you can fill the baked pie crust and further chill it once it’s assembled.
How to Store
Store this pie covered in the fridge for up to 1-2 days for best results. I suggest using plastic wrap to cover it airtight. You might notice that the whipped topping starts to weep after a day or so, but the flavors are still good. This pie cannot be frozen.
More Pie Recipes
Banana Cream Pie
- Prep Time: 1 hour
- Chilling Time: 4-6 hours
- Total Time: 0 hours
- Yield: 8-10 servings
- Category: Pies
- Method: Stovetop
- Cuisine: American
Description
This incredible banana cream pie combines smooth vanilla custard with fresh banana slices and the fluffiest whipped cream. Everything is 100% homemade, right down to the flaky pie crust!
Ingredients
- 1 prepared deep dish pie crust, blind baked and cooled
For the Filling
- 4 large egg yolks, room temperature
- ¾ cup (143g) granulated sugar
- ½ cup (60g) all-purpose flour
- 1 cup (236ml) heavy whipping cream
- 2 cups (473ml) whole milk
- ½ teaspoon salt
- 2 teaspoons (10ml) vanilla extract
- 3 tablespoons (42g) salted butter, cubed and room temperature
- 2–3 large ripe bananas
For the Topping
- 1 1/2 cups (354ml) heavy whipping cream
- 3/4 cup (177g) powdered sugar
- ¼ teaspoon cream of tartar
- 1 teaspoon (5ml) vanilla extract
Instructions
- I suggest blind-baking the pie crust the day you want to assemble it.
For the Filling
- In a small bowl gently whisk the egg yolks until foamy and lightened in color, about 2 minutes, and set aside.
- In a medium-sized saucepan, combine the granulated sugar, flour, heavy cream, whole milk and salt with a whisk. Heat over medium-low heat, continuously stirring to dissolve the dry ingredients into the wet ingredients until the filling is warm to the touch and slightly thickened but not boiling., remove from heat.
- Next, temper the egg yolks. Take about ½ cup of the hot filling mixture and whisk into the egg yolks to temper the egg yolks. Whisk the egg yolk mixture back into the pan of the milk mixture and return to medium-low heat.
- Continue stirring until the pudding starts to burp large bubbles and thicken. Cook for at least 60-90 seconds while continuously stirring. The filling should be thickened like pudding.
- Remove from heat and add in the vanilla extract and butter, stirring until fully combined. Pour the pudding through a fine sieve into a medium-sized bowl. If needed, you can use a whisk or spatula to help push it through the sieve. Optional: strain a second time through the sieve, washing in between.
- Place a layer of plastic wrap directly on the surface of the pudding and chill on the counter for 1 hour. Transfer to the refrigerator and chill completely.
- To assemble, once the filling has chilled, spread about 1 cup of the pudding into the bottom of the pie crust, slice bananas and layer ½ of them on top of the pudding base, then spoon another 1 cup of the filling on top of the bananas, followed by the remaining half of the bananas and the rest of the filling. The filling will be very thick, see notes*. Cover with plastic wrap and refrigerate for 3-4 hours, or until the filling is completely set and firm.
For the Topping
- Prepare the whipped cream. Place the mixing bowl in the freezer for 5-10 minutes. Pour the heavy whipping cream into the chilled bowl and use a stand or electric mixer with a whip attachment to beat the heavy cream on medium-high speed until the cream thickens. Add powdered sugar, cream of tartar, and vanilla extract and continue beating on high speed until stiff peaks form.
- Remove the saran wrap from the filled pie and spread as much of the whipped cream over the filling as you would like, or use a large piping tip to decorate the pie. Garnish with more banana slices if desired.

Notes
- Be sure to cook the filling low and slow and once it starts to burp bubbles, cook for only 60-90 seconds longer.
- The pudding filling will be thick. Like, really thick. This is on purpose! I’ve found that as the bananas leak moisture into the filling, it starts to soften. To make the filling easier to spread, dollop it over the bananas and press it smooth with a silicone spatula.
How to Prep Ahead
- Pie crust: Pie crust can be prepped 3 days in advance, and stored in the fridge or in the freezer for up to one month. If you’re planning to freeze, double-wrap the crust in plastic wrap.
- Filling: My best time-saving tip to prepare the crust the night before serving. Let the filling set overnight. Bake and fill the pie the next morning.
- Same day prep: Prepare the filling and while it’s chilling, make the crust. As long as the filling isn’t too warm, you can fill the baked pie crust and further chill it once it’s assembled.
Storing
- Store this pie covered in the fridge for up to 1-2 days for best results. I suggest using plastic wrap to cover it airtight. You might notice that the whipped topping starts to weep after a day or so, but the flavors are still good. Do not freeze.
Nutrition
- Serving Size: 1 slice
- Calories: 725
- Sugar: 40.8 g
- Sodium: 387 mg
- Fat: 46.1 g
- Carbohydrates: 69.6 g
- Fiber: 2 g
- Protein: 10.2 g
- Cholesterol: 242.8 mg


I love banana cream pie and I love this recipe
Thank you so much Gail, I am so glad to hear that!
Pie is awesome 👌 👏 👍!
That’s fantastic, thank you!