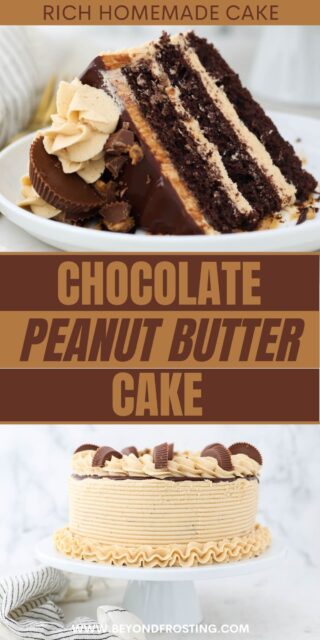
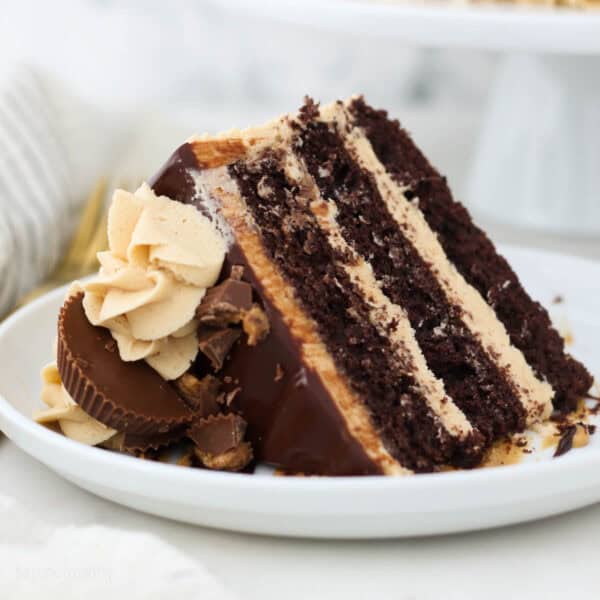
This chocolate peanut butter cake has three layers of moist chocolate cake filled with creamy peanut butter frosting, decadent chocolate ganache, and peanut butter cups. I love the sweet-salty contrast of the peanut butter and chocolate in this dessert. It’s completely irresistible!
I use my favorite moist chocolate cake as a base for so many recipes, from chocolate cupcakes to the chocolate layer cake in this chocolate and peanut butter cake recipe! If you love this dessert, try my peanut butter cup ice cream cake, next.

Chocolate Cake with Peanut Butter Frosting
I’ve never met a chocolate and peanut butter dessert that I didn’t like. This chocolate cake with peanut butter frosting has layers of my best-ever chocolate cake recipe, frosted inside and out with creamy homemade peanut butter buttercream. I top mine with a generous drizzle of chocolate ganache and chopped peanut butter cups. If you’re a peanut butter lover like I am, you NEED to try this cake.
Why I Love This Chocolate Peanut Butter Cake
- Soft and moist cake layers. I use my easy, moist chocolate cake recipe for the layers. This is my absolute favorite cake recipe! It’s light, fluffy, and it comes together in about 10 minutes.
- Creamy peanut butter frosting. The frosting is to die for! It’s smooth, creamy, full of peanut butter flavor, and melts in your mouth.
- Easy recipe. Even if you’re new to making layer cakes, this dessert is very approachable. I’ll show you how to frost and stack the layers, and you can be as fancy as you’d like when it comes to decorating.

Ingredient Notes
This chocolate peanut butter cake is super moist, tender, and fudgy thanks to a few key ingredients, which I cover below. Scroll down to the recipe card at the bottom of the post for a printable version with the full amounts and recipe details.
- Oil – I use oil instead of butter in most of my cake and cupcake recipes. It produces an extra soft, moist cake that stays moist for days. Choose a neutral-flavored vegetable oil or canola oil.
- Sour Cream – Sour cream is essential for keeping this cake moist. You can use light sour cream or full-fat if you prefer. If you don’t have sour cream, I recommend substituting it with plain Greek yogurt.
- Cocoa Powder – I use Hershey’s Special Dark Cocoa Powder. You can learn about the different types of cocoa powder if needed.
- Espresso Powder and Brewed Coffee – Coffee does wonders to enhance the flavor of chocolate cake recipes. You don’t even taste the coffee! Adding espresso powder is optional, however, and you can substitute brewed coffee for milk if needed.
For the Peanut Butter Frosting
- Butter – Make sure it’s COLD from the fridge. I like to use unsalted butter.
- Peanut Butter – I recommend using shelf-stable, creamy peanut butter as opposed to natural peanut butter. Natural peanut butter won’t combine properly with the frosting ingredients, as the oils tend to separate.
- Heavy Whipping Cream – For the smoothest, creamiest frosting, use full-fat heavy whipping cream. You can also use whole milk in a pinch
How to Make a Chocolate Peanut Butter Cake
Here’s an overview of how to prepare this incredible chocolate cake with peanut butter frosting. Scroll to the recipe card for the printable instructions.
Make the Chocolate Cake
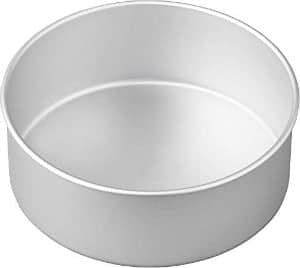
I make this cake using 8-inch round baking pans. The bottom and sides of the pans should be well greased and lightly floured before you start, to prevent sticking. With your pans ready and your oven preheating to 350ºF, here’s how to make the batter:
- Mix the wet ingredients. Combine the sugar, oil, eggs, and vanilla extract and beat them together until fluffy. Then, beat in sour cream until well combined.
- Combine the dry ingredients. In a separate bowl, combine the remaining dry ingredients. I recommend sifting them to remove any clumps. Add the dry ingredients to the wet batter a little at a time, alternating with coffee until everything is mixed.
- Bake. Divide the batter between your three prepared pans, it’s about 1 2/3 cups per pan. Bake the cake layers at 350ºF for 20-24 minutes and then cool completely.


Next, Make the Peanut Butter Frosting
My frosting recipes always start with COLD butter. It’s a bit unconventional, but it allows much better control of the consistency of the frosting. It takes a bit of additional whipping, but the exceptionally light and fluffy texture is more than worth it! Follow these steps to see it in action:
- Start with butter and peanut butter. Add the cold, cubed butter to a mixing bowl and beat for several minutes, until fluffy and whipped. Next, add peanut butter, continuing to beat until smooth.
- Add powdered sugar. Alternate adding powdered sugar to the peanut butter mixture followed by vanilla and heavy cream. Make sure that the powdered sugar is thoroughly mixed before adding more, as the frosting will combine more smoothly this way.
- Whip. Once everything is combined, give the peanut butter frosting a good whip for another few minutes, to get it light and fluffy.


Assemble and Frost the Cake
If you’re new to assembling layer cakes, don’t worry. It’s a lot easier than you might think. If you’d like a more in-depth how-to, I have a great tutorial for How to Make a Layer Cake that walks you through it. In the meantime, let’s assemble and frost your chocolate peanut butter cake:
- Start by leveling your cakes. If the centers of the cakes puffed up while they baked, use a bread knife to trim off the domes.
- Frost the first layer. Start by placing the first cake layer onto a plate or cake board. I like to place it over a dollop of frosting, to help hold the cake in place. Next, pipe the frosting in a swirl from the outside edges to the middle of the cake layer. Spread the frosting around so that it’s even.
- Assemble. Top this first cake with the second cake layer, and repeat. After adding the third layer, use the remaining frosting to frost the top and sides of the cake.


Decorating the Cake
Once your chocolate peanut butter cake is assembled and frosted, it’s time to decorate. I garnish my cake with a simple dark chocolate ganache. I’ll also save a little frosting for decorating the top, plus peanut butter cups for extra garnish. Here’s how to do it:
- Prepare the ganache. Combine dark chocolate with heavy whipping cream, heating it in increments until melted. Give it a stir, then let the ganache cool.
- Drizzle. Drizzle the ganache over the top of the cake. Use a piping bag if you have one, otherwise, a plain old spoon will also work.
- Decorate. You can be as simple or as fancy as you’d like. Leave the cake as is with just a ganache drizzle, or you can use a large piping tip and leftover frosting to pipe rosettes over top (if you’re curious about piping, check out my posts on how to use a piping bag and how to use piping tips for more guidance and inspiration).

Recipe Tips
- Rotate the pans. If your oven has hot spots, I recommend rotating the pans about halfway through baking so that the cakes bake more evenly.
- Beat the frosting well. Follow the steps and take the time to beat the frosting at every stage, so that you end up with a soft and creamy frosting that’s easy to pipe.
- If your frosting is too thick, add more heavy cream one spoonful at a time. If it’s too thin, add additional powdered sugar. If you find the frosting too sweet, you can add a pinch of salt to help balance the flavor.
- Level and torte each cake layer. Starting with a flat surface is key for a layer cake’s stability. Also, use a piping tip to add the frosting between the layers. This again ensures a flat, even layer of frosting.
- Don’t skip the crumb coat. A crumb coat is a thin layer of frosting added prior to the final frosting layer. The aim of a crumb coat is to pick up any loose crumbs so that they don’t get mixed into the final layer of frosting. Use your piping bag to fill in any gaps between the cake layers.
- Different frosting. If you’d prefer to skip the peanut butter frosting, you can frost this cake with my chocolate fudge frosting or my chocolate buttercream frosting to make a full chocolate cake instead. You can still garnish the top of the cake with Reese’s for a dose of peanut butter flavor.
- More topping ideas. If you’re making this as a birthday cake or for the holidays, add your favorite colored sprinkles. Or, melt peanut butter in the microwave and drizzle it over the chocolate ganache. You can also add peanut butter chips on top, in addition to or in place of Reese’s Peanut Butter Cups.
More Cake Sizes
You can make this recipe in different-sized pans. Just remember that baking times will vary due to how full the pans are, the type of pans you use, and the true oven temperature. Use the times below as guidelines, and make sure to check the cakes while they bake. Stick a toothpick into the center of the cake, and if it comes out clean, the cake is done.
- For an 8-inch cake with thicker layers, divide the batter evenly between two cake pans (approx. 2 1/4 cups of batter per pan). Bake at 350ºF for 25-30 minutes.
- To make two 9-inch cakes, bake for 28-32 minutes.
- If you use 6-inch cake pans, one recipe is enough to make four layers (about 1/3 cup of batter per pan), similar to my mini chocolate cake. Bake for 22-28 minutes.
- To make a sheet cake instead, add the batter to a 9×13-inch cake pan and bake for 26-28 minutes.
Another thing to keep in mind is that you’ll need to adjust the amount of frosting depending on what size cake you choose. Luckily, it’s easy to scale the recipe up or down as needed.

How to Store a Frosted Cake
- At room temperature. This chocolate peanut butter cake can be covered airtight and kept at room temperature for 3-4 days. The only time I wouldn’t advise keeping it on the counter is if you live in a hot/humid environment. I recommend a cake carrier, which seals airtight and keeps homemade cakes that much fresher for longer. It’s also a handy way to transport cakes if needed. Just place some grippy material (like the kind you would line a drawer with) on the bottom of the cake carrier to prevent the cake from sliding.
- Store leftover frosting. The peanut butter frosting can also be made up to 2 days ahead. Store it airtight in the fridge and give it a fresh whip right before you use it.
- Freeze. I don’t usually recommend freezing a finished, frosted cake. Instead, I’ll freeze the individual chocolate cake layers. After the cakes are completely cooled, double-wrap them in plastic wrap, with a layer of parchment paper lining the top and bottom of the cakes. Whenever you’re ready to frost and serve, thaw the cakes completely and whip up the frosting.
More Chocolate Cake Recipes
Chocolate Peanut Butter Cake
- Prep Time: 30 minutes
- Cook Time: 22 minutes
- Total Time: 52 minutes
- Yield: 12 slices
- Category: Cake
- Method: Baked
- Cuisine: American
Description
This decadent chocolate and peanut butter cake features three moist chocolate cake layers filled with creamy peanut butter frosting, topped with homemade chocolate ganache and sweet-salty peanut butter cups.
Ingredients
For the Cake:
- 1 ½ cups (285g) granulated sugar
- ½ cup (118 ml) vegetable oil
- 3 large eggs, at room temperature
- 1 tablespoon (15 ml) pure vanilla extract
- ½ cup (120g) sour cream, at room temperature
- 2 cups (280g) all-purpose flour, sifted
- ½ cup (40 g) cocoa powder, sifted
- 1 tablespoon (5g) espresso powder (optional)
- 2 ½ teaspoons (9 g) baking powder
- ½ teaspoon (2 g) baking soda
- 1 teaspoon (5 g) salt
- 1 ¼ cup (296 ml) hot brewed coffee
For the Frosting:
- 2 cups (454g) unsalted butter
- 1 heaping cup (180g) peanut butter (up to 1 1/4 cup)
- 7–8 cups (911-1041g) powdered sugar
- 4 tablespoons (60ml) heavy whipping cream or milk
- 1 tablespoon (15ml) pure vanilla extract
For the Ganache:
- 2 ounces dark chocolate
- 6 tablespoons (90ml) heavy whipping cream
- 6–8 Reese’s peanut butter cups for garnish (optional)
Instructions
For the Cake:
- Preheat the oven to 350°F. Prepare three 8-inch round baking pans, line the bottom with parchment paper, and grease the sides. Prepare your bake even stripes if desired.
- In a large mixing bowl, combine the sugar, vegetable oil, eggs, and vanilla extract. Beat on medium speed until the eggs and oil are well incorporated and the batter is lighter in color. Next mix in the sour cream and beat until well combined.
- In a separate bowl, sift together the dry ingredients. Add half the dry ingredients to the wet ingredients, followed by half of the coffee, and mix until the flour is just incorporated at a low speed. Then add the remaining dry ingredients and coffee. Beat until all of the ingredients are well combined. Use a spatula to scrape down the sides of the bowl and stir the batter from the bottom to the top to ensure it’s well mixed.
- Divide the batter evenly between the three pans, about 1 2/3 cups of batter per pan. Bake at 350°F for 20-24 minutes. Test the cake for doneness by inserting a toothpick into the center of the cake. If the toothpick comes out clean, the cake is done. Remove from the oven and allow to cool completely.
For the Frosting:
- Cut the butter into pieces. Using the paddle attachment, whip butter for 3-4 minutes, scraping down the bowl occasionally. Beat until the butter looks light in color. Next, beat the peanut butter until well mixed.
- Alternate adding 2-3 cups of powdered sugar at a time with the liquid ingredients: vanilla extract & heavy cream. Ensure all the powdered sugar is well combined and beat for 2-3 minutes before adding additional powdered sugar.
- Once all ingredients have been added, whip for 3-4 minutes until the frosting is light and airy. If the frosting is too thick, add additional heavy whipping cream 1 tablespoon at a time. Add a pinch of salt if needed to cut the sweetness.
For the Chocolate Ganache:
- In a microwave-safe bowl, combine the chocolate and heavy whipping cream. Melt the chocolate in the microwave at 50% power in 30-second increments and stir until completely combined. Allow to cool.
To Assemble this Cake:
- Level the cake layers if needed. Place a dollop of frosting on your cake board and place the bottom layer of cake on top of that. Place half of the frosting in a large piping bag, then cut off the end of the piping bag. Pipe the first layer of frosting, pipe in circles working outside edge to the middle. Spread evenly with an offset spatula.
- Add the second layer of cake and add the remaining frosting. Place the third layer of cake on top, and invert the top layer.
- Use the piping bag to fill in any gaps between the layers and to create a crumb coat. Using an offset spatula or icing smoother, wipe away the excess frosting, leaving you just enough to coat the outside of the cake. With the remaining frosting, proceed to frost the top and sides of the cake using an offset spatula.
- Use a spoon or piping bag to drizzle the ganache along the edges of the cake. Use a large piping bag to pipe the rosettes on top. Fill the piping bag with the remaining frosting, and pipe the border of the cake on the top and bottom. Garnish with chopped peanut butter cups.


Notes
Ingredient Substitutions
- Cocoa powder: I prefer to use Hershey’s Special Dark Cocoa Powder for the cake
- Sour cream substitute: If you don’t have sour cream, substitute plain or Greek yogurt.
- Brewed coffee substitute: If you don’t want to use coffee, you can use milk, but I do recommend heating it up.
Storing and Freezing
- Storing this cake: This can be stored at room temperature unless you live in a hot and humid environment. I recommend a cake carrier, which seals the cake with an airtight lock.
- Make ahead and freezing options: I don’t usually freeze a finished, frosted cake. Instead, I’d recommend freezing the cake layers after they’ve completely cooled. Double wrap in plastic wrap, lining the top and bottom with parchment paper. Thaw the layers prior to frosting. The frosting can be made up to 2 days in advance, but I recommend whipping prior to using.
Nutrition
- Serving Size: 1 slice
- Calories: 1040
- Sugar: 98g
- Sodium: 376mg
- Fat: 60g
- Saturated Fat: 34g
- Carbohydrates: 122g
- Fiber: 3g
- Protein: 10.5g
- Cholesterol: 145mg


I made this cake yesterday and it’s frickin amazing!! My family really enjoyed it and I’m taking the rest to work for my co-workers to enjoy. Thank you so much for your amazing recipes!! It was my first time using coffee and espresso powder in a cake, so delicious! 😋
Yeeees Tonyna! Thank you for sharing your feedback!
Hi there!! First off, I wanted to tell you that I a HUGE fan of your blog. I found you in March 2022 and have been baking away like a mad woman since! I mostly follow you recipes and tips. I have mix and matched several of your recipes and really appreciate you!!
This cake alone I have baked 3-4 times. This last time was this last weekend for my nephew’s 11th birthday! It was a HUGE hit as usual.
I wanted to write and say THANK YOU but also ask you a question. I am finding that i’m getting a pretty flat chocolate sponge with this recipe. I’ve baked your chocolate cake recipe probably 50x now and keep just getting a flatter sponge than I like. I do use the bake easy strips. I am using 3tbps of baking powder as an adjustment which helped make the sponge a little less flat… i’m not an experienced enough baker to know how else to adjust the recipe for a fuller sponge? Any suggestions?
Thanks again SO much for these wonderful recipes and tutorials!! You rock.
Hi Vanessa! First of all, thank you SO much for your kind words, that means so much to me! Have you tried baking it with out the bake easy strips? It should produce a high rise without them. Email me and let’s talk further.
Thank you , thank you! My son never wants a cake from the bakery for his birthday he always asks me to make one from scratch…28 years later. I am flattered that he still wants it to come from me, believe me we have excellent bakeries in our area. Anyways, this year he asked for a chocolate peanut butter cake. I searched my cook books and the internet but I went to your site because the recipes I have used from you have been spot on. I searched your site and found this recipe. His birthday was yesterday and the cake was delicious!
Thanks again for the recipe.
Thank you so much for coming back Christine!! That means the world to me, I hope my kiddo still wants me baking cakes for him in 28 years!
I made this recipe into chocolate cupcakes with chocolate ganache topping and peanut butter frosting!! Oh my goodness, they were gone Ina blink of any eye! So good and every single recipe that I have made utilizing your frosting recipes are winners always! Thank you very much for sharing, Julianne!😋
That sounds absolutely perfect Cristel, thank you so much for sharing!