Make adorable Easter bunny cupcakes following this easy step-by-step tutorial. I’ll show you how to make chocolate ears and then decorate these Easter cupcakes using frosting and coconut. They’re the perfect dessert, just in time for spring.
Easter means my family’s favorite cinnamon rolls for brunch and fun, spring desserts like these bunny cupcakes and Easter dirt cake!

Easy Bunny Cupcakes for Easter
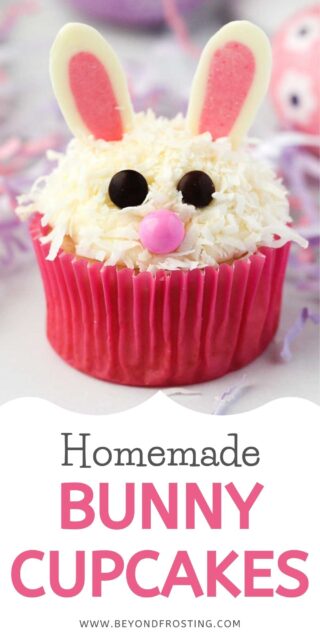
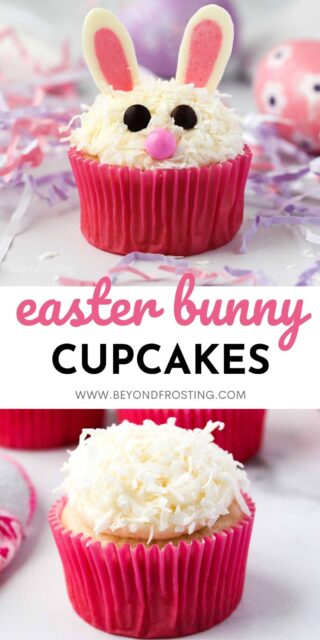
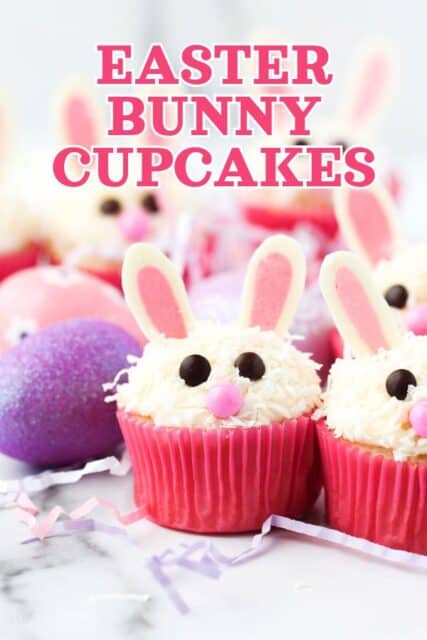
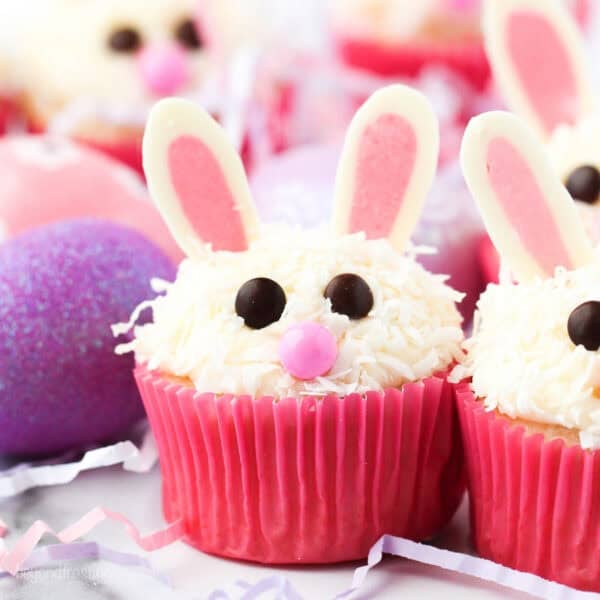
How sweet are these homemade Easter bunny cupcakes? They’re such an easy Easter dessert and a great way to get the whole family involved in the fun. After frosting a batch of cupcakes, I rolled the frosting in coconut to give these bunnies their fur and piped melted chocolate onto parchment paper for the ears. Then, we got decorating! Below, I’ve given step-by-step instructions that walk you through these simple techniques.
3 Reasons to Love Them
- Easy decorating idea. My Easter bunny cupcakes use very easy decorating techniques that don’t require any fancy tools or skills. Just a piping bag (or Ziploc bag) and a handful of decorations are all you need.
- Edible chocolate ears. I’ll show you how to pipe chocolate over a template to create adorable, edible bunny ears.
- Adaptable. You can adapt the flavor of the cupcakes with any homemade recipe you’d like. The same can be said for the frosting. And if you’re pressed for time, you can always follow this Easter decorating tutorial using your favorite boxed cake mix.

What You’ll Need
These are my notes on what you’ll need to turn your favorite cupcakes into Easter bunnies. Afterward, scroll down to the printable recipe card at the bottom of the post for the complete list, recipe amounts, and details.
- Cupcakes – I include my recipe for coconut cupcakes in the recipe card. You can make these Easter bunny cupcakes with any homemade cupcakes you’d like, see below.
- Frosting – The recipe for my coconut buttercream frosting is also included in this tutorial. It’s easy to make with cold butter, powdered sugar, heavy cream, and coconut extract. Feel free to use classic vanilla buttercream if you prefer.
- Shredded Coconut – This can be sweetened or unsweetened. If you’d like, you can toast the coconut to give it some color.
- M&Ms – Either mini or regular-sized brown M&Ms for the eyes (I always pick up a few bags of M&Ms and pick out the brown ones). You could also use chocolate chips, black sugar pearls, or candy googly eyes.
- Pink Candies – For the nose. Pink Sixlets, sugar pearls, or jelly beans are all good options (Walmart and Michaels have great small candy selections and are usually very affordable).
- White Chocolate – I recommend Ghirardelli white candy melts or another quality melting chocolate. Almond bark and Wilton candy melts will also work.
- Pink Food Coloring – I use the pink gel coloring from AmeriColor. Wilton also offers gel colors, you’ll find them in craft stores and online.
Instead of Coconut Cupcakes, Try These


If you’d prefer another cupcake as the base, feel free to use your favorite vanilla cupcakes or any of the other cupcake recipes from my site. These are some more easy ideas. If you’d like, you can add a filling to your cupcakes, like chocolate ganache, edible cookie dough, or homemade lemon curd.
Prepare the Frosting
Before we can decorate our bunny cupcakes, we’ll need a batch of frosting. These are the steps to make the creamy coconut frosting I use for this tutorial. Refer to the recipe card below the post for more details.
- Whip the butter. Make sure that the butter is COLD, and cut it into cubes. Beat the cold, cubed butter for several minutes until it’s light and fluffy. Scrape down the bowl as needed and beat at high speed.
- Add the other ingredients. Next, add the powdered sugar one cup at a time, alternating with the heavy cream and flavoring extract (in this case, coconut). Beat the frosting for a good minute in between each addition so it’s well-mixed.
- Whip again. Beat the frosting for another 3-5 minutes on medium-high speed, until it’s completely smooth.

How to Make Easter Bunny Cupcakes
You’ll need a piping bag and piping tips to make the chocolate ears and pipe the frosting in this tutorial. If you need extra guidance, I have in-depth tutorials on how to use piping bags and how to use piping tips that you can refer to.
Make the Chocolate Ears
If you’re short on time or if you’d rather not make the ears yourself, you can buy fondant ears or find paper ears at craft stores, like Michaels. Otherwise, making chocolate ears is relatively easy, and you can prepare them up to two days in advance. Keep the ears airtight on the counter or in the fridge until you’re ready to decorate the cupcakes.
Bunny Ears Template
I make the chocolate bunny ears for these Easter cupcakes using a technique similar to the buttercream transfer I use for my Paw Patrol cake. For this tutorial, it involves piping melted chocolate onto parchment paper, which you’ll remove after the chocolate sets. I recommend that you download and print this template to use as a guide when piping the chocolate in the shapes of the ears.
- Melt the chocolate. In a microwave-safe bowl, melt half of the white chocolate in 30-second intervals at 50% power, stirring in between. See how to melt chocolate for details.
- Prepare the template. Meanwhile, print out a copy of your chosen bunny ears template (see above), and tape it to a cookie sheet. Place a piece of parchment over top, and tape the edges down to hold it in place. You should be able to see the template through the parchment paper.
- Pipe the outside of the ears. Add the melted chocolate to a small piping bag fitted with a size 4 piping tip (you could also snip the very tip from the end of the bag). Carefully pipe the white chocolate around the outside of the bunny ears. Afterward, let the chocolate set. You can speed this up by placing it into the fridge.
- Fill the inside of the ears. Next, melt another ¼ cup of white chocolate and stir in a drop of pink food coloring. Using a new piping bag, pipe the pink chocolate inside the white chocolate outline. Gently tap the pan against the counter so that the pink chocolate spreads and settles.
- Remove the ears. Allow the chocolate to set completely before carefully lifting the ears from the parchment paper using an angled spatula or toothpick.


Decorate the Cupcakes
With your cupcakes and frosting ready and the chocolate ears set, here’s how to turn a batch of cupcakes into cute, fluffy Easter bunnies.
- Frost the cupcakes. Add the prepared frosting from earlier to a large piping bag fitted with an open-round tip. Position the piping tip 90 degrees above the first cupcake, and pipe the frosting.


- Coat with coconut. One at a time, roll the frosted cupcakes in a bowl of shredded coconut, gently pressing it into the frosting.
- Add the eyes, nose, and ears. Place two ears onto each cupcake, followed by the candy eyes and pink candy nose. Repeat with the rest of the cupcakes, and your bunnies are ready to serve.


Julianne’s Decorating Notes
- Not a fan of shredded coconut? Prepare an extra batch of frosting and use a Wilton #233 grass tip to pipe frosting “fur” onto the bunnies instead, using a similar technique as my Elmo cupcakes.
- Leave off the decorations until serving. The moisture in the frosting can cause the candy decorations to bleed their colors, so for this reason, only add your eyes, ears, and noses just before serving.
- Do a practice round. If you’re getting the hang of handling piping bags, do a few practice rounds where you pipe the chocolate in a steady line on a separate sheet of parchment paper before you take your newfound skills to the template. The good news is that if you make a mistake, you can wipe the chocolate off and start again!
- Get the good side. When placing the bunny ears onto the cupcakes, flip them around so the backside of the ears (the side that was flat against the cookie sheet) is facing outward. It helps hide any mistakes in the piping, and the ears look nice and flat.
- If you don’t have pink candy for the nose, you can pipe a pink nose with the small piping tip and leftover pink chocolate you used for the chocolate ears.
Make-Ahead and Storage
- Make-ahead. I recommend leaving off any decorations until you’re ready to serve. However, you can prepare the cupcakes, frost them, and roll them in coconut up to 48 hours ahead of time. Store the frosted cupcakes in an airtight container at room temperature (unless you live somewhere warm, in this case, consider refrigerating and then serving them at room temperature). When you’re ready to serve, add the ears, eyes, and noses.
- Freeze. You can freeze the baked, unfrosted cupcakes once they’re completely cool. Store the cupcakes airtight and freeze them for up to 2 months. When it’s time to frost and decorate them, thaw the cupcakes at room temperature beforehand.
More Easter Desserts
Easter Bunny Cupcakes
- Prep Time: 60 minutes
- Cook Time: 15 minutes
- Total Time: 1 hour 15 minutes
- Yield: 12 cupcakes
- Category: Cupcakes
- Method: Oven
- Cuisine: American
Description
Learn how to decorate Easter bunny cupcakes topped with adorable chocolate ears! They’re the perfect Easter cupcakes and so easy to make.
Ingredients
For the Cupcakes
- ¾ cups (143g) granulated sugar
- ¼ cup (59 ml) vegetable oil
- 1 tablespoon (14g) unsalted butter, melted
- 1 large egg
- 1 large egg white
- 2 teaspoons (10ml) coconut extract
- ½ teaspoon pure vanilla extract
- ¼ cup (59ml) sour cream
- 1 ¼ cups (175g) all-purpose flour
- 1 teaspoon baking powder
- ½ teaspoon baking soda
- ½ teaspoon salt
- 2/3 cup (158ml) coconut milk, well stirred
For the Frosting
- 1 cup(226g) unsalted butter, cold
- 3 cups (390g) powdered sugar
- 1 teaspoon(5ml) coconut extract (additional to taste)
- 1 tablespoon(15ml) heavy whipping cream (or milk or coconut milk)
- Pinch of salt (optional)
Decorating Supplies
- 1 bag (7oz) shredded coconut, sweetened or unsweetened
- Brown mini M&M or Chocolate Chips
- Pink Sixlets or Sugar Pearls
- 1 bag (10oz) Ghirardelli white candy melts
- Pink Food coloring
Instructions
For the Cupcakes
- Preheat the oven to 350°F. Line a cupcake pan with cupcake liners.
- In a large mixing bowl, combine the sugar, vegetable oil, butter, eggs sour cream and extracts. Beat on medium speed until well incorporated and the batter is lighter in color, about 2 minutes. Scrape down the bowl as needed.
- In a separate bowl, combine the remaining dry ingredients. Alternate adding half the dry ingredients and half the coconut milk at a time and mix just until the flour starts to incorporate. Use a spatula to scrape down the sides of the bowl and stir the batter from the bottom to the top to ensure it’s well mixed.
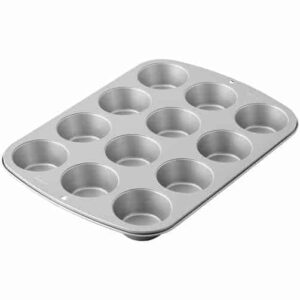
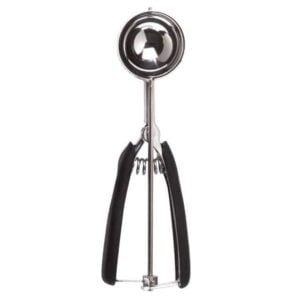
- Using a large cookie scoop, divide the batter evenly, filling each liner 2/3 full. Bake at 350°F for 14-16 minutes. Test the cupcakes for doneness by inserting a toothpick into the center of the cupcake. If the toothpick comes out clean, the cupcakes are done. Cool Completely.
For the Frosting
- Cut the butter into pieces. Using the paddle attachment, whip the butter for 3-5 minutes, scraping down the bowl occasionally. Beat until the butter looks light in color and has increased in volume.
- Add 1 cup of powdered sugar at a time and mix on low speed until incorporated into butter then continuing adding additional powdered sugar, alternating with the extracts and heavy cream. After each additional cup of powdered sugar, beat for about 60 seconds on medium-high or until the powdered sugar is well combined.
- Increase speed to medium-high and beat for another 3-5 minutes to whip additional air into the frosting.
To Decorate
- Prepare the bunny ears (download template here).
- Melt half of the chocolate in a microwave-safe bowl at 50% power in 30 second intervals; stir after each interval and continue until chocolate is melted. Reduce microwave time as needed so the chocolate does not burn.
- Line a baking sheet with parchment paper over top of the template, tape down. Fit a small piping bag with a size 4 piping tip or cut off the very tip of the bag. Pipe the outside of the bunny ears. Allow the chocolate to set.
- Melt another ¼ cup of white chocolate, add a small drop of pink gel color, and stir to combine. Fill the middle of the ears. Gently tap the tray on the table to gently spread and flatten the chocolate. Remove any air bubbles with a toothpick. Allow the chocolate to set completely, then carefully remove each ear.
Frost the Cupcakes
- Fill a large piping bag fitted with an open round tip (Ateco 808 or similar). Or cut off the end of the piping bag about 1 inch up from the bottom. Hold the bag at 90 degrees above the cupcake and pipe the frosting.
- Place the shredded coconut in a bowl and roll the cupcake in the coconut, gently pushing the coconut into the cupcake. Then place the eyes and nose on the cupcake then the ears.

Notes
- Ingredient substitutions:
- Sour cream: Plain yogurt or Greek yogurt.
- Coconut milk: Use regular milk.
- Heavy whipping cream (in the frosting): Can be substituted with milk or coconut milk.
- Flavor alternatives: If you don’t love coconut, you could make these with my vanilla cupcakes or yellow cupcakes. You could even make them with a chocolate cupcake base. For the frosting, I would suggest my vanilla buttercream.
Nutrition
- Serving Size: 1 cupcake
- Calories: 443
- Sugar: 42g
- Sodium: 169mg
- Fat: 25g
- Carbohydrates: 54g
- Fiber: 0g
- Protein: 3g
- Cholesterol: 61mg
These cupcakes were just perfect, delicious and adorable
Yeah! Thank you so much Linda! Email me a photo if you took one, I would love to see them!