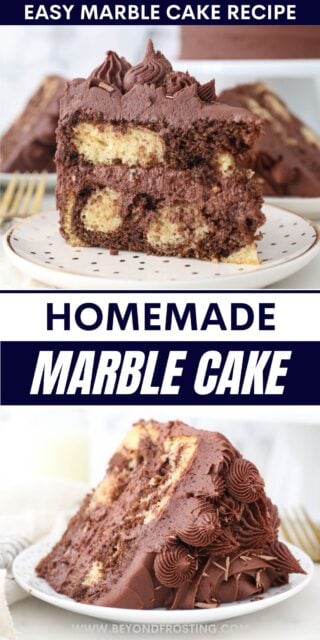
This beautifully swirled Marble Cake starts with one easy batter recipe. It’s a moist and fluffy cake made from marbled vanilla and chocolate cake layers, frosted inside and out with fluffy chocolate buttercream. This cake only looks fancy, but it’s really a breeze to make!
If you love Moist Vanilla Cake and Chocolate Cake, bring them together in this unbelievably rich and fluffy marble cake.

Moist and Fluffy Chocolate Marble Cake
By popular demand, I went and made a marble cake. The best part is, you only need one batter to make it! This recipe borrows the batter from my Classic Yellow Cake recipe. Simply mix a portion of it with melted chocolate to make a chocolate cake batter, and then swirl them together into the perfect marble cake. The finished cake is light and fluffy and beautifully marbled throughout, finished off with the best homemade chocolate buttercream frosting.
I tested and tested to get this recipe exactly right, and it definitely paid off. It hits the right balance between the lightness of the vanilla cake and the fudginess of the chocolate swirls. It’s destined to become a new favorite cake recipe for birthdays, and you better believe I’m eating leftovers for breakfast.
Why You’ll Love This Marble Cake
A marble cake is the best of both worlds. It’s both a vanilla and chocolate cake swirled together to create a beautiful, marbled effect. Here’s why you’ll love this old-fashioned cake recipe:
- One batter, two variations. Rather than mixing the yellow and chocolate cake batters separately, this recipe keeps it simple with one batter, that’s then divided to create the two flavors. I’m all about a streamlined cake!
- Moist and tender. Some key ingredients (that I go into detail below) contribute to the richest, most moist, and most tender marble cake ever. This recipe is one of my favorites because the flavor and texture are next-level delicious.
- Occasion-worthy. This cake is definitely becoming a go-to birthday cake. After one bite of this moist marble cake smothered with chocolate frosting, you’ll want to make this recipe for every holiday and occasion from here on out. It’s a million times better than anything from a box!

Key Ingredients For the Cake
As mentioned above, this cake uses a handful of simple ingredients that kick the flavor and texture up a notch. Below is a short overview of the key ingredients you’ll need to make your marble cake and frosting. Be sure to refer to the recipe card (at the bottom of the post) for the full list of ingredients as well as the amounts.
- Chocolate – I like to use real dark chocolate for the chocolate portion of the cake (vs. cocoa powder), as it makes it super fudgy, almost like a Fudgy Brownie. You can use milk chocolate if you prefer. Whichever chocolate you choose, I recommend using a good quality bar, like Ghirardelli or Lindt, as opposed to chocolate chips.
- Oil and Butter – The combination of melted butter and oil, compared to using only butter, yields a lighter, more tender cake.
- Eggs & Egg Yolks – You’ll need two eggs, plus 2 egg yolks. The additional egg yolks give this cake a very soft, rich crumb.
- Sour Cream – My must-have ingredient for an ultra-moist cake. If you don’t have sour cream, I recommend substituting it with non-fat Greek yogurt instead.
How to Make Chocolate Marble Cake
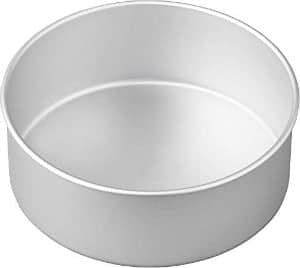
This layered marble cake is way easier to make than its fancy appearance lets on! Begin by preheating the oven to 350ºF while you grease and line two 8-inch round pans. Then, start with your cake batter:
- Melt the chocolate. Heat the chocolate in a microwave-safe bowl at half-power, stirring between increments so that the chocolate doesn’t burn. Once it’s melted and smooth, set the chocolate aside to cool.
- Mix the wet ingredients. In one bowl, you’ll beat sugar together with the wet ingredients (everything but the milk), then add the sour cream.
- Add the dry ingredients. In a separate bowl, whisk together the dry ingredients. Next, alternate adding the dry ingredients to the wet batter together with the milk, stirring until just combined.
- Divide the batter. Measure out a portion of the batter into a new bowl. This will be your chocolate portion. Gently fold in the melted chocolate from earlier until it’s well combined.


- Fill the pans. Now, alternate adding the vanilla cake batter and chocolate batter to your two prepared pans. Try your best to get both batters divided evenly between each pan. After, use a knife to carefully swirl the two flavors together, but don’t over-mix.
- Bake. Bake your marble cakes at 350ºF for about 30-35 minutes, then take them out and allow the cakes to cool completely before removing them from the pans.


Creamy Chocolate Frosting
The frosting I use for this cake is based on my favorite Chocolate Buttercream Frosting recipe. I use a little less powdered sugar in this version, for an extra-whipped and fluffy finish. You’ll see my recipe starts with cold butter: my secret to the perfect frosting consistency! Here’s how to make an easy chocolate frosting:
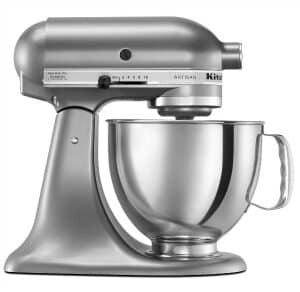
- Whip the cold butter. This is easiest to do if you cut the butter into cubes beforehand. Then, beat the butter in the bowl of your stand mixer for a good 3-4 minutes, until soft and well-whipped. You’re looking for the consistency of spreadable peanut butter (like Jif).
- Combine. Next, beat in the cocoa powder followed by the powdered sugar, alternating with the vanilla and heavy cream. Make sure to beat the frosting well each time you add the sugar.
- Whip. Once all the frosting ingredients are combined, up the mixing speed and give everything a final whip to get the chocolate frosting ultra-light and airy.


How to Assemble and Frost the Cake
If you’re new to making layer cakes, I have a full tutorial on How to Make a Layer Cake that goes into full detail on how to assemble and frost a cake from start to finish. It’s actually so easy to do! Here’s how to put together and frost your marble cake:
Level the cakes. Before you layer your cakes, you’ll need to level them so that they stack evenly. Use a serrated knife to carefully trim away the domes (the puffed-up centers) on both cakes so that the tops are flat and even.


Start with the first layer. Next, drop a dollop of frosting onto the middle of your cake board or plate, and place the first cake layer over top. This helps to keep the cake from slipping while you work. Afterward, pipe a layer of frosting over the cake, starting at the outside edge and swirling inward. Use an offset spatula to smooth out the frosting.


Assemble. Place the second cake layer over the first. I recommend inverting the layer so that the flat bottom becomes the top of the cake (this makes it more even).
Add a crumb coat. Next, using your offset spatula, spread any excess frosting in a thin layer around the sides of the cake. The crumb coat collects any stray crumbs and keeps them from ending up in the final frosting layer. Now, place the partially frosted cake into the fridge to chill.
Frost the cake. After about 10 minutes, take the cake out and use a large open round tip or a cake icer tip to pipe frosting all around the outside of the cake. Once again, smooth everything over with an offset spatula (or use an icing smoother).
You can leave the finished, frosted marble cake as is, or decorate it further. If you choose to add a texture to the frosting like the one in the photos, make sure to do this before the frosting fully sets. See the next section for more decorating instructions.

How to Decorate a Marble Cake
There’s really no wrong way to decorate your marble cake. If you’re new to decorating cakes with buttercream frosting, my Buttercream Flower Cake tutorial has lots of easy techniques that can get you started. Here are some ideas for decorating your chocolate marble cake:
Add a texture to the frosting. Before your chocolate frosting sets, use an angled spatula (or a spoon) and, very gently, press it up against the side of the cake. Rotate the cake while keeping an even pressure, working from the bottom up to the top edge. A cake turntable comes in handy here.
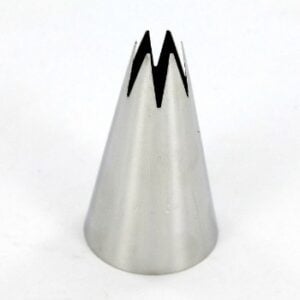
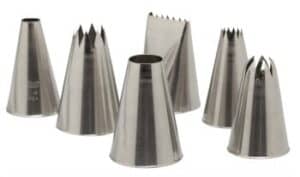
Use a piping bag. Whenever I’m using multiple piping tips, I like to first place my frosting in a large piping bag, and then use a smaller piping bag with a coupler to trade out different piping tips. I have tutorials dedicated to How to Use Piping Tips and How to Use a Piping Bag where I share all my tips and tricks.
Decorate the top of the cake. I used a 1M tip and Ateco 866 to pipe the roses and large rosettes that you see in the photos. After, I used my Wilton 199 and open star tip 21 to fill in the smaller details. Shaved chocolate also makes a nice finishing touch.


Can I Prepare This Cake Ahead?
Yes! The cake layers can be prepared up to 2 days in advance. Simply line the top and bottom of the baked and cooled cakes with parchment paper, and then wrap them tightly in plastic wrap or store them in an airtight container. You can store the cakes at room temperature. Alternatively, you can freeze them, though I’d recommend adding an extra layer of plastic wrap to help prevent freezer burn.
You can also prepare the chocolate frosting a day or two ahead of time, and store it airtight (also at room temperature, unless you live in a particularly warm climate). You’ll want to give the frosting a fresh whip before you use it. See further on in the post for tips on storing the finished, frosted cake.
Recipe Tips and Variations
This easy marble cake recipe is a surefire way to be amazed by your own baking and frosting skills. Here are some final tips and variation ideas for this perfect homemade marble cake:
- If your marble cake is dry, this could be the result of too much flour, overly mixed batter, or overbaking. Make sure to measure dry ingredients correctly (ideally using a kitchen scale), and only mix the batter until the ingredients are just combined.
- Avoid overbaking. Not all ovens bake the same. Make sure to test your marble cakes for doneness after the minimum suggested baking time by sticking a toothpick into the center of the cake. If the toothpick comes out clean, your cake is ready to come out.
- To bake this cake in a 9×13-inch pan, adjust the baking time to about 24-30 minutes and you’ll want to cut the frosting recipe in half.
- If your frosting is too thick, you can beat in additional cream one half-tablespoon at a time. If it’s too thin, beat in a bit more powdered sugar until you reach the right consistency.
- Use a different frosting. This marble cake would be just as delicious frosted with Vanilla Buttercream, this Peanut Butter Frosting, or even Nutella Frosting. Or, check out more Homemade Frosting Recipes.

Storing Frosted Marble Cake
Store the frosted cake airtight on the counter for up to 4 days. I love my cake carrier as it helps to keep this cake moist. If you live somewhere that’s especially hot and humid, it’s best to keep your cake stored in the fridge instead and take it out to serve at room temperature.
Can I Freeze This Cake?
Yes, the cake can be frozen before or after it’s frosted. See the make-ahead section earlier for details on how to freeze the baked cake layers. To freeze a frosted marble cake, store it airtight and freeze it for up to 2 months. Thaw the cake overnight in the fridge and then allow the cake to come back to room temperature before you serve it.
Print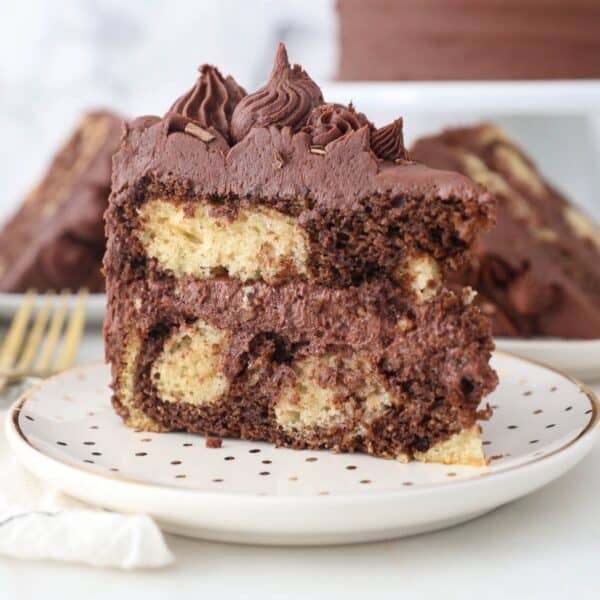
Marble Cake
- Prep Time: 60 minutes
- Cook Time: 33 minutes
- Total Time: 1 hour 33 minutes
- Yield: 10 slices
- Category: Cake
- Method: Baked
- Cuisine: Oven
Description
This moist chocolate Marble Cake recipe looks fancy but comes together with one easy cake batter! It’s the fluffiest swirled vanilla and chocolate cake topped with creamy chocolate buttercream frosting.
Ingredients
For the cake
- 6 ounces (170g) dark chocolate, melted
- 1 ½ cup (285g) granulated sugar
- ½ cup (118ml) vegetable oil
- ¼ cup (56g) butter, melted
- 2 large eggs, at room temperature
- 2 large egg yolks, at room temperature
- 1 tablespoon (15ml) pure vanilla extract
- ½ cup (120g) sour cream, at room temperature
- 2 ½ cups (350g) all-purpose flour, sifted
- 2 teaspoons (7.5g) baking powder
- 1 teaspoon (4.2g) baking soda
- 1 teaspoon (5g) salt
- 1 ½ cups (355ml) milk, at room temperature
For the frosting
- 2 cups (454g) unsalted butter, cold
- 1 cup (111g) cocoa powder
- 5 cups (650g) powdered sugar
- 1 tablespoon (15ml) pure vanilla extract
- 3 tablespoons (45ml) heavy whipping cream
Instructions
For the cake
- Preheat the oven to 350°F. Prepare two 8-inch round baking pans, line the bottom with parchment paper, and grease the sides. Wrap with bake even stripes if desired.
- In a microwave-safe bowl, melt the chocolate in the microwave at 50% power in 30-second increments and stir until completely smooth. Allow to cool.
- In a large mixing bowl, combine the sugar, vegetable oil, melted butter, eggs, egg yolks, and vanilla extract. Beat on medium speed until the eggs and oil are well incorporated and the batter is lighter in color. Next mix in the sour cream and beat until well combined.
- In a separate bowl, combine the dry ingredients. Alternate adding half the dry ingredients followed by half of the milk and mix just until the flour starts to incorporate. Repeat with remaining ingredients. Use a spatula to scrape down the sides of the bowl and stir the batter from the bottom to the top to ensure it’s well mixed.
- Measure out 2 ½ cups of the prepared batter into a second bowl. Stir in the melted chocolate until well combined.
- Alternate pouring the vanilla cake batter into the pan with the chocolate cake batter and gently swirl with a knife. Try to divide the batter evenly between the pans, about 2 ½ cups (combined) of batter per pan. Bake at 350°F for 30-35 minutes. Test the cake for doneness by inserting a toothpick into the center of the cake. If the toothpick comes out clean, your cake is done. Remove from the oven and allow to cool completely.
For the frosting
- Cut the butter into pieces (about 1 tablespoon in size). Using the paddle attachment, whip butter for 5-7 minutes, scraping down the bowl occasionally. Beat until the butter is really light and fluffy. Next, beat the cocoa powder into the butter until well-mixed.
- Alternate adding 2 cups of powdered sugar at a time with the liquid ingredients: vanilla extract & heavy cream. Ensure the powdered sugar is well combined, and whip for 1-2 minutes before adding more powdered sugar. Once all the powdered sugar has been added, increase the speed to medium-high and beat for another 2-3 minutes to whip additional air into the frosting.
To assemble the cake
- Level off the cakes by removing any domes. Place a dollop of frosting on your cake board and place the bottom layer of cake centered on the cake board.
- Pipe a layer of frosting in circles working outside edge to the middle. Spread evenly with an offset spatula. Add the second layer of cake, inverted. Apply a crumb coat the cake and put in the freezer for 5-10 minutes. Remove from freezer and add remaining frosting to the side and top of the cake. Decorate and serve.

Notes
- Sour cream substitute: You can use yogurt or Greek yogurt
- Dark Chocolate: Any variety will do, I tend to stick with something like 60% dark chocolate for my personal taste.
- Preparing this cake in advance: Prepare the cake layers up to 2 days in advance. Wrap tightly in plastic wrap with a piece of parchment paper on the top and bottom of the cake layer. Or these can also be stored in an airtight container. Cake layers can also be frozen, double-wrapped in plastic wrap. The frosting can also be prepared 1-2 days in advance and kept in an airtight container at room temperature. You’ll need to remix it prior to using it.
- Storing a frosted cake: This cake is best stored at room temperature in an airtight container such as a cake carrier. If you live in a hot or humid environment, store it in an airtight container in the refrigerator, and serve it at room temperature
- Alternative pan sizes: You can bake this in a 9×13-inch pan and bake for approximately 24-30 minutes. Reduce the frosting in half.
Nutrition
- Serving Size: 1 slice
- Calories: 1124
- Sugar: 97g
- Sodium: 412mg
- Fat: 65g
- Carbohydrates: 131g
- Fiber: 4,8g
- Protein: 10g
- Cholesterol: 195mg


I used the original recipe for my son’s birthday and as cupcakes….my daughter wanted the same, but with strawberry instead of vanilla. I just added some strawberry purée, strawberry emulsion and pink food coloring to the vanilla batter, a little more flour and it was DELICIOUS!!! They were perfect both times! I did substitute the frosting, a swiss merengue frosting for the vanilla/chocolate and strawberry chocolate swirl for the strawberry/chocolate! I definitely want to experiment with other flavors!!! Thank you!
Hi Melissa, I’m so glad you enjoyed the marble cake even with the strawberry modifications (which sound delicious!!). Hope you get to make it again soon.
Absolutely Fantastic! So moist and the chocolate buttercream was to die for.
Made a couple of minor adjustments to the leavening due to my higher altitude and it came out perfectly😀👍
Amazing Maureen, thank you so much for sharing this feedback. I am so happy it worked out!
Can I replace the chocolate for cocoa powder?
No this is not an acceptable substitute
Hello! How can I make this recipe into a 3 layer, 8 inch cake?
Hi Diana, yes you can. The layers will be much thinner around 3/4″-1″ in height so handle with care.
Thanks! How can I make it into the regular layers? Do I add an additional 50% of the recipe?
What do you mean by regular layers?
What consistency is the chocolate batter? The chocolate made the batter stiff. I put it in the pan with a spoon. Seemed to bake ok. Am I able to use your triple layer vanilla and triple layer chocolate and marble?
Hi Kym, It a little thicker than the yellow batter, but not as thick as brownie batter. Were you able to watch the video? That might be helpful.
This cake was amazing! It was so easy to follow the directions too! This was the BEST frosting ever! I made this for my boss and everyone at work loved it!
That’s wonderful Kelsey! Thank you so much for sharing!!
Hello, I’m making this cake for my huband his Birthday is tomorrow, the 10th of Jan.
I will let you know how it turns out in awhile.
I have my eggs out warming up .
Sitting having a couple cups of coffee, then to making a cake.
Please do let us know! Happy birthday to your husband!
I am making this today, but would like to offer a suggestion. I missed adding the melted butter into the batter because when to add it just wasn’t clearly anywhere in the instructions. I guess it was part of “repeat with remaining ingredients”? Bummed to have missed it, but I melted it at the end and divided it amongst my two bowls of batter. Hoping that it’s not ruined, as my layers are baking now.
Hi Paula, thank you for your note. It should have been in step three with the other liquid ingredients, and appears to be missing. Thanks for calling that to my attention and I have updated the recipe. I hope you enjoy it.
Thank you! I think it’s a nice marble cake. I will make it again. 🙂
You’re welcome. I am so happy you enjoyed this recipe, it’s one of my favorite cakes!