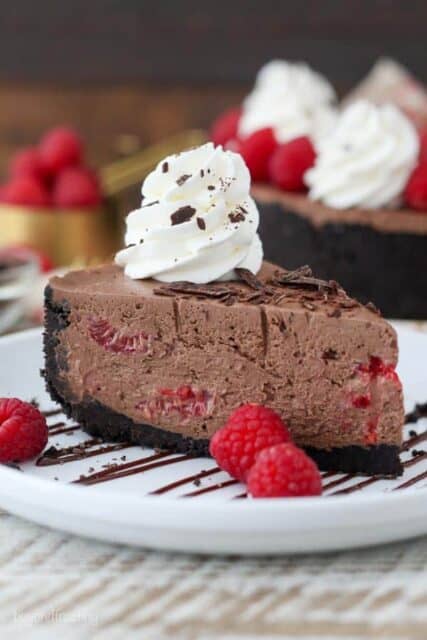
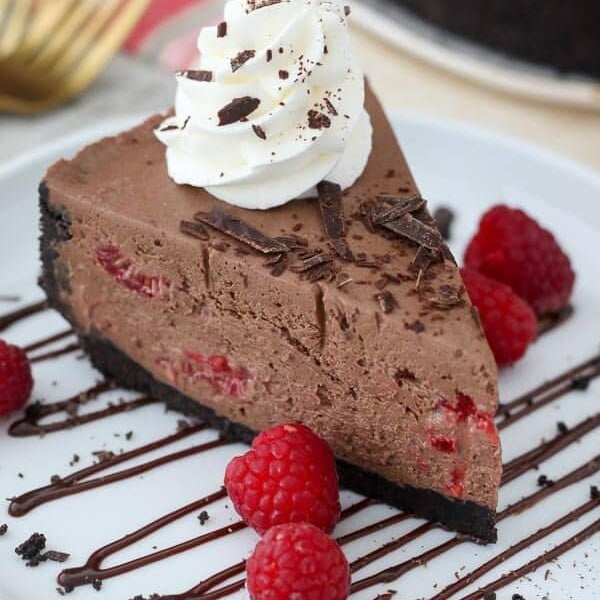
This no-bake chocolate and raspberry cheesecake has a fudgy Oreo cookie crust and a rich and creamy chocolate cheesecake filling swirled with homemade raspberry sauce. It’s perfect for a special occasion and comes together with half the effort of a traditional baked cheesecake!
No-bake desserts are great to make ahead for holidays, or just because. You might also love this no-bake chocolate Oreo cheesecake and my classic no-bake cheesecake recipe.

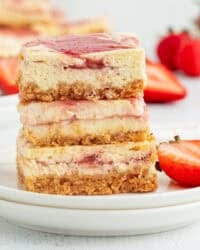
Last summer, I made a white chocolate raspberry swirl cheesecake, and I didn’t even give it a second thought when I decided I needed a chocolate version. I used the base recipe from my favorite no-bake chocolate cheesecake and swirled it with a simple, juicy raspberry puree and fresh raspberries.
Of all the summer berries, raspberries are my favorite. At my house in Vermont, my parents had huge gardens lining our property, and part of that included quite a large raspberry patch. We always had more raspberries than we knew what to do with. I remember grabbing them straight off the vines while trying to avoid all the bees that were flying around!
What You Need to Know About This Chocolate Raspberry Cheesecake
- Double the raspberries. I knew that a simple swirl of raspberry puree would not be enough for this cheesecake, so I sliced up some whole raspberries and tossed them into the cheesecake as well. This is where the flavor really shines through.
- Rich dark chocolate in the filling. The melted chocolate really is the driving force behind the flavor here, so it’s important that you use a high-quality chocolate, and I prefer dark chocolate myself. You can use chocolate chips, but I find that chocolate bars melt the best.
- You can make it in advance. One of the main reasons I love no-bake cheesecake so much is that it’s the perfect make-ahead dessert for a special occasion. You don’t need to switch on the oven, and you can make it a day in advance and chill it in the fridge overnight.
- Easier than traditional cheesecake. The method is a lot simpler than a classic baked cheesecake. There’s no wrapping the pan, water bath, or hours of gradual cooling needed, here.

Important Notes!
- Prep your ingredients beforehand. For the cheesecake filling, you have the usual suspects: cream cheese (be sure to use full-fat), sugar, cocoa powder, whipped cream, and homemade chocolate ganache made from melted chocolate and heavy cream.
- Soften the cream cheese. My best advice I can give you is to make sure your cream cheese is somewhat soft, or well beaten so that it’s easier to incorporate the other ingredients. If you need to soften the cream cheese quickly, you can microwave it for a few seconds.
- Whip the cream into stiff peaks. This is key when making no-bake cheesecake. Make sure to thoroughly whip the heavy cream for the filling into stiff peaks. This means that when you turn the whisk upright, the whipped cream should hold its shape without drooping. If you under-whip the cream, the cheesecake filling won’t be firm enough.
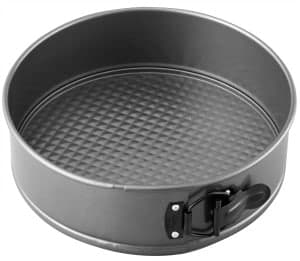
- Choose the right pan. You first need to prepare your crust in a 9-inch springform pan or an 9-inch square pan. Make sure the pan is at least 3 inches tall or you’ll be right up to the tippy top. I prefer an Oreo crust because it holds together so nicely, which makes for a very sturdy crust. You could also make this cheesecake with a graham cracker crust.
- Save an extra bowl. I don’t like doing dishes, so I prepare the whipped cream first, and then scoop it into a bowl (that can go in the dishwasher). Afterward, I make my cheesecake filling in the same bowl I used to whip the cream.
- Make a simple puree. Last but certainly not least is the raspberry sauce. First, puree 3 ounces of berries in a small food processor, or just smash them in a bag. You can decide if you want to strain out the seeds or just leave them in.
- Layer the raspberries. Next, you’ll slice some raspberries in half to layer in the dessert. Since the cheesecake batter is pretty heavy, instead of folding the berries into the batter, I like to layer these in once I add the cheesecake batter to the pan.

How to Assemble a No-Bake Chocolate and Raspberry Cheesecake
Once you’ve prepared the chocolate cheesecake batter and mashed up the raspberries for the puree, you’re ready to assemble the crust and cheesecake in a springform pan. If you need extra guidance when preparing your crust, my in-depth tutorial on how to make a no-bake crust in a springform pan has detailed step-by-step instructions. Assembling this chocolate cheesecake is very easy:
- First, add about ⅓ of the cheesecake batter to the crust. Spread it evenly up to the edges.
- Then, drizzle in about ⅓ of your raspberry puree. Gently swirl it with the knife.
- Afterward, scatter some sliced raspberries on top. Repeat two more times until you’ve filled the pan.
For the topping, you can garnish your chocolate raspberry cheesecake however you’d like. I chopped up some of my leftover chocolate bar to sprinkle on top and added swirls of whipped cream along with extra berries. To decorate with whipped cream or frosting, you can use a piping tip (see my guide on how to use them) or simply fill a ziplock bag and snip off the end.
To Puree, or Not to Puree
The main reason I don’t use only the puree is that I didn’t find the flavor stood out enough for my liking. The extra raspberries scattered throughout the batter really helped here. The second reason was that I didn’t want to puree all the raspberries, as the additional liquid makes it difficult for the cheesecake to set properly.

No-Bake Cheesecake FAQs
How long does this cheesecake need to chill in the fridge?
This no-bake chocolate raspberry cheesecake will need at least 4 hours to set up in the fridge, or you can chill it overnight for best results. It’s a great dessert to make ahead.
Why didn’t my no-bake cheesecake set overnight?
If your cheesecake has been in the fridge for hours and still hasn’t set properly, the temperature of your ingredients may be the culprit. The cream cheese should be softened (room temperature) and not too warm. I also recommend melting the chocolate for the cheesecake filling first so it can cool off while you prepare the rest of the ingredients.
Lastly, remember what I said above about too much liquid in the puree and whipping the cream enough, which can affect how the cheesecake sets. If needed, you can chill a less-than-set cheesecake in the freezer for 30 minutes or so before serving, to help firm it up a bit.

How to Store
- Refrigerate. This no-bake chocolate raspberry cheesecake needs to be kept refrigerated. Store it covered for up to 5 days in the fridge, though it’s best enjoyed within the first 2 days. Cover the cut edges with plastic wrap to prevent a skin from forming.
- Freeze. You can freeze this no-bake cheesecake without the toppings. Wrap it tightly with plastic wrap, then with foil, and freeze it for up to 2 months. Thaw the cheesecake in the fridge before garnishing and serving.
I am pretty good at resisting my own desserts, but I cut a quarter of this cheesecake and saved it for my dad because he would be visiting me the following week. I loved that no matter how much food we ate for dinner, my dad cut himself a slice of cheesecake every night until it was gone. What can I say? The man loves his desserts. I know you’ll love this chocolate raspberry cheesecake as much as we did!
More No-Bake Desserts
No-Bake Chocolate Raspberry Cheesecake
- Prep Time: 45 minutes
- Cook Time: 4 hours
- Total Time: 4 hours and 45 minutes
- Yield: 10 servings
- Category: Dessert
- Method: Chilled
- Cuisine: American
Description
This creamy chocolate raspberry cheesecake has a fudgy dark chocolate cheesecake filling swirled with a fresh raspberry puree and chunks of raspberries. No baking required!
Ingredients
For the Crust:
- 1 14-ounce package Chocolate Sandwich Cookies
- 1/2 cup Unsalted Butter, melted
For the Filling:
- 6 ounces Dark Chocolate
- 9 ounces Raspberries, divided
- 1 1/4 cups Heavy Whipping Cream, plus 2 tablespoons
- 1/2 cup Powdered Sugar
- 2 tablespoons Unsweetened Cocoa Powder
- 16 ounces Cream Cheese, softened
- 1/4 cup Granulated Sugar
- 1 teaspoon Pure Vanilla Extract
For the Topping:
- 3/4 cup Heavy Whipping Cream
- 2–3 tablespoons Powdered Sugar
- Fresh Raspberries, for garnish
- Chopped Chocolate, for garnish, optional
Instructions
For the Crust:
- Prepare a 9-inch springform pan by lightly greasing the edges of the pan with cooking spray and then wiping gently with a paper towel. Line the bottom of the pan with parchment paper.
- Grind the cookies into a fine crumb using a food processor or blender.
- In a small bowl, melt the butter in the microwave for 30 to 45 seconds. Pour the melted butter over the cookie crumbs and stir until the crumbs are well coated.
- Pour the crumbs into your springform pan and press firmly into the bottom and up on the sides to create a thick crust. Refrigerate the crust while you are preparing the filling.
For the Filling:
- Place the mixing bowl and whisk attachment in the freezer for 5 to 10 minutes to chill.
- In a microwave-safe bowl, combine the chocolate and 2 tablespoons of heavy cream. Melt the chocolate in the microwave at 50% power in 30-second increments, stirring each time until the chocolate is melted. Stir until completely smooth.
- Puree 3 ounces of raspberries in a small food processor. Strain through a fine sieve if desired. Set aside. Take the remaining 6 ounces of raspberries and slice them in half.
- Pour 1 1/4 cups heavy whipping cream into the chilled bowl and use an electric mixer to beat the heavy cream on medium-high speed until it reaches stiff peaks. Add the powdered sugar and cocoa powder and continue beating at high speed until stiff peaks form. Set the whipped cream aside.
- Beat the softened cream cheese until it’s completely smooth. Scrape down the sides of the bowl as needed. Next, add the granulated sugar and vanilla extract and continue beating until smooth. Next, add the melted chocolate, beating until it’s completely mixed into the cream cheese.
- Finally, slowly fold in the whipped cream until it’s completely incorporated into the filling.
To Assemble:
- Pour 1/3 of the batter into the prepared crust and spread evenly. Then, spoon about 1/3 of the raspberry purée over the cream cheese and use a knife to swirl it into the batter. Next, layer in a handful of the chopped raspberries and gently push them into the batter. Repeat these steps two more times.
- Refrigerate for at least 4 hours to allow the cheesecake to set. Add the toppings before serving.
For the Topping:
- Prepare the second batch of whipped cream following the same method as described above.
- Pipe the whipped cream borders using a large open or closed star tip. Garnish with leftover raspberries and chopped chocolate if desired.
Nutrition
- Serving Size: 1/10 of recipe
- Calories: 682
- Sugar: 34g
- Sodium: 294mg
- Fat: 50g
- Saturated Fat: 22g
- Carbohydrates: 53g
- Fiber: 1g
- Protein: 5g

I don’t have a springform pan and I noticed in the recipe you mentioned a 9″ square pan. Will that work as well? And how easy will it be to get out of the pan?
Hi Arlene, you will need to slice them as bars, you won’t be able to remove the entire thing from the pan. You’ll probably sacrifice one corner piece and then you can remove the rest rather easily.
I love this recipe and so did my family!
Wonderful! Thank you so much!
I made this for a colleagues birthday & everyone absolutely loved it! I didn’t even make the topping. Delicious! Will make again!
Thank you so much Candi!
Hiya! Can you use Frozen raspberries in. This or would it add too much moisture and not set properly?
Looks amazing, either way am making this chocolate cheesecake!
Hi Carri, I would not recommend using frozen berries unless you wanted to boil them into a syrup and them mix it into the cheesecake. Frozen berries are heavier and have more moisture when they thaw. It would create an imbalance with the filling.
This recipe was very very very confusing, and I wish it was written better. I did not do it right and I hope it comes out good.
I would love some additional feedback as to what was confusing for you so that I can make the changes. Please clarify, without this feedback it’s difficult to understand your comment.
I think a video of the pie being made would solve any confusion that we might have. Thank you.
This recipe is very challenging to follow! It was confusing how in the ingredient list the headings are crust, filling, topping. Then in the instructions it’s filling, whipped cream, layers, topping. If there are different parts of the “filling” then maybe label them as such in the ingredients list and in the instruction headings. I also don’t know why I melted chocolate first thing bc it hardened before I could use it. Probably state first thing to put the mixing bowl and whisk in the fridge, similar to a recipe that starts with “preheat oven”.
Hi Faith, thank you for the feedback. It appears this recipe has not been updated in quite some time, and as such, it needs some fine tuning, so I made some updates based on this, removed the extra heading to combine the steps. Although I do feel that the chocolate needs plenty of time to cool down. It should not have hardened before using it though, that would take hours for it to reharden.
Hi Julianne,
This looks amazing — that texture looks absolutely perfect and I feel like raspberries don’t get enough dessert love the the summer months. Excited to try it!