
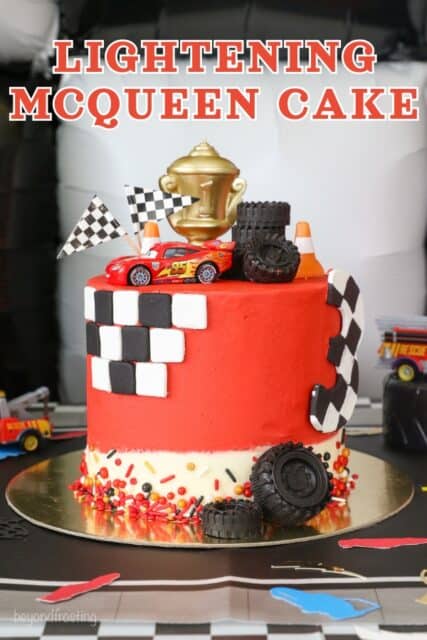
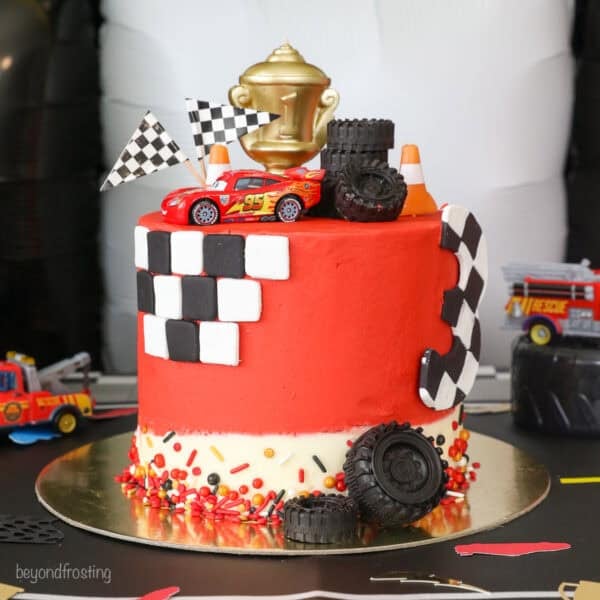
This Lightning McQueen cake was such a hit at my son’s birthday! I’ll show you how to make and decorate this homemade Disney Cars birthday cake step by step. With racing-red buttercream frosting and a little bit of fondant, it’s easier to make than you’d think and perfect for kids’ parties.
Easy Lightning McQueen Birthday Cake Tutorial
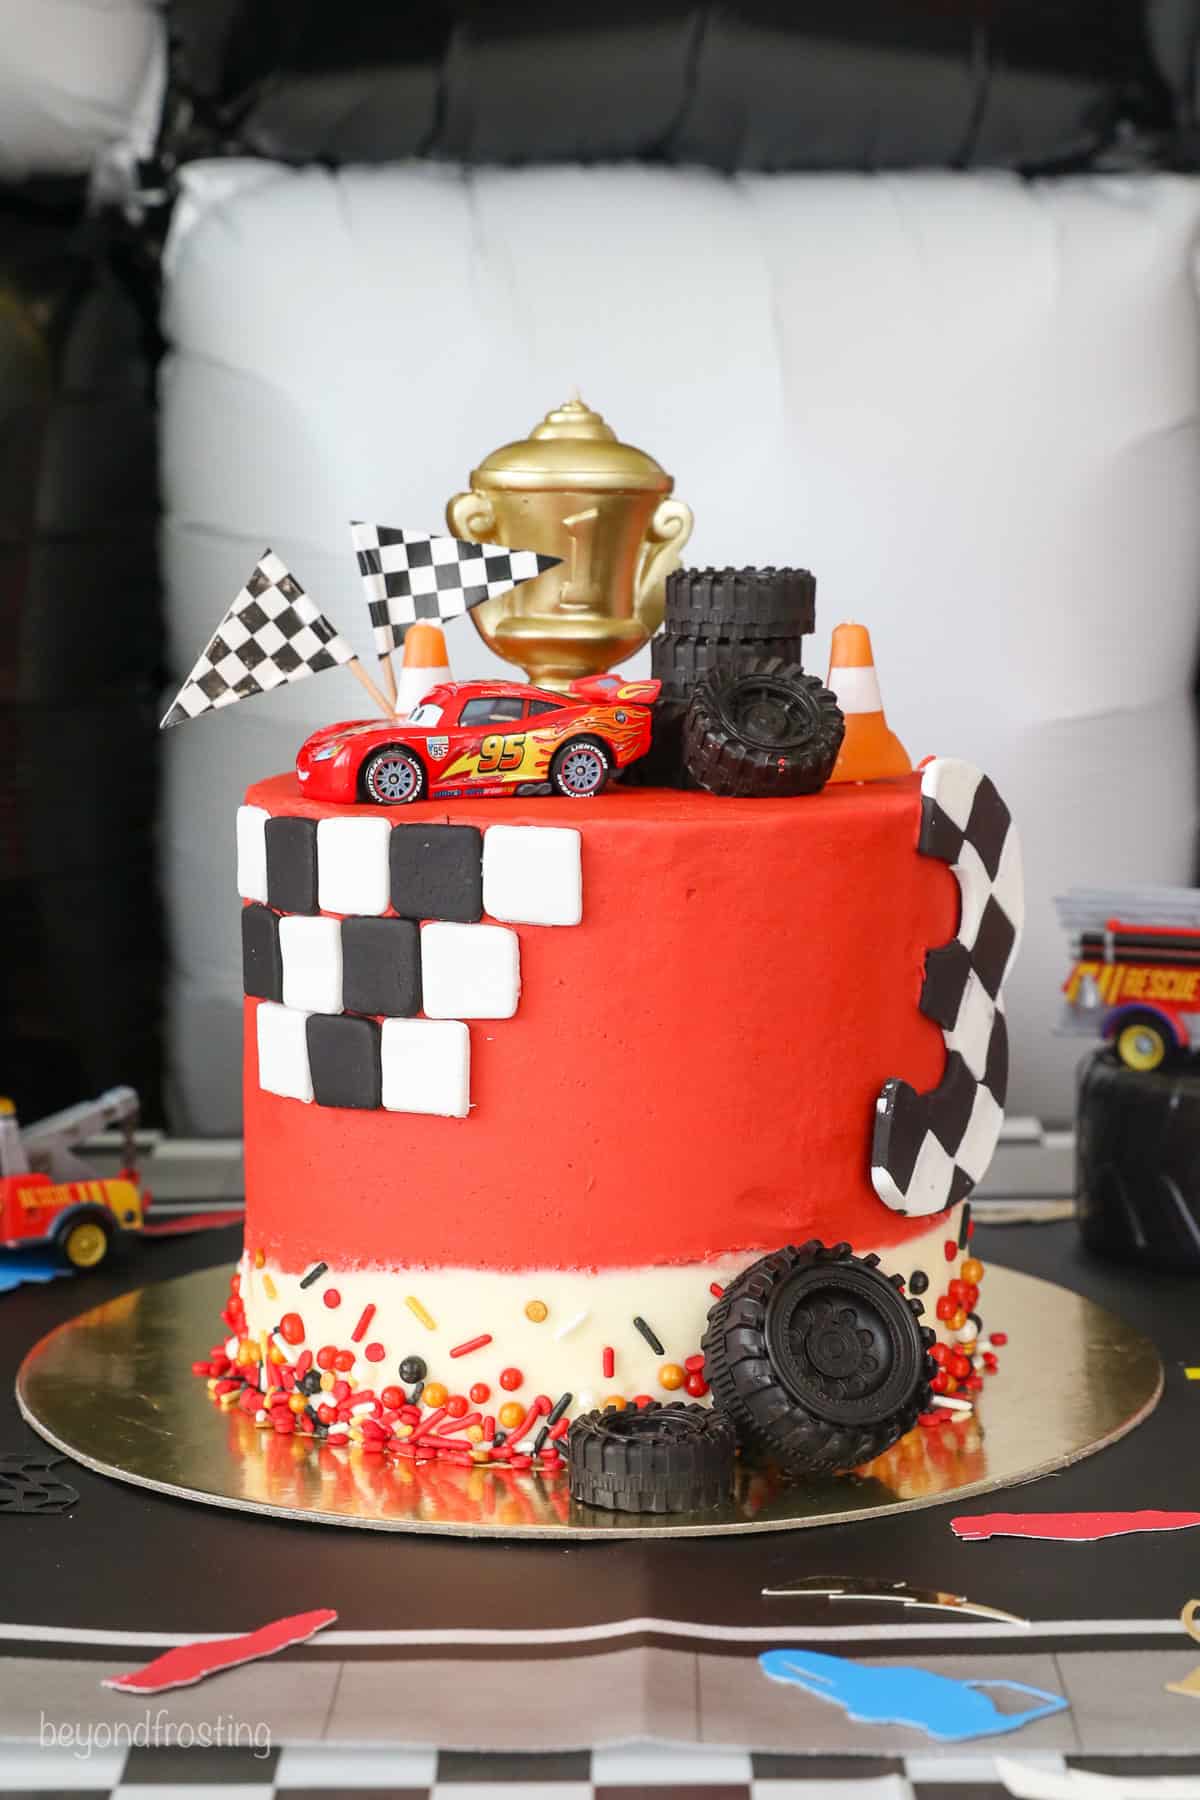
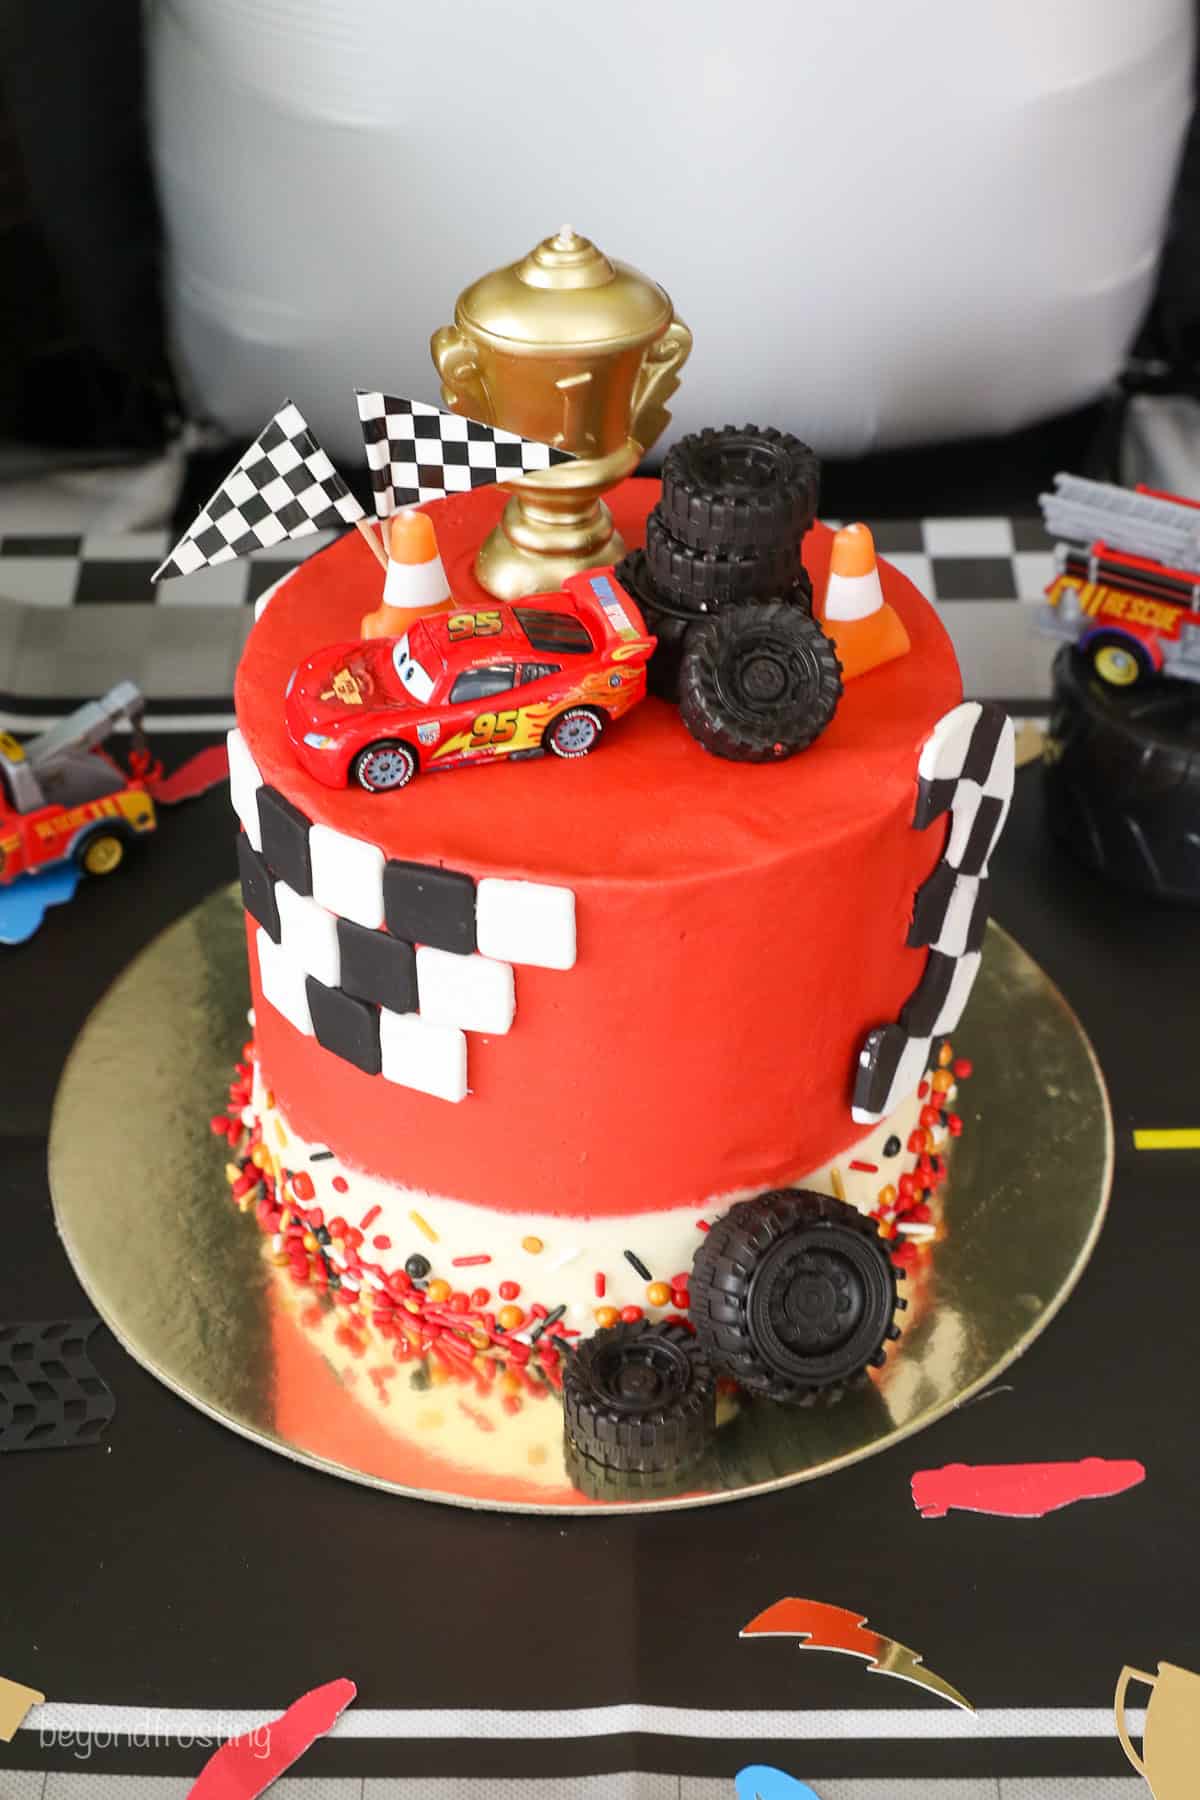
I’m back with another kid’s birthday cake tutorial. This time, I made this Lightning McQueen cake for my son’s Cars birthday party. It’s a three-layer, 6-inch chocolate cake decorated with red buttercream frosting and a little bit of fondant for the racing designs inspired by the Disney movie Cars.
As you may know, my boys are all about all things cars, construction, and Paw Patrol, and I love turning their favorite things into full party themes. Cake, party favors, and all.
It seems like just yesterday I was baking dinosaur and Cookie Monster smash cakes for their first birthdays! Time flies, that’s for sure.
I had so much fun making this Lightning McQueen cake, and I’ve broken it down step by step to make the whole process easy and approachable. The best part is that you can adapt this tutorial to any Cars character just by changing the frosting color. If you bake this cake for your next party, check out these play dough kits for racing party favor inspiration.
What You’ll Need
Here’s a look at the supplies you’ll need for this Lightning McQueen cake decorating tutorial. You’ll find the complete cake and frosting recipes in the printable recipe card below.
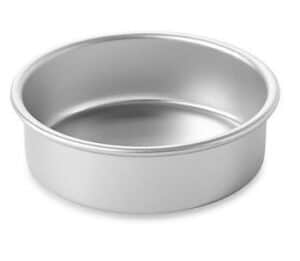
- Cake Layers – I use my moist chocolate cake recipe and bake it in three 6-inch round cake pans. It’s a rich cake made with sour cream, oil, cocoa powder, and a touch of coffee to boost the chocolate flavor. You can use any cake flavor you prefer (more ideas below).
- Frosting – Buttercream frosting is the most stable and best for decorating birthday cakes. I use my vanilla frosting recipe and color it red for this cake.
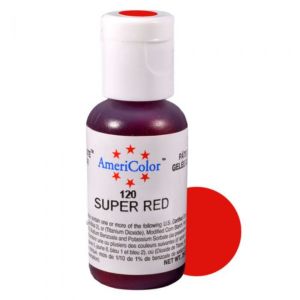
- Red Gel Colors – Speaking of coloring, gel food dye will give you the brightest, most vibrant red frosting. I recommend brands like AmeriColor and Wilton. Super Red is a great color to start with.
- White and Black Fondant – To cut out into squares for a “checkered flag” effect. You’ll find edible fondant in baking stores and craft stores like Hobby Lobby and Michaels, but often Walmart has what you need.
The Best Cake Base for a Lightning McQueen Cake
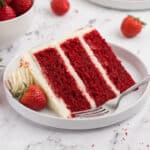
I use a small chocolate cake as the base, but a mini vanilla cake or any of the sturdy, moist cake recipes from my site will work for this tutorial. You can even use your favorite boxed cake mix if you’re in a hurry. These are more base options.
How to Make a Lightning McQueen Cake (Step-by-Step)
For this Cars cake tutorial, you’ll need to bake three 6-inch cake layers until a toothpick comes out clean. Afterward, allow the cakes to cool completely and prepare your vanilla frosting. Starting with cold butter takes extra time to whip the cold butter to a soft, spreadable consistency, but the result is super-stable, pipeable buttercream. Refer to the recipe card for detailed instructions.
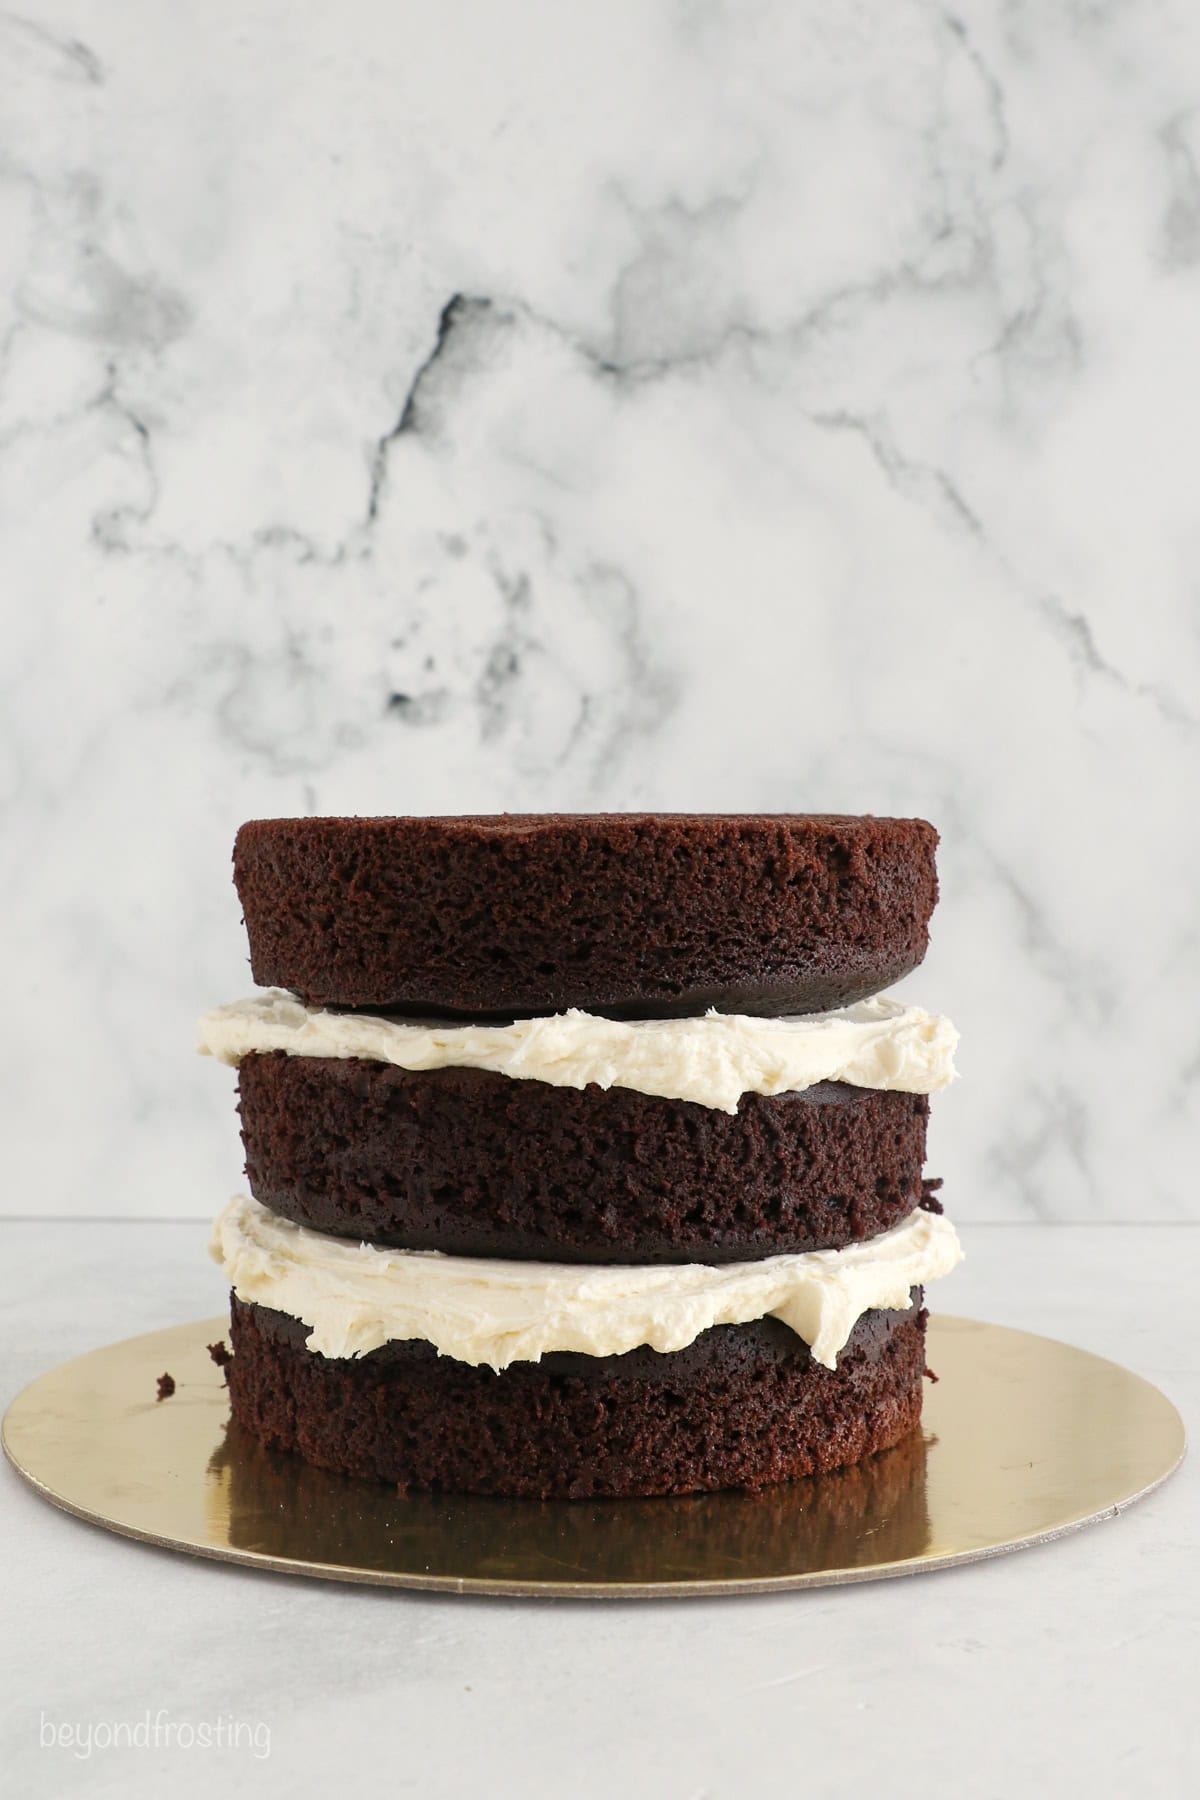
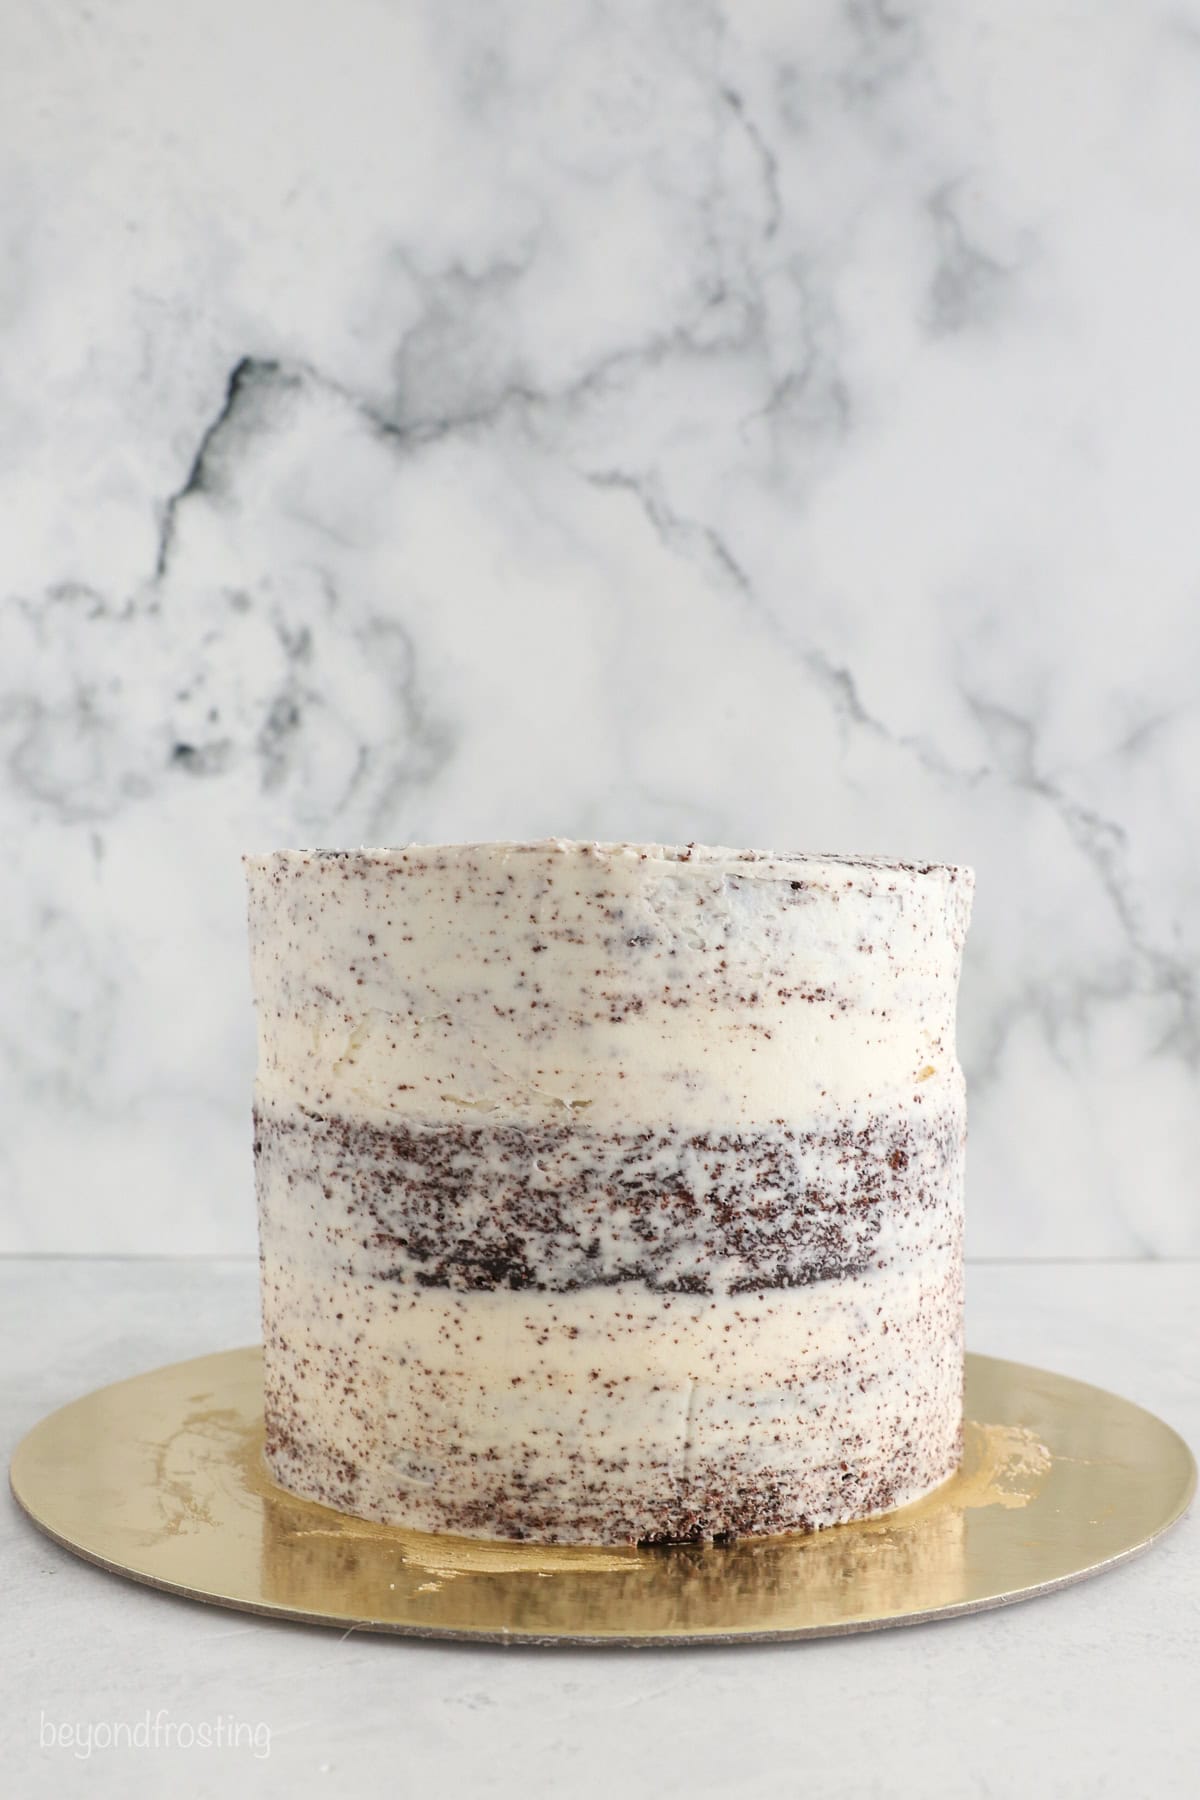
- Level the cake layers, stack them, and add a crumb coat so your cake is ready for frosting and decorating. Refer to the recipe card, and see how to make a layer cake for a step-by-step guide.
- I used about 1 cup of frosting between each cake layer. Refrigerate the cake for 15-30 minutes before you decorate, so the crumb coat can set.
Frosting the Cake
- Start with white buttercream. Add about 2 cups of white buttercream to a piping bag with the tip snipped off (see how to fill a piping bag).
- Color the remaining frosting. Use Super Red color gel or similar to dye the remaining frosting bright red.
Tips for Bright Colored Buttercream
Coloring frosting is color theory combined with the saying, “a little goes a long way.” I have an in-depth guide on how to color buttercream that covers my techniques. For this Lightning McQueen cake, these are my tips for achieving a vibrant racing red frosting.
- Add a little black. To deepen the red color, add a touch of black gel icing. Dip a toothpick into the black gel, mix it into the red, and repeat until you reach your desired color. Be sure to use a new toothpick each time.
- Add a drop of purple. Using the above method, add purple or violet gel to shift the red to a more crimson color. Add a little at a time. You can always add more, but you can’t take it away!
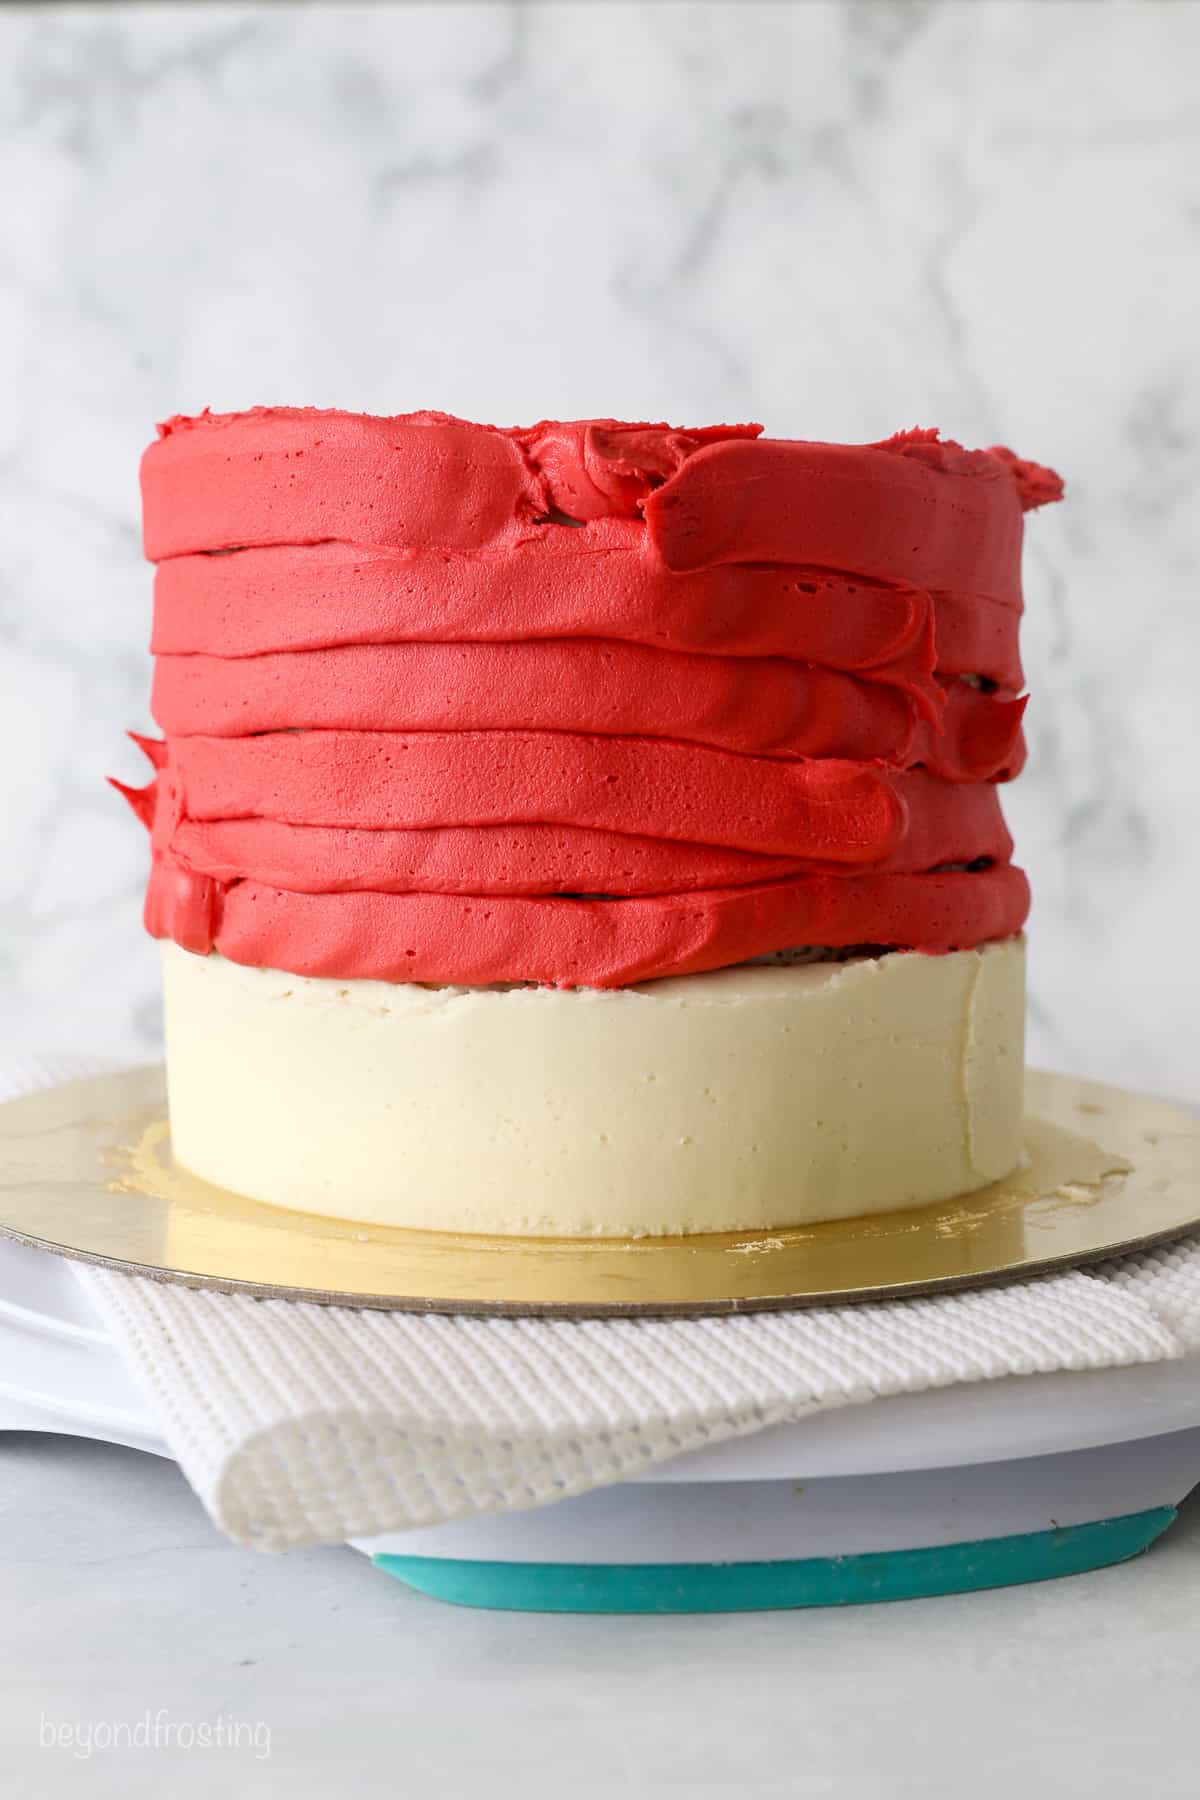
- Frost the cake. Starting at the bottom edge of your assembled cake, pipe three rows of white (uncolored) frosting. Smooth it over with an icing scraper. Fill about ½ of a large piping bag with red frosting, and add a thin layer of frosting to the top of the cake. Smooth the top, and pipe the rest of the red buttercream around the sides of the cake. Start at the edge of the white frosting and work your way up the cake.
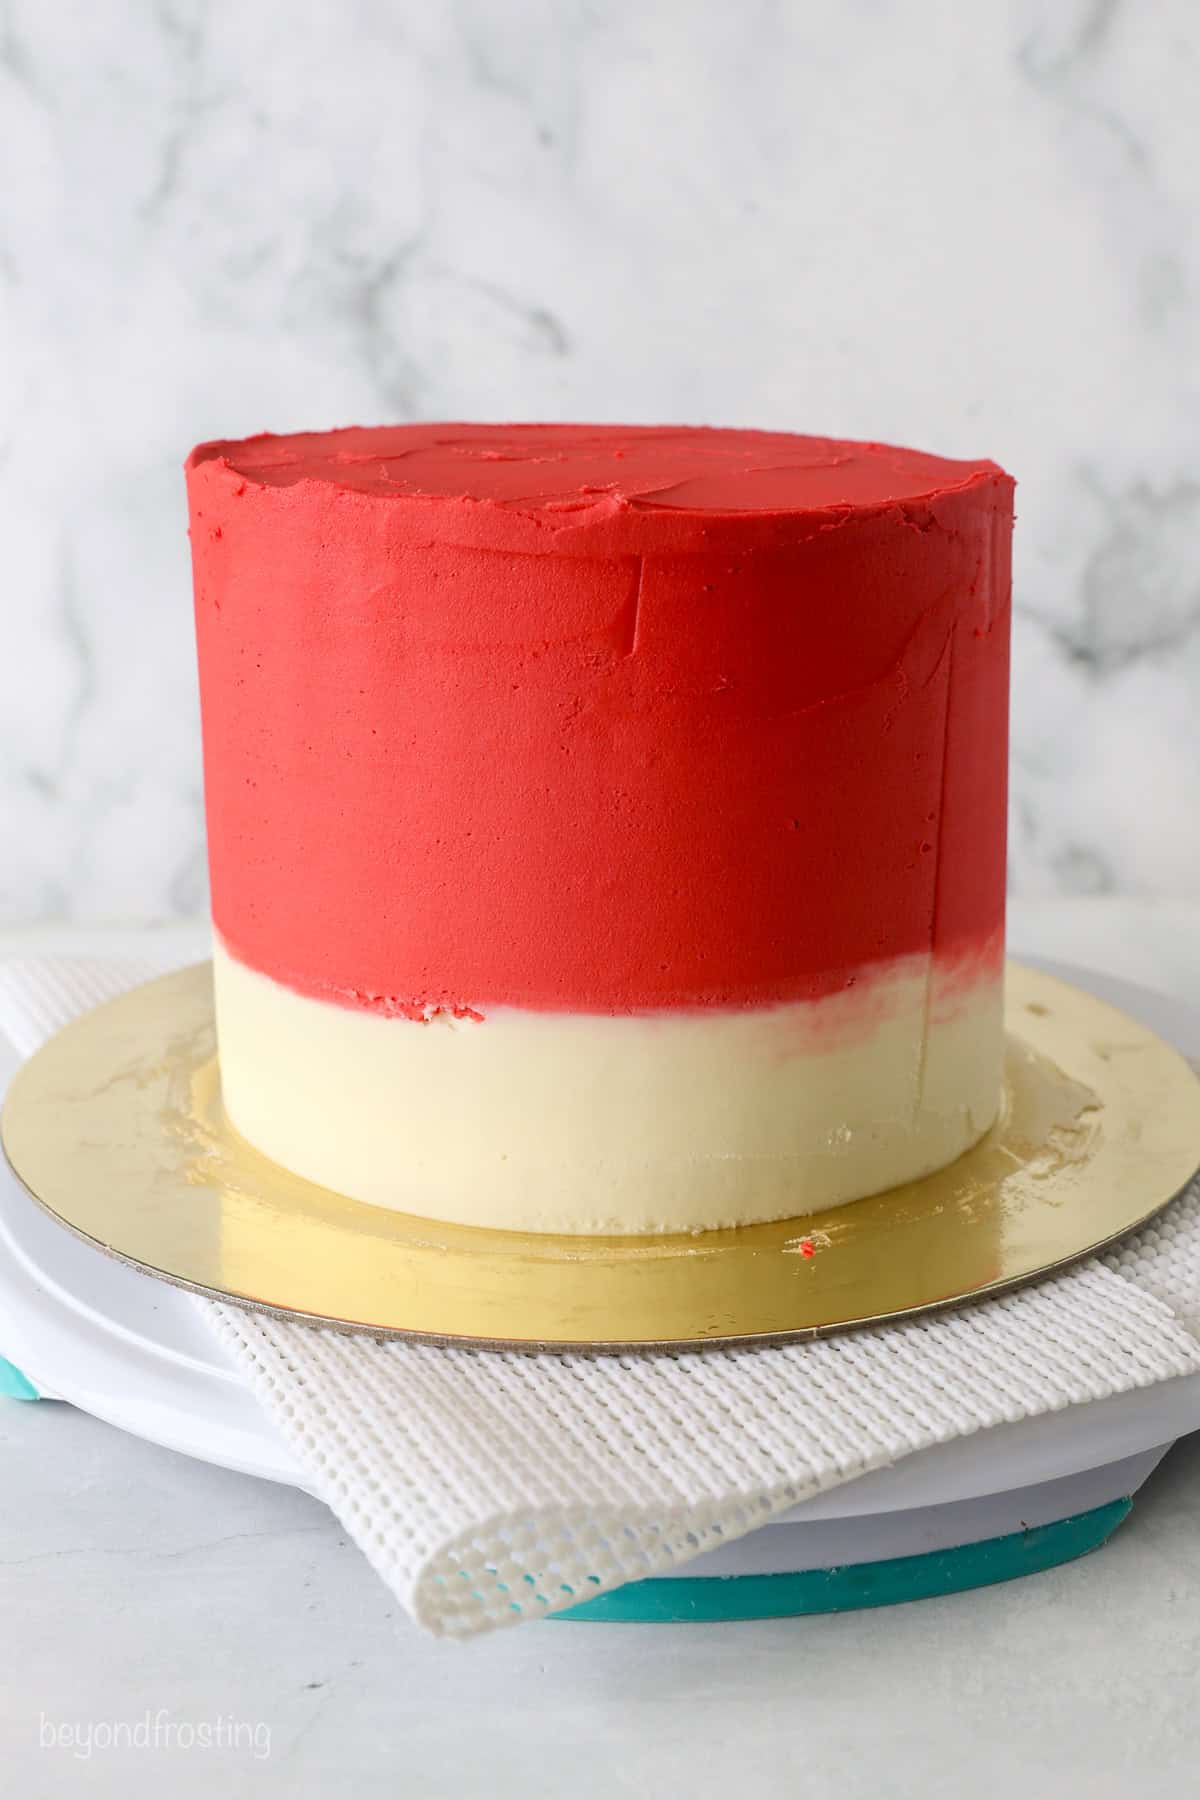
- Scrape the frosting. Smooth the red frosting using your scraper. Afterward, clean your scraper and smooth over the entire cake.
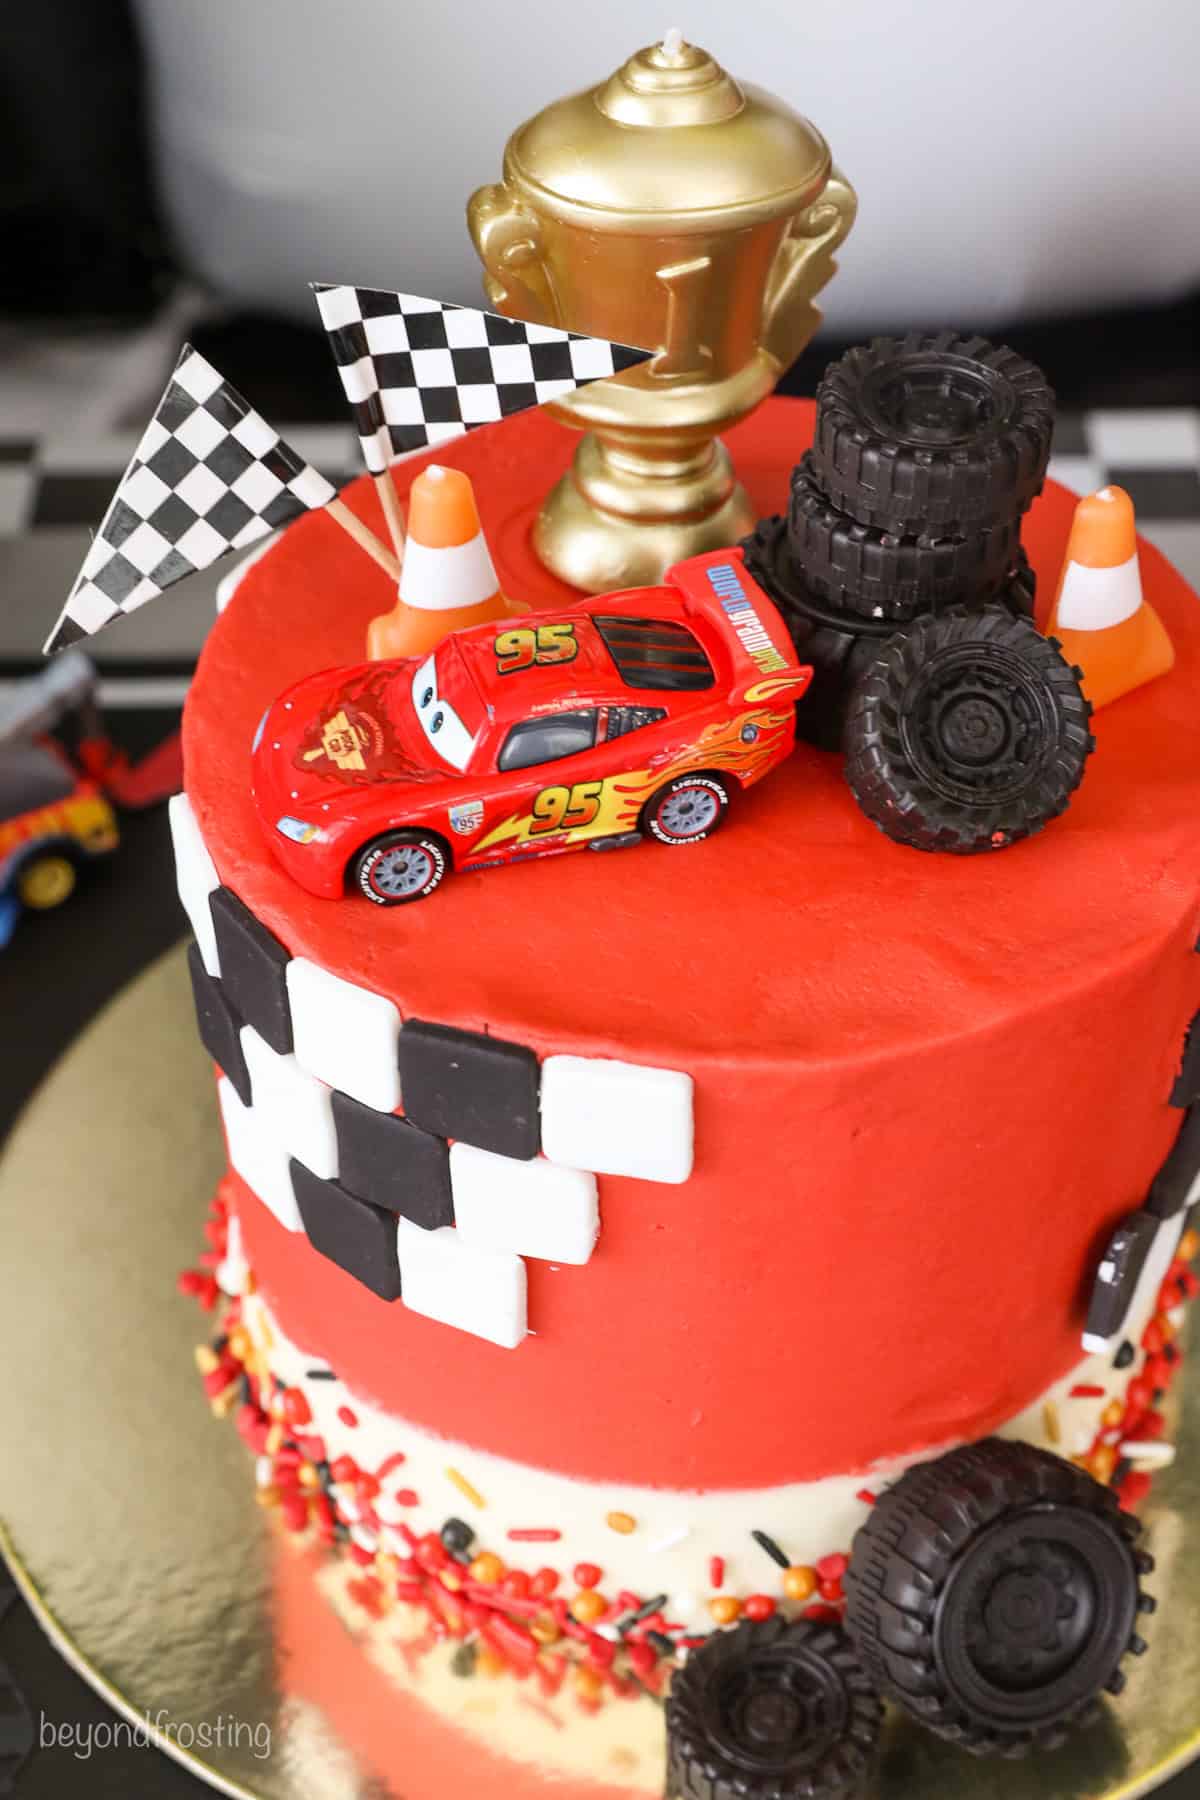
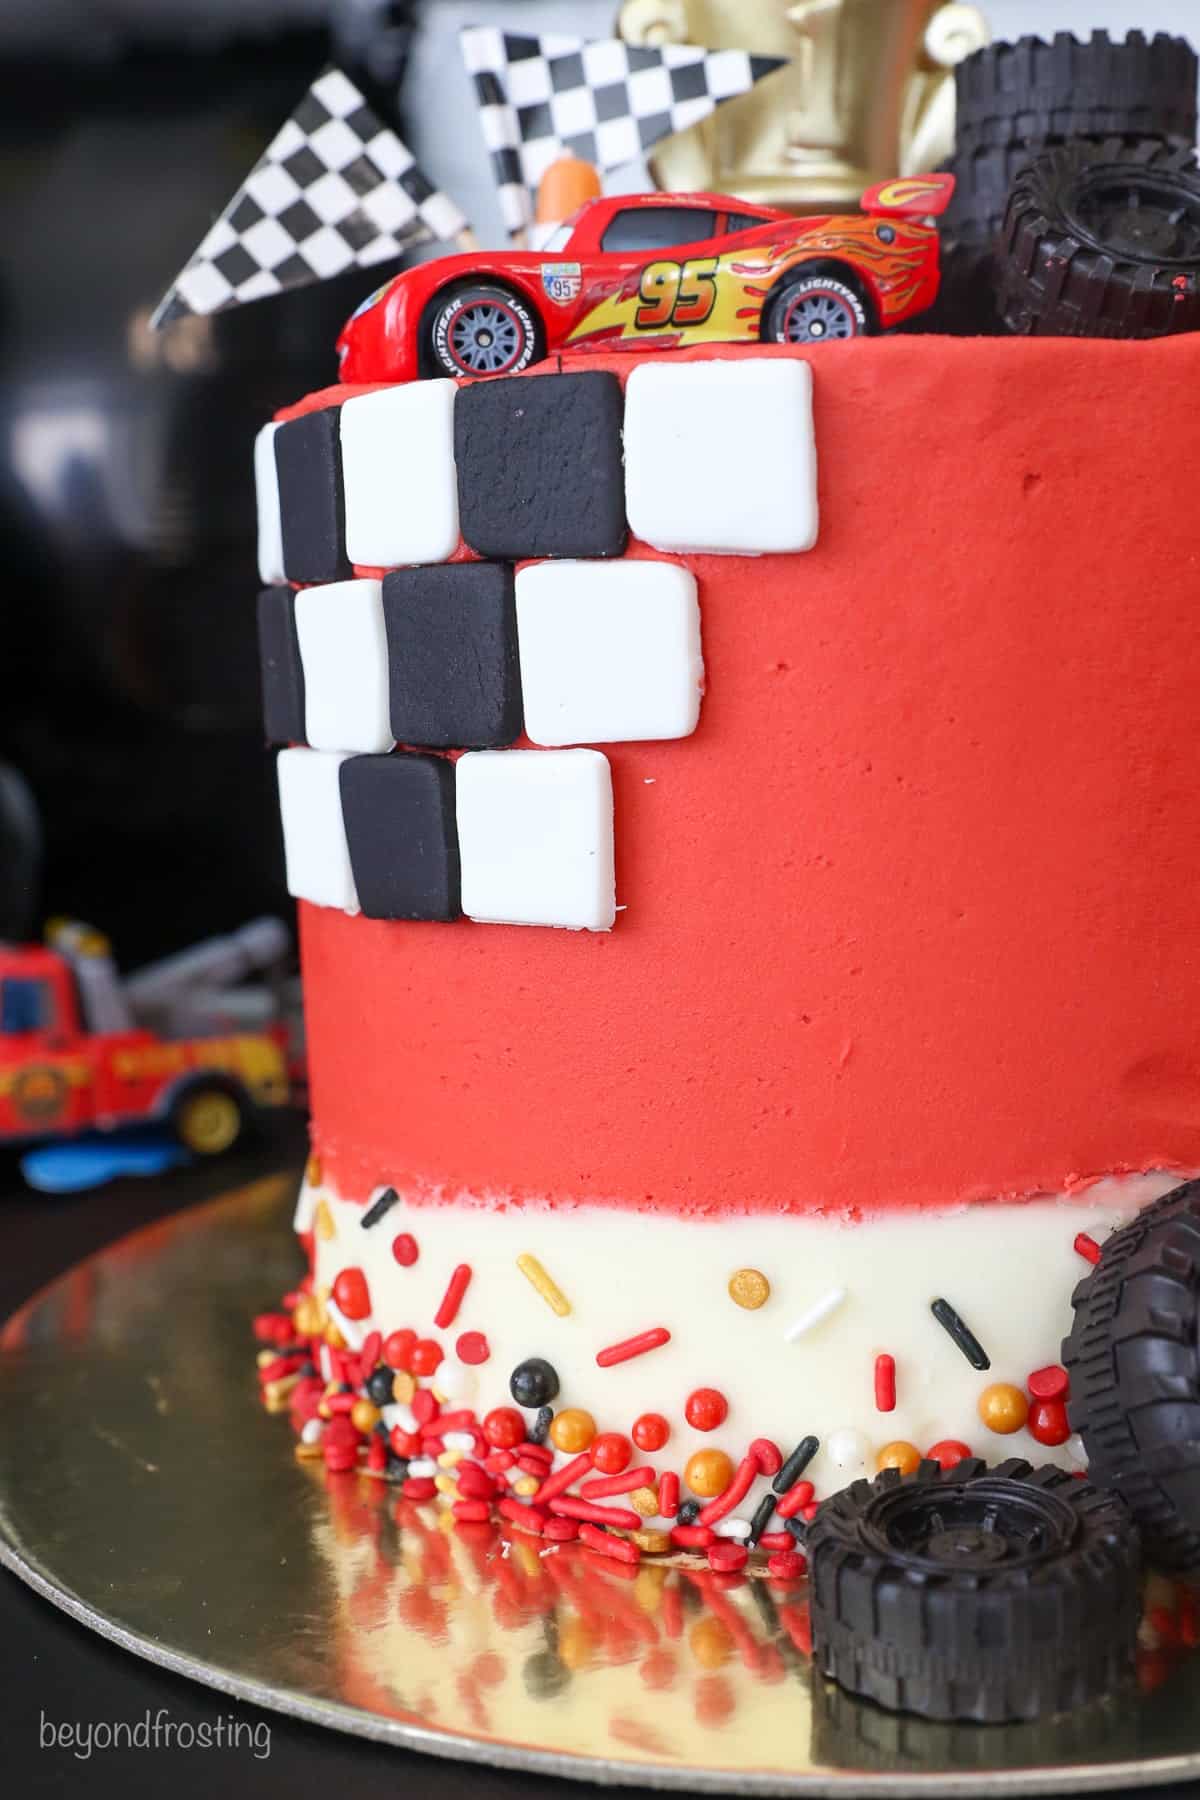
- Add the decorations. Press sprinkles into the white buttercream at the bottom of the cake. Next, press fondant squares along the top edge, alternating black, then white, like a checkered flag. See below.
Using an Icing Scraper
I used an icing scraper tool to smooth over the frosted edges of the cake, creating an even canvas for the fondant and sprinkles. A rotating cake plate or cake stand comes in handy when scraping a cake. Here’s how to do it:
- Run the scraper under hot water and dry it completely.
- Hold the scraper at a 90-degree angle against the side of the cake. Apply light, even pressure as you rotate the cake in a circle, smoothing out the frosting.
- Repeat as needed until you’ve smoothed out the buttercream.
Alternatively, you can use an offset spatula to smooth over the icing if you don’t have a scraper. You’ll just need to wipe it clean more often.
Making the Checkered Fondant Squares
I used a similar decorating technique for my Hot Wheels Cake. I loved the look (and ease) of a checkered pattern that required minimal fondant.
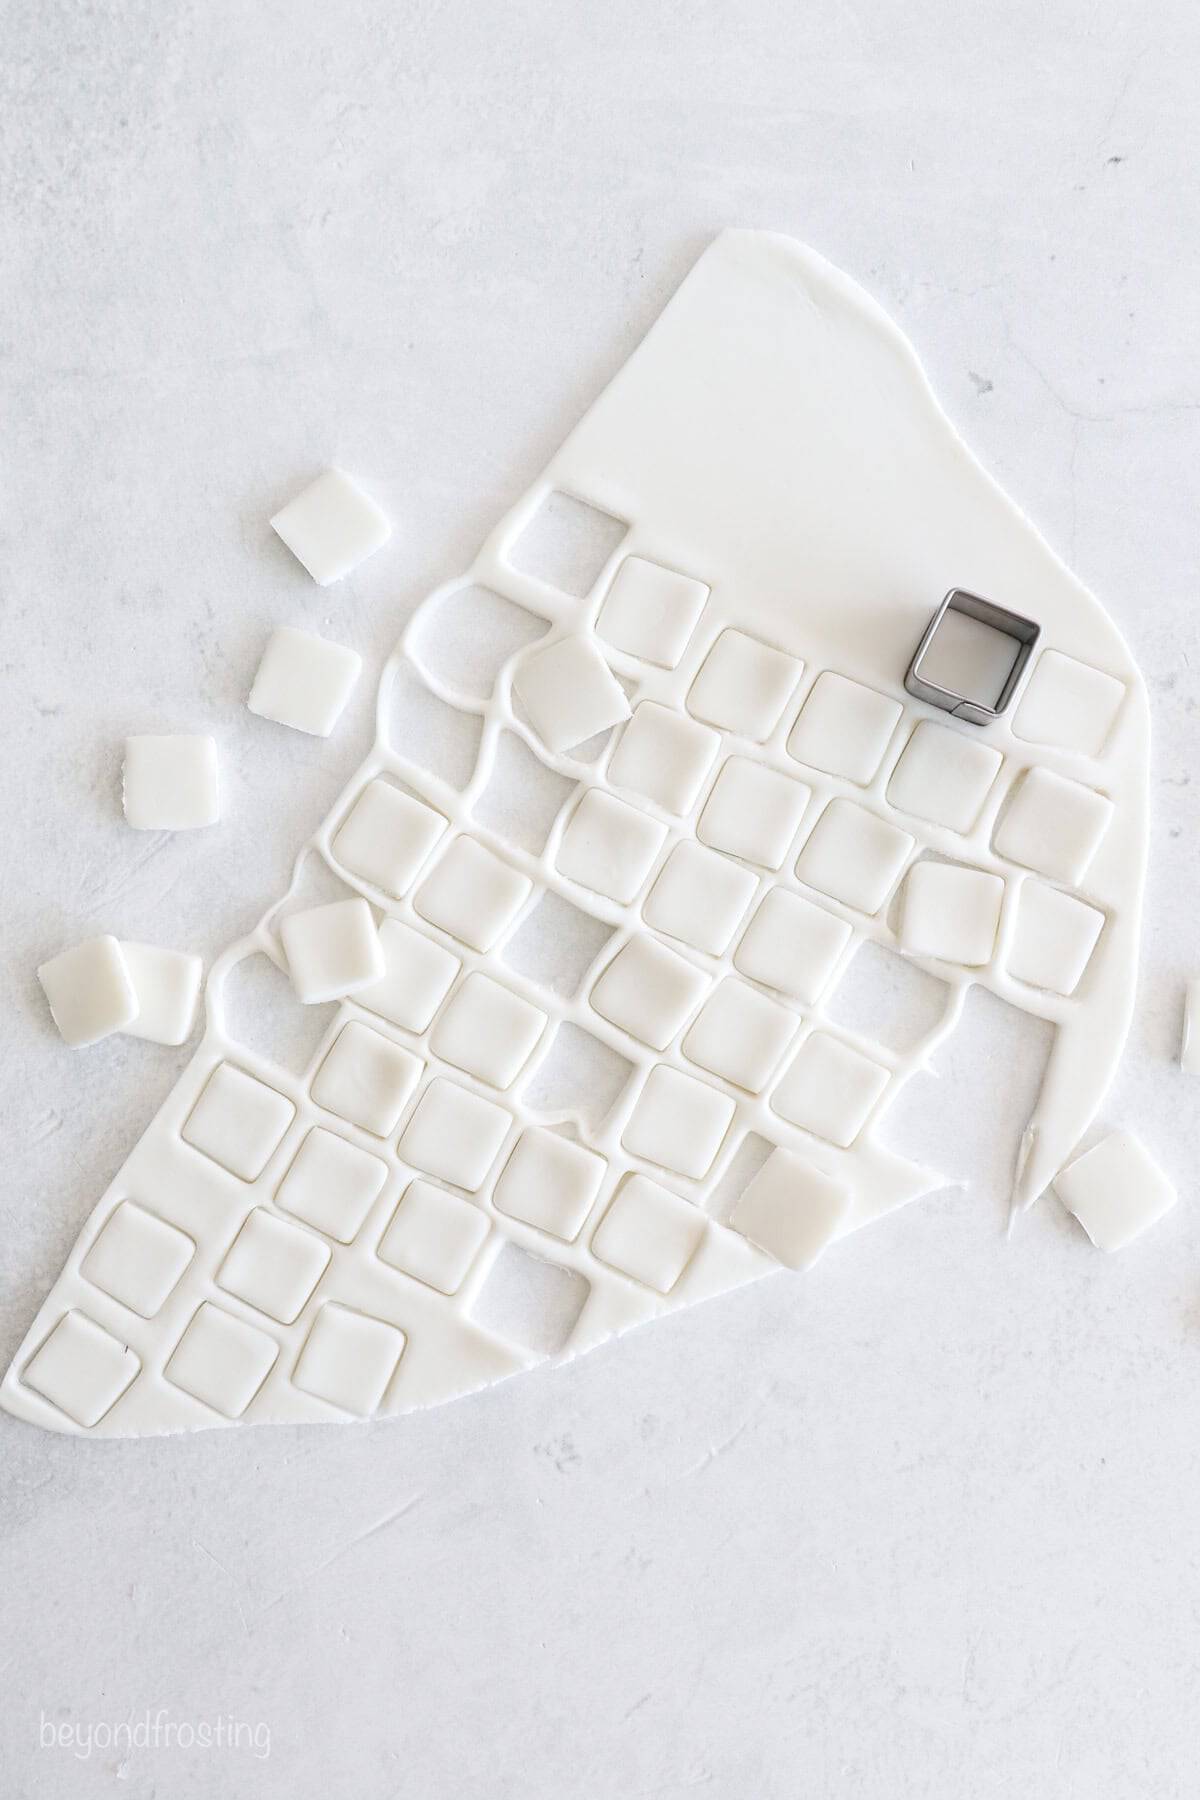
You’ll need less than 4 ounces of fondant for the black and white squares. You can cut your fondant squares up to 48 hours ahead of time. If you do, arrange them in a single layer in an airtight container to store for later. Cutting out the squares is easy:
- Roll out the fondant. Use a fondant roller or rolling pin to roll out each color to an even ⅛” thickness.
- Cut out the squares. Next, use a small square cookie cutter to cut out squares in each color. The cutter I used is ⅝”. Alternatively, you can use a ruler and pizza cutter to measure and cut (I’ve also seen plunger cutters and multi-cutter squares, but I have not personally used them). You’ll need approximately 40 squares of each color, depending on how much decoration you want to do.
It’s best to apply the fondant squares to the cake when the buttercream is fresh. If you’ve already frosted the cake and are applying the squares later, use a toothpick to gently scratch the buttercream before you place the fondant on top. This helps it adhere to the cake. Or you can use piping gel as a makeshift adhesive.
FAQ: Can I Make This Without Fondant?
Yes. Instead of fondant, there are other ways to recreate a checkered flag pattern on this Cars cake! I recommend using white and black frosting and piping tips to create a checkered pattern. The basketweave tip has a flat edge on one side that will work best. The easiest way to make black frosting is to use chocolate buttercream and color it using black gel dye. This way, you’re already starting with a dark base.
Additional Decorations
To complete this Lightning McQueen-themed cake, I repurposed a few of the techniques and decor from the Hot Wheels Cake I made last year. Luckily, my kids’ hobbies all have wheels, cars, and racing in common!
Fondant Number
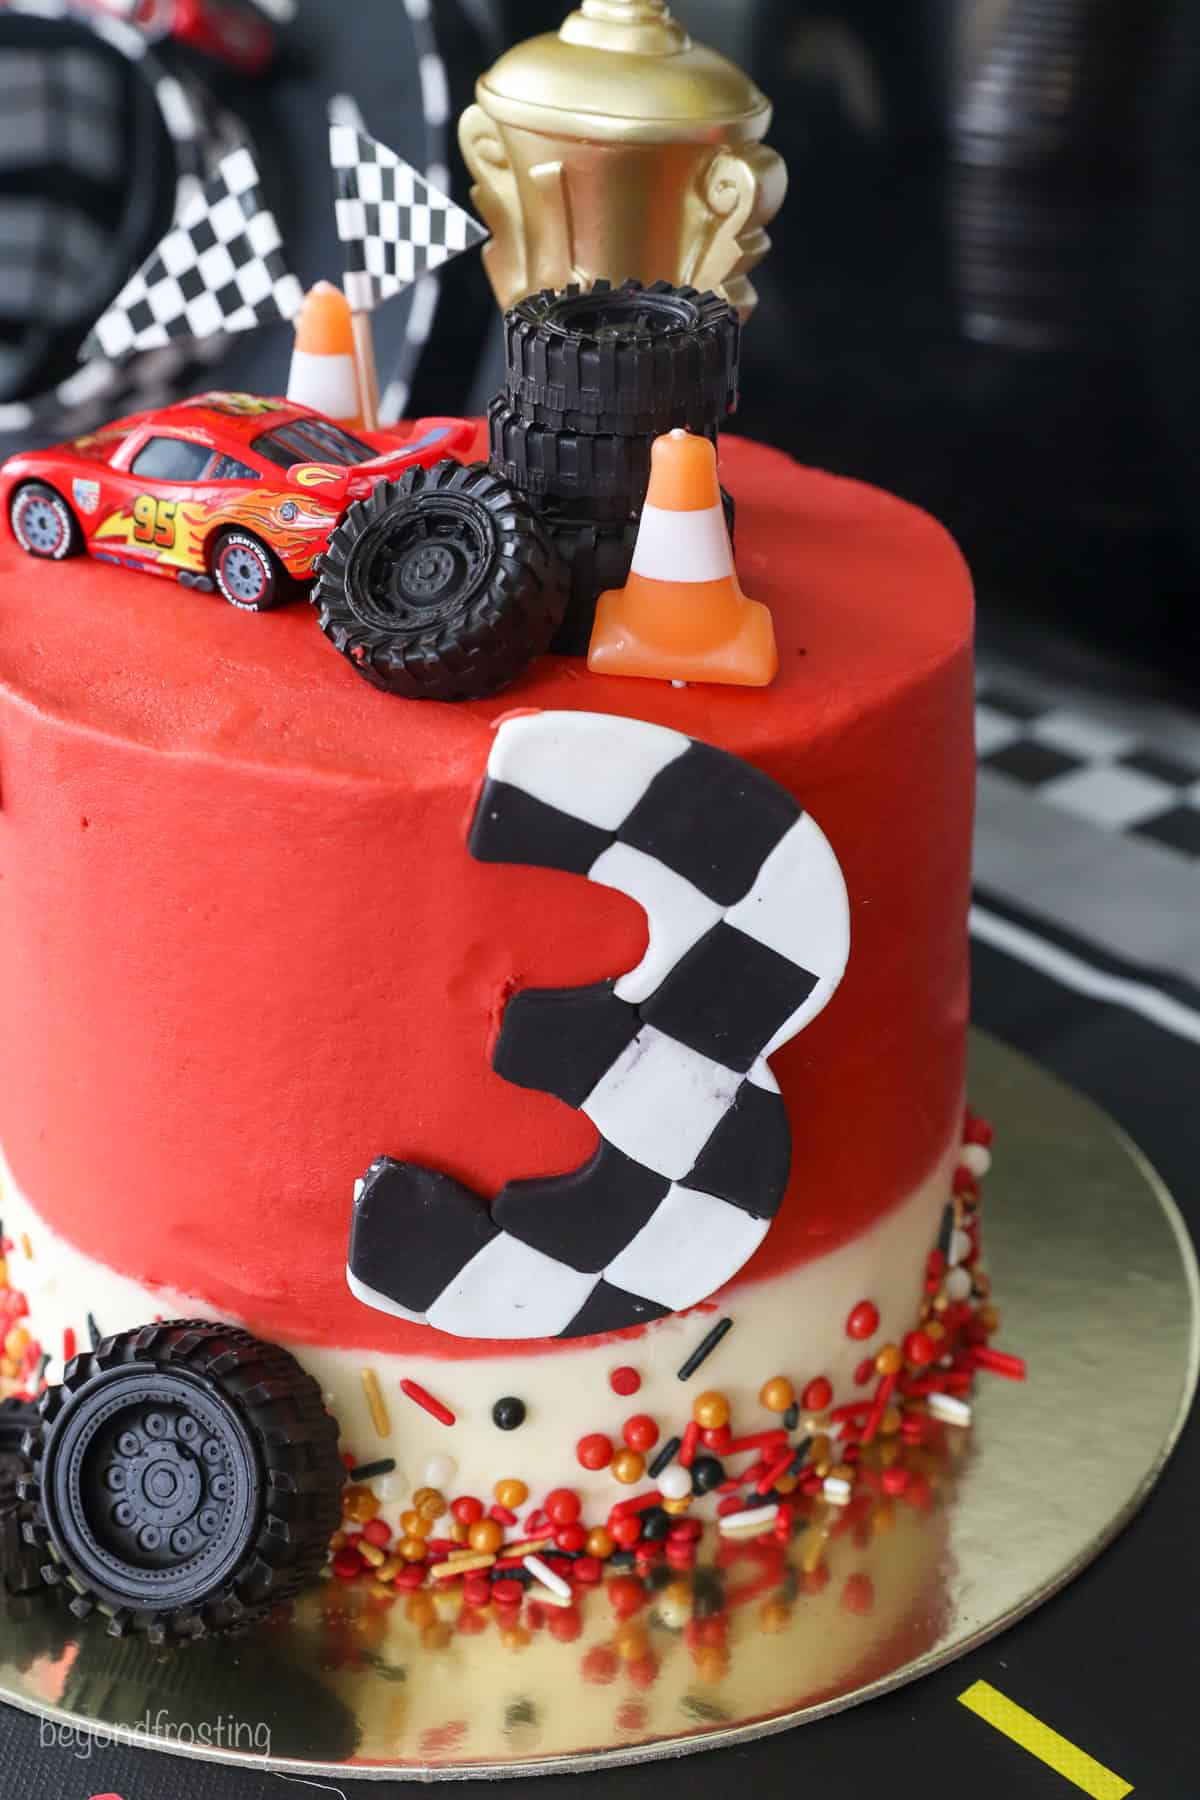
For the number 3, I laid out the black and white pattern, then very gently smoothed it over with a rolling pin so the squares would stick together. Afterward, I cut out the number, gently removed the cookie cutter, and left the “3” to lie flat overnight until it was dry.
Since the fondant will wilt with time, I recommend placing the number on the finished cake right before serving. Again, you can use buttercream or piping gel to help it stick.
Edible Chocolate Tires
The tires you see on the cake are actually edible! These are the same homemade chocolate tires I used for my Monster Jam Gravedigger Cake and Hot Wheels Cake.
I use these tire molds and fill them with leftover fondant or melted chocolate. If using chocolate, I recommend black candy melts or Ghirardelli Chocolate Wafers. See my separate tutorial on melting chocolate.
Chocolate wafers will be brown. To color the chocolate black, you’ll want to use oil-based black food coloring that’s specifically made for coloring chocolate. Liquid-based food dyes will not work.
Cars Birthday Party Décor
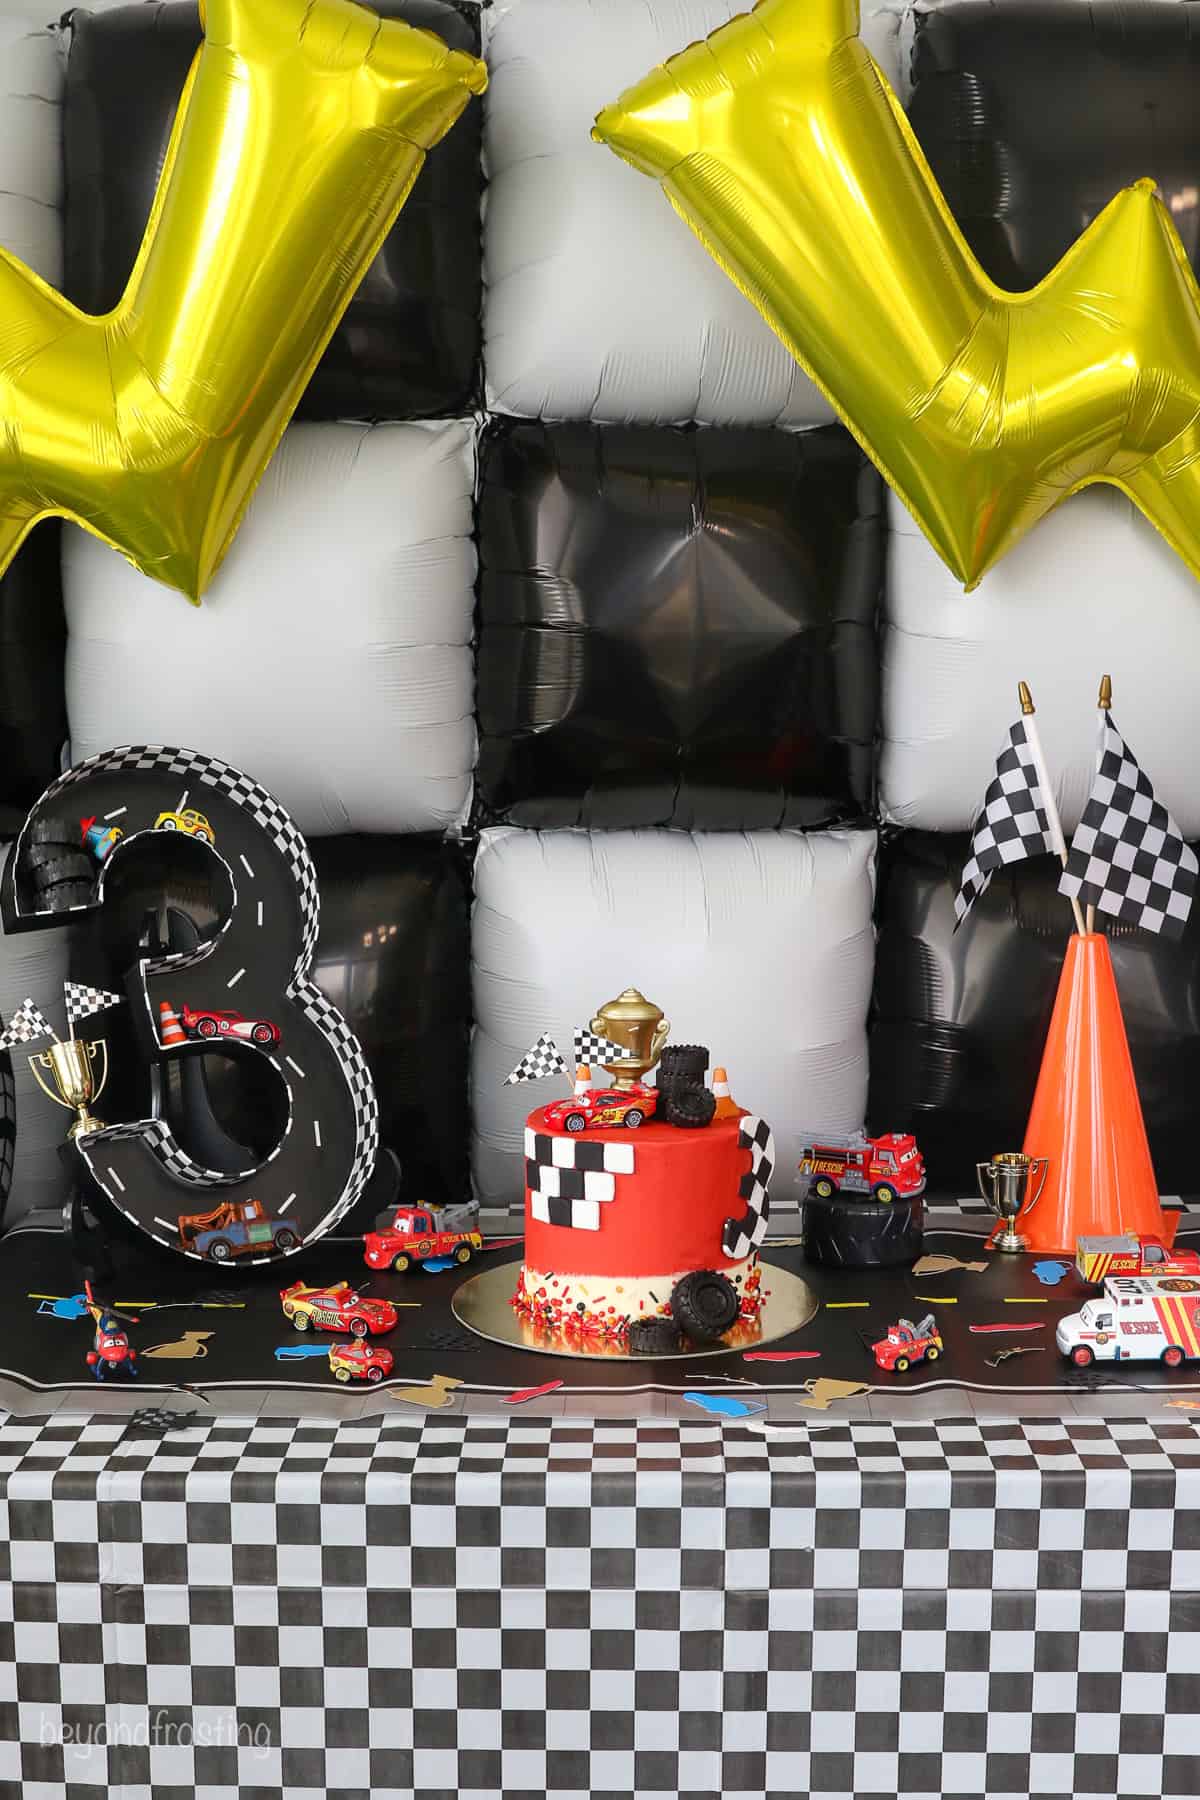
All of my party décor, including decorations, tableware, and cake decorating supplies, was either homemade or purchased from Amazon, Michaels, Target, or Hobby Lobby. You can view the items in my Amazon Store Front or shop the rest here.
Can I Make This Cake Ahead?
Yes! You can easily get a head start on the components and break up the steps over a couple of days. If I made this cake ahead, I’d bake the cakes and prepare the frosting the day before (since the red frosting also deepens in color as it sits). I’d also make the chocolate tires, cut out the white and black fondant squares, and store everything airtight 1-2 days in advance until it was time to decorate.
How to Store the Decorated Cake
- Store at room temperature for 1-2 days. Store the finished cake in a cake carrier. Another option is to use toothpicks to hold a sheet of plastic wrap away from the frosting and cover the cake that way. Remove any plastic decorations before storage. I only recommend storing frosted cakes in the fridge if you live somewhere especially warm or humid.
More Cake Decorating Tutorials
Lightning McQueen Cake
- Prep Time: 60 minutes
- Cook Time: 25 minutes
- Total Time: 1 hour 25 minutes
- Yield: 12-15 slices
- Category: Cake
- Method: Baking
- Cuisine: American
Description
With racing-red frosting and just a little fondant, this Lightning McQueen cake is perfect for a kids’ Cars birthday party! From the cake to the buttercream and decorations, here’s how to make it, step by step.
Ingredients
For the Cake
- 1 ½ cups (285g) granulated sugar
- ½ cup (118 ml) vegetable oil
- 3 large eggs, at room temperature
- 1 tablespoon (15 ml) pure vanilla extract
- ½ cup (120g) full-fat sour cream, at room temperature
- 2 cups (280g) all-purpose flour, sifted
- ½ cup (40 g) cocoa powder, sifted
- 1 tablespoon (5g) espresso powder (optional)
- 2 ½ teaspoons (9 g) baking powder
- ½ teaspoon (2 g) baking soda
- 1 teaspoon (5 g) salt
- 1 ¼ cup (296 ml) hot brewed coffee
For the Buttercream
- 2 cups (453g) unsalted butter, cold
- 7–8 cups (910-1041g) powdered sugar
- 1 tablespoon (15ml) pure vanilla extract
- 1–3 tablespoons (15-44ml) heavy whipping cream (or milk)
- 1/8 teaspoon salt
- Red gel colors
For the Decorations
- 4 ounces White and black fondant
Instructions
For the Cake
- Preheat the oven to 350°F. Prepare three 6-inch round baking pans, line the bottom with parchment paper, and grease the sides.
- In a large mixing bowl, combine the sugar, vegetable oil, eggs, and vanilla extract. Beat on medium speed until well incorporated. Next, mix in the sour cream and beat until well combined.
- In a separate bowl, sift together the dry ingredients. To the batter, alternate adding half the dry ingredients followed by half of the coffee, and mix just until the flour starts to incorporate. Repeat with the remaining ingredients. Use a spatula to scrape down the sides of the bowl and stir the batter from the bottom to the top to ensure it’s well mixed.
- Divide the batter evenly between the three pans, about 1 2/3 cups of batter per pan. Bake at 350°F for 25-32 minutes. Test the cake for doneness by inserting a toothpick into the center of the cake. If the toothpick comes out clean, the cake is done. Remove from the oven and allow to cool completely.
For the Buttercream
- Cut the butter into pieces. Using the paddle attachment, whip the butter for 5-7 minutes, scraping down the bowl occasionally. Beat until the butter is whipped to a soft and spreadable consistency.
- Alternate adding 3 cups of powdered sugar at a time with the liquid ingredients: vanilla extract & heavy cream. Add the salt. Ensure the powdered sugar is well combined, then whip for 1-2 minutes before adding the next cups of powdered sugar.
- Once all the powdered sugar has been added, increase the speed to medium-high and beat for another 2-3 minutes to whip additional air into the frosting. Then turn the mixer down to the lowest speed and beat for about 2-3 minutes, which helps eliminate some of the air bubbles.
To Assemble
- Use a cake leveler to cut the domes off the top of the cake so all 3 layers are even and flat. Place a dollop of frosting on a cake board and place the bottom layer of cake on top of that.
- The middle layers of the cake are frosted with the white buttercream (not colored). Using 1 cup of frosting between each layer, spread it evenly with an offset spatula. Add the second cake layer and add the remaining buttercream. Place the third layer of cake on top.
- Next, add a crumb coat to the entire cake. First, use an offset spatula to press any excess buttercream onto the edges of the cake. Next, fill a large piping bag and cut off about 1 inch from the bottom. Pipe a thin layer of frosting along the outside edge of the cake, filling in additional gaps between the layers, and a thin layer of buttercream on top of the cake. Then, use an offset spatula or icing scraper to wipe away the excess frosting, leaving just enough to coat the outside of the cake. Do not mix the crumb-coating frosting back into the bowl if it has cake debris in it. Refrigerate the cake for 15-30 minutes until the outside layer is chilled.
To Decorate
- Prepare the black and white fondant squares by rolling out each color to a thin but even thickness, but not less than 1/8” thick. Use a square cookie cutter (mine was 5/8” wide) and cut the squares out, about 2 dozen of each color. Set aside or place in a single layer in a flat, airtight container to be used later.
- Fill a large piping bag with 2 cups of white buttercream, and cut the tip of the piping bag off about 1/2 “ up from the bottom tip. Starting at the bottom edge of the cake, evenly pipe 3 rows of white buttercream. Next, use an icing scraper to smooth out the frosting. First, run it under very hot water and dry it thoroughly.
- Lightly press the scraper up against the side of the cake at a 90-degree angle, rotate the cake in a circle, applying even pressure on the scraper. Repeat these steps until the buttercream is smooth.
- Dye the remaining buttercream red using a Super Red gel until it reaches the desired color. See the note section for additional tips for dying buttercream red. Fill a large piping bag half full. First, add a thin layer of red buttercream to the top of the cake and smooth. Use the remaining buttercream to pipe around the outside edge of the cake, working your way from the edge of the white icing up to the top of the cake. Lightly press the scraper up against the red buttercream on the side of the cake at a 90-degree angle, rotate the cake in a circle, applying even pressure on the scraper.
- Once it’s mostly smoothed, you can scrape the entire cake as needed. Heat the scraper under very hot water and dry it thoroughly. Lightly press the scraper up against the side of the cake at a 90-degree angle and smooth.
- Press sprinkles into the white buttercream.
- Next, place the fondant squares along the top edge, alternating black and white. If you find they are not sticking, use a toothpick to gently rough up the buttercream so the fondant can stick to it, or add a touch of buttercream to the back of the fondant square.
Notes
Tips for Red Buttercream:
- To make the red a bit darker, you can add a touch of black gel icing. Stick a toothpick into the black icing color, and then dot that into the red buttercream, mix to incorporate and repeat as needed (do not stick the toothpick back into the gel icing container; get a new one).
- Adding a drop of purple or violet gel color can also help to deepen the red color and shift it to be more crimson. Work slowly, as adding too much at a time may shift the buttercream to a color you don’t like.
Storage:
- Store the unfrosted cake layers tightly wrapped for up to 2 days. Keep the finished cake covered airtight in a cake carrier. Remove any plastic decorations before storage.
- Leftover buttercream can be stored in the refridgerator for 7 days or in the freezer for up to 2 months in an airtight container.
Party Decor
- You can shop cake items and party decor on my Amazon Store Front or shop the decor here.
- For the sprinkles, I combined 2 packages of “Sarah’s Bakeshop” Sprinkles found at Walmart. One package is red, the other is black, white, and gold, which may be discontinued as it’s not on their website.
Nutrition
- Serving Size: 1 Slice
- Calories: 850
- Sugar: 94.2 g
- Sodium: 300.8 mg
- Fat: 43.7 g
- Carbohydrates: 114.6 g
- Fiber: 1.7 g
- Protein: 5 g
- Cholesterol: 134.2 mg