These adorable Mickey and Minnie Mouse cupcakes are such a fun and easy decorating idea. Make Disney-themed cupcakes with your favorite homemade cupcake recipe and just a few basic pantry items. They’re perfect for kids’ parties and birthdays!

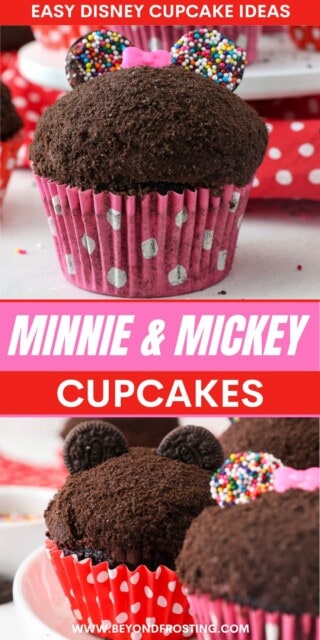
The Cutest (and Easiest!) Disney Cupcake Idea
Oh boy, and hot diggity dog. These Mickey and Minnie Mouse-themed cupcakes were SO fun to make. If your kiddos are Disney-obsessed, look no further for the ultimate birthday cupcakes!
These are soft, chocolatey cupcakes frosted with a thick layer of fudgy frosting, dunked in Oreo crumbs, and decked out with adorable mouse ears. It’s a simple decorating technique that doesn’t require any fancy tools or a major time commitment.
When I made these for my son’s third birthday, he requested a Mickey and Minnie-themed birthday. At the time, I was about 6 weeks postpartum with my second baby, and surely didn’t have the time to pull off my normal birthday extravaganza, but I somehow managed to pull off these cupcakes, along with some Mickey Oreo Cookie Lollipops. With the help of my husband and mom to watch the boys, I worked for most of the day to make it all happen. The cupcakes were by far the easiest part.
Why You Should Make Mickey and Minnie Mouse Cupcakes
- Beginner-friendly. If you’re new to decorating cupcakes, this tutorial is a great place to start. There are no piping bags or piping tips, here.
- Works with any type of cupcake. If you can bake a batch of cupcakes, you can make these, even if that means using cake mix.
- Easy birthday dessert. I love serving cupcakes for a little one’s birthday celebration. It’s quicker and easier for kids, no utensils are required.
- Make-ahead friendly. Bake your cupcakes the day before to break up the process a bit.

What You’ll Need
Here are some notes on what I used to create these Mickey and Minnie Mouse cupcakes. You’ll find the printable recipes and further details in the recipe card below the post.
- Cupcakes – I use my classic chocolate cupcakes for this tutorial (full recipe provided in the recipe card). This decorating technique works with any cupcake recipe, though, so make a batch of your favorite flavor.
- Frosting – Nothing pairs better with chocolate cupcakes than chocolate buttercream frosting (also included in the recipe card). Like the cupcakes, you can choose any frosting you prefer.
- Oreos – You’ll need regular-sized Oreo cookies, ground into a fine crumb for the topping, and Mini Oreos for decorating. Scrape the filling out both of the Oreos beforehand.
- Sprinkles – I found these adorable bow candy sprinkles from Michael’s that work perfectly for my Minnie Mouse cupcakes! I also like to coat Minnie’s ears with rainbow nonpareils.

How to Make Mickey and Minnie Mouse Cupcakes
First things first, you’ll want to bake a batch of cupcakes and prepare the frosting according to the directions. I’ve included the full recipes in the recipe card, or you can choose your own favorite homemade cupcakes and frosting.
I’ll sometimes prepare these chocolate cupcakes up to one day in advance and keep them in an airtight container on the counter. This way, they’re ready to decorate.
The Perfect Cupcake Liners
I found these super-cute cupcake liners with polka dots that suit these Minnie and Mickey cupcakes perfectly! These are a go-to for me, they are grease-free and hold the color after baking. Only fill each liner about ⅔ of the way full to avoid any overflow.
Mickey Mouse Cupcakes
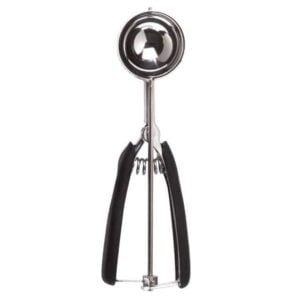
These Mickey and Minnie cupcakes are great for beginner bakers and decorators. I love this technique because I don’t need to bother with piping bags. I use a large scoop to portion the frosting onto each cupcake before dipping the tops in cookie crumbs. Follow these easy steps:
- Make the Oreo crumbs. First, scrape the filling from the regular-sized Oreos and pulse the cookies in a food processor or blender. Transfer the crumbs to a bowl.
- Add the frosting. Top your cupcake with a large scoop of frosting (a cookie scoop works great here). Smooth the frosting into a rough dome shape.
- Dip and Roll! Dip the frosted top into the Oreo crumbs, rolling it from side to side to coat the entire top.
- Add the ears. Remove the filling from a Mini Oreo. Place one of the cookies on each side of the cupcake to make Mickey’s iconic ears. Voila!


Minnie Mouse Cupcakes
To decorate your Minnie Mouse cupcakes, follow the same directions as above right up until you’re ready to add the ears. Instead, once you’ve removed the filling from a Mini Oreo, do the following:
- Add sprinkles. Spread a little frosting over one side of each chocolate cookie. Dip the frosted side into a small bowl of rainbow nonpareils.
- Finish the cupcakes. Press your sprinkle-covered cookies into the frosted cupcake, one on each side (same as you did for Mickey). Top each cupcake with a pink candy bow. Sometimes it can be helpful to use a knife to pierce the frosting before adding the ears.


Easy Variations


Make this easy design with any variety of cupcakes or frosting! Instead of chocolate frosting, make a batch of classic vanilla frosting and color it red (see how to color buttercream), and use red sprinkles or sanding sugar in place of Oreo crumbs. Or, try any of the cupcake ideas or frosting flavors you see here. The sky’s the limit!

Make-Ahead and Storage
- To Store. I’ll keep the frosted cupcakes in an airtight container on the counter for a couple of days. The only time that I’d recommend keeping these cupcakes in the fridge is if your kitchen is especially warm. In this case, take the cupcakes out to let them rest at room temperature before serving.
- Freeze. The unfrosted cupcakes can be stored airtight and frozen for up to 1 months. Defrost the cupcakes completely before frosting and decorating.
Storing Leftover Frosting
If you’re using the frosting the same day, or even the next day, you can store it airtight at room temperature and re-whip it just before you frost the cupcakes.
Most buttercream frosting can be prepared in advance and kept in the fridge for up to 1 week or freezer for 2 months. Make sure to store it in an airtight container. Let the frosting come back to room temperature and give it a fresh whip before you use it.

More Cake Decorating Ideas
Print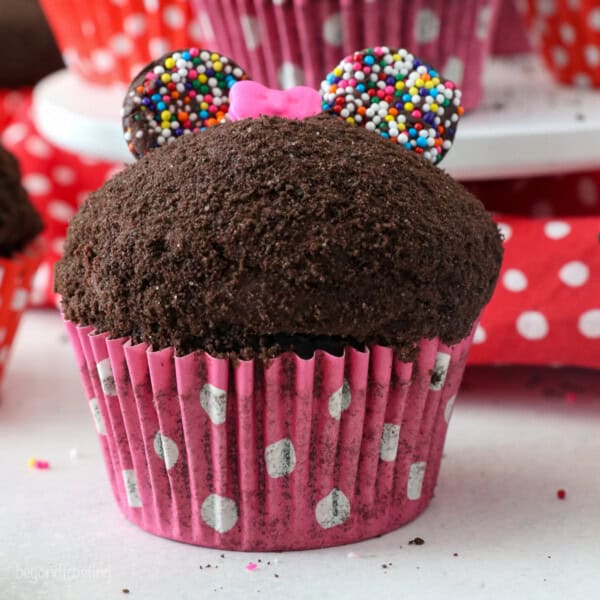
Mickey and Minnie Mouse Cupcakes
- Prep Time: 30 minutes
- Cook Time: 15 minutes
- Total Time: 45 minutes
- Yield: 24 cupcakes
- Category: Cupcakes
- Method: Oven
- Cuisine: American
Description
These Disney-themed Mickey and Minnie Mouse cupcakes are such a fun and EASY decorating idea. Use your favorite cupcakes and frosting. They’re perfect for kids’ parties and birthdays!
Ingredients
For the Cupcakes
- 1 ½ cups (285g) granulated sugar
- ½ cup (118 ml) vegetable oil
- 3 large eggs, at room temperature
- 1 tablespoon (15 ml) pure vanilla extract
- ½ cup (118 ml) sour cream, at room temperature
- 2 cups (280g) all-purpose flour, sifted
- ½ cup (40 g) cocoa powder, sifted
- 2 ½ teaspoons (9 g) baking powder
- ½ teaspoon (2 g) baking soda
- 1 teaspoon (5 g) salt
- 1 ¼ cup (296 ml) hot brewed coffee
For the Frosting
- 1 1/2 cups (345g) unsalted butter, cold
- 1 cup (80g) cocoa powder, sifted
- 5 cups (650g) powdered sugar
- 1 tablespoon (15ml) pure vanilla extract
- 1/4 cup (59ml) heavy whipping cream (or milk)
Decorations
- 10–12 Oreos (regular-sized), filling removed.
- Mini Oreos (3.5oz size of Snak-Sake 8oz)
- Rainbow Nonpareils (optional)
- Bow Sprinkles
Instructions
For the Cupcakes
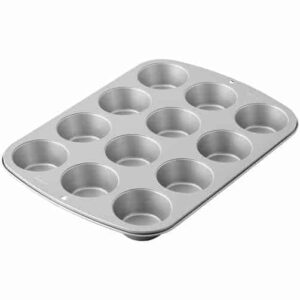
- Preheat the oven to 350°F. Line a cupcake pan with cupcake liners.
- Combine the sugar, vegetable oil, eggs, and vanilla extract in a large mixing bowl. Beat on medium speed until the eggs and oil are well incorporated and the batter is lighter in color. Next mix in the sour cream and beat until well combined.
- In a separate bowl, sift together the dry ingredients. Add half the dry ingredients to the wet ingredients, followed by half of the coffee, and mix until the flour is just incorporated at a low speed. Then add the remaining dry ingredients and coffee. Beat until all of the ingredients are well combined. Use a spatula to scrape down the sides of the bowl and stir the batter from the bottom to the top to ensure it’s well mixed.
- Divide the batter evenly using a large cookie scoop, filling each liner 2/3 full. Bake at 350°F for 14-16 minutes. Test the cupcakes for doneness by inserting a toothpick into the center of the cupcake. If the toothpick comes out clean, the cupcakes are done. Cool Completely.
For the Frosting
- Cut butter into pieces, 1 tablespoon size. Whip butter for 5-7 minutes using the paddle attachment, scraping down the bowl occasionally. Beat until the butter looks light in color and has more volume.
- Sift the cocoa powder into the mixing bowl. Turn the mixer on slow speed and beat until cocoa powder is incorporated.
- Add 2 cups powdered sugar and the vanilla extract and mix on low speed until incorporated. Beat for an additional 2 minutes.
- Continue adding the additional powdered sugar, 2 cups at a time, alternating with the heavy whipping cream, and beat on low speed until sugar is incorporated. Increase speed to medium-high and beat for 2 minutes before adding more powdered sugar.
- After all the powdered sugar has been added, increase the speed to medium-high and beat for another 2 minutes to whip additional air into the frosting.
To Decorate
- Remove the filling from Oreos and grind them into a fine crumb using a food processor. Place in a bowl.
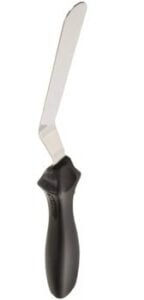
- Place a large scoop of frosting on top of the cupcake and use a flat edge spatula to swirl it into a ball then immediately roll the cupcake in Oreo crumbs to coat the top.
- Next, remove the filling from the mini Oreos and place one on each side.
- To make the Minnie ears, spread a very thin layer of frosting over one side of the cookie and dip into a shallow bowl of Nonpareils. Place one on each side. Add a pink bow sprinkle in the middle.
Notes
Storing:
- Store finished cupcakes at room temperature in an airtight container for 2-3 days, unless it’s hot or humid, then I recommend refrigerating for storing, and serving at room temperature. Note the Oreo ears will soften once placed in the frosting. So if you are preparing in advance and plan to store in the refrigerator, maybe hold off adding the Oreo ears.
- Frosting can be made up 7 days in advance and kept in the refrigerator in an airtight container, or frozen for up to 2 months, Allow the frosting to come to room temperature and re-whip with a mixer before using. If you plan to make the frosting only a day ahead of time, it can be kept at room temperature in an airtight container. Rewhip before using.
Substitutions:
- Sour cream: use plain or Greek yogurt
- Brewed coffee: If you’re concerned about caffeine, try decaf coffee, otherwise I recommend milk.
Alternative flavors:
Nutrition
- Serving Size: 1 cupcake
- Calories: 367
- Sugar: 37.3 g
- Sodium: 140.7 mg
- Fat: 19 g
- Carbohydrates: 49.6 g
- Fiber: 1.9 g
- Protein: 3.4 g
- Cholesterol: 58.2 mg


