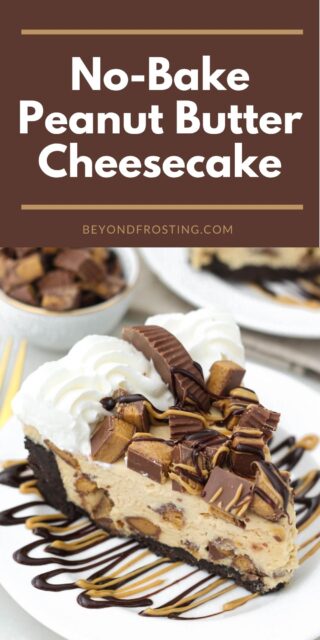
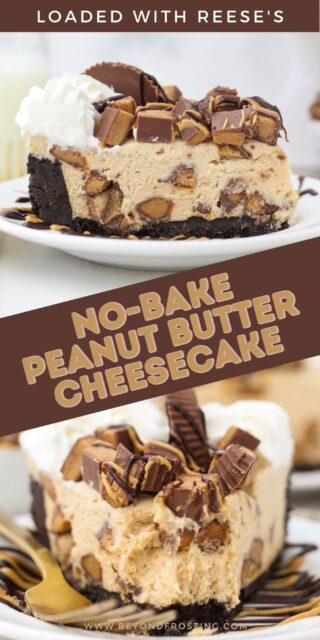
This no-bake peanut butter cheesecake is the ultimate dessert for Reese’s lovers! It’s an ultra-rich and creamy peanut butter cheesecake recipe loaded with chopped Reese’s peanut butter cups in a crunchy Oreo crust.
If you love decadent desserts like this peanut butter cup cheesecake, check out this no-bake peanut butter marshmallow pie and my baked Turtle cheesecake!

Easy Peanut Butter Cup Cheesecake (No Bake Recipe!)
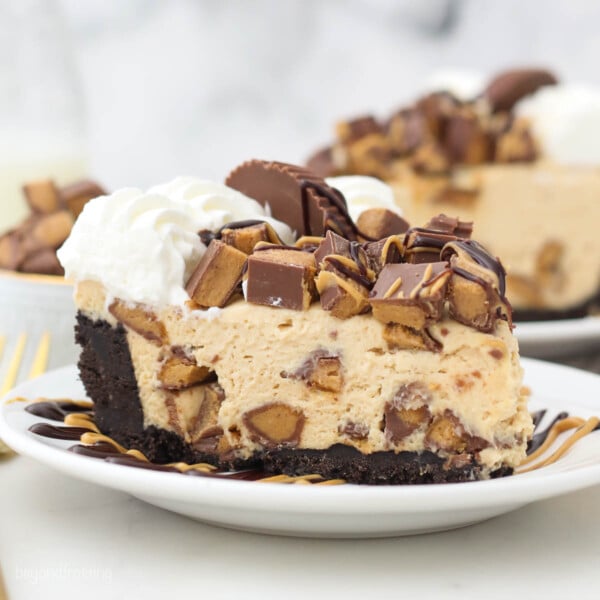
This peanut butter cup cheesecake is one of my favorite variations on my classic no-bake cheesecake recipe. It starts with a chocolatey Oreo crust filled with fluffy no-bake peanut butter cheesecake that’s loaded with chopped Reese’s peanut butter cups. The whole thing gets topped off with homemade whipped cream, drizzled with melted peanut butter and fudge, and piled with more Reese’s. I can’t get enough! I originally made this peanut butter cheesecake in 2014, and I’ve tweaked the recipe over time so that it’s better than ever.
Why I Love This No Bake Peanut Butter Cheesecake
- Extra tangy. I’ve upped the amount of cream cheese and peanut butter in the filling and added a little sugar for a delicious sweet-tangy contrast.
- 100% homemade. I use homemade whipped cream in the no-bake cheesecake filling, for a rich and creamy peanut butter cheesecake that’s made completely from scratch. I originally made the filling with Cool Whip, however, and it still works great in a pinch!
- Loaded with toppings. I top this peanut butter cup cheesecake with more whipped cream, fudge sauce, and melted peanut butter. Plus more peanut butter cups, because, why not? There are so many ways to make this recipe your own, though. So feel free to get creative.
- Versatile. Peanut butter cup cheesecake is great for birthdays (especially for the peanut butter-obsessed!) and holidays. I love making it for our Thanksgiving dessert table or as a Christmas dessert. This no-bake cheesecake also freezes well, so it’s a perfect easy dessert to make ahead of time.

Ingredient Notes
There are a handful of key ingredients in a no-bake cheesecake that stays firm and creamy once set. Below are some notes on the important ingredients in this recipe. Scroll down to the printable recipe card below the post for a complete list along with recipe details.
- Crust – I use my easy Oreo cookie crust made from melted butter and regular Oreos (not Double Stuf, as there’s too much filling). You could substitute the Oreos with another chocolate cookie, or make this peanut butter cheesecake with a graham cracker crust instead.
- Heavy Whipping Cream – Make sure to use full-fat whipping cream for a thick and silky cheesecake filling.
- Powdered Sugar – Also called confectioner’s sugar or icing sugar.
- Cream Cheese – You’ll want to use the kind that comes in bricks. Like the whipped cream, the cream cheese should be full-fat. Take the cream cheese out of the fridge ahead of time so that it softens to room temperature.
- Peanut Butter – Make sure to use shelf-stable creamy peanut butter, like Jif or Skippy, and not natural peanut butter. Natural peanut butter is too oily and can cause the filling to split.
- Peanut Butter Cups – I use Reese’s peanut butter cups, but you can use your favorite store brand, too. Chop the peanut butter cups into small, dime-sized pieces.

How to Make a No Bake Peanut Butter Cheesecake
With your ingredients prepped and ready, follow the steps below to make this easy peanut butter cup cheesecake from scratch. You’ll find the printable instructions in the recipe card.
First, Grease and Line the Pan
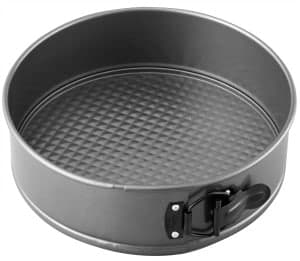
Before getting started on the peanut butter cheesecake filling, I like to prepare the pan. I recommend lining the bottom of a springform pan with parchment paper to make it easy to remove the cheesecake from the pan. Afterward, grease the edges with cooking spray. Another option is to use cake collars to get those perfect, smooth sides.
- Make the crust. First, use a food processor to grind the Oreo cookies into a fine crumb, creme filling and all. Combine the crumbs with melted butter. Then, press the crust into the bottom and up the sides of a greased and lined 9″ springform pan. Use a measuring cup to help pack the crust in tightly. Refrigerate the crust while you prepare the filling.
- Prepare the whipped cream. Meanwhile, chill your stand mixer’s mixing bowl and whisk attachment in the freezer for 5-10 minutes. Afterward, make a batch of homemade whipped cream for the filling. If you’re short on time, you can use a tub of Cool Whip instead.


- Make the no-bake filling. In a new bowl, beat the cream cheese until it’s free of lumps. Next, beat in the peanut butter, followed by sugar and a dash of vanilla. Fold the prepared whipped cream and chopped peanut butter cups into the peanut butter mixture by hand.


- Assemble and chill. Lastly, spread the cheesecake filling into the prepared Oreo crust. Cover the cheesecake and pop it into the fridge to chill for 4 hours.


- Add toppings and serve! When you’re ready to serve, make a fresh batch of whipped cream and melt peanut butter and hot fudge in the microwave for the garnish. Pipe swirls of whipped cream around the borders of the cheesecake, garnish with peanut butter cups, and then drizzle the peanut butter and fudge over top.

Recipe Tips
- Use the right cream cheese. The best cream cheese for cheesecakes is full-fat, good-quality bricks of cream cheese. Do not use the spreadable cream cheese that comes in tubs (like you’d use for bagels). Bring the cream cheese to room temperature so that it mixes smoothly with the other filling ingredients.
- Use creamy peanut butter. As mentioned in the Ingredient Notes, the best peanut butter choice for this no-bake cheesecake is creamy, commercial peanut butter where the oils are fully incorporated. Natural peanut butter won’t work here.
- Keep the crust intact. Since we aren’t baking the Oreo crust, make sure to get all the crumbs well coated with butter, and press the crust firmly into the springform pan. Use the bottom of a glass or measuring cup to really compact the crust so it holds its shape. Remember to grease and line the pan first so that the crust doesn’t crumble when you go to remove the cheesecake.
- If the no-bake cheesecake filling seems a bit loose, even after hours in the fridge, try placing the cheesecake into the freezer for 30 minutes before you serve it.
- Add the toppings right before serving. I recommend leaving off any whipped cream or garnishes until you’re ready to serve your no-bake cheesecake. For the best results, remove the cheesecake from the springform pan before decorating.
- More toppings. Drizzle this no-bake peanut butter cheesecake with pourable chocolate ganache or salted caramel sauce. You can also add sprinkles, chocolate chips, or peanut butter chips.

How to Store
- Refrigerate. I recommend storing this no-bake peanut butter cheesecake without toppings whenever possible. Keep it covered and airtight in the fridge for 3-4 days.
- Freeze. Allow the cheesecake to set completely in the refrigerator, then freeze it in the springform pan for a couple of hours. Once frozen, remove the pan, double-wrap the cheesecake in plastic wrap, and then wrap the cheesecake in aluminum foil to prevent freezer burn. Freeze for up to 2 months. To thaw, unwrap the cheesecake and transfer it to an airtight container. Thaw overnight in the fridge and add any toppings before serving.
More No Bake Cheesecake Recipes
No Bake Peanut Butter Cup Cheesecake
- Prep Time: 45 minutes
- Chill time: 4 hours
- Total Time: 4 hours 45 minutes
- Yield: 10 slices
- Category: Cheesecake
- Method: No-Bake
- Cuisine: American
Description
This no bake peanut butter cheesecake is loaded with Reese’s peanut butter cups in an ultra-rich and creamy peanut butter cheesecake filling. It’s the ultimate dessert for peanut butter lovers!
Ingredients
For the Crust
- 1 package (14.3oz) Oreo cookies
- 1/2 cup (113g) unsalted butter, melted
For the Filling
- 1 1/4 cups (295ml) heavy whipping cream
- 1/2 cup (65g) powdered sugar
- 16 ounces (452g) full-fat cream cheese, at room temperature
- 1 cup (180g) creamy peanut butter, at room temperature
- 1/4 cup (48g) granulated sugar
- 1 tablespoon (15ml) pure vanilla extract
- 1 package (10oz) snack size Reese’s Peanut Butter Cups, chopped
For the Toppings (Optional)
- 3/4 cup (177ml) heavy whipping cream
- 2–3 (16-24g) tablespoons powdered sugar
- 8 snack size Reese’s Peanut Butter Cups, chopped
- 2 tablespoons (22g) creamy peanut butter
- 2 tablespoons (43g) hot fudge sauce
Instructions
For the Crust
- For the crust: Prepare a 9-inch springform pan by lightly greasing the edges of the pan with cooking spray, and then wiping gently with a paper towel. Line the bottom of the pan with parchment paper.
- Grind the cookies into a fine crumb using a food processor or blender.
- In a small bowl, melt the butter in the microwave for 30 to 45 seconds. Pour the melted butter over the cookie crumbs and stir until the crumbs are well coated.
- Pour the crumbs into your springform pan and press firmly into the bottom and up on the sides to create a thick crust. Refrigerate the crust while you are preparing the filling.
For the Filling
- Place the mixing bowl and whisk attachment in the freezer for 5 to 10 minutes to chill.
- Prepare the whipped cream. Pour the heavy whipping cream into the chilled bowl and use an electric mixer to beat the heavy cream at medium-high speed until the cream starts to thicken. Slowly add the powdered sugar and continue beating at high speed until stiff peaks form. Set the whipped cream aside.
- Beat the softened cream cheese until it’s completely smooth. Then add the peanut butter and mix until well combined.
- Next, add the granulated sugar and vanilla extract and continue beating until smooth.
- Finally, slowly fold in the whipped cream until it’s incorporated, then add the chopped peanut butter cups and continue mixing until well combined. Pour the filling into the prepared crust, spreading evenly. Refrigerate for 3-4 hours minimum.
For the Garnish
- Prepare another batch of whipped cream by placing your bowl in the freezer for 5-10 minutes. Pour the heavy whipping cream into the chilled bowl and use an electric mixer to beat the heavy cream at medium-high speed until soft peaks form. Slowly add the powdered sugar and continue beating at high speed until stiff peaks form. Pipe the borders of the cheesecake with whipped cream using a large open-star piping tip. Finish decorating with chopped peanut butter cups as desired.
- Melt peanut butter in a microwave-safe bowl for 30-60 seconds. Stir until smooth. Drizzle over top of the cheesecake with a spoon.
- Heat hot fudge in the microwave in 30-second increments until melted. Stir until smooth and drizzle over cheesecake.
Notes
- Cool Whip substitution: For the filling, you can swap out the homemade whipped cream for one 8-ounce container of Cool Whip
- You’ll need two 10oz bags of snack-size Reese’s Peanut Butter Cups. One full bag for the filling and the other bag to decorate with if desired.
Nutrition
- Serving Size: 1 slice
- Calories: 841
- Sugar: 41g
- Sodium: 421g
- Fat: 67.4g
- Carbohydrates: 50.9g
- Fiber: 2.6g
- Protein: 14g
- Cholesterol: 125.9g


I made two of these for a large family Thanksgiving. The recipe was easy to follow and they turned out amazing!
Thank you for sharing my recipes with your family! I am SO thrilled you picked this recipe!
So so good and easy! I used the unwrapped mini Reese’s cups. My family LOVED it!! Going to use this base/process to create other cheesecake flavors!
Wonderful! Thank you so much!
I made this recipe for Thanksgiving desert! Our family is a huge Reese’s fan! The recipe was easy to follow and easy to throw together! The cheesecake turned out perfect and it was bigger than I thought it was going to be, which was great cause we ate on it for days!! So glad to have found this recipe!!
Danielle, thank you so much for coming back and sharing your feedback, I really appreciate it! This is a favorite of mine, and I am so happy you found it!
Can this be made in a pie dish instead of baking pan?
Hi Kim, yes you can. If you use a regular pie plate, but I would reduce the crust, you can follow my Oreo crust amounts. If you are using a deep dish pie plate, then you can follow the crust recipe here. The filling will likely be higher than the sides of the pie plate unless you have a deep dish pie plate. But you should have no problem slicing it.
That looks so good I’m making this tonight!!
Yea! I hope you enjoyed it!
Would there be any reason I couldn’t use an already made Oreo pie crust? Thanks.
Nope! But the filling might be a little high in the middle, it will for sure fill the pan and then some, but once it’s set you should have no problem slicing and serving.
Can you leave the finished cheesecake in the refrigerator overnight?
Yes this has to be refrigerated after it’s prepared. It will last for several days in the fridge, cover tightly
I’m not sure how to remove the parchment paper from bottom of the cheesecake after it’s removed from springform pan Does the parchment paper go on bottom of pan and then up the sides? Any chance you could make a video of prepping the pan and then removing the paper from the Bottom. I’m making this for a party but I’m nervous about getting it out of the pan. It looks amazing!
Thank you!
Hi Linda, I followed up with you via email, but this post might be helpful, it has pictures of how I use the parchment paper https://beyondfrosting.com/make-no-bake-crust-springform-pan/
I recently made this recipe for my boyfriend’s birthday and he said it was the best cake anyone has ever made him! It was so easy and delicious and a new dessert staple!
That’s incredible Giovanna, thank you so much!
One of the best things I’ve ever tasted. This is my third time making it now. Delicious and rich but not overly sugary.
HA!! That’s amazing Erin, thank you so much for sharing, this is amazing!
Could I make this the day before and just leave it in the fridge and garnish before serving the next day?
Hi Ally- yes, this can be prepared up to 48 hours in advance and kept in the fridge. I recommend adding the toppings prior to serving.
Do I have to add powdered sugar if I use cool whip?
No, the powdered sugar is used to make the whipped cream, so if you’re replacing it with Cool Whip, you can omit the heavy cream and powdered sugar.
Do I take this out of the pan before decorating?
Yes, as long as the cheesecake is set, I recommend removing the sides before decroating.
Perfect, can’t wait to eat it!!
I made this for a friends Birthday & he was floored, it looked so good. He called yesterday & said it was the BEST ! Wish I could post a picture….
Yess!!!! Thank you Susie! You can send me an email julianne at beyondfrosting dot come
This recipe is AMAZING! It’s so good!! Everyone LOVED it! I read the directions wrong and put less Reese’s than the filling called for, but it still came out amazing! I also used Reese peanut butter (not sure if it’s actually any different than regular peanut butter but jic) def try this recipe!
Sounds amazing to me!
What if you don’t have a Kitchen Aid mixer? Can you use a hand mixer?
Absolutely! Just be sure to beat the softened cream cheese really well!
hi. I’m wondering about your referral to “1 package of Oreo cookies”. could mean many different amounts. depending on the country your from. could you more specific
Hi Marty- It’s 14.3oz thanks for the note, we will update this!
Delicious! My son has requested this for his bday for the past few years. Do you think it would be too salty if I used a pretzel crust instead of the Oreo crust?
HI Rhonda, it sounds delicious! It might be a tad salty, this is already a rich and sweet dessert, so you might enjoy the saltiness
Are these regular size Reese’s or the mini’s?
Regular but either would work
I’d love to make this for my son’s wedding. Timing of making this Wil be tricky! How far in advance can this be made?
Hi Janet, you can make the cheesecake in advance and freeze, then add the toppings before serving. While I am sure it is fine to freeze further in advance, I usually recommend 1 week and then thaw it in the refrigerator 24-48 hours before serving.
Do you crush the oreos with the filling inside too or just the cookies?
The whole Oreo- filling and all.