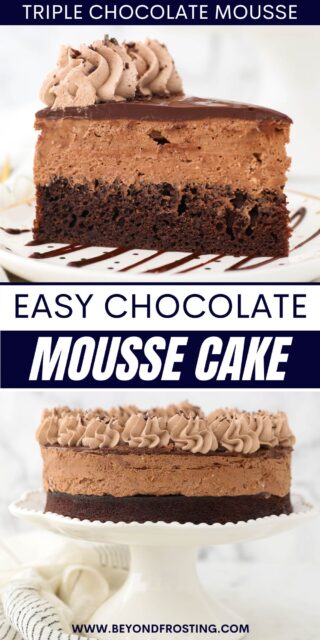
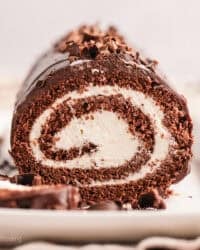
Rich and velvety Chocolate Mousse Cake is an impressive yet oh-so-easy cake recipe that’s sure to wow at the dessert table! It’s a triple threat made from layers of moist chocolate cake, fluffy chocolate mousse, and chocolate ganache, topped with chocolate whipped cream.
Do you love chocolate mousse? Try my other recipes for No-Bake Chocolate Oreo Mousse Cake and Triple Chocolate Brownie Mousse Cake, too!

Smooth and Decadent Chocolate Mousse Cake
I finally combined my best-ever Chocolate Cake with my all-time favorite chocolate mousse recipe, and can I just say: Fireworks!
This easy chocolate mousse cake layers moist chocolate cake with velvety chocolate mousse, that’s then covered with a rich homemade chocolate ganache. But why stop there? I go all out and top this cake with chocolate whipped cream. Bring on ALL the chocolate.
When approaching this recipe, just take it layer by layer. It’s easy to make from start to finish, and it always impresses!

Key Ingredients
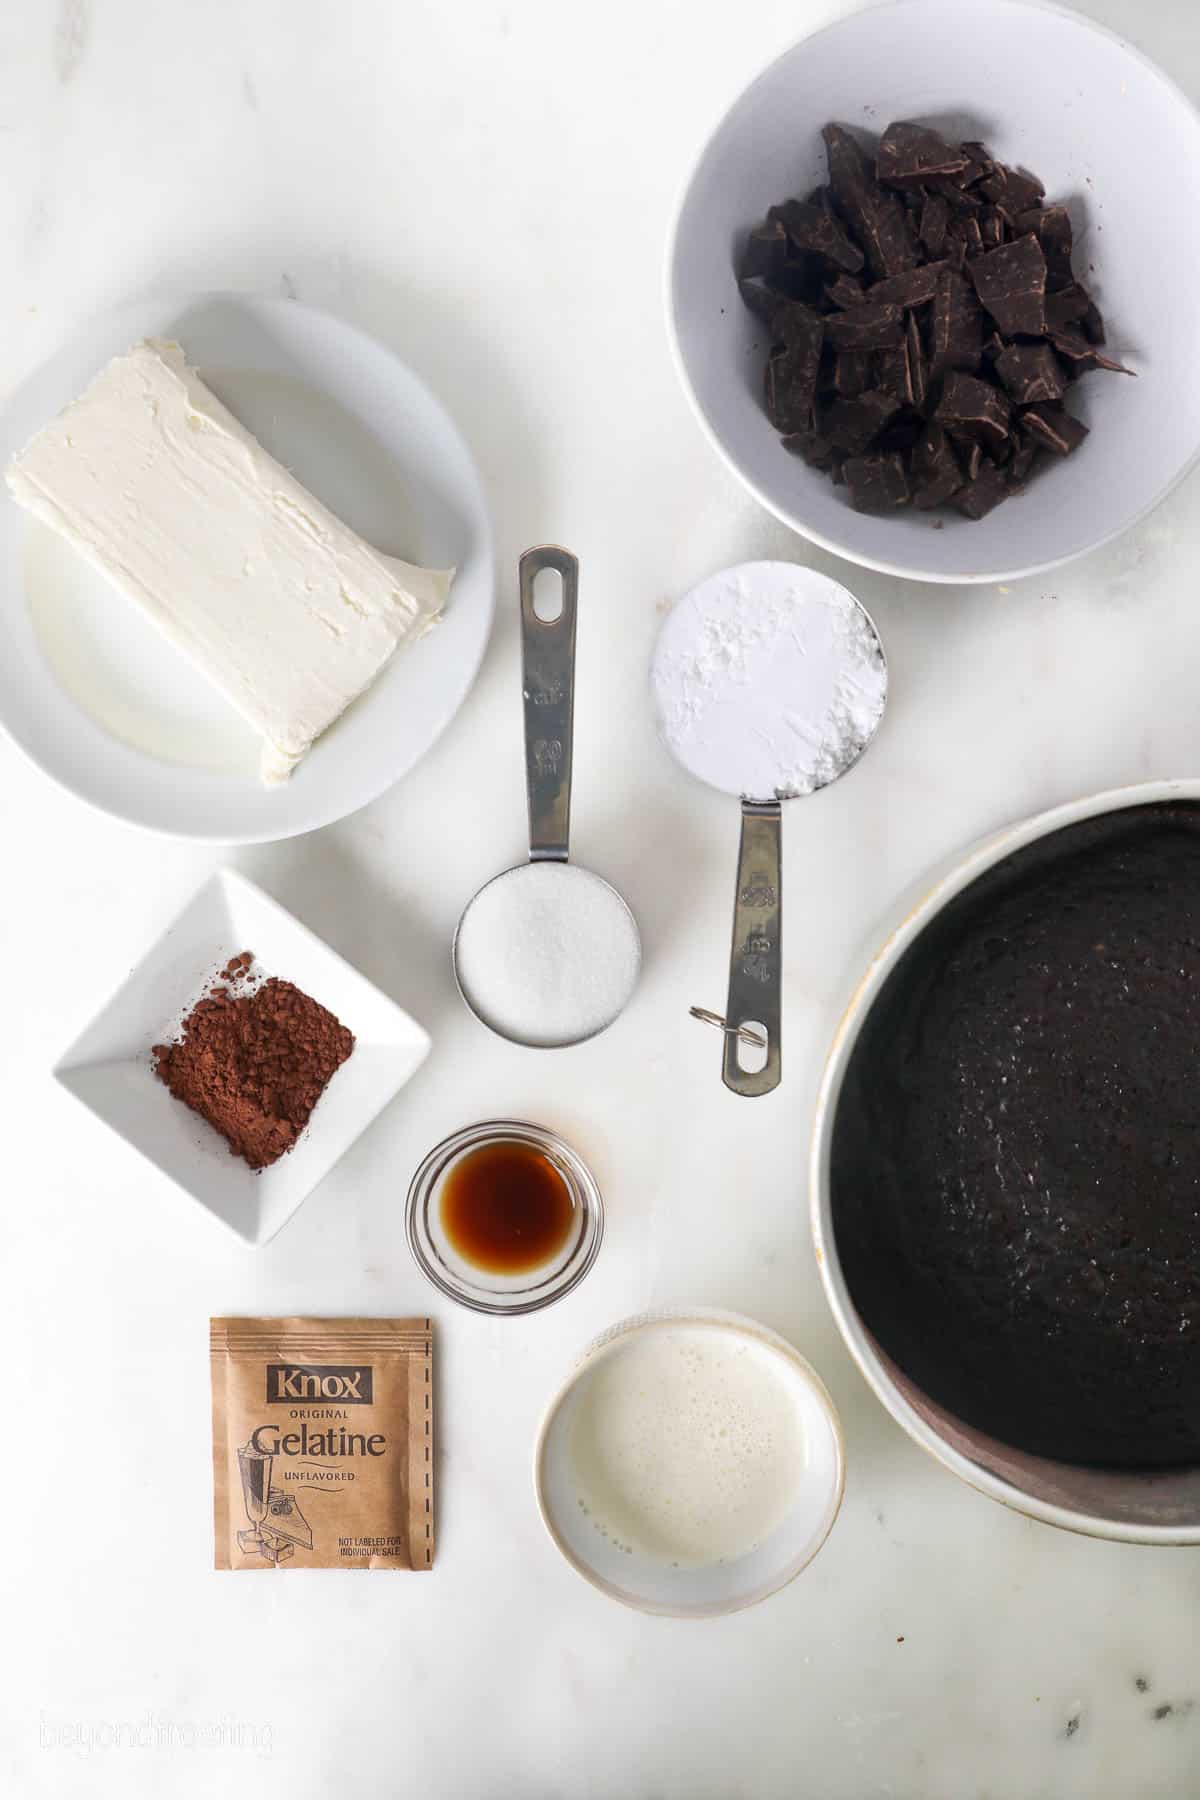
Aside from your usual baking staples (flour, sugar, baking powder, etc.), there are a few ingredients that set this mousse cake apart from other chocolate cakes. Below I’ve summarized the key ingredients, and don’t forget to refer to the recipe card for the full details at the bottom of this post.
For the Cake Layer
- Oil – Using vegetable oil in place of butter in cake recipes is key to a moist and tender cake crumb.
- Sour Cream – My second secret for ultra-moist chocolate cake. If you don’t have sour cream, use plain Greek yogurt instead.
- Cocoa Powder – You’ll need cocoa powder for the cake as well as the chocolate mousse and whipped topping. You can use regular unsweetened cocoa powder, I use Hershey’s Special Dark.
- Coffee – You won’t taste the brewed coffee added to this cake, but it does wonders to enhance the chocolate flavors! If you’d prefer to go without it, use equal parts milk.
For the Chocolate Mousse Layer and Topping
- Gelatin – I bloom powdered gelatin in cold water before adding it to the base of the chocolate mousse. Gelatin helps to stabilize the mousse filling so that it’s smooth and creamy.
- Heavy Cream – You’ll use heavy whipping cream in the mousse, in the ganache, and again when making the whipped topping.
- Chocolate – I recommend using a high-quality dark chocolate bar like Ghirardelli in both the mousse as well as the ganache, rather than chocolate chips. Chocolate bars tend to melt down more smoothly.
- Cream Cheese – I love the subtle tanginess and richness of cream cheese in this mousse. Take the cream cheese out of the fridge ahead of time to soften it.
How to Make Chocolate Mousse Cake
I love love love the chocolate cake recipe that’s the base for this mousse cake. It always makes fabulous sheet cakes, layer cakes, and Cupcakes. And it turns out that a half recipe makes the perfect thick, single-layer cake.
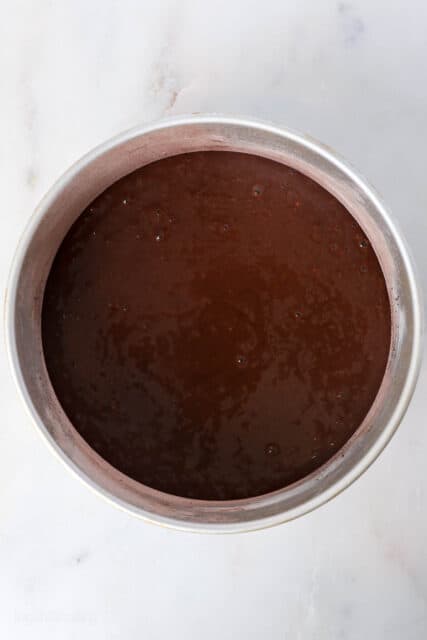
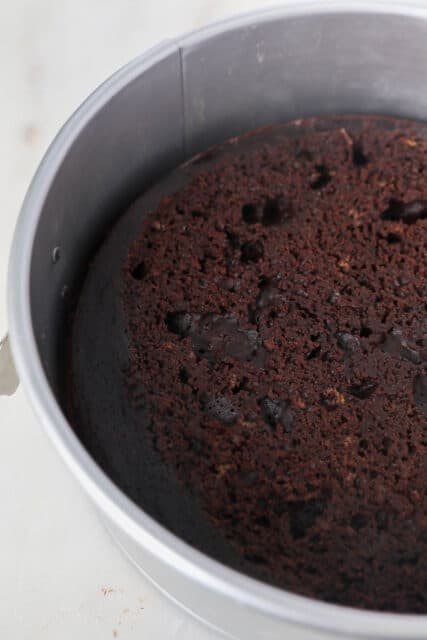
While the oven preheats, grease and line an 8-inch cake pan. Then, start by preparing your chocolate cake layer:
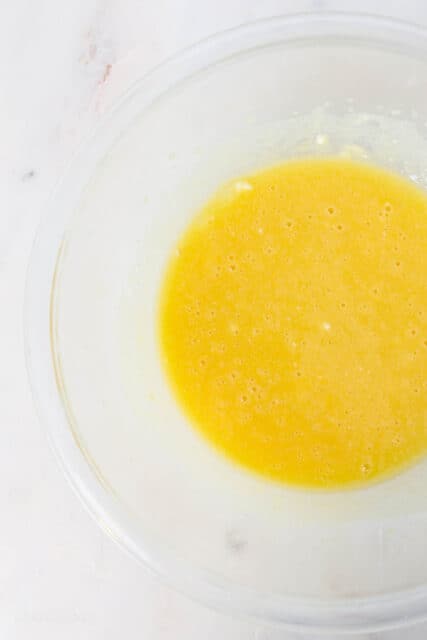
- Combine the wet ingredients. First, beat together the sugar, oil, eggs, and vanilla, followed by the sour cream.
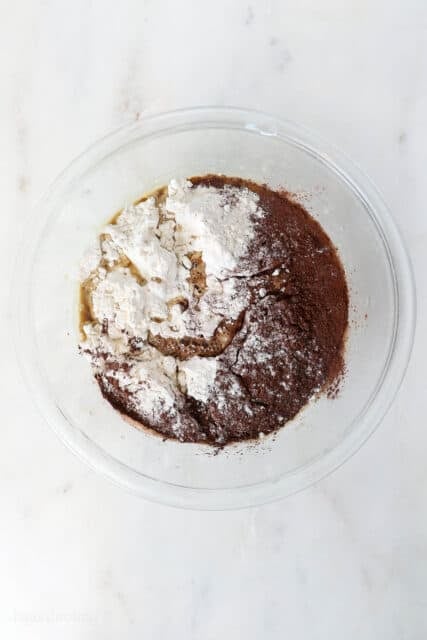
- Add the dry ingredients. Next, sift the dry ingredients, including the cocoa powder, into a separate bowl. Add the dry ingredients to the wet batter, alternating with coffee, until just combined.
- Bake. Transfer the cake batter to your prepared baking pan. Bake at 350ºF for 28-30 minutes, then take the cake out to cool completely.
Preparing the Mousse Layer
Before you whip the cream for your chocolate mousse, you’ll need to chill the bowl. Pop the metal mixing bowl from your stand mixer into the freezer while you prepare the ingredients:
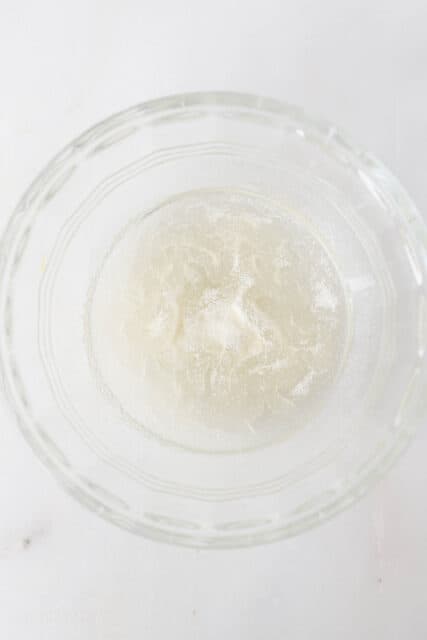
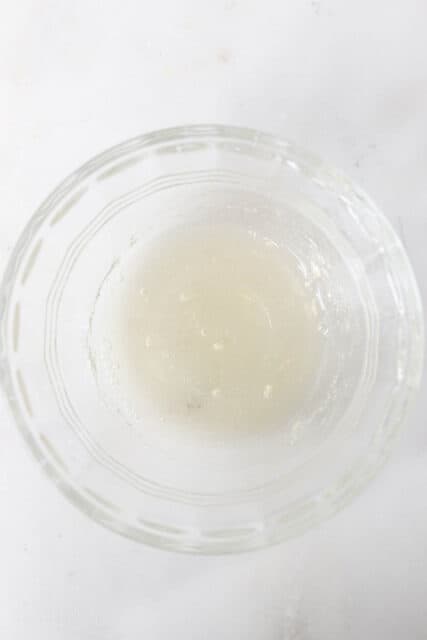
1. Bloom the gelatin. Combine the gelatin powder with one tablespoon of cold water. Let it sit for a couple of minutes as it thickens into a gummy, solid state. Then, heat the gelatin in the microwave for 5-7 seconds just until it’s melted. Make sure and remove any pieces that didn’t melt down.
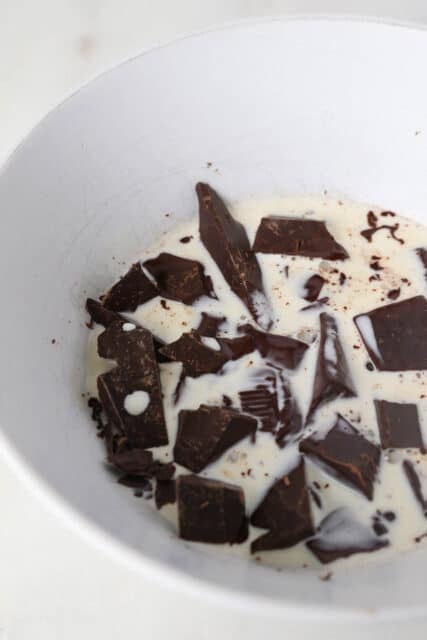
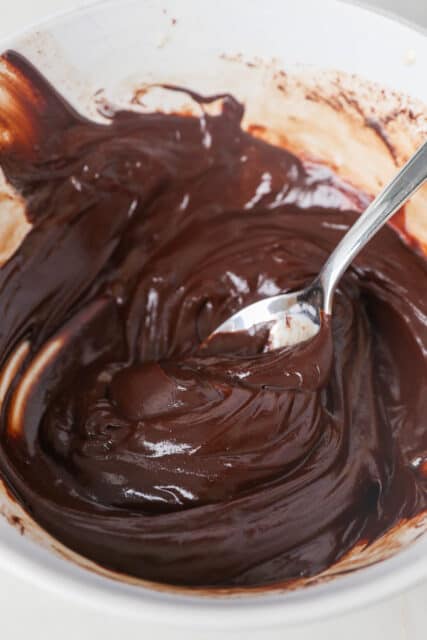
2. Melt the chocolate. Meanwhile, microwave the chocolate with heavy cream until melted. Then stir the liquid gelatin into your melted chocolate and set aside for now.
3. Prepare the whipped cream. Take your chilled bowl out from the freezer, and pour in the remaining heavy cream. Whip the cream using your stand mixer, then gradually beat in the powdered sugar until you get stiff peaks. Set this aside as well.
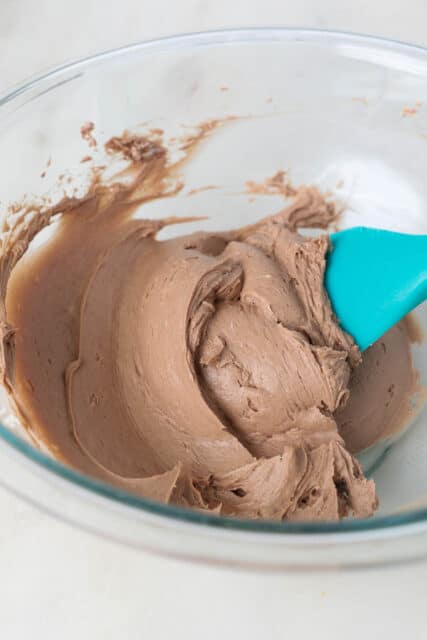
4. Prepare the cream cheese mixture. Next, beat the softened cream cheese together with sugar, cocoa, and vanilla.
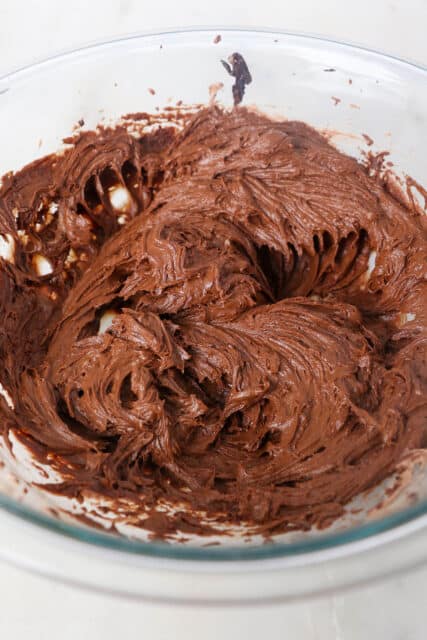
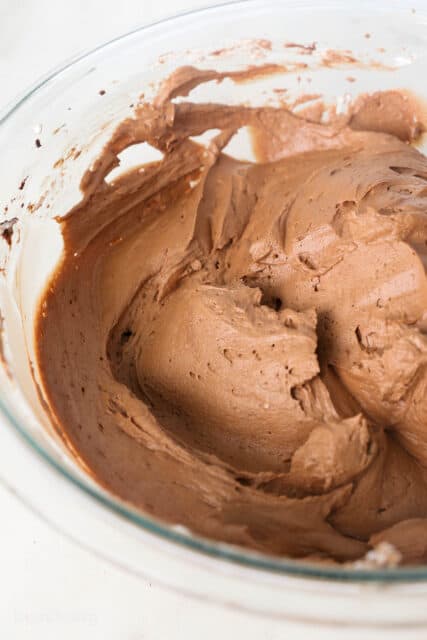
5. Combine. Fold the melted chocolate into the cream cheese until fully combined, followed by the whipped cream. Give everything a good final stir. Now, it’s time to assemble your chocolate mousse cake.
Assembling the Cake
I find it’s easiest to assemble this cake in an 8-inch spring form pan. I’ll usually bake the cake layer in a regular cake pan (see above) and then transfer it to a springform pan afterward. Here’s how to prepare the chocolate mousse cake:
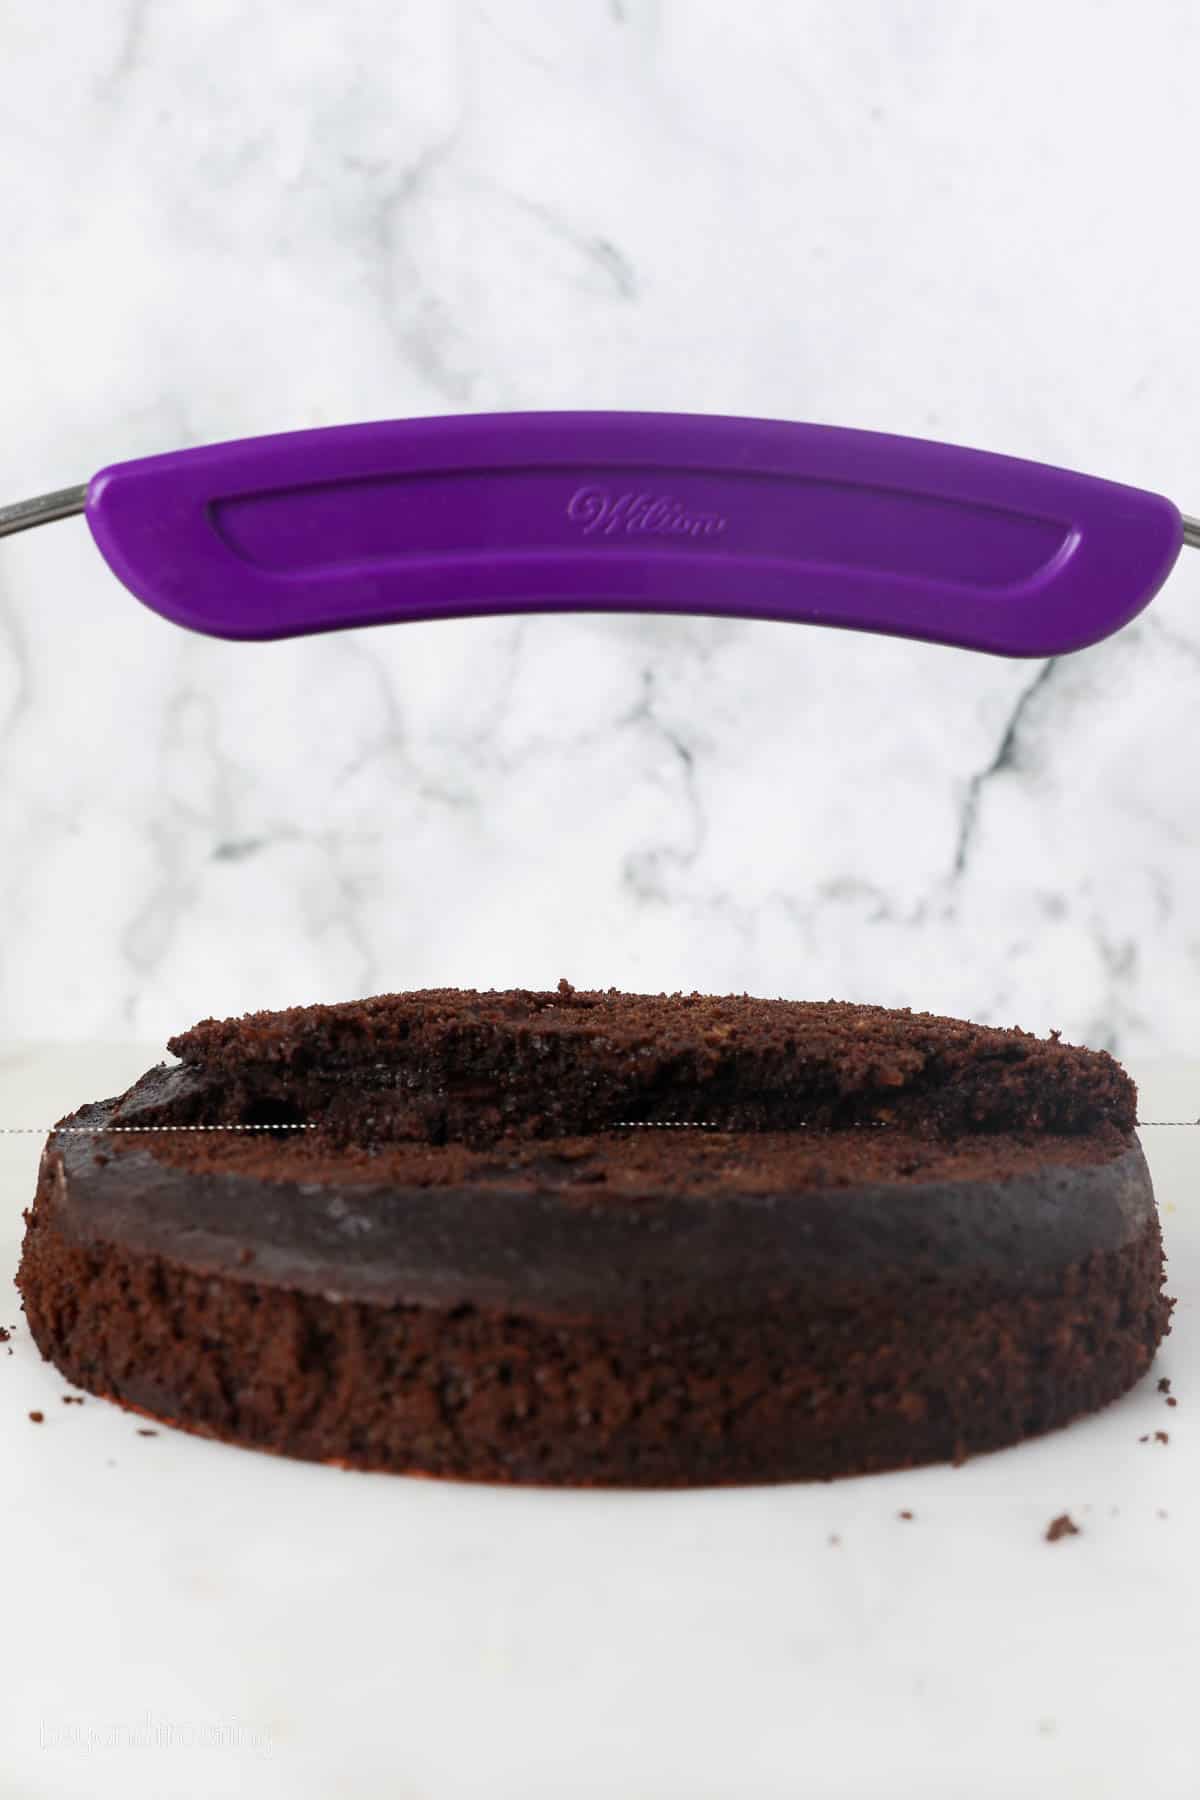
- Add the cake layer to the bottom of the pan. Sometimes you may want to torte the cake layer, meaning that you make it level. Because this is a single-layer cake, you may choose to leave the dome of the cake on. Either way is ok.
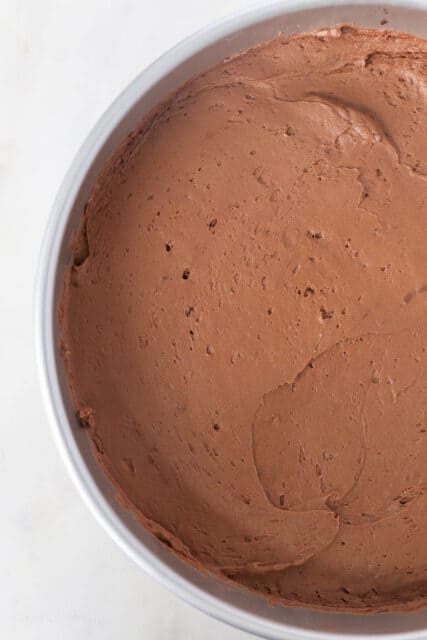
- Pour the chocolate mousse filling over the cake and spread it evenly.
- Finally, chill the cake in the fridge until the filling is set.
Adding the Toppings
Lastly, once the cake is fully set, we’ll top it with a silky smooth homemade ganache and pipe on some chocolate whipped cream. This is very easy to do:
- Prepare the chocolate ganache. I recommend using a 3:1 ratio of heavy cream to chocolate. Heat the ingredients in the microwave in increments, until completely melted. Pour the ganache over the mousse layer and spread it out evenly with an angled spatula.
- Make the whipped topping. Following the directions from earlier, prepare a new batch of chocolate whipped cream. I use a piping bag with an open-star tip to pipe a neat little border around the edge of the cake. But there really is no right way to decorate a cake! See below for more ideas.

Tips for Success
I firmly believe that anyone can make this dessert! The cake itself is pretty simple, as is the mousse. Just take it one step, one layer at a time, and you’ll be golden. Here are some more helpful tips for making a layered chocolate mousse cake:
- Remove any lumps in the gelatin. After you’ve microwaved the gelatin so that it’s liquid again, use a toothpick to fish out any leftover gummy bits. You definitely don’t want to be chewing on those!
- Use a cake collar. I use a cake collar for all my no-bake desserts, even when they’re in a pan (though a pan isn’t necessary). This is because the cake sometimes shrinks and leaves gaps at the edges, and it also makes it easier to cleanly remove the sides of the pan. I’ll tape a cake collar tightly around the cake layer before pouring over the mousse.
- If you don’t have an 8-inch springform pan, you can still assemble the cake in your regular baking pan. I highly recommend removing the cooled cake and lining the whole pan with plastic wrap or parchment paper before you add the cake back in to assemble. This way you can lift it out after it’s set.
- Leveling the cake. It’s up to you if you want to level (remove the dome) of the cake. I bake my cakes using bake-even stripes which help it to bake more level. So I usually just remove the very top layer to have a flat surface to work with. This is totally optional. You’ll find more helpful resources for this in my how to make layer cake post.
More Decorating and Variation Ideas
I use whipped cream to decorate this cake, but there are so many possibilities! You can just as easily pipe on swirls of Chocolate Buttercream or Oreo Frosting. Even Peanut Butter Frosting or Nutella Frosting would be delicious.
When it comes to decorating your chocolate mousse cake, try adding rainbow sprinkles, chocolate shavings, or chopped chocolate for garnish.
For more tips on decorating cakes, I have handy tutorials for How to Use a Piping Bag as well as How to Use and Decorate with Piping Tips. I also have a whole category dedicated solely to Mousse Cakes that’s a treasure trove of inspiration!

Does Mousse Cake Have to Be Refrigerated?
Yes. When it comes time to store your chocolate mousse cake, keep it covered airtight in the fridge and enjoy it within 2 days.
Can I Freeze Mousse Cake?
You can freeze this chocolate mousse cake for up to 2 months. I recommend freezing it while it’s still in the pan, wrapped tightly in a layer of plastic wrap, plus foil. Note that because the mousse recipe contains gelatin, it will not freeze completely solid. Thaw the chocolate mousse cake in the fridge before removing it from the pan and serving.
Print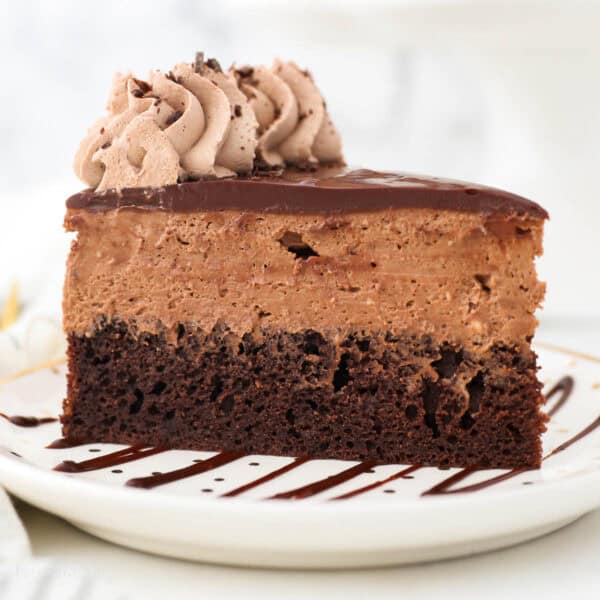
Chocolate Mousse Cake
- Prep Time: 4 hours
- Cook Time: 28 minutes
- Total Time: 4 hours 28 minutes
- Yield: 10 slices
- Category: Cake
- Method: Baked
- Cuisine: American
Description
Make this easy yet impressive Chocolate Mousse Cake with decadent layers of moist chocolate cake, fluffy chocolate mousse, and rich chocolate ganache topped with chocolate whipped cream.
Ingredients
For the cake:
- ¾ cup (143g) granulated sugar
- ¼ cup (59ml) vegetable oil
- 2 large eggs, at room temperature
- 2 teaspoons (10ml) vanilla extract
- ¼ cup (48g) sour cream, at room temperature
- 1 cup (140g) all-purpose flour, sifted
- ¼ cup (20g) cocoa powder, sifted (I use Hershey’s Special Dark)
- 1 ¼ teaspoons (4.6g) baking powder
- ¼ teaspoon baking soda
- ½ teaspoon salt
- 2/3 cup (157ml) hot brewed coffee
For the chocolate layer
- 1 tablespoon (15ml) cold water
- 1 teaspoon powdered gelatin
- 1 cup plus 2 tablespoons (266ml) heavy whipping cream, divided
- 4 ounces (113g) dark chocolate, roughly chopped
- ½ cup (65g) powdered sugar
- 8 ounces (226g) cream cheese, at room temperature
- ¼ cup (48g) granulated sugar
- 2 teaspoons (5g) cocoa powder
- 1 teaspoon (5ml) vanilla extract
For the ganache
- 2 ounces (75g) dark chocolate, chopped
- 6 tablespoons (90ml) heavy whipping cream
For the whipped topping
- 1 cup (236ml) heavy whipping cream, cold
- ½ cup (65g) powdered sugar
- 2 tablespoons (10g) cocoa powder
- 1 teaspoon (5ml) vanilla extract
Instructions
For the cake layer:
- Preheat the oven to 350°F. Line an 8-inch cake pan with parchment paper or a silicone baking mat and grease & flour the edges.
- In a large mixing bowl, combine the sugar, vegetable oil, eggs, and vanilla extract. Beat on medium speed until the eggs and oil are well incorporated and the batter is lighter in color. Next mix in the sour cream and beat until well combined.
- In a separate bowl, sift together the dry ingredients. Add half the dry ingredients to the wet ingredients, followed by half of the coffee, and mix until the flour is just incorporated at a low speed. Then add the remaining dry ingredients and coffee. Beat until all of the ingredients are well combined. Use a spatula to scrape down the sides of the bowl and stir the batter from the bottom to the top to ensure it’s well mixed.
- Bake at 350°F for 28-32 minutes. Test the cake for doneness by inserting a toothpick into the center of the cake. If the toothpick comes out clean, the cake is done. Cool Completely.
For the mousse layer:
- Place the mixing bowl and whisk attachment in the freezer for 5 to 10 minutes to chill while you are preparing the next steps.
- Place 1 tablespoon of cold water in a small dish. Sprinkle the gelatin over the cold water, trying to spread the powder evenly. Allow the gelatin to turn to a solid (about 2-3 minutes)
- In a microwave-safe bowl, combine the chocolate and 2 tablespoons of heavy whipping cream. Microwave in 30-second increments, stirring each time until the chocolate is melted.
- Next, melt the gelatin in the microwave for 5-8 seconds until it turns back into a liquid. Watch it closely! Remove any lumps that did not melt. Stir the liquid gelatin into the melted chocolate and set it aside to cool.
- Prepare the whipping cream. Using the chilled bowl, beat the heavy cream on high speed until it’s thickened to soft peaks. Next, add the powdered sugar and continue beating at high speed until stiff peaks form. Set the whipped cream aside.
- Beat the cream cheese until it’s completely smooth and free of lumps. Scrape down the sides of the bowl, add the granulated sugar, cocoa powder, and vanilla extract, and beat until well combined.
- Next add the melted chocolate, beating until it’s completely mixed into the cream cheese, scraping down the bowl as needed. Lastly, fold in the prepared whipped cream and mix until all ingredients are combined.
To assemble:
- Transfer the cake layer to an 8-inch springform pan, or line the cake pan with plastic wrap or parchment paper along the bottom and up the sides if you want to remove the cake from the pan. Place the cake in the bottom of the pan. Pour the chocolate filling over the chocolate cake, spread evenly, and refrigerate until the filling is set, 2-4 hours.
For the chocolate ganache:
- In a microwave-safe bowl, combine the chocolate and heavy whipping cream. Melt the chocolate in the microwave at 50% power in 30-second increments and stir until completely combined. Allow to cool.
- Pour the chocolate over the mousse layer and spread evenly. Allow the ganache to set a little bit before adding the topping.
For the Topping:
- Prepare a second batch of whipped cream following the same instructions above, adding the cocoa powder together with the powdered sugar and vanilla. Pipe the border using a large open star tip.

Notes
Substitutions:
- Sour cream: If you need to substitute the sour cream, use nonfat Greek Yogurt
- Coffee: If you need to substitute the coffee, use milk
- For the chocolate in the mousse and the ganache, I prefer to use a chocolate bar such as Ghirardelli or Bakers Chocolate as opposed to chocolate chips.
Storage Instructions
- The cake can be prepared up to 2 days in advance and stored in an airtight container at room temperature. Once assembled with the mousse, this needs to be refrigerated. Keep stored in an airtight container. It’s best served within 2-3 days of preparation but will last up to 5 days.
Nutrition
- Serving Size: 1 slice
- Calories: 634
- Sugar: 41g
- Sodium: 319mg
- Fat: 44g
- Saturated Fat: 27g
- Carbohydrates: 56g
- Fiber: 2.8g
- Protein: 7.8g
- Cholesterol: 130mg


I don’t like how the instructions on this recipe read. The ingredients should read in the order they need to be used, like the 2 tbsp of cream and the 4 oz of chocolate. Then proceed to next step . The cup of whipping cream and the powder sugar. I was using my stand mixer and had to transfer the whipped cream to another bowl while I did the cream cheese part.
Too many suggestions that are confusing and I’m an experienced baker
Hi Madelaine, I always appreciate feedback, but as I read your comment, and read the instructions, they are actually listed in the order in which they are used. The heavy cream is listed as “1 cup plus 2 tablespoons (266ml) heavy whipping cream, divided” so that you know exactly how much you need for the recipe instead of listing it twice in the ingredients. The instructions do specify the amount of cream needed in each step, and the stepfor metling the chocolate does come before making the whipped cream. The instructions do call for you to make the whipped cream first and then transfer it to another bowl. By doing this you have the whipped cream already prepared for when it needs to be mixed into the mousse and you don’t need to reclean the bowl before proceeding. If you had to make the whipped cream after the cream cheese mixture, not only would have you take the cream cheese mixture out of the bowl, but you’d have to do the additional step of cleaning the mixing bowl before you do the cream. So I do feel these are written in the most efficient way to move through the step of making the filling.
I just finished making this cake for the third year in a row for my boyfriends birthday! It’s our favourite recipe. His favourite chocolate bar is Aero so I substitute that in place of the chocolate in the mousse, whipped topping and ganache and it turns out great each time. Thanks for the great recipe!
WOW! I am flattered! Thank you so much!!
Could I double this and make two layers of cake and two of mousse to stack?
I have not tried it but I think it should work, as long as you have a pan tall enough, or a cake collar to help support the additional layers before they chill
You just blankly told me how to create the basics to making mousse layered cake thank you <3
You are so welcome!
How can I make this a taller cake? I was thinking of doing cake layer, mousse layer, ganache layer and then repeating cake, mousse, ganache on top of it and then cover it with white icing. Will that work or will the cake layer be too heavy to put on top of the mousse and ganache?
Hi Jackie- yes if you have a tall enough pan, you can stack them. I am not sure about covering with white icing. The cake layers shouldn’t be too heavy.
Oh my gosh, my family loved this cake! I ended up doing just one layer and it really was enough! I made a less sweet buttercream icing and spread a thin layer over the cake, it looked amazing! So many compliments all around!
Yes Jackie! That so wonderful! Thank you again for sharing this!
I made this for my family on Christmas day they still want me to make it again for them n I will. It was the hit of the day.
Amazing! Thank you so much Zama! This makes my day!
I tried this recipe for Christmas Day. Was a big hit. Thanks for the best recipe. I served vanilla ice cream next to it
That’s wonderful Chantal, thank you for sharing!
Just made this today as a trial run for family Thanksgiving this year. It made the cut, though my husband and I will be eating it for a week. Rats. Really moist and delicious and surprisingly comparatively light, which is what I wanted. Last year I made your blackberry lemon cake which was just wonderful. I’ll make this chocolate cake ahead of time (I make everything a day ahead of time except the Turkey and stuffing) and just blast on some canned whipped cream instead of your topping right before I serve it. Hope that’s not sac religious.
Sounds like a great plan to me Marian! Enjoy and thank you!
Hi Ingris- what type of chocolate are you using? That may have something to do with it. You can try microwaving at 50% power so it doesn’t heat up too fast.
Hi, I’ve made the mouse by placing the melted chocolate and whipping cream in a bowl and microwaving it. It turned out grainy and even though I watched it like a hawk I thought I burned the chocolate. I the. Tried again but on the stove over boiling water, it turned out grainy again. I gave up and just added it to the gelatin and mixed it i to the rest of the ingredients. It came out perfectly though 🤣 surely it can’t be right…is there a reason the chocolate goes grainy, I certainly did not overheat it the second time. Would it work better by melting the chocolate first and then adding the cream?
I’m planning to do this for family occasion we are quite a big family so I decide to do your chocolate cake recipe as one layer my question is do I have to double the recipe of the mousse? So I’ll have nice cake and mousse layers or Stick with this recipe as it is ?
What you see here is a single recipe of each, the layers are about even.
I have been struggling with depression and feeling low for a while and although I enjoy cooking and baking, the whole task seemed unenjoyable now. Until I found your recipe and made somehow got excited to try this out. It turned out so well. You explained everything so easily. Everyone in my family loved it and it made me feel so good about myself. This recipe brought me joy and a glimmer of hope when I had resigned to the fact that I may never experience it again. Thank you!!
Hi Aastha, I am sorry to hear you’ve been dealing with depression. I am glad that baking and sharing recipes brings you joy at this difficult time. Thank you for sharing your story with me.
Made this for my grown son’s birthday dinner. It is delicious! I followed the directions and by breaking it down layer by layer you made it super easy to do. I’m sure this will become my family’s go to special event dessert. It is beautiful as well as delectably delicious.
I love that Camela, thank you so much! I really try to show how approachable these recipes can be, so this means a lot to hear this! thank you
Can i bake this in a 9 in cake pan?
Yep, that shouldn’t be a problem.
Made this for a friends birthday, she absolutely loved it.!!
Easy to follow directions, for sure I’ll make this amazing cake again.💕
Thank you so much Wendy! I am super glad to hear this!
I made this for my boys 6th birthday and it was amazing! Once the cake layer cooled, I put it in a trifle bowl I felt like it too me a while to make the different sections but it was worth it. The instructions themselves were easy to follow. I will be making this again! Thank you!
That’s so wonderful Courtney, thank you!!
Such an amazing recipe! Directions were easy to follow and it turned out perfect! Was the perfect birthday cake for my mom’s 53rd birthday! She was very pleased and we all want it again next year.. or next week! I ended up using semisweet chocolate by mistake, and it made me want to try it with dark chocolate even more! Absolutely delicious!
This is awesome Madisson! Thank you so so much for sharing!
I’m not a talented baker but wanted something fancier than brownies to take to a dinner party. I was a little daunted by the recipe, which seemed pretty ambitious for me, but the instructions were great. I stuck to them step by step and the cake turned out so well! People loved it and marveled over how gorgeous and delicious it was. Very special.
Thank you so much Carolyn! I am glad to know this and really appreciate you leaving this feedback!
This chocolate mousse cake was absolutely delicious! It’s a little time consuming, but so worth it! I received countless compliments, and am sure you will too.
To be honest, I’ve been successful with each of your recipes that I’ve tried – thank you for sharing with us
Amazing!! Thank you so much for sharing!
This cake is absolutely delicious. I plan to make it this weekend for the second time. I followed the instructions almost to the letter, with the exception of subbing milk for coffee in the cake and baking in a 9-inch cake pan. I didn’t have any experience working with gelatin, but it was very simple. The cake was moist, the mousse was the perfect creamy texture and the whole thing was wonderfully chocolatey.
Thank you so much Lauren! This is awesome to hear and I am so glad you enjoyed it!
This looks great! My daughter wants me to make it for her birthday. But, all I have is 9 inch cake pans. Would this recipe work for that? Or would I need to adjust the recipe up somehow?
Hi Cheryl- yes you sure can make it in a 9-inch pan. No adjustments needed other than baking time.